

WALKTHROUGH MENU
- General Tips
- Stage 1: Draco’s Office
- Stage 2: Signs of Struggle
- Stage 3: Where is Mark? Puzzle
- Stage 4: Not Part of the Tour
- Stage 5: A Cry for Help
- Stage 6: Out of the Frying Pan Puzzle
- Stage 7: Prisoners in the Dungeon
- Stage 8: Four Knights Puzzle
- Stage 9: Got Garlic?
- Stage 10: An Old Game Remembered Puzzle
- Stage 11: The Van Helsing Estate
- Stage 12: Dark Visitor Puzzle
- Stage 13: A Cure for the Cursed
- Stage 14: A Dark, Dark Basement
- Stage 15: Monster Hunting 101 Puzzle
- Stage 16: Portrait of a Lycanthrope Puzzle
- Stage 17: Who’s Afraid of the Big, Bad Wolf?
- Stage 18: Where the Wolfsbane Blooms
- Stage 19: The Sacred Grotto
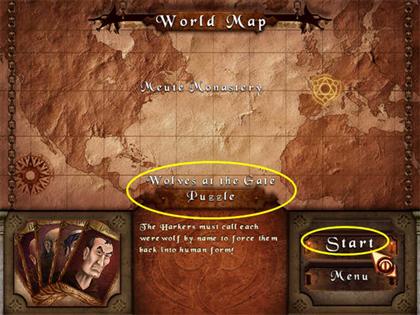
- Stage 20: Wolves at the Gate Puzzle
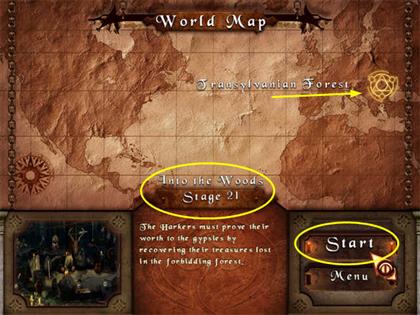
- Stage 21: Into the Woods
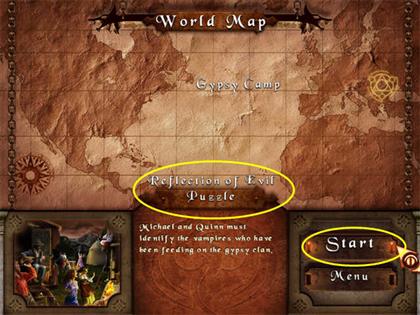
- Stage 22: Reflection of Evil Puzzle
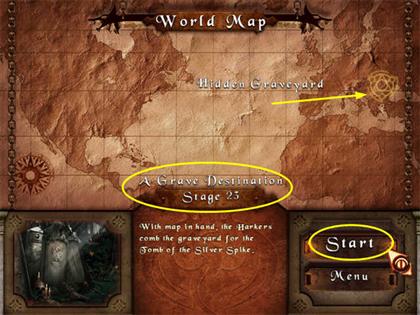
- Stage 23: A Grave Destination
- Stage 24: The Tomb of the Silver Spike Puzzle
- Stage 25: Locked Up
- Stage 26: Six Knights Puzzle
- Stage 27: The Lair of the Vampire
- Stage 28: Coffin of the Black Dragon Puzzle
- Stage 29: A Duel with Draco Puzzle
- Stage 30: The Black Dragon Revealed Puzzle
GENERAL TIPS
- This is a Hidden Object Adventure Game. The mini-games are a variety of puzzles. You will follow the adventures of the Harker and Van Helsing families when they find themselves drawn into a battle against Dracula as he seeks revenge for what their grandparents did to him.
- You may play in either timed or untimed mode, but you can only make this choice once when you set up your player profile from the Main Menu. If you want to try the other mode, you’ll have to start over with a new player profile.
- You can skip any mini-game by clicking on the Skip button.
- The only way to reset a puzzle to its starting position is to exit the game completely and then come back in.
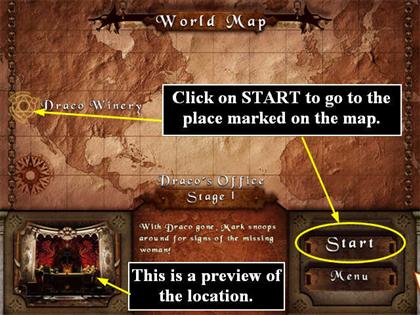
- Whenever you see the World Map, the area at the bottom left of the screen shows you a preview of the scene/puzzle you are about to enter. You must click on the START button in the lower right to begin.
- The game frequently begins a Stage with a text explanation of tasks or setting. You must click once to clear the text and begin the Stage itself.
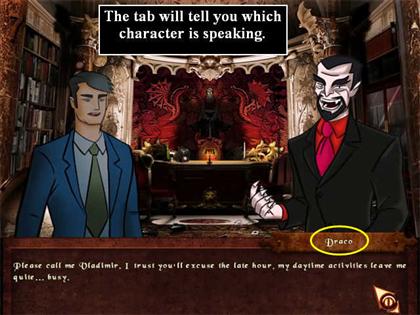
- During the cut scenes you can tell which character is speaking by the name on the tab.
- Anything that starts with the World Map is counted as a Stage, even if it doesn’t give its stage number. So all of the puzzles that start from the World Map will count as Stages.
- The games will autosave every time you exit, but only to the point of the last completed Stage. So if you leave in the middle of a Hidden Object scene, for example, you will have to start over again at the beginning of that scene when you return.
- You can use the Options Menu to adjust the volume for the music and the special effects as you like.
General Tips for the Hidden Object Scenes
- If you make too many incorrect clicks in a row, the scene will freeze for a few moments. If you are in timed mode you will also lose 20 seconds.
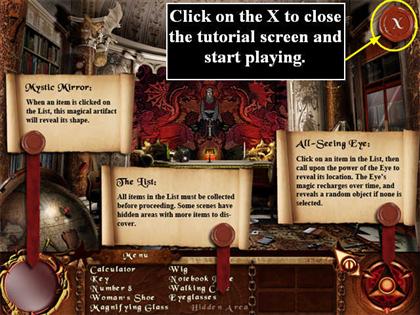
- If you click on the name of most objects on the Find List, the silhouette will appear in the Mystic Mirror on the far left. This does not use up a hint.
- The silhouette will be oriented the same way that the object is in the scene.
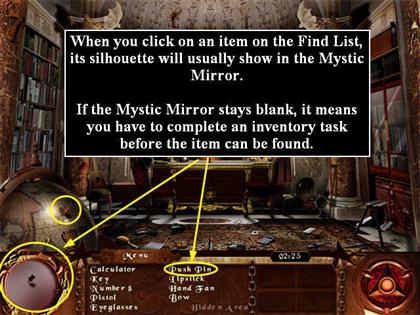
- If the silhouette for an object is unavailable, that means there is an inventory task that must be completed before it can be revealed.
- If the Find List entry is for multiple items, like “3 Flowers,” then the Mystic Mirror will show one item until you find that one. Click on the entry again, and it will show you the silhouette of another of the multiples. This can be very helpful.
- The All-Seeing Eye on the lower right will give you unlimited hints, but you have to wait for it to recharge each time.
- Click on an item in the Find List, then click on the All Seeing Eye on the right to get a hint. The Eye will flash white very quickly over the object, so if you’re not looking you may miss it. This is particularly true in scenes with fog or other white areas on the screen.
- If the All Seeing Eye tells you it can’t give you a hint for the object, that’s the same as not being able to see it in the mystic Mirror—there’s some inventory task that must be completed first.
- Most objects are relevant to the scene and the right size and color, although there are some exceptions.
- If the words “Hidden Area” at the bottom of the Find List are sparkling, it means there is a hidden area in the scene that you must find. This is usually a passage to another room.
- The Hidden Area itself will sparkle when your cursor touches it, and the cursor will glow blue.
- The cursor will also glow blue if it touches an area where you are supposed to use an inventory object.
- The inventory tray is on both sides of the Find List.
- Items in the inventory tray are generally used by dragging them to the part of the scene where they are needed. Some items just need to be clicked and then you click again where you want to use it in the scene. The game is somewhat inconsistent, so try dragging if clicking doesn’t work.
General Tips for the Find the Differences Puzzles
- The right side represents the reflection of the left side in a mirror, so positions are flipped 180 degrees. You’re not looking for something that’s in a different position—you’re looking for things that are missing altogether.
- You are looking for complete items, not partial differences. They will be present on the left side and absent on the right side.
- The diamonds at the bottom of the screen are a counter. A diamond will light up each time you find an item, so the unlit diamonds tell you how many items you have left to find.
General Tips for Timed Mode
- The time for each Hidden Object scene includes the time for any in-scene inventory puzzles, but not puzzles that go back to the World Map first.
- The Hidden Area gets additional time, which is added to any time you have left from the original Hidden Object scene.
- If you are having trouble finding one or two items in the main scene, you may want to go into the Hidden Area just to pick up the extra time. Use the BACK tab to go back to the main scene when you’ve completed the Hidden Area Find List.
- If you make too many clicks in Timed Mode, the scene will freeze for a few moments AND you will lose 20 seconds off your timer.
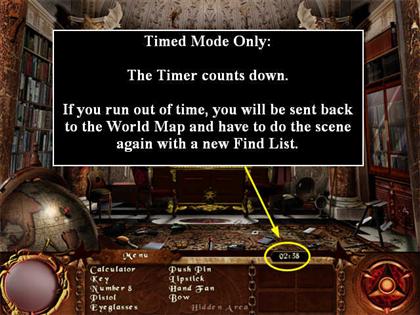
- If you fail to complete a scene in time, you will be kicked back to the World Map and have to start the scene over with a new Find List.
- The timer is shown at the top right of the Find List in the Hidden Object scenes.
- The puzzles remain untimed.
- If you start in timed mode and find you would prefer to play in untimed mode, you will have to set up a new player profile from the Main Menu and start the game from the first stage. You will get somewhat different Find Lists when you replay.
Stage 1: Draco’s Office
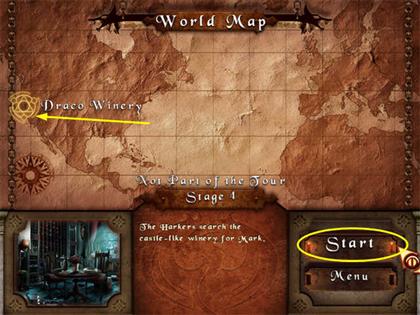
The World Map
- Click on the START button in the lower right corner to begin the Stage.
Draco’s Office
- The game begins with a tutorial screen. After you have read everything, click on the X in the upper right corner to close the tutorial.
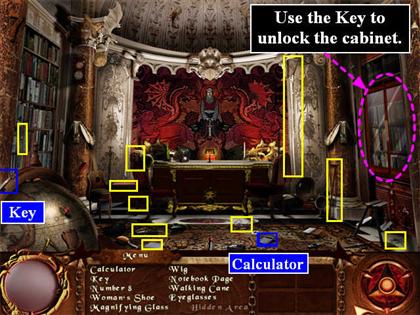
- Collect the items on the Find List.
- Drag the Key from your inventory to the cabinet on the right hand side of the scene to unlock it and view the contents of the cabinet.
Inside the Cabinet
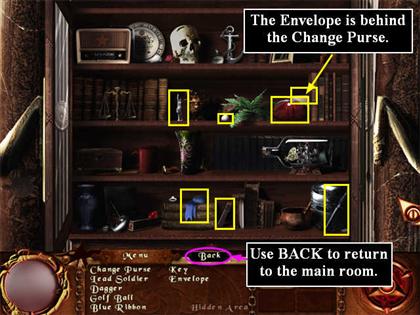
- Collect the items on the Find List.
- The Envelope is behind the Change Purse.
- After you have collected all the items, click on the BACK tab to return to Draco’s Office.
The Calculator Puzzle
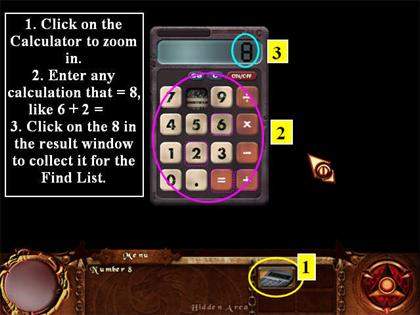
- You still have to find “the number 8.”
- Left-click on the Calculator in your inventory. This will open a zoom scene.
- Click on the keys just like you would on a regular calculator. Choose any combination that will have an answer of 8, such as 6 + 2.
- Remember to click on the = sign.
- The 8 will appear in the results window.
- Now you must click on the 8 in the results window to collect it.
- Watch the Scene.
Stage 2: Signs of Struggle
World Map
- Click Start to begin the stage.
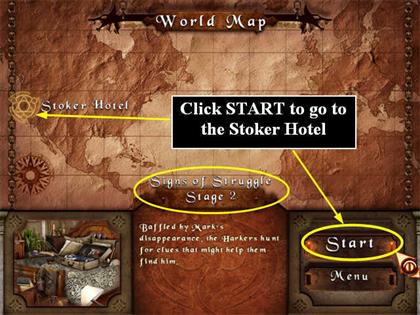
Mark’s Hotel Room at the Stoker Hotel
- Note: Bram Stoker was the author of the original Dracula book.
- Collect the items on the Find List.
- The “Lost Photo” is torn in two pieces and is colored.
- The “torn Photos” have more than 3 pieces, but are in 3 stacks and you collect each stack with 1 click.
- You can’t do anything with the photos yet, just collect them for now.
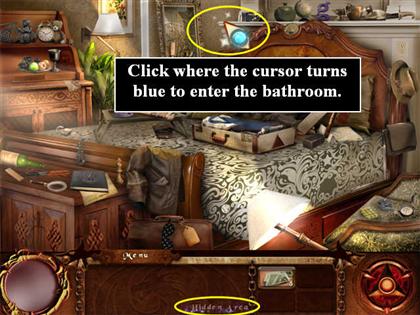
- The “clover” looks more like a cross; it’s like 4 diamonds put together on the front of the cabinet on the left side of the bed.

- Click where the cursor turns blue on the left side of the scene to enter the Bathroom. That’s the Hidden Area.
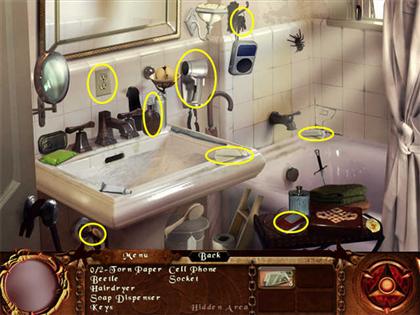
The Bathroom
- Collect the items on the Find List.
- The Torn Paper is in two stacks, one stack on the sink and one on the edge of the bathtub. You collect each stack with one click.
Stage 3: Where is Mark? Puzzle
World Map
- Click on Start to begin the puzzle.
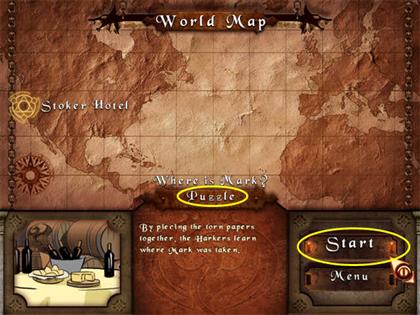
- This is a jigsaw puzzle. It is a flyer from Draco’s Winery.
Stage 4: Not Part of the Tour
World Map
- Click on Start to go to the Winery.
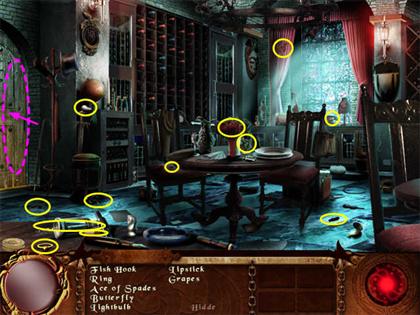
The Winery Library
- Collect all the items on the Find List.
- When you have finished collecting all the items, click on the door to enter the storage area.
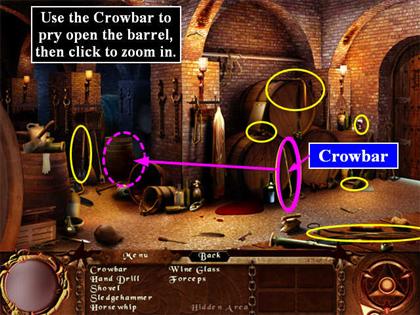
The Storage Area
- Collect all the items on the Find List.
- Use the Crowbar to pry open the barrel that sparkles.
- Click to zoom in on the Hidden Area.
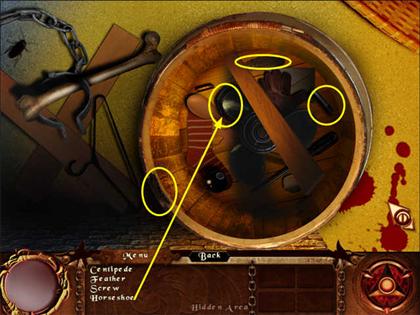
Inside the Barrel
- Collect the items on the Find List.
- The Horseshoe is black.
Stage 5: A Cry for Help
World Map
- Click on Start to begin the stage.

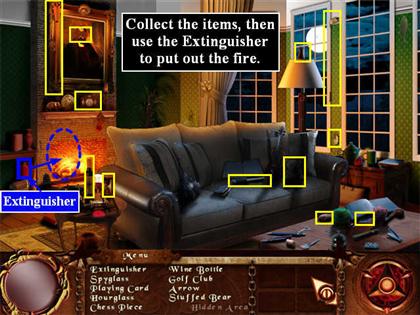
The Winery Library
- You are back in the library at the Winery, but the Find List is new.
- Collect all the items on the Find List.
- When you have finished collecting all the items, use the Extinguisher to put out the fire in the fireplace.
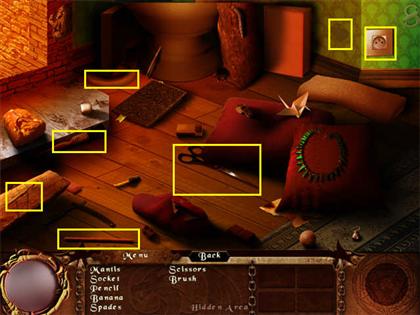
The Fireplace
- Collect all the items on the Find List.
- “Spades” is just a single spade outline on the wall.
- The socket is a round 2 hole socket on the wall.
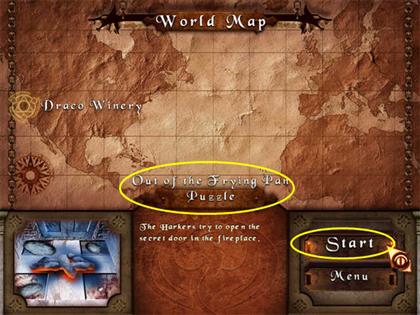
Stage 6: Out of the Frying Pan Puzzle
World Map
- Click on Start to begin the puzzle.
- You must listen to the dialogue as well as read the text to get the full instructions.
- The prisoner’s captor did something with the stones before opening the secret room behind the fireplace. He couldn’t remember exactly what to do, but he looked around and saw something that reminded him.
- There are three sizes of stones in the stack.
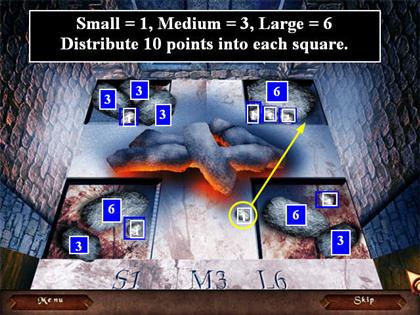
- There are four compartments in the floor. You must stack an equal weight of stones in each.
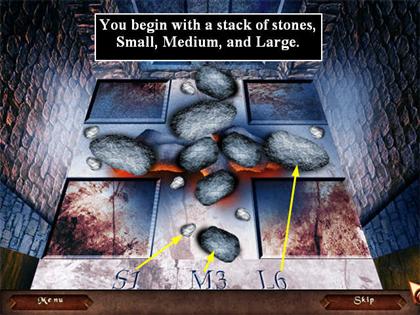
- The weight of the stones is recorded in the letters at the front: Small = 1 pound, Medium = 3 pounds, Large = 6.
- The total weight of all the stones added together is 40, so you must put stones that add up to a weight of 10 in each of the four compartments.
- Oh, no! It was a trap—the “prisoner” is one of Draco’s vampires!
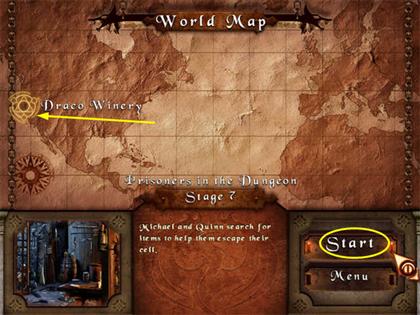
Stage 7: Prisoners in the Dungeon
World Map
- Click on Start to begin the stage.
The Winery Dungeon
- Collect all the items on the Find List.
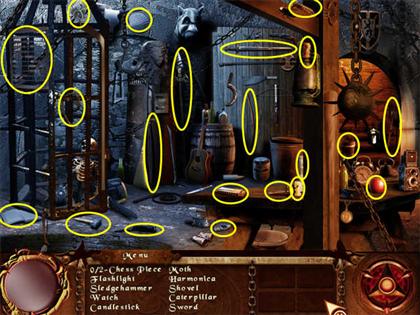
- David said there was an escape route through the Iron Maiden. It is locked with a puzzle.
Stage 8: Four Knights Puzzle
World Map
- Click on Start to begin the puzzle.
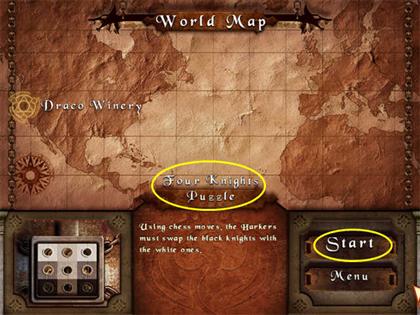
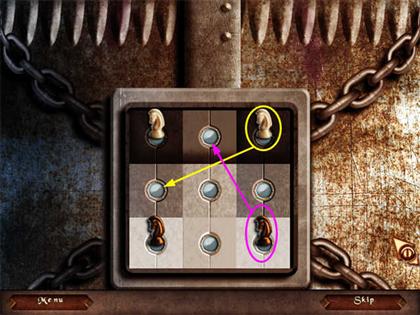
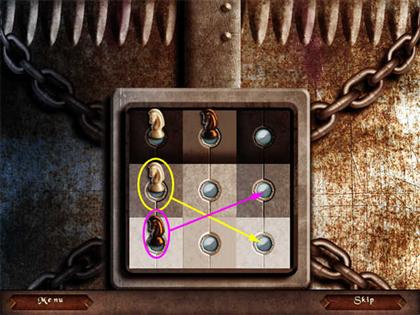
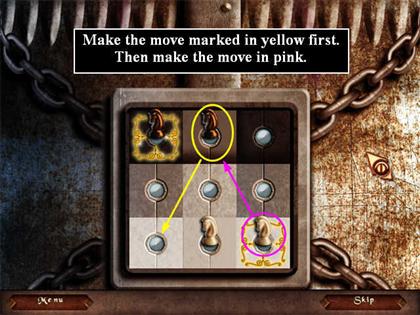
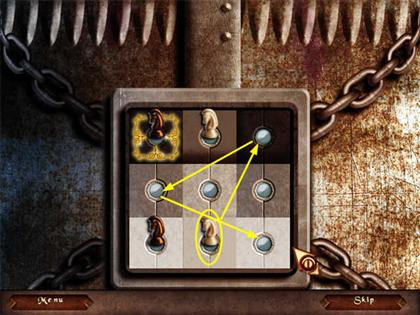
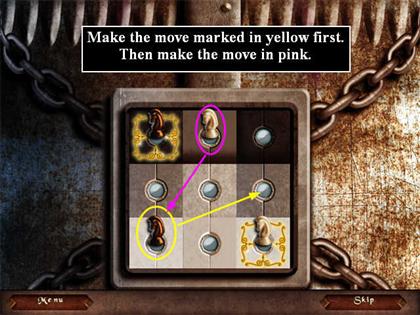
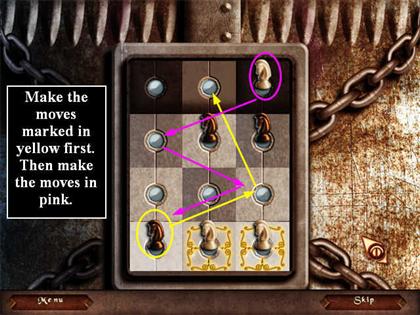
- Your task is to swap the positions of the light and dark Knights.
- There are many different possible solutions.
- When you click on a knight, the squares it can move to will be highlighted green. There may be several possible moves, depending on your starting position.
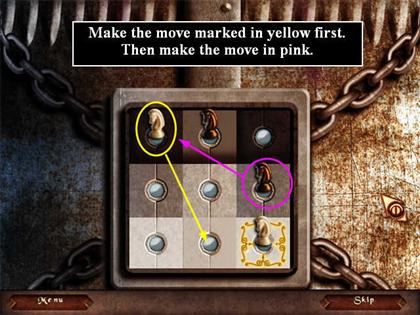
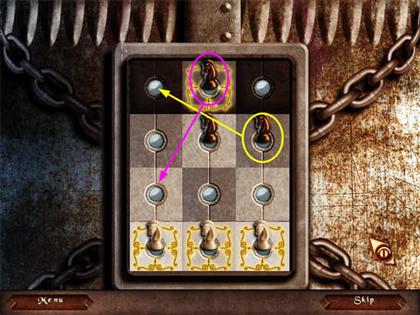
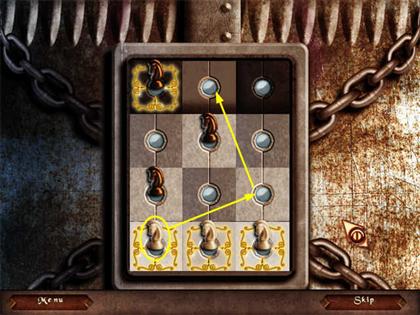
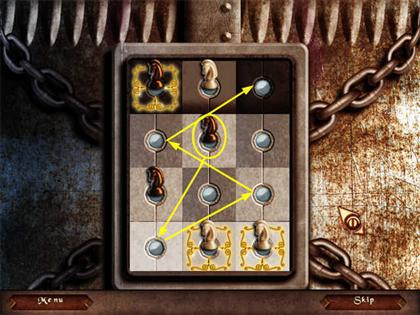
- One solution is shown in the screenshots. If there is a yellow path and a pink path in the same screenshot, do the yellow path completely first.
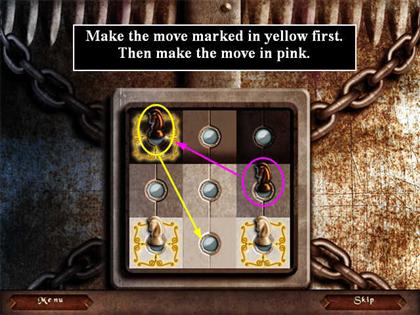
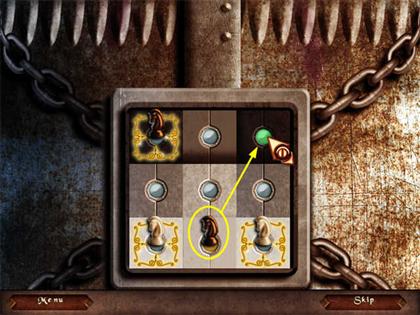
- Now you can escape the Dungeon!
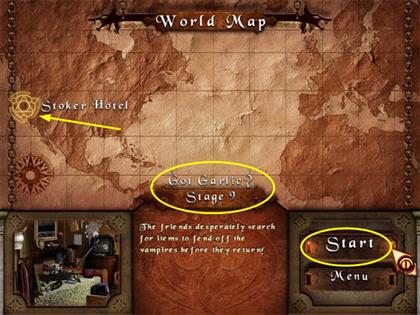
Stage 9: Got Garlic?
World Map
- Click on Start to go to the hotel.
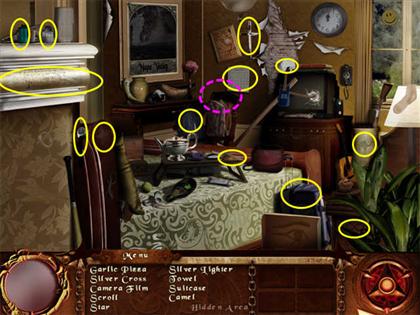
- Collect all the items on the Find List.
- When you have finished collecting all the items, click on the hidden area by the calendar to enter the storage area.
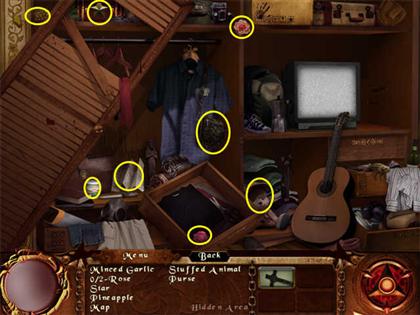
The Closet
- Collect all the items on the Find List.
Stage 10: An Old Game Remembered Puzzle
World Map
- Click on Start to begin the puzzle.

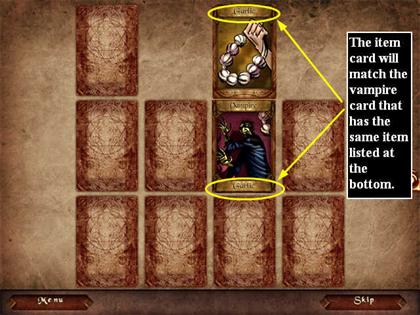
- Your task is to remove the cards in pairs until all the cards have been removed.
- Match an item card, like Garlic, with the vampire card that lists that item at the bottom.
- Clearly it’s time to get in touch with the Van Helsings in London. Hopefully they have a cure for Mark.
Stage 11: The Van Helsing Estate
World Map
- Click start to begin the stage.
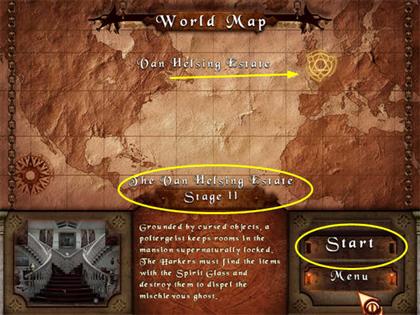
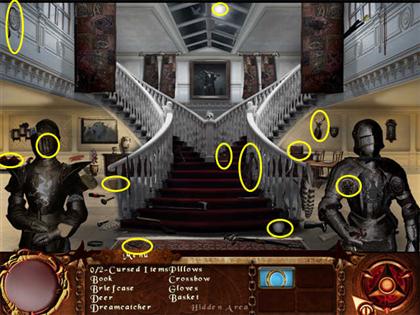
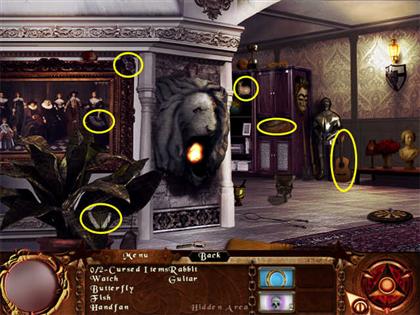
The Van Helsing Estate
- You arrive at the Van Helsing Estate, but the mansion is being haunted by a poltergeist and all the rooms are locked. Your first task is to get rid of the poltergeist by locating and then burning the Cursed Objects that are anchoring it here.
- Collect the regular items on the Find List.
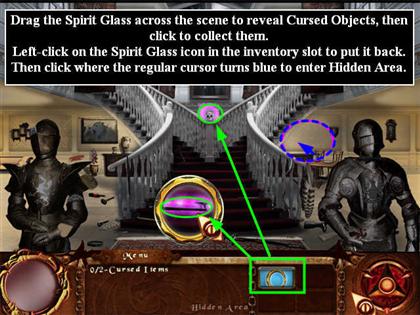
- Time to find the Cursed Items. Elizabeth Van Helsing has given you a Spirit Glass. It is in your inventory.
- Take the Spirit Glass and drag it across the scene. Any item that glows with pink fire is Cursed. Left-click to collect it.
- When you have collected enough Cursed Items, the Find List will clear.
- Left-click on the icon in the inventory tray to put the Spirit Glass back.
- Now use the regular cursor to find the Hidden Area. Click where it turns blue.
Behind the Stairs
- Collect the items on the Find List.
- Time to find the Cursed Items in this area.
- Take the Spirit Glass and drag it across the scene. Any item that glows with pink fire is Cursed. Left-click to collect it.
- When you have collected enough Cursed Items, the Find List will clear.
- Left-click on the icon in the inventory tray to put the Spirit Glass back.
- Now use the regular cursor to drag the Skull from your inventory tray to the fire in the mouth of the lion statue. This will burn all the Cursed Items.

- That gets rid of the poltergeist, but now a demon is preventing Elizabeth from contacting the spirit of her grandfather. You must find any vampire-tainted items in Van Helsing’s study and remove them.
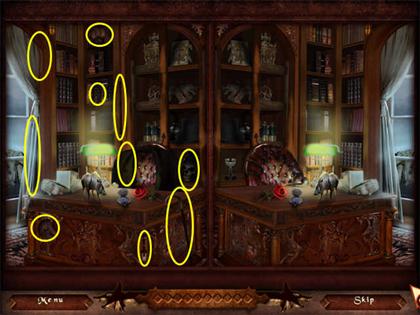
Stage 12: Dark Visitor Puzzle
World Map
- Click on Start to begin the puzzle.
- This is a Find the Differences puzzle.
- Remember that the right side represents the reflection of the left side in a mirror, so positions are flipped 180 degrees. You’re not looking for something that’s in a different position—you’re looking for things that are missing altogether.
- You are looking for complete items, not partial differences. They will be present on the left side and absent on the right side.
- There are no hints available for this part of the game, but you can use the SKIP if you like.
- The diamonds at the bottom of the screen are a counter. A diamond will light up each time you find an item, so the unlit diamonds tell you how many items you have left to find.
- There are a couple of white items against the white curtains on the left that would not normally be white in real life, like a white golf club.
- There is a small Ankh on the third shelf down from the top that can be hard to see.
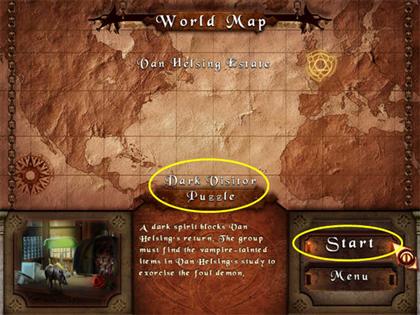
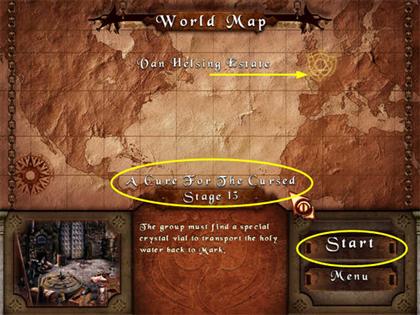
Stage 13: A Cure for the Cursed
World Map
- Click Start to begin the stage.
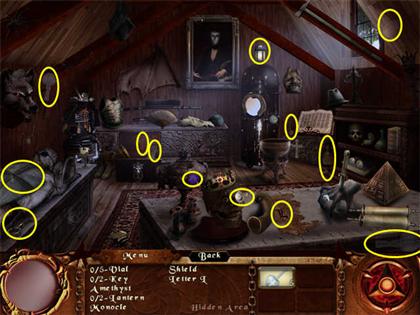
The Workroom
- Collect the items on the Find List.
- A “vial” is any small crystal bottle. They come in different shapes and sizes.
- Use the mirror to show you a silhouette of one of the vials. As you find each one, you can see a new silhouette by clicking on the Vials item in the Find list again.
- Click where the cursor turns blue on the door on the left to enter the next room.
The Storeroom
- Collect the items on the Find List.
Stage 14: A Dark, Dark Basement
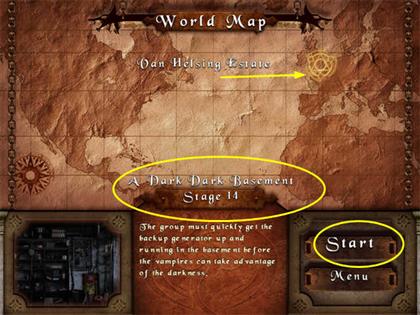
World Map
- Click Start to begin the stage.
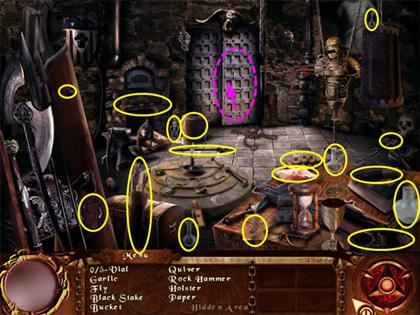
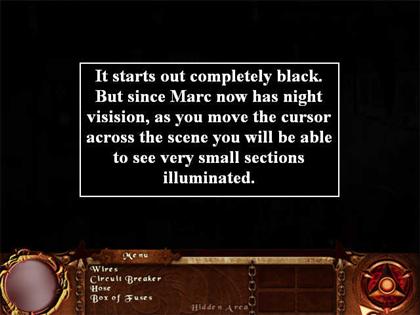
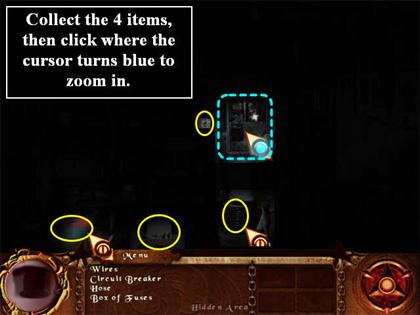
The Basement
- The lights are out. However, because Mark is turning into a vampire, he has begun to develop night vision. As you move your cursor around the scene, you will be able to see items, faintly.
- Collect the items on the Find List. The screenshot is a composite of the items you will need.
- The Hose is very hard to see, but it is a dark coil just to the left of the Dog statue.
- Click on the Circuit Box to zoom in.
- This isn’t really a puzzle—all you have to do is click on an item in your inventory and you’ll see a faint blue glow showing you where to put it in the circuit box. Drag it there and it will automatically position itself correctly.
- Do this for each of the 4 items.
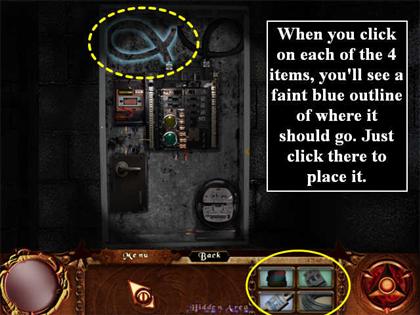
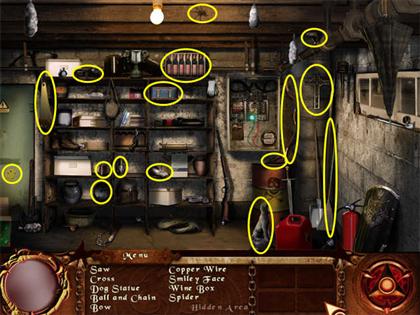
- The lights are back on and you have a new Find List.
- Collect the items on the Find List.
- The Wine Box is a box of wine bottles on the top shelf.
- The Chest is a small blue case on the second shelf on the right.
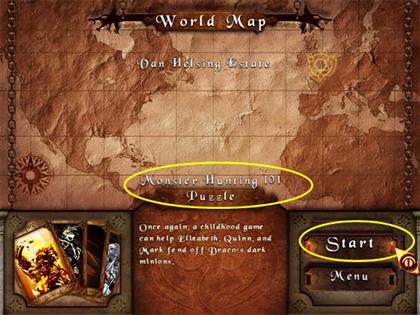
Stage 15: Monster Hunting 101 Puzzle
World Map
- Click on Start to begin the puzzle.
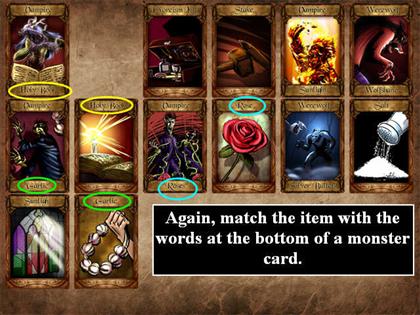
- This works exactly the same way as the previous card pairs puzzle except that now there is more than one kind of monster on the cards.
- Your task is to remove the cards in pairs until all the cards have been removed.
- Match an item card, like Garlic, with the monster card that lists that item at the bottom.
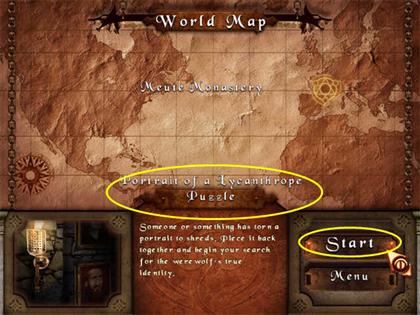
Stage 16: Portrait of a Lycanthrope Puzzle
- Michael has arrived at the Monastery looking for the Holy Water. But it seems that this place, too, has been attacked by forces of Evil. Michael must help the monk before he will be allowed to collect the Holy Water.
World Map
- Click on Start to begin the puzzle.
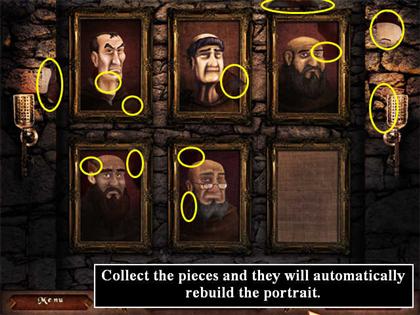
- The idea here is that the portrait on the far right has been slashed to pieces, and the pieces have flown all over the wall and stuck there. So they are overlaid on the wall or the other portrait.
- Your task is to find each of the scattered pieces and click on it. It will then automatically go back into the portrait on its own.
- The diamond counter at the bottom of the screen shows how far along you are.
Stage 17: Who’s Afraid of the Big Bad Wolf?
World Map
- Click Start to begin the stage.
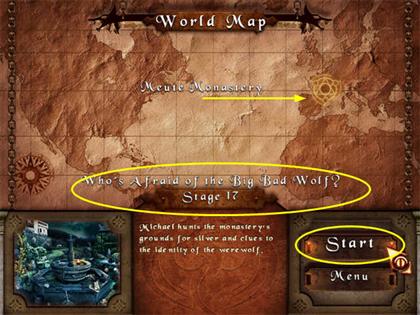
The Monastery Grounds
- Collect the items on the Find List.
- You can see the Dagger but you can’t collect it yet because of the rats.
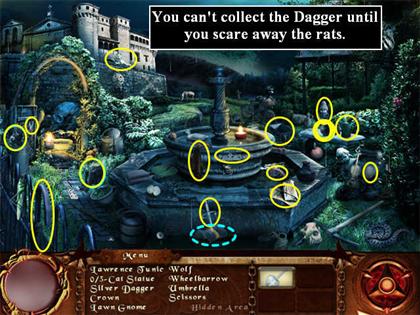
- The 3 pieces of the Cat Statue will automatically combine once you have collected them.
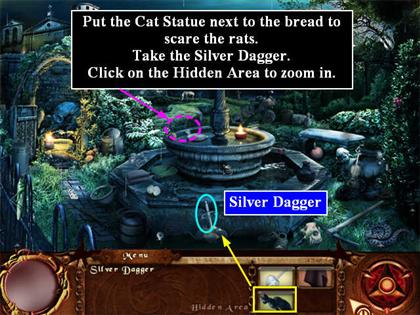
- Take the Cat Statue from your inventory and put it by the bread. It will scare away the rats.
- Collect the Silver Dagger.
- Now click on the back part of the fountain where your cursor turns blue to zoom in on the Hidden Area.
- Click where the cursor turns blue on the left side of the scene to enter the Bathroom. That’s the Hidden Area.
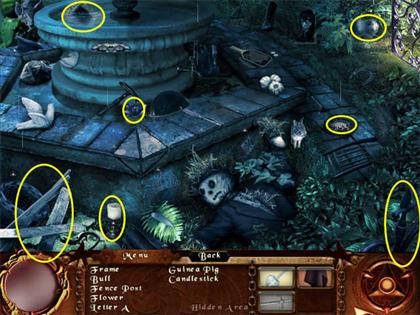
The Fountain (close-up)
- Collect the items on the Find List.
- The fence post is black cast iron like the Monastery gate. It is in the lower right corner.
- The “letter A” is just 3 pieces of wood leaning on each other in the lower left.
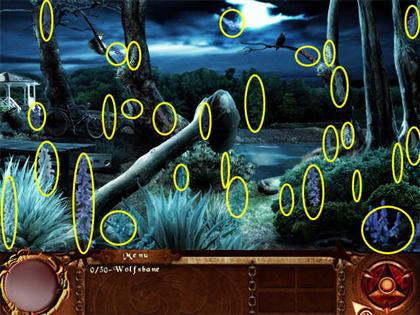
Stage 18: Where the Wolfsbane Blooms
World Map
- Click on Start to begin the puzzle.
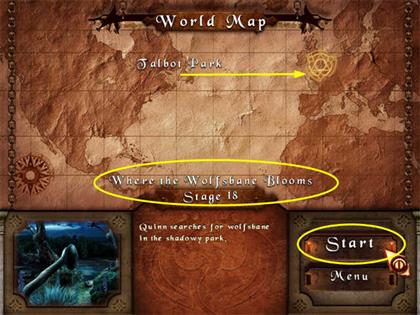
- You must find 30 different Wolfsbane plants in the picture. They can vary in shade, usually white, green, blue, or purple. They are all long thin stalks with many petals.
- And, yes, there is one floating in the sky.
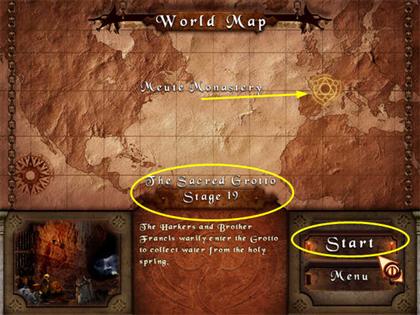
Stage 19: The Sacred Grotto
World Map
- Click Start to begin the stage.
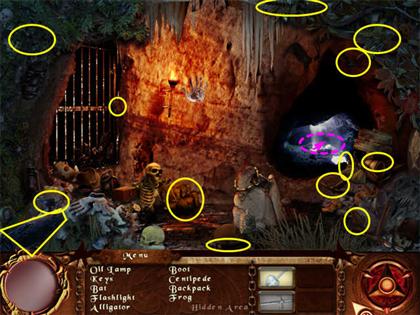
The Outer Grotto
- Collect the items on the Find List.
- The Keys are green and are in the leaves in the upper right.
- Once you’ve collected all the items, click where the cursor turns blue to enter the Hidden Area in the Inner Grotto.
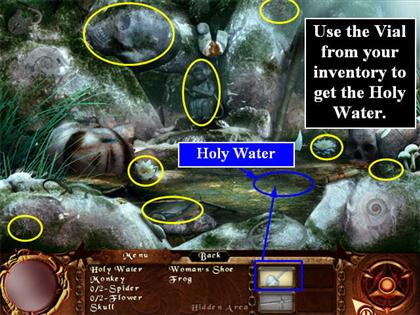
The Inner Grotto
- Collect the items on the Find List.
- Once you have collected all the visible items, click on the Vial in your inventory and drag it to where the sparkles are to collect the Holy Water.
Stage 20: Wolves at the Gate Puzzle
World Map
- Click on Start to begin the puzzle.
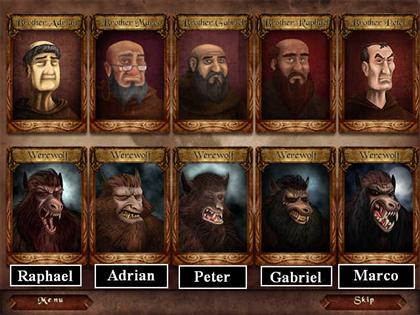
- You have to click on a werewolf portrait, then click on the portrait of the monk that it matches.
- You are supposed to be able to do this on the basis of “similar features.” However, we found that many things didn’t seem to match, including eyebrows, hair color, eye color, and hairline. Ultimately we just solved it with trial and error.
Stage 21: Into the Woods
World Map
- Click Start to begin the stage.
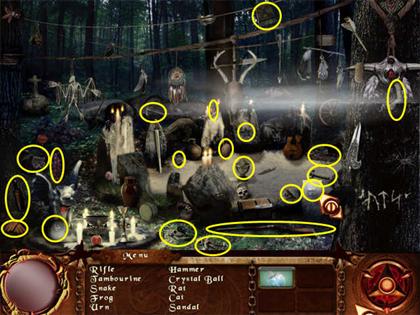
Abandoned Gypsy Camp
- The band of fog in the scene will roll slowly from the top to the bottom, then back again. So an area that was covered with fog will eventually be clear again.
- You can pick up an item that is in the fog, you just can’t see it as clearly.
- Collect the items on the Find List.
- The urn is the small silver container in the center of the stone circle.
- The bottle is brown, on the lower left side.
- The Spellbook is gray, leaning against the gargoyle in the lower left.
- The snake is white, head down, on the tree on the right by the ruby.
- The screenshot is a composite.
Stage 22: Reflection of Evil Puzzle
World Map
- Click on Start to begin the puzzle.
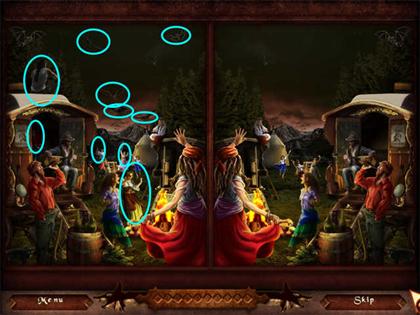
- This is a Find the Differences puzzle.
- Remember that the right side represents the reflection of the left side in a mirror, so positions are flipped 180 degrees. You’re not looking for something that’s in a different position—you’re looking for things that are missing altogether.
- You are looking for complete items, not partial differences. They will be present on the left side and absent on the right side.
- There are no hints available for this part of the game, but you can use the SKIP if you like.
- Since you are looking for vampires, the only things you have to check are people and bats. However, some of the bats are regular bats, not vampires, so you’re looking for the ones that are present in the left scene and absent in the right.
- The dancers in the back are a little confusing, because what happens is that there is a vampire on the left who is blocking your view of some mortals. When the vampire is absent on the right side, suddenly you see people who didn’t seem to be there on the left. However, they really are on both sides, it’s just that your view is blocked on the left.
- Look carefully at the musician in the wagon. There is a man behind him who is hard to see on either side. Is he present on both sides?
- The diamonds at the bottom of the screen are a counter. A diamond will light up each time you find an item, so the unlit diamonds tell you how many items you have left to find.
Stage 23: A Grave Destination
- Now you have the amulet. Time to find the Silver Spike!
World Map
- Click Start to begin the stage.
The Restless Ghost
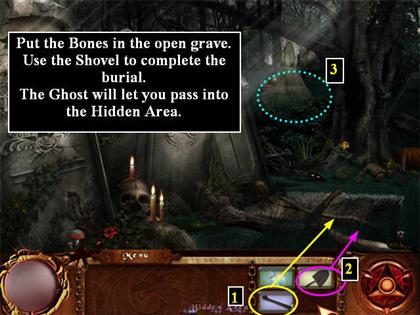
- Collect the items on the Find List.
- The skull does not count as a Bone.
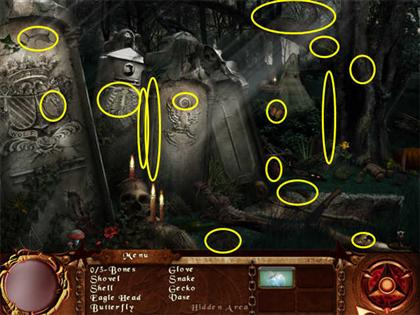
- Drag the Bones from your inventory tray to the open grave.
- Use the Shovel from your inventory to fill in the grave.
- Now click on the ghost and she will let you pass into the Hidden Area.
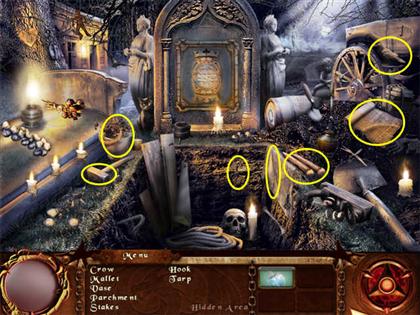
The Open Grave
- Collect the items on the Find List.
- The hook is on the back wall of the grave.
- The tarp is a large piece of fabric draped over the right side of the grave.
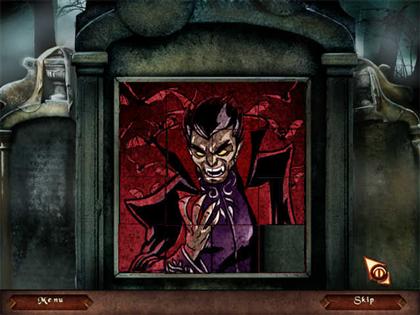
Stage 24: The Tomb of the Silver Spike Puzzle
World Map
- Click on Start to begin the puzzle.
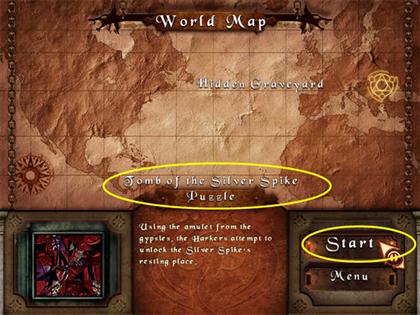
- This is a standard sliding tiles puzzle. It is a portrait of Draco.
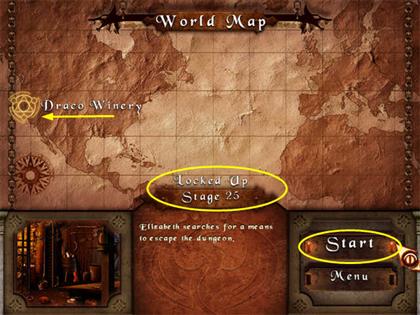
Stage 25: Locked up
- Back in California, Elizabeth Van Helsing has been locked in the same Dungeon where Quinn and Michael were held.
World Map
- Click Start to begin the stage.
The Dungeon
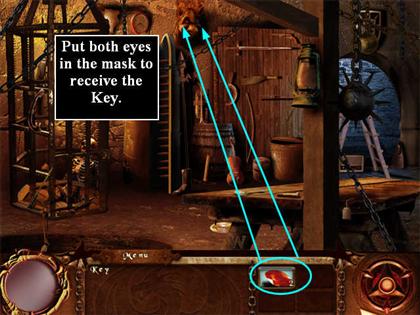
- Collect the items on the Find List.
- The Smoking Pipe is on the floor to the left of the table.
- The Pliers are very large and are hanging on the door.

- Drag each of the two rubies from your inventory to the Mask in the upper left. You will then receive the Key.
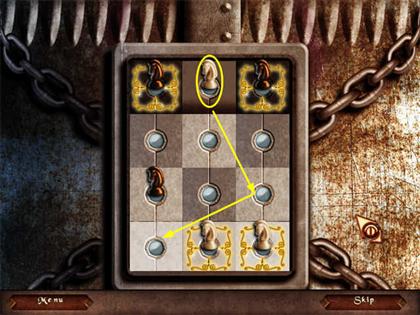
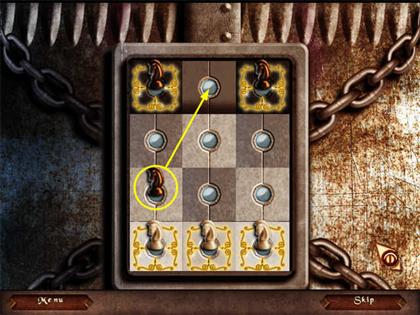
Stage 26: Six Knights Puzzle
World Map
- Click on Start to begin the puzzle.
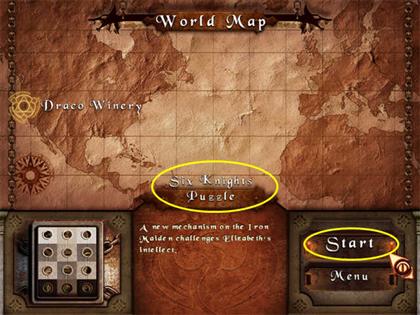
- The Iron Maiden lock has been upgraded from 4 to 6 Knights, but it’s the same basic idea. Your task is to swap the positions of the light and dark Knights.
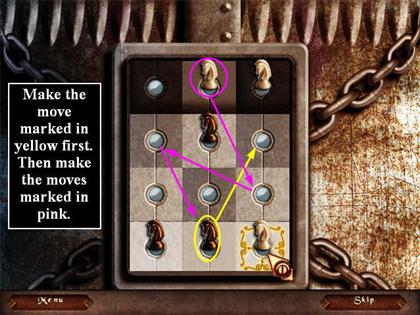
- There are many different possible solutions.
- When you click on a knight, the squares it can move to will be highlighted green. There may be several possible moves, depending on your starting position.
- One solution is shown in the screenshots. If there is a yellow path and a pink path in the same screenshot, do the yellow path completely first.

- Now you can escape the Dungeon!
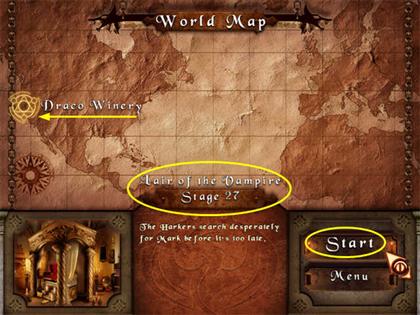
Stage 27: Lair of the Vampire
World Map
- Click Start to begin the stage.
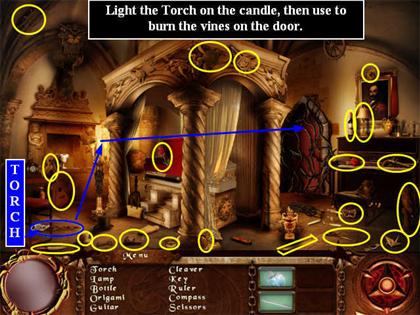
Draco’s Sleep Chamber
- There is a contradiction here—the previous card game said vampires don’t like roses, but Draco has them all over his sleep chamber. Perhaps the card game was just wrong.
- Collect the items on the Find List.
- The Compass is a navigational compass on the floor to the left of the bedpost.
- Pick up the large Torch from the floor under the chair. Light it on the candles as shown in the screenshot, then use it to burn the vines on the door.
Stage 28: The Tomb of the Silver Spike Puzzle
World Map
- Click on Start to begin the puzzle.
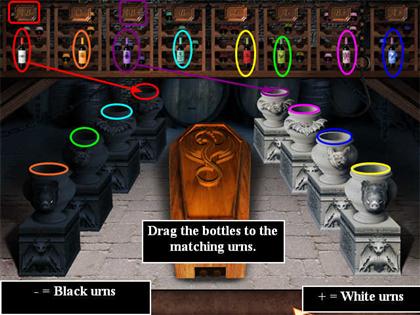
- You see a coffin with a line of black urns on the left and a line of white urns on the right.
- There are bottles of “wine” along the back wall. At the top of each column of wine is a blood type, like AB+ or O-.
- You must drag each bottle to its corresponding urn.
- Negative blood types go to black urns. Positive blood types go to white urns.
- The wine labels are supposed to match the symbols on the urns, but they’re a little hard to see. However, once you figure out one, you can immediately place its opposite type (+ or -) in the matching urn of the other color.
- When you drag a bottle to the correct urn, that urn will glow.
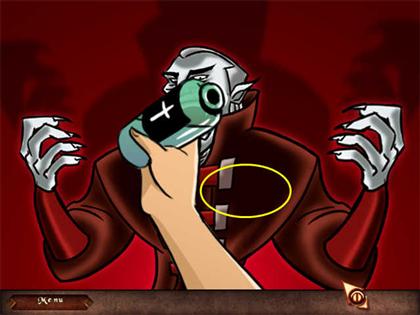
Stage 29: A Duel with Draco Puzzle
World Map
- Click on Start to begin the puzzle.
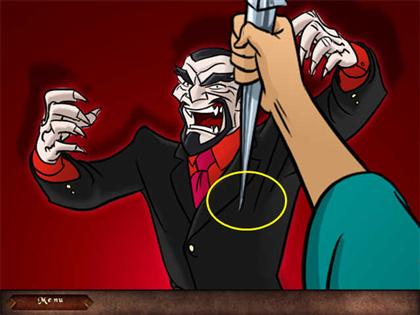
- You just have to click in the area near the heart. You can’t really lose this puzzle.
Stage 30: The Black Dragon Revealed Puzzle
World Map
- Click on Start to begin the puzzle.

- Again, you just have to click on the area near the heart. You can’t really lose this puzzle.
- Watch the ending.
Created at: 2009-11-08