

Walkthrough Menu
- Getting Started
- Goals, Levels, Chapters, and Stars
- Currency
- Boosters and Power-ups
- Game-play and Scoring
- Hazards
- Bonus Levels
- Tips and Tricks
Getting Started
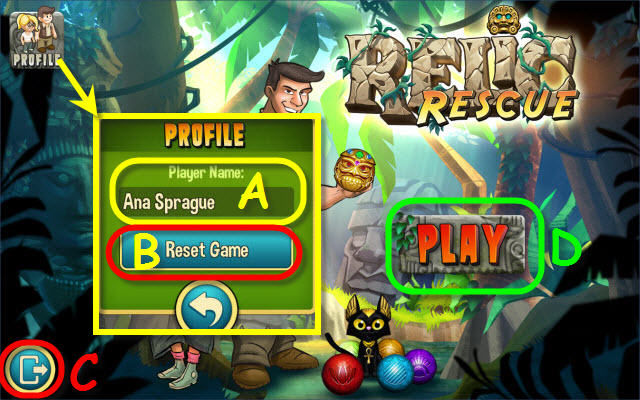
- Select profile (A) to set up your profile and reset all progress in the game (B).
- Exit the game here (C).
- Begin the game by selecting play (D).
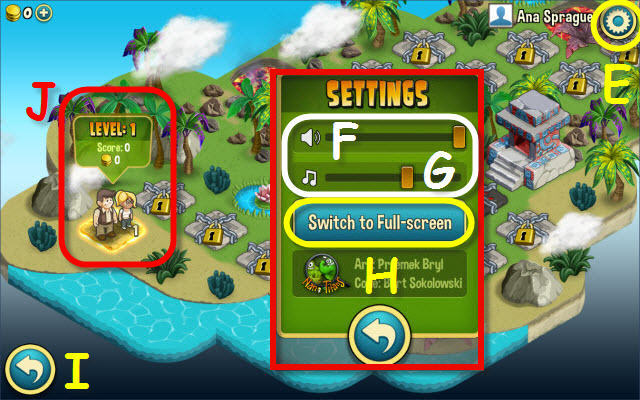
- Select the gear (E) to access the settings on the map screen as well as in each level screen.
- You may change the sound effect (F) and music levels (G) here.
- Toggle between Windowed and Full-screen mode here (H).
- Return to main menu (I).
- Select the level to begin playing (J).
Goals, Levels, Chapters, and Stars
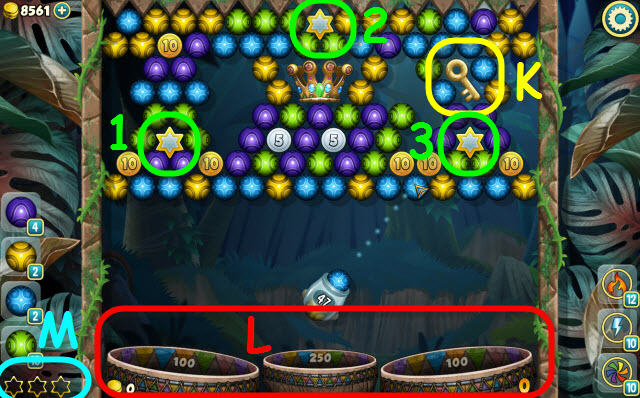
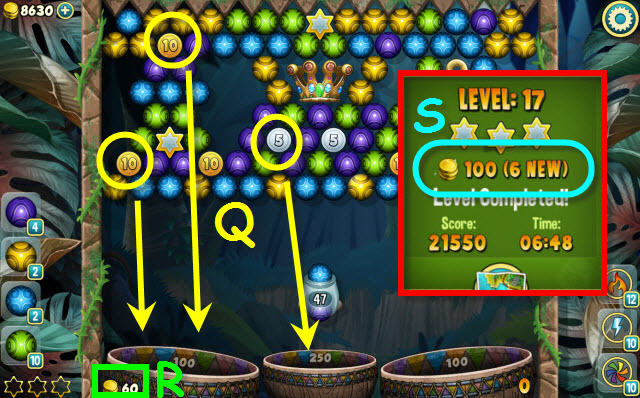
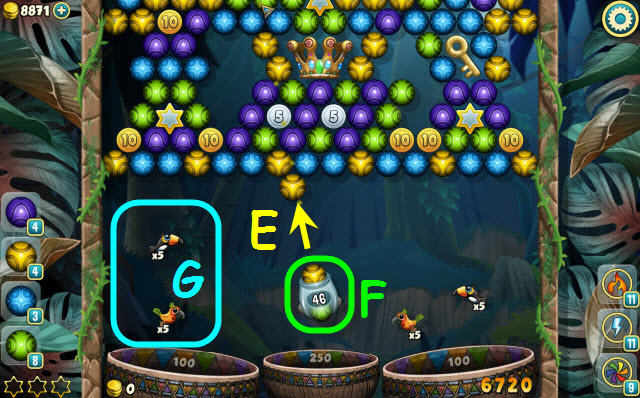
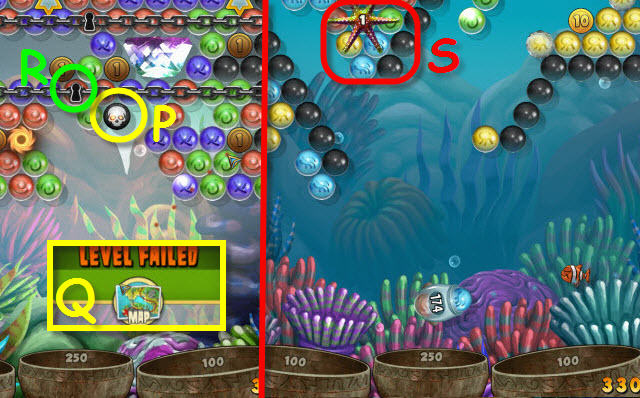
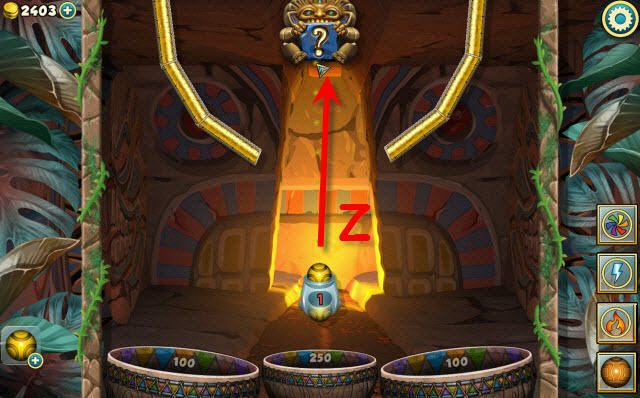
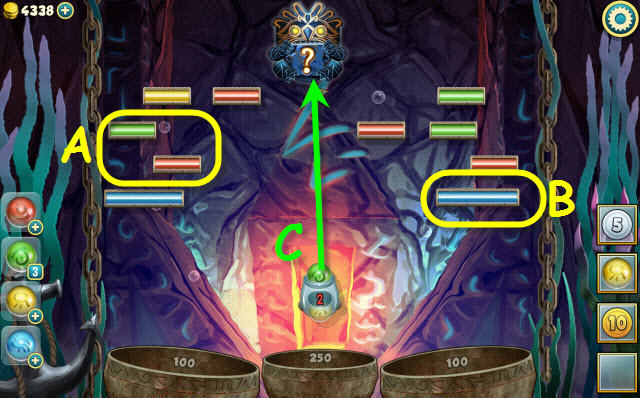
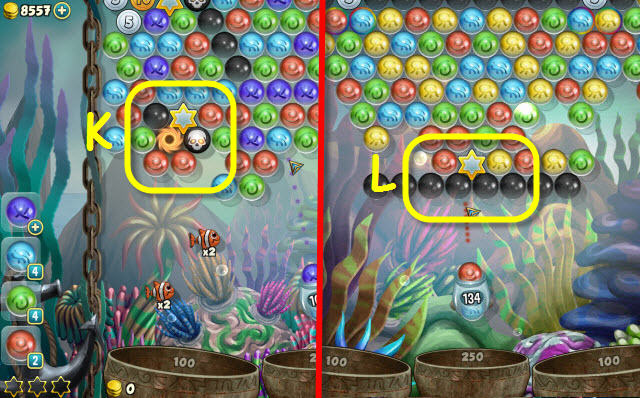
- The goal in each level is to collect the key (K) by freeing it and dropping it into one of the baskets below (L); collecting the key will unlock the next level. The level game-play will end once the key is freed.
- Stars are collected by freeing them and dropping them into the baskets below. There are three stars per level (1-3).
- Your current number of collected stars are tallied here (M).
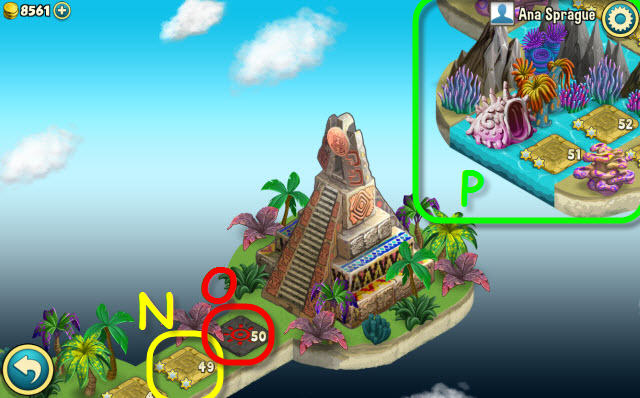
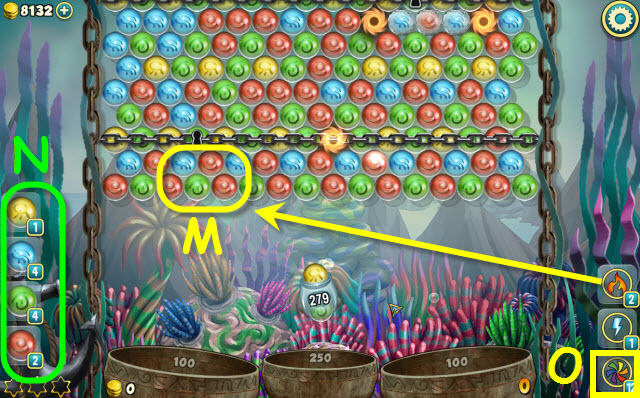
- There are 45 regular levels (N) and 5 bonus levels (O) in each chapter.
- Each chapter takes place in a new unique land (P).
Currency
- Gold coins are your currency for all in-game purchases.
- You can earn gold coins by freeing and dropping them into the baskets (Q). The value of the gold coin is marked on each one.
- The amount of gold coins you have already earned during this round appears here (R).
- You can earn additional gold coins by replaying the level and freeing up any gold coins that may still have been on the board when the key was freed. These additional gold coins will be noted here as new ones (S).
- Gold coins can also be won playing bonus rounds.
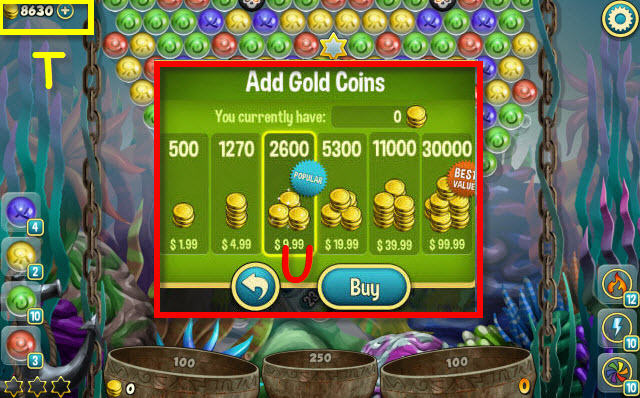
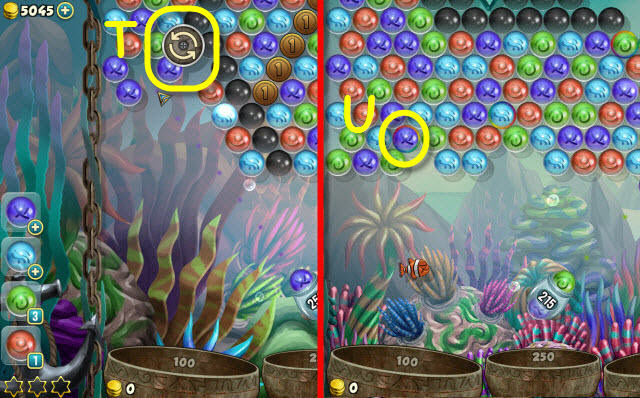
- Your total gold coins are shown here (T).
- Selecting the gold coins brings up the store to purchase additional gold coins. Choose your package and select buy (U).
Boosters and Power-ups
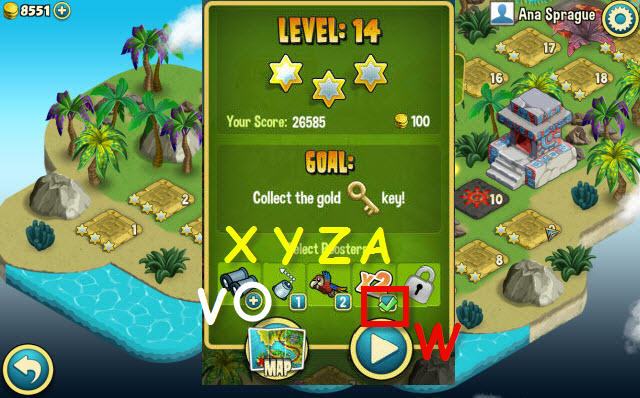
- You may select or purchase (V) extra boosters prior to playing a level; select the button of your choice.
- When the boosters are first introduced, you will be given three of each. They will automatically be checked to use them. If you want to save them, be sure to uncheck them (W).
- Binoculars: First introduced on level 7, the Binoculars will allow you to see the entire playing field before you begin. Be sure you are paying attention when you start the level, because you only get one preview (X).
- Precision Aim: First introduced on level 13, the Precision Aim allows you to see the trajectory of the bubble before you shoot (Y).
- Permanent Pet: First introduced on level 18, the Permanent Pet booster will remain active and not fly away (Z).
- Double Points: First introduced on level 24, the Double Points booster will double the amount of points scored on that level (A).
- You may select or purchase a power-up during game-play to assist you with finishing the level. You will receive three of each power-up when they are first introduced.
- Joker: First introduced on level 5, the Joker will turn the bubble being launched into a multi-colored bubble that will match any color needed (B-1).
- Bolt: First introduced on level 12, the Bolt will destroy a line of bubbles within a set range (C-2).
- Fireball: First introduced on level 15, the Fireball destroys all surrounding bubbles after it makes contact (D-3).
Game-play and Scoring
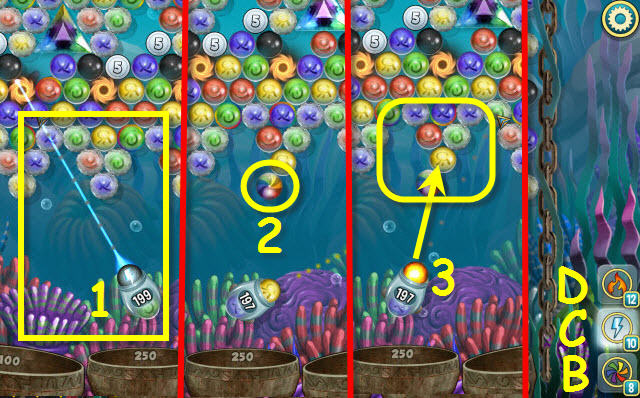
- In order to clear the field, you must make matches of 3 or more bubbles by shooting them from the cannon (E).
- You can use either the right mouse button or select the cannon to rotate it; use the opposite bubble if it's a preferred color (F).
- A parrot will appear when you make a match of 3 or more. The more consecutive matches you make, the more parrots and the higher the multiplier will be. The following is the criteria for how they appear.
- Match 1: 1 parrot.
- Match 2: 1 parrot with double multiplier.
- Match 3: 1 parrot with double multiplier and a second parrot.
- Match 4: 2 parrots with double multipliers.
- Match 5: 2 parrots with double multipliers and a third parrot.
- This will continue until you have 4 parrots with unlimited multipliers (G). Missing a match will cause one parrot to fly away.
- Try and release the relics above the parrots so that they hit them and get points. A parrot hit is worth ten points and that will be multiplied by the number of the multiplier on that parrot.
- In addition to the parrots, consecutive matches increase the point value of each bubble hit.
- You can use an extra ball to load in the cannon to keep up a winning streak or to continue the game if you ran out of bubbles (H). Select the bubble of your choice and it will load into the cannon.
- Dropping relics into the baskets will give you a large amount of points (I).
- Try to clear the stars and relics before freeing the key to get the most points.
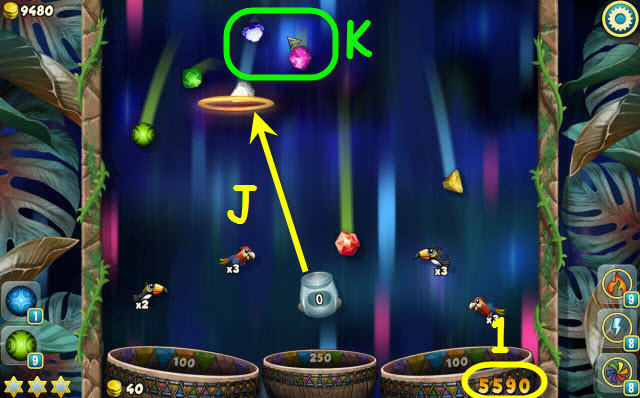
- Bubble fever is created with the remaining bubbles in the cannon after the key is dropped.
- Aim the cannon so that the bubbles shoot through the hoop (J) and turn into gems (K). The gems are worth more than bubbles when they fall into the baskets.
- Your total score for the level is located here (1).
Hazards
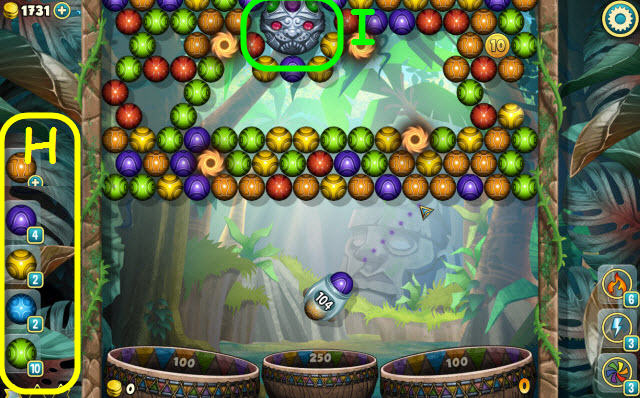
- Black bubbles are introduced in level 11. They cannot be matched, so they must be eliminated by removing all the bubbles around them (L).
- Crystal-encased bubbles and coins are introduced in level 21. You can break the crystal casing by hitting it with any colored bubble and then it will be a regular bubble or coin (M).
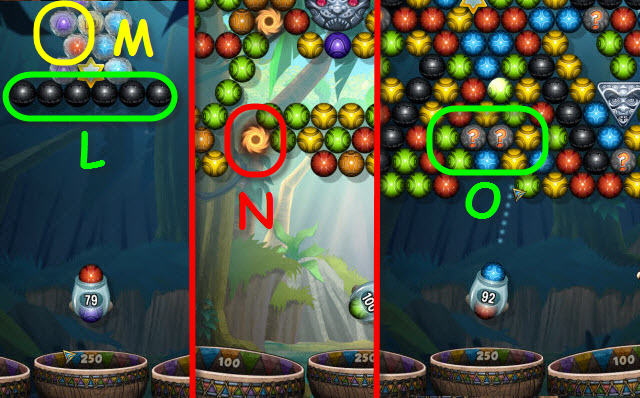
- Vortexes are introduced in level 31. Any bubble that lands next to a vortex will be pulled into it and disappear (N).
- Question-marked bubbles are introduced in level 41. The can be popped by any color bubble and hide a bubble or a hazard (O).
- Skull bubbles are introduced in level 51. Hitting or landing next to a skull (P) will end the game (Q).
- Chains are introduced in level 61. You must make a match using the color of the bubble under the lock to unlock it and remove the chain (R).
- Starfishes are introduced in level 71. The number in the center represents the number of direct hits by any color bubble that is required to remove it (S).
- Rotating disks are introduced in level 81. Every launch from the cannon will rotate the disk and the attached bubbles. You must remove all surrounding bubbles to remove the disk (T).
- Morphing bubbles are introduced in level 91. The bubble changes color after each bubble launch. You can see what the color change pattern is by watching it go through the color sequence after using the cannon on other bubbles (U).
Bonus Levels
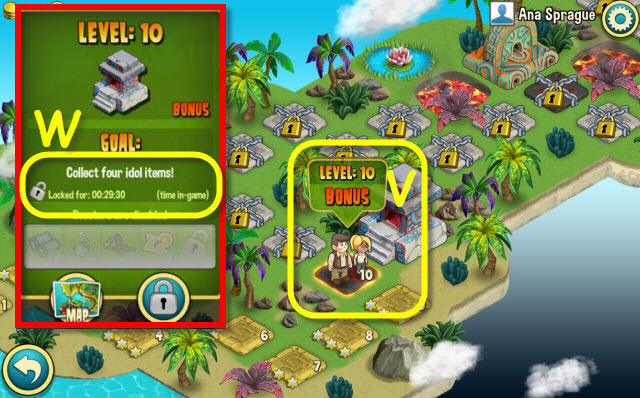
- Every tenth level is a bonus level. These can be played over and over to earn extra bubbles, gold coins and power-ups (V).
- You may play them every 30 minutes of in-game time (W).
- I advise playing them as often as you can because you can gain valuable items.
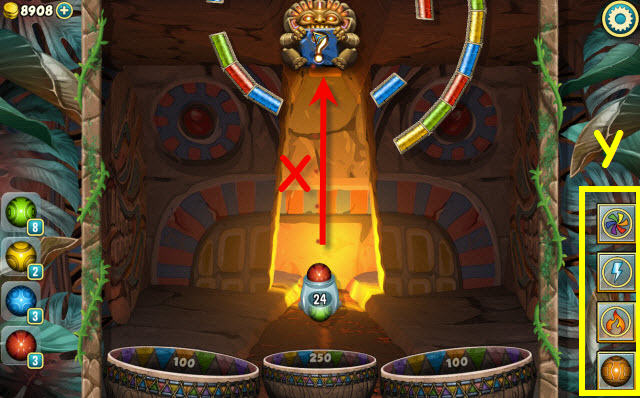
- Levels 10, 20, 30, and 50, you will begin with enough available bubbles in the cannon to remove a large section in each spinning row.
- After you have created an adequate space to shoot through, just wait for the spaces to align and shoot into the goal (X).
- The items won are located here (Y).
- Level 40 has limited bubbles. Use 2 of them to break a couple of joined bars and shoot through them when they rotate and you get a clear shot to the goal (Z).
- Levels 60, 70, 80, 90, and 100, you will have less available bubbles in the cannon so you will need to be more selective in your shots.
- Shorter bars (A) move faster than longer bars (B), so focusing on clearing more of those will give you an easier shot to the goal (C).
- Levels 110, 120, 130, 140, and 150, you will need to concentrate on the center spinning bars only and then you will be able to get the bubbles in the goal easily.
- Solution: Level 110 (D), level 120 (E), level 130 (F), level 140 (G), and level 150 (H).
Tips and Tricks
- The following are some general tips and tricks to help you get through the levels.
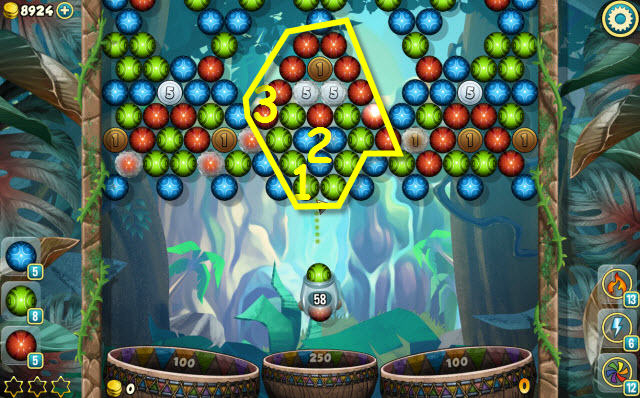
- It is important to look at the whole field and try to make your way through by working bottom-up. Strategically shooting 3 bubbles (1-3) will eliminate this entire section (I).
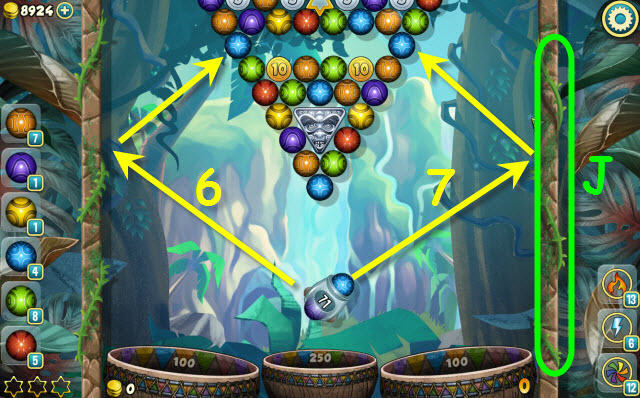 <
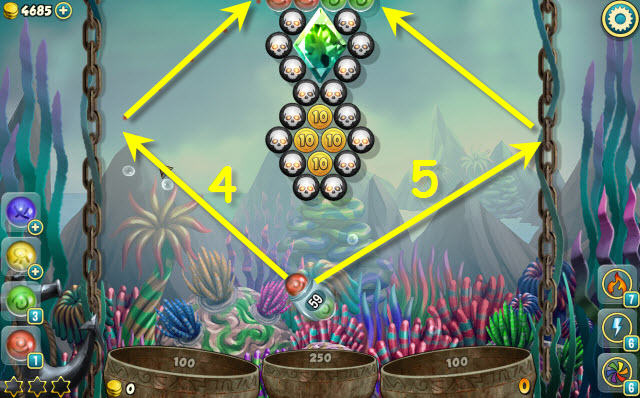
<- Using a bank shot off the wall (4-5) and (6-7) can drop large areas. A good level for practicing bank shots is level 6.
- Once you get a feel of where to aim on the wall to get it to go where you want it to, look at the landmarks such as the ivy (J) to help you remember where to shoot.
- Using Precision Aim prior to starting a level with allow you to get a more accurate aim and will increase your odds of completing a level.
- Using a Fireball or Bolt to eliminate the vortexes and skull bubbles will save you many of bubbles in the cannon because you need to drop them without touching them (K).
- Use a Fireball in the center of a long line of black bubbles to remove them (L).
- In order to beat a level with chains that have rows of bubbles blocking access to the lock, use the fireball on the bubbles directly in front of the lock (M).
- After you clear the bubbles and can access the lock, use your spare balls (N) or the Jokers (O) on the lock to break the chain.
Created at: 2014-09-26