

Walkthrough Menu
- General Tips
- Chapter 1: Behind the Looking Glass
- Chapter 2: The White Shore
- Chapter 3: The Ice Prison
- Chapter 4: Crossroads
- Chapter 5: The Red Shore
General Tips
- This is the official guide for Bridge to Another World: Through the Looking Glass.
- This guide won't tell you when to zoom into a location; the screenshots show each zoom scene.
- Hidden-object puzzles are referred to as HOPs. Only the locations of the HOPs will be shown.
- Use the Map to fast travel to a location.
Chapter 1: Behind the Looking Glass
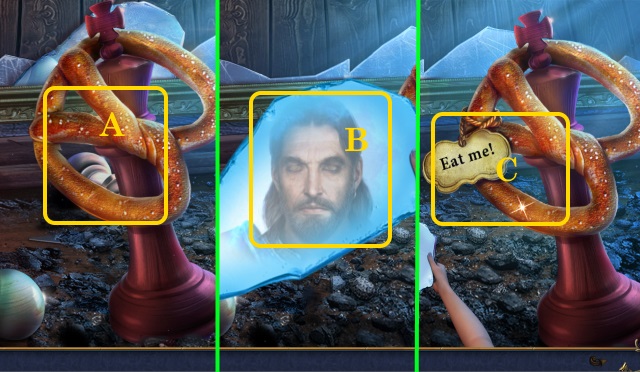
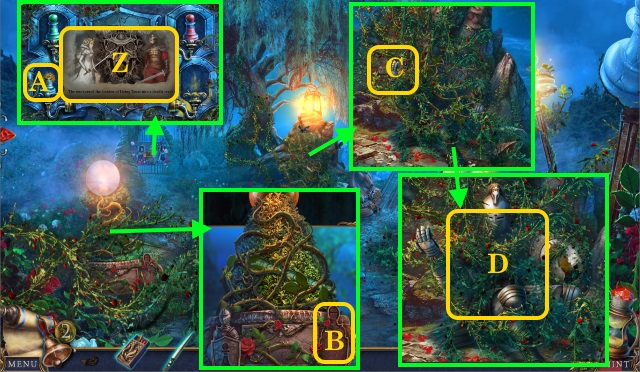
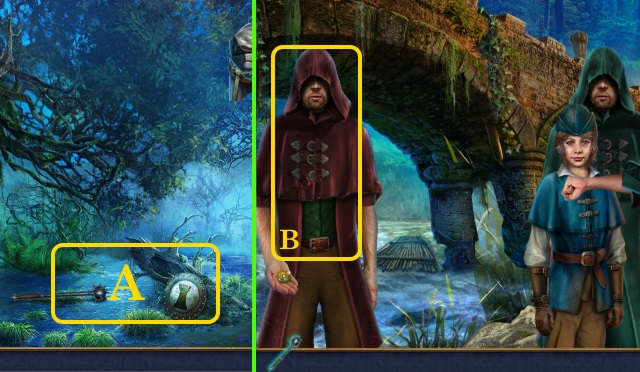
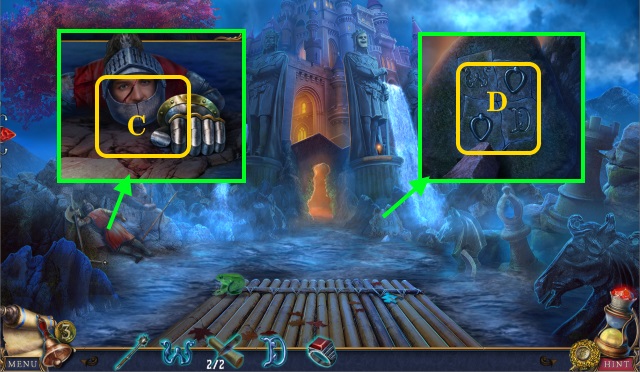
- Move (A); look.
- Speak (B); eat (C).
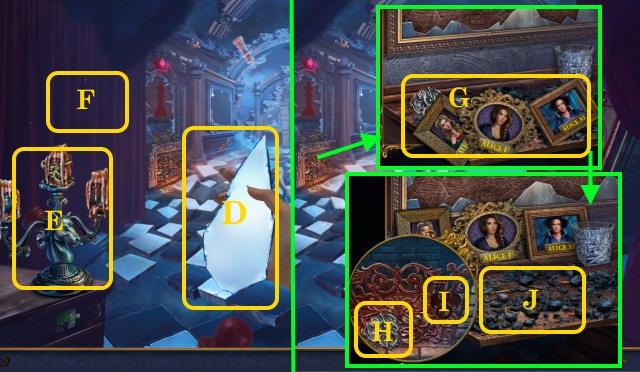
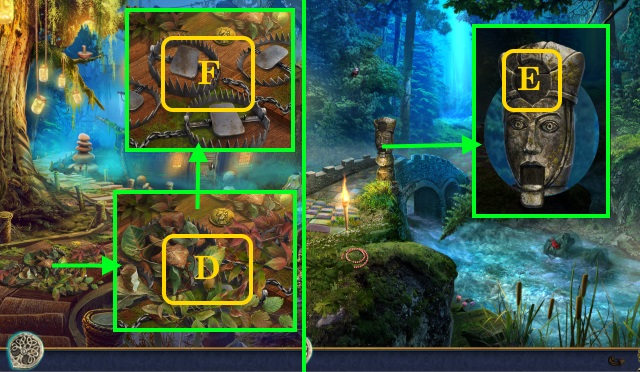
- Take MIRROR SHARD (D); pick up CANDLEHOLDER (E).
- Look (F).
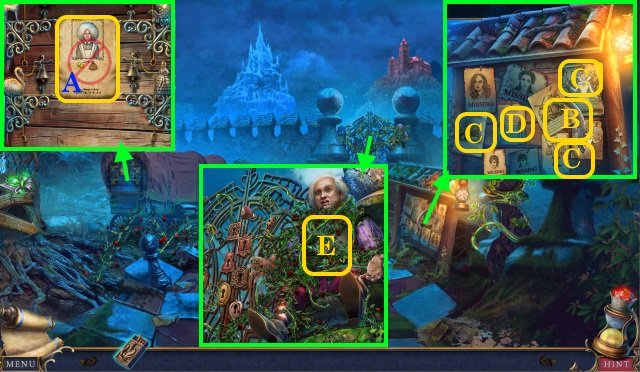
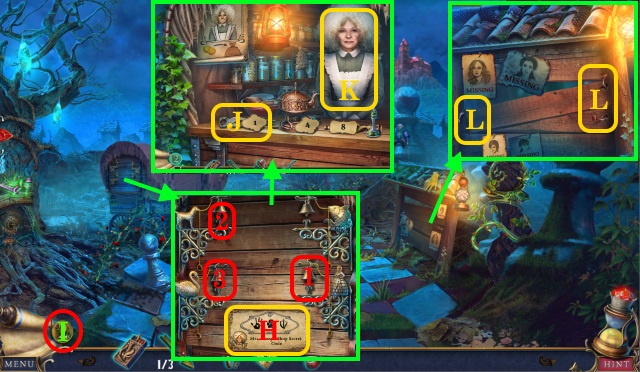
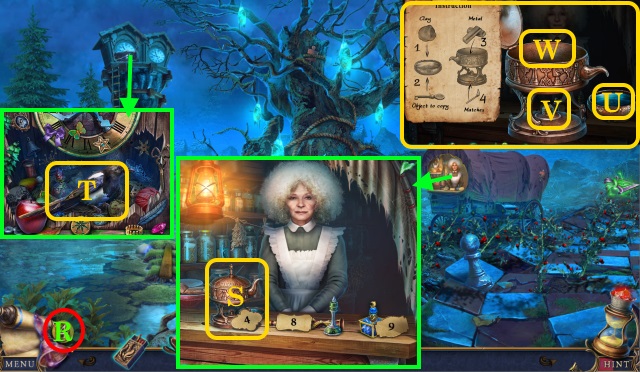
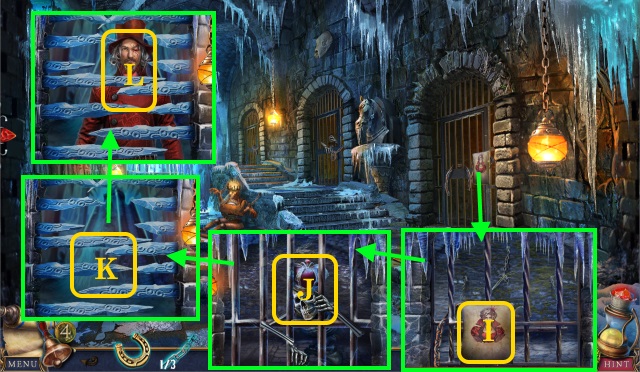
- MIRROR SHARD on CANDLEHOLDER; take CLOCK KEY.
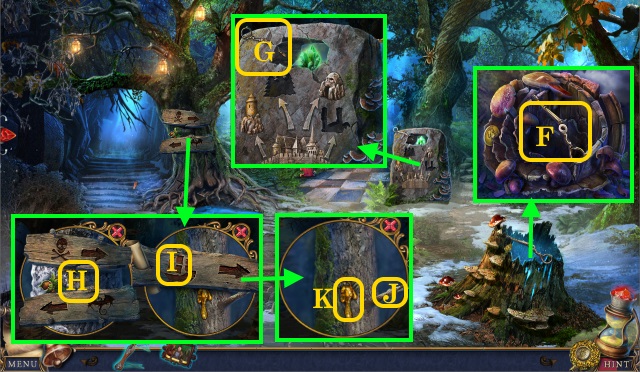
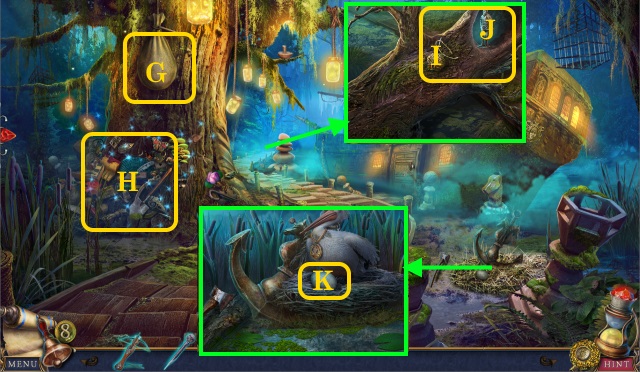
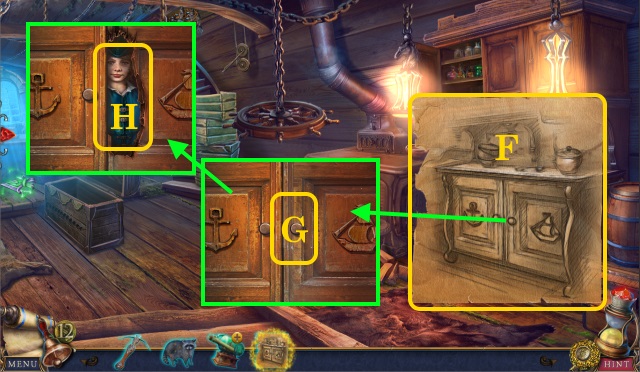
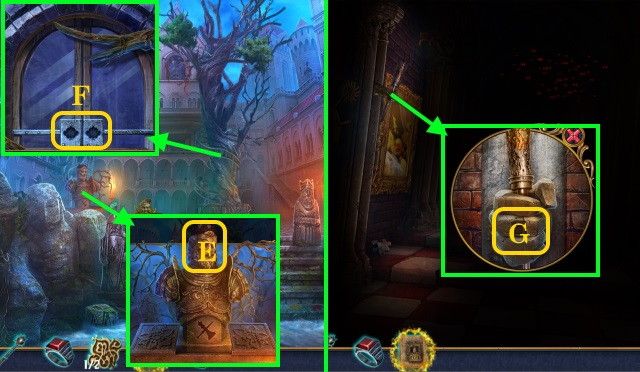
- Clear (G); inspect.
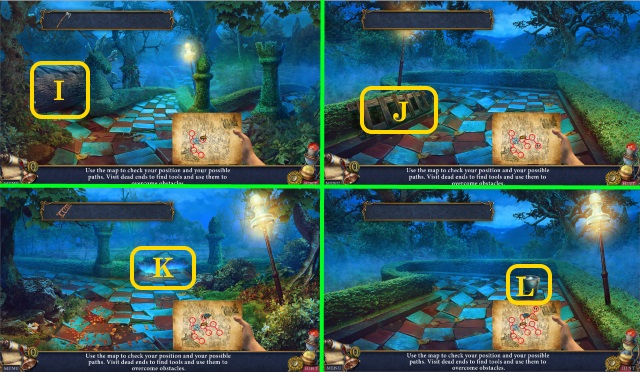
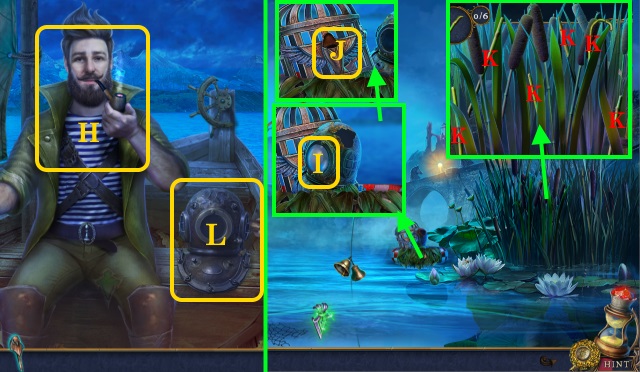
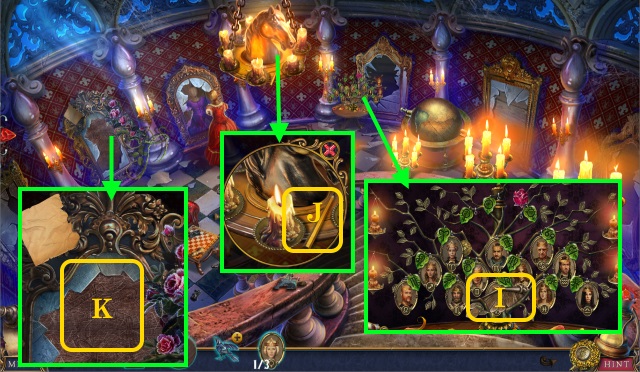
- Move (H-I); open; find CANDLE 1/3 and BELLOWS.
- Use BELLOWS (J); collect MATCHES.
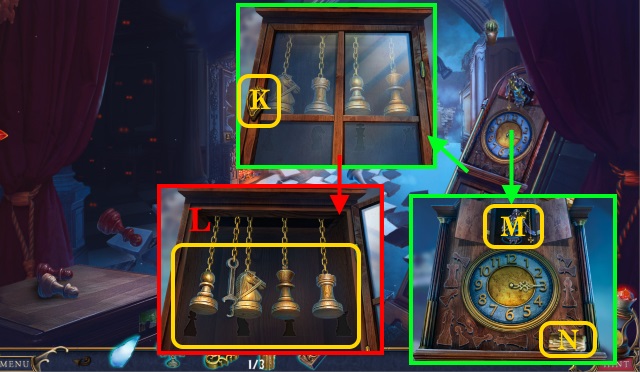
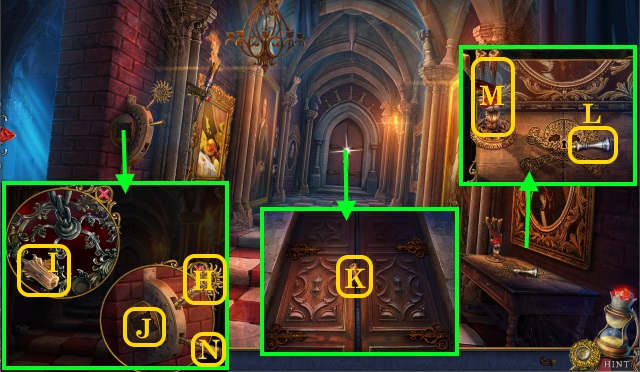
- Use CLOCK KEY (K); open.
- Solution (L).
- Pick up WRENCH.
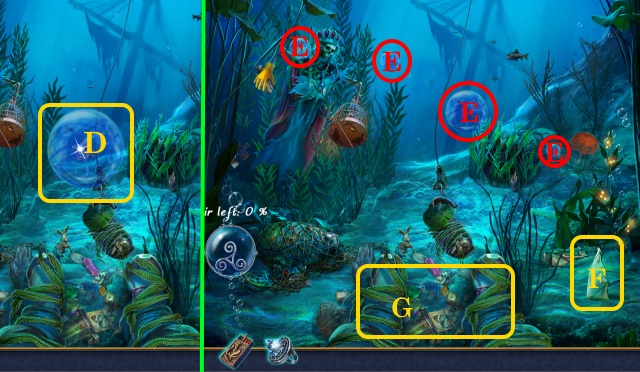
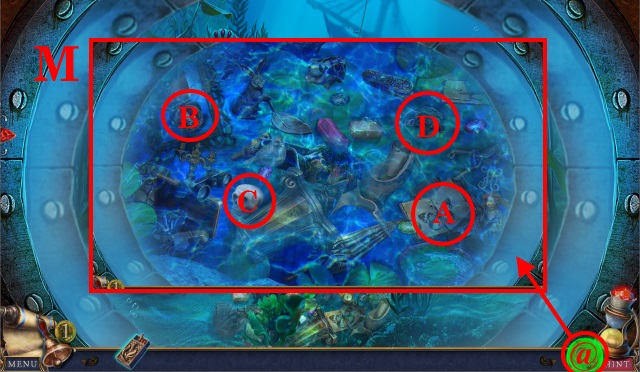
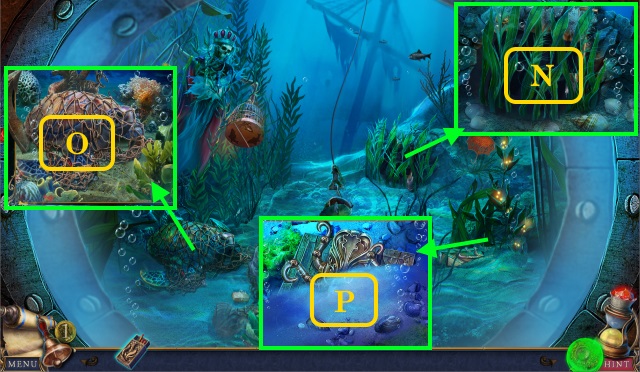
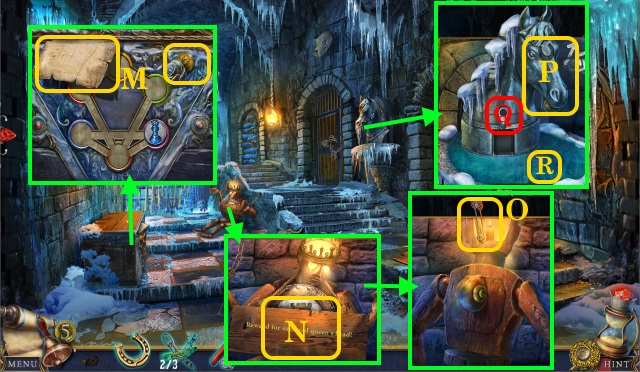
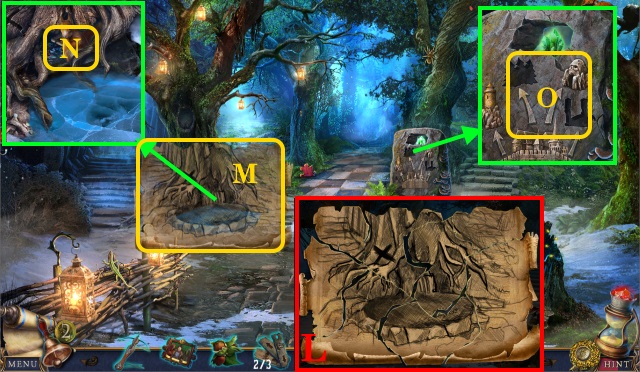
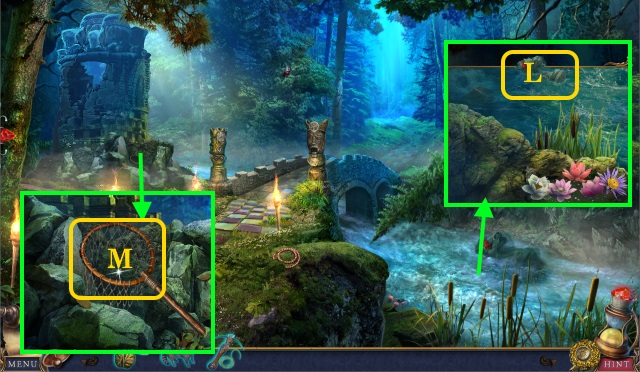
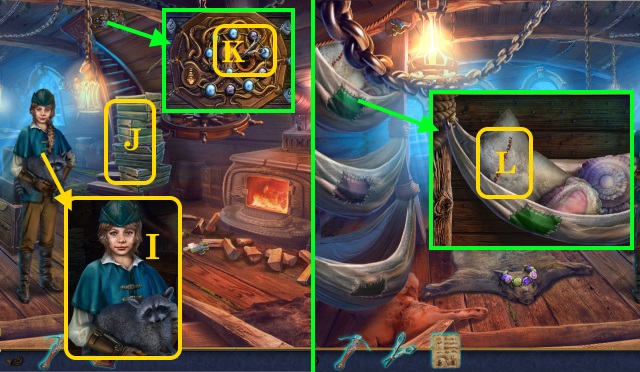
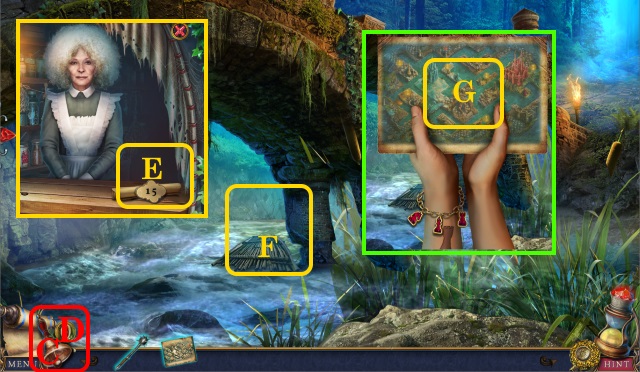
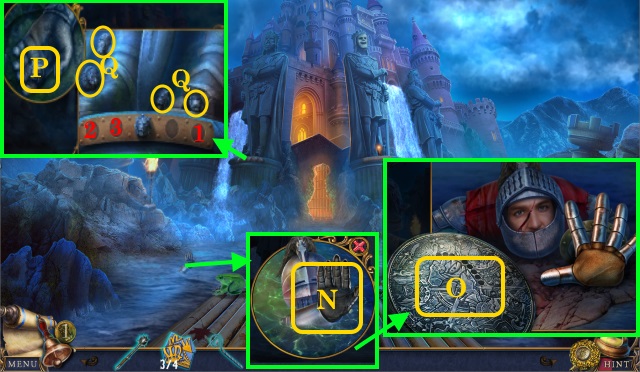
- Look (M); pick up CANDLES 2/3 (N).
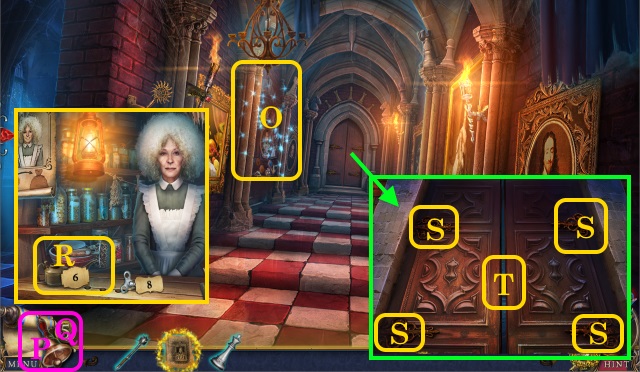
- Look (O); pick up CANDLES 3/3.
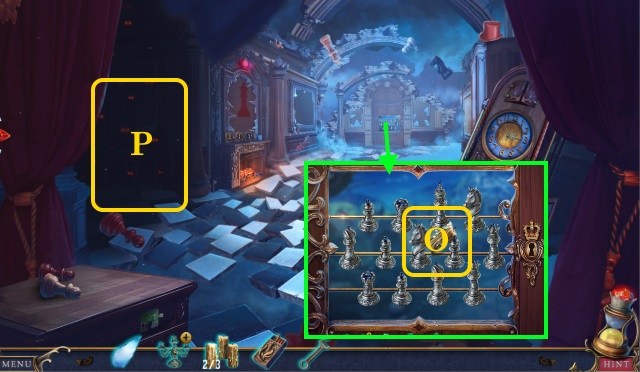
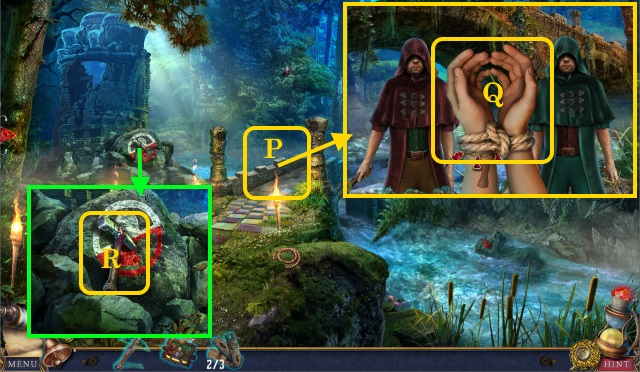
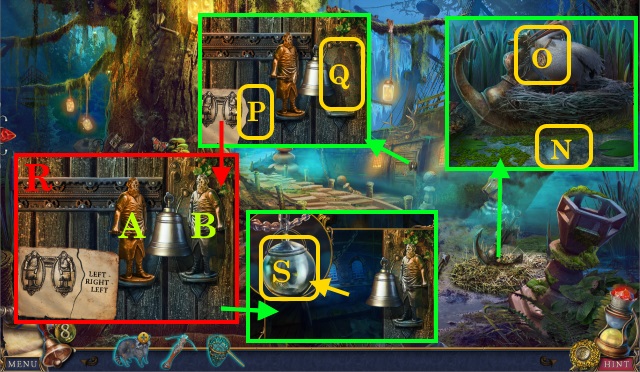
- CANDLES and MATCHES on CANDLEHOLDER; take LIT CANDLES.
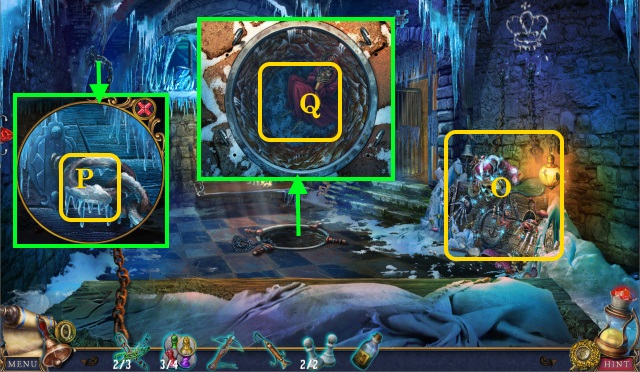
- Use LIT CANDLES (P); complete HOP; receive SCROLL.
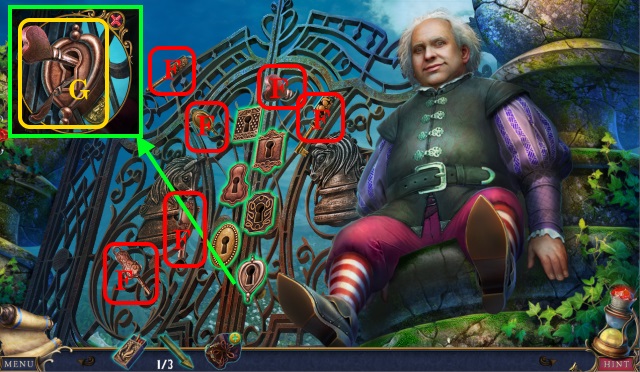
- Inspect SCROLL; find 'A' SIGNET RING and ROOM PICTURE.
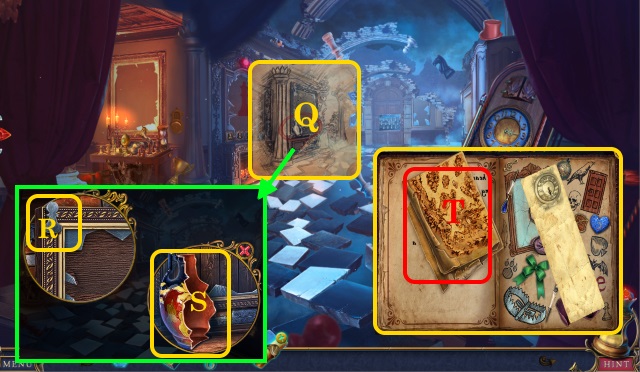
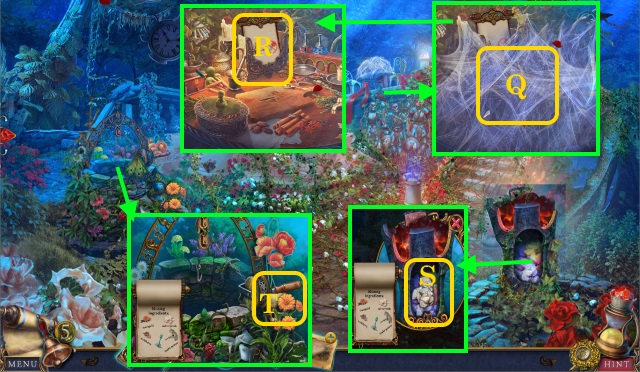
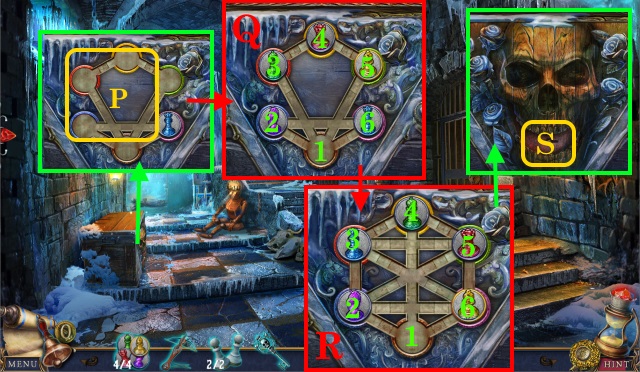
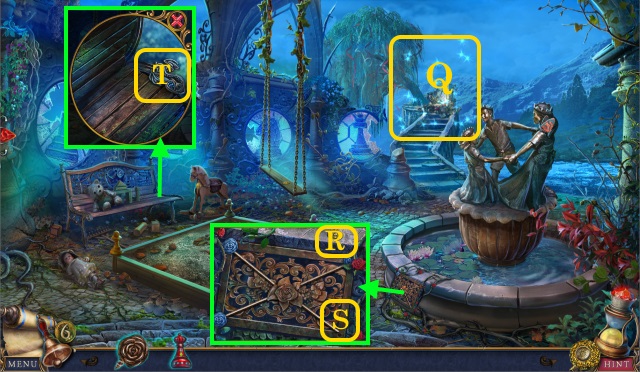
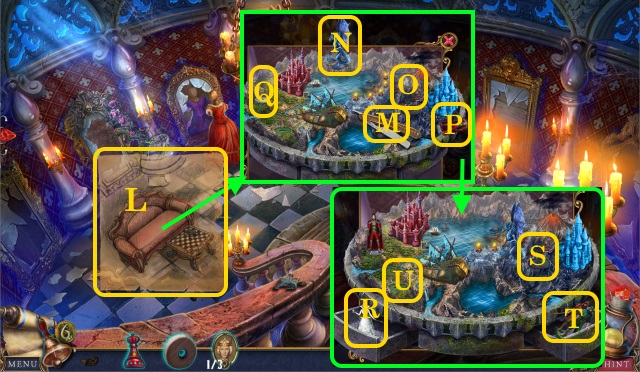
- Align ROOM PICTURE (Q).
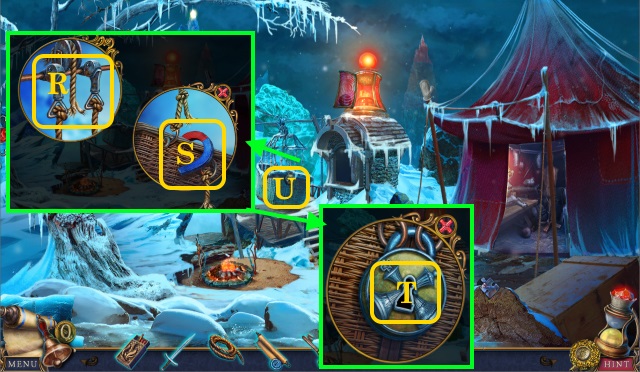
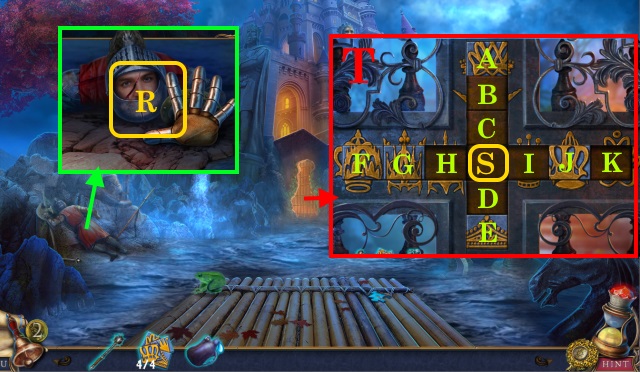
- Use WRENCH (R); slide.
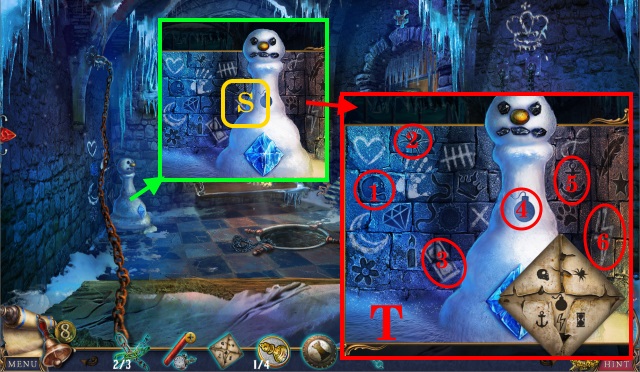
- Move (S); find DIARY.
- 'A' SIGNET RING on DIARY; open.
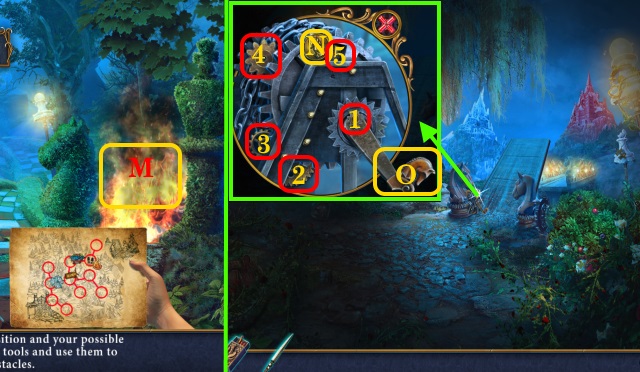
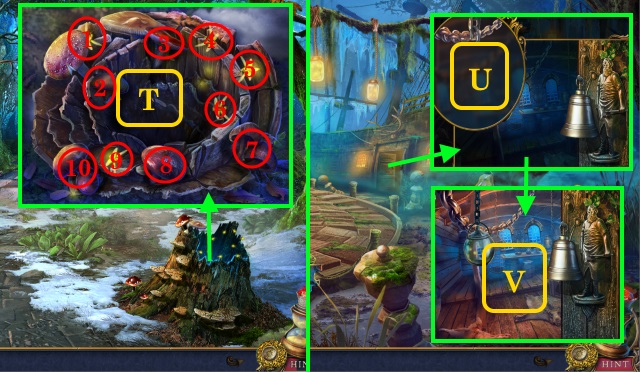
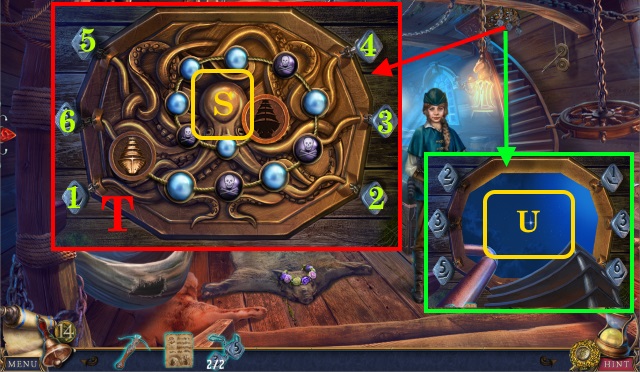
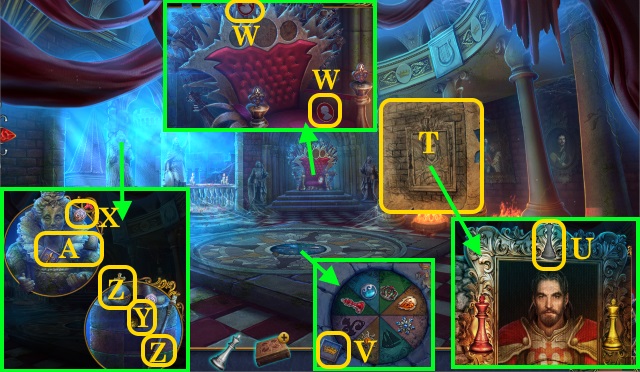
- Pick up map (T); use MIRROR SHARD.
- Complete HOP; take CLOCK CODE.
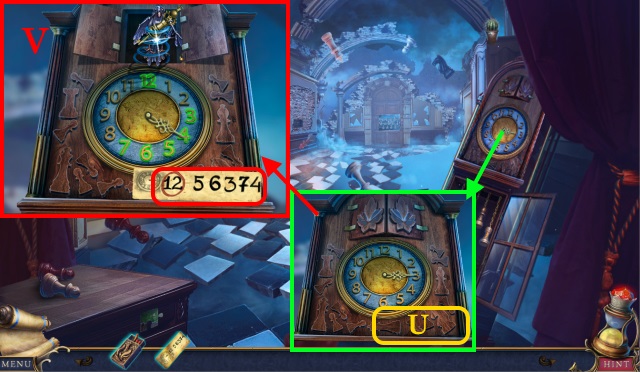
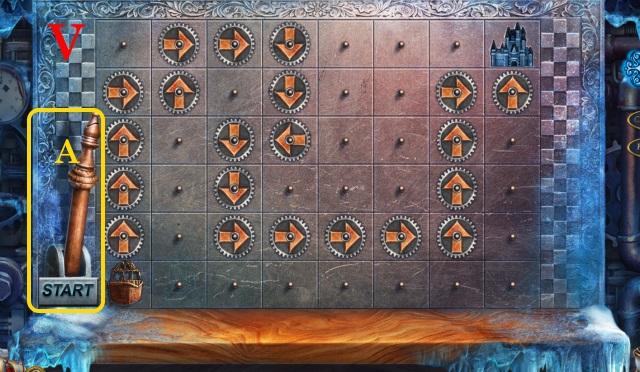
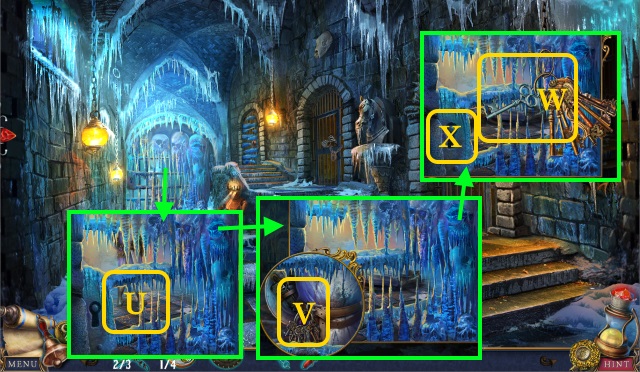
- Place CLOCK CODE (U).
- Solution (V): 12-5-6-3-7-4.
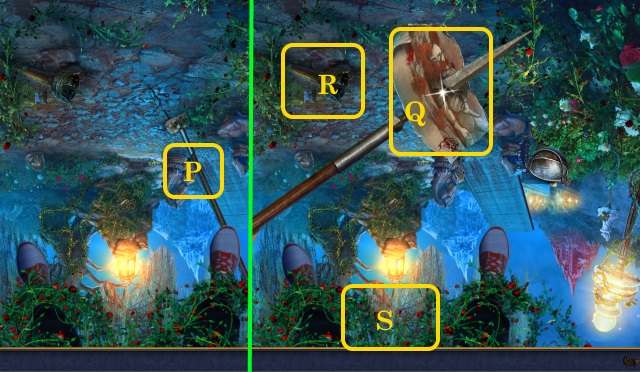
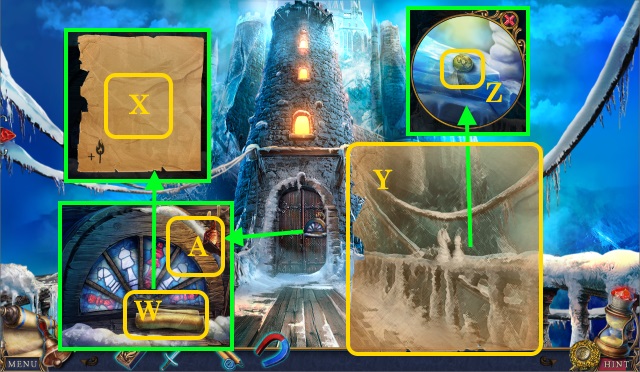
- Pick up DOOR KEY.
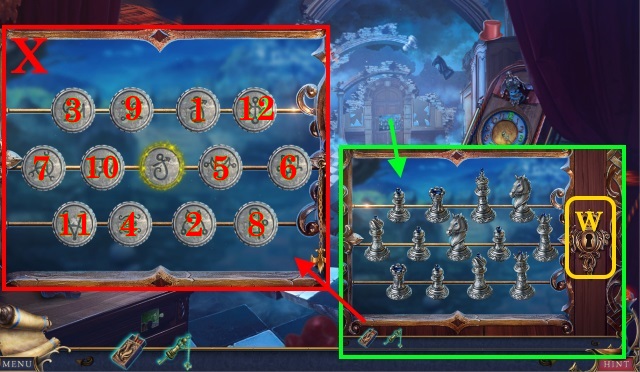
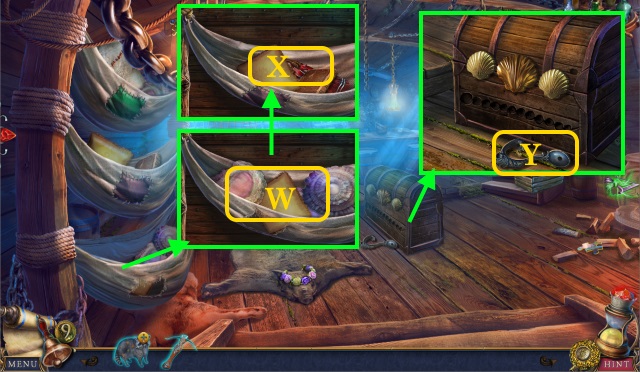
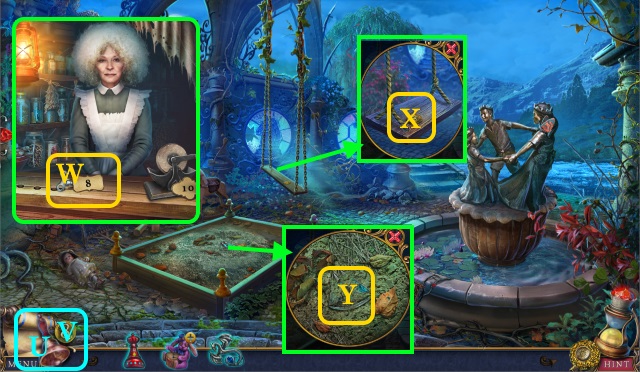
- Use DOOR KEY (W).
- Solution (X): 1-12.
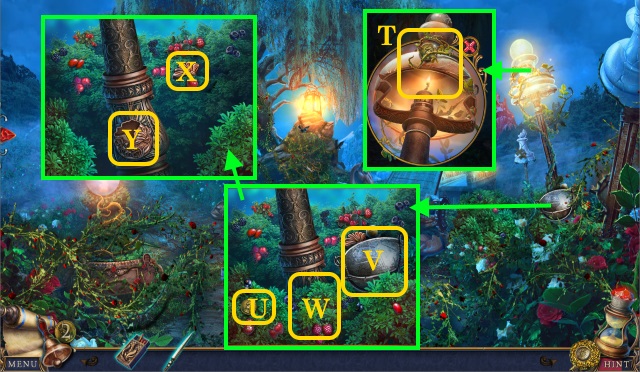
- Walk forward.
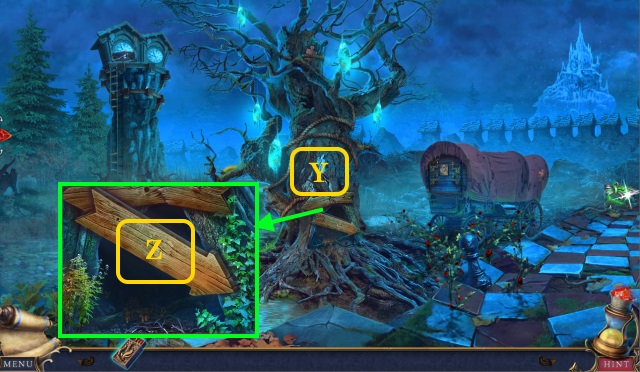
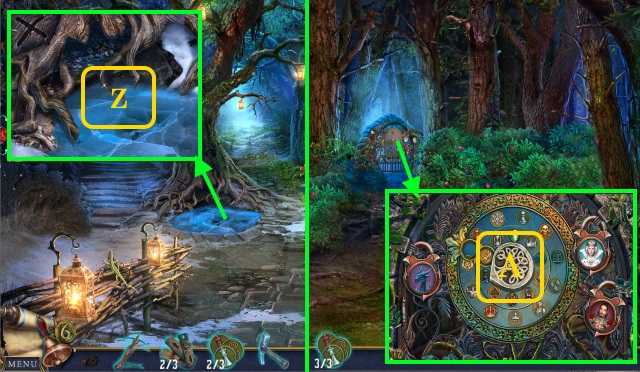
- Look (Y); pick up ROAD SIGN 1/3 (Z).
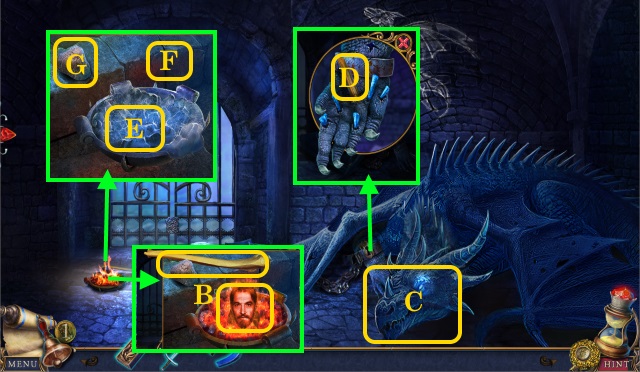
- Look right.
- Inspect (A); find SICKLE HANDLE.
- Place SICKLE HANDLE (B); take SICKLE.
- Read (C); move (D).
- Use SICKLE (E); speak.
- Complete HOP; receive HUMPTY-DUMPTY'S POUCH.
- Collect (F); pick up BROKEN KEY and coin (G).
- Open HUMPTY-DUMPTY'S POUCH; find coin and SHOP CODE.
- MATCHES on HUMPTY-DUMPTY'S POUCH; pick up SMOKING PIPE.
- Place SHOP CODE (H); ring 1-2-3.
- Spend (I-J); receive NAIL PULLER.
- Speak (K); receive bell.
- Use NAIL PULLER (L); pick up BOARDS 2/3, 3/3 and coin.
- Look left.
- Use SMOKING PIPE (M); find coin.
- Place BOARDS (N); pick up CLAY (O).
- Pull (P); climb.
- Look (Q); pick up coin.
- Look right.
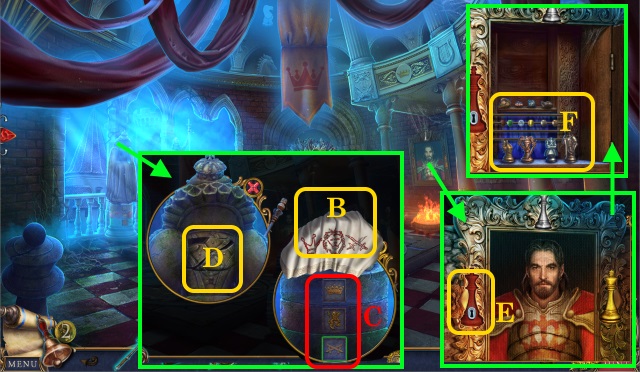
- Spend (R-S); receive MELTING MOLD.
- Open MELTING MOLD; inspect; find CHEESE.
- Give CHEESE (T); complete HOP; receive SILVER PIECES.
- Inspect MELTING MOLD; place CLAY and BROKEN KEY (U); press.
- Use MATCHES (V); place SILVER PIECES (W); pick up SILVER KEY.
- Look right.
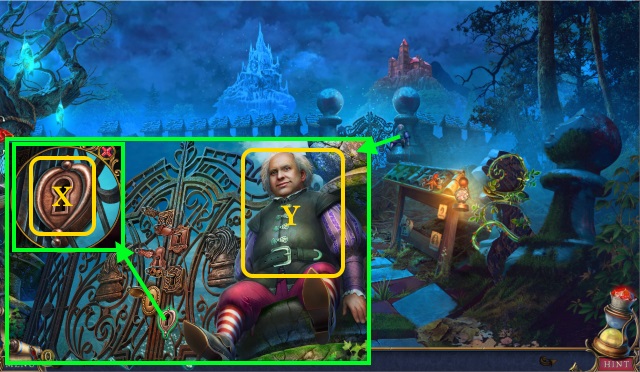
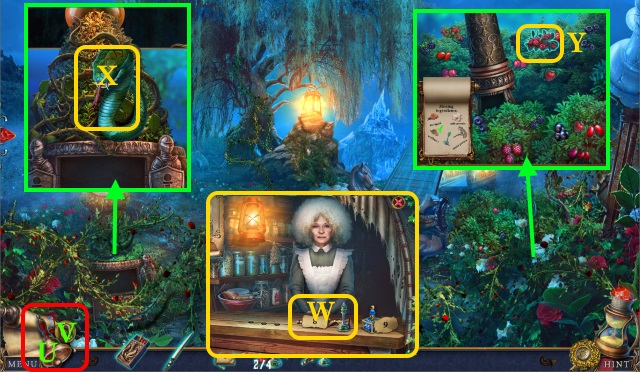
- Use SILVER KEY (X); speak (Y); receive bracelet and compass.
- Walk forward.
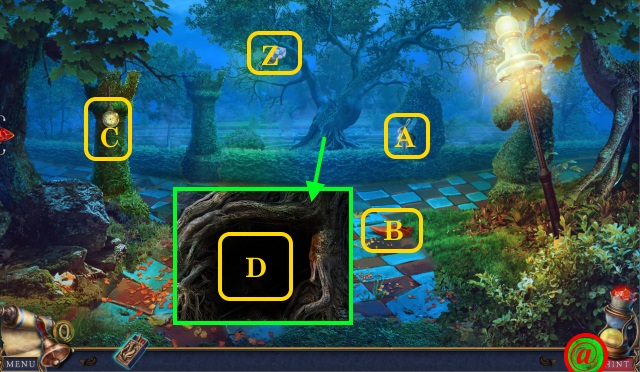
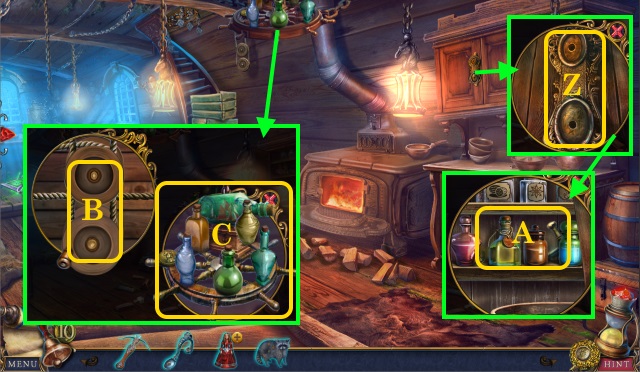
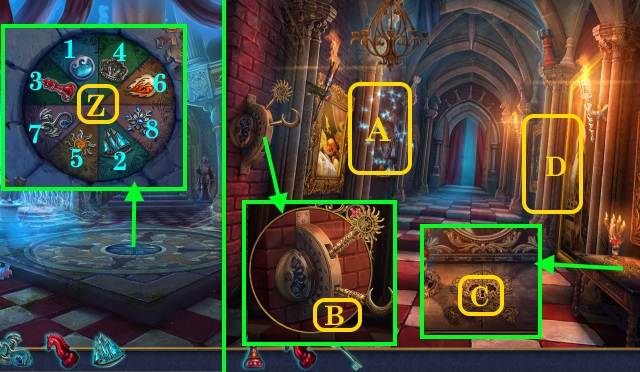
- Use (@).
- Examine (Z-A-B-C).
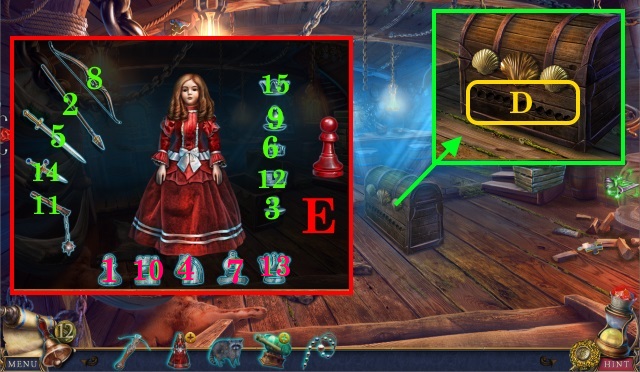
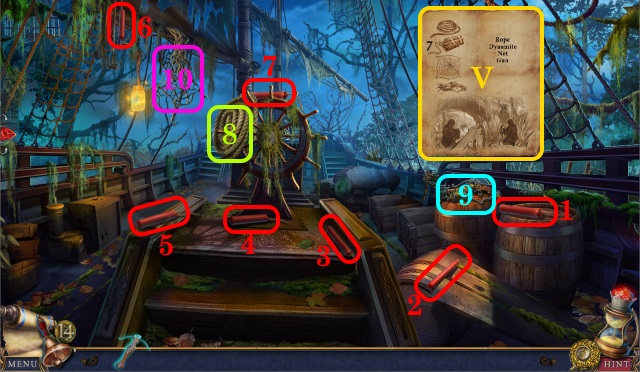
- Use MATCHES (D); take MAP and PAWN'S SPEAR.
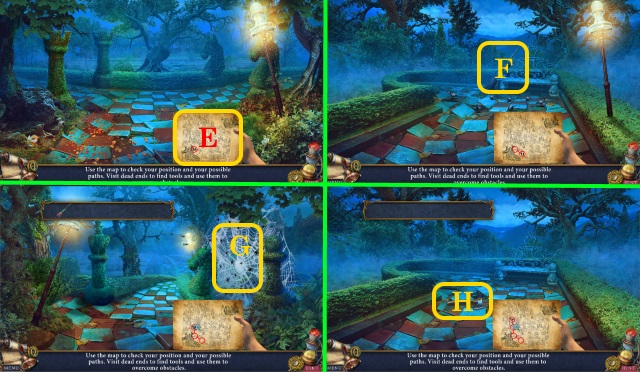
- Use MAP (E); walk right.
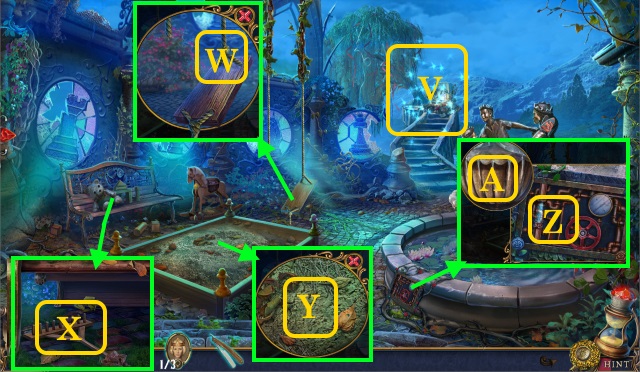
- Pick up BROOM (F); walk down; walk left.
- Use BROOM (G); walk forward.
- Pick up AXE (H); walk down; walk right.
- Use AXE (I); walk forward; walk right.
- Pick up LADDER (J); walk down twice; walk left.
- Place LADDER (K); walk forward twice.
- Pick up WATER (L); walk down.
- Use WATER (M); walk right.
- Pick up coin (N); collect 1-5; turn (O).
- Grab (P); take coin, PAPER and PAWN'S SPEAR (Q).
- Use PAWN'S SPEAR (R); receive TORCH.
- PAPER and MATCHES on TORCH; take LIT TORCH.
- Use LIT TORCH (S).
- Use PAWN'S SPEAR (T).
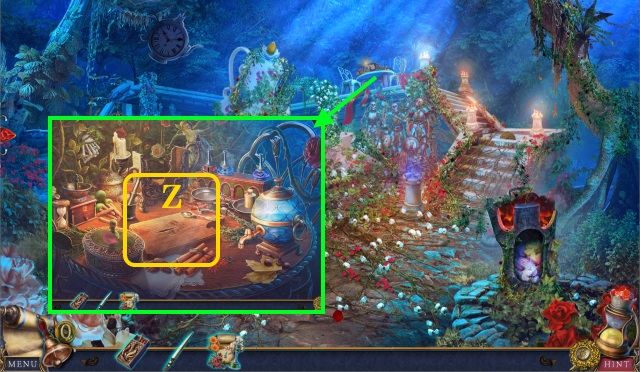
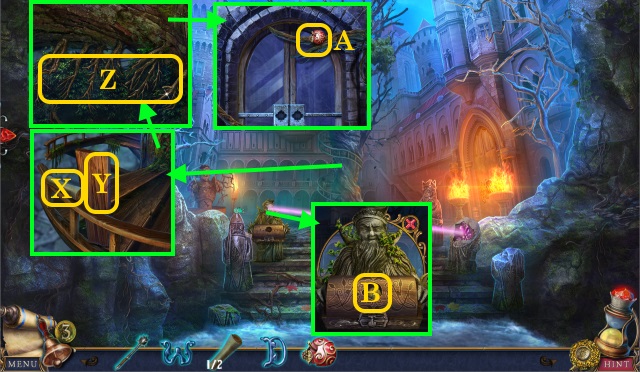
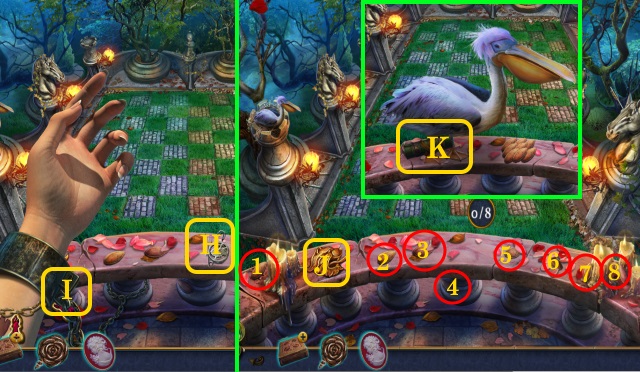
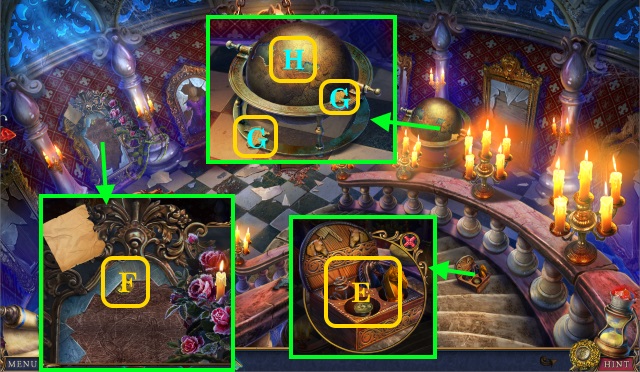
- Pick up coin (U); take POT and PAINT 1/2 (V); clear (W).
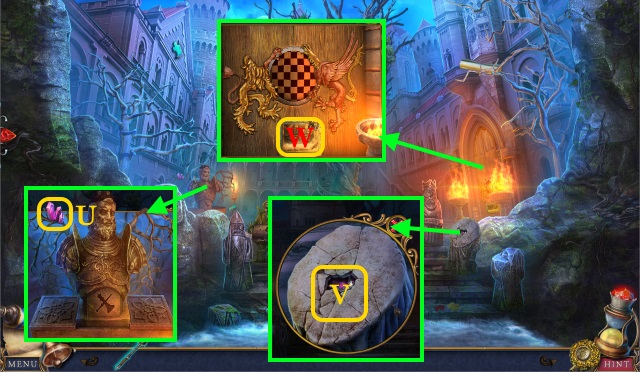
- Move (X-Y); pick up COLUMN DECORATION.
- Move (Z); find KNIGHT FIGURINE; pick up coin (A).
- Place KNIGHT FIGURINE (B); take coin and PAINTS 2/2.
- Inspect (C).
- Speak (D); take SKETCHBOOK.
- Inspect SKETCHBOOK; take COAT-OF-ARMS CLUE.
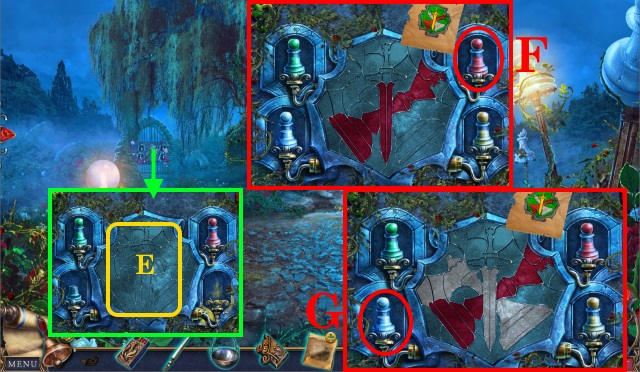
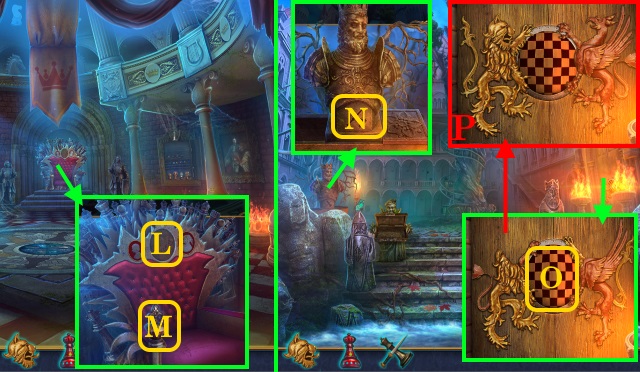
- Place PAINTS and COAT-OF-ARMS CLUE (E).
- Solution (F).
- Solution (G).
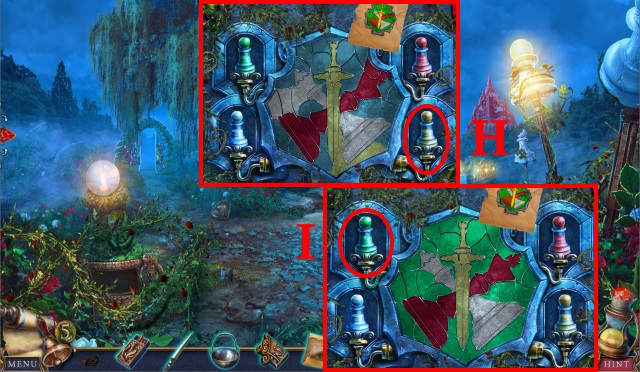
- Solution (H).
- Solution (I).
- Walk left.
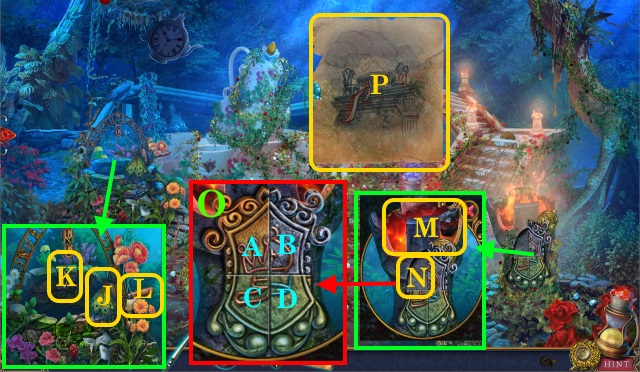
- Pick up FEATHER DUSTER (J); place POT (K).
- Turn (L); pick up coin and WATER.
- Pour WATER (M); pick up coin and COAL.
- Place COLUMN DECORATION (N).
- Solution (O): Dx2-A-D-A-C-D-A-C.
- COAL on SKETCH-BOOK; take GARDEN PICTURE.
- Align GARDEN PICTURE (P).
- Use FEATHER DUSTER (Q).
- Read (R); find coin and ANTIDOTE FORMULA.
- Pick up ANTIDOTE INGREDIENTS 1/4 (S).
- Pick up ANTIDOTE INGREDIENTS 2/4 (T); walk down.
- Ring (U); spend (V-W); receive SNAKE-CHARMER KIT.
- Play SNAKE-CHARMER KIT (X); receive ANTIDOTE INGREDIENTS 3/4.
- Pick up ANTIDOTE INGREDIENTS 4/4 (Y).
- ANTIDOTE INGREDIENTS on ANTIDOTE FORMULA; receive FORMULA WITH INGREDIENTS.
- Walk left.
- Place FORMULA WITH INGREDIENTS (Z); complete HOP; receive ROSE ANTIDOTE.
- Walk down.
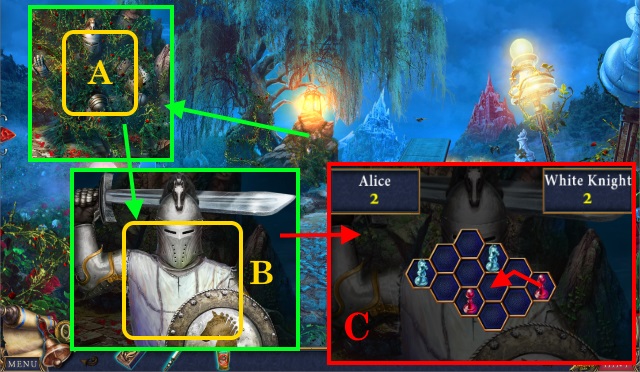
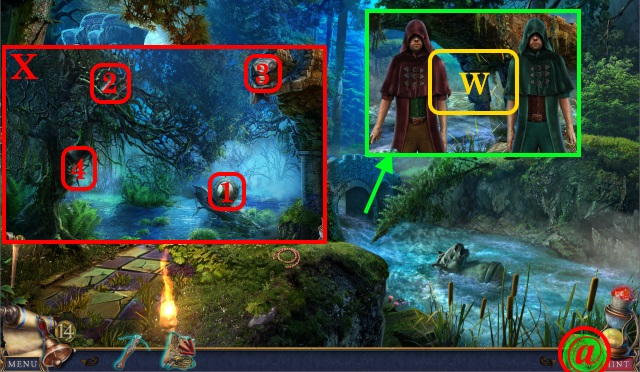
- Spray ROSE ANTIDOTE (A); swing PAWN'S SPEAR (B).
- Solution (C).
Chapter 2: The White Shore
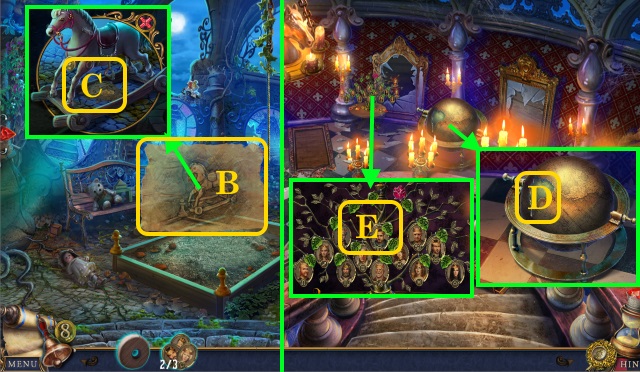
- Pick up DIAMOND RING (D).
- Select random bubbles (E).
- Use (F-G); swim up.
- Speak (H); receive BIRD HEAD.
- Walk down.
- Use DIAMOND RING (I); pick up GLASS 1/2 and coin.
- Place BIRD HEAD (J); open; pick up TAR.
- Collect (K); receive REED PIPES.
- Assemble REED PIPES; add TAR; receive DIVING HELMET PARTS 2/2.
- Walk left.
- Place DIVING HELMET PARTS (L); inspect.
- Walk down.
- Solution (M): Select (@); find A-B-C-D.
- Take KNIGHT'S SWORD.
- Use KNIGHT'S SWORD (N); pick up coin and SHOVEL.
- Use KNIGHT'S SWORD (O); find METAL FISH 1/2.
- Use SHOVEL (P); find coin; clear.
- Pick up FLY and OLD BOOT (Q).
- FLY on OLD BOOT; take coin and CHESS FIGURINE.
- Place CHESS FIGURINE (R): A-B-Cx3-D-Ex3-F-Gx2; open.
- Complete HOP; receive HAND MIRROR; take FABRIC.
- Place FABRIC (S); use SHOVEL; inspect.
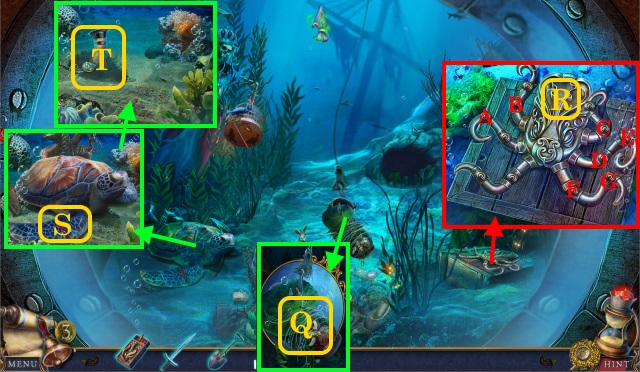
- Pick up coin and HUNTING HORN (T); swim up.
- Use HUNTING HORN (U); find WOODEN JELLYFISH 1/2 and STEERING WHEEL 1/2.
- Walk down.
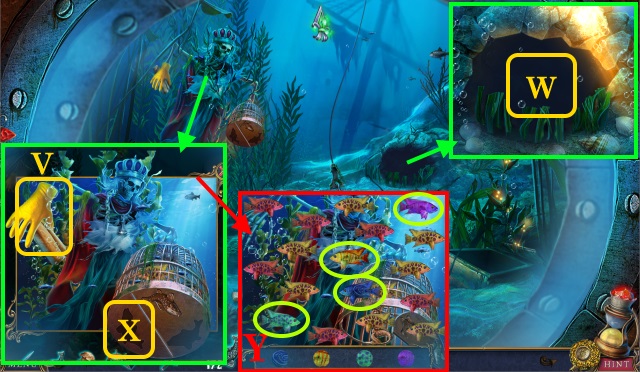
- Read note (V); take RUBBER GLOVE.
- Use HAND MIRROR and RUBBER GLOVE (W); take METAL FISHES 2/2.
- Place METAL FISHES (X).
- Solution (Y).
- Pick up WOODEN FIGURINES 2/2; swim up.
- Place WOODEN FIGURINES (Z); take BOAT PARTS 2/2.
- Give BOAT PARTS (A).
- Pick up coin and ROPE (B).
- Solution (C): 1-11.
- Use MATCHES (D); take SHISH KEBAB.
- Look (E); read note; pick up ROYAL CLASP.
- Pick up coin (F); place ROYAL CLASP (G).
- Solution (H): 1-7.
- Complete HOP (I); receive SCROLL.
- Inspect SCROLL; find coin and PERMISSION.
- Show PERMISSION (J).
- Speak (K); take coin.
- Ring (L); spend (M-N); receive SLEEPING POTION.
- SLEEPING POTION on SHISH KEBAB; take SOPORIFIC SHISH KEBAB.
- Give SOPORIFIC SHISH KEBAB (K); inspect.
- Assemble (O); inspect; find FIRE SYMBOL.
- Place FIRE SYMBOL (P); take GONDOLA KEY.
- Solution (Q): B-Ax3-B.
- Clear (R); use ROPE.
- Take MAGNET (S); repair.
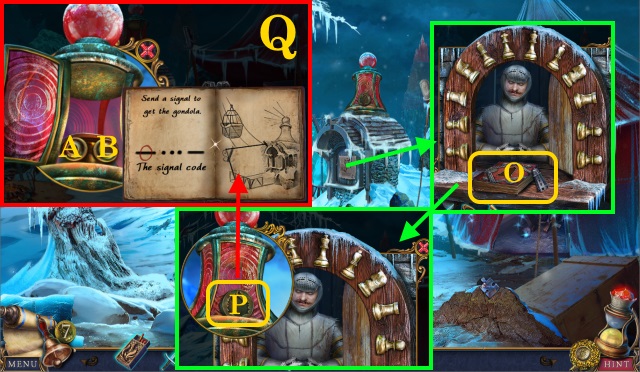
- Use GONDOLA KEY (T); enter (U).
- Solution (V); pull (A).
- Investigate (W); use MATCHES (X); take BRIDGE PICTURE.
- Align BRIDGE PICTURE (Y).
- Pick up coin (Z); use KNIGHT'S SWORD; find BELL.
- Hang BELL (A); ring; show PERMISSION.
- Walk forward.
- Speak (B); pick up BONE.
- Give BONE (C); take PICKET (D).
- Slide (E); use PICKET (F).
- Use (G-F); find coin and TWEEZERS.
- Take FLAG (H).
- Use TWEEZERS and FLAG (I); take WIRE.
- Inspect WIRE; add MAGNET; receive HOOKING DEVICE.
- Use HOOKING DEVICE (J); use (K-L); walk forward.

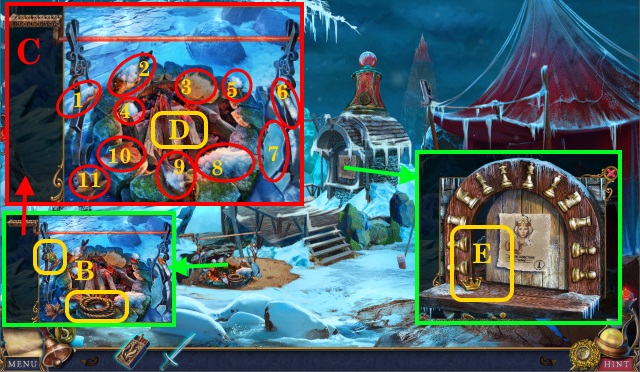
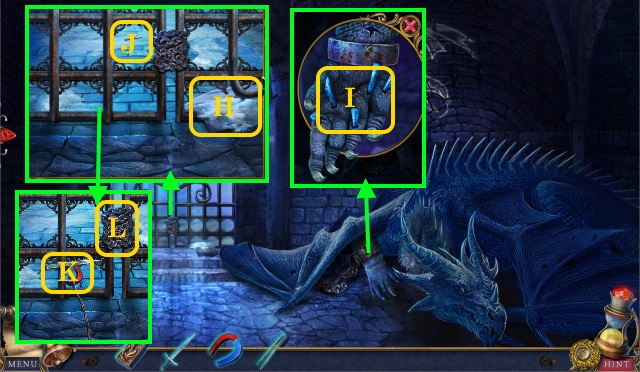
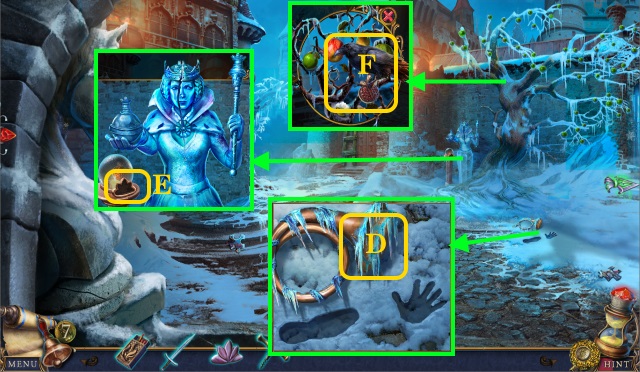
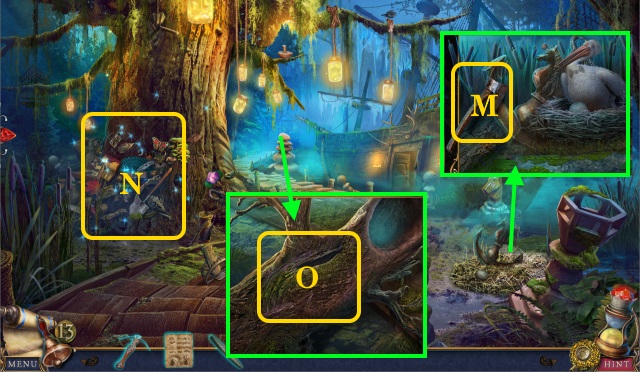
- Pick up BROKEN LADDER (M) and ICE CROWN 1/3 (N).
- Investigate BROKEN LADDER; find MAGNIFIER.
- Look (O); pick up FROZEN BELONGINGS 2/3 (P).
- Use MAGNIFIER (Q); take YARD PICTURE.
- Pick up HAMMER (R); look right.
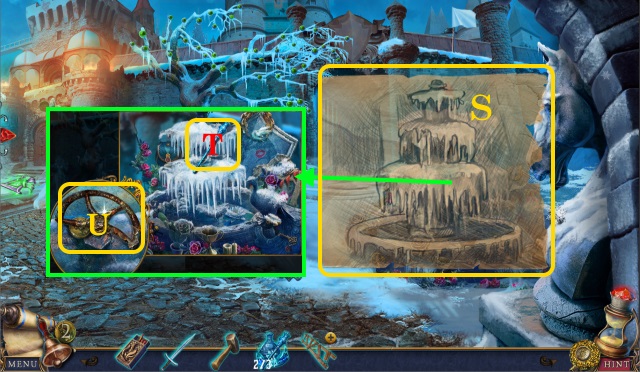
- Align YARD PICTURE (S); pick up FROZEN BELONGINGS 3/3 (T).
- Clear (U); find coin.

- Place FROZEN BELONGINGS (V); pick up coin and VALVE.
- Use VALVE (W); complete HOP; receive NAILS.
- NAILS and HAMMER on BROKEN LADDER; take LADDER.
- Look left.
- Place LADDER (X); climb.
- Complete HOP (Y); receive CROWN FIGURINE.
- Pick up ICE FIGURINE (Z).
- Solution (A); take LIT CANDLE and coin.
- Use LIT CANDLE (B); find coin and CORKSCREW.
- Place CROWN FIGURINE (C); take coin and LOTUS FIGURINE.
- Walk down.
- Use CORKSCREW (D); pick up coin and FRENCH HORN.
- Place LOTUS FIGURINE (E); inspect.
- Play FRENCH HORN (F); find coin.
- Complete HOP; receive APPLE PENDANT.
- Look right.
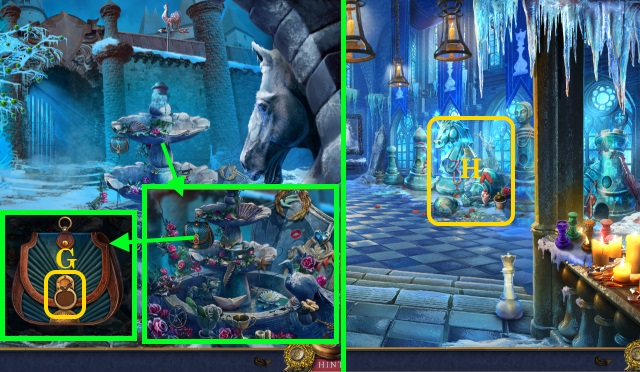
- Place APPLE PENDANT (G); find ICE FIGURINE.
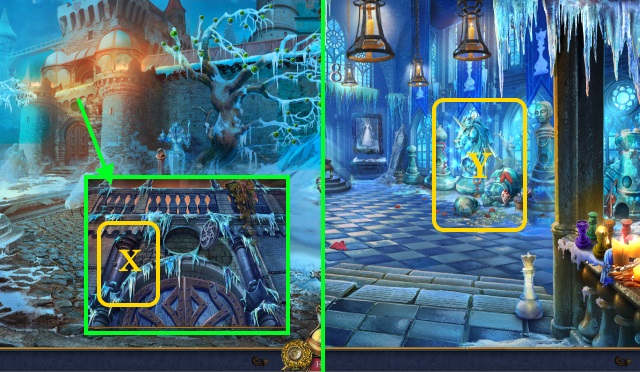
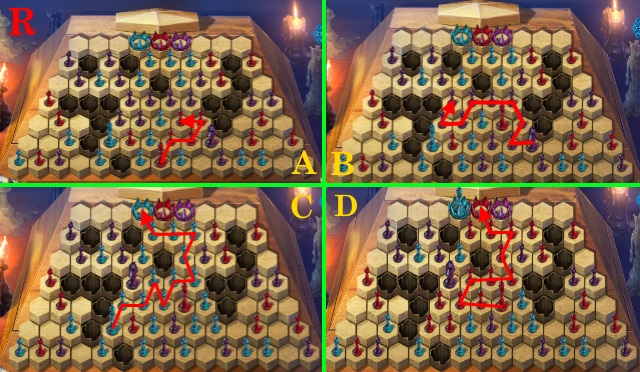
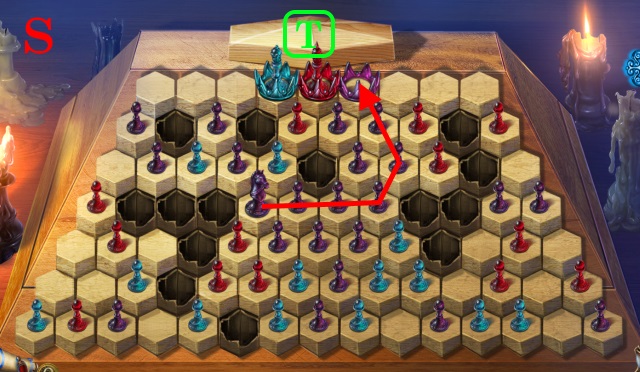
- Move to White Hall.
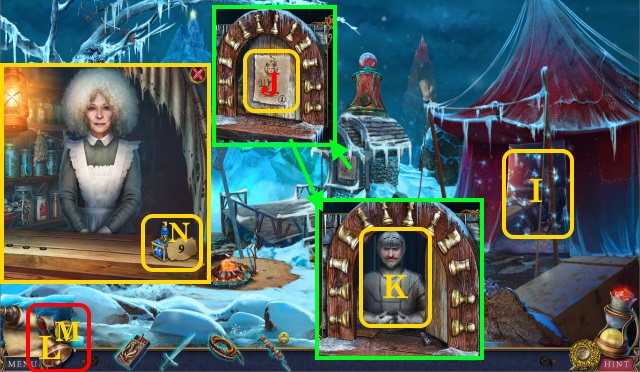
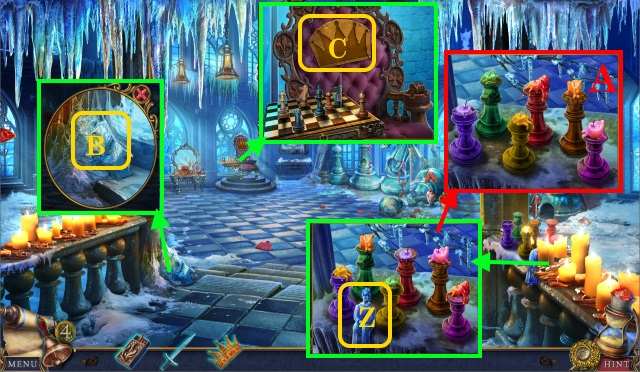
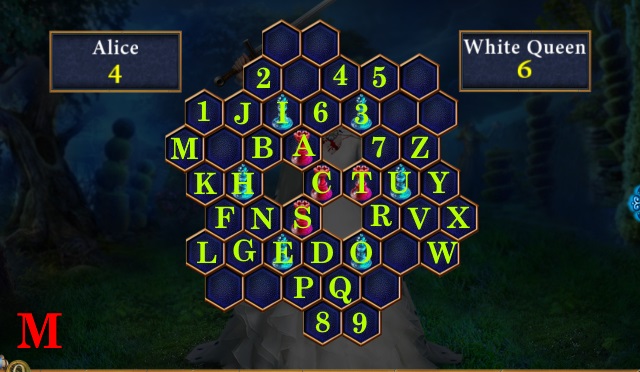
- Complete HOP (H); receive CHESS CODE.
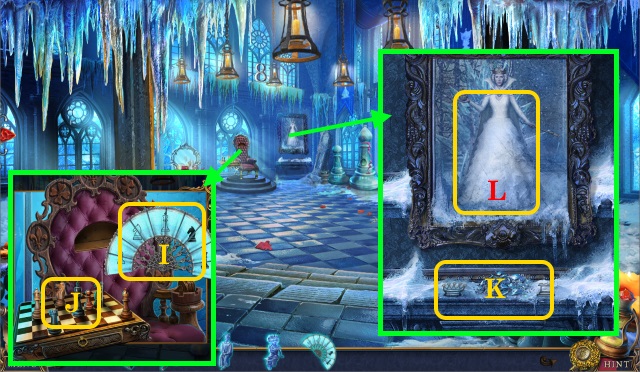
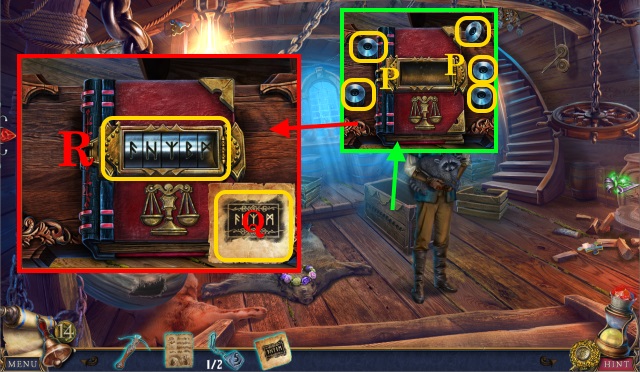
- Use CHESS CODE (I); inspect (J); pick up WHITE QUEEN'S DIARY.
- Clear (K); inspect (L).
- Place ICE FIGURINES x2 (K); take DIARY KEY.
- DIARY KEY on WHITE QUEEN'S DIARY; open; find coin.
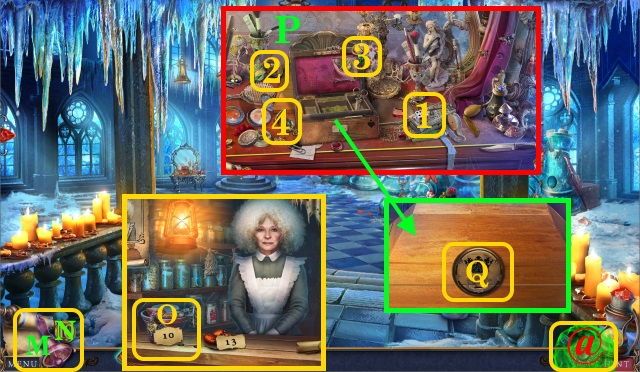
- Ring (M); spend (N-O); receive INVISIBLE INK SOLVENT.
- INVISIBLE INK SOLVENT on WHITE QUEEN'S DIARY; read; find CROWN MEDALLION.
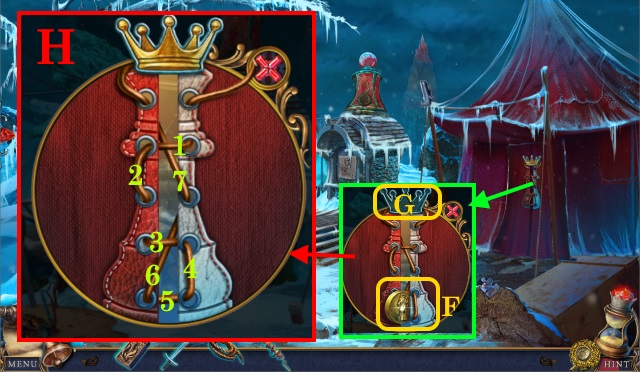
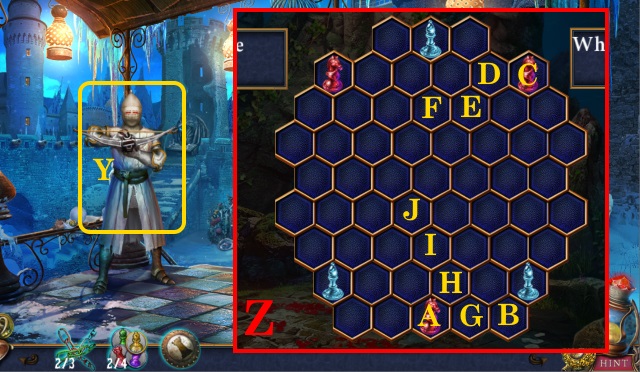
- Solution (P): Select (@); find 1-2-3-4.
- Place CROWN MEDALLION (Q).
- Solution (R): A-B-C-D.
- Solution (S).
- Investigate (T).
Chapter 3: The Ice Prison
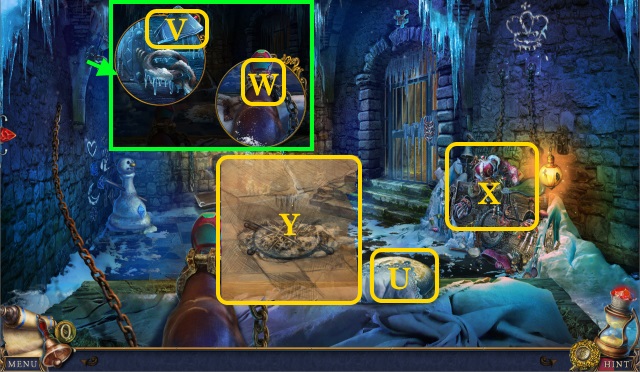
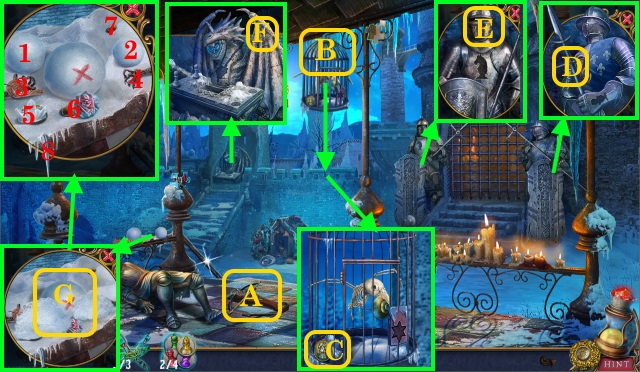
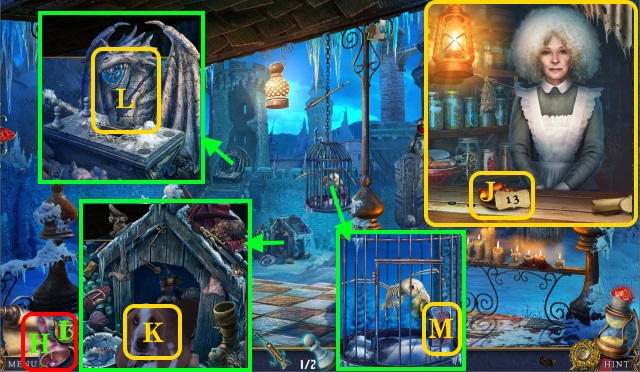
- Pick up STALE BREAD (U).
- Inspect STALE BREAD; take NAPKIN.
- Use NAPKIN (V); take SHARD.
- SHARD on STALE BREAD; find coin and NIPPERS.
- Use NIPPERS (W); pick up PORTRAIT PIECE.
- Complete HOP (X); receive JAIL PICTURE.
- Align JAIL PICTURE (Y).
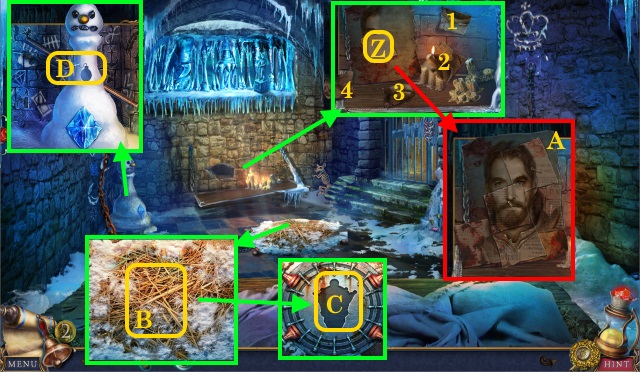
- Collect 1-4; place PORTRAIT PIECE (Z).
- Solution (A); find SKULL MEDALLION.
- Clear (B); place SKULL MEDALLION (C); find coin and CARABINER.
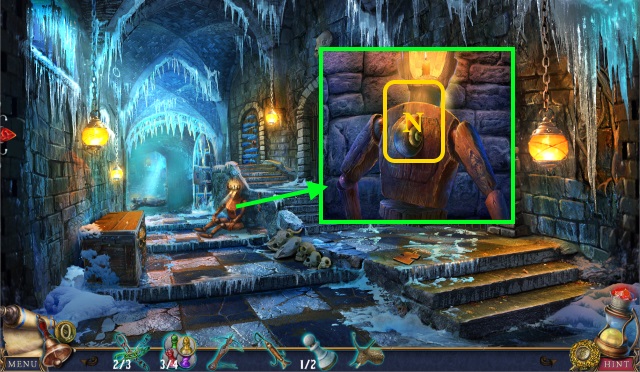
- Pick up STICK (D).

- Place CARABINER (E); pick up HEAVY STATUETTE (F).
- Inspect HEAVY STATUETTE; find coin.
- STICK on HEAVY STATUETTE; pick up HAMMER.
- Use HAMMER (G); take coin and HORSESHOE.
- Use HAMMER (H); pick up CHAIN PIECE 1/3.
- Walk right.
- Look (I); pick up LONG CHAIN 2/3; find coin (J).
- Look (K); speak (L); receive UNFINISHED BOMB.
- Pick up NOTE and coin (M).
- Read NOTE; find coin.
- Fold NOTE; receive SNOWMAN CODE.
- Move (N); take SHIELD.
- Flip (N); pick up TONGS (O).
- Take coin; place HORSESHOE (P).
- Select (Qx6); pick up TOKEN 1/4 (R).
- Walk down.
- Place SNOWMAN CODE (S).
- Solution (T): 1-6; pick up coin and FUSE.
- FUSE on UNFINISHED BOMB; assemble; take BOMB WITH FUSE.
- Walk right.
- Throw BOMB WITH FUSE (U); use TONGS (V).
- Search (W); find TOKENS 2/4.
- Sort (W); unlock (X); walk forward.
- Use SHIELD (Y).
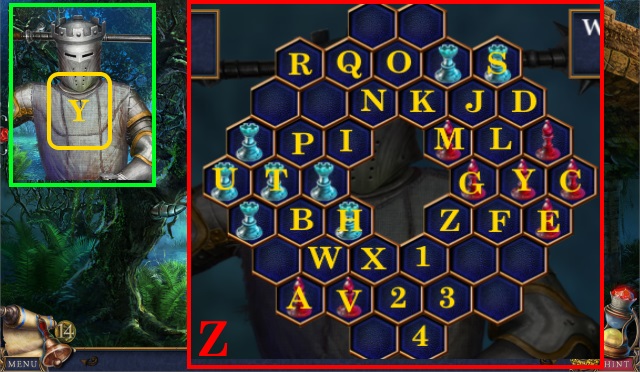
- Solution (Z): A-B; C-D; C-E; E-F; B-G; G-A; G-H; H-I; I-J.
- Pick up CROSSBOW (A).
- Shoot CROSSBOW (B).
- Pick up coin (C).
- Take HOOK (D).
- Find coin and PAWN STATUETTE 1/2 (E).
- Take coin (F).
- Clear (G); assemble 1-8; find coin and TOKENS 3/4.
- Ring (H); spend (I-J); receive SAUSAGES.
- Give SAUSAGES (K); complete HOP; receive DRAGON MEDALLION.
- Place DRAGON MEDALLION (L); pick up METAL SNOWFLAKE.
- Use METAL SNOWFLAKE (M); take SNAIL HEAD.
- Walk down.
- Place SNAIL HEAD (N); pick up PAWN STATUETTES 2/2 and ACID.
- Walk down.
- Complete HOP (O); receive SKULL KEY.
- Use ACID (P); receive LONG CHAIN 3/3.
- Use LONG CHAIN and HOOK (Q); pull; receive TOKENS 4/4.
- Walk right.
- Place TOKENS (P).
- Solution (Q): 6-2-1-3-4-5-1.
- Solution (R): 4-3-5-6-1-4-5-6-2-1.
- Use SKULL KEY (S); find TOP HAT and HORSE FIGURINE.
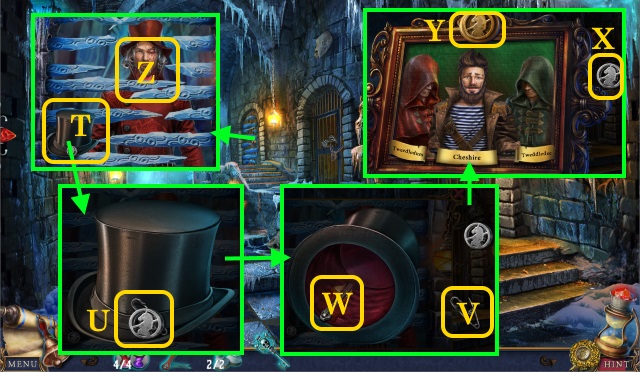
- Place TOP HAT (T); inspect (U).
- Use (V-W); open.
- Place (X-Y); pick up DRAGON KEY and HATTER'S PORTRAIT.
- Speak (Z).
- Walk forward.
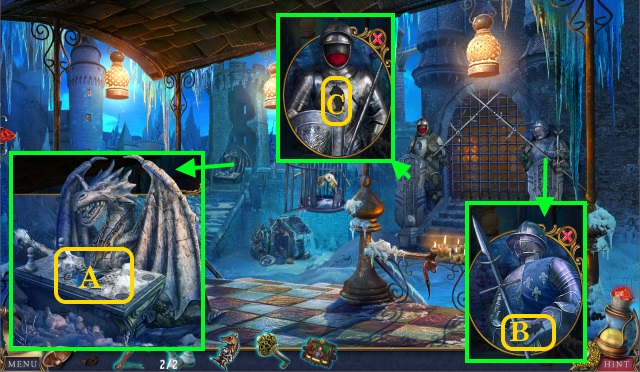
- Place PAWN STATUETTES (A); read note; pick up KNIGHT DECORATION.
- Place KNIGHT DECORATION (B).
- Place HORSE FIGURINE (C).
- Walk right, then left.

- Use DRAGON KEY (D); open; inspect.
- Solution (E): Solution is random.
Chapter 4: Crossroads
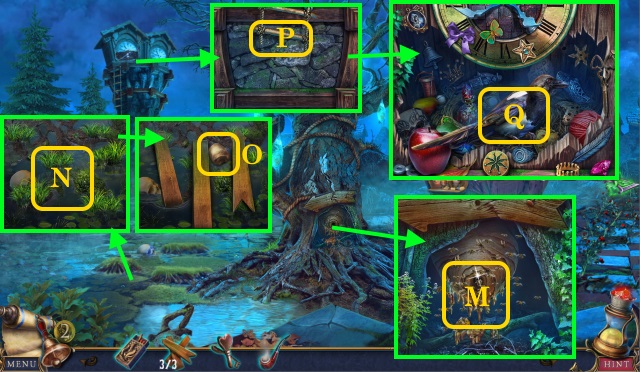
- Pick up FORCEPS PART (F); inspect; find coin.
- Place FORCEPS PART (G); take FORCEPS.
- Take HAZELNUT (H); use FORCEPS; pick up BOARDS 1/3, coin and TREE EMBLEM.
- Pick up TORN PICTURE (I); use FORCEPS; take BOARDS 2/3.
- Use (J-K); pick up TAR.
- Inspect TORN PICTURE.
- Solution (L).
- Use TAR; take FOREST PICTURE.
- Align FOREST PICTURE (M).
- Give HAZELNUT (N); pick up BRIDGE EMBLEM.
- Place TREE EMBLEM and BRIDGE EMBLEM (O); find coin; read note.
- Walk right.
- Look (P).
- Speak (Q); give HATTER'S PORTRAIT; take TOKEN 1/3.
- Pick up PICKAXE (R) and clear.

- Search (S); find coin.
- Move (T-U) and (V-T).
- Pick up coin (W); move (X-W); pick up STONE EYE.
- Take coin (Y); place STONE EYE; pick up TOKENS 2/3.
- Walk down.
- Use PICKAXE (Z); pick up coin and TOKENS 3/3.
- Walk forward.
- Pick up STONE MEDALLION (A); place TOKENS.

- Solution (B): 1-2-3.
- Enter (C).
- Clear (D); move to Silent Wood.
- Place STONE MEDALLION (E); find BOARDS 3/3.
- Move to Pelican Swamp.
- Use BOARDS (F); pick up coin and METAL ARROW.
- Shoot CROSSBOW (G).
- Complete HOP (H); receive RACCOON.
- Pick up THREAD (I).
- Inspect (J); send RACCOON; pick up RACCOON.
- Inspect RACCOON; find ROPE and BELL RINGER.
- Look (K); move to Silent Wood.
- CROSSBOW and METAL ARROW on ROPE; assemble; take CROSSBOW WITH ROPE.
- Shoot CROSSBOW WITH ROPE (L); receive CROSSBOW; pick up FISHNET.
- Place FISHNET and THREAD (M); assemble; receive BUTTERFLY NET.
- Move to Pelican Swamp.
- Use BUTTERFLY NET (N); inspect (O); find DOOR CODE.
- Place DOOR CODE (P) and BELL RINGER (Q).
- Solution (R): A-B-A.
- Inspect (S); find coin and JAR.
- Walk down.
- Place JAR (T); collect 1-10; take FIREFLY LANTERN.
- Walk forward.
- Hang FIREFLY LANTERN (U); enter (V).
- Search (W); find COMB.
- Clear (X); pick up DOLL.
- COMB on RACCOON; pick up coin.
- Take DRAWER HANDLE (Y); look right.
- Use DRAWER HANDLE (Z); move (A); pick up coin and CORKSCREW.
- Shoot CROSSBOW (B); search (C); pick up coin and MESSAGE IN A BOTTLE.
- CORKSCREW on MESSAGE IN A BOTTLE; inspect.
- Complete HOP; receive BEADS.
- Look left.
- Place BEADS (D); open; find DOLL'S STUFF.
- DOLL'S STUFF on DOLL.
- Solution (E): 1-15.
- Take HUT PICTURE.
- Look right.
- Align HUT PICTURE (F); inspect (G).
- Speak (H); give RACCOON.
- Speak (I); receive AMBUSH PLAN PART.
- Inspect MESSAGE IN A BOTTLE; complete HOP; receive AMBUSH PLAN PART.
- AMBUSH PLAN PART on AMBUSH PLAN PART; pick up AMBUSH PLAN.
- Move boxes to (J); pick up SCISSORS (K); look left.
- Use SCISSORS (L); pick up coin and GRINDSTONE.
- Walk down.
- Use GRINDSTONE (M); pick up SHARPENED AXE.
- Complete HOP (N); receive RUNIC CODE.
- Use SHARPENED AXE (O); find coin and WEIGHT 1/2.
- Walk forward.
- Collect (P).
- Place RUNIC CODE (Q).
- Solution (R); pick up HATCH WEIGHTS 2/2.
- Look right.
- Place HATCH WEIGHTS (S).
- Solution (T): 1-6.
- Enter (U).
- View AMBUSH PLAN (V): 1-10.
- Pick up AMBUSH KIT.
- Move to Silent Wood.
- Give AMBUSH KIT (W).
- Solution (X): Select (@); find 1-4.
- Look (Y).
- Solution (Z): A-B; C-D; E-F; G-D; H-I; J-K; D-L; M-N; N-K; N-O; I-P; I-Q; Q-R; D-S; T-U; V-W; V-X; H-B; Y-Z; Z-1; 2-3; 1-Z; 2-4.
- Look (A); pick up MACE.
- Pick up coin (B); speak.
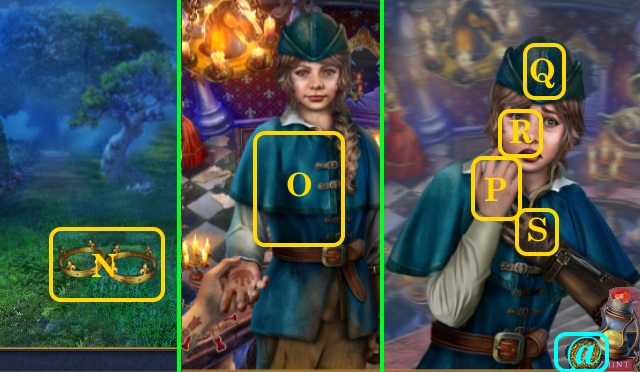
- Ring (C); spend (D-E); receive MAP.
- Use MAP (F); view (G).
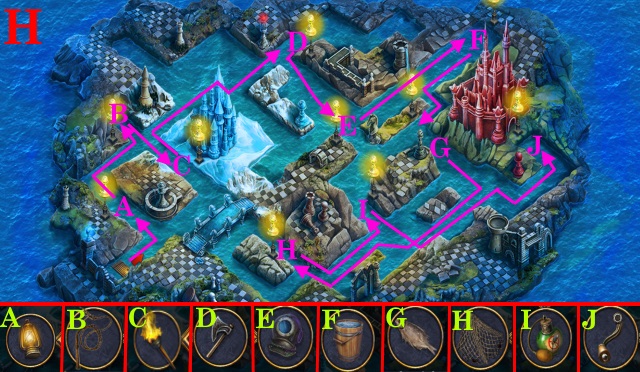
- Solution (H): Recommended path shown; use items A-J.
Chapter 5: The Red Shore
- Read (I); pick up BAR.
- Pick up CANDLE (J); use BAR (K); find ROPE.
- Pick up TILE 1/4 (L); speak.
- Look (M); use MACE and CANDLE; pick up coin and TILES 2/4.
- Search (M1); find TILES 3/4.
- Throw ROPE (N); take SHIELD (O).
- Inspect SHIELD; complete HOP; receive coin and SPYGLASS.
- Inspect (P); place SPYGLASS; move (Q).
- Look (P); select 1-3; take TILES 4/4 and WATER.
- Give WATER (R); speak; take GATE KEY.
- Place TILES (S).
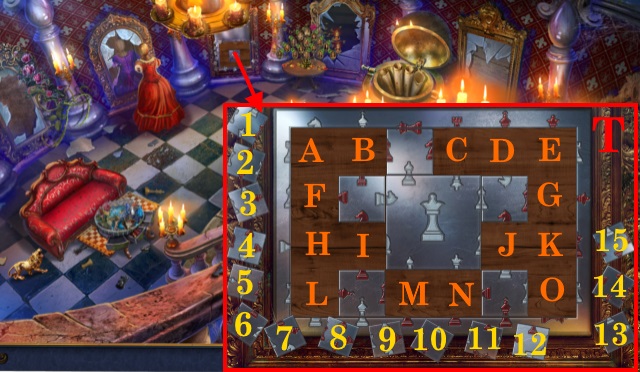
- Solution (T): A-D; I-A; J-B; K-C; D-K; E-J; C-E; J-D; B-J; A-I; D-A; I-B; J-C; H-D; G-J; F-I; C-F; D-G; I-C; J-H; C-J; E-I.
- Use GATE KEY (S); walk forward.
- Pick up CRYSTAL (U).
- Use MACE (V); pick up SHEARS; place CRYSTAL.
- Inspect (W); find METAL LETTER.
- Pick up PAPER 1/2 (X); move (Y); walk forward.
- Use SHEARS (Z); find METAL LETTER; walk forward.
- Pick up APPLE FIGURINE (A).
- Pick up coin (B); place APPLE FIGURINE; take SIGNET RING and QUILL AND PAPER 2/2.
- Walk down.
- Give QUILL AND PAPER (C); speak; take METAL DECORATION 1/2 and THRONE ROOM PICTURE.
- Place METAL LETTER x2 (D); pick up coin and STONE CROWN.
- Walk forward.
- Place STONE CROWN (E); pick up WINDOW DECORATIONS 2/2.
- Use WINDOW DECORATIONS (F); enter.
- Place SIGNET RING (G).
- Push (H).
- Pick up CANDLE 1/2 (I); move (I-J); pick up coin.
- Take CANDLES 2/2 (K).
- Pick up CHESS PIECE (L); place CANDLES (M); find CRESCENT HANDLE.
- Use CRESCENT HANDLE (N); push.
- Complete HOP (O); receive CASKET.
- Inspect CASKET; find coin.
- Ring (P); spend (Q-R); receive OILER.
- Use OILER (S); open (T); enter.
- Align THRONE ROOM PICTURE (T).
- Place CHESS PIECE (U); pick up coin.
- Take STONE TILE (V); move (W); find STATUE CODE.
- Look (X); pick up coin and ROSE SCREW (Y).
- Move (Z); move (A); place STONE TILE (Y).
- Place STATUE CODE (B); solution (C).
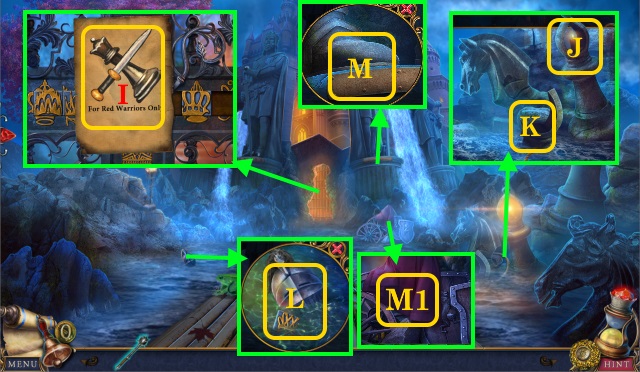
- Use MACE (D); find PICTURE KEY.
- Use PICTURE KEY (E); look (F).

- Solution (G): A-G-E-F-G-Cx2-G-Bx2.
- Pick up CAMEO; inspect.
- Use (H-I); open.
- Pick up LION HEAD (J); collect 1-8.
- Inspect (K); find coin and CHESS PENDANT.
- Walk down.
- Place CAMEO (L); take coin and CASKET KEY (M).
- CASKET KEY on CASKET; complete HOP; receive KING'S SYMBOL.
- Move to Red Castle.
- Use KING'S SYMBOL (N); find EAGLE HEAD and coin.
- Place LION HEAD and EAGLE HEAD (O).
- Solution (P).
- Pick up coin; enter.
- Complete HOP (Q); receive CLOCKWORK RABBIT.
- Inspect CLOCKWORK RABBIT; find coin.
- Pick up coin (R); use ROSE SCREW (S); open.
- Look (T); complete HOP; receive DRAGON FIGURINE.
- Ring (U); spend (V-W); receive WINDING KEY.
- WINDING KEY on CLOCKWORK RABBIT; find RED HORSE.
- Pick up coin (X).
- Search (Y); find SHIP FIGURINE.
- Move to Red Hall.
- Place SHIP FIGURINE and DRAGON FIGURINE (Z); select 1-8; pick up coin and SKULL KEY.
- Walk down.
- Complete HOP (A); receive COMET LEVER.
- Place COMET LEVER (B); push.
- Use SKULL KEY (C); pick up coin and BROKEN MECHANICAL BIRD.
- Inspect BROKEN MECHANICAL BIRD; find WHITE HORSE.
- Look (D); walk right.
- Pick up coin (E); place RED HORSE and WHITE HORSE; press.
- Pick up RED KING'S PORTRAIT 1/3.
- Take coin (F).
- Move (G); spin (H); find WHEEL.
- Pick up coin and WING (I).
- WING on BROKEN MECHANICAL BIRD; pick up MECHANICAL BIRD.
- Send MECHANICAL BIRD (J); receive PENCIL.
- Use PENCIL (K); receive HIDING PICTURE.
- Align HIDING PICTURE (L).
- Pick up RAZOR (M).
- Move (N-O); move (P-Q).
- Move (R-S); move (T-U); find coin.
- Move to Winter Garden.
- Complete HOP (V); receive DIRTY MEDALLION.
- Use RAZOR (W); take ROPE.
- Tie ROPE (X); pick up RAKE.
- Use RAKE (Y); pick up coin and PIPE.
- Place PIPE (Z); wash DIRTY MEDALLION (A); find GARDEN PICTURE and PORTRAITS 2/3.
- Align GARDEN PICTURE (B).
- Pick up coin (C); replace WHEEL; find CONTINENT.
- Move to Hall of Looking Glasses.
- Place CONTINENT (D); pick up coin and PORTRAITS 3/3.
- Hang PORTRAITS (E).
- Solution (F).
- Take CHESS PENDANT.

- Place CHESS PENDANT x2 (G).
- Inspect scene.
- Ring (H); spend (I-J); receive SHARP DAGGER..
- Look (K); speak (L); use SHARP DAGGER.
- Solution (M): A-B; C-D; C-E; B-F; G-H; I-J; K-L; B-M; M-N; O-P; N-O; F-Q; F-R; R-S; J-I; D-G; T-U; N-V; U-W; O-M.
- Pick up CROWNS (N); give CROWNS (O).
- Use (@); select P-Q-R-S.
- Solution (T): 7-J; 11-O; 14-K; 8-G; 2-E; 12-D; 4-C; 15-B; 1-A; 3-F; 5-H; 6-I; 9-L; 13-M; 10-N.
- Congratulations, you've completed Bridge to Another World: Through the Looking Glass.
Created at: 2018-07-06