
Walkthrough Menu
1. Brittany
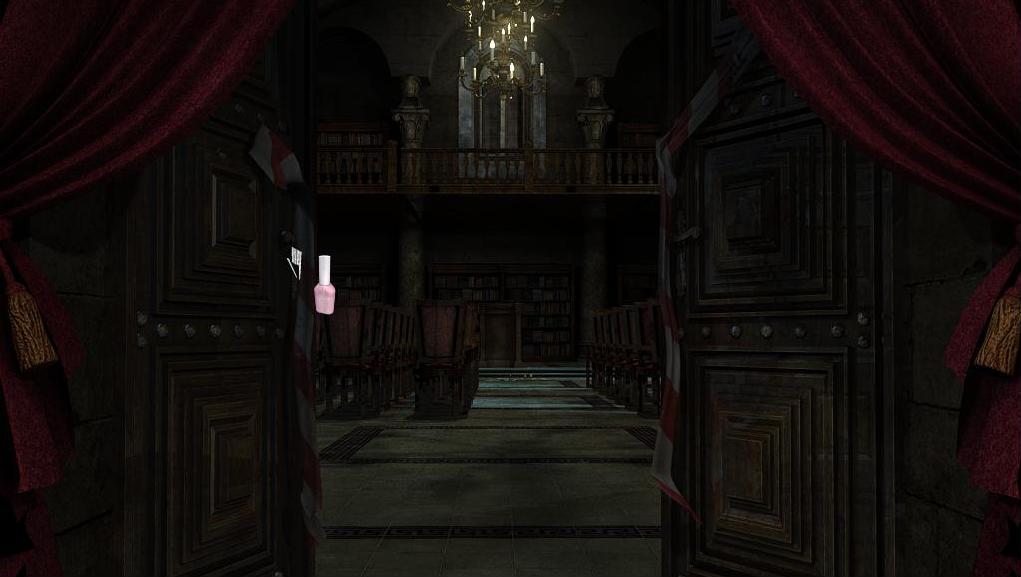
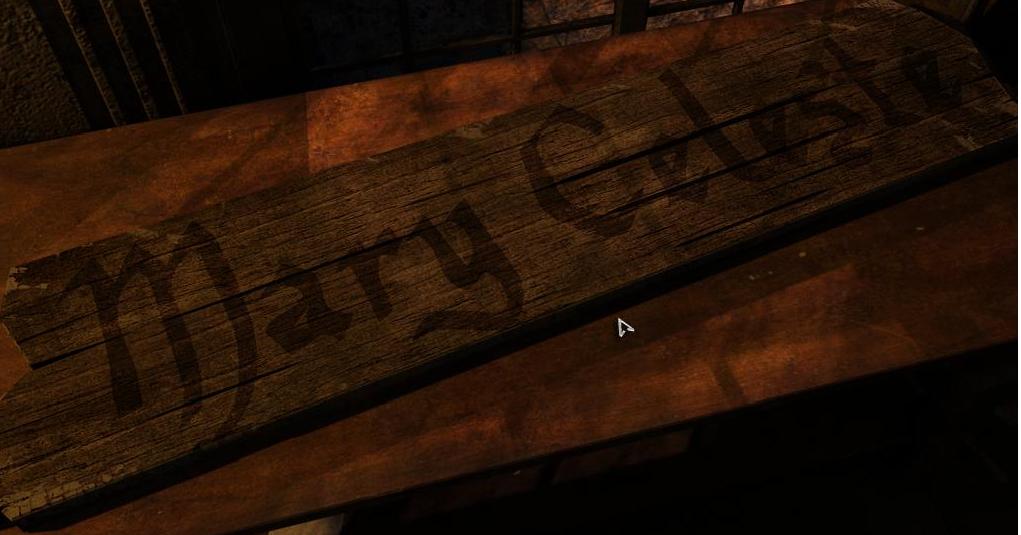
Talk to the museum director. Go to the bay window and look at the conquistador's chest.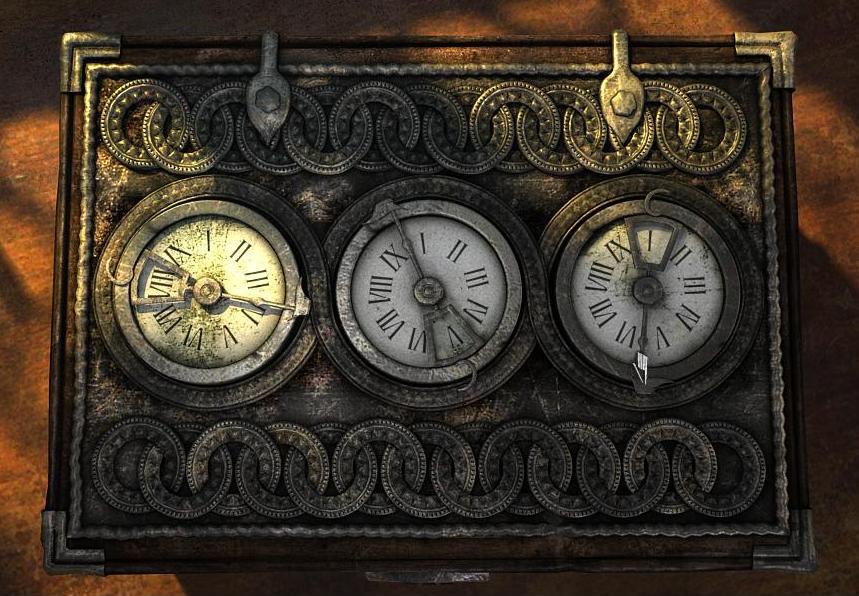 Exit the room and enter the exhibition. Talk to the
conservator, Claire, in the nave. Go back to the studio and
take the dictaphone and the tweezers from the desk drawer.
Exit the room and enter the exhibition. Talk to the
conservator, Claire, in the nave. Go back to the studio and
take the dictaphone and the tweezers from the desk drawer.
 Return to Claire and talk to her about the dictaphone card.
Enter the studio, combine the card with the dictaphone and
listen to the recording. Look at the vault in the exhibition
room, then at the boards with reproductions in the studio. Go
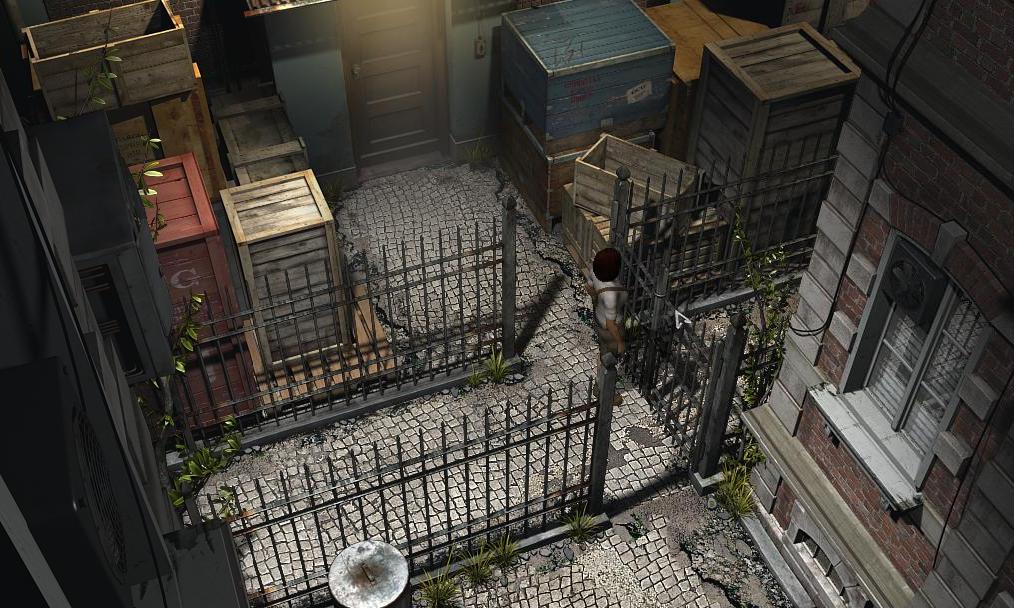
out to the courtyard and talk to Claire about every available
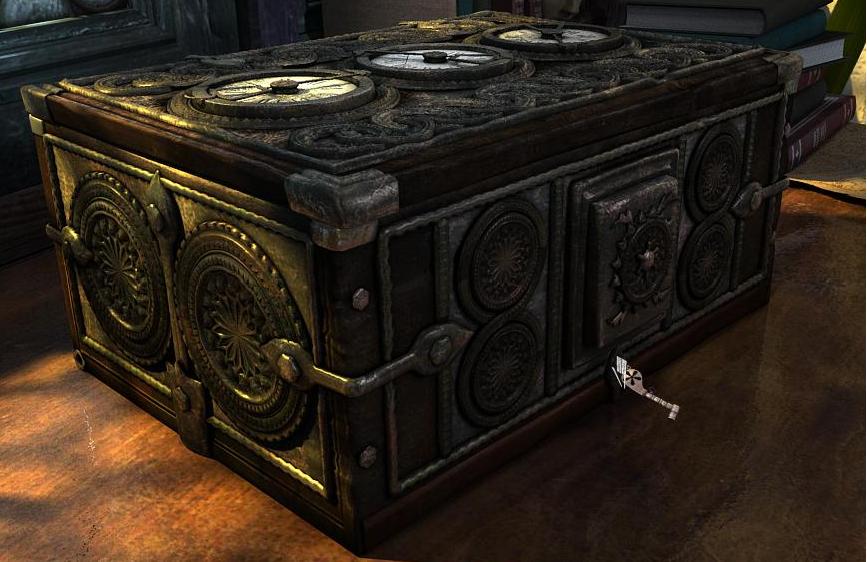
topic. Go back to the bay window by the studio, come to the
chest's lid and set the digits in the correct order (from the
left): 8, 5, 2. The lock will open.
Return to Claire and talk to her about the dictaphone card.
Enter the studio, combine the card with the dictaphone and
listen to the recording. Look at the vault in the exhibition
room, then at the boards with reproductions in the studio. Go
out to the courtyard and talk to Claire about every available
topic. Go back to the bay window by the studio, come to the
chest's lid and set the digits in the correct order (from the
left): 8, 5, 2. The lock will open.
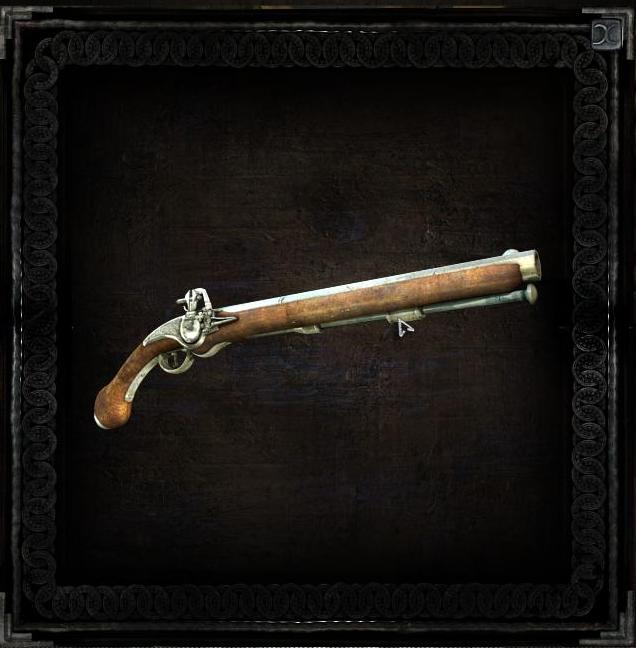
 Take the key and the gun from the chest.
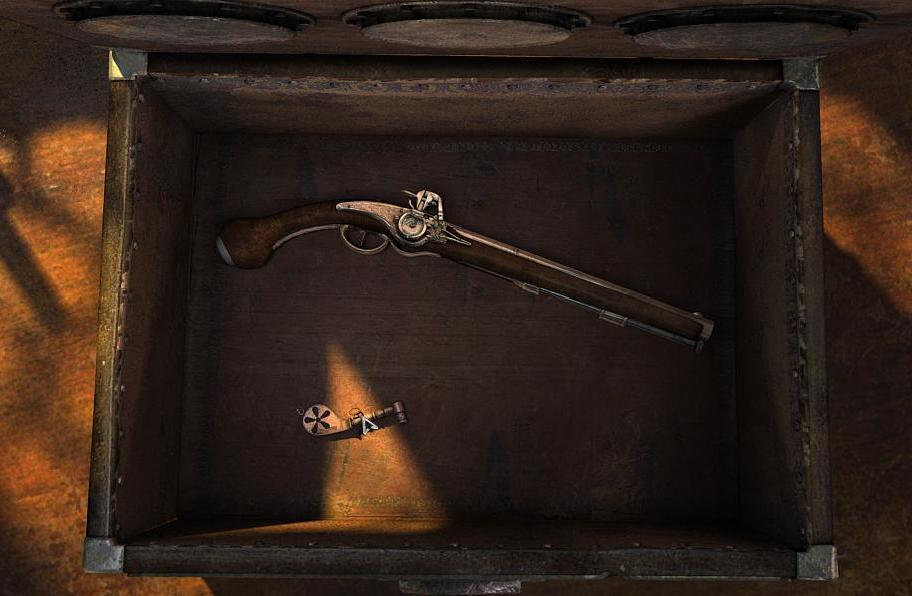 Pull the ramrod out of the gun.
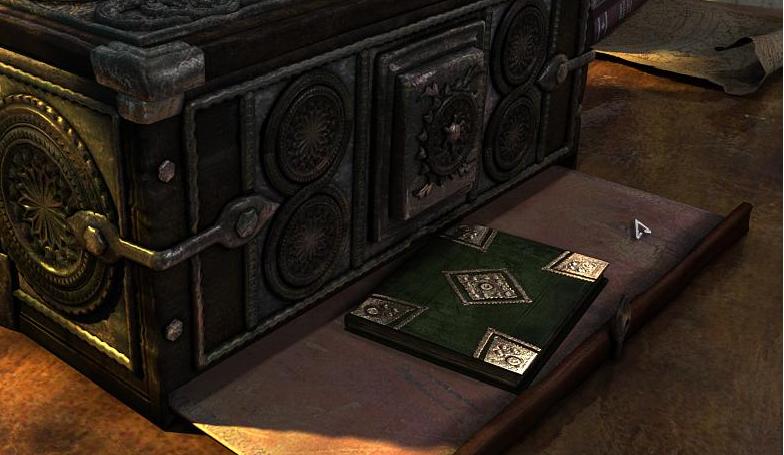
 Look at the chest's side. Open the lock with the key and use
the ramrod on the block at the chest's back.
Look at the chest's side. Open the lock with the key and use
the ramrod on the block at the chest's back.
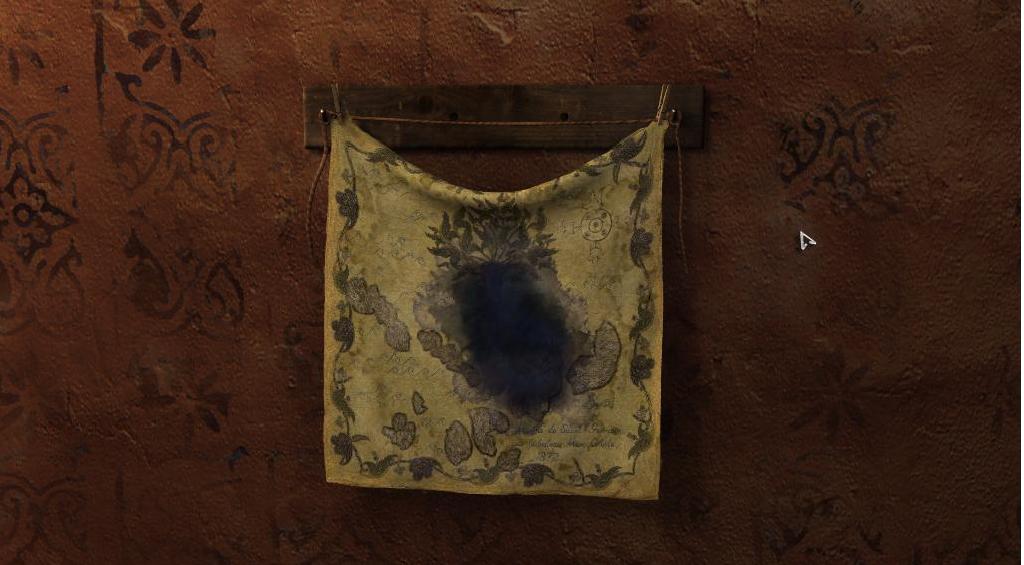
 A double bottom will open. Take the manuscript and look at it.
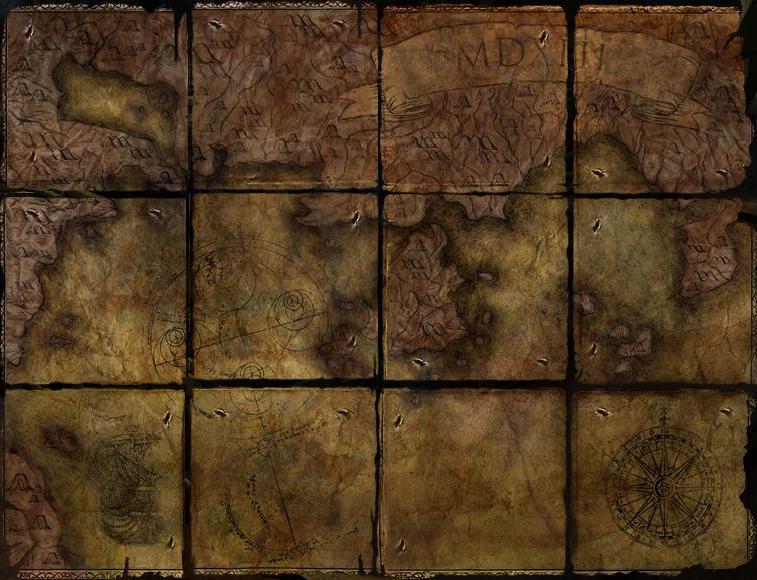
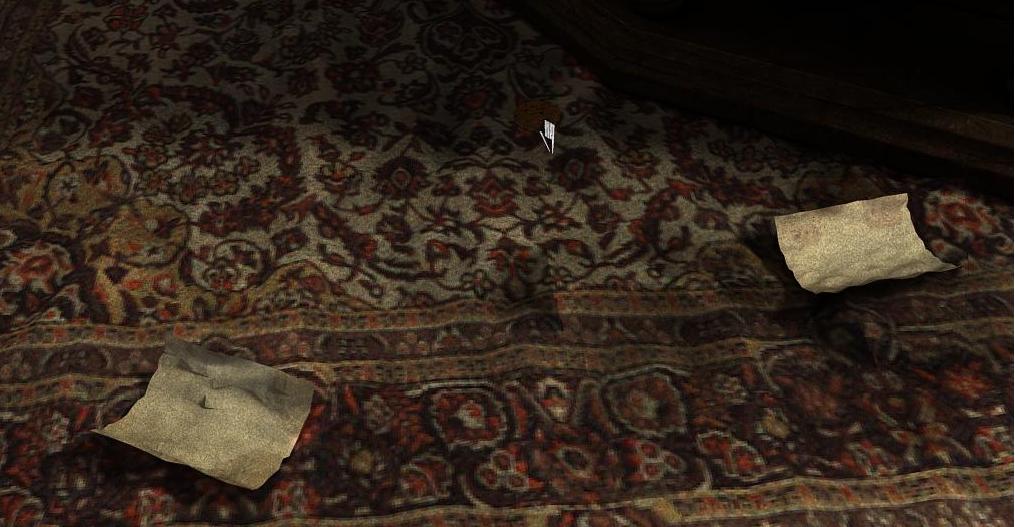
 With the use of the tweezers, pull the threads out of the
manuscript. Then look at the pieces of a map found in the
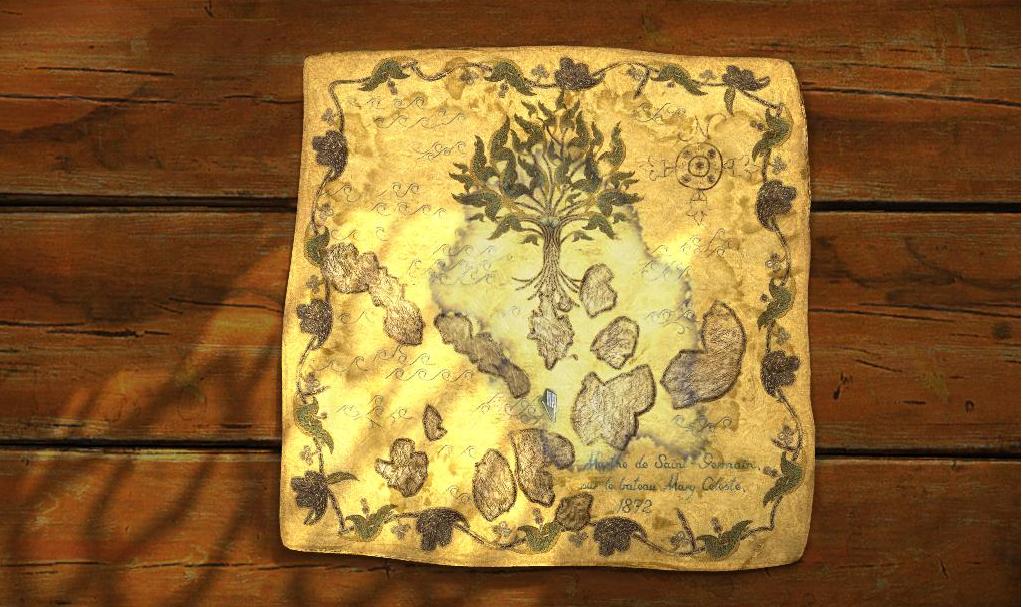
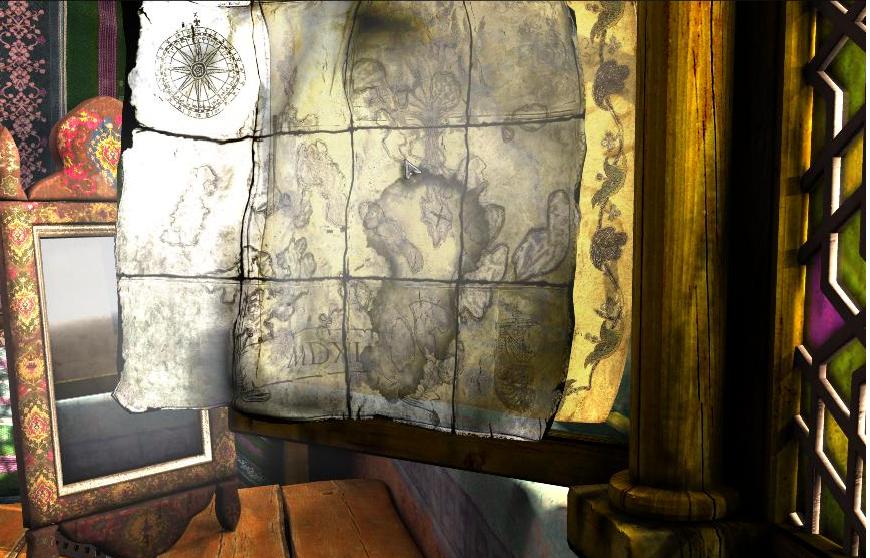
manuscript. Put the pieces together to create the map: 1.
Click on the edge of a piece to turn it over. 2. Click the RMB
to rotate a piece 90 degrees. 3. The assembled map's image
(front).
With the use of the tweezers, pull the threads out of the
manuscript. Then look at the pieces of a map found in the
manuscript. Put the pieces together to create the map: 1.
Click on the edge of a piece to turn it over. 2. Click the RMB
to rotate a piece 90 degrees. 3. The assembled map's image
(front).
 The assembled map's image (back):
 Go to the studio and come to the photocopier. Open the lid on
the photocopier's side and take an empty toner.
Go to the studio and come to the photocopier. Open the lid on
the photocopier's side and take an empty toner.
 Enter the exhibition room and ask the director about the
toner. He will tell you to ask the porter. Go through the
courtyard to the porter's lodge. Ring the bell to call the
porter, then talk to him. As a result of the conversation, he
will give you a new toner. Return to the exhibition room, come
to the table and try to open the toolbox, which will not open.
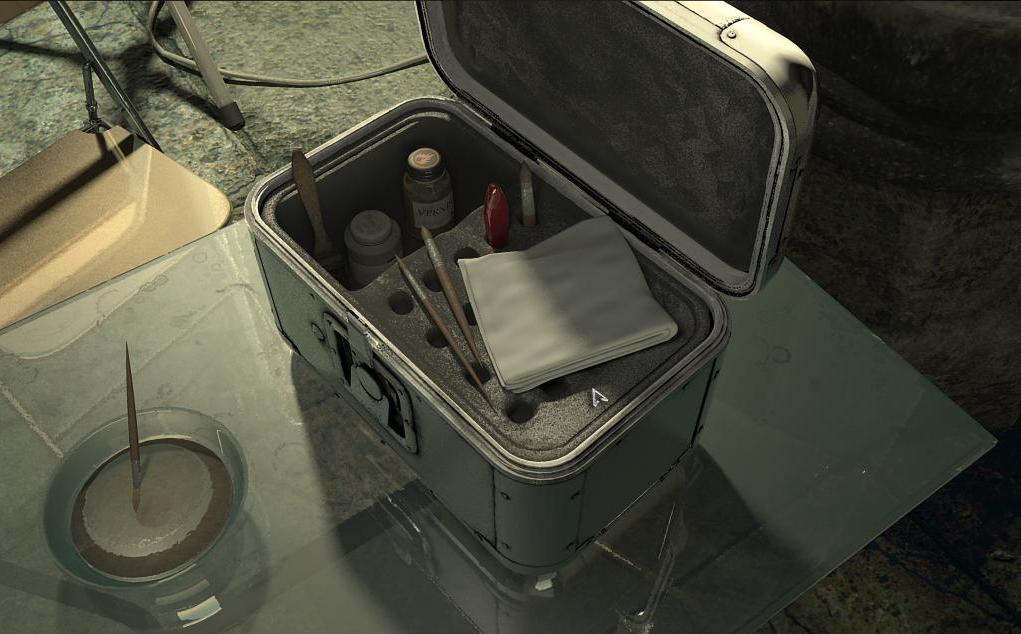
Approach Claire and ask her about tools. Having been given the
permission, take the varnish, the brush and the cloth from the
box.
Enter the exhibition room and ask the director about the
toner. He will tell you to ask the porter. Go through the
courtyard to the porter's lodge. Ring the bell to call the
porter, then talk to him. As a result of the conversation, he
will give you a new toner. Return to the exhibition room, come
to the table and try to open the toolbox, which will not open.
Approach Claire and ask her about tools. Having been given the
permission, take the varnish, the brush and the cloth from the
box.
 Go to the studio and come to the photocopier. Open the top lid
of the photocopier. Clean the dirty glass with the cloth and
install the new toner in the slot, where you took the empty
toner from.
Go to the studio and come to the photocopier. Open the top lid
of the photocopier. Clean the dirty glass with the cloth and
install the new toner in the slot, where you took the empty
toner from.
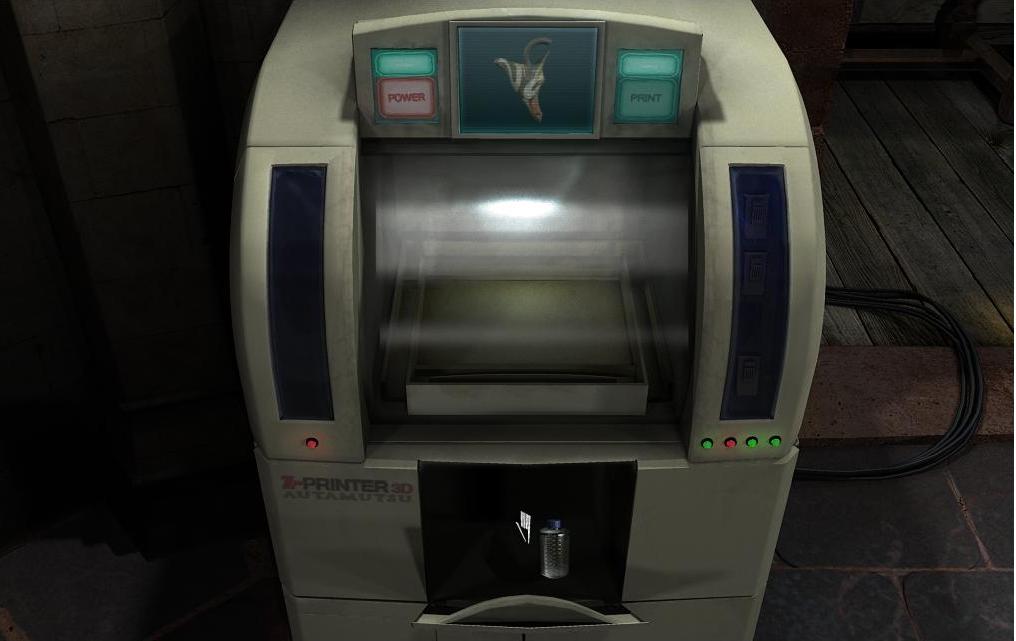
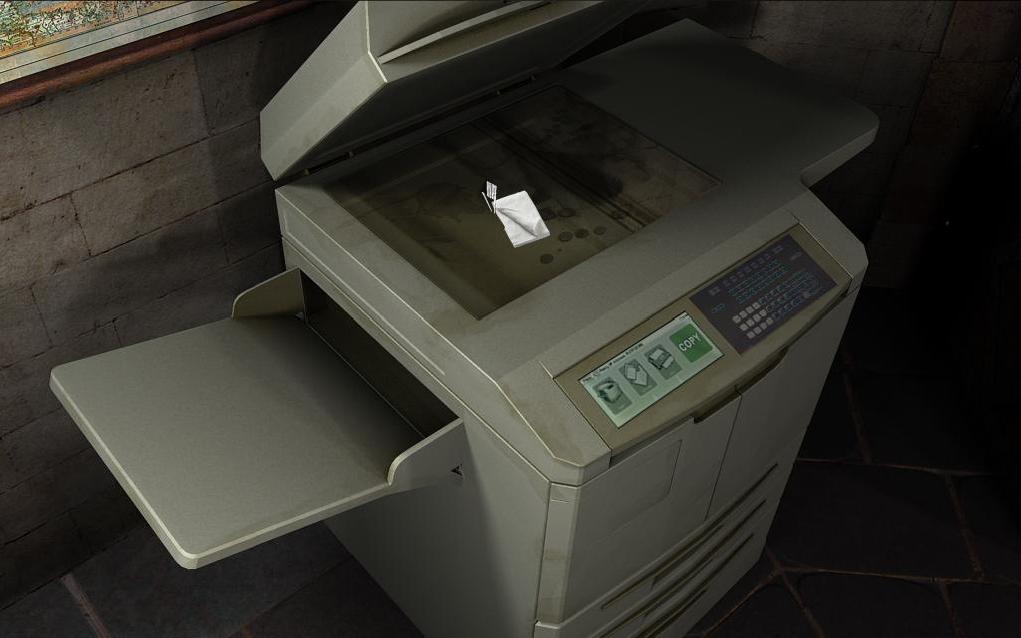 Put the assembled map on the photocopier, close the lid and
press the 'Copy' button. Take the map and its copy. Come to a
3D printer and look at it. Go to the director and talk to him.
Return to the 3D printer and look at all 3 lids. Take an empty
container from the left slot.
Put the assembled map on the photocopier, close the lid and
press the 'Copy' button. Take the map and its copy. Come to a
3D printer and look at it. Go to the director and talk to him.
Return to the 3D printer and look at all 3 lids. Take an empty
container from the left slot.
 Go to the director again and ask him about resin for the
printer. The director will tell us to talk to the porter. Go
to the porter and talk to him. Then go out to the cliff and
talk to the innkeeper. Go back to the porter and take the
resin. Talk to the porter about other available topics. Go to
the printer and insert the container filled with resin into
the correct slot (bottom lid – resin slot).
Go to the director again and ask him about resin for the
printer. The director will tell us to talk to the porter. Go
to the porter and talk to him. Then go out to the cliff and
talk to the innkeeper. Go back to the porter and take the
resin. Talk to the porter about other available topics. Go to
the printer and insert the container filled with resin into
the correct slot (bottom lid – resin slot).
 Go to the cliff and talk to the innkeeper. You will be given a
bucket. Go to the exhibition room, enter the nave and take the
rope from the ship. Next go to the well on the courtyard, open
the lid, combine the rope with the bucket and throw the bucket
into the well. Come back to the innkeeper and give him the
bucket with water. In return he will give you starch. Pour
starch into the empty container. Go to Claire and talk to her.
She will give you the key to Marcel's bureau. Go to the
studio, come to the bureau and use the key to open it. Take
the dye container from the bureau. Look at the letter and
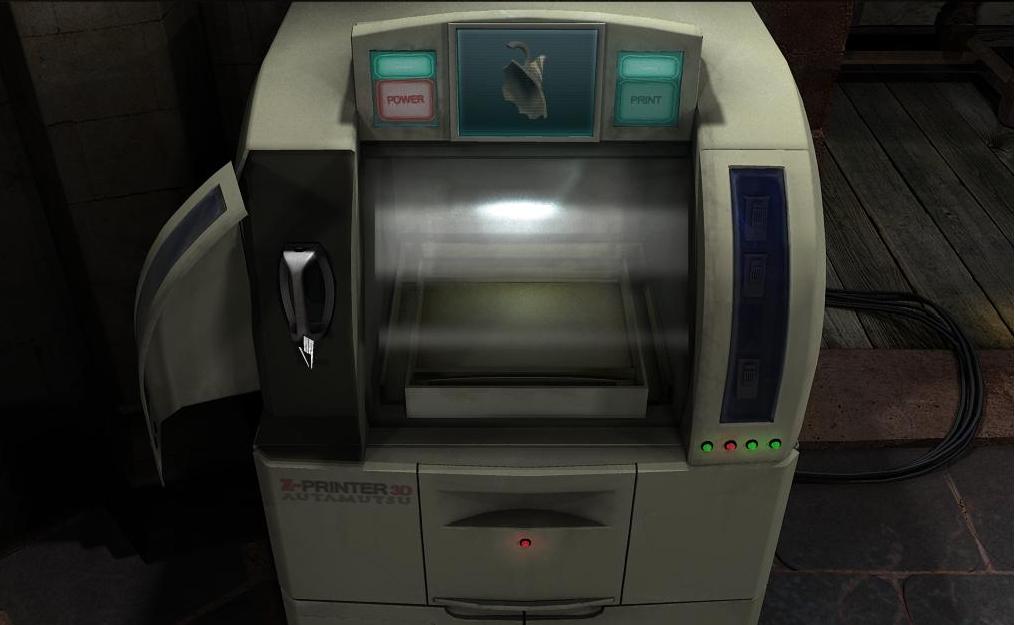
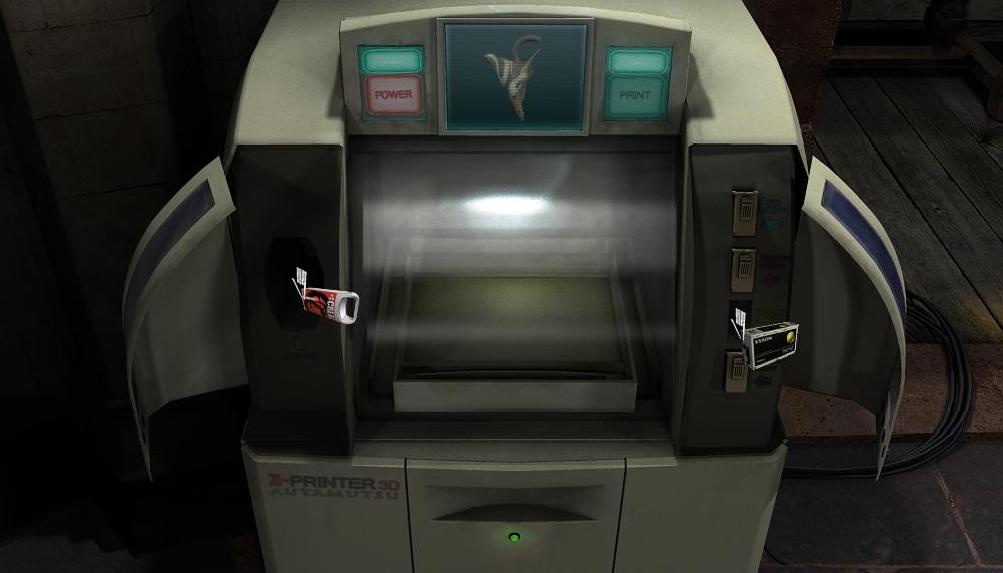
Marcel's notebook. Come to the 3D printer. Insert the powder
container into the left slot and the dye container into the
right slot, then press the 'Print' button.
Go to the cliff and talk to the innkeeper. You will be given a
bucket. Go to the exhibition room, enter the nave and take the
rope from the ship. Next go to the well on the courtyard, open
the lid, combine the rope with the bucket and throw the bucket
into the well. Come back to the innkeeper and give him the
bucket with water. In return he will give you starch. Pour
starch into the empty container. Go to Claire and talk to her.
She will give you the key to Marcel's bureau. Go to the
studio, come to the bureau and use the key to open it. Take
the dye container from the bureau. Look at the letter and
Marcel's notebook. Come to the 3D printer. Insert the powder
container into the left slot and the dye container into the
right slot, then press the 'Print' button.
 When printing finishes, open the lid and take the jug spout's
copy. Soak the brush in the varnish and use it on the jug
spout's copy. Go to Claire and talk to her. Next go to the
innkeeper and talk to him about all the available topics. Come
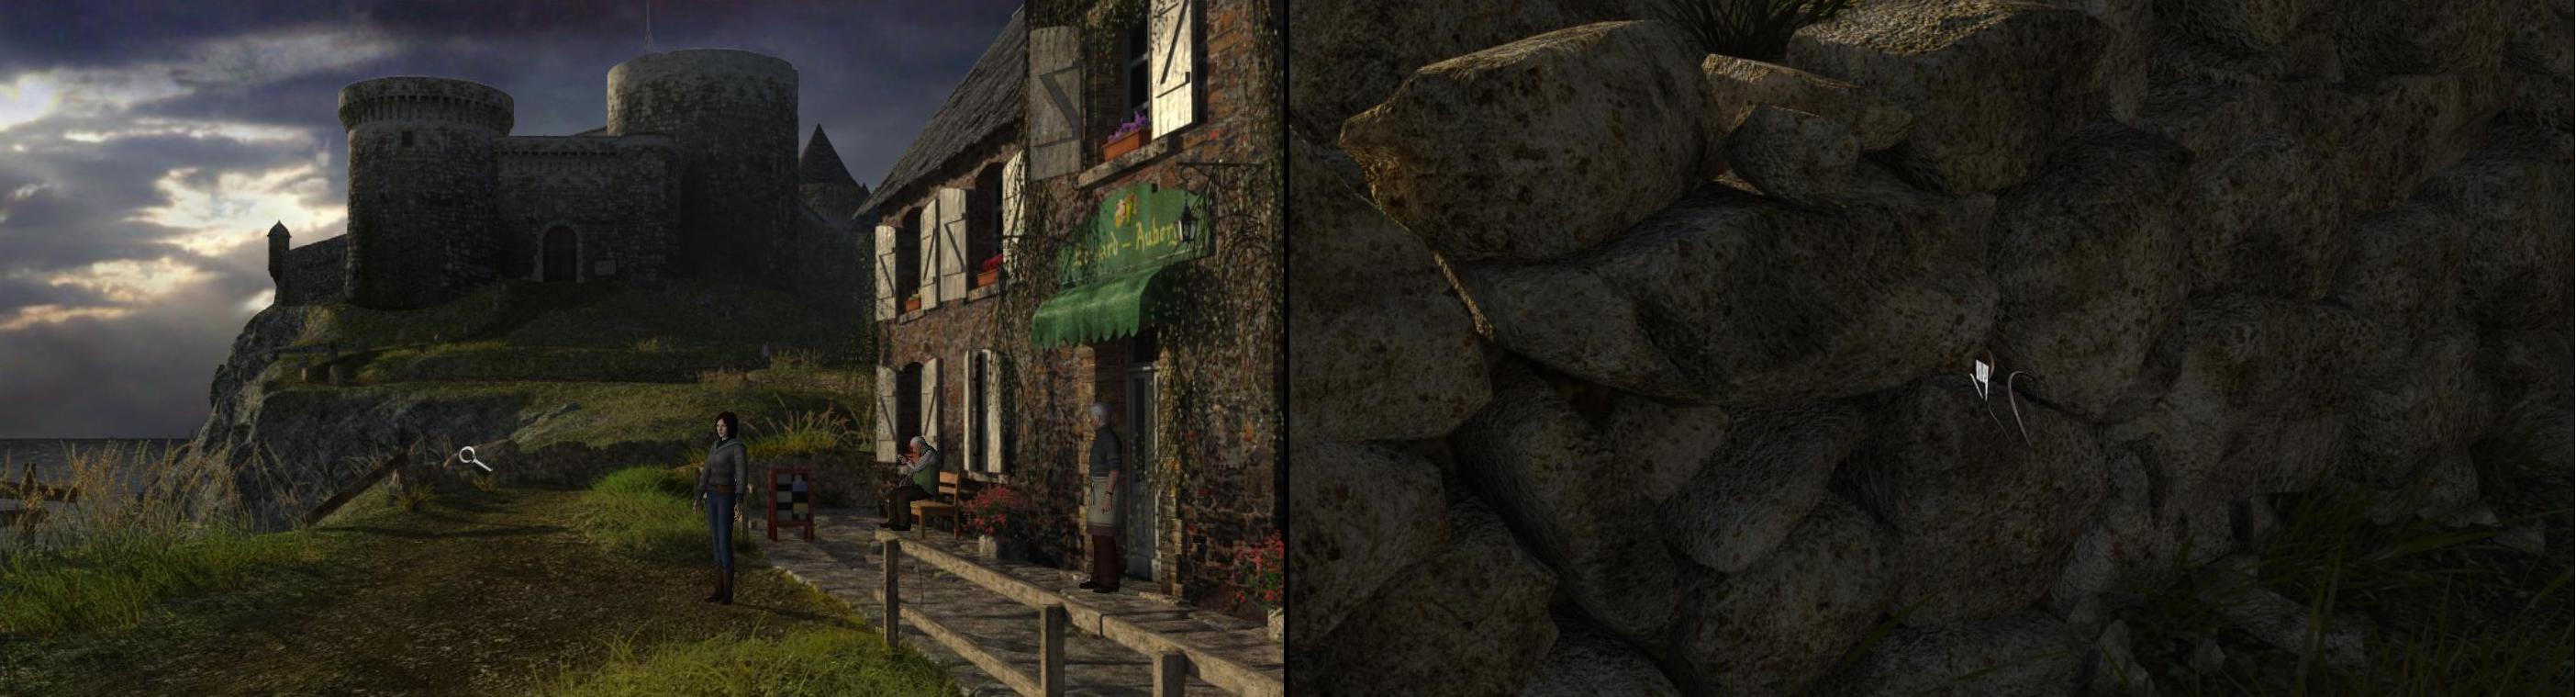
to the fence and take a piece of wire. Then go to the wall on
the cliff (near the passage leading to the castle) and pull a
coin out of the wall with the use of the wire.
When printing finishes, open the lid and take the jug spout's
copy. Soak the brush in the varnish and use it on the jug
spout's copy. Go to Claire and talk to her. Next go to the
innkeeper and talk to him about all the available topics. Come
to the fence and take a piece of wire. Then go to the wall on
the cliff (near the passage leading to the castle) and pull a
coin out of the wall with the use of the wire.
 Go back to the museum and talk to the director.
2. Venice
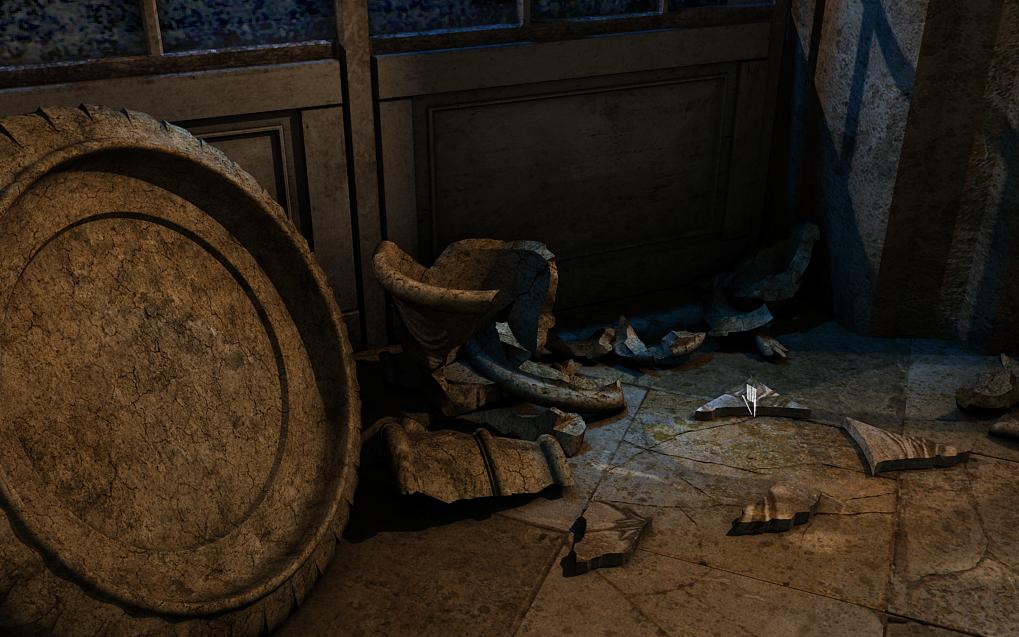
Talk to the lecture's organiser. Go to the niche through the meeting room. Take the ladder and head right for the low relief. Place the ladder on the floor and climb it to look at the upper part of the low relief. Remove the bottom right corner slab, make up a sentence and then return the removed slab to its place. The arranged sentence's image: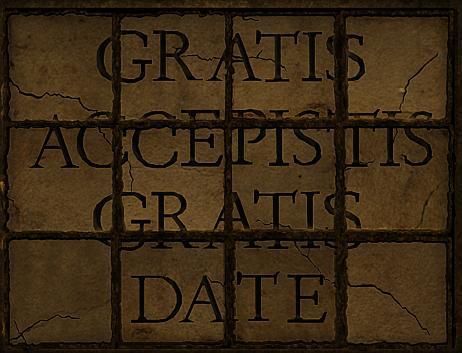 Descend to the lower part of the low relief. Rotate the right
column right 4 times, then the left column left twice. Open
the hiding place and take the seeds from inside. Next go to
the meeting room and talk to the count's man. Afterwards talk
to the lecture's organiser. When the conversation is over,
come to the desk and take all the items. Remove the police
tape from the door. To do this, you need to apply some nail
varnish remover to the tape. Enter the room and come to the
display cases. Take the documents from the chair and pick up
the coin from the floor. Come to the display case on the
right. It's locked. Return to the organiser and talk to him.
He will give us the keys to the display case. Go to the case
and open it with the key you received. Take the tools from
inside. Come back to the hall, talk to the organiser and give
the keys back to him. Come to the door and use the nail
varnish to stick the tape.
Descend to the lower part of the low relief. Rotate the right
column right 4 times, then the left column left twice. Open
the hiding place and take the seeds from inside. Next go to
the meeting room and talk to the count's man. Afterwards talk
to the lecture's organiser. When the conversation is over,
come to the desk and take all the items. Remove the police
tape from the door. To do this, you need to apply some nail
varnish remover to the tape. Enter the room and come to the
display cases. Take the documents from the chair and pick up
the coin from the floor. Come to the display case on the
right. It's locked. Return to the organiser and talk to him.
He will give us the keys to the display case. Go to the case
and open it with the key you received. Take the tools from
inside. Come back to the hall, talk to the organiser and give
the keys back to him. Come to the door and use the nail
varnish to stick the tape.
 Look at the chronometer, which you received from the
gondolier. Open the chronometer and clean it with the use of a
swab and liquid silver cleaner. Look at the chronometer again.
Next soak the brush in the liquid to patinate silver. Use the
brush on the chronometer. Then clean the chronometer with the
cloth and examine it through the magnifying glass. Read the
sign on the chronometer's case.
Look at the chronometer, which you received from the
gondolier. Open the chronometer and clean it with the use of a
swab and liquid silver cleaner. Look at the chronometer again.
Next soak the brush in the liquid to patinate silver. Use the
brush on the chronometer. Then clean the chronometer with the
cloth and examine it through the magnifying glass. Read the
sign on the chronometer's case.
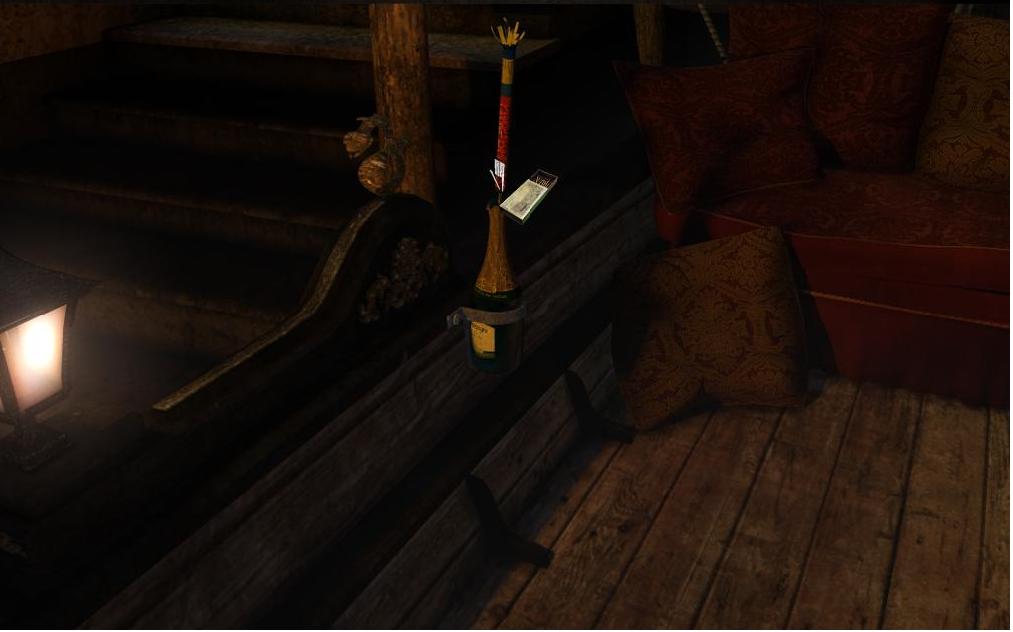
 Talk to the organiser about every available topic. Go outside
and talk to people wearing fancy dress. Go to the scuola's
entrance, open the book and sign it. Talk to the people in
fancy dress again. In return for the signed book, you will
receive a flare and a mask. Go to the hall and come to the
shredder under the desk. Cut the mask in the shredder, then
open the shredder and take the cut-up mask from inside. Go
outside. Take the police tape and an empty champagne bottle
from the dustbin. Take the scissors and the pliers from the
crate standing nearby. Cut off the flare's tip with the
scissors. Put the cut-up mask into the flare. Put the flare
with the pieces of the mask inside into the champagne bottle.
Go to the bay window, come to the table and take a tablecloth,
a curtain and a tieback. Come to the hatch and pull the nails
out of the lid with the pliers. Next tie the lid to the window
sill with the tieback. Approach the passage you created.
Combine the tablecloth with the curtain in the pocket and use
the rope you made on the plank. Descend to the platform. Take
the stick, which is stuck near the platform. Enter the gondola
and take the matches, a broken oar and the key. Use the police
tape to tie the oar to the stick. Insert the bottle with the
flare into the gondola's handle and light the flare.
Talk to the organiser about every available topic. Go outside
and talk to people wearing fancy dress. Go to the scuola's
entrance, open the book and sign it. Talk to the people in
fancy dress again. In return for the signed book, you will
receive a flare and a mask. Go to the hall and come to the
shredder under the desk. Cut the mask in the shredder, then
open the shredder and take the cut-up mask from inside. Go
outside. Take the police tape and an empty champagne bottle
from the dustbin. Take the scissors and the pliers from the
crate standing nearby. Cut off the flare's tip with the
scissors. Put the cut-up mask into the flare. Put the flare
with the pieces of the mask inside into the champagne bottle.
Go to the bay window, come to the table and take a tablecloth,
a curtain and a tieback. Come to the hatch and pull the nails
out of the lid with the pliers. Next tie the lid to the window
sill with the tieback. Approach the passage you created.
Combine the tablecloth with the curtain in the pocket and use
the rope you made on the plank. Descend to the platform. Take
the stick, which is stuck near the platform. Enter the gondola
and take the matches, a broken oar and the key. Use the police
tape to tie the oar to the stick. Insert the bottle with the
flare into the gondola's handle and light the flare.
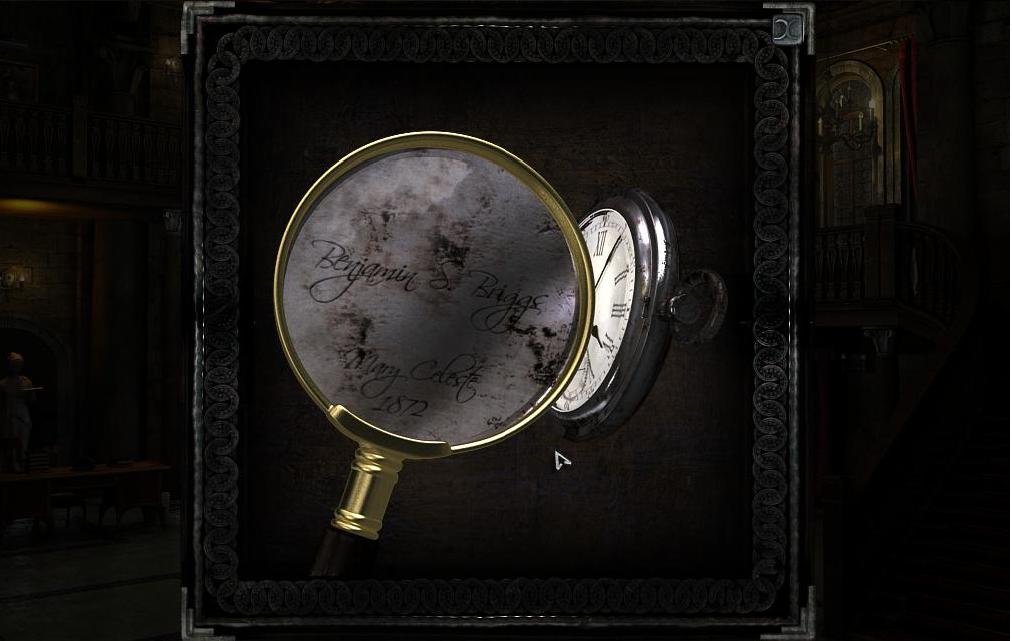
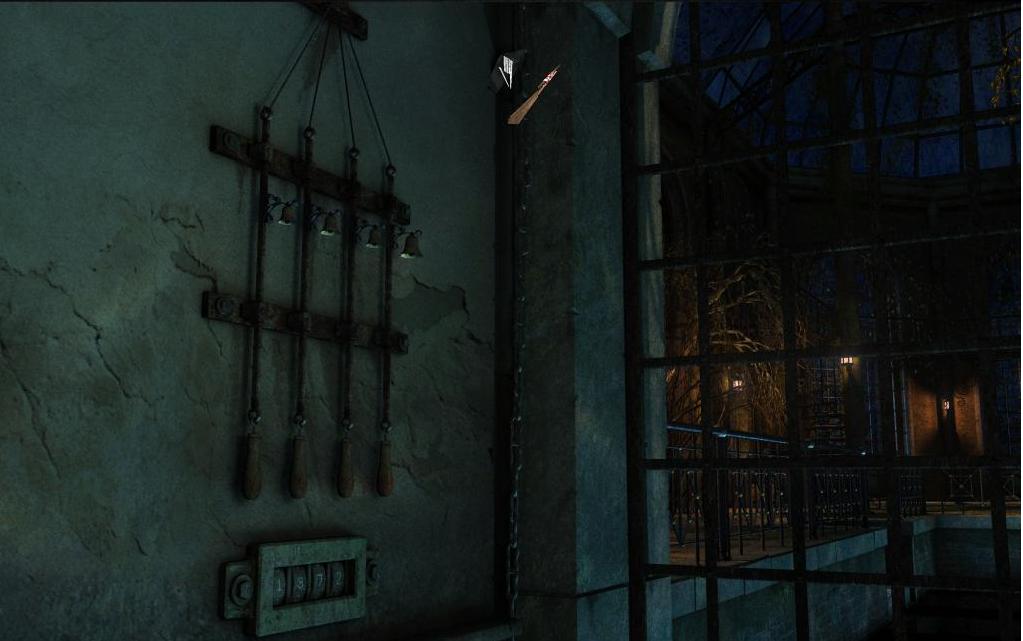
 Sail to the palace and come to the bar gate. Pull the bells'
handles so as to set the number 1872 on the counters below
them. Use the oar to knock a stone off the chain's top. It
will cause the bar gate to open.
Sail to the palace and come to the bar gate. Pull the bells'
handles so as to set the number 1872 on the counters below
them. Use the oar to knock a stone off the chain's top. It
will cause the bar gate to open.
 When you are inside, come to the pond and take the watering
can and the bowl. Draw water from the pond with the watering
can. Come to the lawn and pick up the glove. Enter the apse
and talk to the count. Come to the table on the right. Scrape
the paint off the plank with the putty knife. Look at the
lower shelf and take lye, polyvinyl acetate and a wire brush.
Come back to the plank. Soak the brush in polyvinyl and secure
the plank. Combine the glove with the wire brush and pour lye
into the bowl. Soak the brush in the bowl. Then use the brush
to clean the plank. Pour water from the water can on the
plank. Finally, scrape polyvinyl acetate you applied before
off the plank with the putty knife.
When you are inside, come to the pond and take the watering
can and the bowl. Draw water from the pond with the watering
can. Come to the lawn and pick up the glove. Enter the apse
and talk to the count. Come to the table on the right. Scrape
the paint off the plank with the putty knife. Look at the
lower shelf and take lye, polyvinyl acetate and a wire brush.
Come back to the plank. Soak the brush in polyvinyl and secure
the plank. Combine the glove with the wire brush and pour lye
into the bowl. Soak the brush in the bowl. Then use the brush
to clean the plank. Pour water from the water can on the
plank. Finally, scrape polyvinyl acetate you applied before
off the plank with the putty knife.
 Go back to talk to the count. Then come to the window and take
the piece of stone which is lying at the highest point.
Go back to talk to the count. Then come to the window and take
the piece of stone which is lying at the highest point.
 Go to the relief in the middle of the absinthe. Enter the
close-up view of the centre of the relief and put the piece of
stone in the cavity.
Go to the relief in the middle of the absinthe. Enter the
close-up view of the centre of the relief and put the piece of
stone in the cavity.
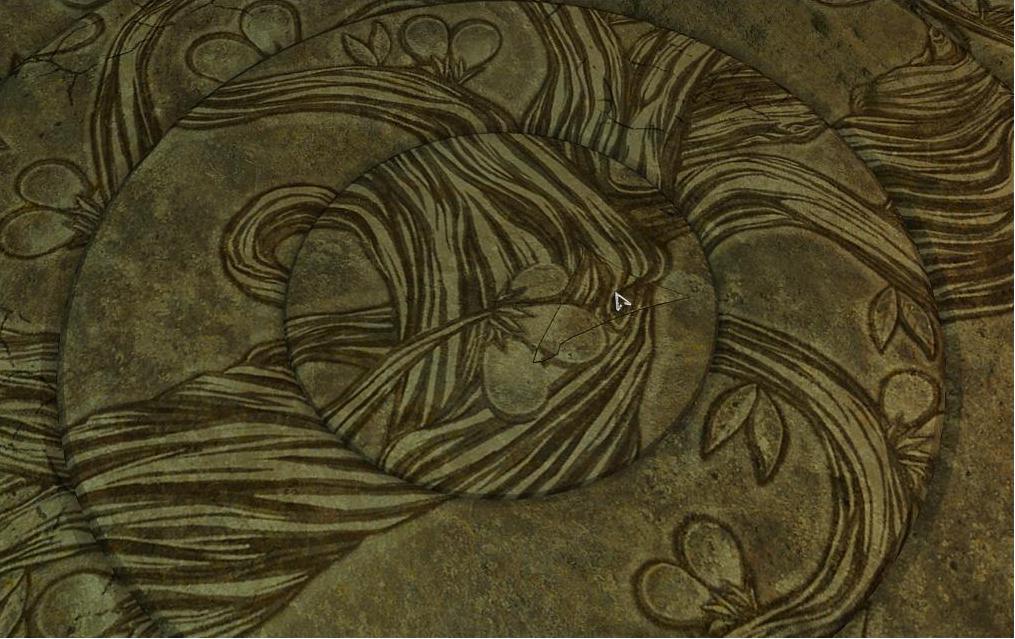 Rotate the third ring so as to match its symbol to the symbol
in the centre. When the symbols match, release the mouse
button. You should hear the sound of the mechanism. Next
rotate the fourth ring so as to match its symbol to the symbol
of the second ring. Now you need to match two pairs of rings.
Doing this successfully will open four hiding places around
the relief. Take seeds from the top hiding place, return to
the count and talk to him.
Rotate the third ring so as to match its symbol to the symbol
in the centre. When the symbols match, release the mouse
button. You should hear the sound of the mechanism. Next
rotate the fourth ring so as to match its symbol to the symbol
of the second ring. Now you need to match two pairs of rings.
Doing this successfully will open four hiding places around
the relief. Take seeds from the top hiding place, return to
the count and talk to him.

3. Cairo
Talk to Ali, the boy in the reception. Come into the room and move the partition. Come to the mirror and take it down. Put inside the photocopy of the map and the jug's spout, then hang the mirror back.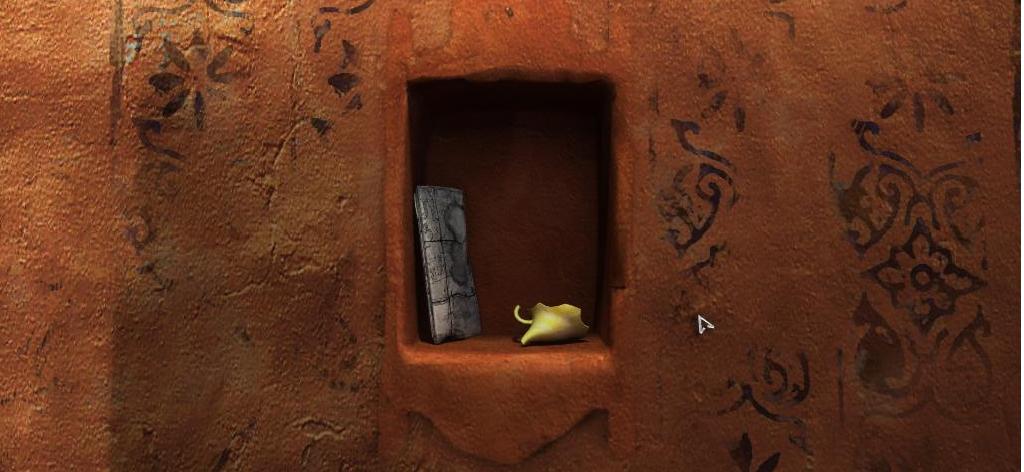 Go to the city centre and talk to the café's owner. Go to the
square, find the antiquarian and talk to him. You will be
given a scarf which needs to be cleaned. Go back to the hotel
street, come to junk near the entrance and take the string. Go
to the hotel room and come to the washbasin. Take the bowl,
soap, the shaving brush and clothespins. Pour water into the
bowl, then throw both soap and the scarf into the bowl. Attach
clothespins to the wet scarf. Come to the clothes stand in the
room. Hang the string on the stand, then hang the wet scarf on
the string.
Go to the city centre and talk to the café's owner. Go to the
square, find the antiquarian and talk to him. You will be
given a scarf which needs to be cleaned. Go back to the hotel
street, come to junk near the entrance and take the string. Go
to the hotel room and come to the washbasin. Take the bowl,
soap, the shaving brush and clothespins. Pour water into the
bowl, then throw both soap and the scarf into the bowl. Attach
clothespins to the wet scarf. Come to the clothes stand in the
room. Hang the string on the stand, then hang the wet scarf on
the string.
 Take swabs from the table in the room. Go to the well square
and talk to the antiquarian. Go back to the room and take the
dry scarf from the stand. Talk to the boy. Go through the
hotel reception to the kitchen annexe, where you should take a
knife, a glass and a small jug. Go to the market square and
talk to the camel trader. You will be given a pot. Try to milk
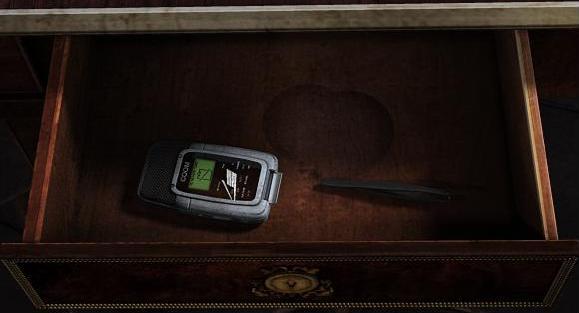
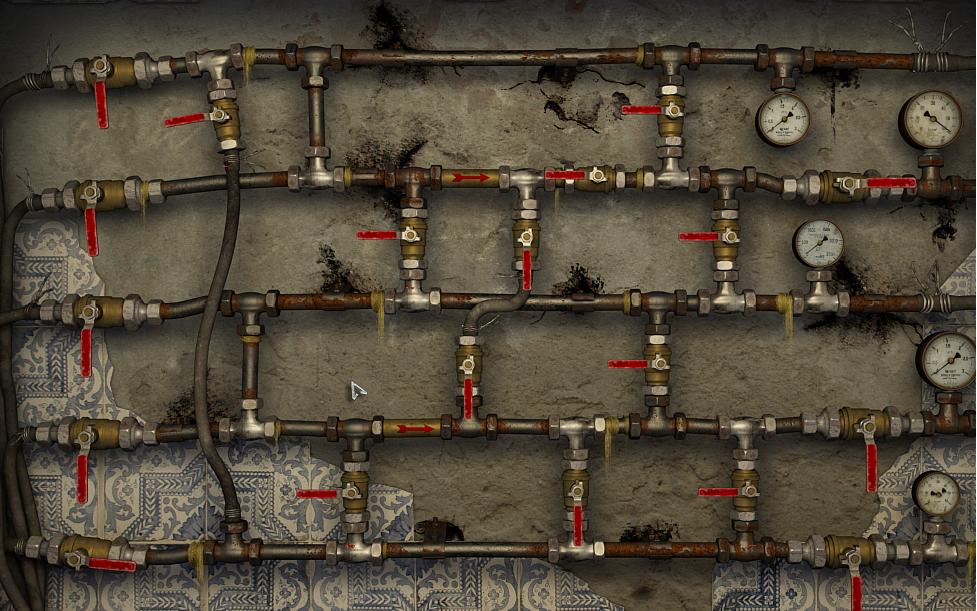
the female camel, which will not be possible. Go to the well
on the well square. Set the water valves so as to let water
flow to the second clock from the top only. The solution:
Take swabs from the table in the room. Go to the well square
and talk to the antiquarian. Go back to the room and take the
dry scarf from the stand. Talk to the boy. Go through the
hotel reception to the kitchen annexe, where you should take a
knife, a glass and a small jug. Go to the market square and
talk to the camel trader. You will be given a pot. Try to milk
the female camel, which will not be possible. Go to the well
on the well square. Set the water valves so as to let water
flow to the second clock from the top only. The solution:
 Go back to the female camel and milk her. You will now have a
pot filled with milk. Come to the lemon tree and try to pick a
lemon. Go to the trader and talk to him about the lemon. He
will give you a small whip. Return to the tree and try to pick
the lemon with the whip. You still won't be able to reach it.
Go back to the trader and talk to him. Go to the hotel street
and enter the café. Have a conversation with the owner and
then go to the box, where you will find Fatima. Talk to Fatima
and play dice with her. First choose the dice which you want
to throw and press 'Throw'. To win, you need to get a better
score than Fatima, but you can't exceed 51. Having won the
game, talk to Fatima. Leave the box and talk to the café's
owner. Return to the box in order to borrow some money from
the woman. Then talk to the café's owner again – he will tell
you to tidy up. Take the broom which stands near the door and
go into the box. Sweep garbage off the floor. Having done
that, bend down and pick up a coin and two pieces of paper.
Go back to the female camel and milk her. You will now have a
pot filled with milk. Come to the lemon tree and try to pick a
lemon. Go to the trader and talk to him about the lemon. He
will give you a small whip. Return to the tree and try to pick
the lemon with the whip. You still won't be able to reach it.
Go back to the trader and talk to him. Go to the hotel street
and enter the café. Have a conversation with the owner and
then go to the box, where you will find Fatima. Talk to Fatima
and play dice with her. First choose the dice which you want
to throw and press 'Throw'. To win, you need to get a better
score than Fatima, but you can't exceed 51. Having won the
game, talk to Fatima. Leave the box and talk to the café's
owner. Return to the box in order to borrow some money from
the woman. Then talk to the café's owner again – he will tell
you to tidy up. Take the broom which stands near the door and
go into the box. Sweep garbage off the floor. Having done
that, bend down and pick up a coin and two pieces of paper.
 Come to the table and take both kanakas with grounds. Pour
grounds on the pieces of paper. Exit the box, talk to the
café's owner and leave the café. Go to the female camel and
give her sweet grounds. The camel will come under the tree.
Come to the tree and pick the lemon with the whip. Return to
the hotel. Draw milk to the small jug and put the jug on a
stove burner in the kitchen annexe. Cut the lemon with the
knife and squeeze the lemon juice into the glass. Go to the
room and put the scarf on the table. Soak the swab in hot milk
and the shaving brush in the glass filled with lemon juice.
Use the brush to spread lemon juice on the scarf. Then use the
swab to spread milk on it. Take the clean scarf from the
table.
Come to the table and take both kanakas with grounds. Pour
grounds on the pieces of paper. Exit the box, talk to the
café's owner and leave the café. Go to the female camel and
give her sweet grounds. The camel will come under the tree.
Come to the tree and pick the lemon with the whip. Return to
the hotel. Draw milk to the small jug and put the jug on a
stove burner in the kitchen annexe. Cut the lemon with the
knife and squeeze the lemon juice into the glass. Go to the
room and put the scarf on the table. Soak the swab in hot milk
and the shaving brush in the glass filled with lemon juice.
Use the brush to spread lemon juice on the scarf. Then use the
swab to spread milk on it. Take the clean scarf from the
table.
 Go down to the reception, take a pencil from Ali and come back
to the room. Take the map from the hiding place. Don't hang
the mirror back and come to the window. Put the mirror on the
table and hang both the scarf and the map on the window. Use
the pencil on the map.
Go down to the reception, take a pencil from Ali and come back
to the room. Take the map from the hiding place. Don't hang
the mirror back and come to the window. Put the mirror on the
table and hang both the scarf and the map on the window. Use
the pencil on the map.
 Take everything off the window. Put the map back into the
hiding place and hang the mirror back. Go to the antiquarian
and talk to him about all the available topics. Go back to the
room, where you will meet Fatima. Talk to her until the boy
interrupts you. Go down to the reception and talk to the boy.
Go to the market to talk to the camel trader. When asked to
give your name, choose „Sylvie Leroux”. You will be given
documents. Go back to the hotel, talk to the boy and enter the
room.
Take everything off the window. Put the map back into the
hiding place and hang the mirror back. Go to the antiquarian
and talk to him about all the available topics. Go back to the
room, where you will meet Fatima. Talk to her until the boy
interrupts you. Go down to the reception and talk to the boy.
Go to the market to talk to the camel trader. When asked to
give your name, choose „Sylvie Leroux”. You will be given
documents. Go back to the hotel, talk to the boy and enter the
room.
4. Yacht
Talk to the count, then go to the mess. Take sleeping pills from the cupboard as well as a thermos flask and a cup from the table. Pour tea from the flask into the cup and add sleeping pills. Go back to the room and come to the hiding place. Take the rope, the screwdriver and glue. Come to the door and open it. Put the tea on the cupboard. Go through the mess to the bridge. Make an announcement using the radio. Then open the radio's cover with the screwdriver and pull out power cords.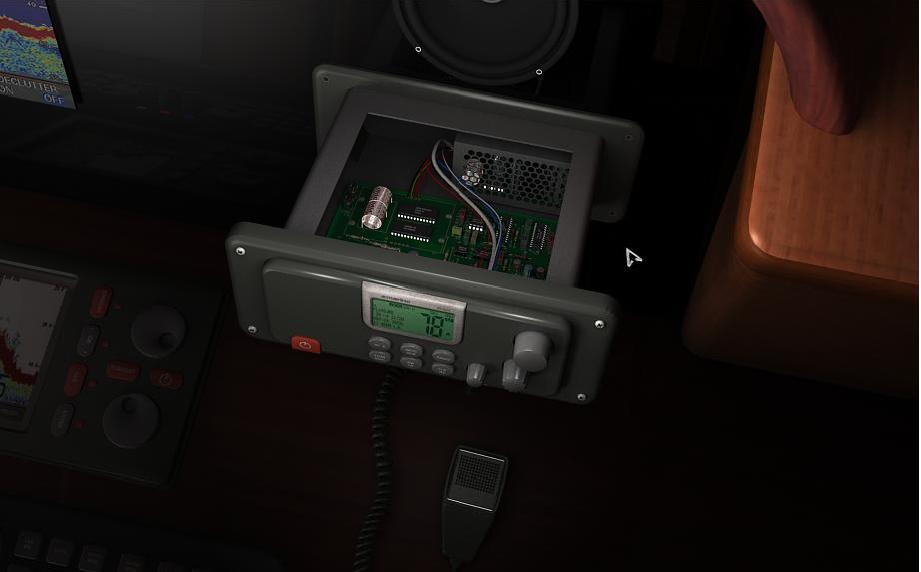 Next use the screwdriver to close the cover. Go to the room
where you left the tea. Go back to the bridge and come to the
steering panel. Click on the helm to change the yacht's
course. Go to the room where you left the tea and have a
conversation with the count. Next come into the room, come to
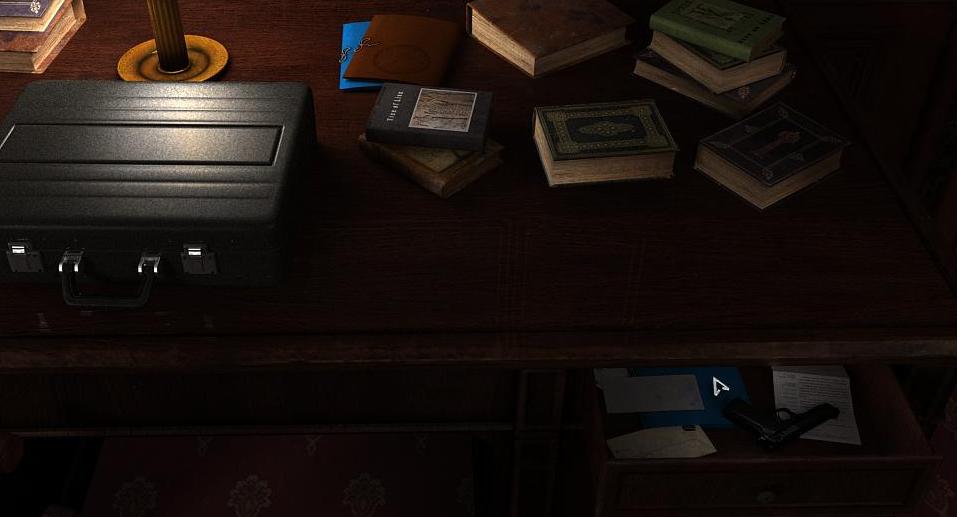
the desk and take the tools from the desk's top and the gun
from the desk's drawer.
Next use the screwdriver to close the cover. Go to the room
where you left the tea. Go back to the bridge and come to the
steering panel. Click on the helm to change the yacht's
course. Go to the room where you left the tea and have a
conversation with the count. Next come into the room, come to
the desk and take the tools from the desk's top and the gun
from the desk's drawer.
 Go to the bridge and talk to the count. Return to the room,
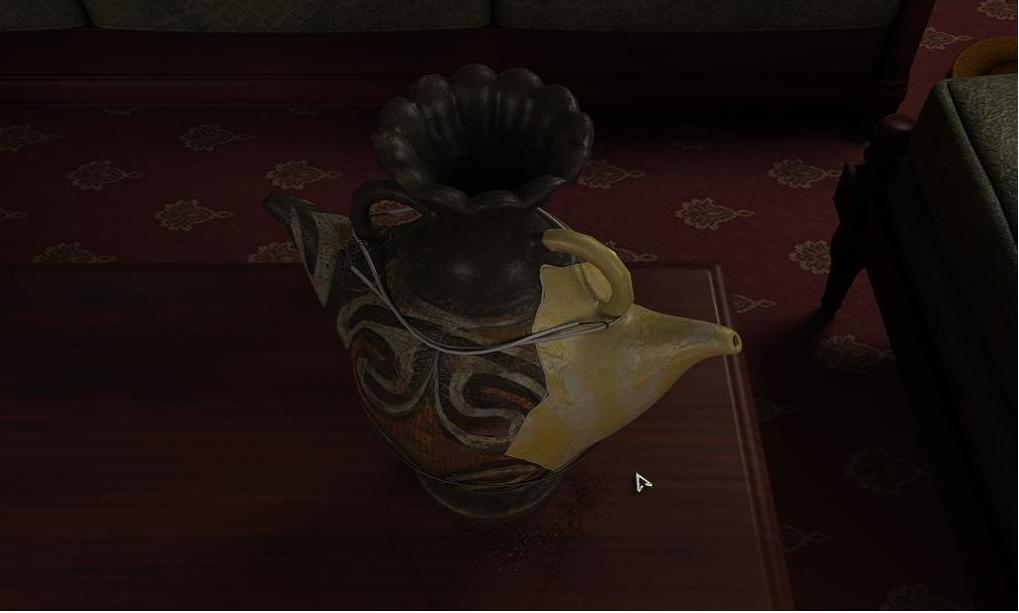
come to the table and clean the jug with the putty knife. Then
use the brush to clean the jug. Next use glue to stick the
spout to the jug and secure the reconstructed jug with cords.
Put the reconstructed jug into your pocket.
Go to the bridge and talk to the count. Return to the room,
come to the table and clean the jug with the putty knife. Then
use the brush to clean the jug. Next use glue to stick the
spout to the jug and secure the reconstructed jug with cords.
Put the reconstructed jug into your pocket.
5. Gibraltar
Go back to the yacht. Take the tin from the second cupboard in the mess and the tin opener from the drawer. Go to the square with the monument. Come to the monument (a cannon) and take the ring from the fence. Head left for the marina and then for the cemetery. You should take a wire brush from the box lying under the bench on the right. Go up the alley and search for the grave of Benjamin Briggs. When you find the grave, clean it with the wire brush, then pick up the candle and put it on the stela's shelf.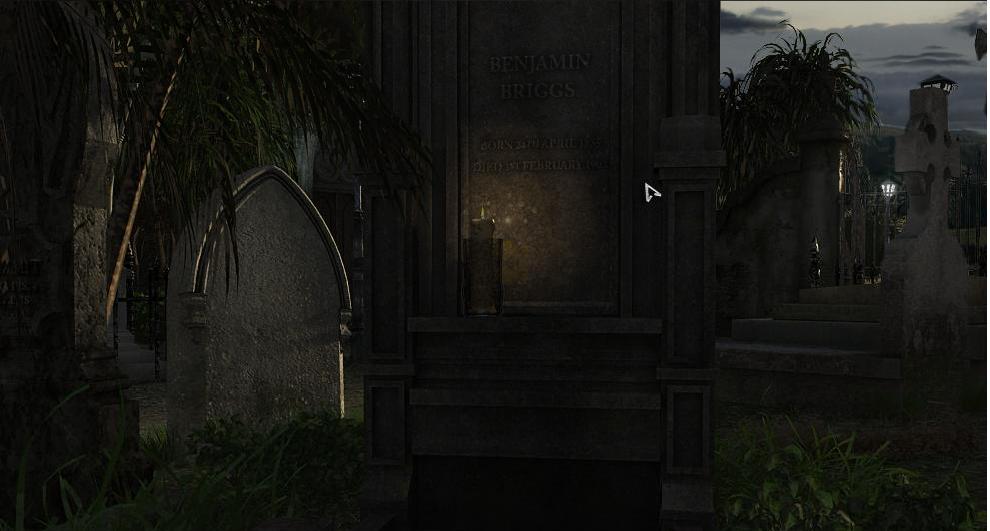 Go back to the square and enter the police station. Go to the
police section. First talk to the police officer, then to the
count. Go back to the yacht and head for the bridge. Take the
count's medicines which you can find by the radio. Take the
rope from the inventory to tie a knot in it. Left click on the
rope to tie the knot.
Go back to the square and enter the police station. Go to the
police section. First talk to the police officer, then to the
count. Go back to the yacht and head for the bridge. Take the
count's medicines which you can find by the radio. Take the
rope from the inventory to tie a knot in it. Left click on the
rope to tie the knot.
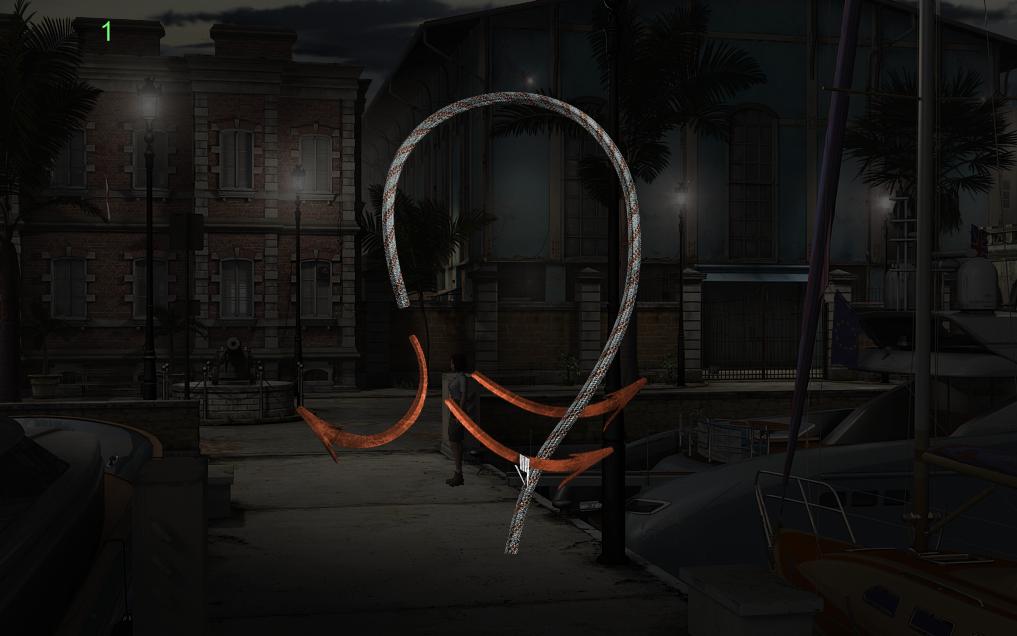
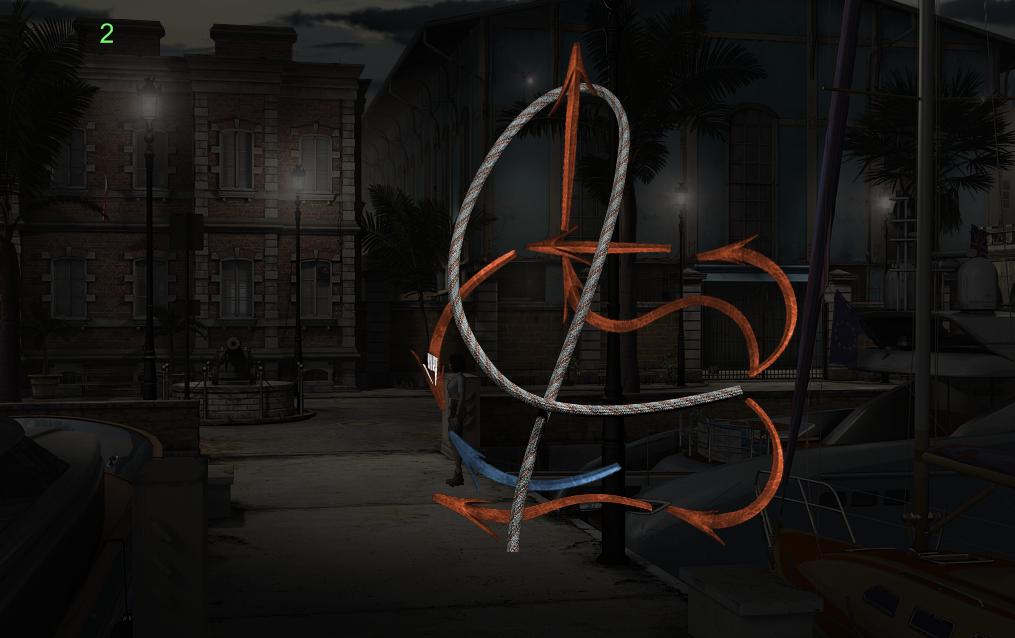

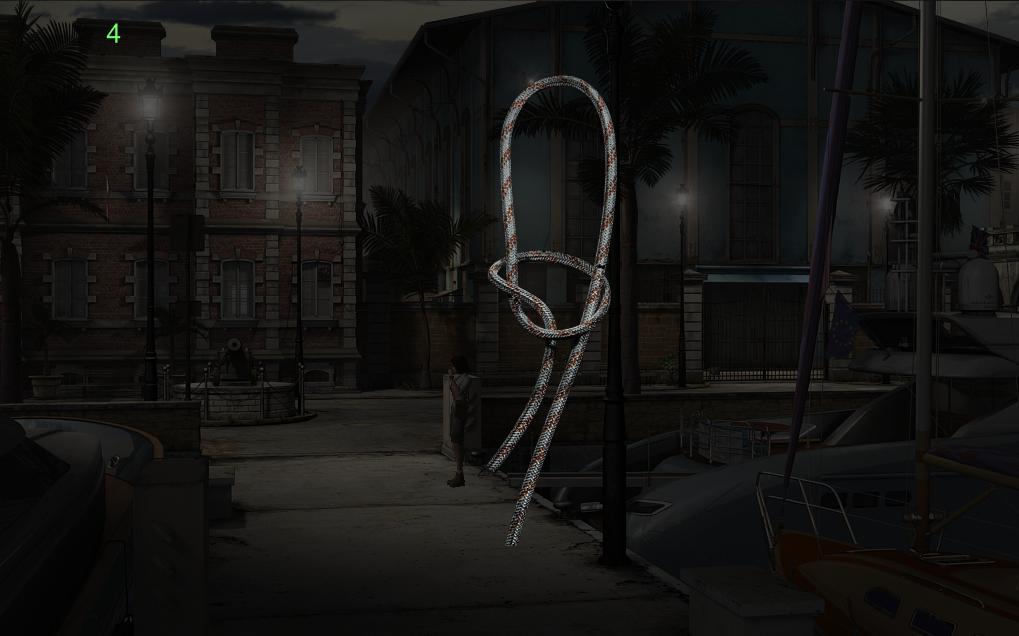 To tie the knot you need to click on the red arrows in the
following order: the middle one, the top right one, the bottom
one. Go to the count's room. Take the count's cane (it stands
by the entrance to the mess) and approach the door to the
count's room. Use the cane to block the door, then tie the
cane to the door's handle with the rope. Go back to the police
station and have a conversation with the officer. Next talk to
the count. Go to the customs officer's window and open it.
Take the fishing rod which stands on the right. Use the
fishing rod to get the parcel, which lies on the desk's top.
Read the address on the parcel, then leave the police station
and go to the address indicated on the parcel. Come to the
gate and open the tin with the tin opener (you took both
objects from the yacht's mess). Throw the open tin to the dog.
Run towards the cemetery. There is a gate in the first part of
the street before the cemetery. Come to the gate, then come to
the stone by the gate. Take the key from under the stone and
use it to open the gate. Go to the annex, open another gate
and block it with the ring taken from the cannon's monument.
Open the building's door.
To tie the knot you need to click on the red arrows in the
following order: the middle one, the top right one, the bottom
one. Go to the count's room. Take the count's cane (it stands
by the entrance to the mess) and approach the door to the
count's room. Use the cane to block the door, then tie the
cane to the door's handle with the rope. Go back to the police
station and have a conversation with the officer. Next talk to
the count. Go to the customs officer's window and open it.
Take the fishing rod which stands on the right. Use the
fishing rod to get the parcel, which lies on the desk's top.
Read the address on the parcel, then leave the police station
and go to the address indicated on the parcel. Come to the
gate and open the tin with the tin opener (you took both
objects from the yacht's mess). Throw the open tin to the dog.
Run towards the cemetery. There is a gate in the first part of
the street before the cemetery. Come to the gate, then come to
the stone by the gate. Take the key from under the stone and
use it to open the gate. Go to the annex, open another gate
and block it with the ring taken from the cannon's monument.
Open the building's door.
 Knock at the door and talk to the woman named Sarah. Follow
her and once again have a conversation with her until exhaust
all topics.. Come back to the police station, talk to the
count and go to the yacht. Head for the count's room, come to
the desk and take the coin. Come to the bed and enter the
close-up view of the painting. Moving the painting away will
reveal a safe. Input the code: 538140 or 53814042 and accept
it. Take the money and the cheques from the safe. Go back to
the hangar and talk to the count and Sarah. Take the cable
from the crates standing in front of the hangar. First use the
cable on the electrical boxes by the gate, then on the box in
front of the entrance. Enter the hangar. Take the chain and
the chain link by the containers standing near the airship.
Take an empty oiler and the gear from the locker. Take the
container filled with oil from under the landing. Use the oil
container on the oiler. Go up the landing and come to the
mechanism. Put the chain and the gear in the correct place.
Put the chain's link on the chain and oil the mechanism with
the oiler. Next use the lever.
Knock at the door and talk to the woman named Sarah. Follow
her and once again have a conversation with her until exhaust
all topics.. Come back to the police station, talk to the
count and go to the yacht. Head for the count's room, come to
the desk and take the coin. Come to the bed and enter the
close-up view of the painting. Moving the painting away will
reveal a safe. Input the code: 538140 or 53814042 and accept
it. Take the money and the cheques from the safe. Go back to
the hangar and talk to the count and Sarah. Take the cable
from the crates standing in front of the hangar. First use the
cable on the electrical boxes by the gate, then on the box in
front of the entrance. Enter the hangar. Take the chain and
the chain link by the containers standing near the airship.
Take an empty oiler and the gear from the locker. Take the
container filled with oil from under the landing. Use the oil
container on the oiler. Go up the landing and come to the
mechanism. Put the chain and the gear in the correct place.
Put the chain's link on the chain and oil the mechanism with
the oiler. Next use the lever.
 Come to the hydrogen generator, take the shovel and use it to
move salt out of the cart and into the generator. Go to Sarah
to talk to her. Go to the police station after the
conversation. Start a conversation with the custom's officer
and continue it until you receive the parcel. Go back to the
pump in the hangar. Open a big panel of the parcel. Left click
on the panel to take out a valve. Install the valve in the
pump.
Come to the hydrogen generator, take the shovel and use it to
move salt out of the cart and into the generator. Go to Sarah
to talk to her. Go to the police station after the
conversation. Start a conversation with the custom's officer
and continue it until you receive the parcel. Go back to the
pump in the hangar. Open a big panel of the parcel. Left click
on the panel to take out a valve. Install the valve in the
pump.
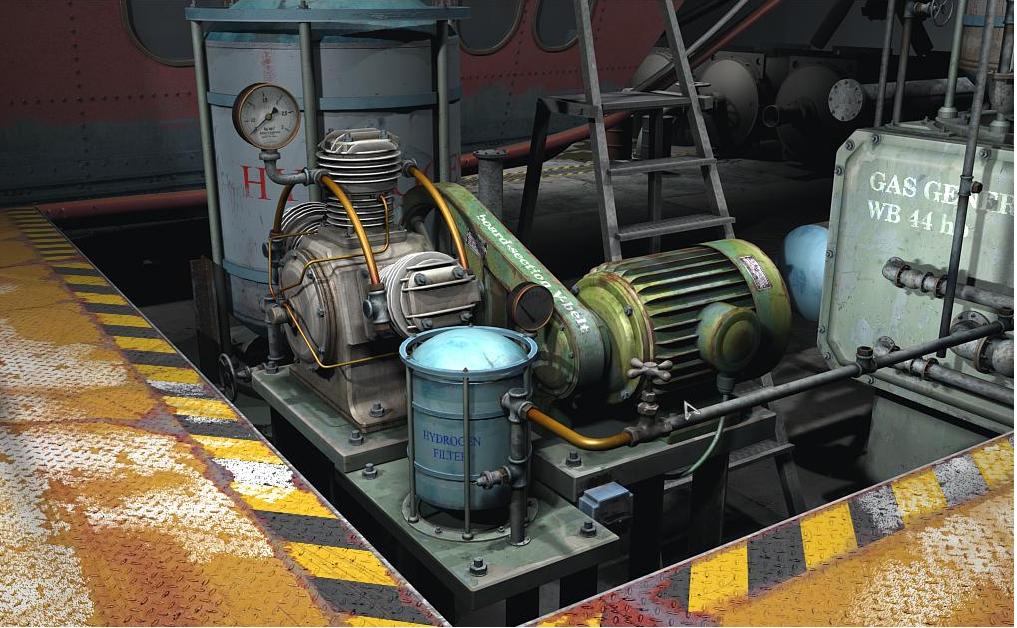 Come to the generator and use the switch to perform
electrolysis. Go in front of the hangar and talk to Sarah
until saying goodbye. You are inside the airship. Come to the
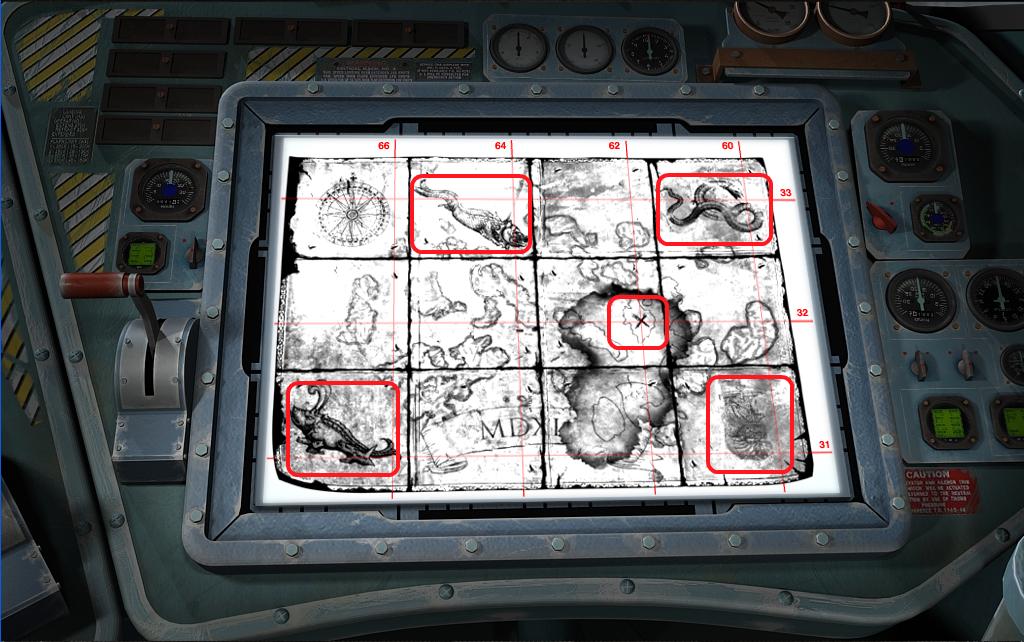
console and put the map's copy on it. Pull the lever. You will
have to mark 5 points on the map: 3 are under the creatures'
drawings, one under a black cross and one in the bottom right
corner.
Come to the generator and use the switch to perform
electrolysis. Go in front of the hangar and talk to Sarah
until saying goodbye. You are inside the airship. Come to the
console and put the map's copy on it. Pull the lever. You will
have to mark 5 points on the map: 3 are under the creatures'
drawings, one under a black cross and one in the bottom right
corner.
 Go to the steering panel and set the airship's course. The
solution:
Go to the steering panel and set the airship's course. The
solution:
 Pull the lever.
6. Bimini
When still in the airship, take the rope ladder, the camp shovel, the brush and the putty knife from the locker near the console. Come to the hatch in the floor and open it. Take an anchor and throw it onto a moving branch.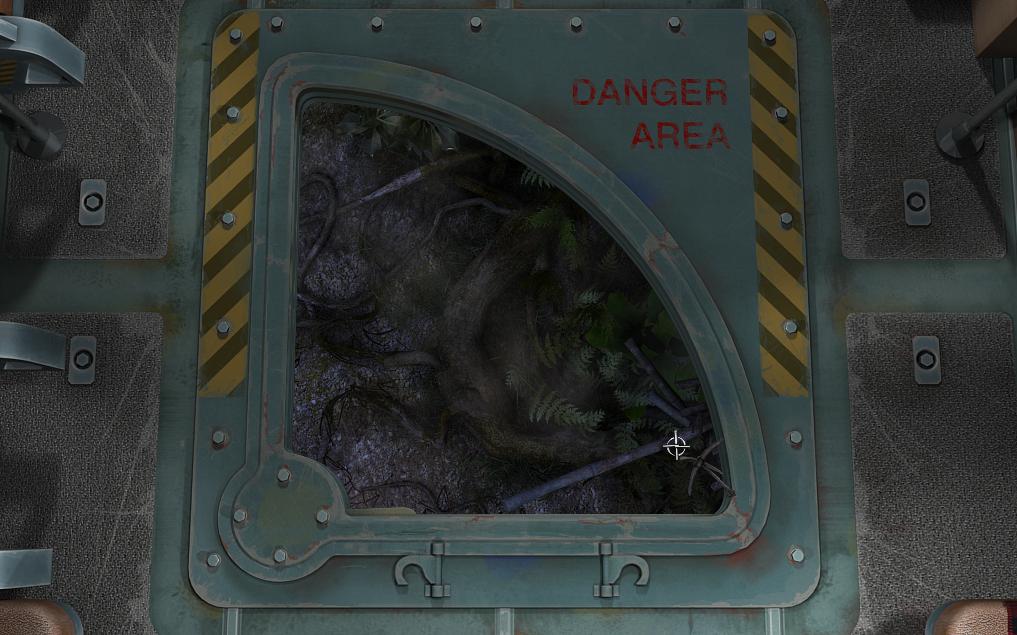 Fasten the ladder to the handles and climb down onto the
landing field. Go into the thickets, come to the bushes and
take brushwood. Come to the herbs, pick them and take a dry
branch. Come to the bridge and chase the bird away with the
dry branch. Go across the bridge to the platform, then go to
the fork in the village. Come to junk and take the rope, the
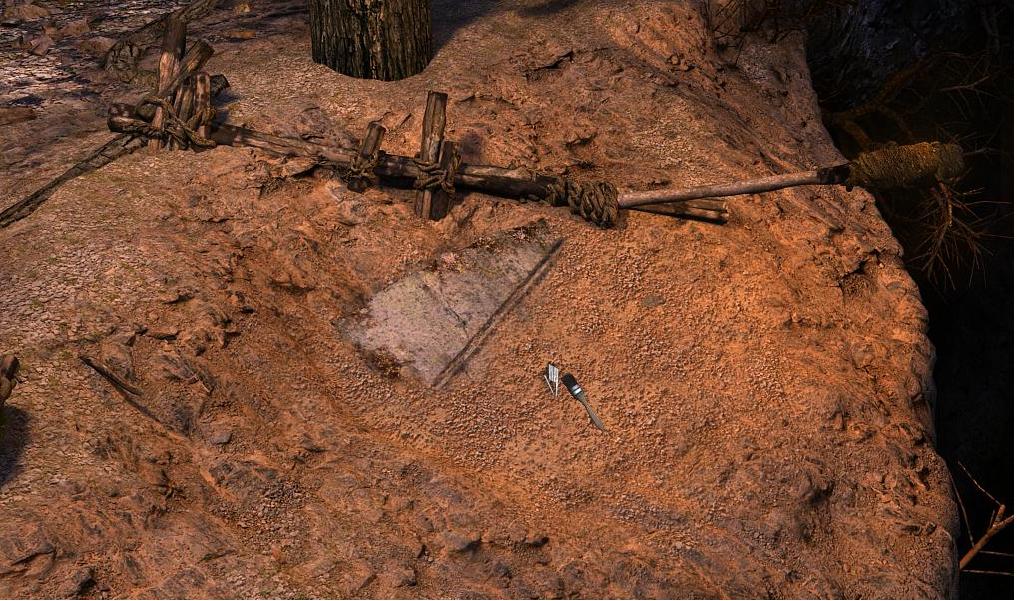
torch and the fruit basket. Come to the precipice. Use the
camp shovel to remove the top ground layer on the precipice.
Next clear the ground with the putty knife to reveal the
stone. Finally, clean the obelisk with the brush.
Fasten the ladder to the handles and climb down onto the
landing field. Go into the thickets, come to the bushes and
take brushwood. Come to the herbs, pick them and take a dry
branch. Come to the bridge and chase the bird away with the
dry branch. Go across the bridge to the platform, then go to
the fork in the village. Come to junk and take the rope, the
torch and the fruit basket. Come to the precipice. Use the
camp shovel to remove the top ground layer on the precipice.
Next clear the ground with the putty knife to reveal the
stone. Finally, clean the obelisk with the brush.
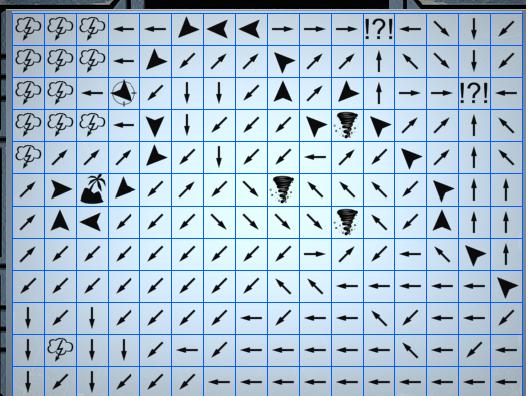
 Head right for the village outskirts and take moss from the
crater's wall. Come back to the fork and head left for the
village. Go left to the bridge. Take the windsock which is
near the bridge. Come back to the village and climb the ladder
to the windmill. Here you must hang the windsock on the
flagpole on the left. Use the lever on the control panel to
adjust the height of the blades and the buttons to move the
windmill left or right. The goal of this puzzle is to set the
windmill in such a position that it faces wind direction. The
windmill may jam on some settings. The solution: Press the
left button twice, move the lever down twice, press the right
button 7 times, move the lever up twice, press the right
button twice, move the lever down once, press the right button
twice, move the lever up once, press the right button twice,
pull the lever down and press the right button once. Move the
lever on the windmill's balcony (on the right) to 'lift'
position and come back to the platform. Take the lift to get
to the tree crown. Pick fruit from the left and the right
branch, put moss into the basket and place the basket on the
platform to the left. Climb up the ladder. Knock fruit off the
left branch with the dry branch. Come to the bough to the
right and hang the rope on it. Descend on rope to the lower
level. Swing on the rope to get the last pieces of fruit. Take
the basket, which you left on the platform, and descend.
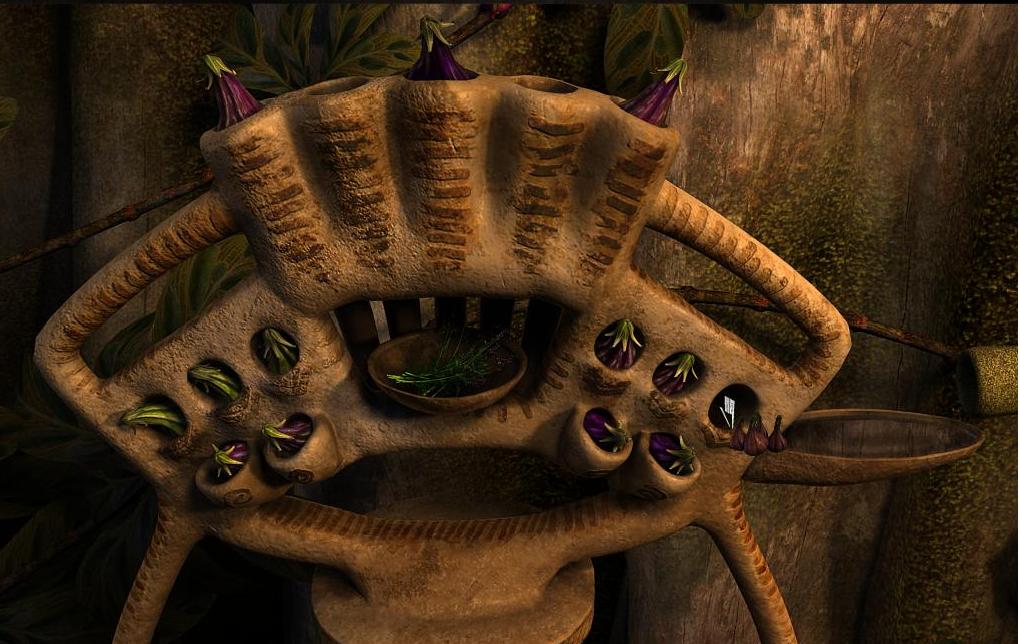
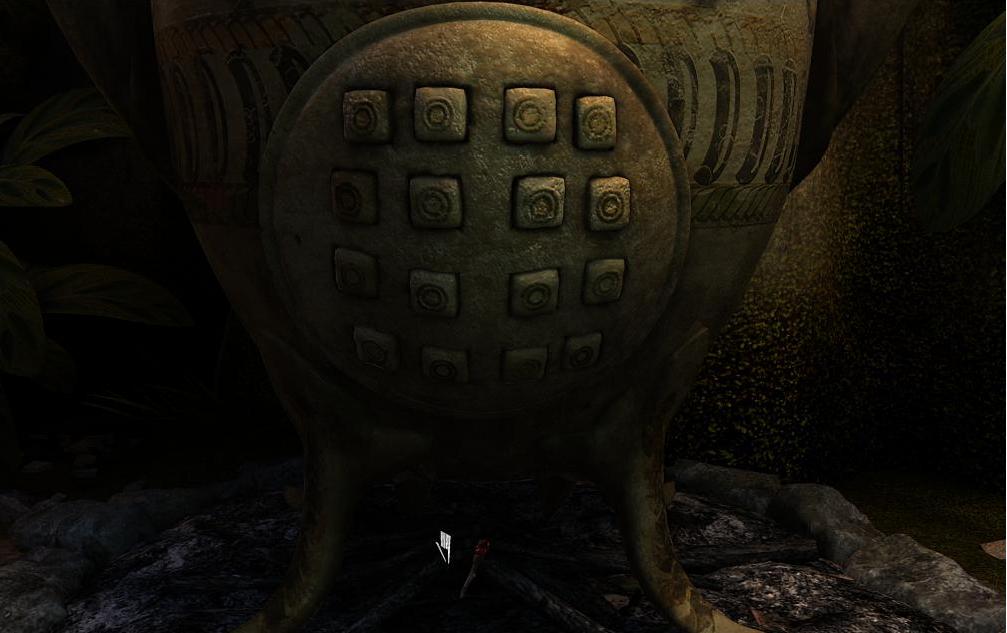
Having picked all the fruit, climb down the tree. Place the
jug on the trunk by the vessel. Come to the vessel under the
tree and enter the close-up view of the dispenser. Try to put
fruit into the dispenser, which won't be possible. Go to the
count and talk to him. Then try to talk to the native in the
village. The native doesn't want to talk to you, so to
encourage him, give him coins. When the conversation is over,
return to the jug and place pieces of fruit in slots. You
should put 2 ripe pieces of fruit and 3 unripe pieces in the
left slots, 1 overripe piece and 2 ripe pieces in the middle
slots, 3 ripe pieces and 2 overripe pieces in the right slot.
Put the picked herbs into the middle slot.
Head right for the village outskirts and take moss from the
crater's wall. Come back to the fork and head left for the
village. Go left to the bridge. Take the windsock which is
near the bridge. Come back to the village and climb the ladder
to the windmill. Here you must hang the windsock on the
flagpole on the left. Use the lever on the control panel to
adjust the height of the blades and the buttons to move the
windmill left or right. The goal of this puzzle is to set the
windmill in such a position that it faces wind direction. The
windmill may jam on some settings. The solution: Press the
left button twice, move the lever down twice, press the right
button 7 times, move the lever up twice, press the right
button twice, move the lever down once, press the right button
twice, move the lever up once, press the right button twice,
pull the lever down and press the right button once. Move the
lever on the windmill's balcony (on the right) to 'lift'
position and come back to the platform. Take the lift to get
to the tree crown. Pick fruit from the left and the right
branch, put moss into the basket and place the basket on the
platform to the left. Climb up the ladder. Knock fruit off the
left branch with the dry branch. Come to the bough to the
right and hang the rope on it. Descend on rope to the lower
level. Swing on the rope to get the last pieces of fruit. Take
the basket, which you left on the platform, and descend.
Having picked all the fruit, climb down the tree. Place the
jug on the trunk by the vessel. Come to the vessel under the
tree and enter the close-up view of the dispenser. Try to put
fruit into the dispenser, which won't be possible. Go to the
count and talk to him. Then try to talk to the native in the
village. The native doesn't want to talk to you, so to
encourage him, give him coins. When the conversation is over,
return to the jug and place pieces of fruit in slots. You
should put 2 ripe pieces of fruit and 3 unripe pieces in the
left slots, 1 overripe piece and 2 ripe pieces in the middle
slots, 3 ripe pieces and 2 overripe pieces in the right slot.
Put the picked herbs into the middle slot.
 You will end up in prison after the conversation with Alpha
and Beta. First talk to the count, then to the native. He will
release you from prison. When you are free, talk to the count
again and head for the airship. You can't go past the tree
because of the conspirators who are standing there. Head for
the village and go to the bridge. Pull the lever by the bridge
to lower it. You can get to the airship via the bridge. While
in the airship, come to the left bunk, pick up the pillow and
take the gun. Descend to the landing field, where a
conversation between the characters will start automatically.
After the conversation go to the windmill in the village and
move the lever from the left to the right side. Come to the
stone on the landing field and light you torch (taken from
village junk) from the burning torch. Return to the adjuster,
put brushwood under it and light brushwood with your torch.
You will end up in prison after the conversation with Alpha
and Beta. First talk to the count, then to the native. He will
release you from prison. When you are free, talk to the count
again and head for the airship. You can't go past the tree
because of the conspirators who are standing there. Head for
the village and go to the bridge. Pull the lever by the bridge
to lower it. You can get to the airship via the bridge. While
in the airship, come to the left bunk, pick up the pillow and
take the gun. Descend to the landing field, where a
conversation between the characters will start automatically.
After the conversation go to the windmill in the village and
move the lever from the left to the right side. Come to the
stone on the landing field and light you torch (taken from
village junk) from the burning torch. Return to the adjuster,
put brushwood under it and light brushwood with your torch.
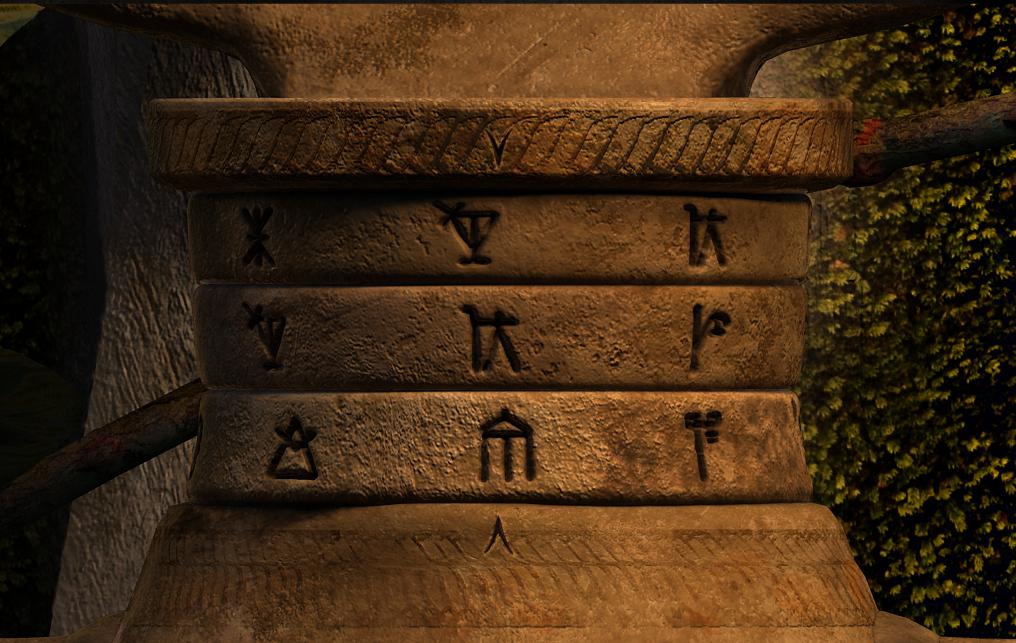
 Come to the vessel and enter the close-up view of the filters.
You need to press them one after another – you can't press two
neighbouring buttons consecutively. When the puzzle is solved,
a dialogue with characters standing by the tree will start
automatically again. Now enter the vessel view and close-up on
the adjuster. You must set the rings correctly. The solution
to this puzzle is provided by three stones with symbols. One
stone is in the village – you dug it out before. Another one
is at the base of the tree. The third one is located on the
landing field, by the torch. The number of frames by the
symbol shows the ring on which that particular symbol will be
(counting from the top). The correct symbol is the one which
is not on two other stones.
Come to the vessel and enter the close-up view of the filters.
You need to press them one after another – you can't press two
neighbouring buttons consecutively. When the puzzle is solved,
a dialogue with characters standing by the tree will start
automatically again. Now enter the vessel view and close-up on
the adjuster. You must set the rings correctly. The solution
to this puzzle is provided by three stones with symbols. One
stone is in the village – you dug it out before. Another one
is at the base of the tree. The third one is located on the
landing field, by the torch. The number of frames by the
symbol shows the ring on which that particular symbol will be
(counting from the top). The correct symbol is the one which
is not on two other stones.
Created at: 2011-01-19