

Walkthrough Menu
- General Tips
- Chapter 1: Devourer of Souls
- Chapter 2: Possessed
- Chapter 3: Fortune Telling
- Chapter 4: Exorcism
General Tips
- This is the official guide for Dark Tales: Edgar Allan Poe's Morella.
- This guide won't tell you when to zoom into a location; the screenshots show each zoom scene.
- Hidden-object puzzles are referred to as HOPs. Only the locations of the HOPs will be shown.
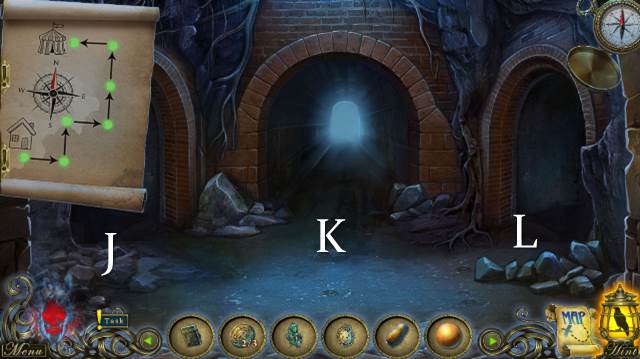
- Use the map to fast travel to a location.
Chapter 1: Devourer of Souls
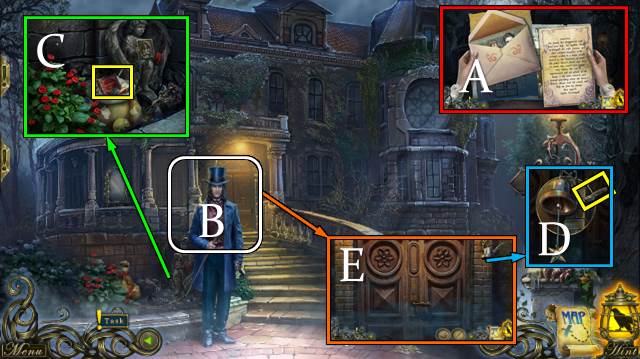
- Inspect papers (A).
- Talk (B).
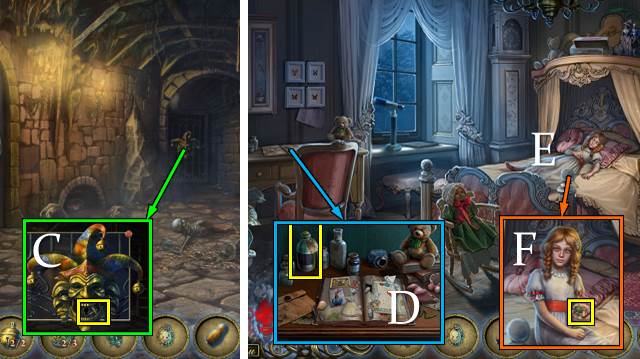
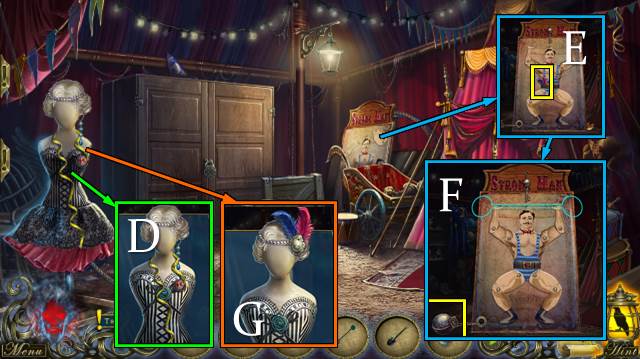
- Move bag; take WOODEN PART and SHEARS HALF (C).
- Take BROKEN SHEARS (D).
- Open door (E).
- Take OLD COIN (F).
- Take SCREW with OLD COIN; take STAR FRAME (G).
- SHEARS HALF and SCREW on BROKEN SHEARS; take SHEARS.
- Take GOLDEN STAR with SHEARS (H).
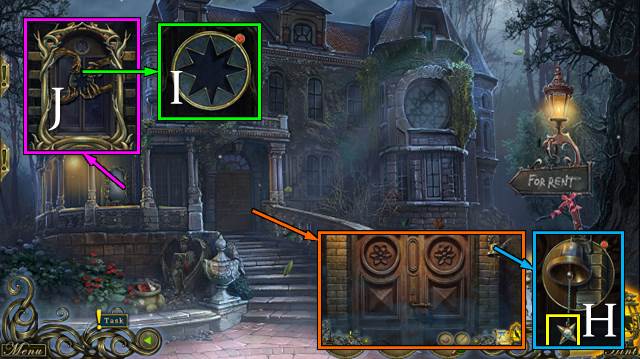
- GOLDEN STAR on STAR FRAME; take STAR PENDANT.
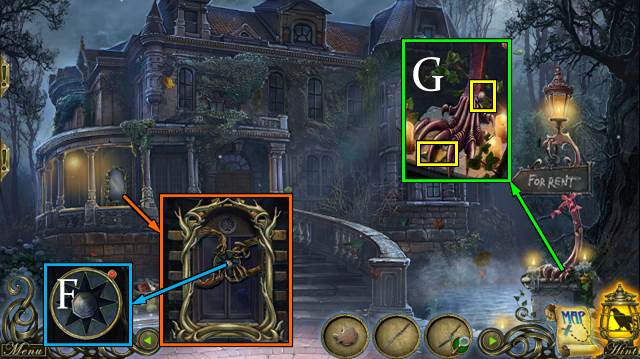
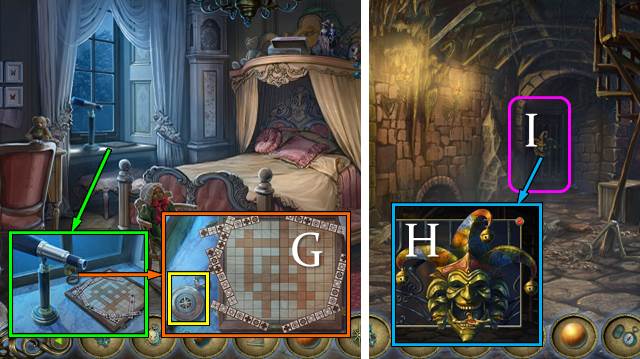
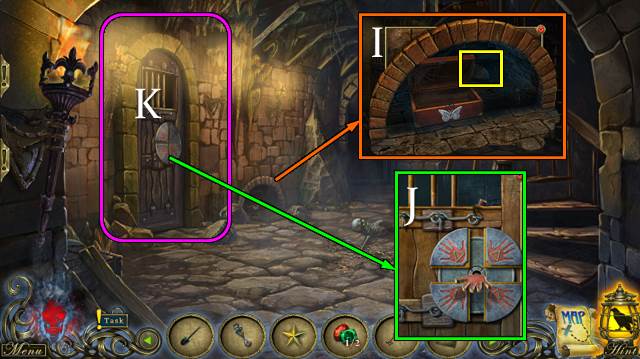
- Place STAR PENDANT (I); go (J).
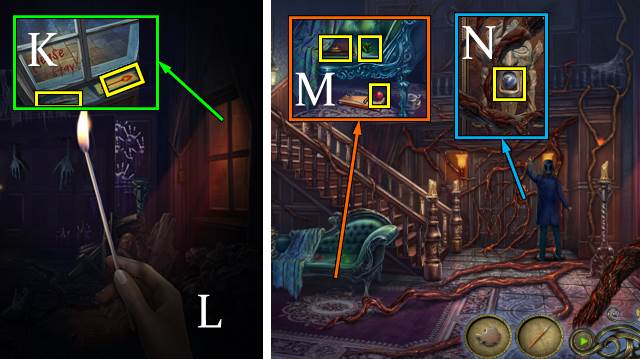
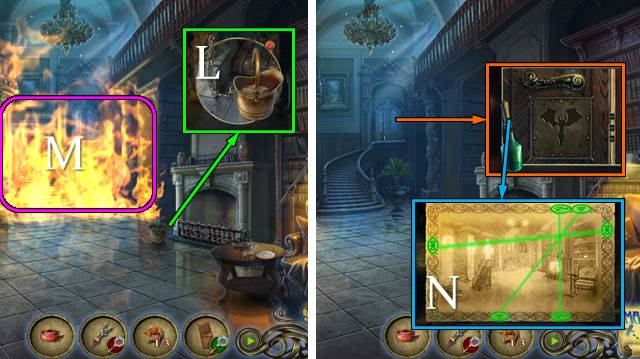
- Take MATCHBOX and PENCIL (K).
- Take BURNING MATCH from MATCHBOX.
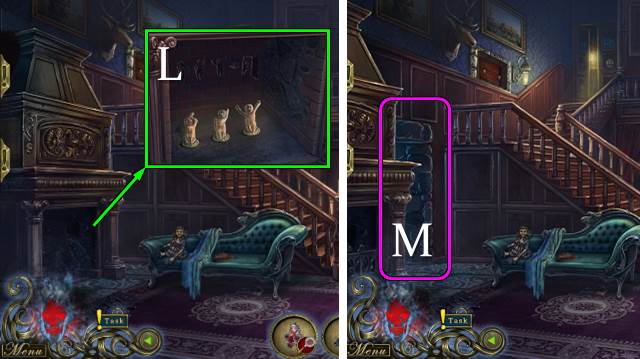
- Use BURNING MATCH (L).
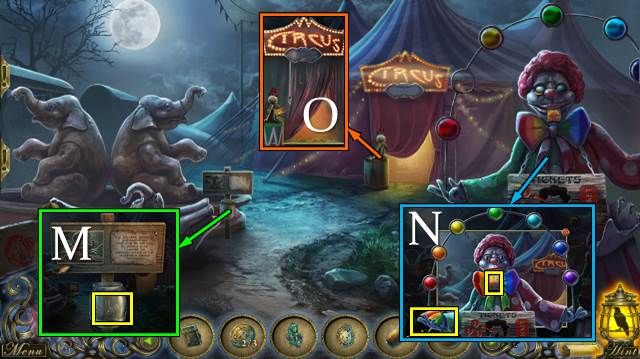
- Take DICE 1/2 and RIBBON. Use PENCIL; take BALL 1/2 (M).
- Take BALL 2/2 (N).
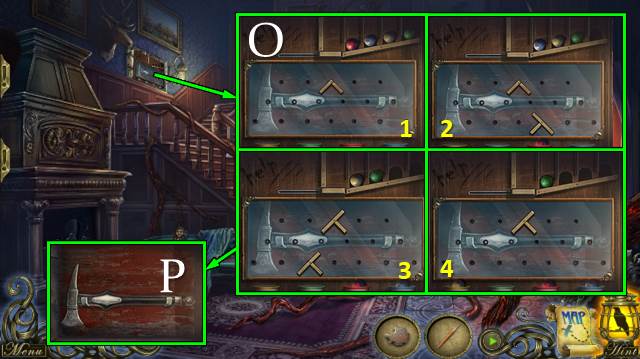
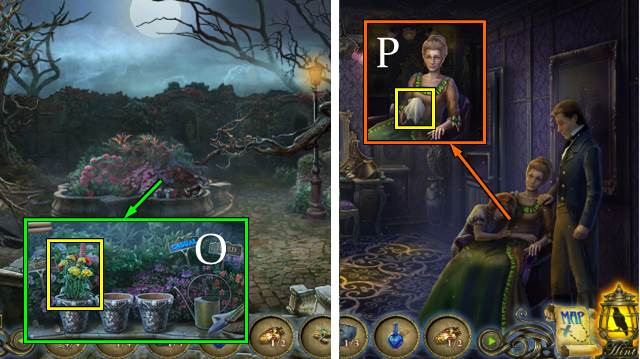
- Place BALL (O).
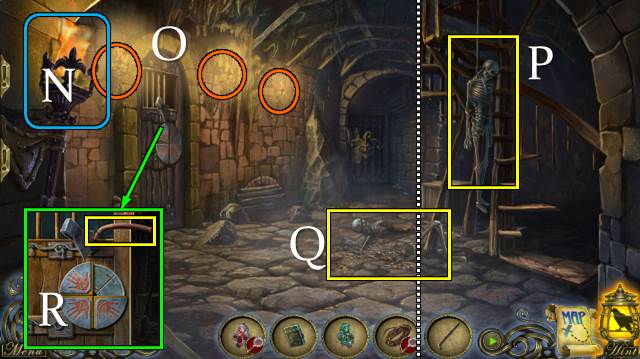
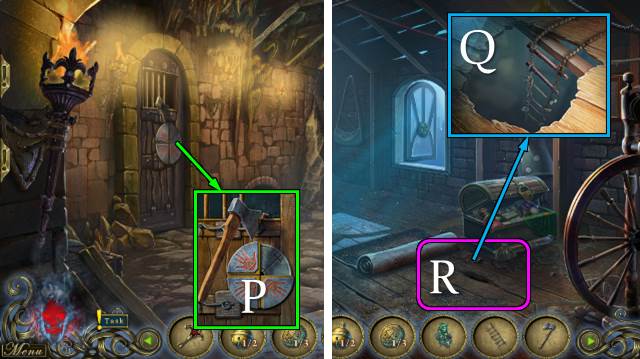
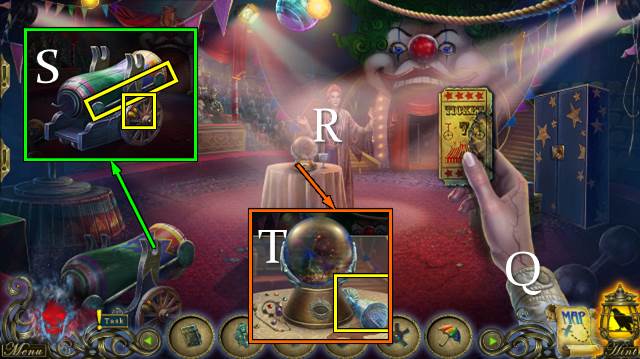
- Take AXE (P).
- Use AXE (Q).
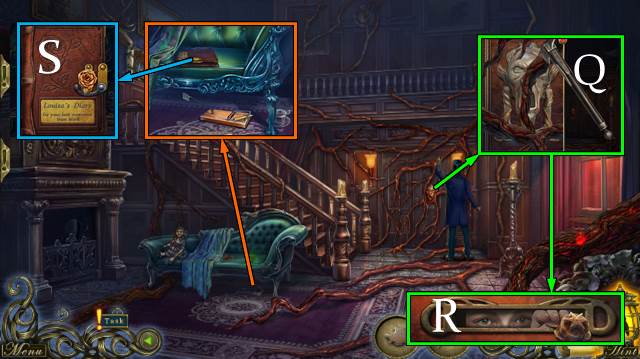
- Take DIARY KEY (R).
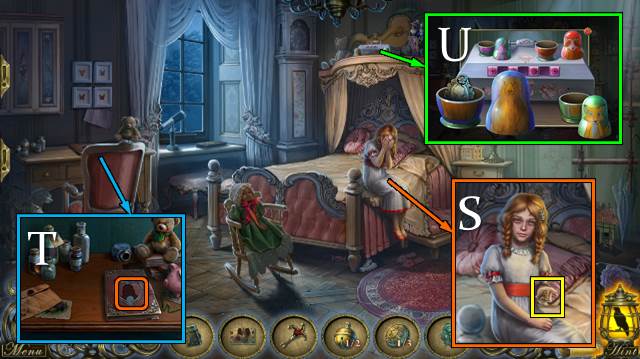
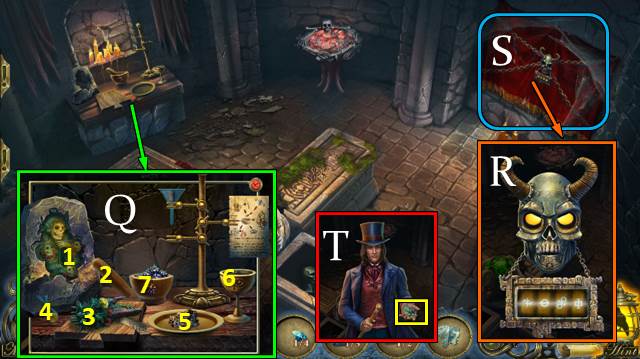
- Use DIARY KEY (S); take CODE.
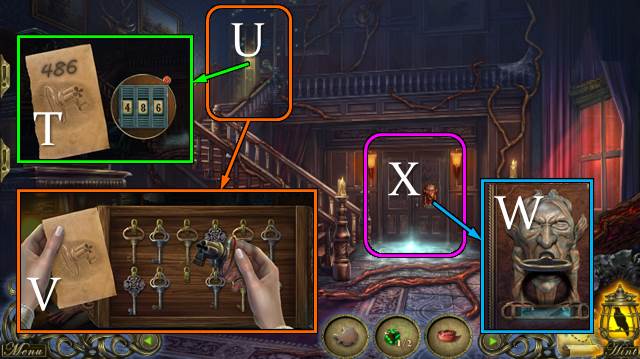
- Place CODE; enter 486 (T).
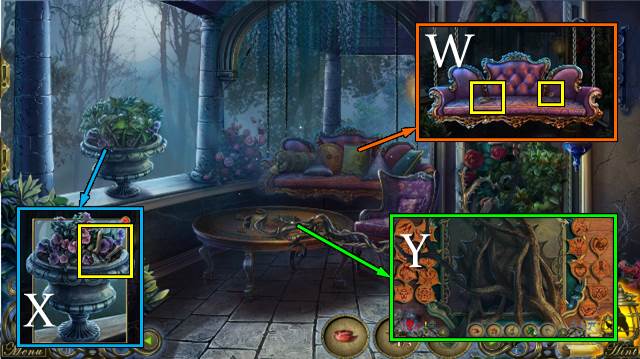
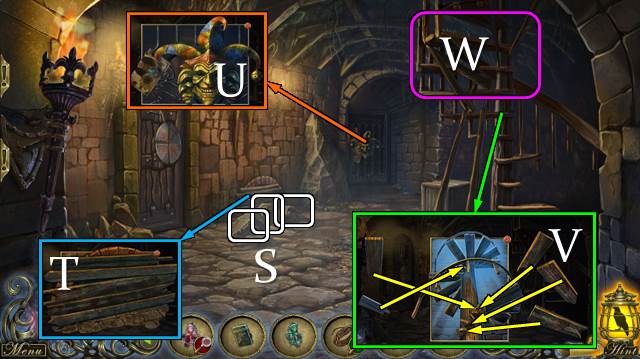
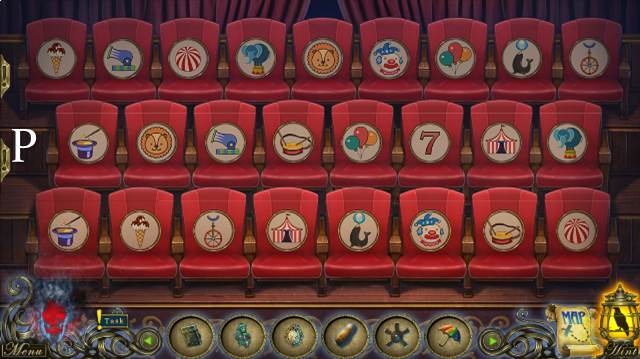
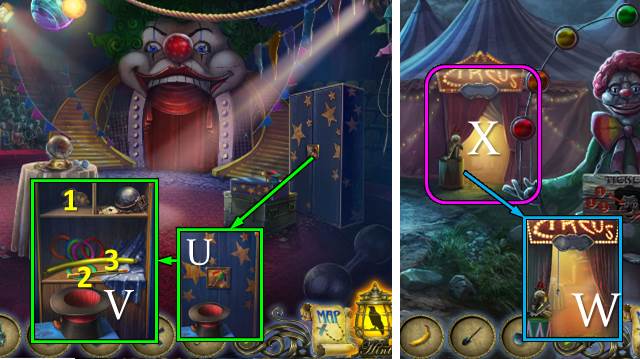
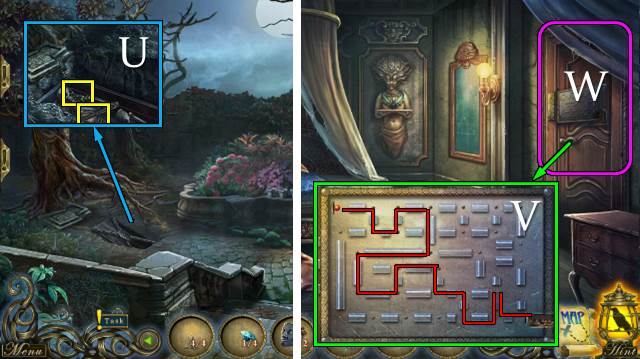
- Play HOP (U); puzzle (V). Receive TERRACE KEY.
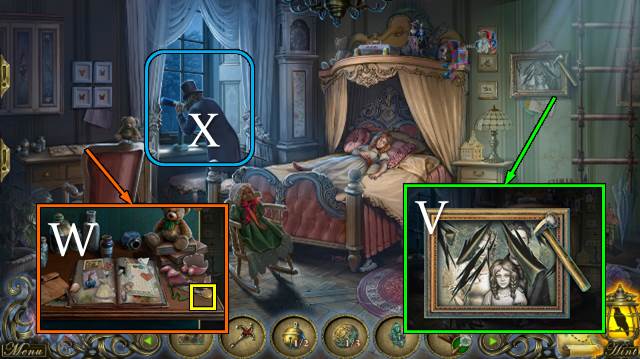
- Use TERRACE KEY (W).
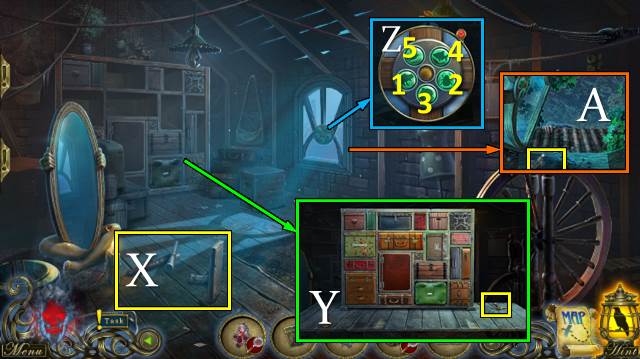
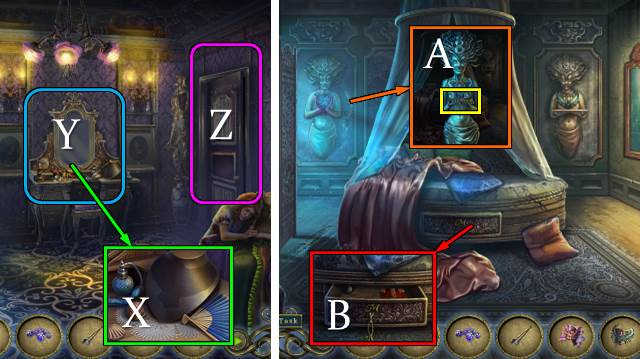
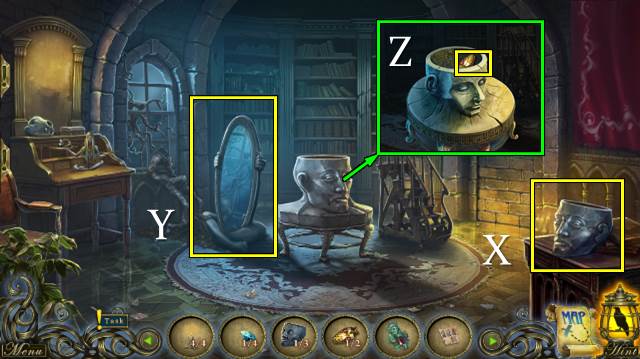
- Go (X).
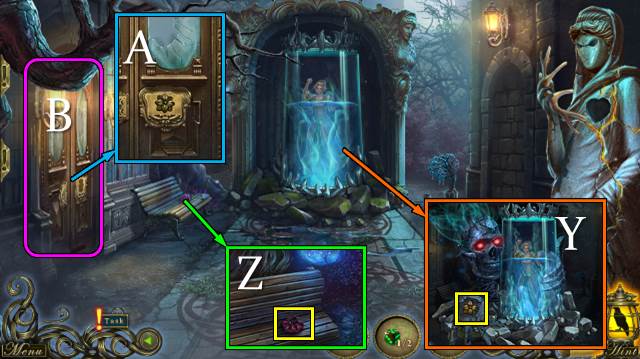
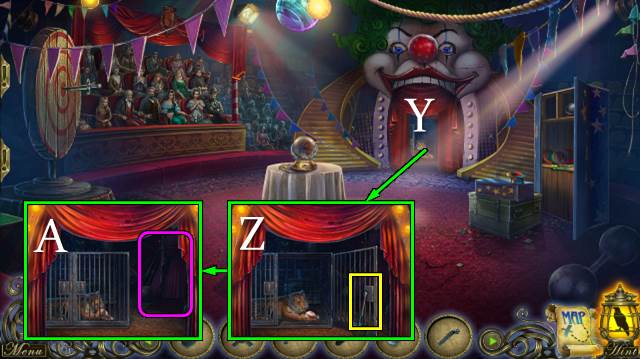
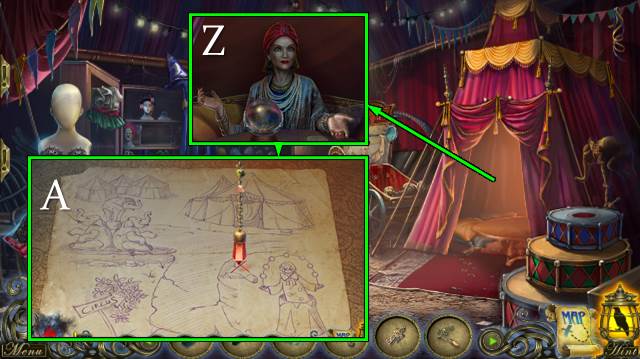
- Talk; take FLOWER EMBLEM (Y).
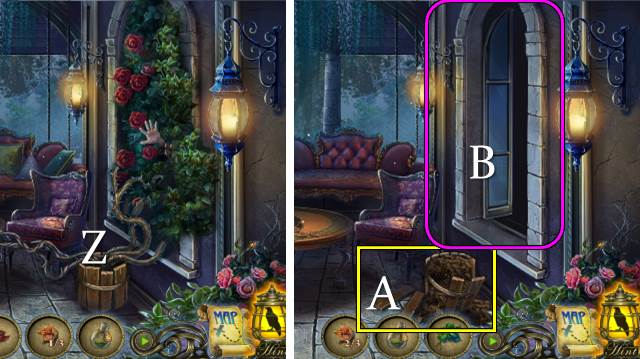
- Take POUCH (Z).
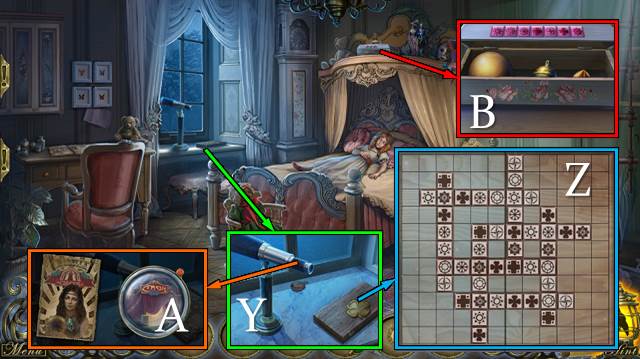
- Place FLOWER EMBLEM (A).
- Go (B).
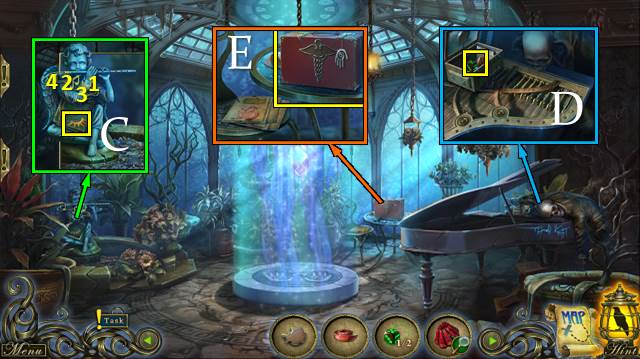
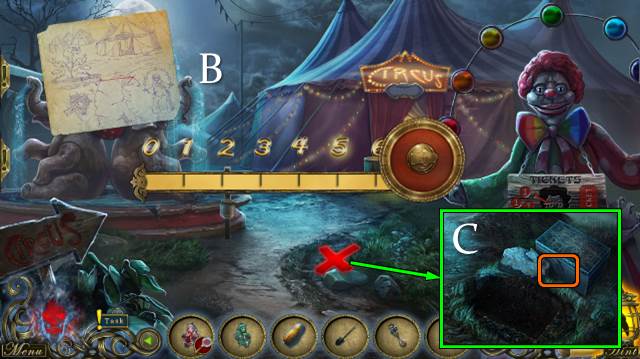
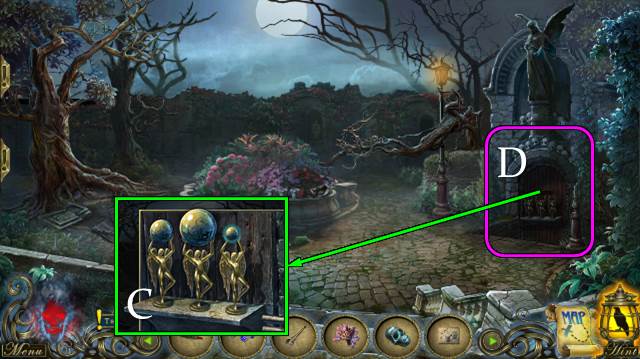
- Select 1-2-3-4; take SUNRAYS (C).
- Take DICE 2/2 (D).
- Take BROKEN BAT EMBLEM from POUCH. Place DICE; take HAND SYMBOL 1/2.
- Take FIRST AID KIT (E).
- HAND SYMBOL 2/2 from FIRST AID KIT.
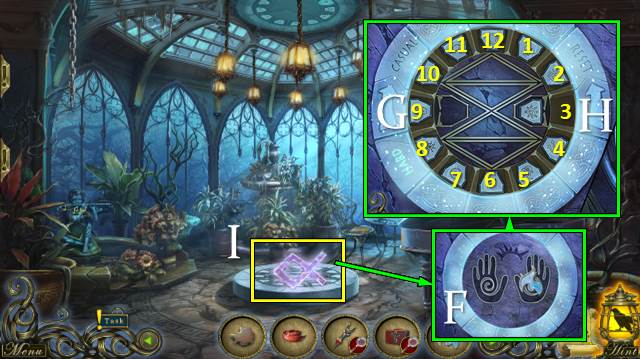
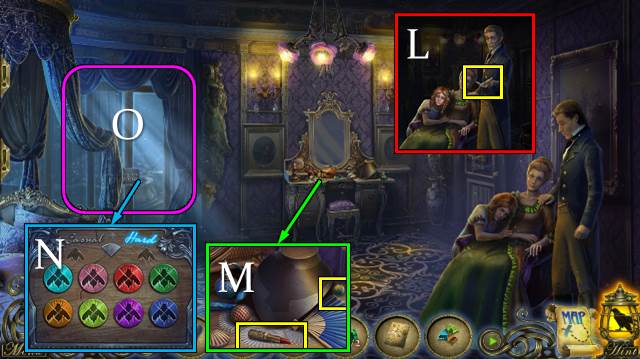
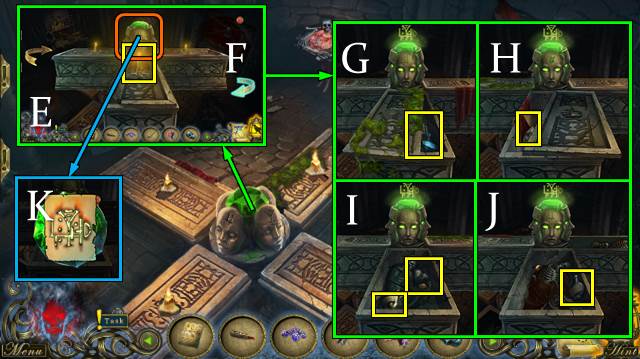
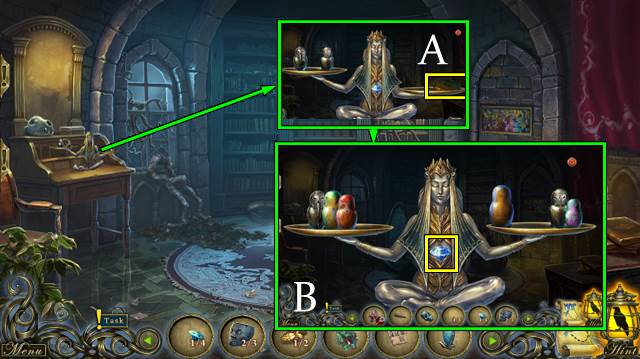
- Take FIRE RUNE; place HAND SYMBOL and SUNRAYS (F).
- Casual solution: G-(8-4)-(4-10)-(2-8)-(8-4)-G.
- Hard solution: Gx3-(4-6)-Hx2-(10-2)-Hx2-(6-8)-Gx4-(4-10)-H.
- Take LOUISA'S SOUL MARK (I).
- Walk down.

- Place LOUISA'S SOUL MARK (J).
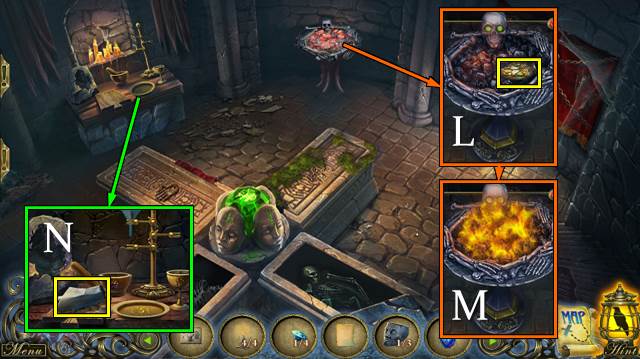
- Use rock (K).
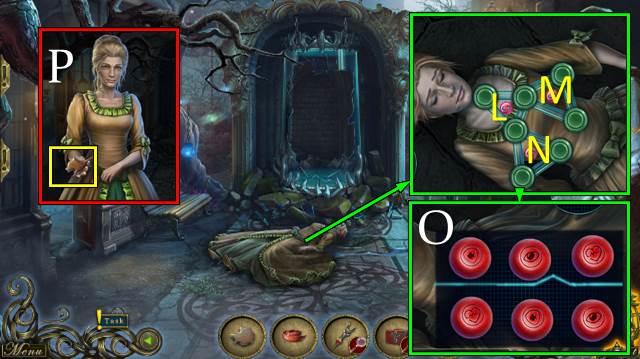
- Solution 1: L-M-L-M-L-L-N-L-N-L.
- Solution 2 (O).
- Take WOODEN PART (P).
- Take HEART (Q).
- Place HEART; take WOODEN PART (R).
- Place WOODEN PART x3 (S).
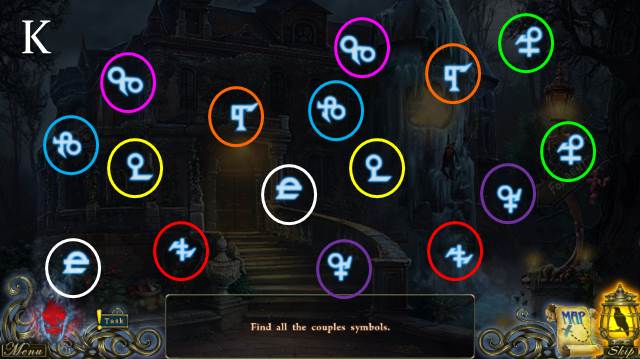
- Solution: 1-U-1-2xV-2-W-2xV-2-Y-3xX-3-3xX-3-A-Z-4-Z-4.
- Go (B).
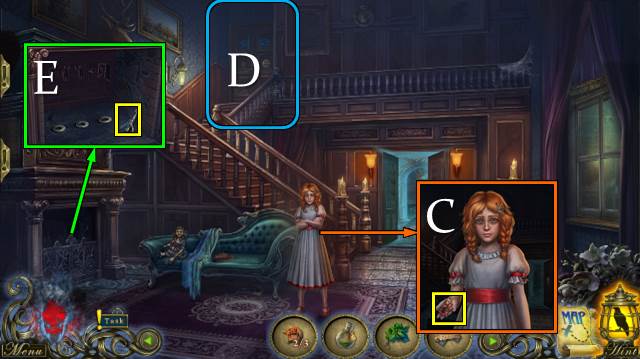
- Talk.
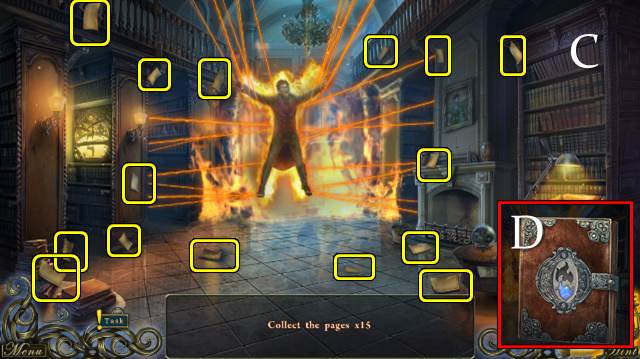
- Find pages (C).
- Place FIRE RUNE (D).
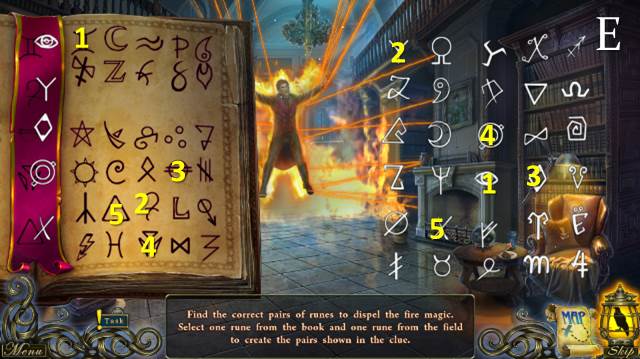
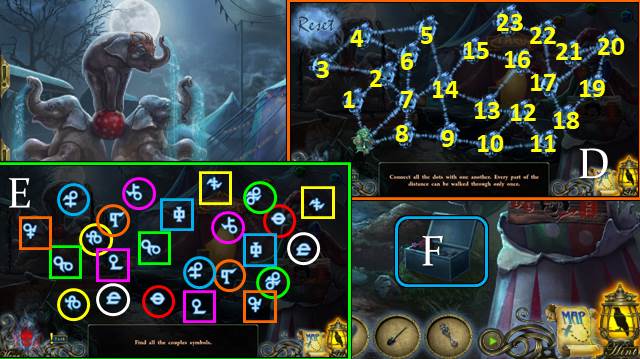
- Find pairs (E).
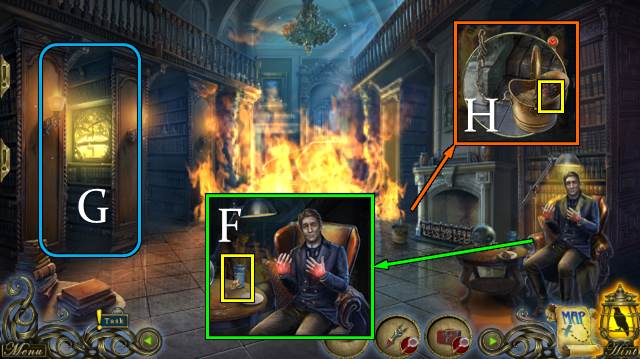
- Talk; take PUZZLE TOKEN and GLASS WITH WATER (F).
- Play HOP (G); receive LIZARD HEAD 1/2.
- Take LIZARD HEAD 2/2 (H).
- Place LIZARD HEAD; take CADUCEUS (I).
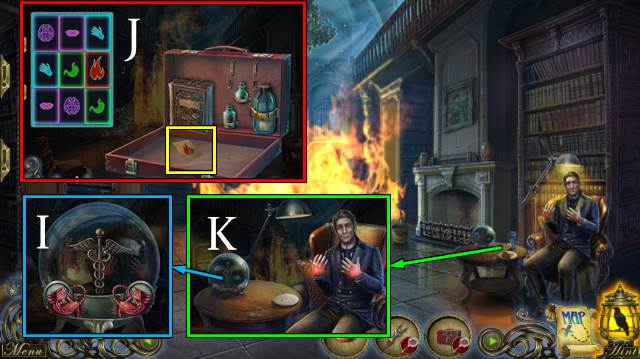
- CADUCEUS on FIRST AID KIT; take BANDAGE.
- Match pairs; take MEDICINAL POWDER (J).
- GLASS WITH WATER and MEDICINAL POWDER on BANDAGE. Powder then bandage in glass; take BANDAGE WITH OINTMENT.
- Offer BANDAGE WITH OINTMENT (K).
- Receive DR. MCDOUGALL'S FILE.
- Take SAW from DR. MCDOUGALL'S FILE.
- Use SAW; take BUCKET WITH SAND (L).
- Use BUCKET WITH SAND (M).
- Select pairs (N).
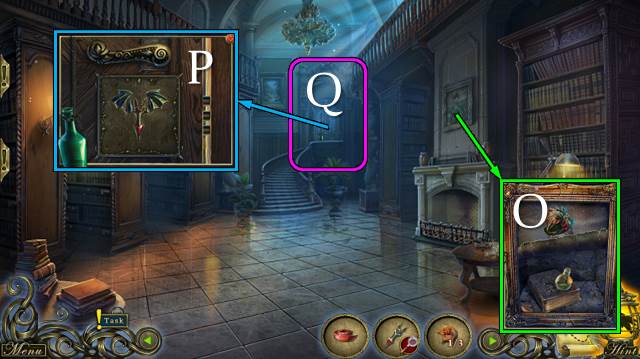
- Move painting; take FUEL, AMULET OF DEATH and BAT WINGS (O).
- BAT WINGS on BROKEN BAT EMBLEM; take BAT EMBLEM.
- Place BAT EMBLEM (P).
- Go (Q).
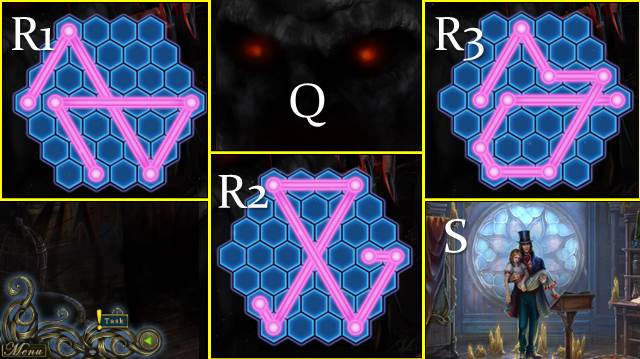
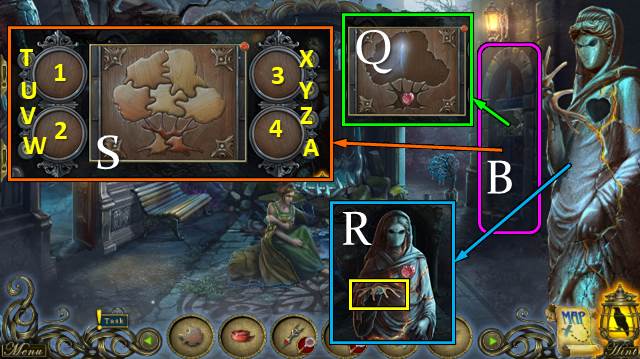
- Select AMULET OF DEATH (Q).
- Solution (R1-3).
- Talk (S).
Chapter 2: Possessed
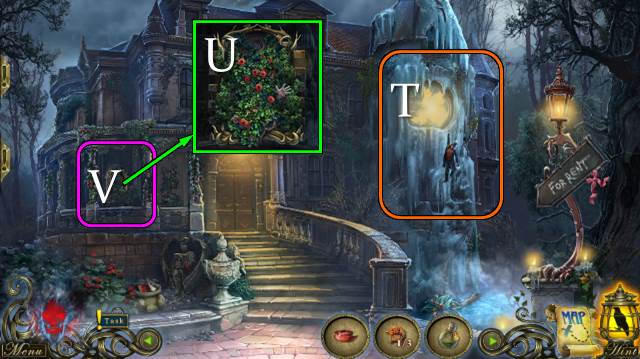
- Talk (T).
- Inspect (U).
- Go (V).
- Remove cushions in pairs; take PUZZLE TOKEN 2/3 and GARDEN GLOVES (W).
- Take NETTLES with GARDEN GLOVE; take SECATEURS (X).
- Arrange NETTLES and place RIBBON; take IMPROVISED BROOM.
- Use SECATEURS (Y).
- Use SECATEURS twice (Z).
- Take BOARDS (A).
- Go (B).
- Talk; take AMULET OF LIFE (C).
- Play HOP (D); receive PUZZLE TOKEN 3/3.
- Use IMPROVISED BROOM; take MARTYR FIGURINE 1/3 (E).
- Walk down.

- Place PUZZLE TOKEN; solution (F).
- Take LIGHTER and MARTYR FIGURINE 2/3 (G).
- Walk down.
- Place BOARDS, FUEL and LIGHTER; take AMULET OF DEATH and MARTYR FIGURINE 3/3 (H).
- Use AMULET OF DEATH (I).
- Solution (J).
- Solution 2 (K).
- Go left and right.
- Place and rearrange MARTYR FIGURINE (L).
- Go (M).
- Use LIGHTER (N).
- Take torch and light torches (O).
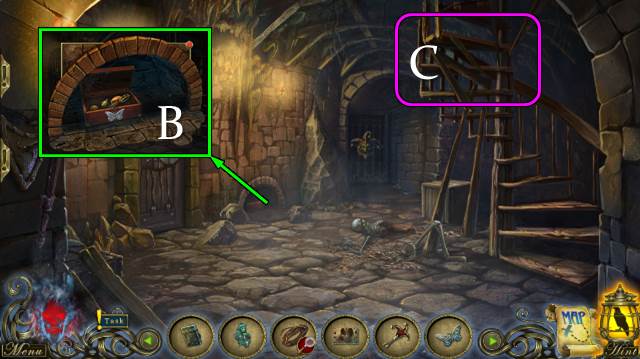
- Take ROPE (P).
- Take BONES (Q).
- Take CROWBAR (R).
- Move stones (S).
- Take BOARDS with CROWBAR (T).
- Move papers; take PLAYBILL SCRAP (U).
- Place BOARDS (V).
- Go (W).
- Take WOODEN LEGS (X).
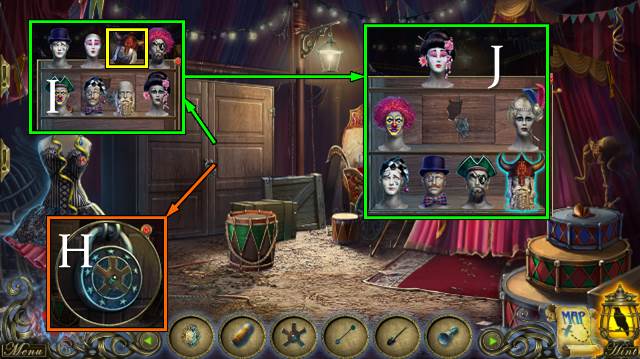
- Place cases on shelves; take HARLEQUIN KEY (Y).
- Select 1-2-3-4-5 (Z).
- Take BUTTERFLY EMBLEM (A).
- Walk down.
- Place BUTTERFLY EMBLEM; take SCISSORS, BELL 1/2 and COIN (B).
- Go (C).
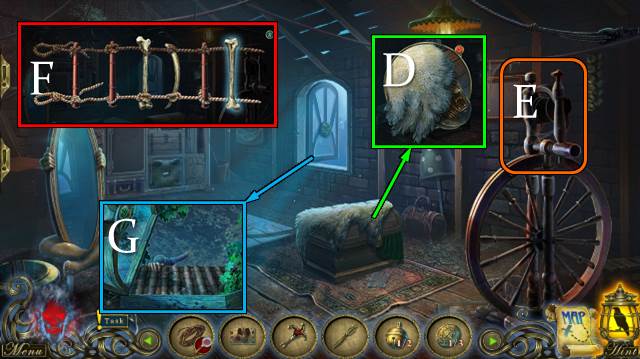
- Take WOOL with SCISSORS (D).
- Place WOOL (E); receive YARN.
- Turn YARN into ROPE.
- BONES, WOODEN LEGS and ROPE on ROPE. Restore ROPE LADDER (F).
- Place ROPE LADDER (G).
- Offer AMULET OF DEATH (H).
- Talk (I).
- Take AMULET OF DEATH (H).
- Take ROPE LADDER (J).
- Move chest (K).

- Move rug (L).
- Take CHEST KEY; look (M).
- Use CHEST KEY (N).
- Play HOP (O); receive AXE HANDLE.
- Walk down.
- Place AXE HANDLE; take AXE (P).
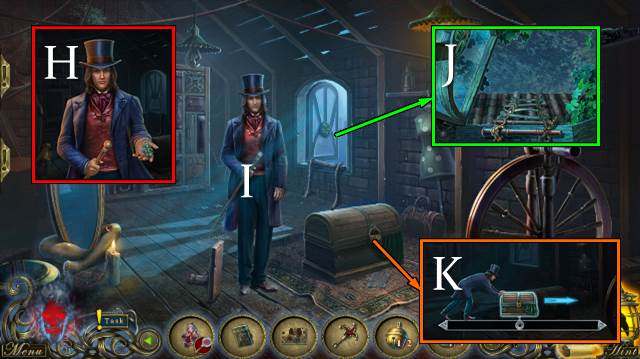
- Go up.
- Use AXE and ROPE LADDER (Q).
- Go (R).
- Talk; take DIARY KEY (S).
- Place DIARY KEY (T).
- Play HOP; receive PLAYBILL SCRAP.
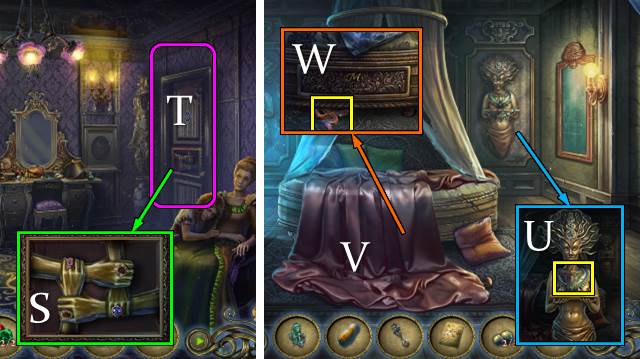
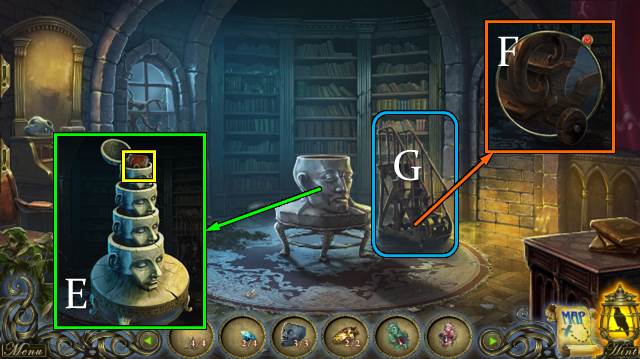
- Take BROOCH; restore NESTING DOLLS (U).
- Take HAMMER (V).
- Use HAMMER; take COIN 2/3 (W).
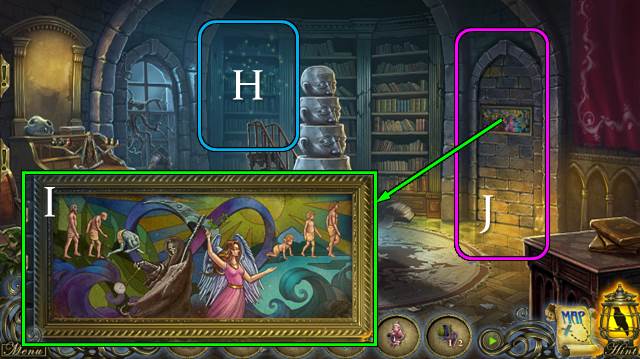
- Talk (X).
- Take CLOVER from PLAYBILL SCRAP.
- Place CLOVER (Y).
- Solution (Z). Take TILE WITH CODE.
- Place PLAYBILL SCRAP x2; take MAP (A).
- Place TILE WITH CODE. Enter code and take BALL and BELL 2/2 (B).
- Walk down twice.
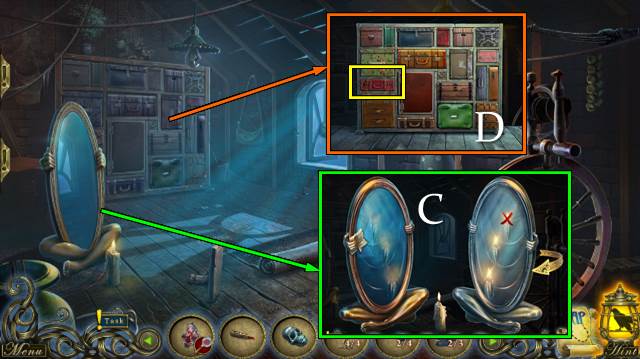
- Place BELL; take CORKSCREW (C).
- Go up and right.
- Move bottles and use CORKSCREW; receive AMMONIA (D).
- Use AMMONIA (E).
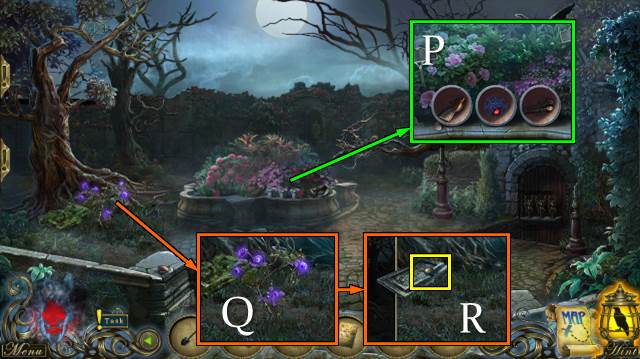
- Take COMPASS EMBLEM (F).
- Place COMPASS EMBLEM; take COMPASS (G).
- Walk down twice.
- Use HARLEQUIN KEY (H).
- Go (I).
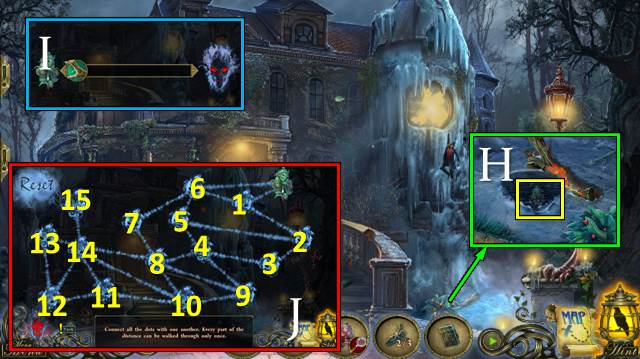
- Place MAP and COMPASS.
- Solution: K-K-L-J-L-L.
Chapter 3: Fortune Telling
- Take CLOSET EMBLEM (M).
- Place BALL and rearrange balls; receive COIN 3/3. Place COIN and take TICKET and UMBRELLA EMBLEM (N).
- Offer TICKET; receive PUNCHED TICKET. Go (O).
- Use LIGHTER (P).
- Find pairs.
- Select PUNCHED TICKET (Q).
- Talk (R).
- Take BARBELL and RUBBER DUCK (S).
- Take GLASS (T).
- Use UMBRELLA EMBLEM (U).
- Move rabbit (1) and use wand (2)(V).
- Move balloon (3), use wand and take BANANA.
- Place RUBBER DUCK, use wand and take FRIED DUCK.
- Walk down.
- Offer BANANA; receive CAGE HANDLE (W).
- Go (X).
- Open curtains (Y).
- Offer FRIED DUCK. Take SHOVEL (Z).
- Close cage; place CAGE HANDLE. Go (A).

- Use AMULET OF DEATH.
- Solution 1 (B).
- Solution 2 (C).
- Take EARRING and RULER (D).
- Take FEATHERS (E).
- Restore strongman and place BARBELL; receive CANNONBALL KEY. Use CANNONBALL KEY and take CANNONBALL 1/3 (F).
- Place BROOCH and FEATHERS; take HEADDRESS (G).
- Place CLOSET EMBLEM (H).
- Move helmet; take CANNONBALL 2/3 (I).
- Place HEADDRESS and restore heads (J).
- Walk down.
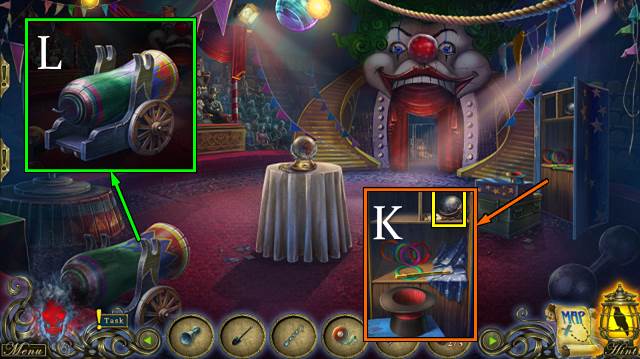
- Use CANNONBALL KEY and take CANNONBALL 3/3 (K).
- Place CANNONBALL and use LIGHTER (L).
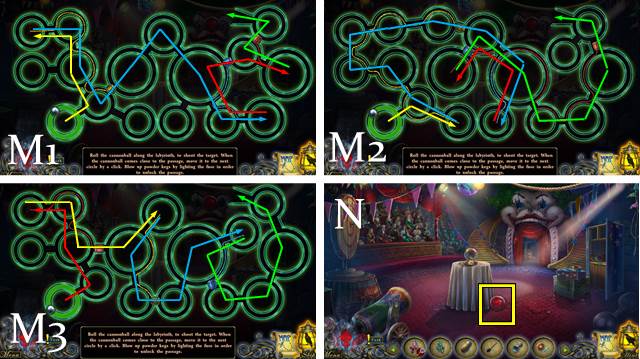
- Move ball through maze (M1-3).
- Take ELEPHANT BALL (N).
- Walk down.
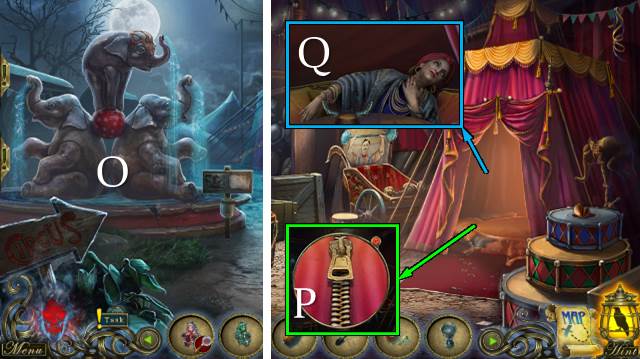
- Place ELEPHANT BALL and elephant. Move trunks (O).
- Use GLASS; receive GLASS WITH WATER.
- Go forward twice.
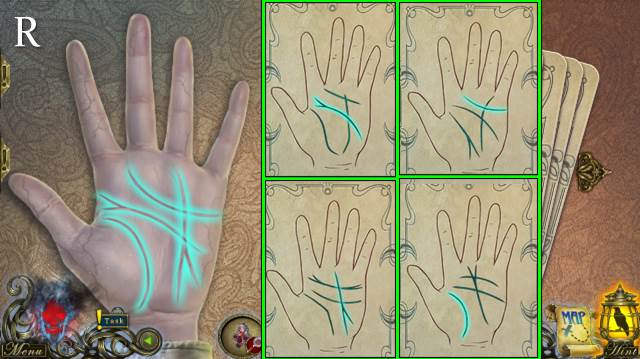
- Open zipper with EARRING (P).
- Talk; offer GLASS WITH WATER (Q).
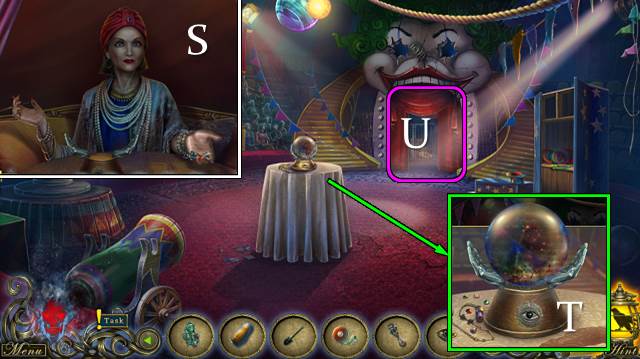
- Read palm (R).
- Take HOURGLASS (S).
- Take EYE EMBLEM (S).
- Walk down.
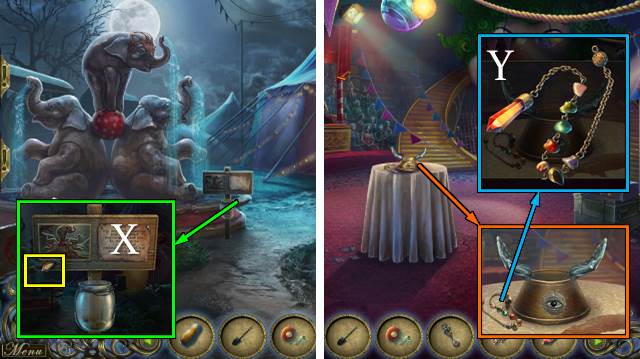
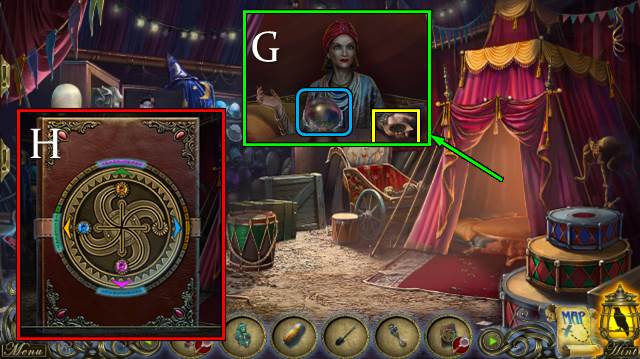
- Place EYE EMBLEM; take CRYSTAL BALL and MASK (T).
- Go (U).

- Place MASK; take STAR (V).
- Place CRYSTAL BALL; play HOP (W).
- Take PIN.
- Walk down twice.
- Take NEEDLE and CHEST EMBLEM from PIN.
- Take CRYSTAL with NEEDLE (X).
- Go forward.
- Restore pendulum and place CRYSTAL; take FORTUNE-TELLING PENDULUM (Y).
- Go forward.
- Offer FORTUNE-TELLING PENDULUM (Z).
- Receive MAP (A).
- Walk down twice.
- Place MAP and RULER (B).
- Use SHOVEL; place CHEST EMBLEM (C).
- Select AMULET OF DEATH.
- Solution 1 (D).
- Solution 2 (E).
- Play HOP (F); receive DIARY.
- Go forward twice.
- Play HOP (G).
- Take DIARY CODE.
- DIARY CODE on DIARY (H).
- Take GEM 1/2, HAND-KEY and RECIPE.
- Walk down three times.
- Place STAR; take PLATE (I).
- Place PLATE and HAND KEY (J).
- Go (K).
Chapter 4: Exorcism
- Talk; take COLORED TILES (L).
- Take SPHERE 1/3 and LIPSTICK (M).
- Place COLORED TILES. Solution (N).
- Go (O).
- Take SCRAPER, GEM 2/2 and TONGS (P).
- Take BERRIES and WATERING CAN (Q).
- Use SCRAPER; take SPHERE 2/3 (R).
- Walk down.
- Place GEM (S).
- Go (T).
- Take BROKEN NECKLACE (U).
- Move blanket (V).
- Take FEATHERED MASK (W).
- Walk down.
- Place BROKEN NECKLACE (X).
- Play HOP (Y); receive NECKLACE.
- Go (Z).
- Place NECKLACE; take BED KEY (A).
- Use BED KEY. Take SPHERE 3/3, open diary and take SKULL KEY and FLOWER INSTRUCTIONS (B).
- Go down and left.
- Place SPHERE (C).
- Go (D).
- At each turn, light eyes and take CANDLE 1-4/4 (E).
- Take CROSS, turn twice (F).
- Place CROSS. Take CRYSTAL 1/4 and PALM EMBLEM (G).
- Turn (F); place PALM EMBLEM. Take STONE EYE and PARCHMENT (H).
- Turn twice (F); place STONE EYE. Take STONE HEART and STONE HEAD (I).
- Turn (F); place STONE HEART. Take HEALING ELIXIR (J).
- Place PARCHMENT; take RUNE PICTURE (K).
- Take SNAKE HEAD with TONGS (L); use FEATHERED MASK.
- Use RUNE PICTURE; receive RUNE ASHES (M).
- Take BAG WITH SEEDS (N).
- Walk down.
- Take MAGIC SEEDS from BAG WITH SEEDS.
- Place WATERING CAN, FLOWER INSTRUCTIONS and MAGIC SEEDS (O). Solution is random.
- Take MAGIC HERBS.
- Walk down.
- Offer HEALING ELIXIR; take RESTORATIVE TEARS (P).
- Go left and right.
- Place RECIPE, BERRIES, HOURGLASS, AMULET OF DEATH, RUNE ASHES, MAGIC HERBS and RESTORATIVE TEARS (Q).
- Move vial (1), use pestle (2), chop and add herbs (3), use pestle, and add sand (4), ashes (5) and tears (6). Take mortar (7) and vial. Take amulet.
- Enter code (R).
- Play HOP (S); receive COFFIN KEY.
- Take AMULET OF DEATH (T).
- Walk down.
- Use SHOVEL and place COFFIN KEY; take BENT PIPE and MIRROR INSTRUCTIONS HALF (U).
- Walk down and right.
- Place BENT PIPE. Solution (V).
- Go (W).
- Take STONE HEAD 2/3 (X).
- Take MIRROR (Y).
- Take SNAKE HEAD 2/2 (Z).
- Take WHEEL (A).
- Place NESTING DOLLS and balance scales; take CRYSTAL 2/4 (B).
- Walk down three times and go right.
- Place MIRROR INSTRUCTIONS HALF, MIRROR and LIPSTICK. Turn (C).
- Take SUITCASE (D).
- SKULL EMBLEM on SUITCASE; take AMULET PART and STONE HEAD 3/3.
- AMULET PART on AMULET OF LIFE.
- Go down, left, right and right.
- Place STONE HEAD; take GRISWOLD'S DIARY (E).
- SCREW NUT and PICTURE PIECE 1/2 from GRISWOLD'S DIARY.
- Place WHEEL and SCREW NUT (F).
- Move ladder (G).
- Play HOP (H); receive AMULET DESTRUCTION SCHEME.
- PICTURE PIECE 2/2 from AMULET DESTRUCTION SCHEME.
- Place PICTURE PIECE; solution (I).
- Go (J).
- Place SNAKE HEAD (K).
- Turn sections; take WAND (L).
- CRYSTAL 3/4 and BROKEN WAND from WAND.
- Take CRYSTAL 4/4 with BROKEN WAND (M).

- Place AMULET DESTRUCTION SCHEME, AMULET OF DEATH, AMULET OF LIFE, CANDLES and CRYSTAL (N).
- Easy solution: red (up-right-up-rightx2), green (left-up), red (right-up), green (leftx2), red (down-leftx2-up-leftx2-upx2-left), green (down-left), red (left), green (rightx5-up), red (leftx3-right-up).
- Hard solution: red (up-right-up-rightx2-up-down-leftx2-up), green (leftx2-up), red (leftx2-upx3-down-right), green (right-downx2-right), red (upx2-right), green (upx2-rightx3-leftx2), red (down), green (rightx3-up-right-up).
- Congratulations, you have completed Dark Tales: Edgar Allan Poe's Morella.
Created at: 2018-01-14