

Walkthrough Menu
- General Tips
- Chapter 1: The Hermit
- Chapter 2: The Stone of Fire
- Chapter 3: The Island
- Chapter 4: Myrthe
General Tips
- This is the official guide for Darkness and Flame: Missing Memories.
- This guide will not mention when you have to zoom into a location; screenshots will show each zoom scene.
- The screenshots will show where to play Hidden-Object Puzzles (HOP).
- This guide will give step-by-step solutions for all puzzles that are not random. Read the instructions in the game for each puzzle.
- Inventory items marked with a green + symbol need to be combined with other items or otherwise altered.
Chapter 1: The Hermit
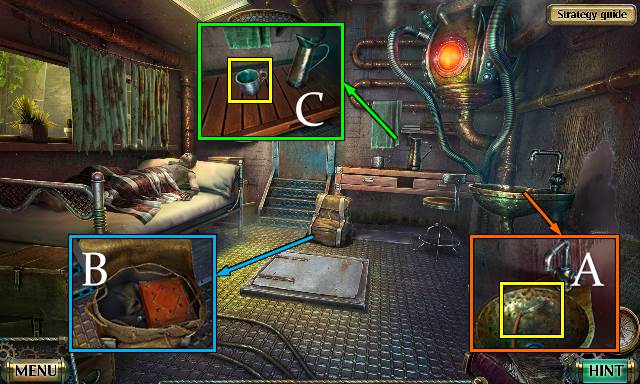
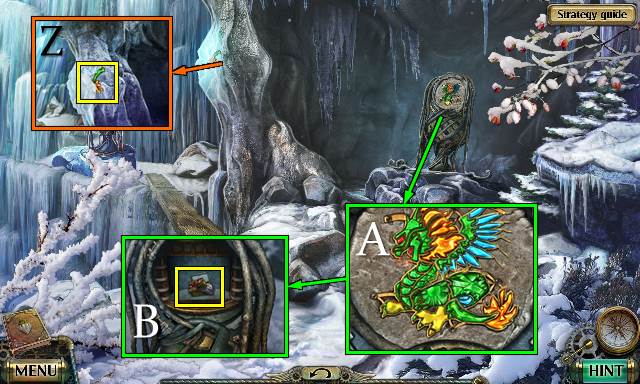
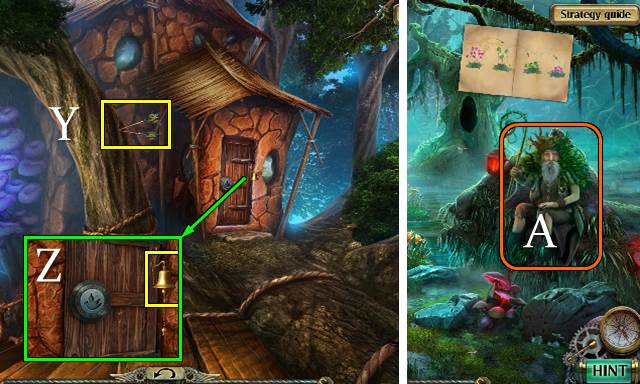
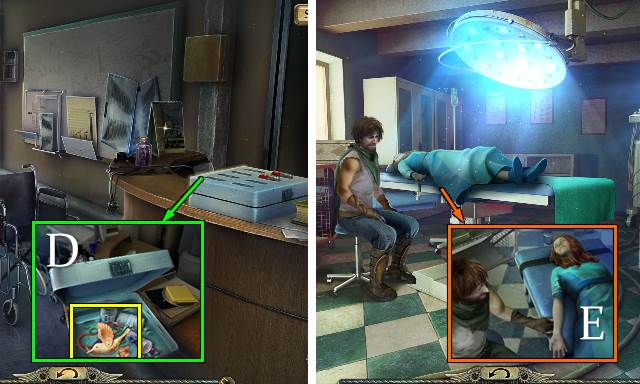
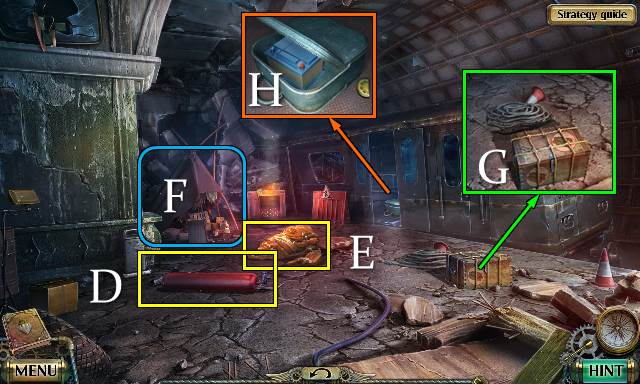
- Take RAZOR (A).
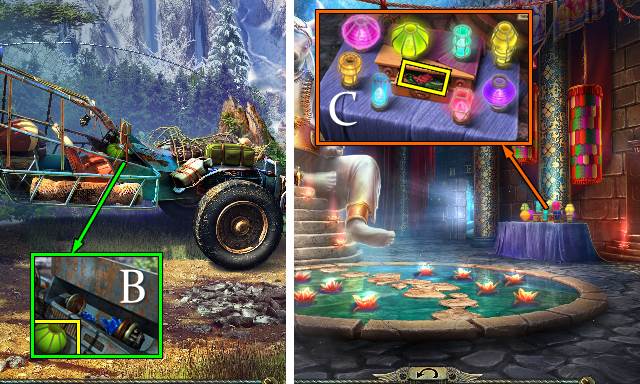
- Open backpack, use RAZOR and remove rope; take diary and VALVE (B).
- Take MUG (C).
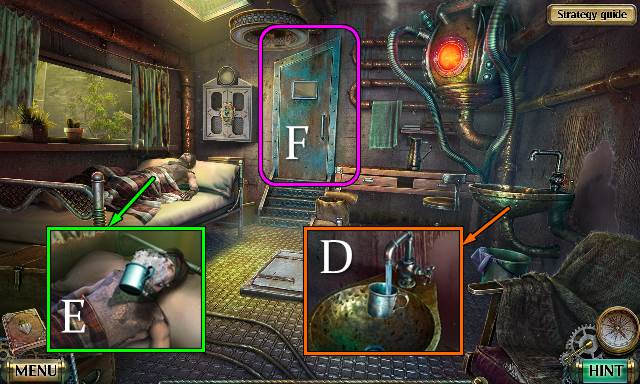
- Place VALVE and MUG; receive MUG OF WATER (D).
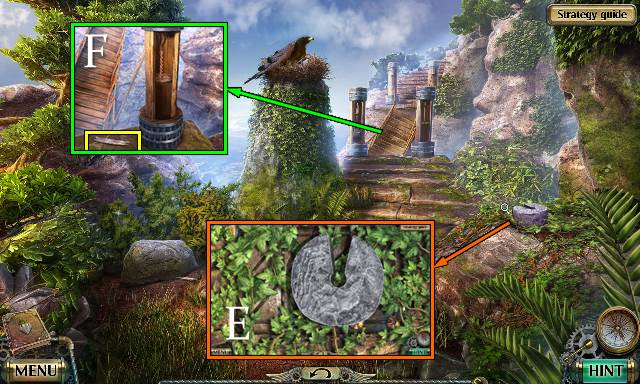
- Use MUG OF WATER (E).
- Open (F).
- Go forward and left.
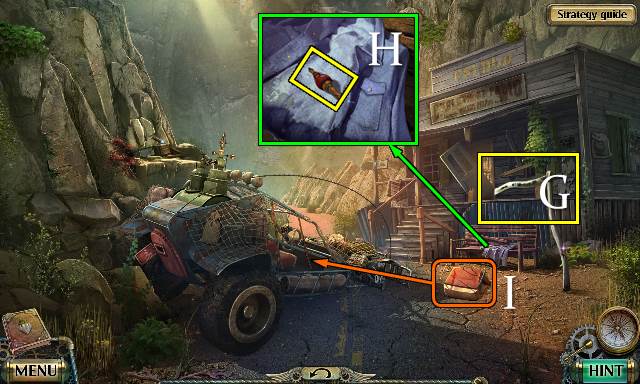
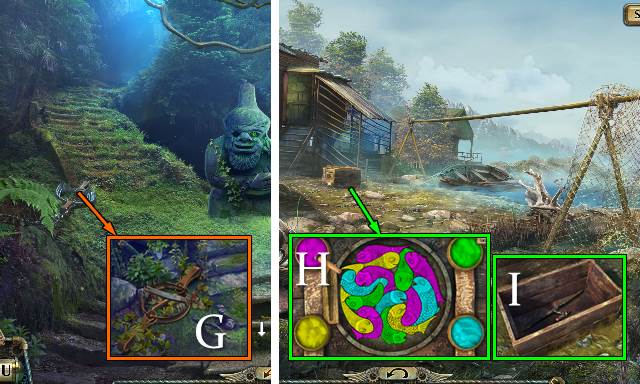
- Take ROAD SIGN FRAGMENT (G).
- Open jacket; take capsule and PIPE (H).
- Take and place seat (I).
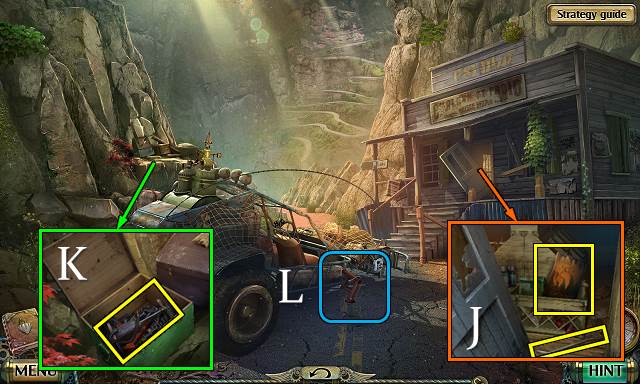
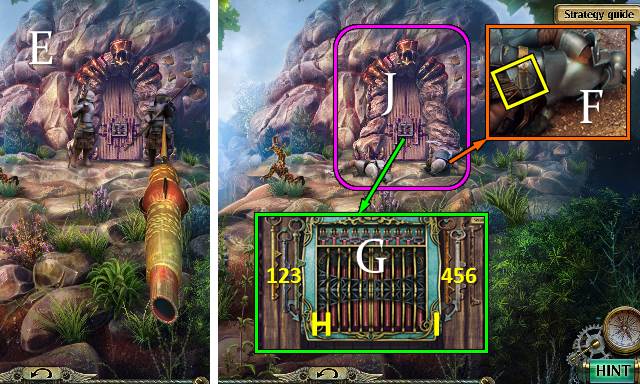
- Take CROWBAR and BAG OF CHARCOAL (J).
- Use PIPE; open crate and take PUMP and JACK (K).
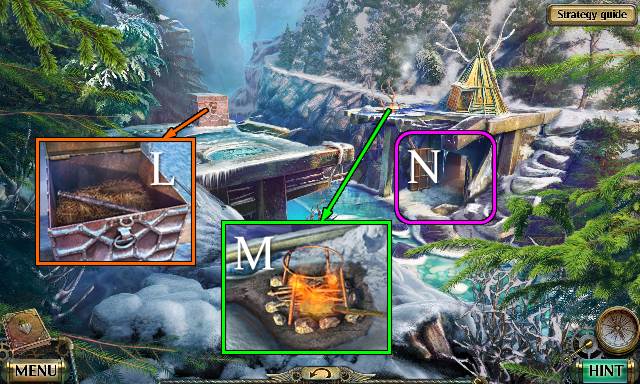
- Place JACK (L).
- Walk down.
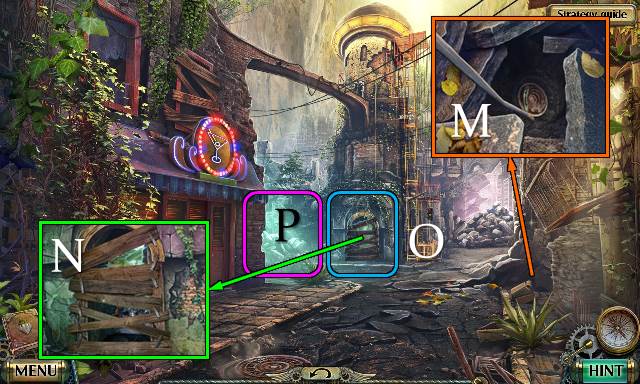
- Take FLAT TIRE with ROAD SIGN FRAGMENT (M).
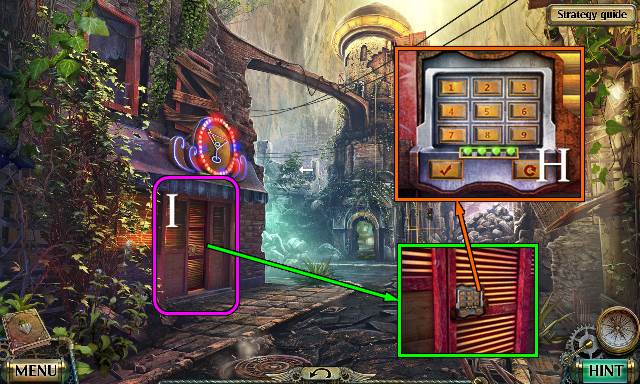
- Use CROWBAR (N).
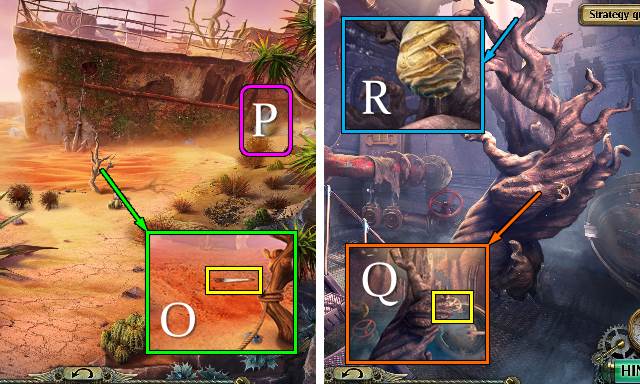
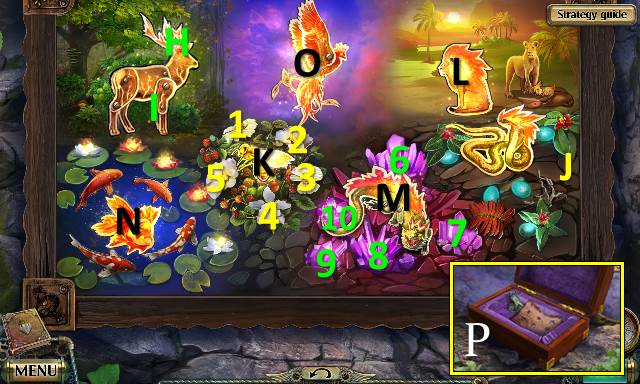
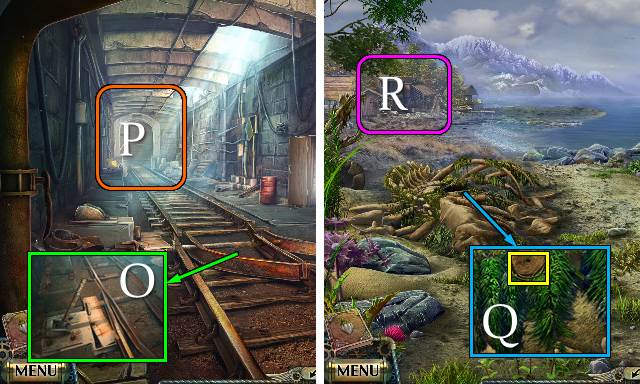
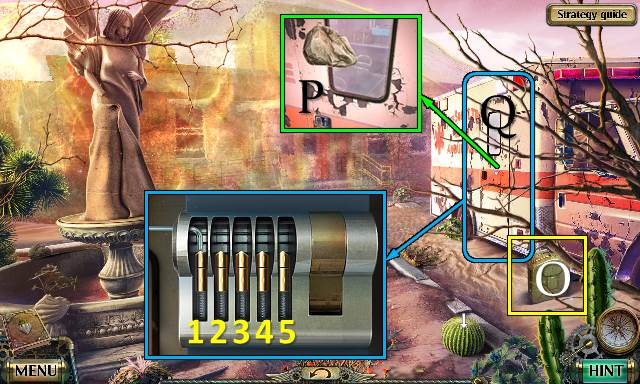
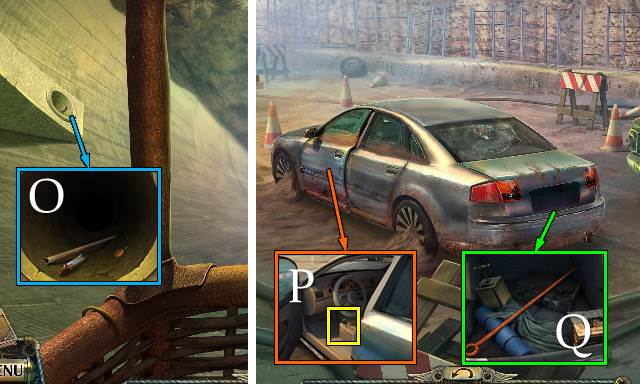
- Play HOP (O); receive UTILITY KNIFE.
- Go (P).
- Open BAG OF CHARCOAL with UTILITY KNIFE; take CHARCOAL.
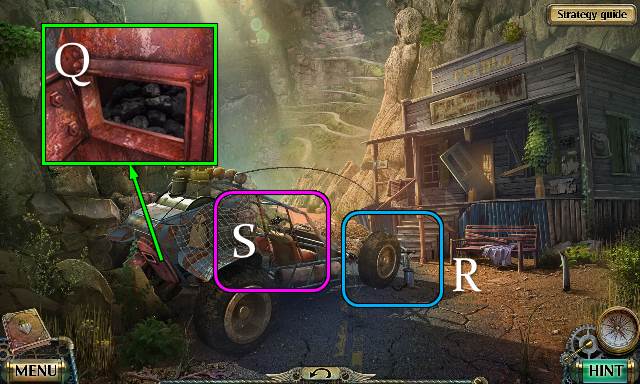
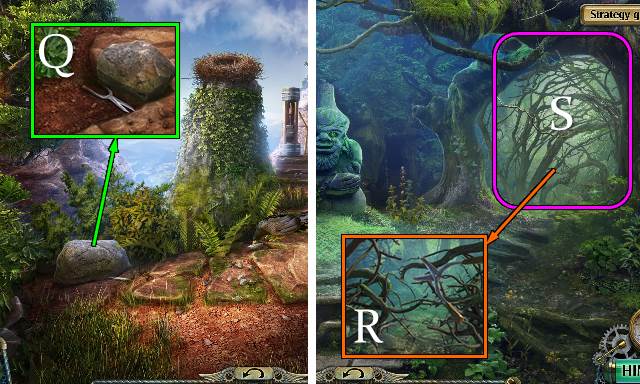
- Place CHARCOAL (Q).
- Place FLAT TIRE and use PUMP (R).
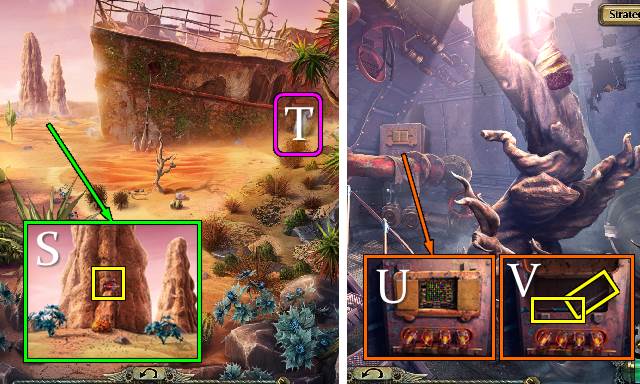
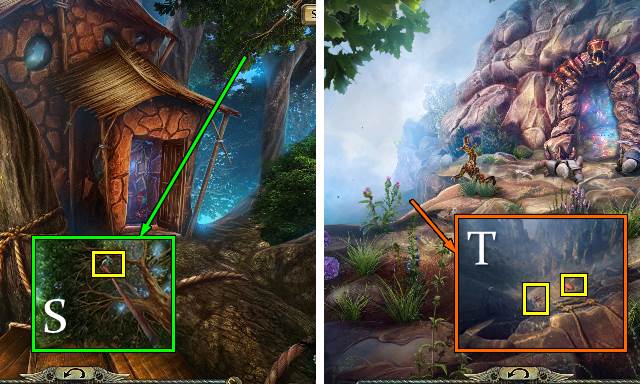
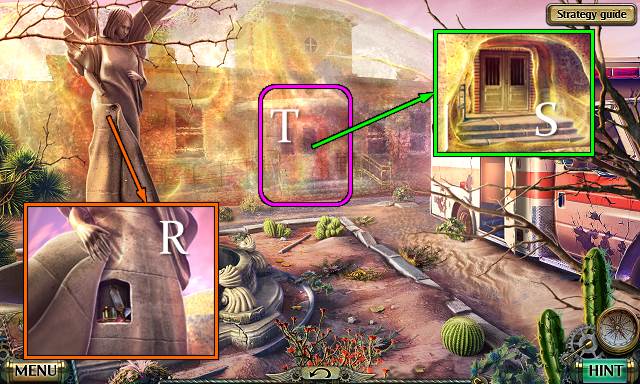
- Go (S).
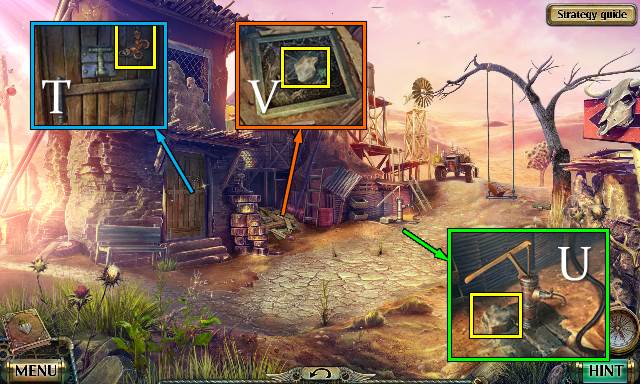
- Knock; take BUTTERFLY (T).
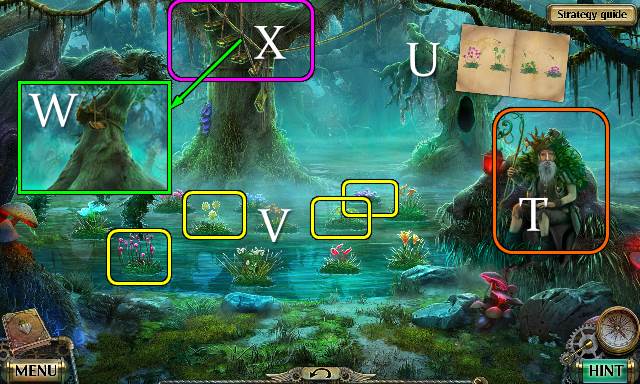
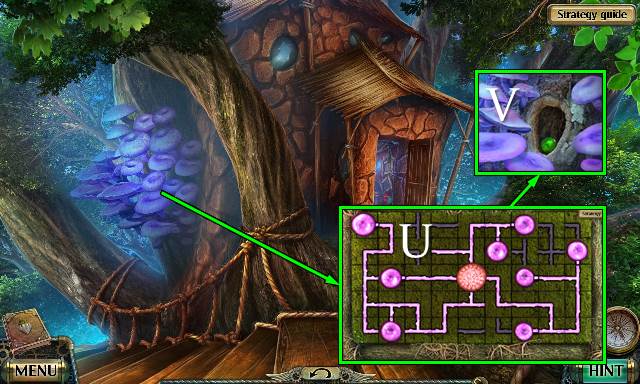
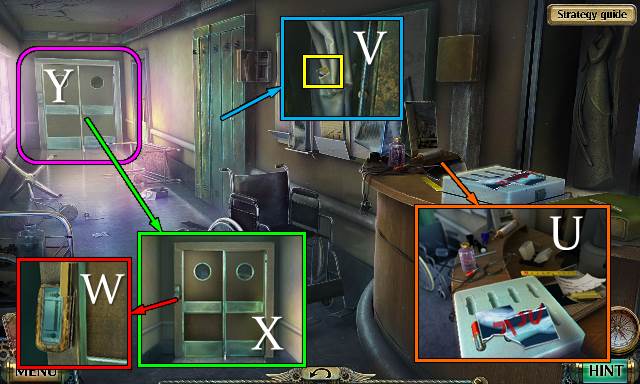
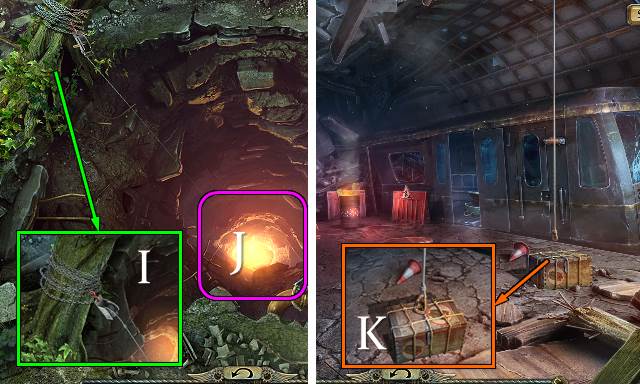
- Take STONE; attach hose (U).
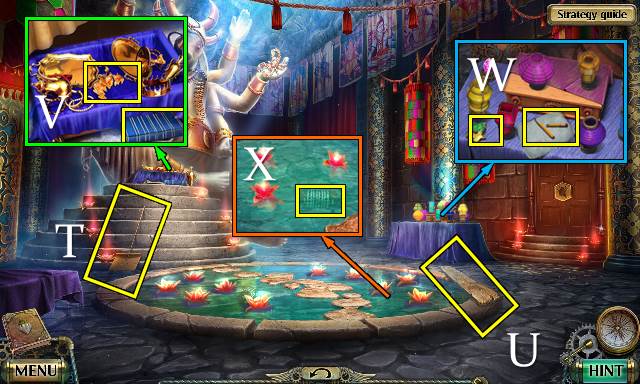
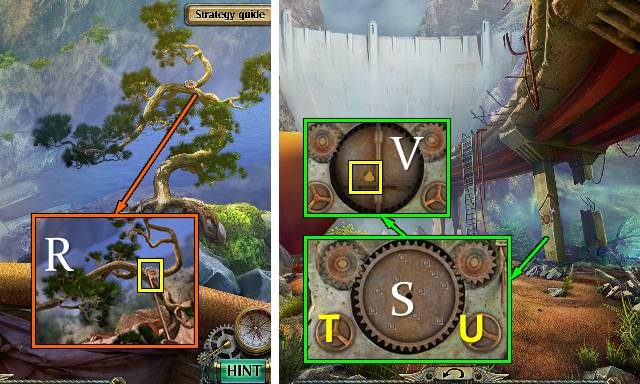
- Move boards; take STONE (V).
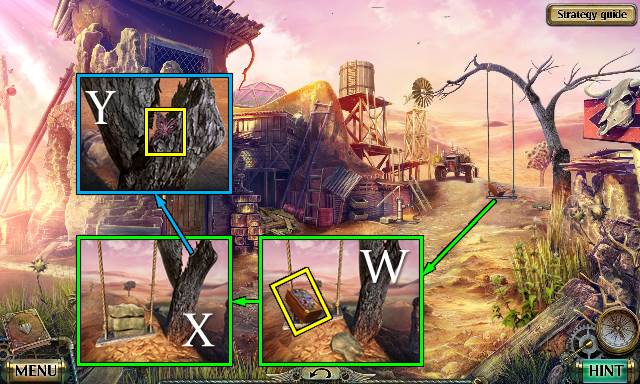
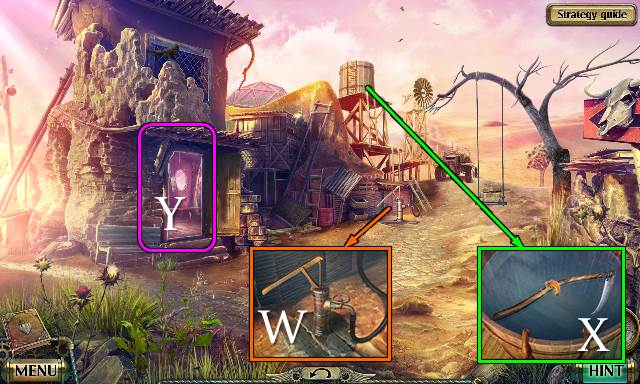
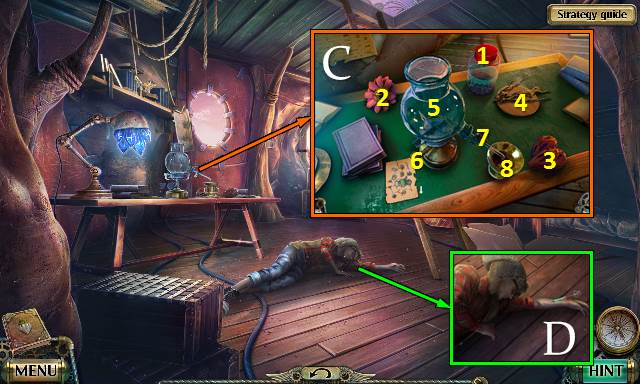
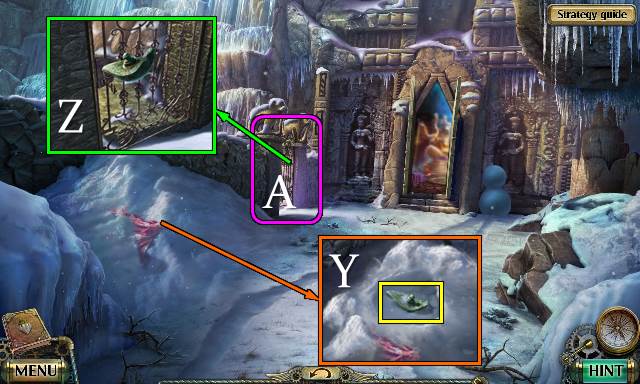
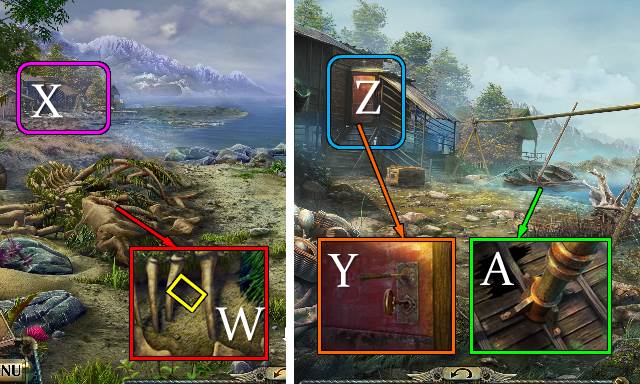
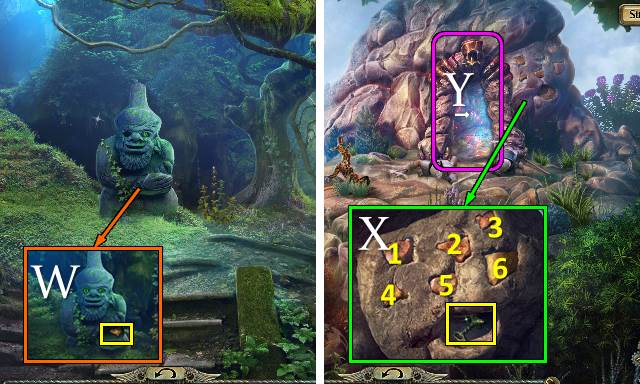
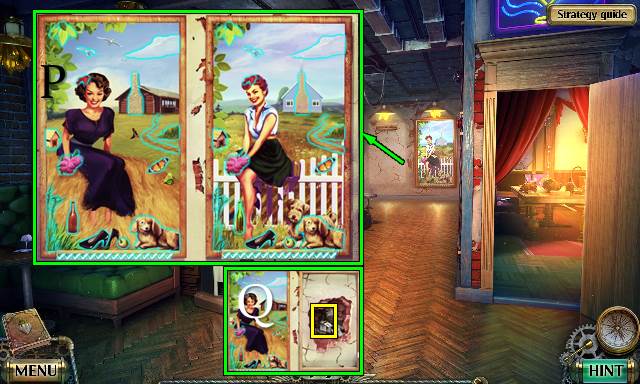
- Take CASKET; (W) place stone and two STONES (X). Take BUTTERFLY (Y).
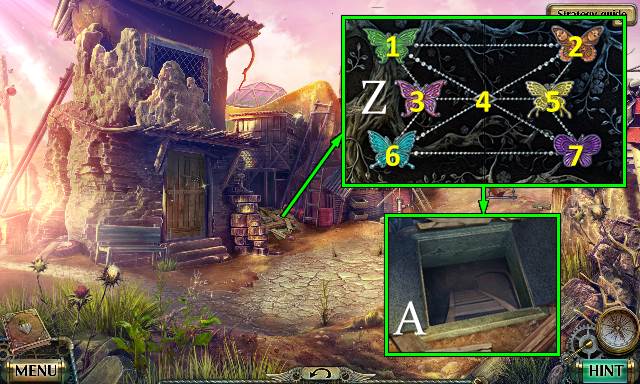
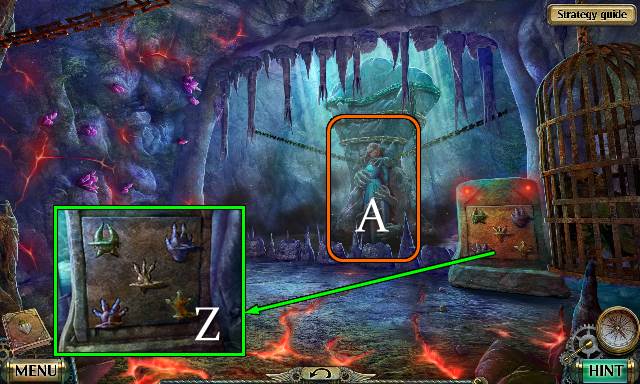
- Place two BUTTERFLIES (Z). Solution: 2-1-3-4-5-2-1-4-7-5-4-6-3-1-2-5-4-2-1-4-6-3-4.
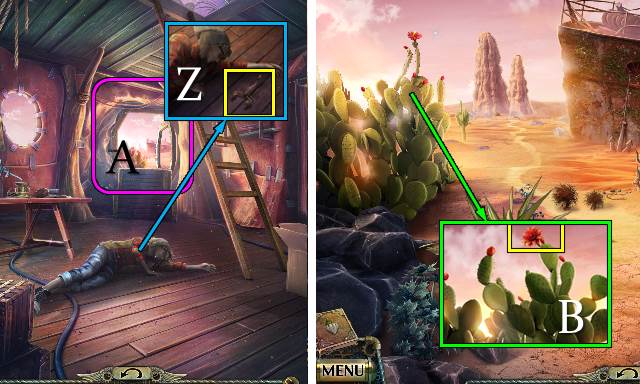
- Go (A).
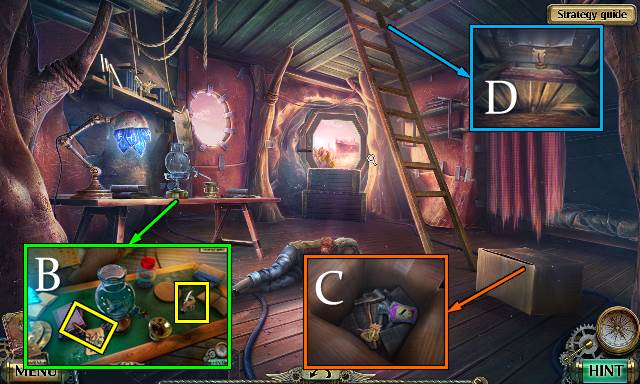
- Move recipe and take KEY, DEER FIGURINE and KNIFE (B).
- Use KNIFE; take SNAKE FIGURINE, BOTTLE OF ACID and HAMMER (C).
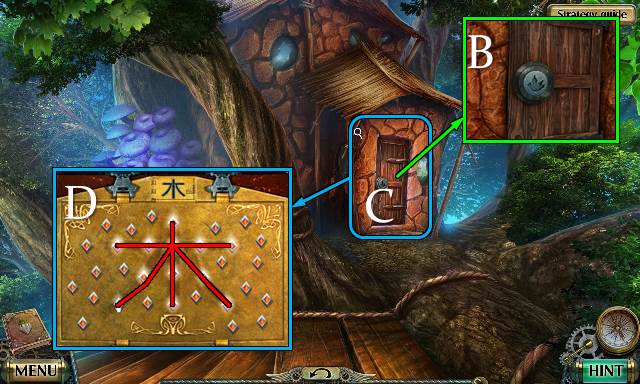
- Use KEY (D).
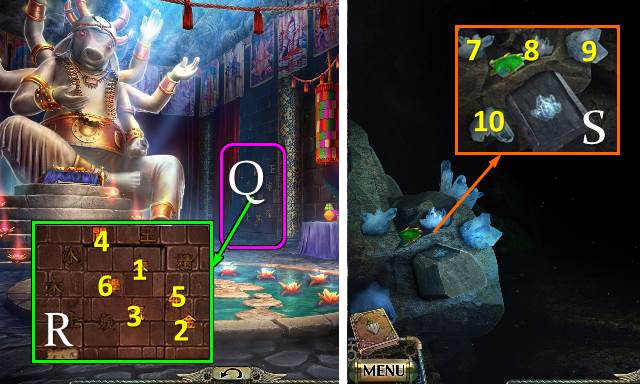
- Play HOP (E). Solution (F). Receive FRUIT.
- Use HAMMER (G).
- Go (H).
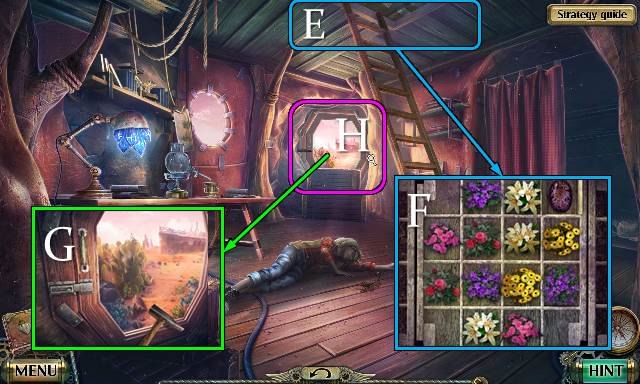
- Solution. Pull up plant and take ROOT with KNIFE (I).
- Use BOTTLE OF ACID; open door (J).
- Go (K).

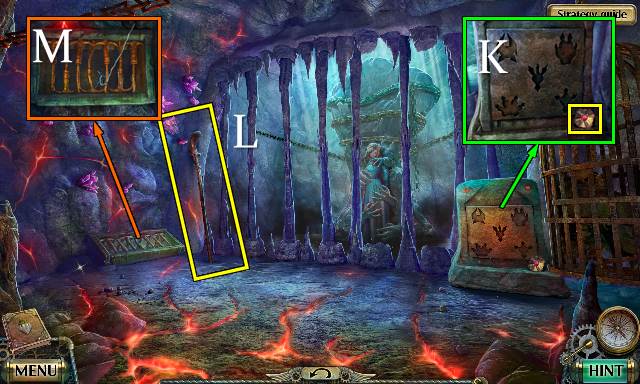
- Take capsule (L).
- Solution (M); take WASP FIGURINE and ROPE (N).
- Walk down.
- Place and tie ROPE; take HANDSAW (O).
- Go (P).
- Use HANDSAW; take HANDWHEEL (Q).
- Take HONEYCOMB with KNIFE (R).
- Walk down.
- Place HONEYCOMB; take PART (S).
- Go (T).
- Place PART and play mini-game (U).
- Take SYRINGE and TWEEZERS (V).
- Go to Desert Settlement.
- Place HANDWHEEL and pull lever (W).
- Take LIZARD FIGURINE and SCYTHE (X).
- Go (Y).
- Take SCORPION with TWEEZERS (Z).
- Go (A).
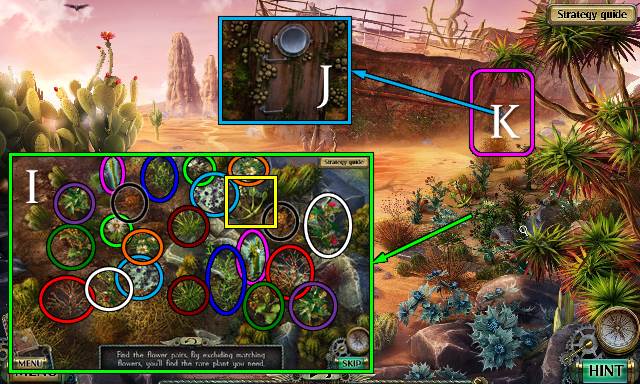
- Take a CACTUS FLOWER with SCYTHE (B).
- Walk down.
- Place FRUIT, ROOT and CACTUS FLOWER. Use KNIFE on 4 and remove lid (1). Put 1-4 and SCORPION into 5. Turn 6 and 7 and take ANTIDOTE (8) with SYRINGE (C).
- Use ANTIDOTE (D).
Chapter 2: The Stone of Fire
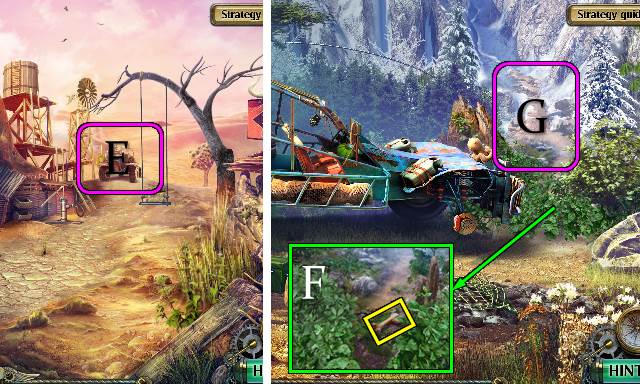
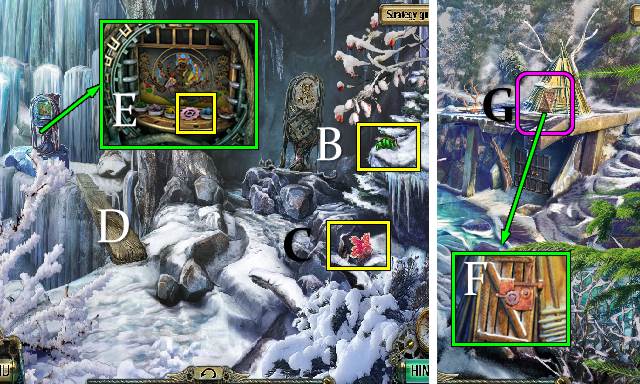
- Go (E).
- Move shrubs; take BONE (F).
- Go (G).
- Throw BONE (H).
- Receive FLINT.
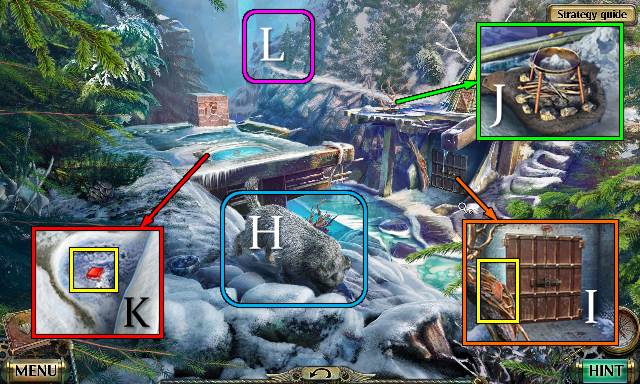
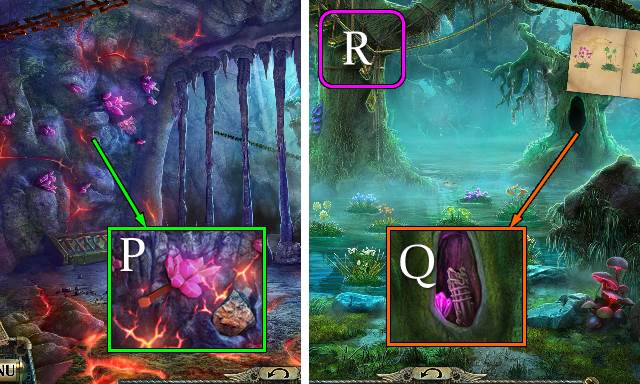
- Take LION FIGURINE and SPLINTERS (I).
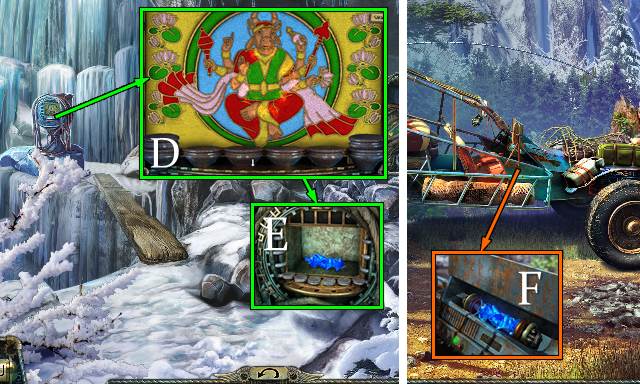
- Place SPLINTERS and use FLINT and fan. Put snow in cauldron. Take CAULDRON OF HOT WATER (J).
- Use CAULDRON OF HOT WATER; take CRYSTAL (K).
- Go (L).
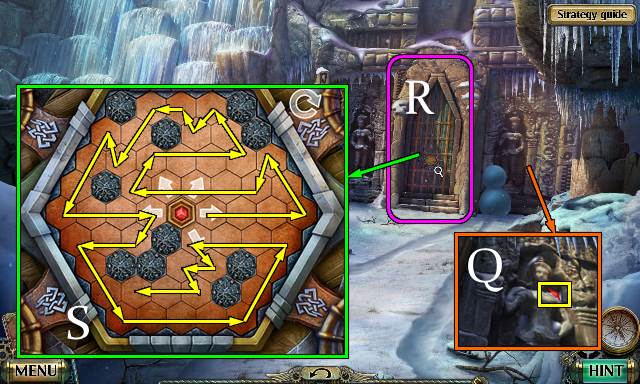
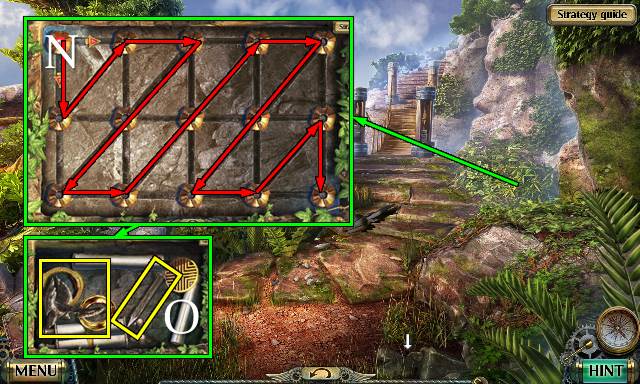
- Solution (M): right-left-forward-left-right-left-left-right-forward-right.
- Take BAS-RELIEF PART (N).
- Take BAS-RELIEF PART (O).
- Roll snowballs (P).
- Take CRYSTAL (Q).
- Inspect door (R).
- Place two CRYSTALS (S).
- Go (R).
- Take SHOVEL (T).
- Take PLANK (U).
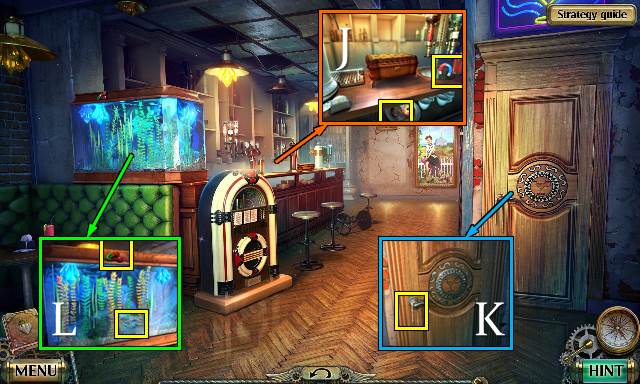
- Move objects; take BAS-RELIEF PART and BOOK (V).
- Take PEN AND PAPER and BAS-RELIEF PART (W).
- Take CRYPTEX (X).
- Walk down.
- Use SHOVEL; take OIL (Y).
- Use OIL; turn key (Z).
- Go (A).
- Take BAS-RELIEF PART (B).
- Take FISH FIGURINE (C).
- Place PLANK (D).
- Take GEAR (E).
- Walk down twice.
- Place GEAR (F).
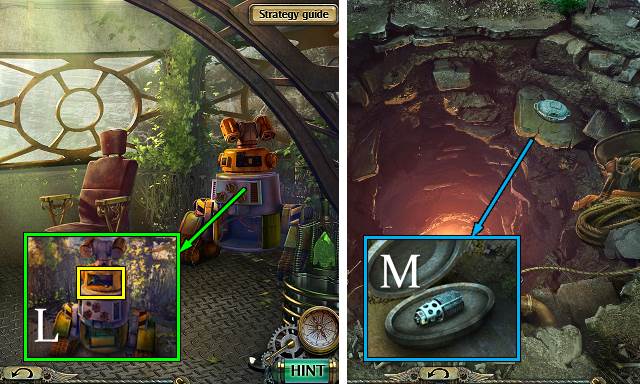
- Play HOP (G); receive BIRD FIGURINE.
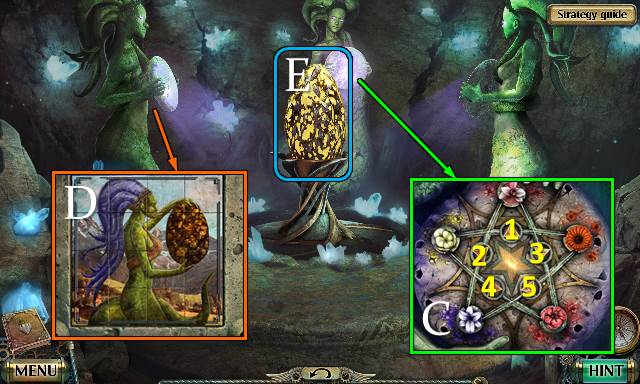
- Place DEER FIGURINE on CASKET. Solution: H-I-H.
- Place SNAKE FIGURINE. Find eggs (J).
- Place WASP FIGURINE (K). Solution: 1-4-2-5-3.
- Place LION FIGURINE (L). Move lions.
- Place LIZARD FIGURINE (M). Solution 7-10-6-7-8-9-6.
- Place FISH FIGURINE. Solution (N).
- Place BIRD FIGURINE; remove clouds (O).
- Take HIEROGLYPHIC MESSAGE and BIRD FIGURINE (P).
- Go forward twice.
- Move drapes (Q).
- Place HIEROGLYPHIC MESSAGE (R). Select 1-2-3-4-5-6.
- Go (Q).
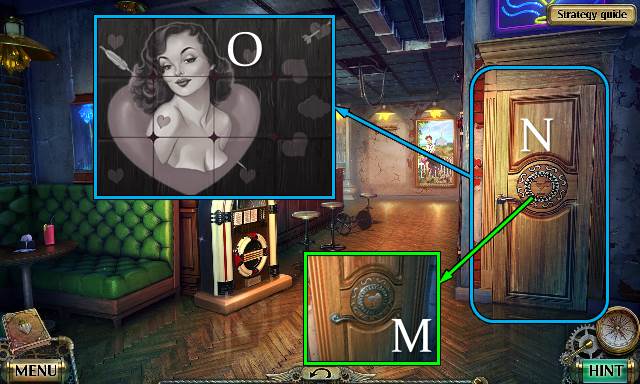
- Take BAS-RELIEF PART. Solution: 7-9-8-10-9-7. Place hand (S).
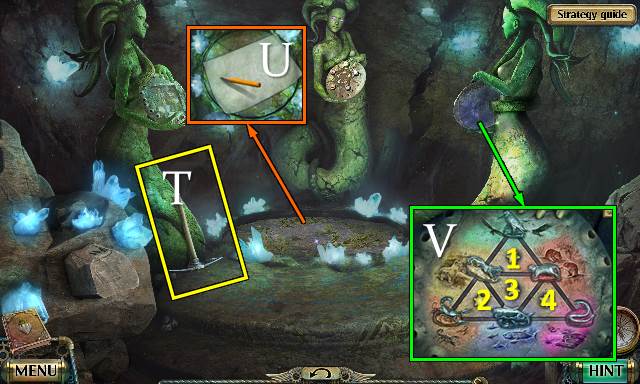
- Take PICK-AXE (T).
- Place PEN AND PAPER (U); receive HINT.
- Place BIRD FIGURINE (V). Solution: 4-3-1-4-2.
- Walk down.
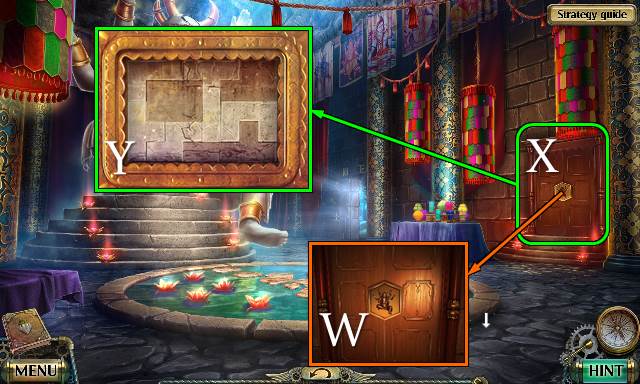
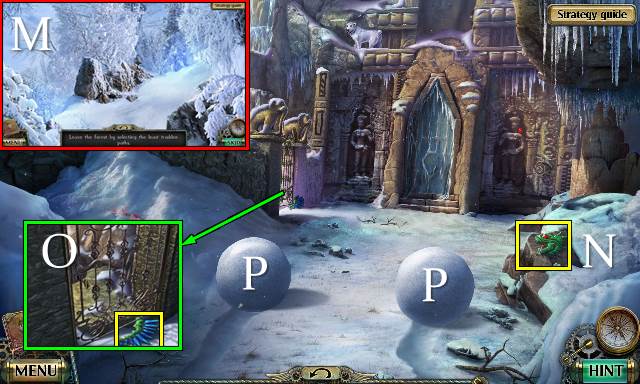
- Place HINT on CRYPTEX and enter code. Take DEITY-SHAPED KEY.
- Place DEITY-SHAPED KEY (W).
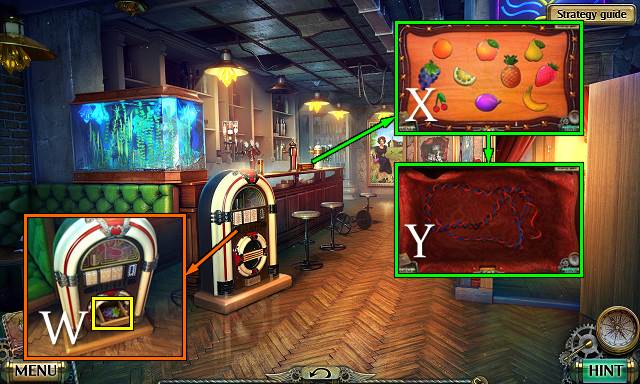
- Play HOP (X); solution (Y). Receive FLOWER.
- Walk down and left.
- Use PICK-AXE; take BAS-RELIEF PART (Z).
- Place seven BAS-RELIEF PARTS (A).
- Take MOSAIC PARTS (B).
- Go to Secret Chamber.
- Place FLOWER (C). Solution: 3-4-2-5.
- Place MOSAIC PARTS. Solution (D).
- Inspect (E).
Chapter 3: The Island
- Go to Mountain Foothills.
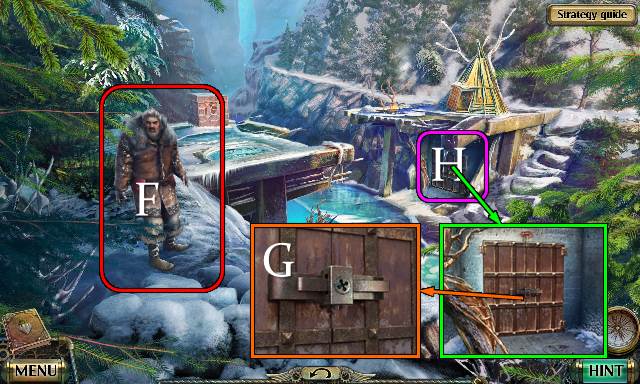
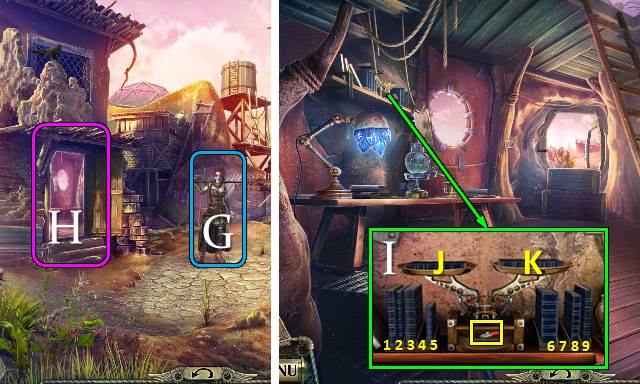
- Talk (F). Receive KEY.
- Use KEY (G).
- Go (H).
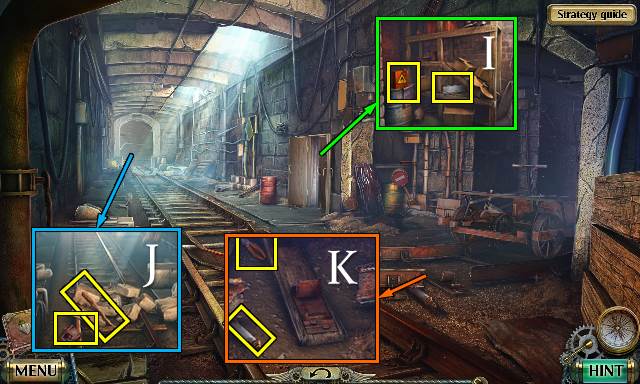
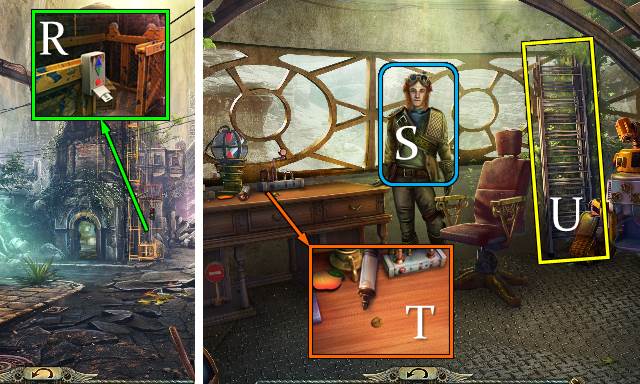
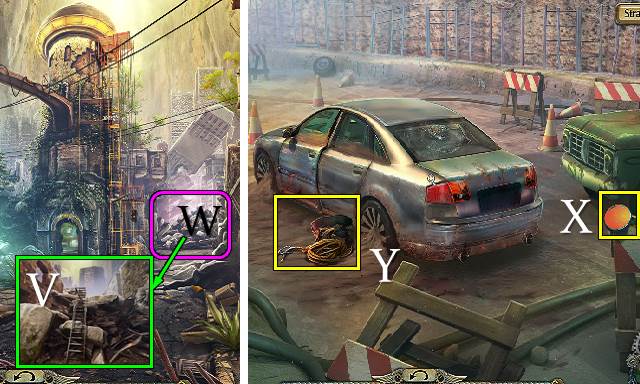
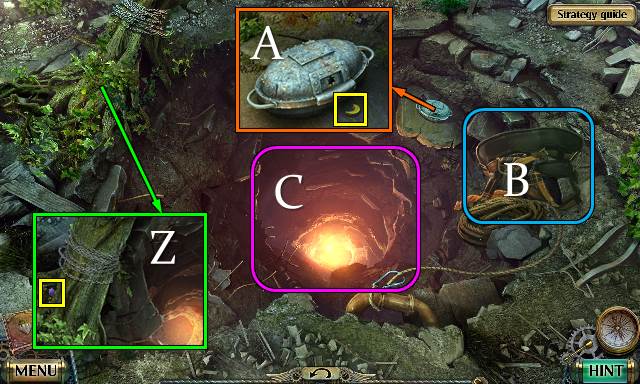
- Take FUEL and RAIL PART (I).
- Take FASTENING and CLUB and move rocks (J).
- Take capsule and CLIPPERS; place RAIL PART and FASTENING (K).
- Walk down.
- Use CLIPPERS; take RAG and LEVER (L).
- Combine RAG and FUEL with CLUB. Wrap rag around club and pour fuel. Receive TORCH.
- Light TORCH (M).
- Go (N).
- Place LEVER (O).
- Use TORCH (P).
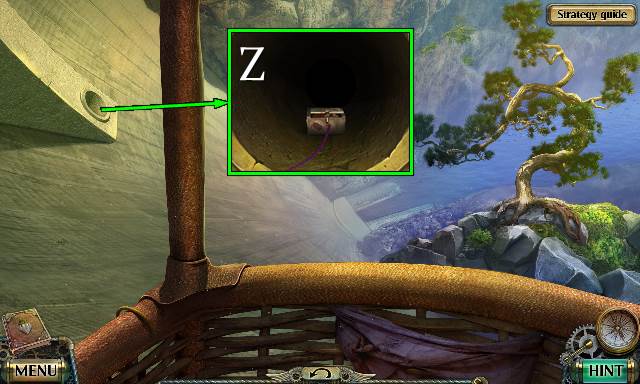
- Take ROPE (Q).
- Go (R).

- Take OAR (S).
- Move shells; take LOAD 1/3 (T).
- Use KNIFE; take SAILCLOTH (U).
- Take capsule and RAKE (V).
- Walk down.
- Use RAKE; take KEY (W).
- Go (X).
- Use KEY (Y).
- Play HOP (Z); receive NAIL PULLER.
- Use NAIL PULLER (A); receive MAST.
- Walk down.
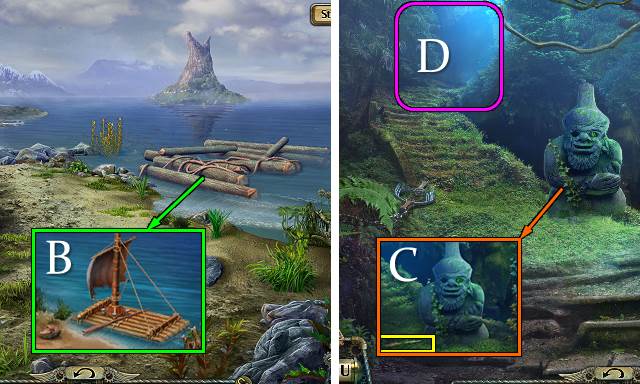
- Assemble raft, place MAST, use rock and place SAILCLOTH, ROPE and OAR (B).
- Take PIPE (C).
- Go (D).
- Take LOAD 2/3; move vines (E).
- Take SPREADER (F).
- Walk down.
- Place SPREADER; take BRUSH (G).
- Go down and left.
- Place BRUSH. Solution (H).
- Take FISHING ROD (I).
- Walk down.
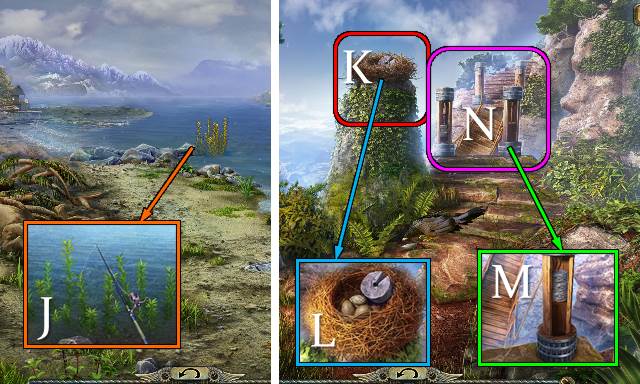
- Extend FISHING ROD.
- Catch FISH with FISHING ROD (J).
- Go right and left.
- Throw FISH (K).
- Take LOAD 3/3 (L).
- Place LOAD (M).
- Go (N).
- Take CLUB (O).
- Take ROPE WITH HOOK (P).
- Walk down.
- Use CLUB; take GARDEN SHEARS (Q).
- Walk down.
- Use GARDEN SHEARS (R).
- Go (S).
- Talk (T). Receive MAP.
- Place MAP (U).
- Select indicated flowers (V).
- Use ROPE WITH HOOK (W).
- Go (X).
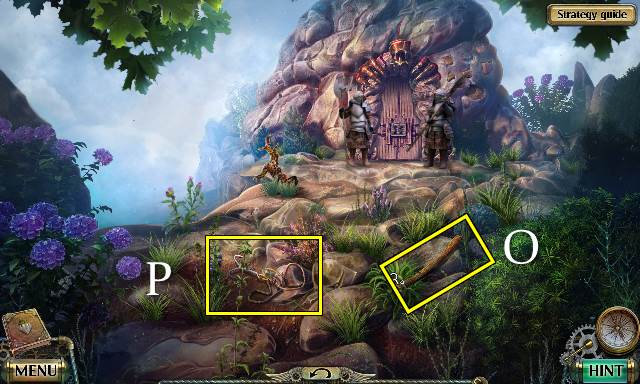
- Take DARTS (Y).
- Take BELL (Z).
- Walk down.
- Offer BELL (A). Receive KEY.
- Go forward.
- Use KEY (B).
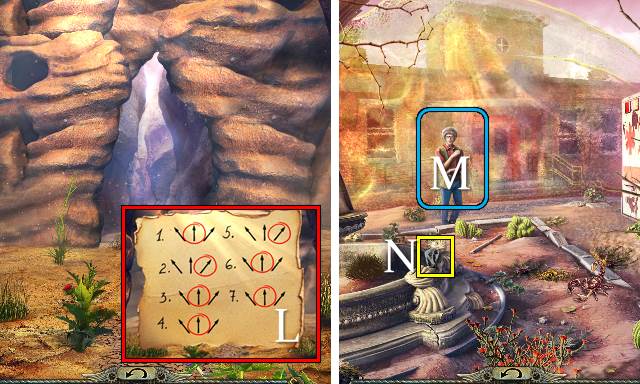
- Play HOP (C); solution (D). Receive SLEEPING POTION.
- Go to On the Mountain.
- Dip DARTS in SLEEPING POTION; put darts in PIPE. Receive BLOW PIPE.
- Use BLOW PIPE (E).
- Take BUNCH OF KEYS (F).
- Remove KEYS from BUNCH OF KEYS and bend wire into a HOOK.
- Place KEYS (G). Solution: (1-I)-(4-H).
- Go (J).
- Take DETAIL (K).
- Take STAFF (L).
- Take KEY with HOOK (M).
- Walk down twice.
- Place DETAIL. Solution (N).
- Take KEY and CHISEL (O).
- Go forward twice.
- Place CHISEL and use rock (P); receive CRYSTAL.
- Go to Swamp.
- Place CRYSTAL; take ROPE LADDER (Q).
- Go (R).
- Take KEY with STAFF (S).
- Go to On the Mountain.
- Place ROPE LADDER; take KEY and MUSHROOM (T).
- Go to Tree House.
- Place MUSHROOM. Solution (U).
- Take STATUE EYE (V).
- Walk down twice.
- Place STATUE EYE; take RUNE (W).
- Go left and forward.
- Place RUNE. Select 4-2-5-3-1-6. Take KEY (X).
- Go (Y).
- Place five KEYS (Z).
- Talk (A).
- Walk down seven times.
- Take LANTERN (B).
- Go to In the Temple.
- Place LANTERN. Move lanterns. Take COLORFUL MOSAIC PARTS (C).
- Walk down and left.
- Place COLORFUL MOSAIC PARTS. Solution (D).
- Take ENERGY CRYSTAL (E).
- Walk down three times.
- Place ENERGY CRYSTAL (F).
Chapter 4: Myrthe
- Talk (G). Receive MAP.
- Go (H).
- Place BOOK (I). Solution: (4-J)-(7-K). Take PILL 1/6.
- Walk down and left.
- Place MAP (L). Go forward-right-forward-forward-right-forward-forward.
- Talk (M). Receive SPECIAL POWDER.
- Take STONE (N).
- Take JERRYCAN OF GAS (O).
- Use STONE; open door (P).
- Play HOP (Q). Solution: 3-5-2-4-1. Receive STATUE HAND.
- Place STATUE HAND; take capsule, PILL 2/6 and BANDAGE (R).
- Use SPECIAL POWDER; open door (S).
- Go (T).
- Take capsule, PILL 3/6, IMAGE FRAGMENTS, RULER and PART (U).
- Use RULER; take CARD and PILL 4/6 (V).
- Use CARD (W); open door (X).
- Go (Y).
- Place IMAGE FRAGMENTS; take FUNNEL (Z).
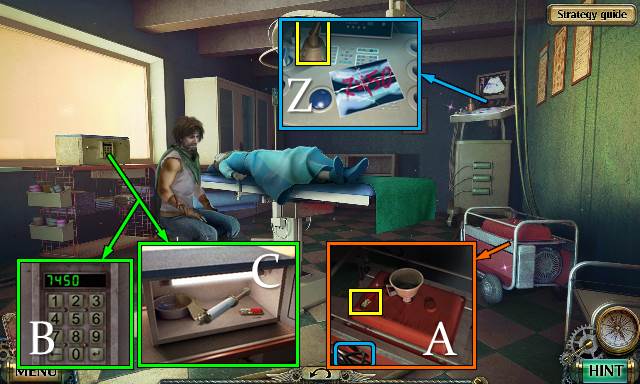
- Take PILL 5/6; place FUNNEL and JERRYCAN OF GAS. Pull handle three times (A).
- Select 7450 and enter (B). Take SYRINGE and PILL 6/6 (C).
- Walk down.
- Place PILL; take KEY and PIPES (D).
- Go forward.
- Combine BANDAGE, PIPES and SYRINGE with PART; receive a TRANSFUSION PUMP.
- Place TRANSFUSION PUMP (E).
- Walk down twice.

- Use KEY and zoom in (F). Solution (G).
- Go forward.
- Enter 6347 (H).
- Go (I).
- Take CARABINER and MAGNET (J).
- Take ROPE (K).
- Attach ROPE to MAGNET.
- Take FRUIT; take GOBLET-SHAPED KEY with MAGNET (L).
- Use GOBLET-SHAPED KEY (M).
- Play HOP (N); solution (O). Receive PICTURE.
- Place PICTURE. Solution (P).
- Take KEY CARD (Q).
- Walk down.
- Use KEY CARD (R).
- Talk (S).
- Take capsule, FRUIT and COIN (T).
- Take LADDER (U).
- Walk down.
- Place LADDER (V).
- Go (W) and go forward.
- Take FRUIT (X).
- Take STRAPS (Y).
- Walk down and right.
- Take FRUIT (Z).
- Take FRUIT (A).
- Place STRAPS (B).
- Go (C).
- Take GAS TANK (D).
- Take BALLOON CANVAS (E).
- Play mini-game (F). Receive HOIST.
- Take ROPE and PIN (G).
- Use PIN; take BATTERY and FRUIT (H).
- Walk down.
- Place HOIST and ROPE (I).
- Go (J).
- Place and attach CARABINER (K).
- Receive DYNAMITE.
- Go to Lookout Tower.
- Place BATTERY; take KEY (L).
- Go to Mine Entrance.
- Use KEY; take BURNER (M).
- Walk down.
- Assemble balloon and place BALLOON CANVAS, GAS TANK and BURNER (N).
- Take capsule, METAL PIPE and FRUIT (O).
- Go to On the Bridge.
- Use METAL PIPE; take KEY (P).
- Use KEY; take HOOK and DETONATOR (Q).
- Walk down and left.
- Get GEAR with HOOK (R).
- Walk down.
- Place GEAR for a mini-game (S). Solution: U-5T-3U-3T-U-3T-U.
- Take FRUIT (V).
- Go to Bar.
- Use COIN; take FRUIT (W).
- Place nine FRUITS (X); take FUSE (Y).
- Open DYNAMITE and place DETONATOR and FUSE. Attach fuse to receive BOMB.
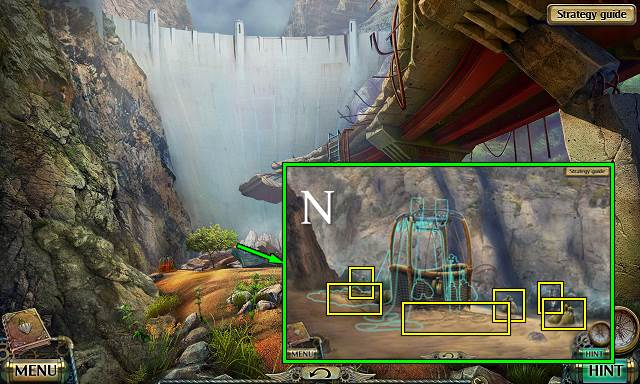
- Go to Top of the Dam.
- Place BOMB (Z).
- Congratulations, you have completed Darkness and Flame: Missing Memories.
Created at: 2017-06-21