

Walkthrough Menu
- General Tips
- Chapter 1: The Missing Tourist
- Chapter 2: Secrets Revealed
- Chapter 3: Electricity
- Chapter 4: The Moon Orb
General Tips
- This is the official guide for Demon Hunter: Ascendance.
- This guide won't tell you when to zoom into a location; the screenshots show each zoom scene.
- Hidden-object puzzles are referred to as HOPs. Only the locations of the HOPs will be shown.
- Use the Map to fast travel to a location.
Chapter 1: The Missing Tourist

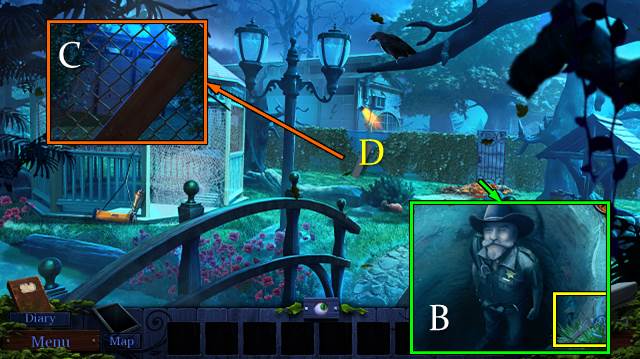
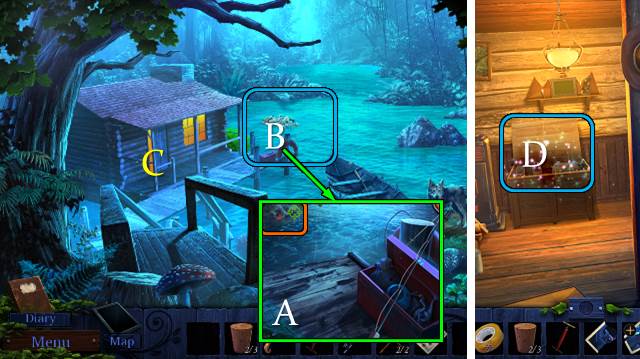
- Talk (A).
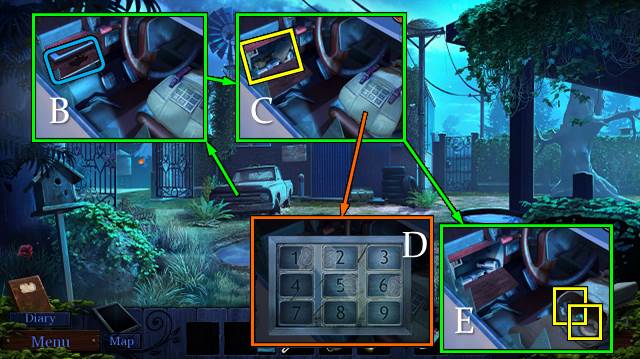
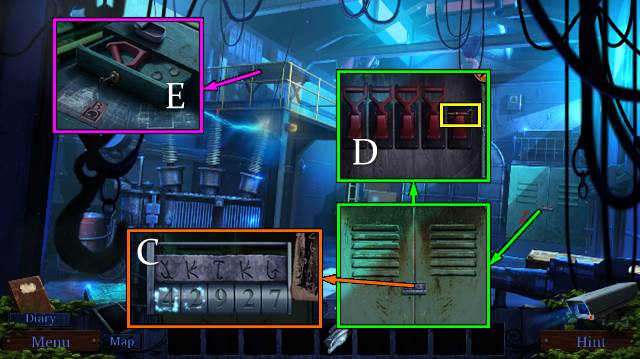
- Take HOUSE KEY (B).
- Access HOUSE KEY; find pairs (C).
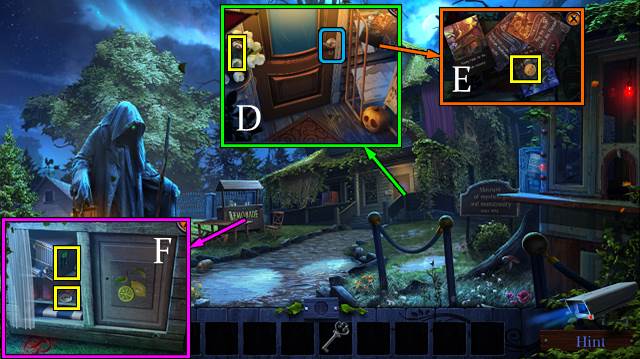
- Use HOUSE KEY. Take FLASHLIGHT (D).
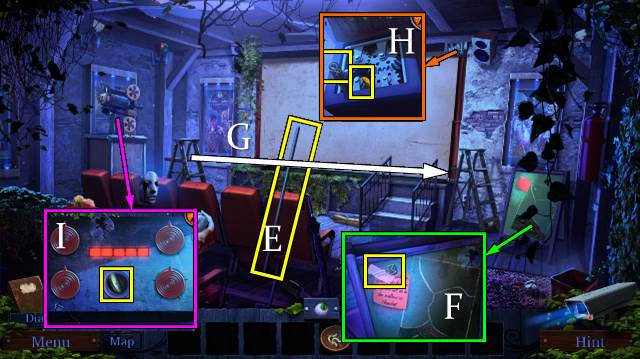
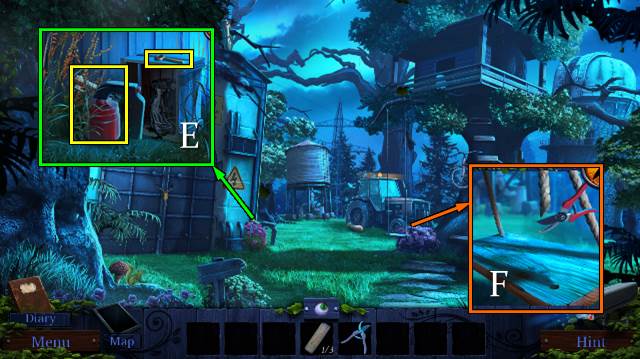
- Move flyers and take COINS 1/2 (E).
- Move curtain and bunting; open compartment. Take COINS 2/2 and BATTERY (F).
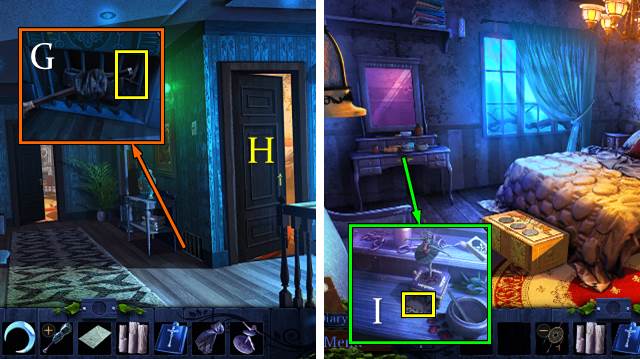
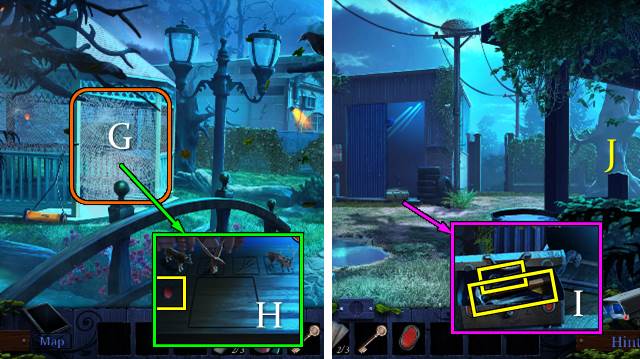
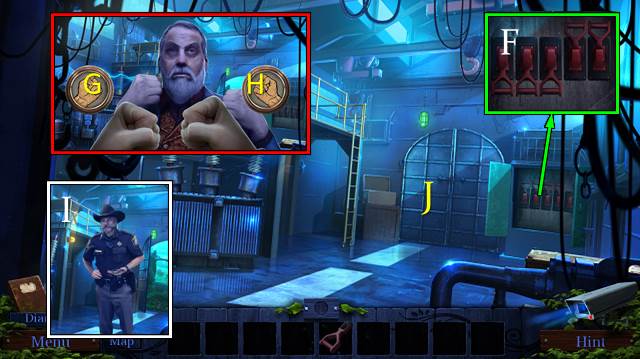
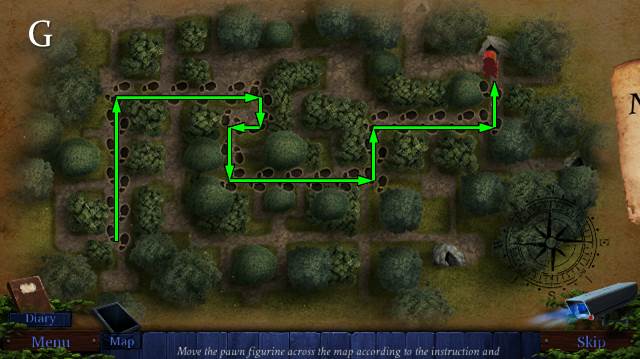
- Use COINS; enter 183 (G).
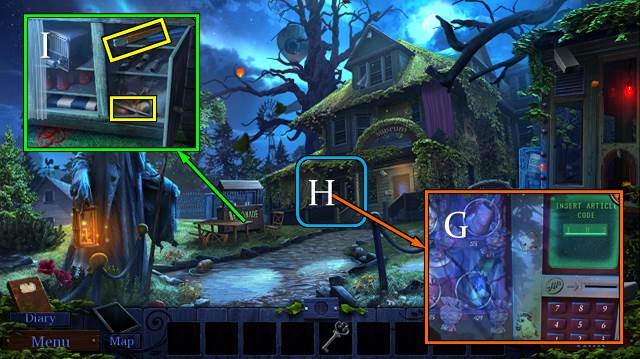
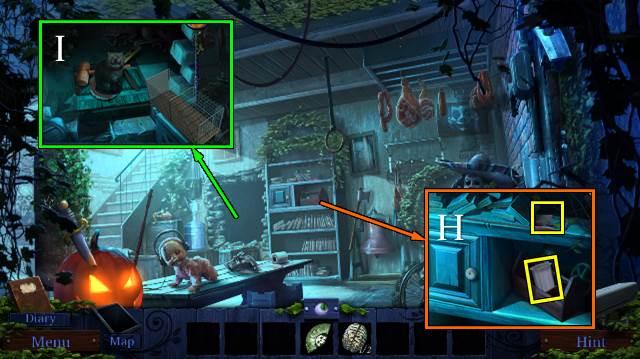
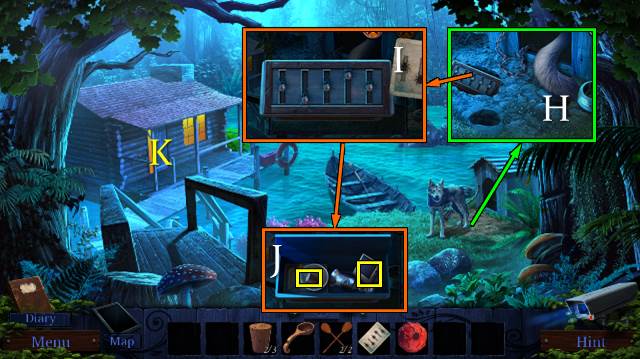
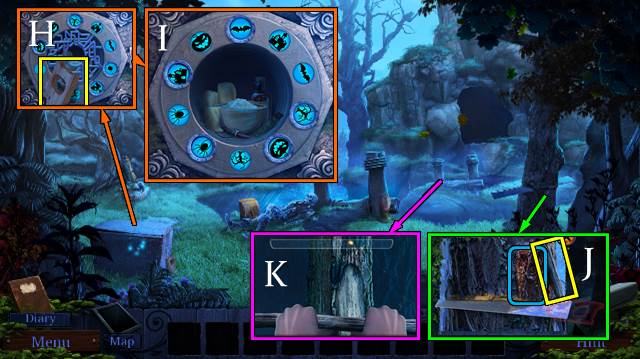
- Play HOP (H); receive HANDLE.
- Place HANDLE; open door and take BUTTER KNIFE and TONGS (I).
- Turn on FLASHLIGHT; replace BATTERY.
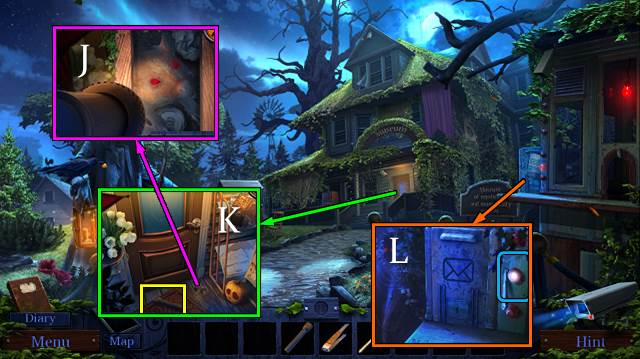
- Use FLASHLIGHT (J).
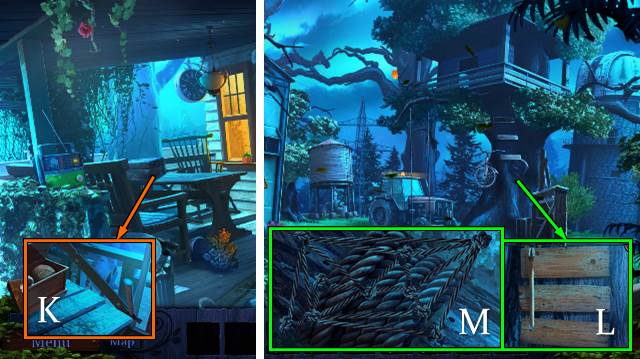
- Take FLASHLIGHT (K).
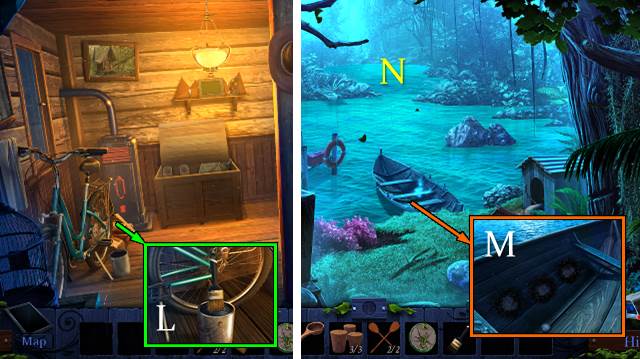
- Read note. Use BUTTER KNIFE; take BULB (L).
- Remove glass of FLASHLIGHT; replace BULB.
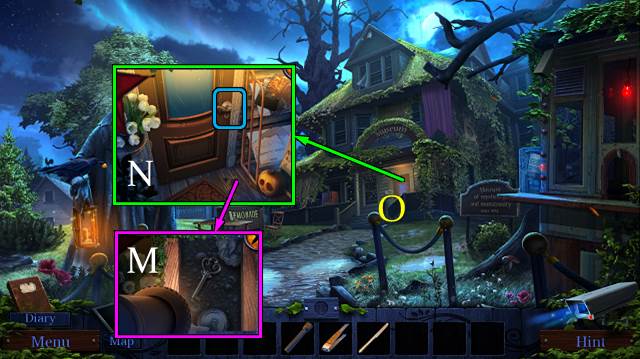
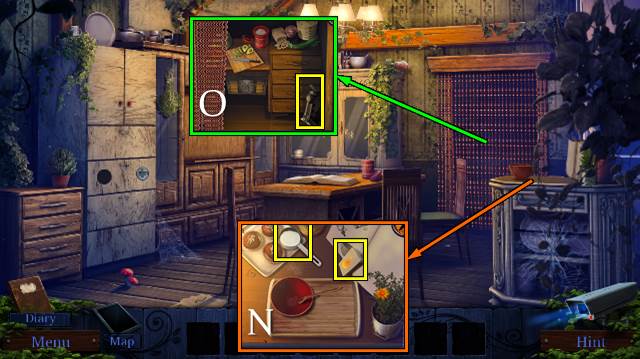
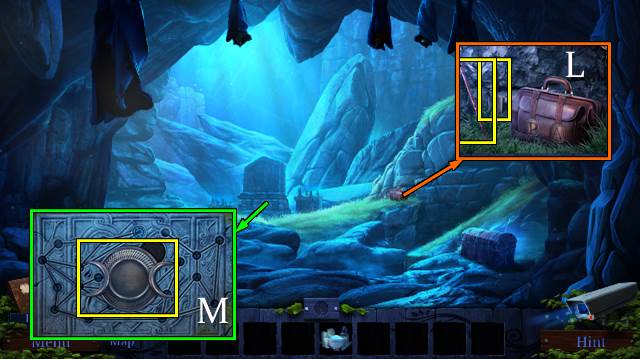
- Use FLASHLIGHT. Take HOUSE KEY with TONGS (M).
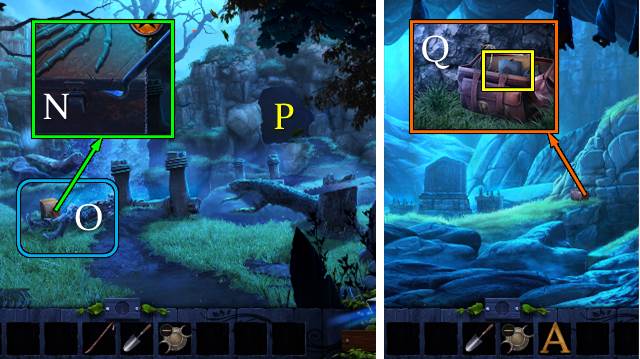
- Use HOUSE KEY (N).
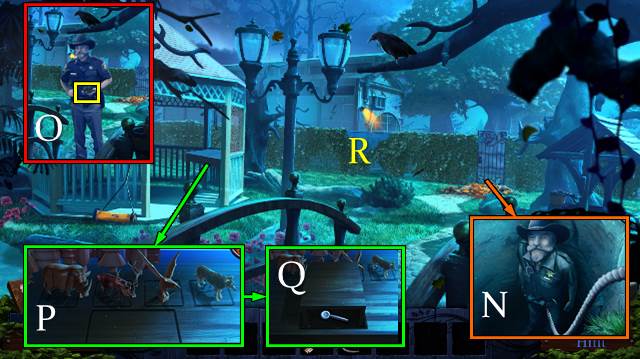
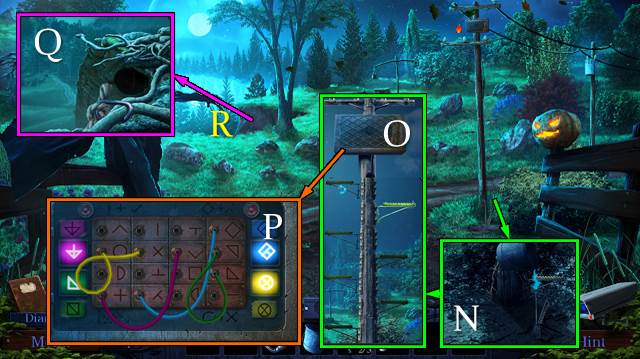
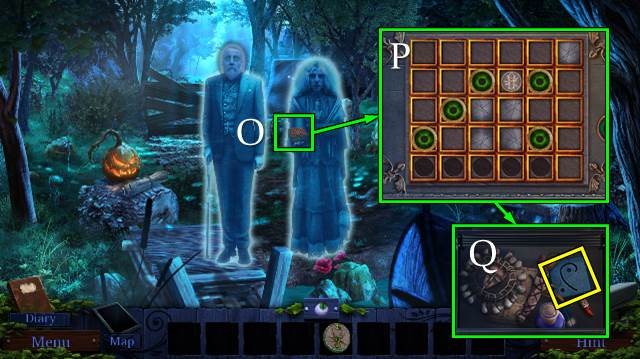
- Go (O).
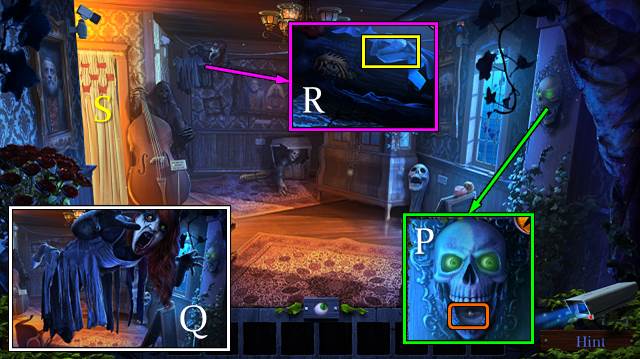
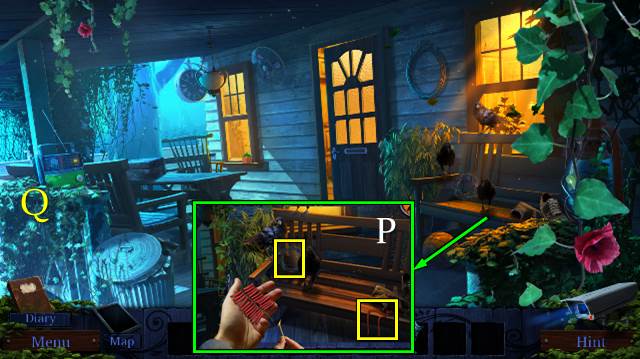
- Turn switch (P).
- Touch dummy (Q).
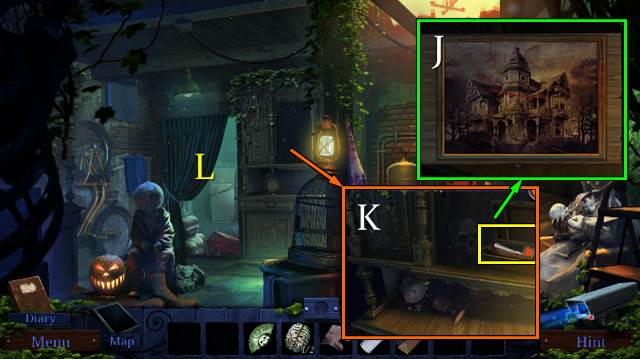
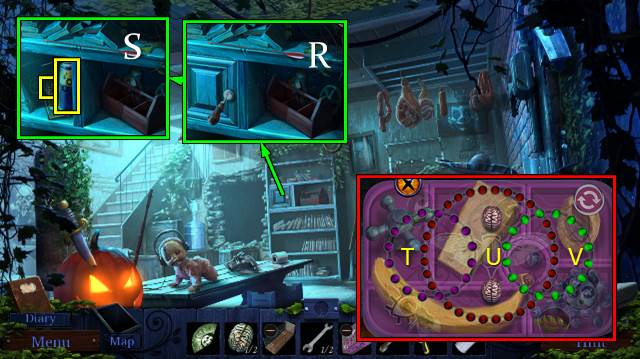
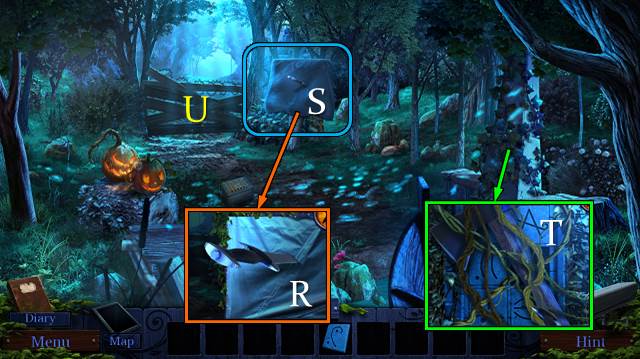
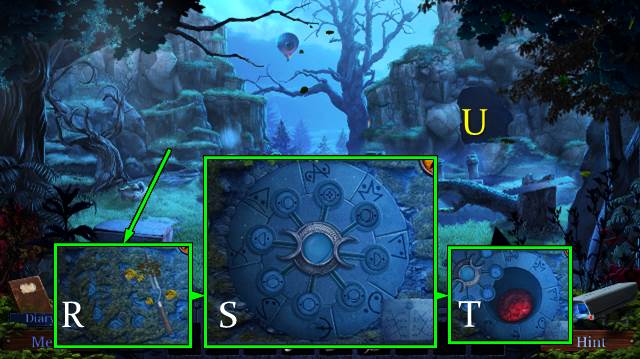
- Take CLOTH (R).
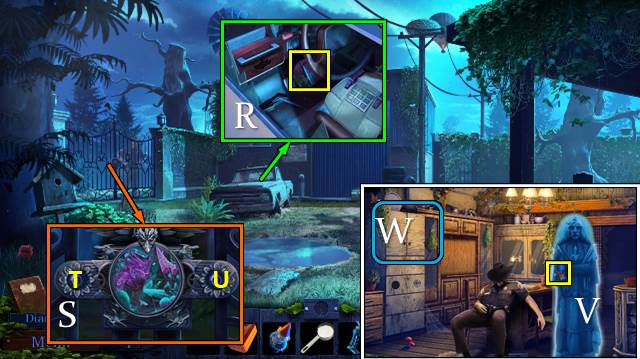
- Go (S).
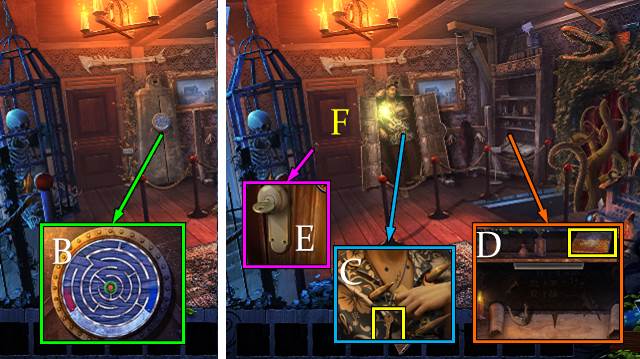
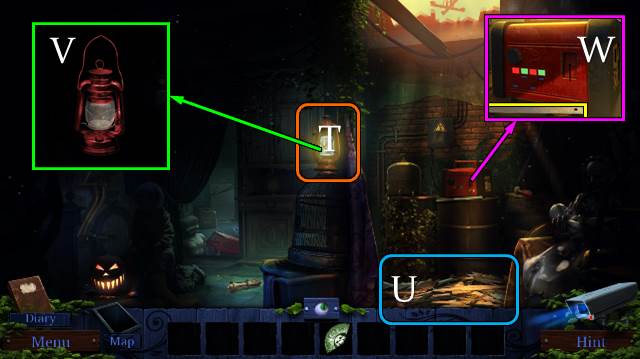
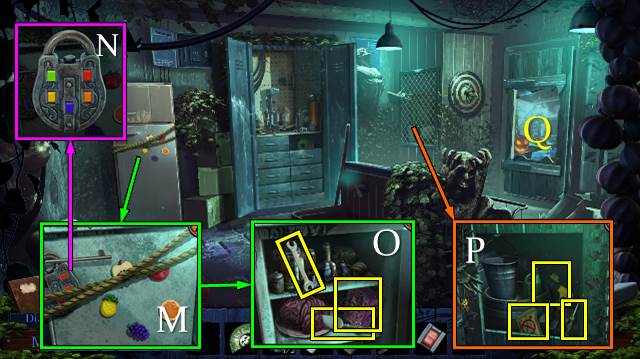
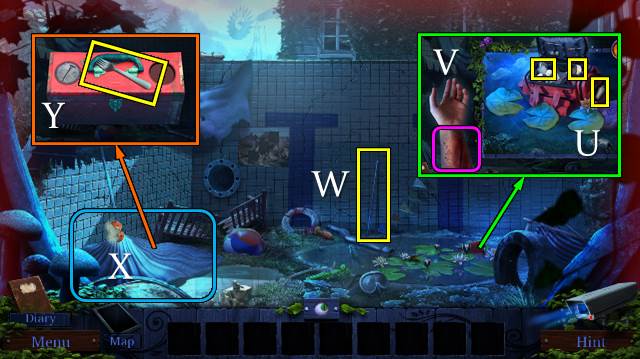
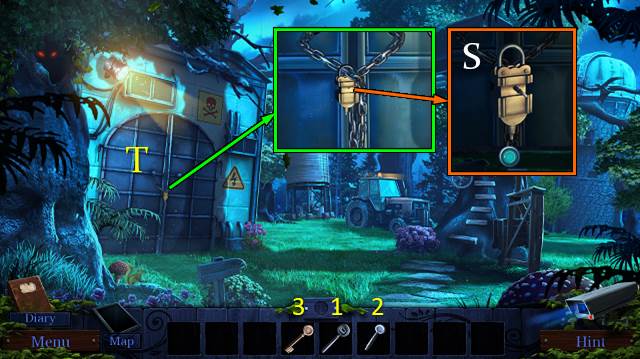
- Take NEEDLE and PADLOCK KEY (T).
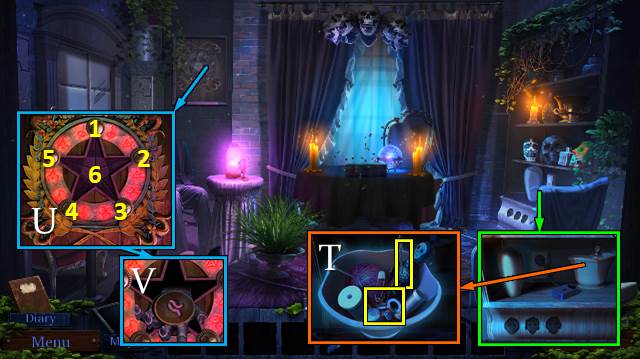
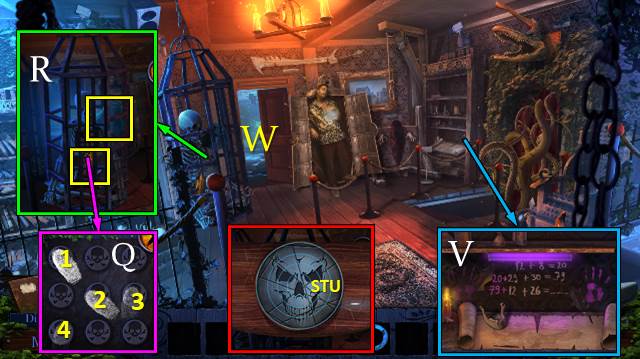
- Inspect puzzle (U). Solution: 1-3-6-2-5-3-6-2-4-6-5-2-6.
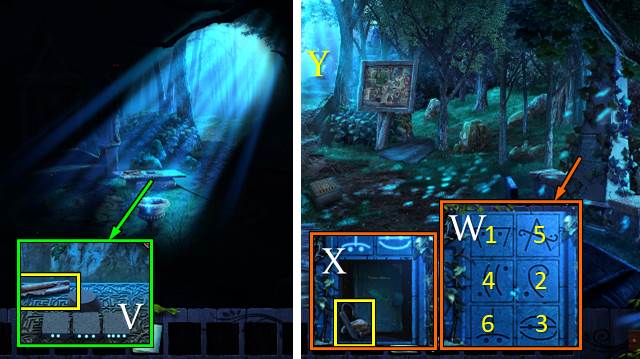
- Take MAGGOTS (V).
- Walk down.
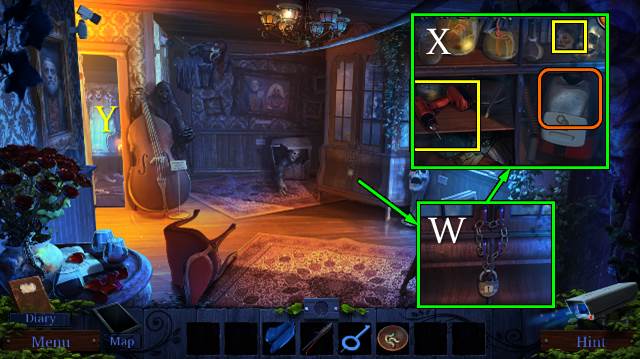
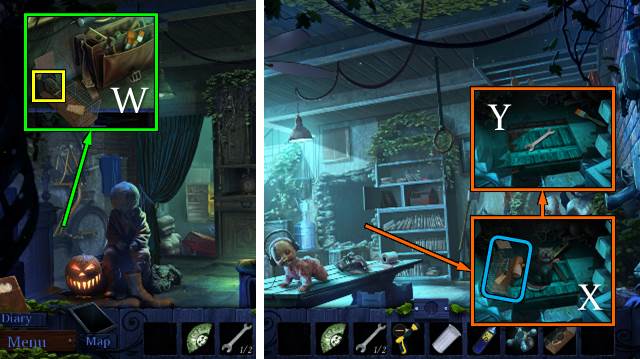
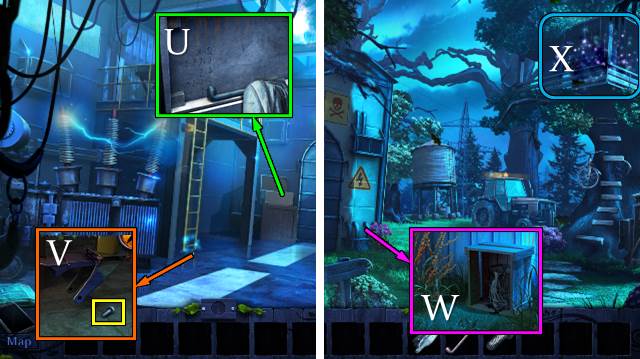
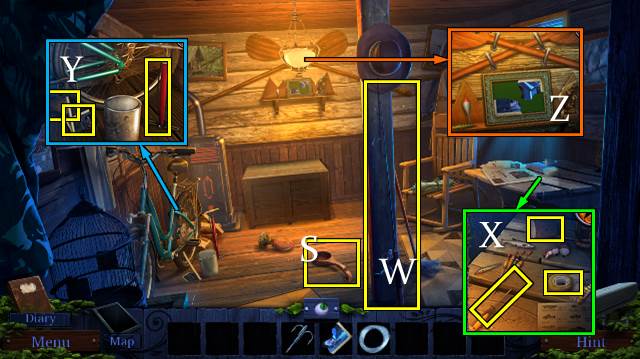
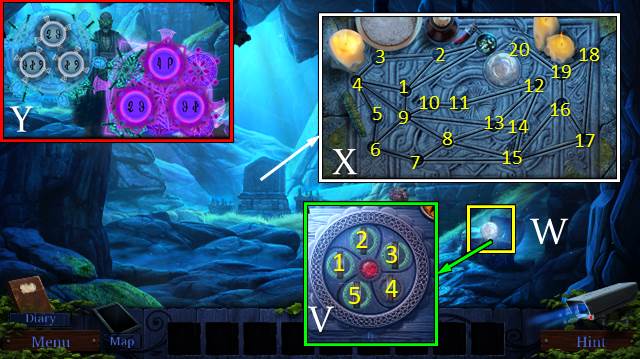
- Use PADLOCK KEY (W).
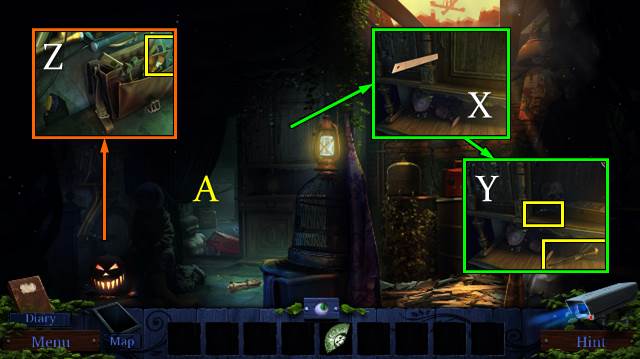
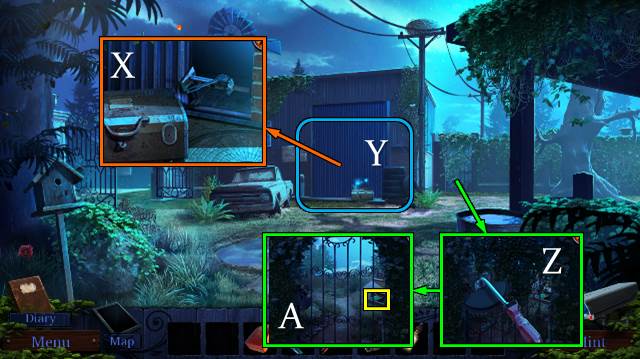
- Take ELECTRIC SCREWDRIVER and SHRUNKEN HEAD and open vacuum cleaner. Place CLOTH and NEEDLE. Take VACUUM CLEANER (X).
- Go (Y).
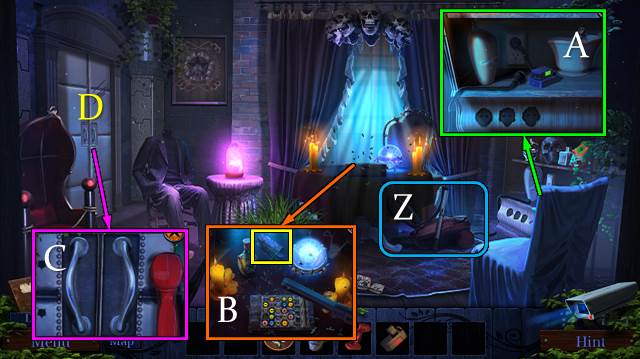
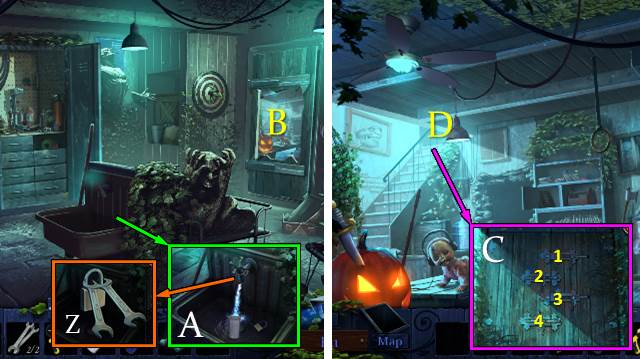
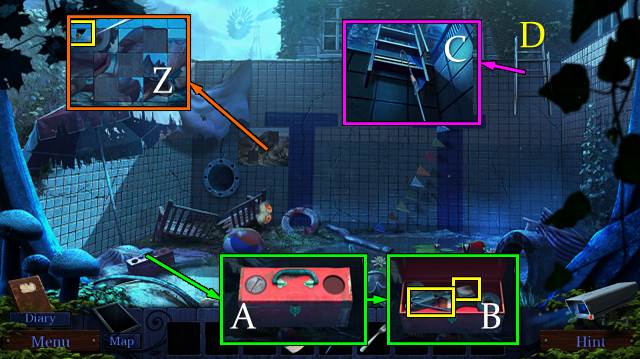
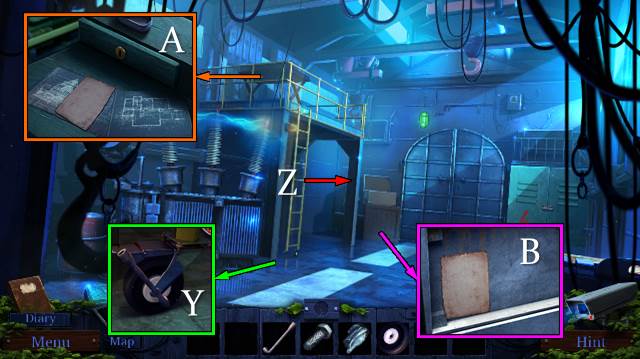
- Place VACUUM CLEANER (Z).
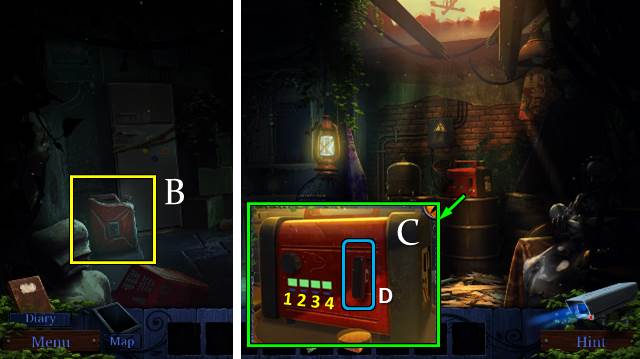
- Take EMPTY BATTERY from ELECTRIC SCREWDRIVER.
- Place EMPTY BATTERY; take CHARGED BATTERY. Plug in vacuum cleaner (A).
- Remove all bugs; take POSTER PARTS 1/3 (B).
- CHARGED BATTERY on ELECTRIC SCREWDRIVER.
- Use ELECTRIC SCREWDRIVER (C).
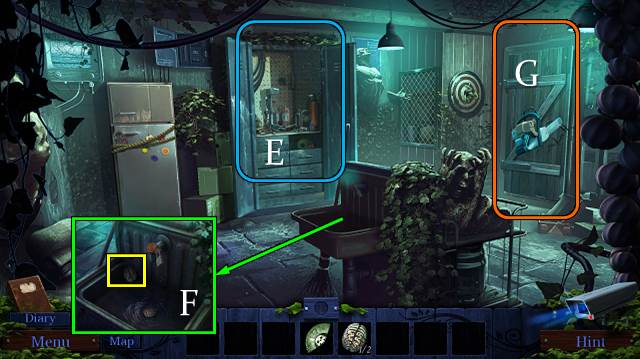
- Go (D).
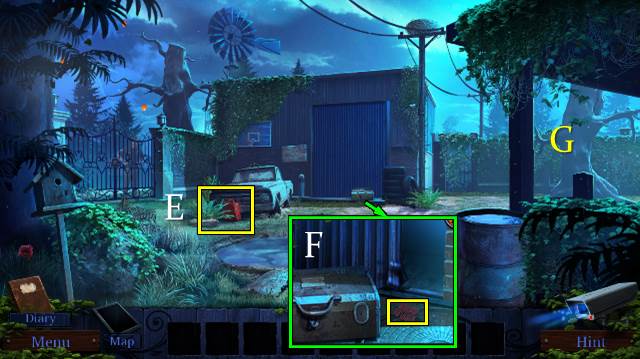
- Take SCREEN CRANK (E).
- Take MAILBOX KEY (F).
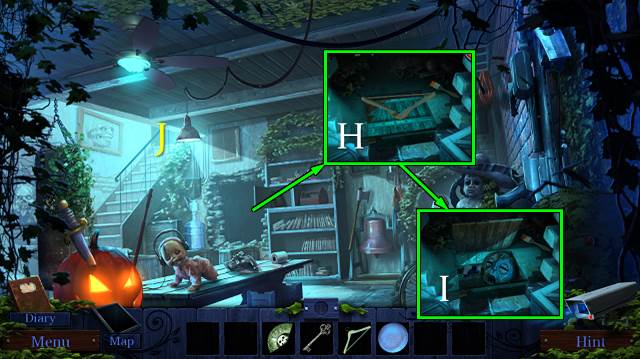
- Move ladder (G).
- Take POSTER PARTS 2/3 and TOKEN (H).
- Take TOKEN (I).
- Go to Museum Entrance.
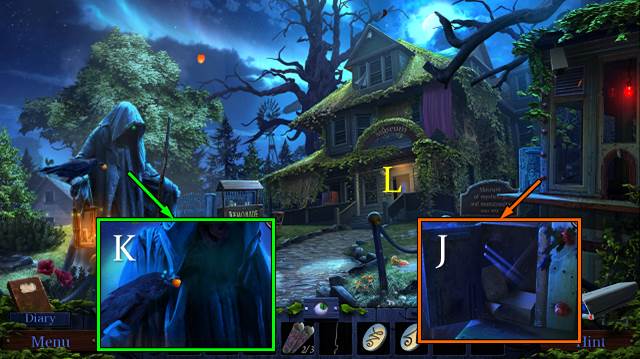
- Use MAILBOX KEY; read letter and take PACKAGE (J).
- Offer MAGGOTS (K); receive EYE.
- Go (L).
- Use SCREEN CRANK (M).
- Play HOP (N); receive GEAR.
- Go (O).
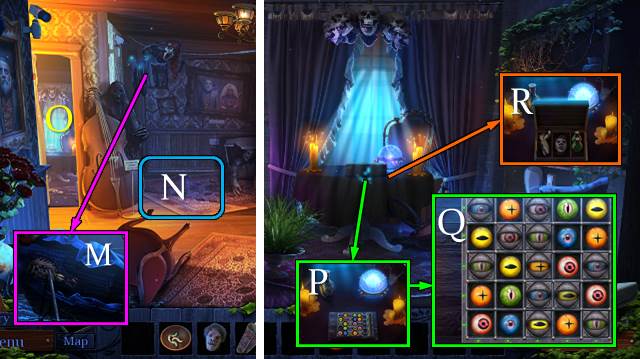
- Place EYE (P).
- Solution (Q).
- Take SHRUNKEN HEAD (R).
- Go left.
- Place GEAR (S).
- Use SCREEN CRANK (T).
- Touch door; take SHRUNKEN HEAD and POSTER PARTS 3/3 (U).
- Place POSTER PARTS; take PROJECTOR CLUE (V).
- Take KNOB from PACKAGE.
- Place KNOB and PROJECTOR CLUE. Solution (W).
- Walk down.

- Place SHRUNKEN HEAD x3 (X).
- Take TOKEN (Y).
- Go left.
- Place TOKEN x3 (Z).
- Go (A).
- Play puzzle (B).
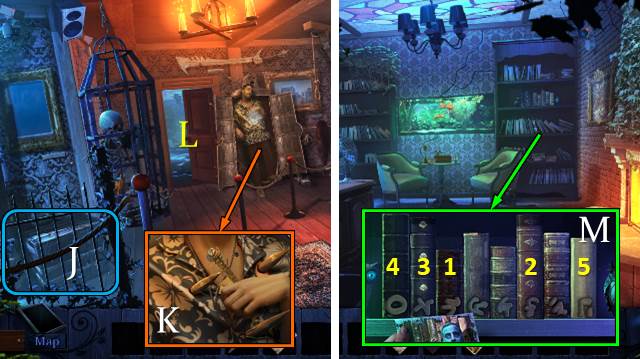
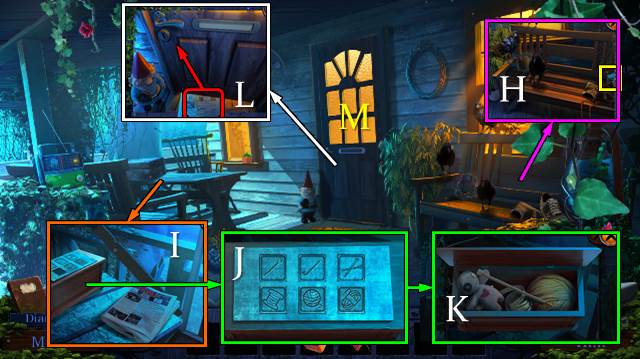
- Take OFFICE KEY (C).
- Take BOOK; remove tube light (D).
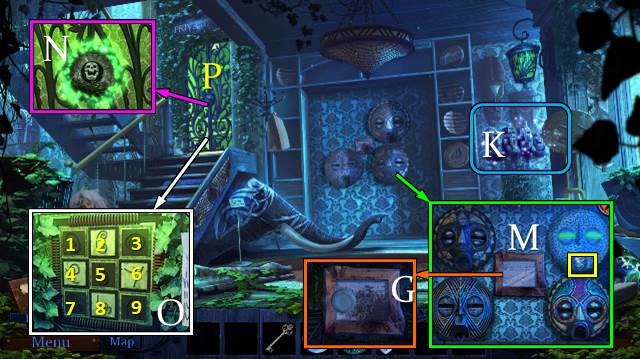
- Use OFFICE KEY (E).
- Go (F).
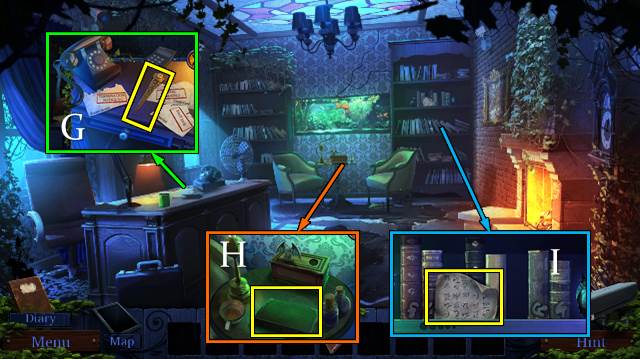
- Answer phone. Move papers; take LETTER OPENER (G).
- Take BOOK (H).
- Take SYMBOL PAPER; place BOOK x2 (I).
- Walk down.
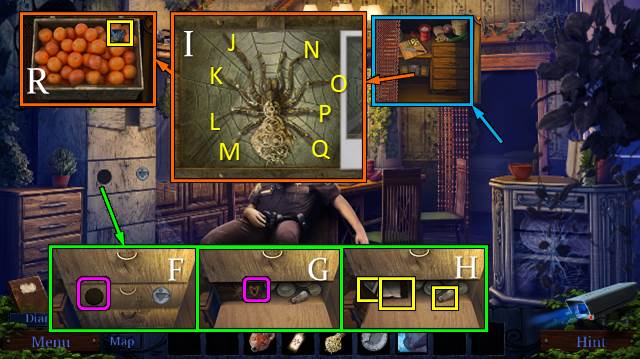
- Open chest; play HOP (J). Receive LOCKPICK.
- Use LETTER OPENER; receive BOOKSHELF CLUE (K).
- Go (L).
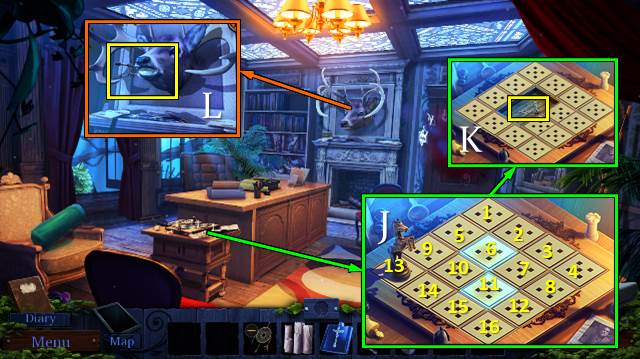
- Place BOOKSHELF CLUE. Solution 1 (M).
- Solution 2: select 1-5 (M).
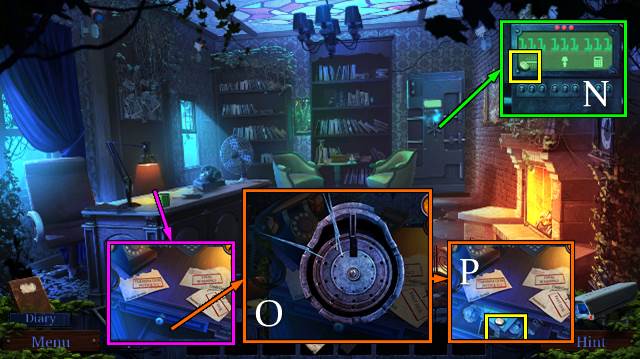
- Take BUTTON 1/2 (N).
- Place LOCKPICK. Solution (O).
- Take BUTTON 2/2 and BOX RING (P).
- Walk down.
- Place BUTTON. Select 1-4 (Q).
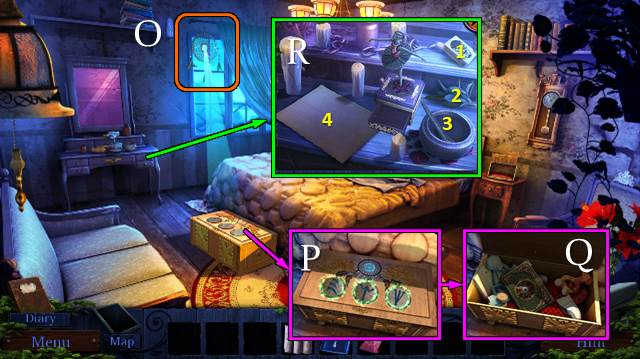
- Take LOCKED BOX and LAMPSHADE (R).
- BOX RING on LOCKED BOX. Solution: align T and U, then S.
- Take NEON and PUNCHED CARD.
- Place NEON (V).
- Go (W).
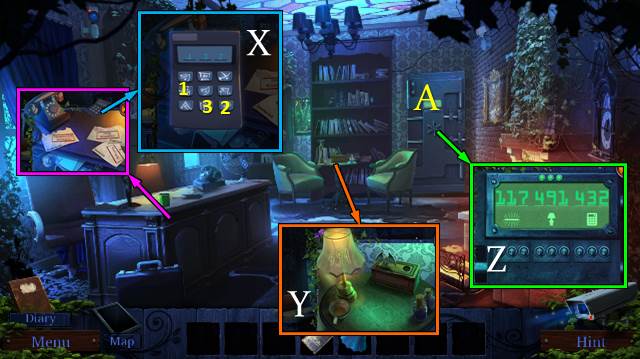
- PUNCHED CARD on SYMBOL PAPER; receive CALCULATOR CLUE.
- Place CALCULATOR CLUE. Select 1-3 (X).
- Place LAMPSHADE (Y).
- Enter 117-491-432 (Z).
- Go (A).
- Take WATER (B).
- Take TAPE (C).
- Walk down.
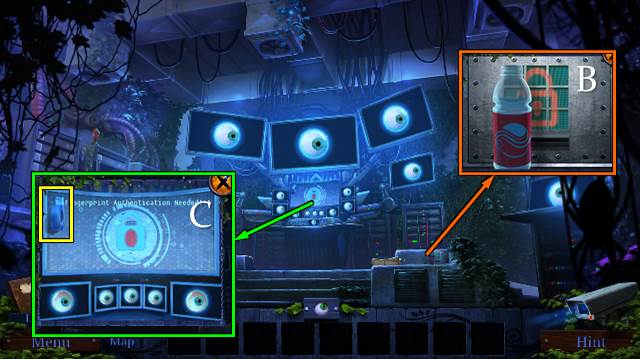
- Play HOP (D); receive VERIFICATION CARD.
- Use WATER and poker; take WINGLESS GARGOYLE (E).
- Use TAPE; take FINGERPRINT (F).
- Go (G).
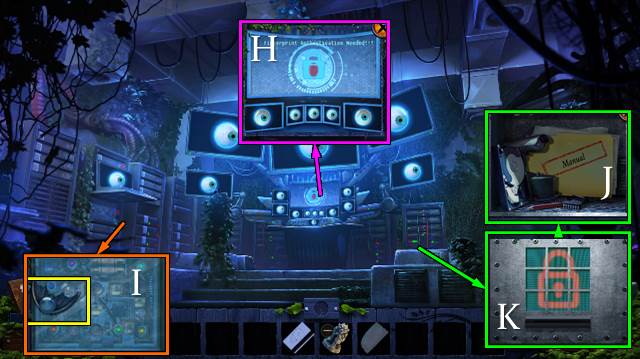
- Place FINGERPRINT (H).
- Take GARGOYLE WINGS (I).
- Use VERIFICATION CARD (J); take HEX KEY from manual (K).
- Walk down.
- GARGOYLE WINGS on WINGLESS GARGOYLE; receive GARGOYLE GUARDIAN.
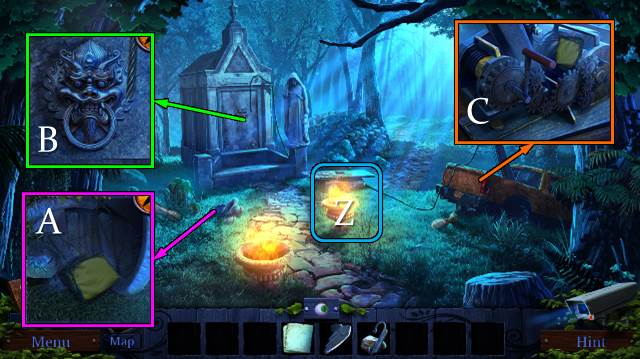
- Place GARGOYLE GUARDIAN (L); take FIREPLACE EMBLEM (M).
- Place FIREPLACE EMBLEM; select 2-3-1 (N).
- Open journal for HOP (O); receive LOGIN PASSCODE.
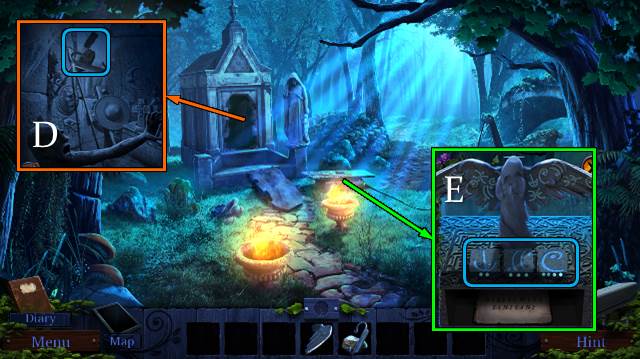
- Walk down.
- Use HEX KEY; take FUSES 1-2/2 (P).
- Go to Media Basement.
- Replace FUSES; solution (Q).
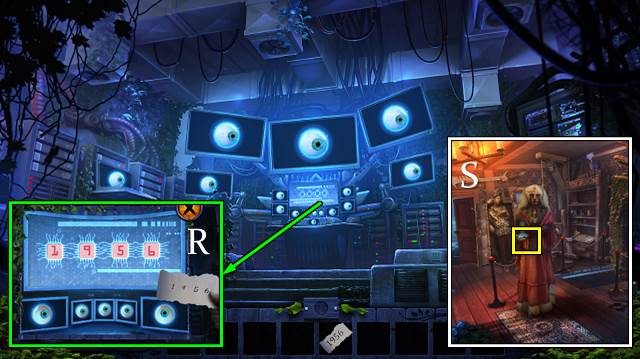
- Place LOGIN PASSCODE; enter 1-9-5-6 (R).
- Take DOOR PIECE (S).
Chapter 2: Secrets Revealed
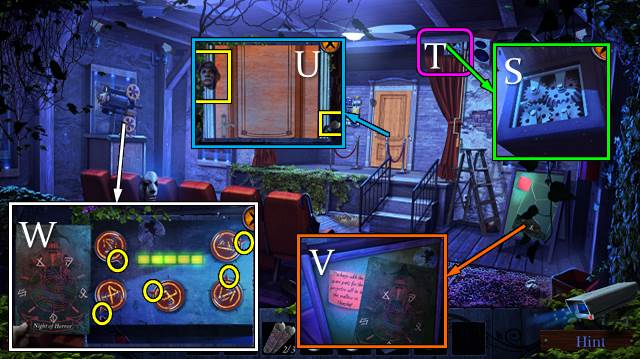
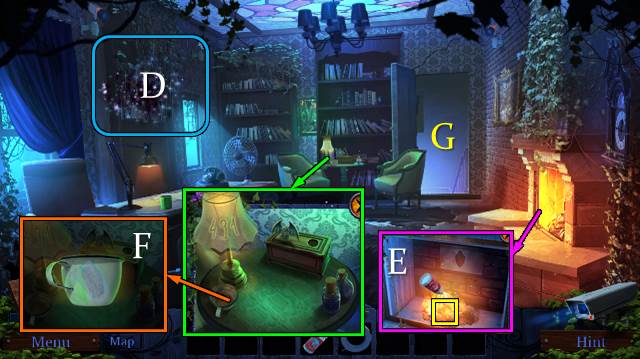
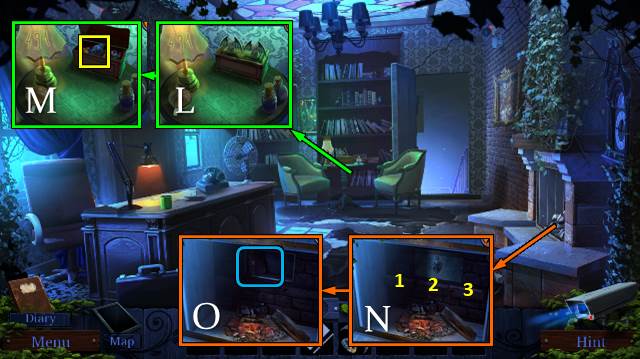
- Inspect lamp (T).
- Play HOP (U); receive LIGHTER.
- Use LIGHTER (V).
- Take RULER (W).
- Use RULER (X); take FUNNEL and HANDLE (Y).
- Open bag; take PLIERS (Z).
- Go (A).
- Take FUEL CAN (B).
- Walk down.
- Use PLIERS. Place HANDLE and FUNNEL and use FUEL CAN (C).
- Solution 3-2-4.
- Pull cord (D).
- Go forward.
- Open locker; play HOP (E). Receive CHAINSAW.
- Take BRAIN 1/2 (F).
- Use CHAINSAW. Go (G).
- Take PHOTO PIECE and SPRAYER BOTTLE (H).
- Take MOUSE TRAP (I).
- Walk down twice.
- Place PHOTO PIECE. Solution (J).
- Take RAZOR and PADLOCK BUTTON (K).
- Go (L).
- Use RAZOR (M).
- Place PADLOCK BUTTON. Solution (N).
- Open fridge; take CAKE TROWEL, WRENCH 1/2 and LUNCHBOX (O).
- Use CAKE TROWEL; remove grate. Take HERBICIDE POWDER, AWL and INCOMPLETE SPRAYER (P).
- Go (Q).
- Use AWL (R); take LUBE SPRAY and BRAIN 2/2 (S).
- BRAIN on LUNCH BOX. Solution: T7-V3-U16-T4-V5-U16.
- Take CHEESE and U.
- Walk down twice.
- CHEESE on MOUSE TRAP.
- Place MOUSE TRAP; receive TRAPPED MOUSE. Take SPRAYER NOZZLE (W).
- Go to Basement.
- Place TRAPPED MOUSE (X).
- Move items; take WRENCHES 2/2 (Y).
- Walk down.
- HERBICIDE POWDER in SPRAYER BOTTLE; receive BOTTLE WITH HERBICIDE POWDER.
- Use WRENCHES (Z).
- Place FAUCET and use BOTTLE WITH HERBICIDE POWDER. Receive SPRAYER WITH HERBICIDE SOLUTION (A).
- Go (B).
- SPRAYER NOZZLE and SPRAYER WITH HERBICIDE SOLUTION on INCOMPLETE SPRAYER; receive HERBICIDE SPRAYER.
- Use HERBICIDE SPRAYER and LUBE SPRAY (C). Select 4-1.
- Go (D).

- Talk; take KEY (E).
- Take COATHANGER (F).
- Take SPONGE (G).
- Walk down.
- Use COATHANGER (H).
- Take MASK and CLEANING SOLUTION (I).
- Go (J).
- Play HOP (K); receive LOCK PART.
- Use CLEANING SOLUTION and SPONGE (L).
- Place MASK. Solution. Take PAPER (M).
- Open PAPER; take BUTTON and ELEVATOR CLUE.
- Place DOOR PIECE and LOCK PART (N).
- Place BUTTON and ELEVATOR CLUE (O).
- Select 4-1-9-6-8-3-7-2-5.
- Go (P).
- Use KEY (Q).
- Go (R).
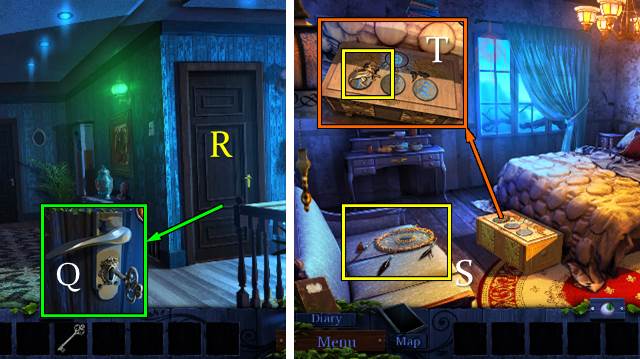
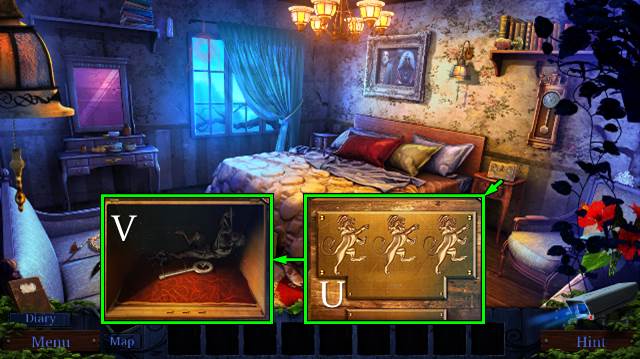
- Take DREAMCATCHER (S).
- Take LION (T).
- Place LION. Align limbs and tails (U).
- Take PAN 1/2 and CLOCK KEY (V).
- Walk down.
- Play HOP (W); receive CRESCENT.
- Place CLOCK KEY; take PANS 2/2 (X).
- Place PANS (Y).
- Solution (Z).
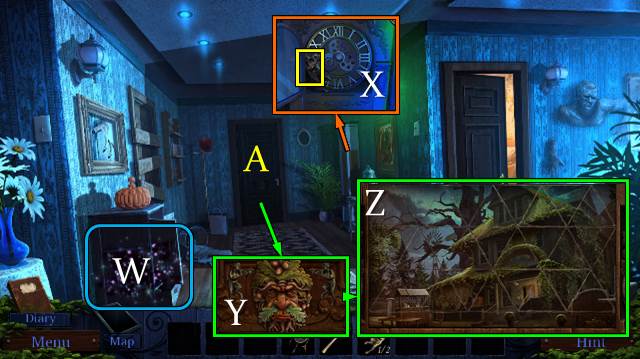
- Go (A).
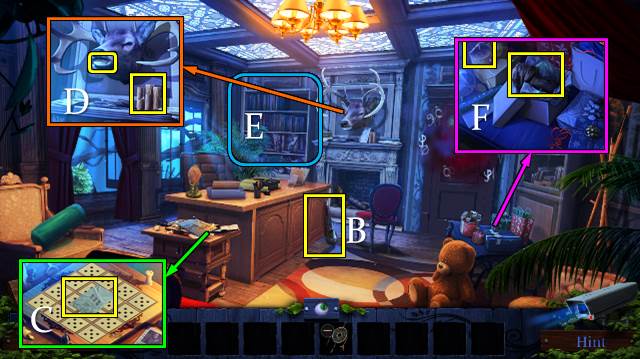
- Take WALKING STICK (B).
- Move paper; take CLOCK CLUE (C).
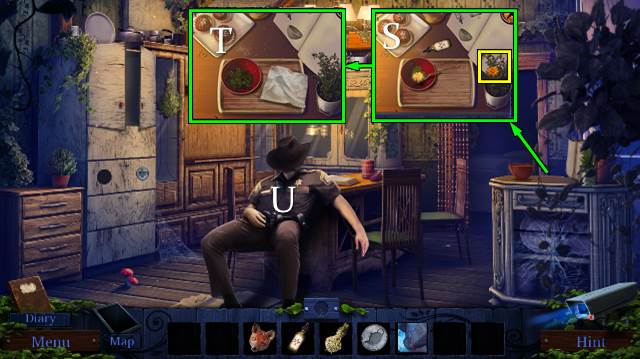
- Read note; take CANDLES. Try to take disc (D).
- Play HOP (E); receive HOLY WATER.
- Take SHAWL and BALLERINA (F).
- Walk down.
- WALKING STICK from WALKING STICK.
- Place SHAWL and WALKING STICK; take DENTAL GAG (G).
- Go (H).
- Place BALLERINA; take HORSE and paper (I).
- Go to Library.
- Place HORSE (J).
- Solution: 6-4-11-2-9-15-8-10-3-5-14-7-16-10-1-7-14-12-6-13.
- Take CLOCK HANDS (K).
- Use DENTAL GAG; take FULL MOON (L).
- Walk down.

- Place CLOCK HANDS and CLOCK CLUE (M).
- Enter times (1-3); take MAGIC DUST.
- Go (N).
- CRESCENT and FULL MOON on DREAMCATCHER.
- Place DREAMCATCHER (O).
- Change symbols (P).
- Open book for a HOP (Q); receive SPELL RECIPE.
- Place SPELL RECIPE and CANDLES (R).
- Use matches (1); put sage (2), HOLY WATER and MAGIC DUST in mortar (3).
- Pour potion on paper (4). Take DISPEL SCROLL (4).
- Go to Library.
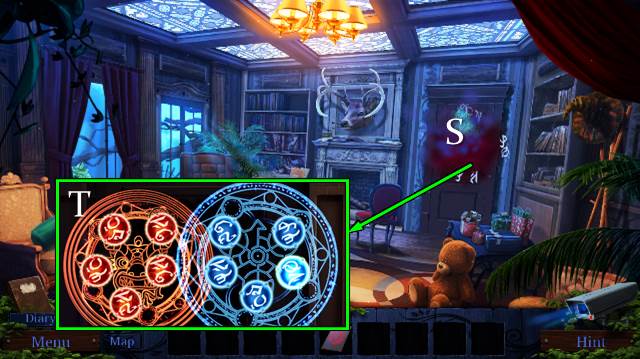
- Use DISPEL SCROLL (S).
- Defeat red (random) (T).
Chapter 3: Electricity
- Open bag x2; take GAUZE, ADHESIVE BANDAGE and MEDICAL GLUE (U).
- Use MEDICAL GLUE, GAUZE and ADHESIVE BANDAGE (V).
- Take METAL PIPE (W).
- Move hammock (X).
- Take FORK (Y).
- Use FORK; take TOOL COIN (Z).
- Place TOOL COIN (A). Take MOSAIC TILE and HOOK (B).
- HOOK and ADHESIVE BANDAGE on METAL PIPE; receive METAL HOOK.
- Use METAL HOOK (C).
- Go (D).
- Take FUEL (E).
- Take FIRECRACKERS (F).
- Go (G).
- Take SEWING TOKEN (H).
- Take NEWSPAPER (I).
- Place SEWING TOKEN; solution (J).
- Take NEEDLE (K).
- Take GNOME. Use NEWSPAPER and NEEDLE; move paper and use key (L).
- Go (M).
- Take MATCHES and POWDERED SUGAR (N).
- Move curtain; take JACK (O).
- Walk down.
- Place FIRECRACKERS and use MATCHES. Take GATE PLATE FRAME and SHOELACE (P).
- Go (Q).
- Use GNOME; take GATE PLATE PART (R).
- GATE PLATE PART on GATE PLATE FRAME; receive GATE PLATE.
- Place GATE PLATE (S).
- Solution: T2-U4-T8.
- Take FOX INSET (V).
- Play HOP (W); receive ESSENTIAL OIL.
- Go to Backyard.
- Use JACK (X).
- Play HOP (Y); receive TRIMMER.
- FUEL and SHOELACE on TRIMMER.
- Use TRIMMER (Z).
- Take CAR EMBLEM (A).
- Place CAR EMBLEM (B).
- Take BAG CODE and SPIDER BODY. Use POWDERED SUGAR (C).
- Place BAG CODE. Enter 1-6-2-5 (D).
- Take DRAWER TOKEN and MOSAIC TILE (E).
- Go to Kitchen.
- Place DRAWER TOKEN (F).
- Place FOX INSET (G).
- Take SALT, CLOTH and SPIDER CLUE (H).
- Place SPIDER BODY and SPIDER CLUE (I).
- Solution: Jx2-Lx4-Mx3-Nx2-P-Qx2.
- Take MOSAIC TILE (R).
- Take and place PLANT PART; add SALT and ESSENTIAL OIL (S).
- Place CLOTH and use mixture. Take SMELLING SALTS (T).
- Offer SMELLING SALTS (U).
- Go to Old Pool.
- Place MOSAIC TILE x3; solution (V).
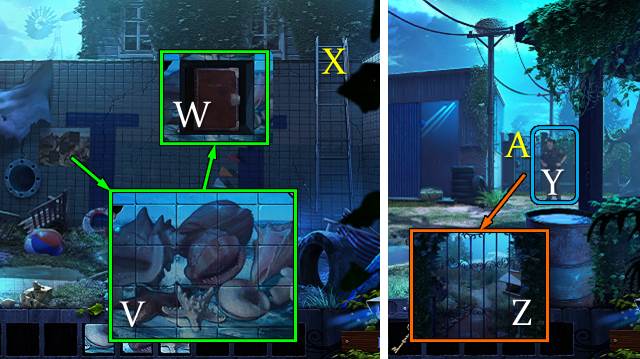
- Open diary for HOP (W); receive GARDEN DOOR KEY.
- Go (X).
- Talk (Y).
- Use GARDEN DOOR KEY (Z).
- Go (A).
- Take SHEARS (B).
- Take PLANK 1/3. Use SHEARS (C).
- Go (D).
- Move grass; take BURNER and GENERATOR SHED KEY (E).
- Use SHEARS; receive PLANK 2/3 (F).
- Walk down.
- Use BURNER (G).
- Take BUTTON BOX (H).
- Walk down.
- Place BUTTON BOX. Take HAMMER and GENERATOR SHED KEY (I).
- Go (J).
- Use HAMMER; receive PLANK 3/3 and NAILS 1-2/6 (K).
- Go to Shed Yard.
- Take NAILS 3-6/6 with HAMMER. Place PLANK, NAILS and HAMMER (L).
- Untangle knots (M).
- Receive ROPE.
- Walk down.
- Offer ROPE (N).
- Take RHINO (O).
- Place RHINO; solution (P).
- Take GENERATOR SHED KEY (Q).
- Go (R).
- Use GENERATOR SHED KEY (1), turn, use GENERATOR SHED KEY (2), turn, use GENERATOR SHED KEY (3) (S).
- Go (T).
- Take RAG and WRENCH (U).
- Take SCREW (V).
- Walk down.
- Use RAG (W); receive BLACK RAG.
- Play HOP (X); receive WHEEL.
- Go forward.
- Use WHEEL, SCREW and WRENCH (Y).
- Move ladder (Z).
- Move blueprint; take PAPER (A).
- Use BLACK RAG and PAPER (B); receive PAPER CODE.
- Place PAPER CODE (C).
- Enter 4-2-9-2-7.
- Take KEY (D).
- Use KEY; take FUSE HANDLE (E).
- Place FUSE HANDLE. Pull handles (F).
- Solution: G-H-H-G; G-G-H-G-H; G-H-G-H-H-G.
- Talk; take CARABINER (I).
- Go (J).
Chapter 4: The Moon Orb

- Move shrubs; take BUCKET (K).
- Use BUCKET; receive WATER BUCKET. Take TROWEL HANDLE and POLE RUNGS 1/3 (L).
- Take TROWEL with TROWEL HANDLE; take POLE RUNGS 2/3 (M).
- Use WATER BUCKET and TROWEL. Take POLE RUNGS 3/3(N).
- Alternate rungs (O).
- Take ROPE; open box. Symbols are the same but randomly placed (P).
- CARABINER on ROPE; receive ROPE WITH CARABINER.
- Place ROPE WITH CARABINER (Q).
- Go (R).

- Take HOOK (R) and PHOTO PART 1 (S); open box and take FISHING LINE (T).
- Go (U).
- Take SCOOP (V).
- Take FISHING ROD (W).
- Move items; take TAPE, SCREWDRIVER and CORKS 1/3 (X).
- Move paper; take BICYCLE PUMP, CORKS 2/3 and PATCHED PHOTO (Y).
- Use SCREWDRIVER; take OARS and PHOTO PARTS (Z).
- Walk down.
- FISHING LINE and HOOK on FISHING ROD.
- Use FISHING ROD (A).
- Play HOP (B); receive DEFLATED CHEW TOY.
- Go (C).
- Play HOP (D); receive PATCH KIT.
- Walk down.

- PATCH KIT on DEFLATED CHEW TOY. Use glue (1), patch (2) and BICYCLE PUMP (E). Receive CHEW TOY.
- Throw CHEW TOY (F).
- Take SHOVEL, BRUSH and BUG PIN (G).
- PATCHED PHOTO, PHOTO PART 1 and TAPE on PHOTO PARTS. Take BUG DRAWING.
- Use SHOVEL (H).
- Place BUG PIN and BUG DRAWING; solution (I).
- Take CORKS 3/3 and SPIDER TOKEN (J).
- Go (K).
- Use SCREWDRIVER and BRUSH; receive TAR BRUSH (L).
- Walk down.
- Use SCOOP, CORKS, TAR BRUSH and OARS (M).
- Go (N).
- Take puzzle (O).
- Place SPIDER TOKEN (P).
- Solution: left-up-leftx2-downx3-right-down-rightx4-upx3-left-downx2-right-down-leftx2-right-upx4-leftx2.
- Down-right-up-right-downx3-right-down-left-upx4-leftx4-down-right-downx2-upx2-rightx2-up-right.
- Take STONE TILE (Q).
- Take KNIFE (R).
- Play HOP (S); receive FOREST MAP.
- Use KNIFE (T); receive AXE.
- Use AXE; go (U).
- Take SYMBOLS INSTRUCTION (V).
- Walk down.
- Place STONE TILE and SYMBOLS INSTRUCTION (W).
- Select 1-6.
- Take FLINT AND STEEL (X). Open journal for a HOP; receive WING.
- Go (Y).
- Use FLINT AND STEEL (Z).
- Take GREASY RAG (A).
- Tie rope (B).
- Use GREASY RAG; turn handle (C).
- Use FLINT AND STEEL for a HOP (D). Receive ANGEL FIGURINE.
- WING on ANGEL FIGURINE.
- Place ANGEL FIGURINE; solution. Take DEMON'S CAVE LOCATION (E).
- Use FOREST MAP (F).
- Place DEMON'S CAVE LOCATION (G). Solution.
- Take SAW HANDLE (H).
- Solution. Take CANDLES AND BOTTLES (I).
- Take BRANCH; dip SAW HANDLE in resin and receive STICKY SAW HANDLE. Place STICKY SAW HANDLE (J).
- Make your way across (K).
- Take CROWBAR and TROWEL (L).
- Take MONOCLE (M).
- Walk down.
- Use CROWBAR (N).
- Play HOP (O); receive BAG INSET.
- Go (P).
- Use BAG INSET; take BOX OF LENSES (Q).
- Walk down.
- MOON SIGN INSTRUCTION and LENS from BOX OF LENSES.
- LENS on MONOCLE; receive MOON MONOCLE.
- Use TROWEL, MOON MONOCLE and MOON SIGN INSTRUCTION (R).
- Solution (S).
- Take CHEST TOKEN (T).
- Go (U).
- Place CHEST TOKEN (V). Solution: 1-3-5-2-4; 5-2-4-1-3; 2-5-3-4-1.
- Take MOON ORB (W).
- Place CANDLES AND BOTTLES and MOON ORB (X); solution.
- Take the moon orb.
- Defeat the demon (Y).
- Congratulations, you have completed Demon Hunter: Ascendance.
Created at: 2018-12-09