

Walkthrough Menu
- Game Info
- Family Compound
- Art
- Music
- Flight
- Discovery
- Pioneers
- Literature
- Science
- Travel
- Invention
- Visionaries
- Final
Game Information
- Game Length: there are 10 basic chapters to the game. Each chapter is further broken down into three different screens covering three different times/individuals. All three screens must be completed before moving to the next chapter.
- Timer: there is an accumulative timer for this game which gives the player the options of playing for speed (simply go faster for a lower timer score), or playing for casual enjoyment of the game.
- Objects: in each screen there are 4 historical objects divided into pieces that must be located and reassembled. Not all pieces are initially available. The guide will specify how many pieces each object is divided into and the number of initially available pieces. The pieces of the historical objects that are not immediately available will become so through the completion of mini-games and the use of items from the toolkit screen.
- Inventory: there is an inventory bar located on the bottom of each screen. This bar shows which items are hidden on that particular screen. Also on the inventory bar is an arrow button which, when pushed, will display all historical objects that have been reassembled and are ready for placement.
- Toolkit: the toolkit screen will show which items have been gathered from the screen and which are still to be found.
- Time Device: in the lower right corner of the screen is the Time Device. It is a circular gold and green dial which will indicate how many pieces of items have yet to be discovered, and how many mini-games have yet to be played for a current screen. This is also the method by which the player moves back and forth between the three screens for each chapter. Simply left-click on the device and it will bring up a round screen which gives you the option of selecting which historical figure and time you wish to travel to next.
- Hints: in the lower left corner of the screen is the hint button, as well as a zoom button for up-close and personal viewing of search screens. There is also a menu button to take you back to the main menu of the game. The hint button is refillable with a fairly quick refill time.
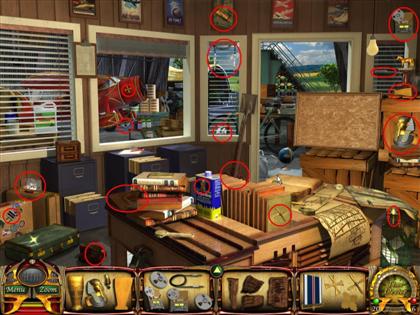
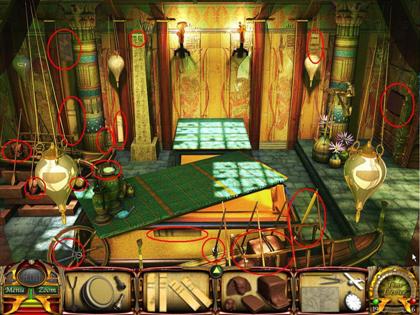
- Hidden Object: these are screens in which the player must locate pieces of historical objects in order to reassemble them and to place them back where they belong. Each item is part of the overall story. There are no item searches that do not move the story forward.
- Mini-Games: there are several mini-games in each chapter of the game. The nature of these games varies greatly and each provides a clue or an item that assists in moving the story and the game forward. There is something for every gaming preference! There are skip buttons for each mini-game in the event that any game seems a bit more difficult or time consuming than the player desires. There is, however, a 20 minute penalty for using the skip button!
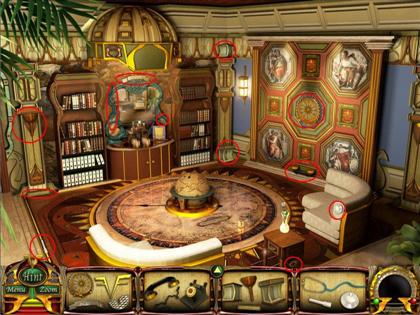
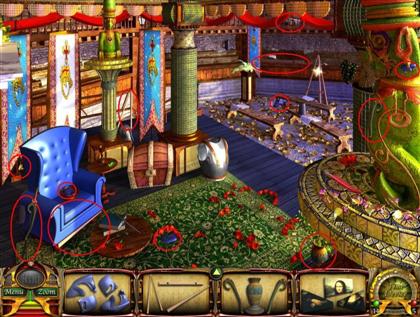
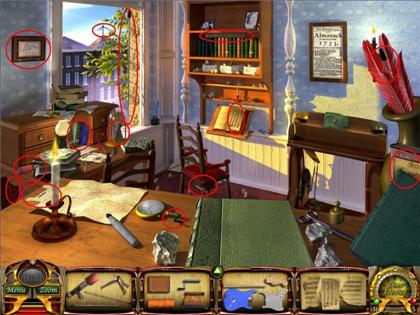
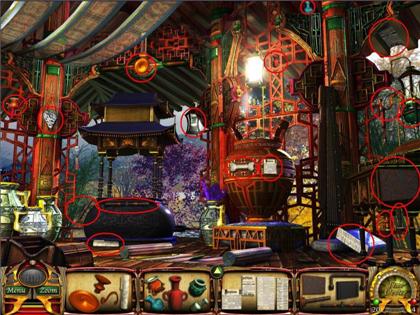
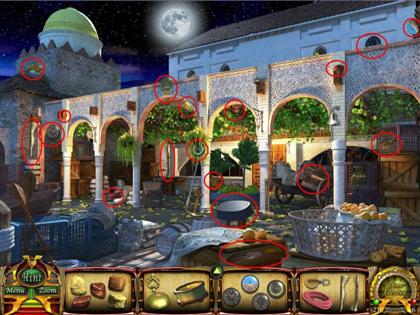
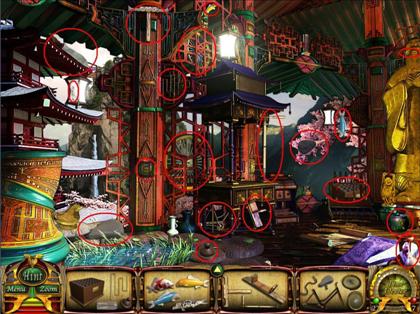
Family Compound
First Room
Historical objects to be reassembled:
- Cryptex (3 pieces, 2 available)
- Hands of a clock (3 pieces, 2 available)
- Teapot (3 pieces, 3 available)
- Freestanding Clock (4 pieces, 3 available)

- Take the completed coffee pot and douse the fire in the fireplace; remove the final piece of the cryptex.
- Place the completed cryptex on the table next to the vase (mini-game triggered).
Cryptex mini-game:
- Complete the mini-game by lining up the same symbol in all four center windows (correct symbols are generated randomly). Once solved, the final piece of freestanding clock will be available.
- Assemble the clock, and the small screen will show the final piece of hands of a clock on the face of the freestanding clock.
- Place the hands of the clock on the face of the grandfather clock (this triggers a mini-game).
Clock mini-game:
- Place the hands of the clock on the face of the grandfather clock (this triggers a mini-game).
- Match the hands on the face of the grandfather clock to those on the face of the freestanding clock (8:12). Once completed, the puzzle piece will be added to the toolkit, and this screen will be completed.
Second Room
Historical objects to be reassembled:
- Flux Family Crest (4 pieces, 3 available)
- Stethoscope (3 pieces, 3 available)
- Old Telephone (3 pieces, 2 available)
- Wall Sconce (3 pieces, 3 available)
- Locate pieces of historical objects marked in red.
- Place the wall sconce on the wall, on the right side of the mural.
- The telephone cord (the final piece of the telephone) will become available.
- Place the completed telephone on the table with the small glass vase between the two chairs.
- The telephone will ring causing the vase to drop from the table, and the gold key will slide out from the broken vase; left-click on key and it will be added to the toolkit.
- Left-click on the key from the toolkit and drag it to the drawer of the telephone table.
- A cut screen will be available. Use the key on the drawer handle; the drawer will open, making the final piece of the Flux Family Crest available. Left-click the final piece and it will be added to the inventory.
- Left-click and drag the Flux Family Crest to a place above the bar; this will trigger a tile to open on the mural.
- Left-click on the puzzle piece in the toolkit and drag it to the open tile space on the mural (this triggers a mini-game)..
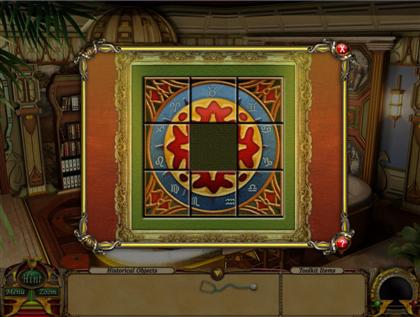
Tile mini-game:
- The solution is as follows (beginning at the bottom row, center):
Pillar safe mini-game
- Left-click on the stethoscope in your inventory and drag it to the pillar.
- Click and hold to turn the dial slowly clockwise until you see the small light on the stethoscope turn green; then, turn the dial counter-clockwise one full turn (past the first number), and then go slowly from one number to the next until you see the light once again turn green; finally, turn the dial clockwise again until you see the light turn green. The combination to this puzzle is random. It may never be the same combination twice.
- Upon successful completion of the combination, a window will open, and a circular device will become available, left-click on the device.
Thumbprint Match
- There will be a cut scene explaining the device and its purpose, with regard to the Flux family. Determining if the player is truly a member of the Flux family requires a thumbprint match.
- Left-click on the matching thumbprints and drag them to the sample prints at the top of the screen to verify your membership within the Flux family.
ART
Leonardo DaVinci:
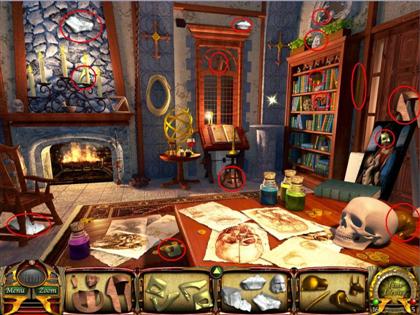
Historical Objects to be reassembled:
- Bust of Hatshepsut (4 pieces, 4 available)
- Mask of comedy (4 pieces, 4 available)
- Bust of Leonardo DaVinci (4 pieces, 4 available)
- Dog of gold (4 pieces, 3 available)
Queen Hatshepsut:
Historical Objects to be reassembled:
- Paint pallet and brushes (5 pieces, 5 available)
- Portrait of Shakespeare (3 pieces, 2 available)
- Ancient bowl (2 pieces, 2 available)
- Exquisite mask (3 pieces, 3 available)
William Shakespeare:
Historical Objects to be reassembled:
- Mask of tragedy (4 pieces, 4 available)
- Painter’s easel (3 pieces, 3 available)
- Ancient vase (3 pieces, 3 available)
- Portrait of Mona Lisa (3 pieces, 2 available)
DaVinci:
Place the historical objects:
- Place the bust of DaVinci on the white pillar between the window and the bookcase.
- Place the paint pallet and brushes on the books behind the skull on the table.
- Place the easel on the right side of the fireplace.
Hatshepsut:
Place the historical objects:
- Place the bust of Hatshepsut on top of the sarcophagus.
- Place the ancient vase on the table on the right, behind the set of three vases.
- Place the ancient bowl on the floor of the tomb beneath the skylight. Sand is falling down from the skylight; the bowl will fill with sand and the filled bowl will be placed in the toolkit.
Shakespeare:
Place the historical objects:
- Place the mask of comedy on the column between the chair and the locked chest.
- Place the mask of tragedy beneath the mask of comedy.
- Place the exquisite mask on the column between the locked chest and the armor breastplate.
Davinci:
Use the toolkit item:
- Take the sand in the ancient bowl and use it to put out the fire in the fireplace.
- Left-click on the last piece of the golden dog.
Hatshepsut:
Place the historical objects:
- Place the dog of gold on the left side of the Queen’s sarcophagus (this triggers a mini-game).
Marble popping mini-game:
- Pop all the suspended marbles using only three white marbles.
- Once the mini-game is solved, the final piece of Shakespeare’s portrait will be revealed; left-click on the final piece to add to the inventory.
Shakespeare:
Place the historical objects:
- Put the portrait of Shakespeare on the easel (this triggers a mini-game).
Portrait cleaning mini-game:
- Left-click on the brush, and then systematically clear off the portrait by continually left-clicking and moving the brush back and forth across the painting. Once the painting is completely clear, the key will be added to the toolkit.
- Left-click on the key and drag it to the locked chest in the middle of the screen; the final piece of Mona Lisa will be revealed.
- Left-click on the final piece of the portrait to add it to the inventory.
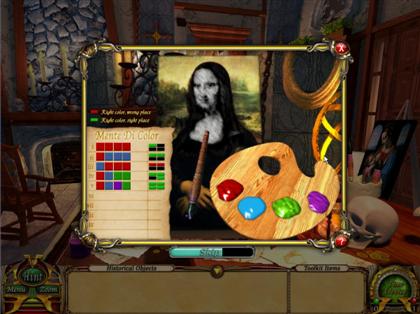
DaVinci:
Place the historical objects:
- Place the portrait of Mona Lisa on the easel to the right of the fireplace (this triggers a mini-game).
- Paintbrush mini-game: the object is to figure out the sequence of four colors. A black box indicates that a color is not in the sequence. A red box indicates that a color is in the sequence, but not in the correct place. A green box indicates the right color is in the right place.
 DaVinci is complete.
Apollo Machine List:
- DaVinci: Mortar and Pestle, Candleholder
- Hatshepsut: Scale, Dog Jars
- Shakespeare: Red quill, Green blanket
MUSIC
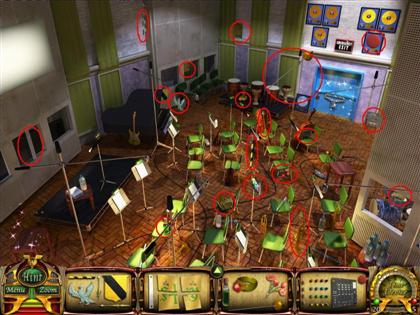
Abbey Road Studios:
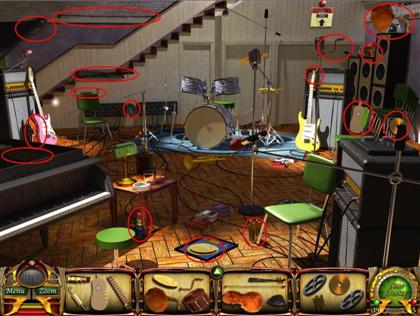
Historical Objects to be reassembled:
- Acoustic Guitar (4 pieces, 4 available)
- Phonograph (4 pieces, 4 available)
- Violin (4 pieces, 4 available)
- Master tape (4 pieces, 3 available)
Toolkit object to be discovered
- Spray Can
Albert Einstein:
Historical Objects to be reassembled:
- Armonica spindle (4 pieces, 4 available)
- Drum set (3 pieces, 3 available)
- Radio (4 pieces, 3 available)
- Harpsichord (4 pieces, 4 available)
Benjamin Franklin:
Historical Objects to be reassembled:
- Mic stand (4 pieces, 4 available)
- Music box (4 pieces, 4 available)
- Electric guitar (4 pieces, 4 available)
- Mozart sheet music (3 pieces, 2 available)
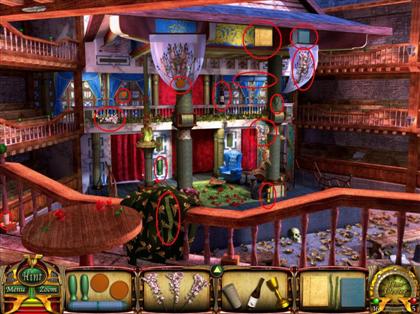
Abbey Road:
Place the historical objects:
- Place the electric guitar on top of the green chair in front of the amplifier.
- Place the mic stand between the pink guitar and the piano.
- Place the drum set in front of the drum set in the room (this triggers a mini-game).
Drum mini-game:
- The object is to hit colored pulses as they intersect with their corresponding pedals. Every time a pulse is hit correctly, the meter on the cymbal stand to the right goes up. When a pulse is missed, or hit incorrectly, the meter will go down. Fill the meter to the top to complete the mini-game. A screwdriver will be added to the toolkit.
Use toolkit items:
- Left-click the mic stand, and the small screen will show the toolkit items that need to be used.
- Left-click the spray can in the toolkit and drag it to the mic stand.
- Left-click the screwdriver and drag it to the mic stand.
- The arm of the mic stand will drop and hit the piano, and then the final piece of the Master Tape will be revealed.
Place the historical objects:
- Left-click the Master Tape and drag it to the control room sign on the back wall of the studio (this triggers a mini-game).
Control panel mini-game:
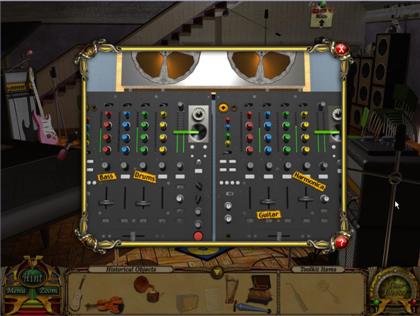
- The object of the mini-game is to remove all the audible feedback by adjusting the volume sliders for the four instruments listed on the panel.
- The volume sliders need to be in such positions that the indicator lights are all in the green level.
- Move each of the sliders to the upper level (red lights) on each instrument slider first, and then slowly lower each one down to the green level.
- A lockpick will be revealed and added to the toolkit.
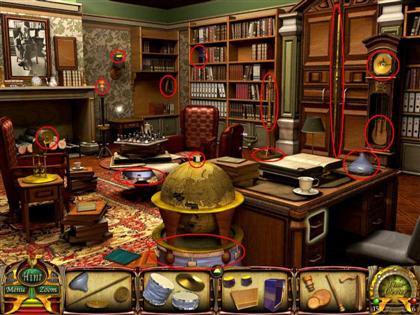
Einstein:
Place historical objects:
- Left-click on the violin and place it next to the side table on the right side of screen.
- Left-click on the phonograph and place it on the table between the fireplace and the bookcase on the back wall.
Franklin:
Place historical objects:
- Place the acoustic guitar against the wall between the bookcase and the large wooden stand.
- Place the music box on the top shelf of the bookcase.
- Place the harp on top of the desk next to the window, above the locked drawer.
- Place the armonica spindle on the large wooden stand next to the acoustic guitar (This triggers a mini-game).
Armonica mini-game:
- Follow and repeat the tones of the armonica by left-clicking on the colored sections that mimic the tones of the game. There will be 8 tones in all.
- Upon successful completion, the gold key will be added to the toolkit.
Use toolkit items:
- Left-click on the key in the toolkit and drag it to the locked drawer of the desk.
- The final piece of Mozart’s sheet music will be revealed.
- Left-click on the piece of sheet music to add it to the inventory.
Einstein:
Place historical objects:
- Place the Mozart sheet music on the wooden frame over the fireplace. A cut screen will show the combination "1776" for the lock on the cupboard beneath one of the bookcases.
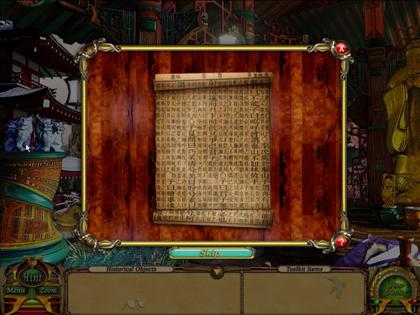
- The cupboard opens to reveal a torn piece of a very old document. Left-click on the document; a small screen will open with additional information.
Use toolkit item:
- Left-click on the lockpick and drag it to the locked drawer of the desk (this triggers a mini-game).
Lockpick mini-game:
- Beginning with the far right tumbler, place the lockpick beneath the bouncing tumbler. Lock the tumbler into place by left-clicking the lockpick when the tumbler is at its highest point.
- Once one tumbler is locked in place, move to the next one.
- The drawer opens to reveal the final piece of the radio.
- Left-click on the final piece to add it to your inventory.
Place historical object:
- Left-click the radio and place it on the desk behind the coffee cup.
Apollo Machine List:
- Abbey Road: Gold album, Trumpet
- Albert Einstien: Physicist’s watch, Green booklet
- Benjamin Franklin: Brass weight, Ink and quill
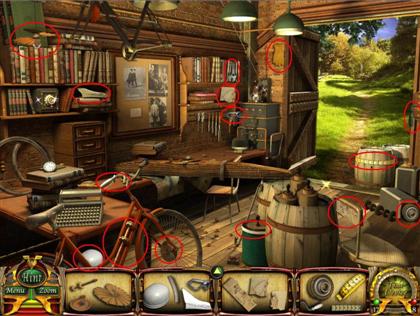
FLIGHT
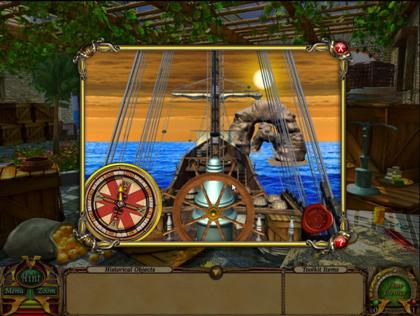
Amelia Earhart:

Historical objects to be reassembled:
- Drawknife (3 pieces, 3 available)
- Glider model (3 pieces, 2 available)
- First airplane (3 pieces, 3 available)
- Divider tool (4 pieces, 4 available)
Toolkit object to be discovered:
- Engine Fan
Wright Brothers:
Historical objects to be reassembled:
- Helicopter model (3 pieces, 3 available)
- Helmet (4 pieces, 4 available)
- Catapult sketch (3 pieces, 2 available)
- Measuring tape (4 pieces, 3 available)
Toolkit objects to be discovered:
- Wrench
- Glove
- Pulley handle
Leonardo DaVinci:
Historical objects to be reassembled:
- Early parachute (3 pieces, 2 available)
- Pieces of medallion (4 pieces, 3 available)
- Canvas roll (3 pieces, 3 available)
- Propeller (4 pieces, 4 available)
Toolkit items to be found:
- Dust Brush
Earhart:
Place historical objects:
- Place the divider tool on the wall above the table with three stacked oil cans.
- Place the helmet on the top of the three stacked oil cans.
- Place the propeller on the nose of the red plane in the hangar (this triggers a mini-game).
Color sequence mini-game:
- The object is to figure out the sequence of four colors. A black box indicates that a color is not in the sequence. A red box indicates that a color is in the sequence, but not in the correct place. A green box indicates that the right color is in the right place.
Use toolkit item:
- Place the engine fan on the front of the engine on the work table. The engine will start; the fan will rotate and blow the paper bag over revealing the final piece of the glider model.
- Left-click on the piece of the glider model to add to the inventory.
Wright Brothers:
Place historical objects:
- Place the drawknife on the work table closest to the open doors.
- Place the first airplane outside of the doors on the pathway.
- Place the canvas roll in the barrel holding three other canvas rolls.
Use toolkit items:
- Left-click on the wrench and drag to the bicycle seat of the bicycle in the lower left corner of screen (this triggers a mini-game).
Bicycle Seat mini-game:
- Left-click on the wrench and drag it to the screw holding the seat to the bicycle frame; move the wrench in a counter-clockwise direction (righty-tighty, lefty-loosey) several turns until the seat is removed, revealing the final piece of the catapult sketch.
- Left-click on the piece of the sketch to add it to the inventory.
- Left-click on the pulley mechanism next to the double doors (sparkly). A small screen appears indicating which toolkit items are needed to complete the task.
- Left-click on the glove and handle from the toolkit, and drag them to the pulley mechanism (this triggers a mini-game).
Pulley mechanism mini-game:
- The object is to move the bicycle frame along the pulley system, along the upper part of the walls. Left-click on the handle and the handle will move the bicycle frame along the track. Once the frame has moved a sufficient distance, the final piece of the measuring tape will appear at the top of the wall; left-click on the tape piece to add to the inventory.
Place historical objects:
- Place the measuring tape on top of the books on the left side of the worktable behind the red bicycle.
DaVinci:
Place historical objects:
- Place the glider model on the stone wall above the fireplace, and the final piece of the parachute will become available. Left-click on the parachute piece to add it to your inventory.
- Place the parachute on the table closest to the closed doors.
- Place the helicopter model on the chains above the closed doors, between the portrait of woman and a window (This triggers a mini-game).
Helicopter mini-game:
- Steer the model helicopter from the books on the right side of screen to two targets. The first target is a metal bowl that has a green target on it. Once the model has safely landed, the target will move to the books on the left side of screen. Left-click and hold to made the model rise; release the button to make the model descend. Moving the mouse to either the right or the left will move the model in the same direction. (It isn’t easy, but it can be done!) Upon completion of the mini-game, the final piece of the medallion will be revealed; left-click on the piece to add it to the inventory.
- Place the catapult sketch on the table beneath the magnifying glass.
Use toolkit item:
- Left-click on the brush and drag it to the catapult sketch beneath the magnifying glass. The brush will remove dust, under which you will find the red wax seal; left-click on the seal to add it to the toolbox.
- Leonardo DaVinci is now complete.
Earhart:
Place historical objects:
- Place the medallion on the single oil can to the right of the stacked set of three oil cans.
Wright Brothers:
Use toolkit item:
- Left click on red wax seal and drag to safe on shelf (sparkly); the three roman numerals on the seal are the combination to the safe; R-23, L-6, R-15; safe opens to reveal a second torn piece of a very old document; left click on piece of paper.
Apollo Machine List:
- Amelia Earhart: Brown shoes, Model plane
- Wright Brothers: Printing type block, Paper roller
- Leonardo DaVinci: Dagger, Knight’s helmet
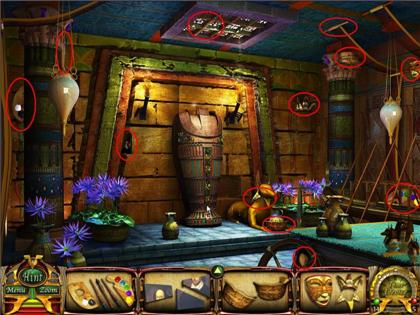
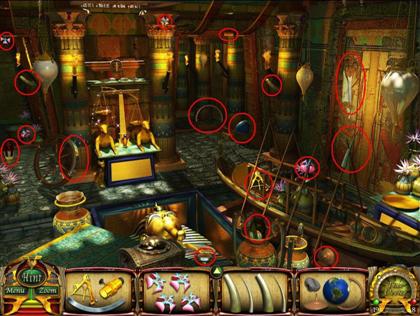
DISCOVERY
Christopher Columbus:
Historical objects to be reassembled:
- Portrait of Confucius (3 pieces, 3 available)
- Tobacco leaves (4 pieces, 3 available)
- Equation (4 pieces, 4 available)
- Telescope (4 pieces, 4 available)
Confucius:
Historical objects to be reassembled:
- Magnetic compass (3 pieces, 2 available)
- Fireworks (4 pieces, 4 available)
- Pressure valve (3 pieces, 2 available)
- Oranges (4 pieces, 4 available)
Toolkit object to be discovered:
- Matchbox
Albert Einstein:
Historical objects to be reassembled:
- Scrolls (4 pieces, 3 available)
- Planetary model (4 pieces, 4 available)
- Ancient guitar (3 pieces, 3 available)
- Spice jars (3 pieces, 2 available)
Columbus:
Place historical objects:
- Place the oranges on the sack of oranges, on the lower left side of screen. The sack falls over, revealing the crowbar toolkit item; left-click on the crowbar to add it to the toolkit.
Confucius:
Place historical objects:
- Place the ancient guitar on the floor between the cushions and the bamboo mat.
- Place Confucius’ portrait on the pillar to the left of the window (this triggers mini-game).
Confucius portrait mini-game:

- Complete the portrait of Confucius by inserting pieces of bamboo into the proper places within the portrait; when placed correctly, the pieces will "click" in that position. Once the mini-game has been solved, the final piece of the magnetic compass will be revealed and added to the inventory.
- The firework will then be added to the tray on the right side of the screen (sparkly).
Use toolkit item:
- Left-click on the matchbox and drag it to the firework tray (this triggers a mini-game).
Firework mini-game:
- Locate the "dud" firework (on the bottom of the pile). There are eight matches available; left-click on a match and it will light. Apply it to the wick of a firework; more than one firework can be lighted; however, the match will burn out. Look for wicks that are close together in the pile to light many at once. Once the "dud" is located, it will break open and reveal the final piece of the pressure pump. Left-click on the pump piece to add it to the inventory.
Einstein:
Place historical objects:
- Place the planetary model above desk.
- Place the pressure valve on top of the locked refrigerator behind desk, and then the magnifying glass will be revealed.
- Place the telescope on the tripod to the right of refrigerator (this triggers a mini-game).
Telescope mini-game:
- Bring an item into view; left-click and hold on the red triangle, and move it up and down until the view becomes completely clear. Left-click on the final spice jar to add it to the inventory.
- Place the equation in the center of the chalkboard behind desk (this triggers a mini-game).
Magnet mini-game:
- Attract 3 or more like-colored magnets without coming into contact with any magnets of any other color. Magnets are activated and de-activated by left-clicking them on and off. Two or more magnets must be activated in order for them to be attracted to each other. Four screens must be completed to successfully finish this game. The utility key will be added to the toolkit screen.
Toolkit item:
- Left-click on the magnifying glass above the pressure valve to add it to the toolkit.
- Left-click on the utility key and drag it to the locked refrigerator; the final scroll will be revealed. Left-click it to add it to the inventory.
Columbus:
Place historical objects:
- Place the magnetic compass on the ship’s wheel (sparkly).
Toolkit item:
- Left-click on the magnifying glass; drag it to the map on the table in the lower right corner of the screen, and then a small screen will reveal a red wax seal on the map. Left-click on the seal to add it to the toolkit screen.
- Left-click the red wax seal and drag it to the ship’s wheel, where the magnetic compass was placed (this triggers a mini-game).
Ships wheel mini-game:
- Steer the ship to the location indicated on the red wax seal (Southwest 260). Left-click and hold to direct the ship to the place indicated on the seal (move the wheel in a clockwise direction). Once you reach SW 260, according to the compass in the lower left corner of the mini-game screen, a third torn piece of paper will be revealed; left-click on the paper to add it to your inventory.
Place historical objects:
- Place the spice jars on the empty side of the scale, on the right side of the screen (this triggers a mini-game).
Spice jar mini-game:
- Left-click and drag different combinations of the brass weights to determine the exact weight of the spice jars; a heavy hammer will be revealed and added to the toolkit screen.
Toolkit item:
- Left-click and drag the crowbar and heavy hammer to the crate in the center of the screen; the crate will open revealing the final tobacco leaf.
Place historical object:
- Place the tobacco leaves on the open sack on top of the three stacked sacks in front of a barrel.
Confucius:
Place historical objects:
- Place the scrolls on the left wall, constructed to hold several different scrolls (this triggers a mini-game).
Scroll mini-game:
- Win four games of "tic tac toe" using scrolls. Left-click on one of the nine boxes outlined in purple to place your first scroll. The computer will then place its scroll in one of the remaining boxes. Win the four games, and then a strange device will be revealed; left-click on the device to add it to the inventory.
Apollo Machine List:
- Christopher Columbus: Wooden mallet, Sexton
- Confucius: Steel statue, Red pot
- Albert Einstein: Tobacco pipe, Gray loafers
PIONEERS
Amelia Earhart
Historical objects to be reassembled:
- Sarcophagus (4 pieces, 4 available)
- Recording Equipment (5 pieces, 5 available)
- Ancient star map (4 pieces, 3 available)
- Medal (4 pieces, 4 available)
Toolkit item:
- The lockpick
Queen Hatshepsut
Historical objects to be reassembled:
- Coil microphone (4 pieces, 3 available)
- Music score (4 pieces, 4 available)
- Senmut (4 pieces, 4 available)
- Chart (5 pieces, 5 available)
Abbey Road
Historical objects to be reassembled:
- Two-way radio (4 pieces, 3 available)
- CD-ROM (4 pieces, 3 available)
- Letter (4 pieces, 3 available)
- Obelisk (5 pieces, 5 available)
Toolkit items:
- Lamp chain located on left side of screen.
- light bulb located in light in studio ceiling
Historical objects to be placed:
- Place the recording equipment on blue chest next to the sound boards.
- Place the music score on the music stand (sparkly).
Toolkit items:
- Left-click and drag the lamp chain to the music stand (sparkly).
- Left-click and drag the light bulb to the music stand (sparkly) (this triggers a mini-game).
Music score mini-game:

- Reassemble pieces of the musical score by clicking and dragging connecting pieces to each other. Once two connecting pieces are put together they will remain connected. Once completed, a small screen will appear with the combination to a locked blue chest.
- Double-click on the lock of the blue chest; put the combination into the lock (6265). The final piece of the letter will be revealed; left-click on the letter to add it to the inventory.
- Move on to Earhart.
Earhart
Historical objects to be placed:
- Place the chart to the bulletin board on top of the crate.
- Place the medal flat on the table next to the tin of turpentine.
- Place the letter on top of the charts and diagrams on the table in front of the chart on the bulletin board (this triggers a mini-game).
Letter mini-game:
- Complete the letter Amelia wrote to her husband. There is a list of words on the right side of the game screen that need to be inserted into their correct place within the body of the letter; in order of appearance in the letter they are: know, aware, hazards, Women, men, tried, failure, challenge.
- Once completed a fourth piece of the old document is revealed; left-click on the document piece.
Translation of the Strange Document
- Put the four pieces of paper together. When all four pieces are together, the strange device will appear to translate the document. Move the device over the ancient text to decipher it’s message (solution below):
- "We need your help! We were deceived and a Flux rule was broken. They are altering history and must be stopped. Find all pieces of the Delphi Device that are scattered throughout time to stop her. When all history’s treasures are replaced, assemble the Delphi and attach it to the time device to realign history. Look to the right press to find the first piece."
Toolkit item:
- Left-click on the lockpick and drag it to the green suitcase on the floor. The suitcase opens to reveal the final piece of the ancient star map; left-click on the piece of star map to add it to the inventory.
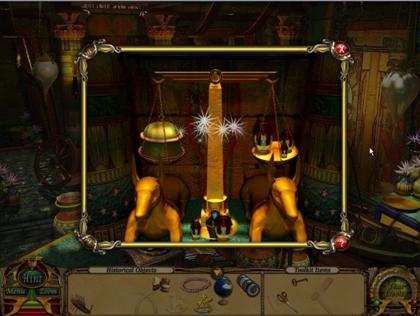
Hatshepsut
Historical objects to be placed:
- Place Senmut on the green platform between the two burning torches.
- Place the obelisk to the right side of Senmut.
- Place the sarcophagus inside of the center chamber box.
- Place the star map in front of the left obelisk (this will trigger a mini-game).
Star map mini-game:
- Move tiles so that the empty space is in the center of the puzzle. The correct placement of the tiles is etched in the spaces beneath them; arrange the tiles so that the correct tile sits atop the correct space. Once completed, a piano key will be added to the toolkit screen.
Abbey Road
Toolkit Item:
- Left-click and drag the piano key to the piano. The final piece of the CD ROM will be revealed; left-click on the piece to add it to the inventory.
Historical object to be placed:
- Place the CD ROM in the empty jewel case on the sound board (this triggers a mini-game).
Color sequence mini-game:
- Determine the correct color sequence. A black box indicates that a color is not in the sequence. A red box indicates that a color is in the sequence, but not in the correct place. A green box indicates that the right color is in the right place. Once the sequence is determined, the final piece of the two-way radio will be revealed.
Earhart
Historical object to be placed:
- Place the two-way radio on the first two-drawer file cabinet; the radio will make a sound, and cause a light bulb in the room to burst. A drawer key falls from the bulb and is added to the toolkit screen.
Toolkit item:
- Left-click on the drawer key and drag it to the two-drawer cabinet on the top of the third two-drawer file cabinet. The drawer will open to reveal a candle snuffer; left-click on the candle snuffer to add it to toolkit screen.
Hatshepsut
Toolkit item:
- Left-click the candle snuffer and drag it to the left torch. Snuff the flame of the torch to reveal a poker; left-click on the poker to add it to the toolkit screen.
- Left-click the poker and drag it to the right front-hanging bulb; click on the bulb, and sand will trickle out of a hole, lowering an awning to reveal the final piece of the coil microphone.
- Left-click on the piece to add it to the inventory.
Abbey Road
Historical item to be placed:
- Place the coil microphone beside the sound board on the lower right of the screen.
Apollo Machine:
- Amelia Earhart: Globe, Red plastic bottle
- Queen Hatshepsut: Turquoise earring, Gold headdress
- Abbey Road: Flute, Conga drum
LITERATURE
Confucius
Historical objects to be reassembled:
- 16th Century Candle (4 pieces, 4 available)
- Ritual vases (5 pieces, 5 available)
- Old newspaper (4 pieces, 3 available)
- Printing press (5 pieces, 4 available)
Toolkit items:
- Flint stone
- Old bone
William Shakespeare
Historical objects to be reassembled:
- The Five classics (5 pieces, 4 available)
- Cherry blossoms (3 pieces, 3 available)
- Wine and chalice (3 pieces, 3 available)
- Fathers of flight (4 pieces, 4 available)
- After locating all available objects, move on to the Wright Brothers.
Wright Brothers
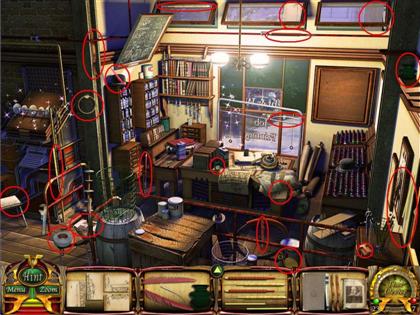
Historical objects to be reassembled:
- Flying machine patent (4 pieces, 3 available)
- Ink and quill (4 pieces, 4 available)
- Incense fireworks (6 pieces, 5 available)
- First Folio (4 pieces, 3 available)
Toolkit Items:
- Drawstring
- Ink bottle
- Ring for string
- Tape
- Printing piece
Historical objects to be placed:
- Place the Fathers of Flight book in the green wire trash basket on top of the barrel.
Toolkit items:
- Left-click on the metal frame by the front window (sparkly). Left-click and drag the drawstring, ring for the drawstring, and tape to the metal frame. The final piece of the flying machine patent will be revealed; left-click it to add it to the inventory.
Historical object to be placed:
- Place the Flying Machine Patent in the empty wooden frame on the wall by front the window (this triggers a mini-game).
Patent mini-game:
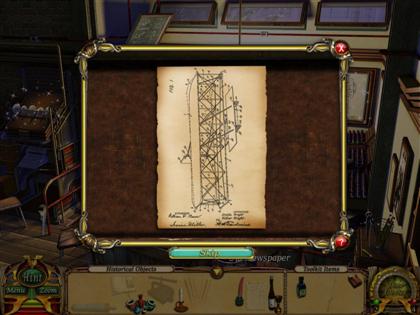
- Reassemble the patent correctly by left-clicking and dragging matching pieces of the document together. Once two connecting pieces are put together they will remain connected. Once the patent is completely restored, the final incense stick will be revealed and added to the inventory.
Confucius
Historical objects to be placed:
- Place the ritual vases on the large pagoda covered altar.
- Drag the incense firework to the large red jar (sparkly).
Toolkit items:
- Left-click and drag the flint stone to the large red jar (sparkly).
- Left-click and drag the old bone to the large red jar (sparkly). The incense firework will ignite. When it lands it reveals the final piece of the newspaper; left-click on the newspaper piece to add it to the inventory.
Shakespeare
Historical objects to be placed:
- Place the wine bottle and the chalice on table between the two roses.
- Place the cherry blossoms to the left of the vase.
- Place the 16th century candle on the railing to the right.
- Place the ink and quill on the left side of the table.
Wright Brothers
Historical objects to be placed:
- Place the old newspaper on the table with the paper roller (sparkly).
Toolkit items:
- Left-click and drag the ink bottle to the table with the paper roller (sparkly).
- Left-click and drag the printing piece to the table with the paper roller (sparkly) (this triggers a mini-game).
Wright Brothers trivia mini-game:
- Correctly answer two of three questions regarding the Wright Brothers:
- The final piece of the First Folio is revealed and added to the inventory.
Shakespeare
Historical object to be placed:
- Place the First Folio on the center of the table (this triggers a mini-game).
Shakespeare trivia mini-game:
- Correctly answer three trivia questions regarding Shakespeare’s plays:
- When successfully completed, the dagger is added to the toolkit screen.
Toolkit items:
- Left-click on the dagger and drag it to the first red curtain. The final piece of the Five Classics will be added to the inventory.
Confucius
Historical object to be placed:
- Place the Five Classics on the wooden holder in the lower left corner of the screen (this triggers a mini-game).
Matching mini-game:
- Match all the pieces to have the final piece of the printing press added to the inventory.
- Confucius is now complete; return to the Wright Brothers.
Wright Brothers
Historical object to be placed:
- Place the printing press on the wooden table next to the wire trash basket. A piece of the Delphi Device is revealed; left-click on the piece to add it to the inventory.
Apollo Machine Items:
- Confucius: Bamboo pen, Wind chime
- Shakespeare: White quill, Skull
- Wright Brothers: Green glass bottle, pipe wrench
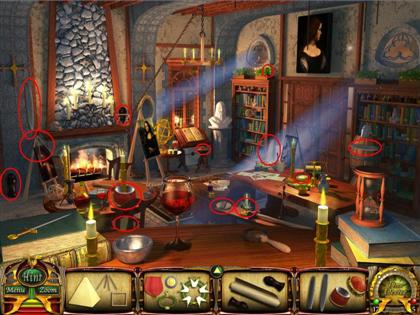
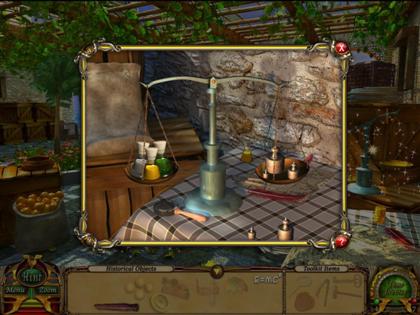
SCIENCE
Albert Einstein
Historical objects to be reassembled:
- Seafarer’s Chart (3 pieces, 3 available)
- Nobel Prize (4 pieces, 3 available)
- Pocket Watch (4 pieces, 4 available)
- Model of crane (4 pieces, 4 available)
Benjamin Franklin
Historical objects to be reassembled:
- Copley Medal (4 pieces, 3 available)
- Skull (4 pieces, 3 available)
- Chess pieces (6 pieces, 6 available)
- Rhombus (4 pieces, 4 available)
Toolkit items:
- Shiny key
Historical items to be placed:
- Place the pocket watch on top of the stack of books on the desk by the lamp (this triggers a mini-game).
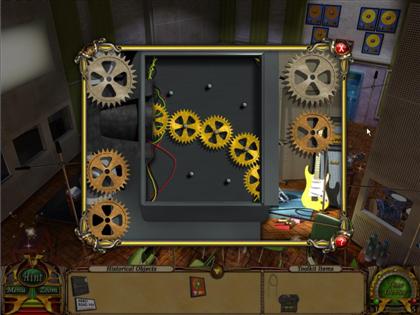
Clock-work mini-game:
- Connect gears from the small gear at the bottom of the watch (that is currently turning) to the middle gear at the upper left of the watch using the size of gears available. It is not necessary to use all the gears to solve the game. Upon completion of the game, the axe will be revealed and added to the toolkit screen.
Toolkit items:
- Left-click on the ax and drag it to the upper wooden panel on the right side of the window. The remaining piece of skull will be revealed; click on the piece of skull to add it to the inventory.
Leonardo DaVinci

Historical objects to be reassembled:
- Human brain (4 pieces, 4 available)
- Protractor (3 pieces, 3 available)
- Kite and string (4 pieces, 4 available)
- Grinder (5 pieces, 5 available)
Toolkit objects:
- Ball
- Rag
- Sponge
- Bowl
Historical objects to be placed:
- Place the crane model on the round table (sparkly).
Toolkit objects placed:
- Left-click on the bowl and drag it to the round table (sparkly).
- Left-click on the ball and drag it to the round table (sparkly) (this triggers a mini-game).
Crane mini-game:
- Drop the crane onto the four balls; lift and drop them into the bowl. Use the right and left keys to move the crane left and right, and use the down arrow key to pick up the ball. Once completed, a vial of "strange liquid" will be added to the toolkit screen.
- Left-click on the strange liquid and drag it to the yellow substance on the floor (sparkly).
- Left-click on the rag and drag it to the yellow substance on the floor (sparkly).
- Left-click the sponge and drag it to the yellow substance on the floor (sparkly). The liquid is cleared and the chest key is added to the toolkit screen.
- Left-click on the chest key and drag it to the chest at end of the long table. The final piece of the brain will be revealed; click on the brain to add it to the inventory.
Historical objects placed:
- Place the rhombus on top of the barrel in front of the bookcase.
- Place the skull on the fireplace mantle next to the other skull.
- Place the grinder on the bench next to chest.
Einstein
Historical items placed:
- Place the human brain in the large fluid filled jar on the counter of the back bookcase.
- Place the protractor on the stack of books to the right of the telescope.
- Place the chess pieces on the chessboard; the fancy wrench will be added to the toolkit screen.
Toolkit items:
- Left-click on the fancy wrench and drag it to the lamb on the wall next to the picture of Einstein. The final piece of the Nobel Prize will be revealed; click it to add it to the inventory.
Historical items placed:
- Place the Nobel Prize medal on the table between the coffee cup and the coffee pot (this triggers a mini-game).
Magnet mini-game:
- Attract groups of three or more like-colored magnets without coming into contact with any magnets of any other color. Magnets are activated by left-clicking them on, and deactivated by left clicking them off. Two or more magnets must be activated in order for them to be attracted to each other. Four screens need to be completed to successfully finish this game. Once completed, the battery pack for the Delphi Device will be revealed.
Franklin
Historical items Placed:
- Place the kite on the glass jar in front of the window.
Toolkit item:
- Left-click on the shiny key and drag it to the glass jar in front of the window. Lightning will strike the key and travel down the kite string, and then the key knife will be added to the toolkit screen.
- Left-click on the key knife and drag it to the chair to reveal the final piece of the Copley medal; left-click on the piece to add it to the inventory.
Historical items placed:
- Place the seafarer’s chart on the book on the desk next to the chair.
- Place the Copley medal on the desk to the left of the seafarer’s chart.
Apollo Machine List:
- Benjamin Franklin: Music box tumbler, picture of house
- Leonardo DaVinci: Paint brush, sketching chalk
- Albert Einstein: Old record, Violin bow
TRAVEL
Amelia Earhart
Historical objects to be reassembled:
- Telescope (4 pieces, 4 available)
- Boat (4 pieces, 4 available)
- Luggage (3 pieces, 3 available)
- Wooden horse (4 pieces, 3 available)
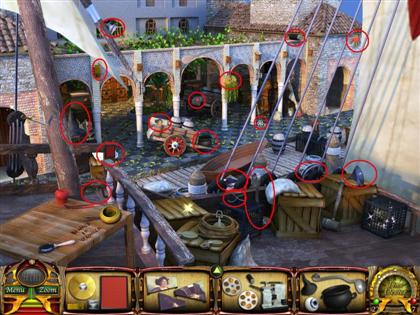
Christopher Columbus
Historical objects to be reassembled:
- Frankincense (5 pieces, 4 available)
- Myrrh (3 pieces, 3 available)
- Gauges (4 pieces, 4 available)
- Sail (4 pieces, 4 available)
Toolkit items:
- Sifter
- Machete
- Axe
Historical items placed:
- Place the sail on the right side of the screen, below the first arch.
- Place the telescope on the crate on the left side of the screen behind the oars (this triggers a mini-game).
Coconut mini-game:
- Find the pea once the coconut shells are finished being moved. The pea must be found three times in order for game to be completed. Once completed, the scoop is revealed and added to the toolkit screen.
Toolkit items:
- Left-click on the sifter and drag it to the sack near the center of the screen (sparkly).
- Left-click on the machete and drag it to the sack near the center of the screen (sparkly).
- Left-click on the scooper and drag it to the sack near the center of the screen (sparkly). The car key will be revealed; left-click on the key to add it to the toolkit screen.
- Left-click on the ax and drag it to the barrel on its side, near the sack where the car key was located. The final piece of frankincense will be revealed; left-click on the frankincense to add it to the inventory.
Queen Hatshepsut
Historical objects to be reassembled:
- Sextant (3 pieces, 3 available)
- Lei (4 pieces, 4 available)
- Tusks (4 pieces, 3 available)
- Globe (4 pieces, 4 available)
Toolkit items:
- Figurine #1
- Figurine #2
- Scissors
Earhart
Historical objects placed:
- Place the globe on the corner of the table near the crate and large green barrels.
- Place the lei on the hook on the left side of the screen.
- Place the luggage under the belly of the plane.
- Place the gauges on the windows of plane (this triggers a mini-game).
Gauge mini-game:
- This is a variation of the paint brush color sequence mini game. Put each gauge in the proper place to start the plane’s engine. Left-click and drag each gauge to a place on the control panel. Push the black button to start the plane. The green lights will show if the gauges are in the correct places.
Toolkit items:
- Left-click on the car key and drag it to the car. The hammer will then be added to the toolkit screen.
- Left-click on the hammer and drag it to the green barrel (sparkly).
- Left-click on the wedge and drag it to the green barrel (sparkly). The barrel lid will open to reveal the final piece of the wooden horse; left-click it to add it to the inventory.
Columbus
Historical objects to be placed:
- Place the wooden horse on the crate beneath the last arch on the left side of the screen.
- Place the sextant on the map on top of the crate next to the oranges.
Hatshepsut
Historical objects to be placed:
- Place the frankincense on the plate on the table close to the doorway.
- Place the boat on the table on the left side of the sarcophagus.
- Place the myrrh on the scale between the two golden dogs.
Toolkit items:
- Left-click on figurines #1 and #2 and drag them to the scale between two golden dogs (this triggers a mini-game).
Egyptian Dog Scale mini-game:
- Left-click and drag different combinations of Egyptian dogs to determine the exact weight of the Myrrh. If dogs were alphabetized from left to right, the correct combination would be A, C, E. The arrowhead will be revealed and added to the toolkit screen.
- Left-click the arrowhead and drag it to the suspended bulb on the left side of the screen. A piece of the Delphi Device will be revealed.
- Left-click on the scissors and drag them to the second drape above the right side of the chamber. The final piece of the tusk will be revealed; left-click on the tusk and it will be added to inventory.
- Place the tusks above the scale.
Apollo Machine List:
- Queen Hatshepsut: Jewel encrusted box, Cat statue
- Amelia Earhart: Flight goggles, Newspaper
- Christopher Columbus: Anchor, Bell
INVENTION
Wright Brothers
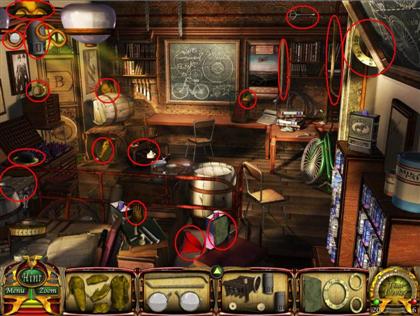
Historical objects to be reassembled:
- Statue (5 pieces, 5 available)
- Spectacles (5 pieces, 4 available)
- Engine (4 pieces, 3 available)
- Odometer (4 pieces, 4 available)
Toolkit Items:
- Can opener
- Funnel
Confucius
Historical objects to be reassembled:
- Battery (4 pieces, 3 available)
- Koi fish (4 pieces, 4 available)
- 3 Axis control (3 pieces, 3 available)
- Bicycle (5 pieces, 5 available)
Toolkit Items:
- Fish food
- Fish net
- Knife
- Empty jar
Historical objects to be placed:
- Place the koi fish in the pond (sparkly).
Toolkit Items:
- Left-click the fish net and drag it to the koi pond.
- Left-click the fish food and drag it to the koi pond (this will trigger a mini-game).
Ripple mini-game:
- Have ripples touch a certain number of fish. Left-click the water to start a ripple; once a ripple touches a fish, the fish will start another ripple. There are three screens to be completed each with a different number of fish that need to be touched with the ripples. A piece of the Delphi Device will be revealed upon completion.
Historical object to be placed:
- Place the statue of Confucius beneath the pagoda shaped, covered altar.
Benjamin Franklin
Historical objects to be reassembled:
- Lightning rod (4 pieces, 4 available)
- Dragon statues (4 pieces, 3 available)
- Paper (3 pieces, 2 available)
- Propeller (4 pieces, 4 available)
Toolkit items:
- Stove hook
- Gloves
- Gun powder
- Lighter
Historical items to be placed:
- Place the lightning rod on the last hook of the shelf holding the scale.
- Place the odometer on the very bottom shelf of the bookcase.
Wright Brothers
Historical objects to be placed:
- Place the bicycle on the chains over the back of the chalkboard (this triggers a mini-game).
Bicycle mini-game:
- Assemble the bicycle. Click and drag the pieces to the main frame of the bicycle in the correct order. If correctly placed, the pieces will not be able to be removed. The empty can will be added to the toolkit screen.
- Place three axis controls against the barrel in the center of screen.
- Place the propeller on the table behind the axis control device.
Toolkit items:
- Left-click the can opener and drag it to the paint can (sparkly).
- Left-click the funnel and drag it to the paint can (sparkly).
- Left-click the empty can and drag it to the paint can (sparkly). The final piece of the engine will be revealed.
Historical items placed:
- Engine placed on table beneath suspended bicycle.
Confucius
Toolkit items:
- Left-click the empty jar and drag it to the waterfall. Water will fill the jar and it will be returned to the toolkit screen.
- Left-click the knife and drag it to the purple cushion on the floor. The final piece of the battery will be revealed.
Franklin
Historical items placed:
- Place the battery on the floor to the right of the stove (this will trigger a mini-game).
Battery mini-game:
- Connect the copper pipes from the source of the current to its place of outflow. It is sometimes easier to begin from the outflow and work backwards. Once the game is completed, the wick will be added to the toolkit screen.
Toolkit items:
- Left-click the gloves and drag them to the stove (sparkly).
- Left-click the jar of water and drag it to the stove (sparkly).
- Left-click the stove hook and drag it to the stove (sparkly). The last of the dragon statues will be revealed and added to the inventory.
- Left-click the gun powder and drag it to the cannon on the top shelf of the bookcase (sparkly).
- Left-click the wick and drag it to the cannon on the top shelf of the bookcase (sparkly).
- Left-click the lighter and drag it to the cannon on the top shelf of the bookcase (sparkly). The cannon will fire, revealing the final piece of the newspaper and adding it to the inventory.
Confucius
Historical items placed:
- Place the dragon statues on the stand on the left side of the screen.
- Place the paper on the pillar near the center of the screen (this triggers a mini-game).
Newspaper Mini-game:
- Reassemble pieces of the newspaper by clicking, dragging, and connecting pieces to each other. Once two connecting pieces are put together, they will remain connected. Once this game has been solved the lockpick will be added to the toolkit screen.
Wright Brothers
Toolkit item:
- Left-click the lockpick and drag it to the locked two-drawer cabinet on the left side of the screen, beneath the photo of the two brothers (this triggers a mini-game).
Lockpick Mini-game:
- Beginning with the far right tumbler, place the lockpick beneath the bouncing tumbler. Lock the tumbler into place by left-clicking the lockpick while the tumbler is at its highest point. The final piece of the spectacles will be revealed and added to the inventory.
Franklin
Historical items placed:
- Place the spectacles on top of the stack of books on the desk in front of the chair.
Apollo Machine List:
- Benjamin Franklin: Victorian jacket, Walking stick
- Wright Brothers: Biplane, Set of bolts
- Confucius: Golden pot, Happy Buddha
VISIONARIES
William Shakespeare
Historical items to be reassembled:
- Log book (4 pieces, 3 pieces)
- Sign (4 pieces, 4 available)
- Romeo’s items (4 pieces, 4 available)
- Map (3 pieces, 4 available)
Historical object placed:
- Place Romeo’s items in front of the thin pillar.
Toolkit items:
- Hammer
- Crowbar
Abbey Road
Historical items to be reassembled:
- Coat of arms (5 pieces, 5 available)
- Flag (5 pieces, 5 available)
- Sword, Ring, and roses (4 pieces, 4 available)
- Recorder (4 pieces, 4 available)
Toolkit item:
- Tape recorder
Christopher Columbus
Historical items to be reassembled:
- Gold Record (4 pieces, 4 available)
- Portrait (3 pieces, 2 pieces available)
- Projector (4 pieces, 3 pieces available)
- Cauldron (4 pieces, 3 pieces available)
Toolkit items:
- Funnel
- Glove #1 and #2
- Pulley
- Tongs
Historical objects placed:
- Place the map on the mast where the dagger is (this triggers a mini-game).
Map mini-game:
- Steer Columbus’ ship to where he landed in the Americas. Click and drag the wheel left and right to maneuver the ship. Release the left button to keep the ship moving in the direction it is pointed. Keep to the path and avoid rocks, whirlpools, and wind. Once the game is solved, the chisel will be added to the toolkit screen.
Toolkit items:
- Left-click on glove #1 and drag it to the rope on the left side of the mast (sparkly).
- Left-click on glove #2 and drag it to the rope on the left side of the mast (sparkly).
- Left-click on the pulley and drag it to the rope on the left side of the mast (sparkly). The sail will rise and the dagger will be revealed; left-click the dagger to add it to the toolkit screen.
- Left-click the dagger and drag it to the sack on the deck of the ship at the bottom center of the screen. The final piece of the portrait will be revealed; left-click on that piece to add it to the inventory.
Historical objects placed:
- Place the flag on the crate closest to the dock.
- Place the portrait on the deck in front of the crate to the left of the wooden mallet.
Shakespeare
Historical objects placed:
- Place the coat of arms close to the ceiling, next to the central pillar.
- Place the sword, ring, and roses at the base of the central pillar, next to the vase (roses will appear inside of the vase once they are placed).
- Place the witches’ cauldron at the base of the column to the right (this triggers a mini-game).
Witch’s potion mini-game:
- This is another variation of the paint brush color sequence game. A black box indicates that a color is not in the sequence. A red box indicates that a color is in the sequence, but not in the correct place. A green box indicates that the right color is in the right place. Once solved, a bottle of acid will be added to the toolkit screen.
Toolkit items:
- Left-click on the hammer and drag it to the upper level over the stage (sparkly).
- Left-click the crowbar and drag it to the upper level over the stage (sparkly).
- Left-click the chisel and drag it to the upper level over the stage (sparkly). The final piece of the log book will be revealed; left-click on that piece to add it to the inventory.
Christopher Columbus
Historical items placed:
- Place the log book on the table on the left side of the screen.
Toolkit items:
- Left-click the tongs and drag them to the wire crate on the right side of the screen (sparkly).
- Left-click the acid and drag it to the wire crate on the right side of the screen (sparkly).
- Left-click the funnel and drag it to the wire crate on the right side of the screen (sparkly). The final piece of the projector will be revealed; left-click it to add it to the inventory.
Abbey Road
Historical items placed:
- Place the projector on the small table closest to the screen where the drum set is (this triggers a mini-game).
Projector mini-game:
- Connect the gears from the small-size gear at the bottom right of the projector (that is currently turning) to the small-size gear at the middle left of the projector, using the various size of gears available. It is not necessary to use all the gears to solve the game. If two gears are connected that will turn in opposite directions, the gears will turn red indicating that they will need to be switched. The solution is to use all small gears starting from the lower right making a gentle arc to the upper left. Once completed, the projector will turn on and the audio cable will be displayed on the screen; left-click on the cable to add it to the toolkit screen.
- Place the recorder panel next to the small table in the lower left side of the screen (sparkly).
Toolkit items:
- Left-click the tape recorder and drag it to the small table in the lower left side of the screen (sparkly).
- Left-click the audio cable and drag it to the small table in the lower left side of the screen (sparkly). The combination to the lock on the double doors will be revealed (7519). Left-click on the double doors (sparkly). Put the combination into the lock, and the doors will open, revealing the final piece of the Delphi Device!
Historical objects placed:
- Place the gold record in the space above the door between the other four gold records already in place.
- Place the Abbey Road sign directly above the doorway.
Apollo Machine List:
- Abbey Road: Platinum Disc, Guitar
- Columbus: Rowboat Arm, Navigation Device
- Shakespeare: Pumpkin, Genie’s Lamp
Final Game
You’ve reached the end of your mission – now it’s time to return all of the antiquities to their rightful times and places. First, you must assemble the Delphi Device: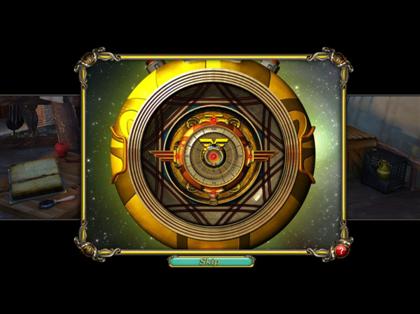 Now, it’s time to return the antiquities to their rightful
owners. In the final mini-game, you must place each antiquity
on the image of its owner:
Now, it’s time to return the antiquities to their rightful
owners. In the final mini-game, you must place each antiquity
on the image of its owner:
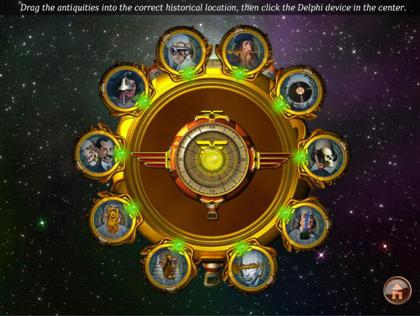 Here is the list of the owners...
- Einstein - Record
- Shakespeare - Skull
- Franklin - Quill
- Abbey Road - Trumpet
- Hatshepsut – Cat statue
- Confucius - Buddha
- Wright brothers – Nuts and bolts
- Columbus - Bell
- Amelia Earhart – Flying Goggles
- DaVinci - Dagger
Created at: 2009-04-13