

Walkthrough Menu
- General Tips
- Chapter 1: A Mystery in Meadows Town
- Chapter 2: Murder at the Mortuary
- Chapter 3: A Third Victim
- Chapter 4: Sheriff Dugan's House
- Chapter 5: The Perpetrator Unmasked?
- Chapter 6: A Chase through the Museum
- Chapter 7: The Real Story Revealed
General Tips
- This is the official guide for Ghosts of the Past: Bones of Meadows Town.
- This guide will not mention each time you have to zoom into a location; the screenshots will show each zoom scene.
- Hidden-object puzzles are referred to as HOPs. This guide will not show screenshots of the HOPs, but it will mention when a HOP is available and the inventory item you'll collect from it.
- This guide will give step-by-step solutions for all puzzles that are not random. Please read the instructions in the game for each puzzle.
Chapter 1: A Mystery in Meadows Town
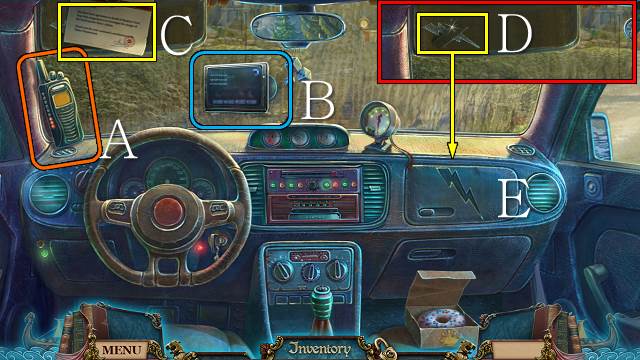
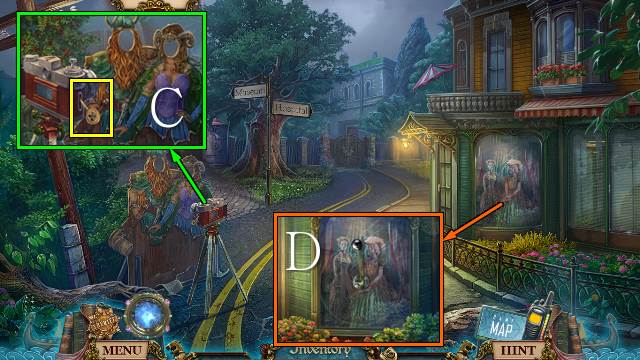
- Take the walkie-talkie (A).
- Take the GPS (B); select the screen to get your map.
- Take the paper (C).
- Take the LIGHTNING SYMBOL (D).
- Open the glove compartment with the LIGHTNING SYMBOL (E).
- Take the HANDCUFFS (F).
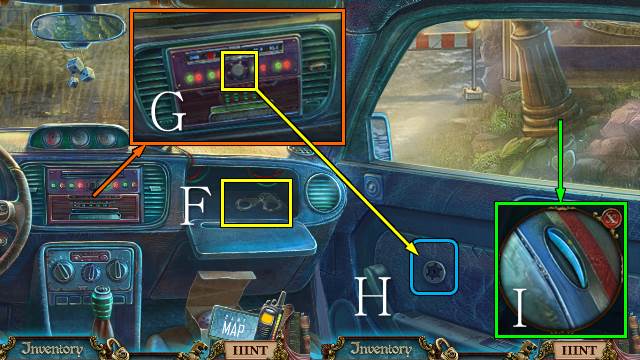
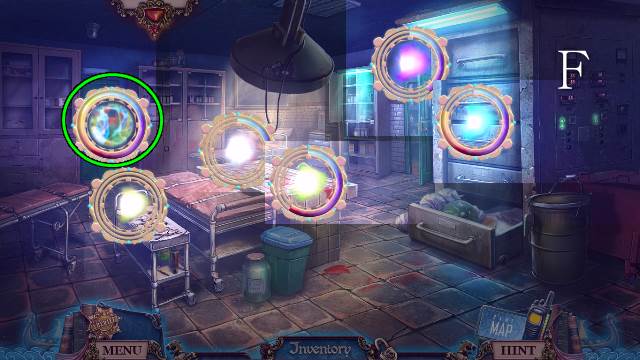
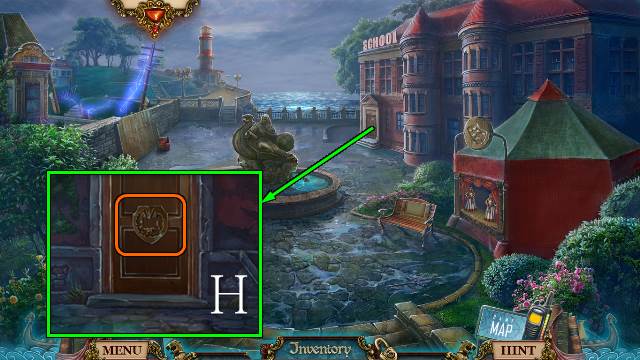
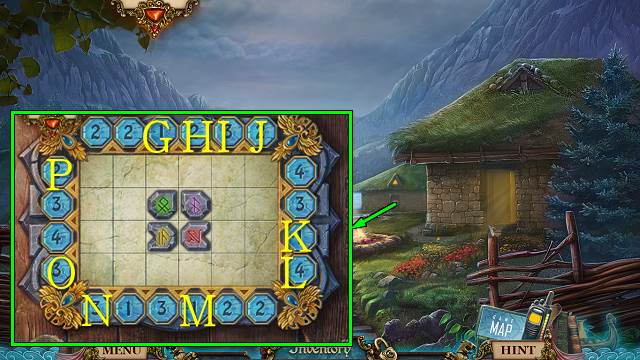
- Turn the knob three times; take the KNOB (G).
- Pan right.
- Place the KNOB and turn it (H).
- Pull the handle (I).
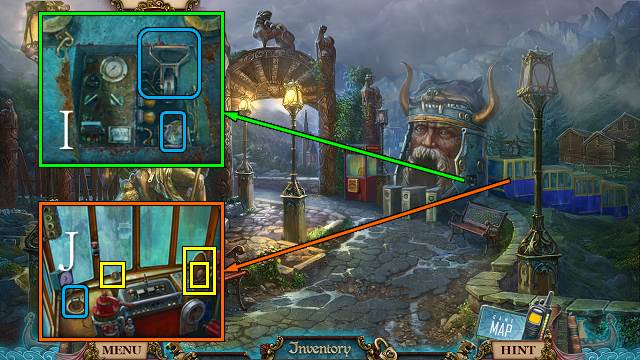
- Go right.
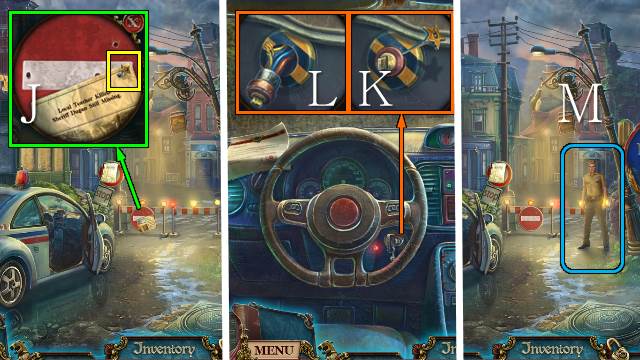
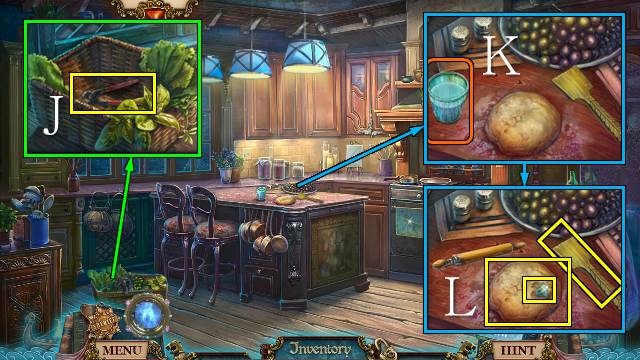
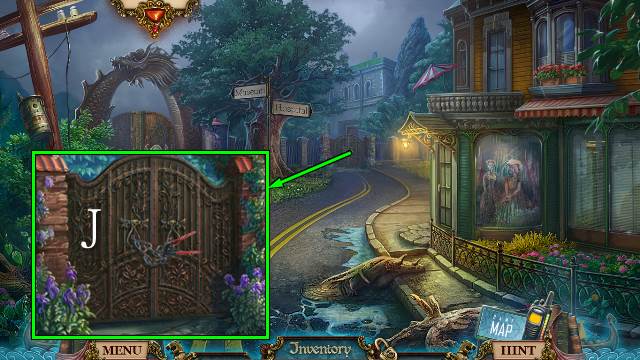
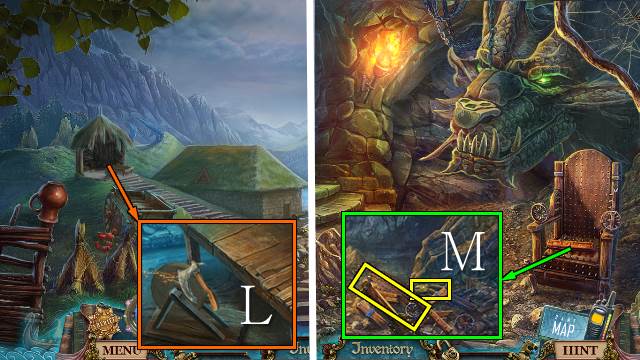
- Take the NAIL (J).
- Go into the car.
- Break the key, use the NAIL (K) and connect the wires (L).
- Go right.
- Talk to Jones (M).
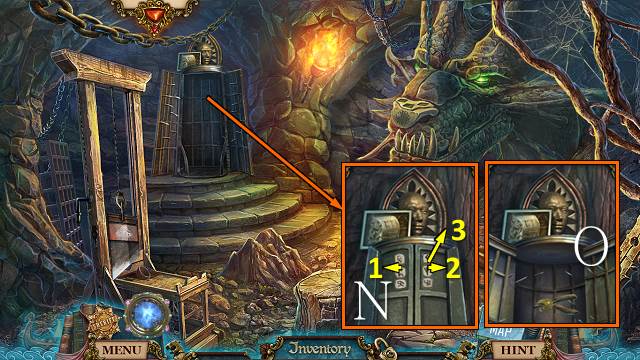
- Walk forward twice.
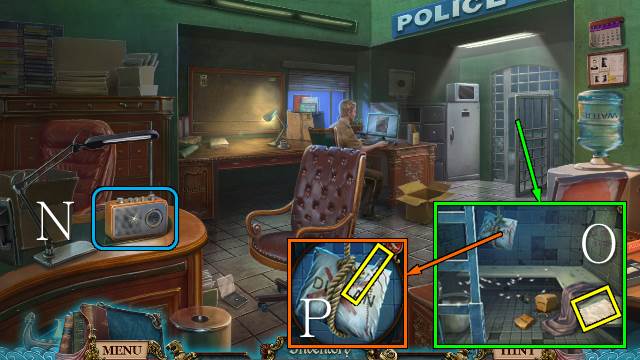
- Play the radio (N).
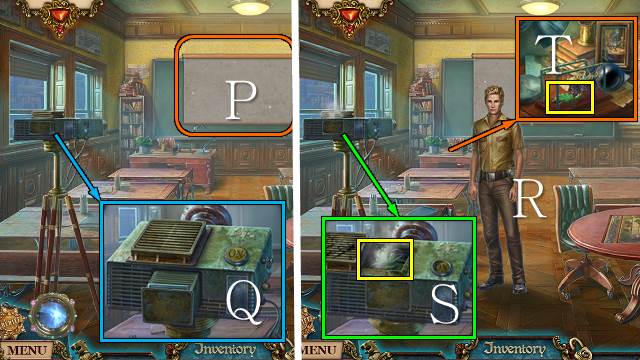
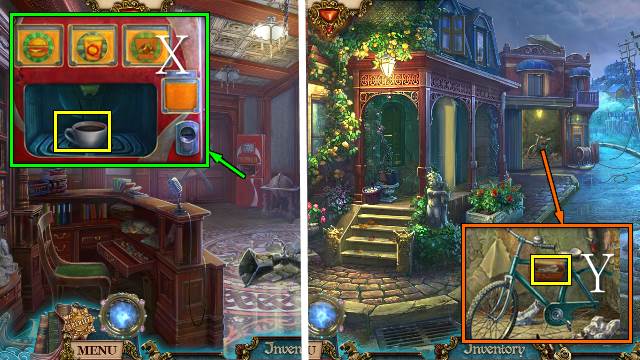
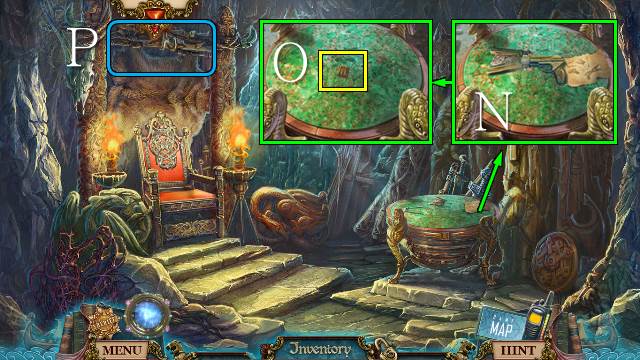
- Take the paper (O); take the NEEDLE (P).
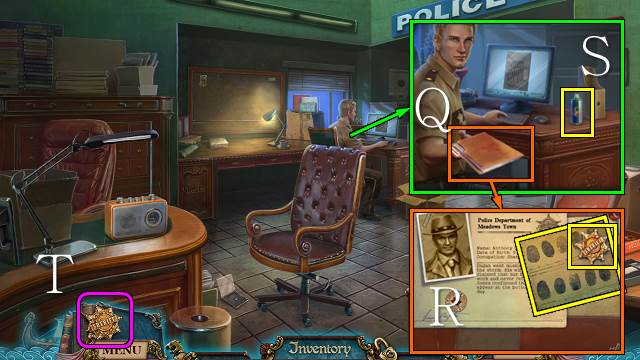
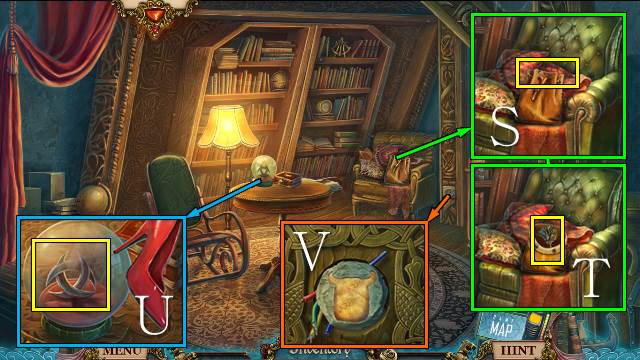
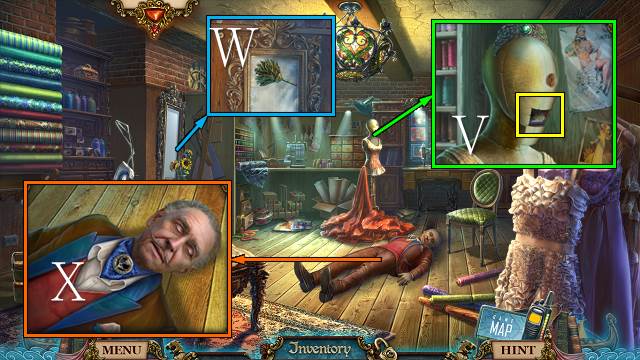
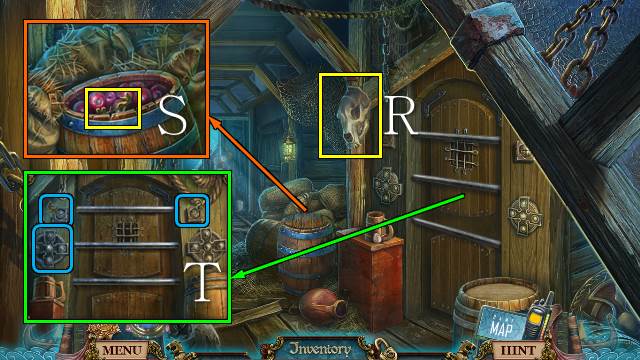
- Talk to Jones and take the case file (Q); open it and take your badge and the FINGERPRINTS (R).
- Take the SPIDER REPELLENT (S).
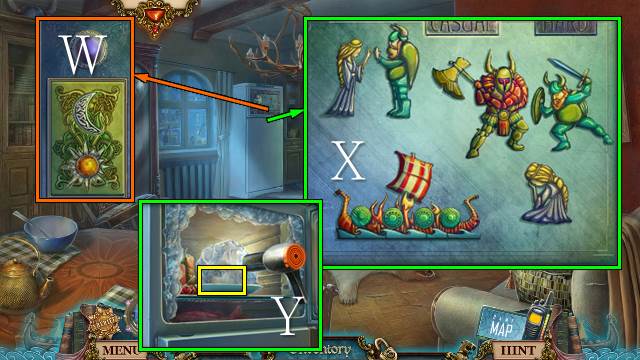
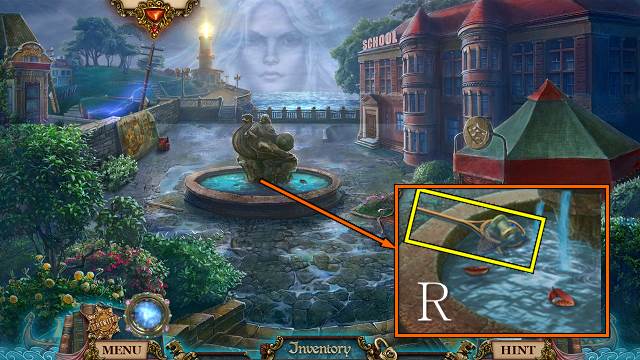
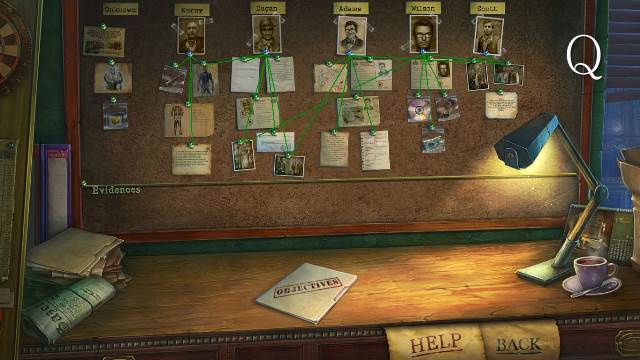
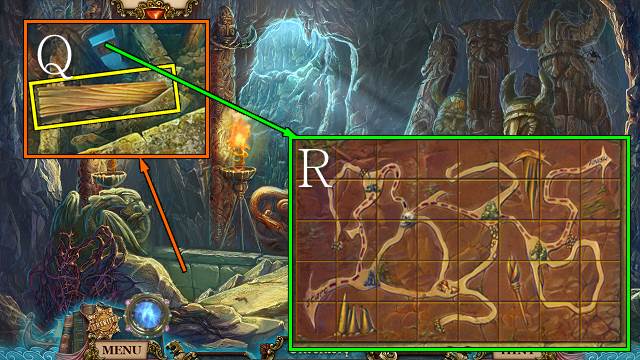
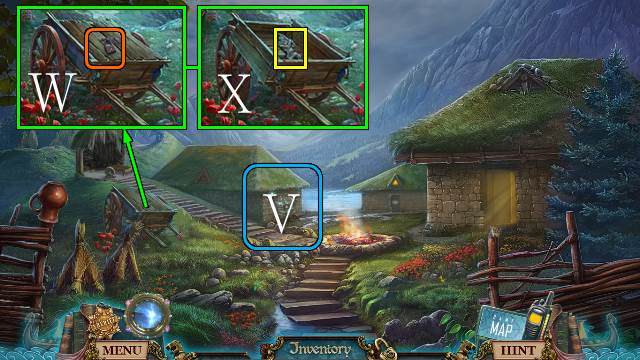
- Select your Badge (T) to go to the Evidence Board.
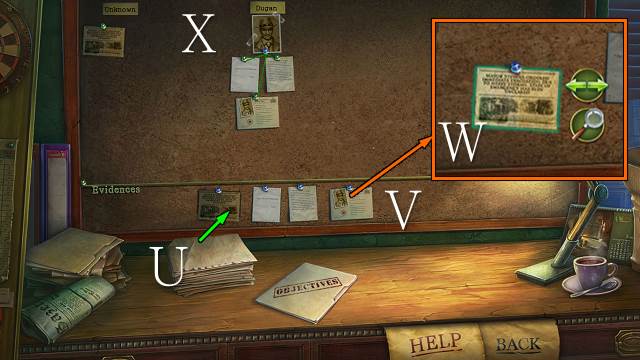
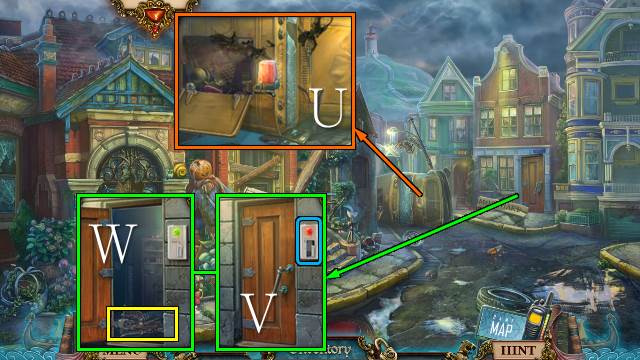
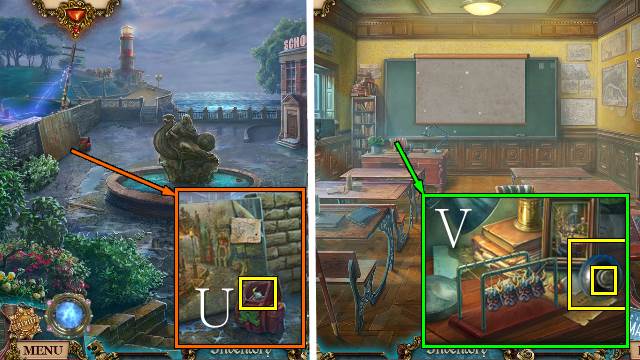
- Take all evidence from the pile (U) and pin it to the board (V).
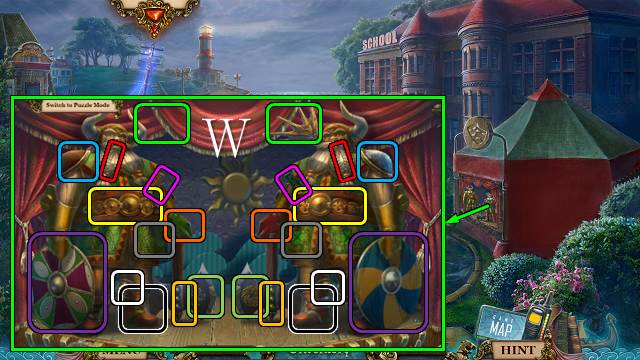
- Select a piece of evidence and then select the magnifying glass to have a closer look at it; select the green arrows to move the evidence (W).
- To place evidence, move it to the corresponding label at the top of the board; correctly placed items will get a green line.
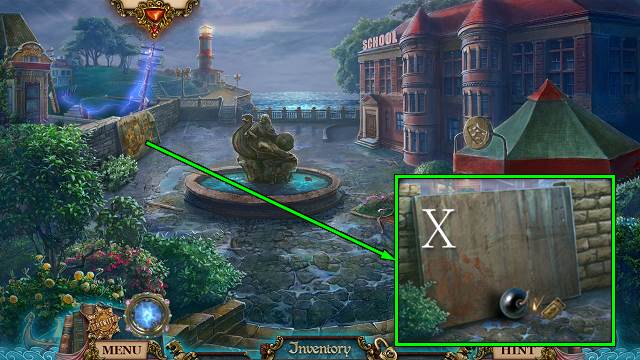
- Move the two notes and case report to Dugan's picture (X).
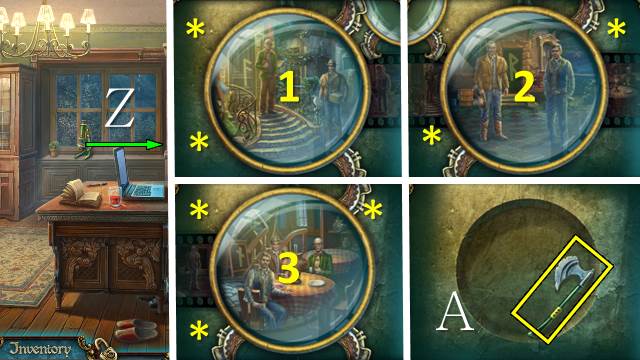
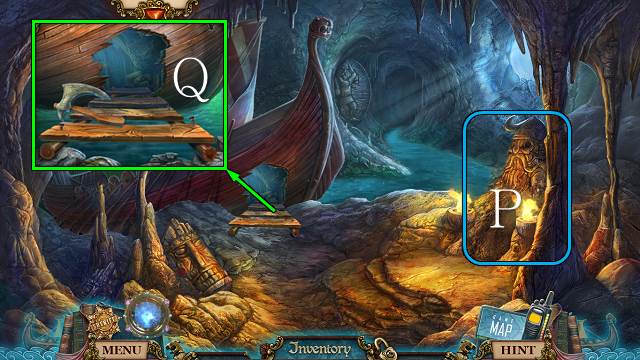
- Walk down and down again.
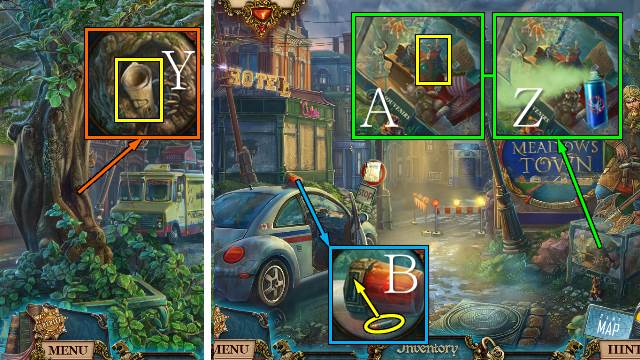
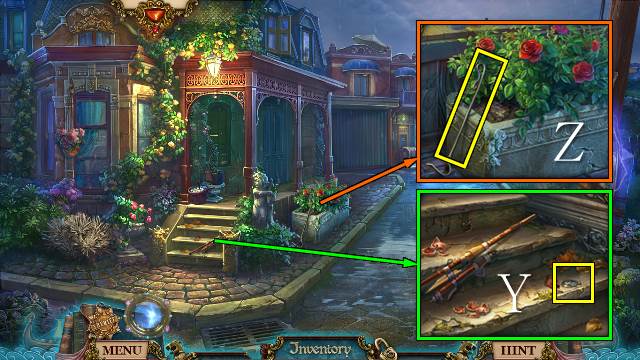
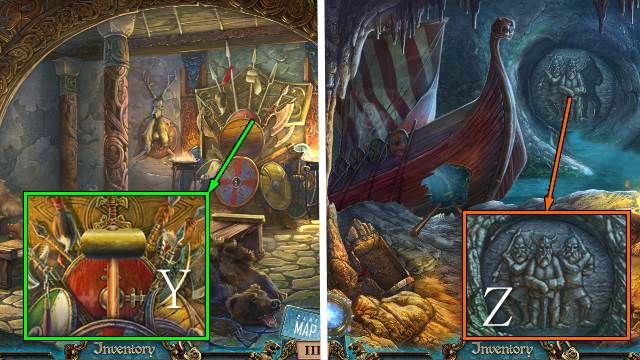
- Take the paper (Y).
- Walk down.
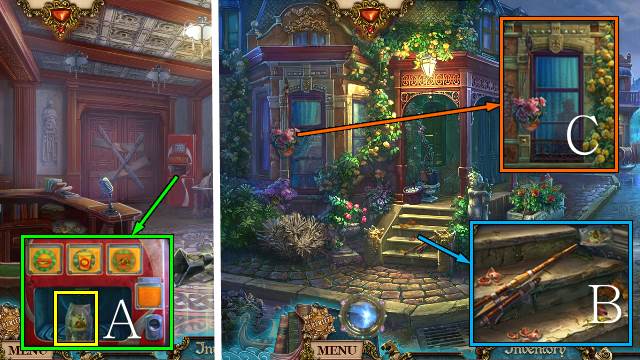
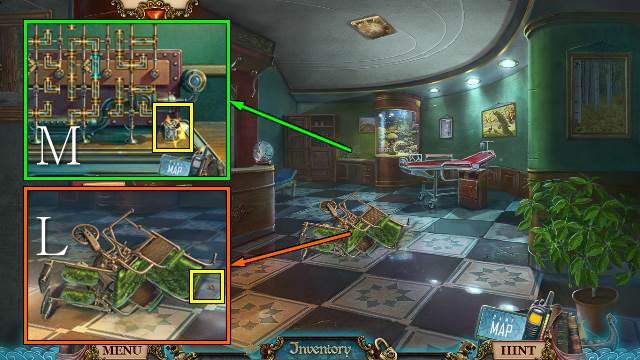
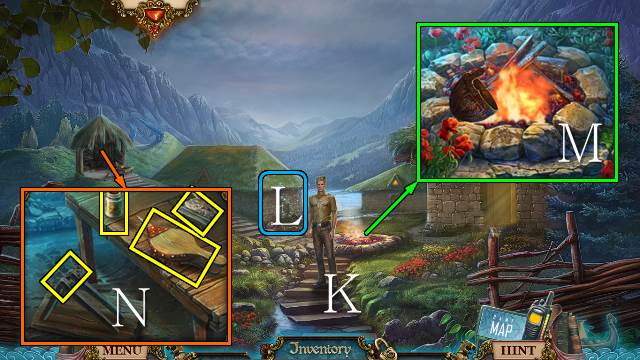
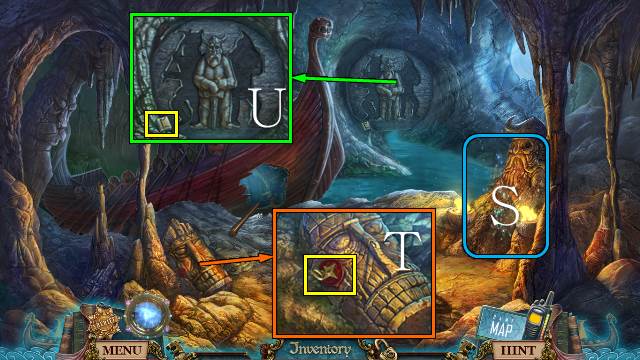
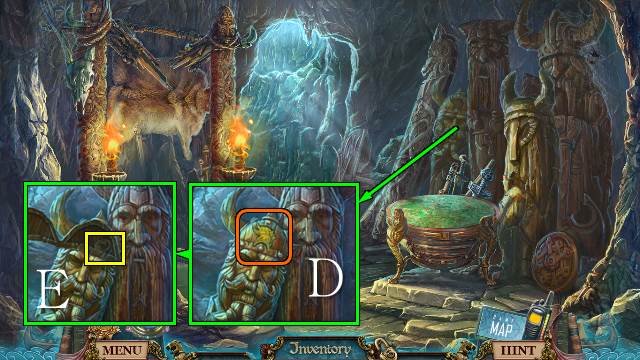
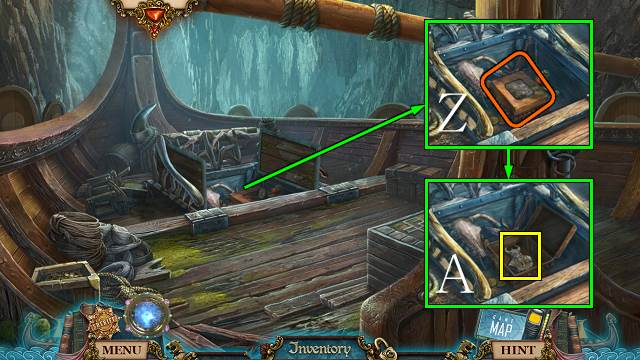
- Use the SPIDER REPELLENT (Z); take the VIKING FIGURINE (A).
- Put the battery in the light; take the POLICE SIREN (B).
- Walk forward.
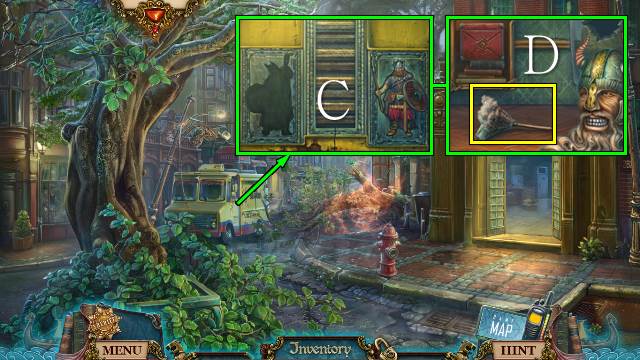
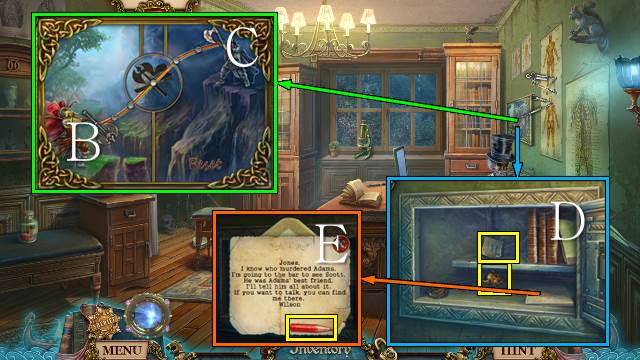
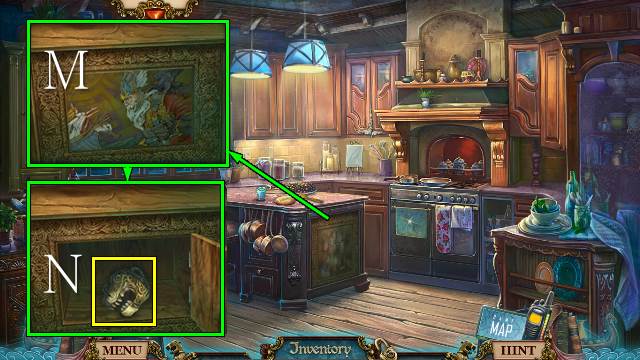
- Place the VIKING FIGURINE (C); take the DUSTER (D).
- Go forward.
- Move the chair (E).
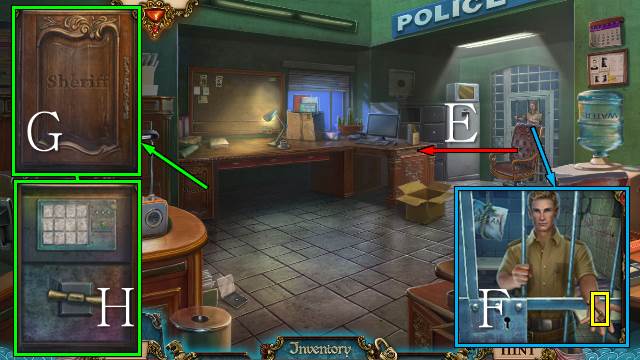
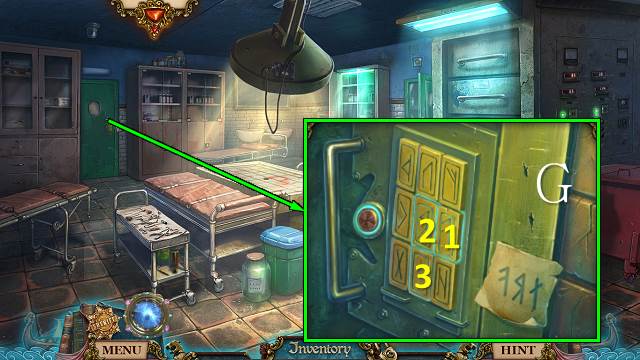
- Talk to Jones; take the CABINET KEY (F).
- Use the CABINET KEY (G), open the cabinet and zoom in (H).
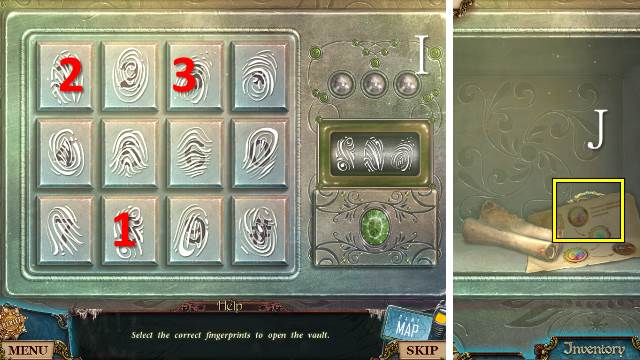
- Place the FINGERPRINTS and use the DUSTER for a mini-game.
- Solution: select the buttons with the same prints as in the example (I).
- Take the notes and Spirit Detector (J).
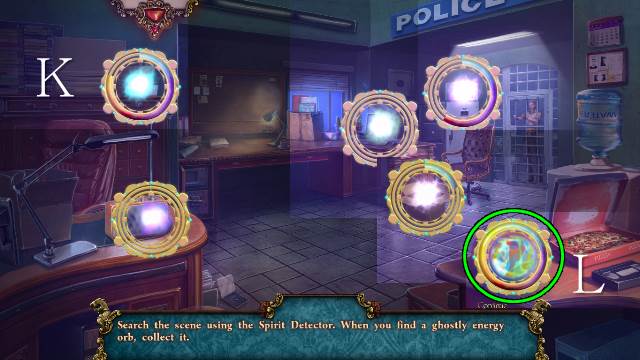
- Move the Spirit Detector across the scene to find glowing items (K).
- When fully charged, move the Detector to the blocked object, indicated by colored swirls (L).
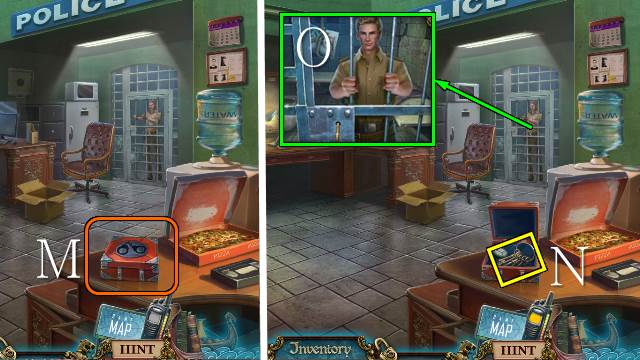
- Use the HANDCUFFS (M).
- Take the CELL KEYS (N).
- Use the CELL KEYS and release Jones (O).
- Walk down.
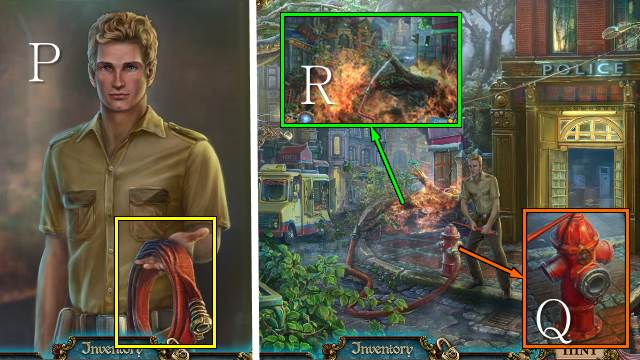
- Talk to Jones; take the FIRE HOSE (P).
- Connect the FIRE HOSE (Q).
- Move the hose over the fire (R).
- Walk forward.
Chapter 2: Murder at the Mortuary
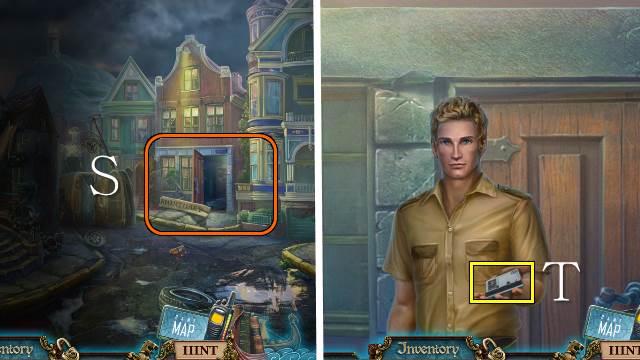
- Inspect the Mortuary (S).
- Take the ACCESS CARD (T).
- Use the POLICE SIREN; play the HOP to receive a HAIR DRYER (U).
- Use the ACCESS CARD (V); destroy the skeleton and take the BONE (W).
- Go into the Mortuary.
- Talk to Jones.
- Take the OFFICE KEY (X).
- Take the two case files (Y).
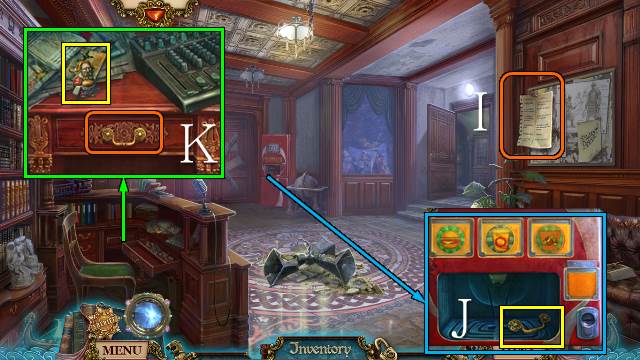
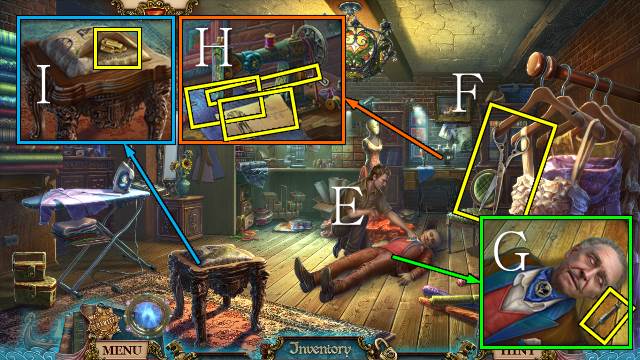
- Take blue PENCIL 1/3 (Z); use the OFFICE KEY and turn the handle (A).
- Go right.
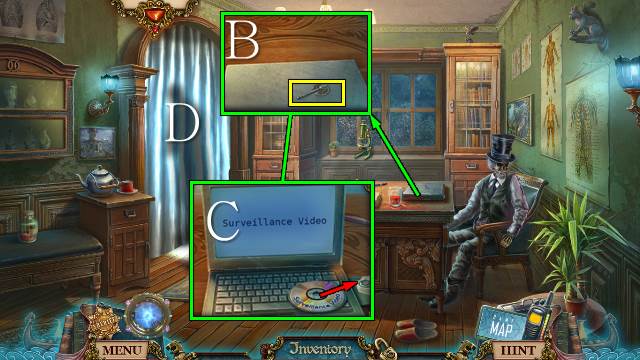
- Take the AXE (B) and open the laptop; put the CD in the drawer (C).
- Open the curtain (D).
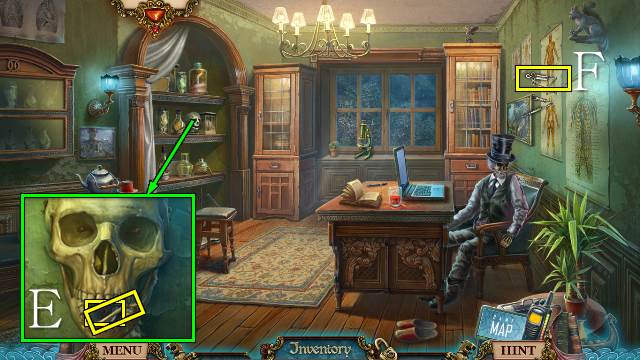
- Use the BONE and take the DRAWER WHEEL and BONE (E).
- Take the ACID (F).
- Walk down.
- Place the DRAWER WHEEL, open the drawer and take the Evidence (G); remove the plastic, put the matches in the box and take the DRAGON PART and MATCHES (H).
- Walk down.
- Talk to Jones (I).
- Burst all balloons with the NEEDLE (J).
- You receive a BUTTON.
- Place the DRAGON PART and open the window; go in (K).
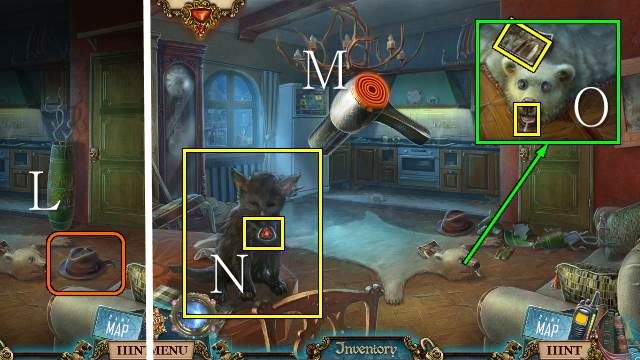
- Inspect the hat (L).
- Use the HAIR DRYER (M).
- Take the GEM and CAT (N).
- Place the BUTTON and use the NEEDLE; take the Evidence and LOLLIPOP (O).
- Place the GEM for a mini-game (P).
- Push the teeth until the mouth is open.
- Pull the handle twice (Q).
- Go right.
- Use the Spirit Detector as before (R).
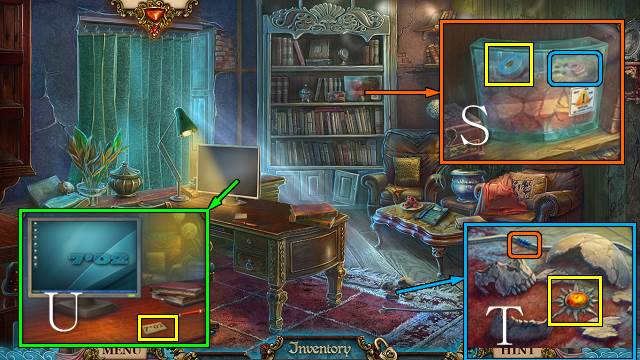
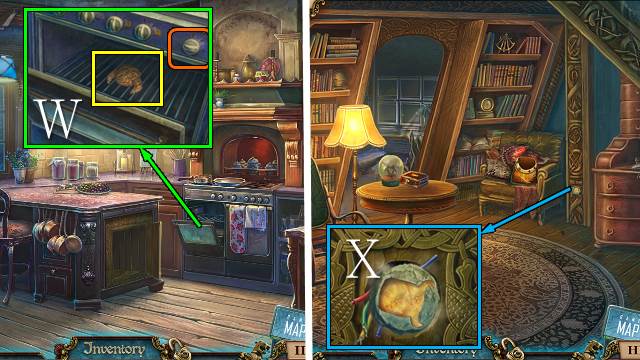
- Use the LOLLIPOP; take the INSULATION TAPE (S).
- Use the INSULATION TAPE; take the SUN SYMBOL (T).
- Browse the computer, write down the code and take the PHONE CODE (U).
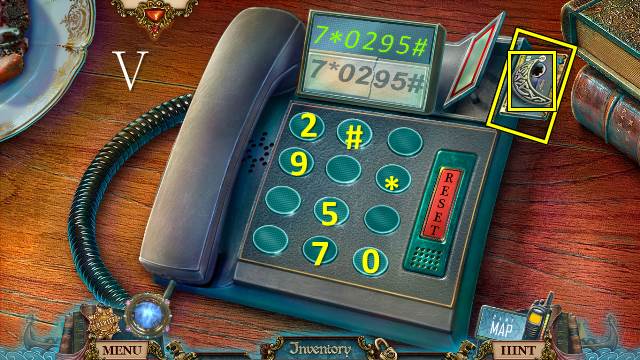
- Place the PHONE CODE for a mini-game (V).
- Inspect all buttons and remember where the correct symbols are; enter the code.
- Take the MOON SYMBOL and Evidence.
- Walk down.
- Take the note; place the SUN SYMBOL and MOON SYMBOL for a mini-game (W).
- Restore the magnets; to rotate a piece, place it on the arrow button (X).
- Pull the handle.
- Use the HAIR DRYER; take the FILM NEGATIVE (Y).
- Go to the Mortuary Main Office.
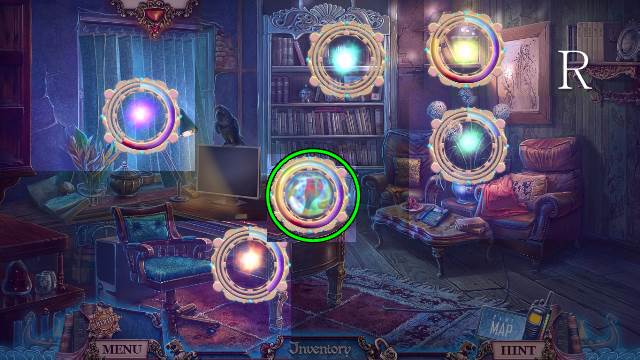
- Place the FILM NEGATIVE and zoom in for a mini-game (Z).
- Find the right combination of lenses for each part of the film.
- Take the AXE (A).
- Place the two AXES on the painting for a mini-game.
- Throw the axes to the center; the movements of one axe affect the movements of the other.
- Solution: Bx3-C-B-C-B-C-B.
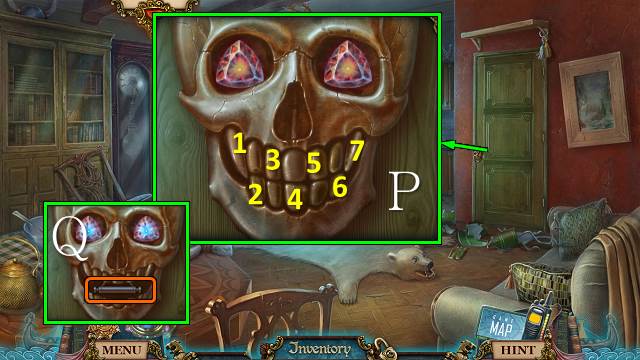
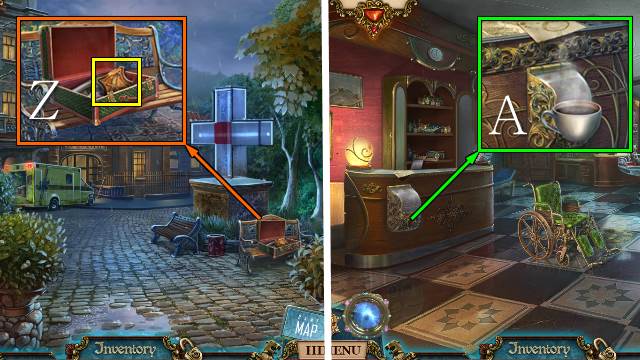
- Take the RUNIC CODE and COMEDY MASK (D); open the envelope and take red PENCIL 2/3 and the Evidence (E).
- Walk down.
- Use the Spirit Detector (F).
- Place the RUNIC CODE and push the correct buttons (G).
- Go left.
Chapter 3: A Third Victim
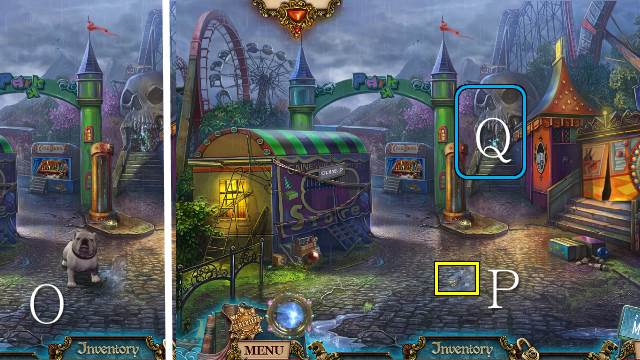
- Take the GAS CAN (H).
- Take the NET STRING (I).
- Throw the BONE to the dog (J).
- Go forward.

- Use the ACID (K); use the GAS CAN and MATCHES (L).
- Release the CAT (M).
- Use the NET STRING and INSULATION TAPE; take the NET (N).
- Look through the keyhole (O).
- Play the reverse HOP; take pink PENCIL 3/3 (P).
- Walk down.
- Place the PENCILS for a mini-game (Q).
- Color the picture according to the examples.
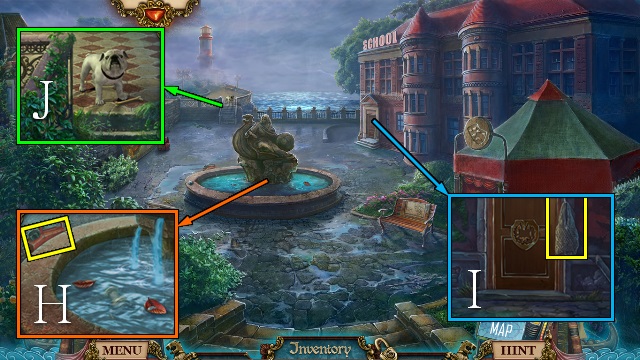
- Take the PAINTING and LIGHTHOUSE.
- Use the NET; take the FISHING REEL (R).
- Walk forward.
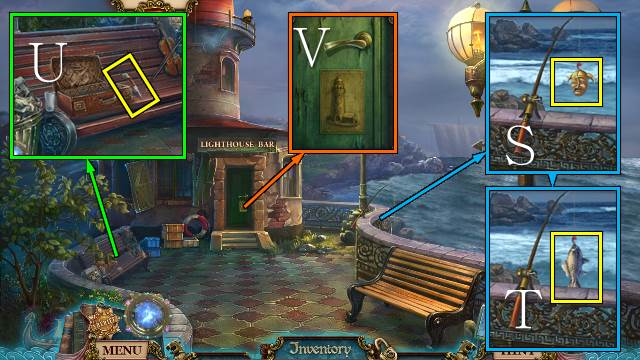
- Place the FISHING REEL; reel in and take the TRAGEDY MASK (S), then reel in and take the FISH (T).
- Take the KNIFE (U).
- Place the LIGHTHOUSE and turn the handle (V).
- Go forward.
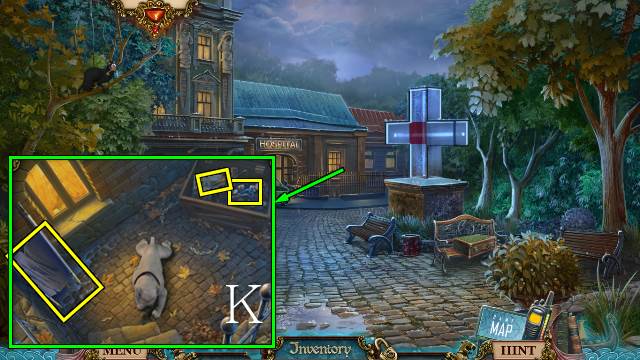
- Use the Spirit Detector (W).
- Talk to Jones and receive more Evidence (X).
- Use the KNIFE; take the TELEPHONE DIAL (Y).
- Take the VIKING FIGURINE (Z).
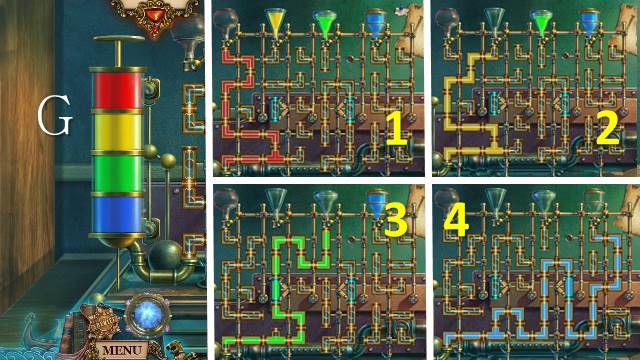
- Push the button for a mini-game.
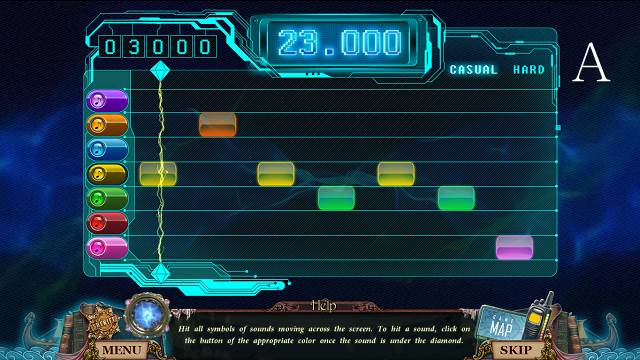
- Whenever a colored block is under the diamond, hit the button of the same color (A).
- Access the CD player, place the CD and take the VOICE RECORDING (B).
- Give the FISH to the otter; take the EMBLEM HALF (C).
- Walk down twice.
- Place the COMEDY MASK and TRAGEDY MASK for a mini-game (D).
- Find the differences; you have to select the items on both sides (E).
- You receive a BELL ROPE.
- Walk forward twice.
- Place the BELL ROPE (F).
- Take the EMBLEM HALF (G).
- Walk down twice.
- Place the two EMBLEM HALVES (H).
- Go right.
- Inspect the scene.
- Take the Evidence (I).
- Take the HANDLE (J).
- Take the VIKING FIGURINE; place the HANDLE and open the drawer for a mini-game (K).
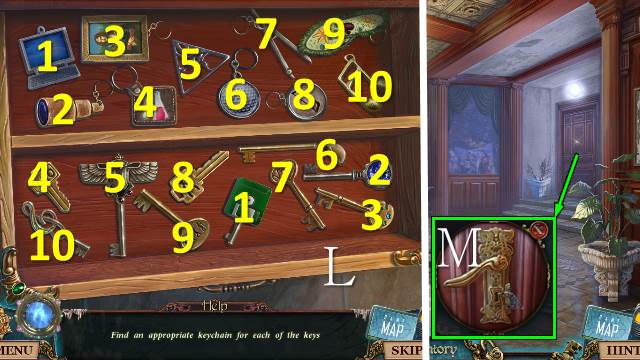
- Match all keys with their key chains (L).
- You receive the CLASSROOM KEY.
- Open the door with the CLASSROOM KEY (M).
- Go right.
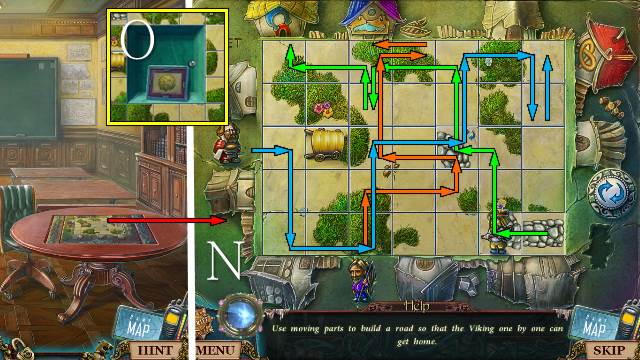
- Place the two VIKING FIGURINES for a mini-game (N).
- Use the three tiles with road to create a path for the Vikings to go home; the two movable tiles can be turned by placing them on the arrow button.
- Take the SLIDE (O).
- Pull down the screen (P).
- Open the drawer, remove the empty slide, place the SLIDE and push the button (Q).
- Talk to Jones (R).
- Remove the cover and take DOVE 1/2 (S).
- Take DOVE 2/2 (T).
- Walk down twice.
- Place the two DOVES, open the bag and take the VIKING HEAD (U).
- Go to the History Classroom.
- Place the VIKING HEAD, move the heads and take the BOTTLE LID and BOMB (V).
- Walk down twice.
- Play the mini-game (W).
- Find the differences; you need to select the differing items on both sides.
- You receive an ANTLER.
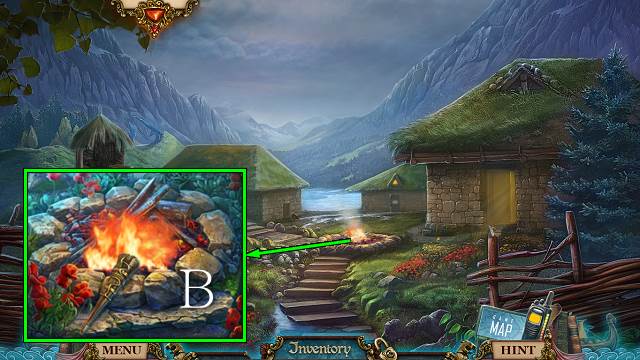
- Take the Evidence and remove the poster; place the BOMB and light it with the MATCHES (X).
- Go forward.
Chapter 4: Sheriff Dugan's House
- Take the 25 CENTS (Y).
- Take the FIRE IRON (Z).
- Go to the School.
- Push the right button and put the 25 CENTS into the slot; take the PEANUTS (A).
- Go down and left.
- Put the PEANUTS in the PEASHOOTER and take it (B).
- Shoot the PEASHOOTER twice (C).
- Go into the house.
- Talk to Maggie (D).
- Take the STILETTO HEEL (E).
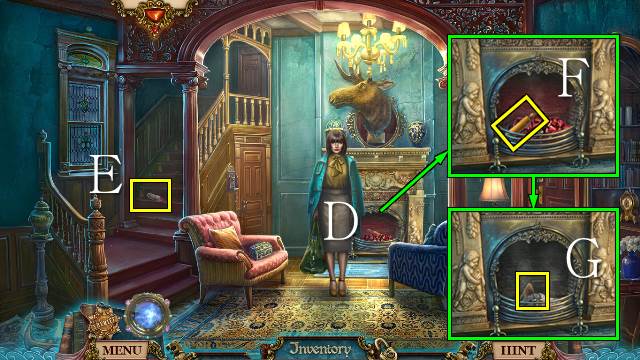
- Use the FIRE IRON to receive the ROLLING PIN (F); use the FIRE IRON again to receive PLATE 1/2 (G).
- Place the TELEPHONE DIAL, lift the receiver and take JEWEL 1/3 (H).
- Place the ANTLER and use the INSULATION TAPE; take the Evidence and TOY BAT (I).
- Open the door and go right.
- Move the herbs and take the NIPPERS (J).
- Pour the water on the dough (K), use the ROLLING PIN and take JEWEL 2/3; use the rolling pin again and take the DOUGH and SPATULA (L).
- Use the SPATULA and place the PAINTING (M); take the STONE HEAD (N).
- Walk down twice.
- Use the SPATULA and take the CLOSET KEY (O).
- Go into the house.
- Open the door with the CLOSET KEY; play the HOP to receive the VOLTAGE SIGN (P).
- Play the VOICE RECORDING (Q).
- Go up the stairs.
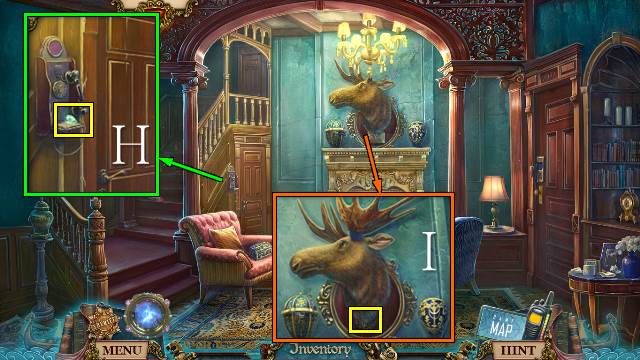
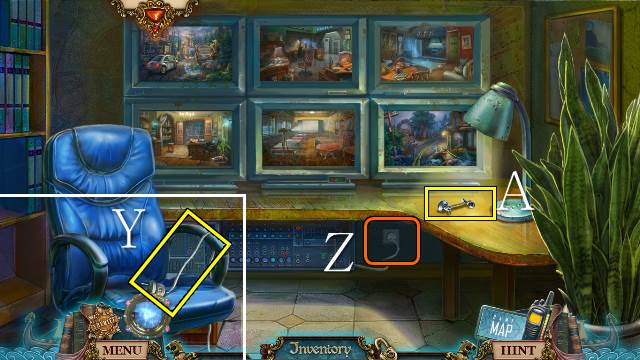
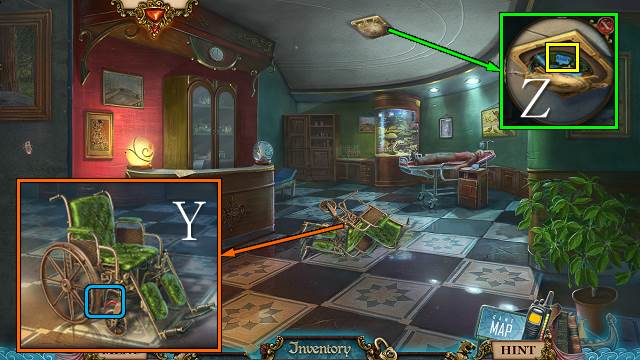
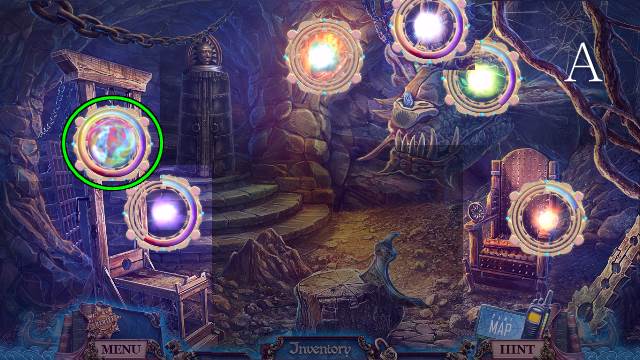
- Use the Spirit Detector (R).
- Take the LEATHER BELT (S) and FEATHER DUSTER (T).
- Use the STILETTO HEEL; take the TRINITY BLADE (U).
- Use the SPATULA and the DOUGH; take the DOUGH HEAD (V).
- Go to the Kitchen.
- Put the DOUGH HEAD in the oven, close the door and turn the knob three times; open the door and take the VIKING COOKIE (W).
- Go to the Attic.
- Place the VIKING COOKIE (X).
- Go forward.
- Take the PLUG (Y).
- Plug in the PLUG (Z).
- Switch on all screens.
- Take the GLASS CUTTER (A).
- Walk down three times.
- Place the VOLTAGE SIGN for a mini-game (B).
- Turn off the power by moving the ring around the fuses.
- Each time the ring passes a fuse the voltage goes down by 1; the ring can't pass fuses with no power.
- Go forward.
Chapter 5: The Perpetrator Unmasked?
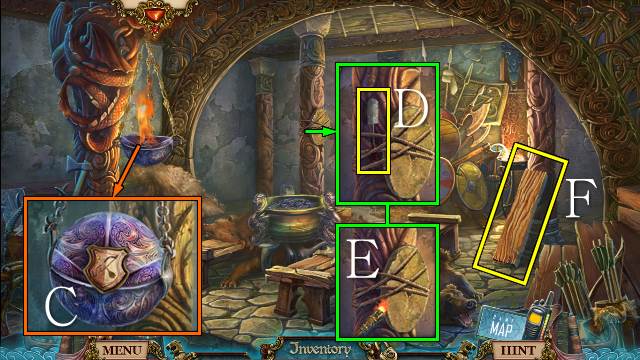
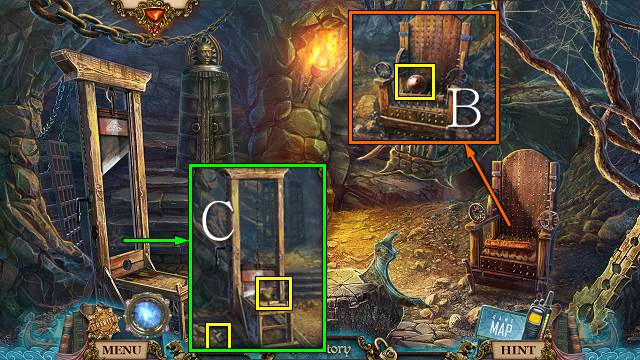
- Take the JEWELRY KEY (C).
- Use the GLASS CUTTER; go in (D).
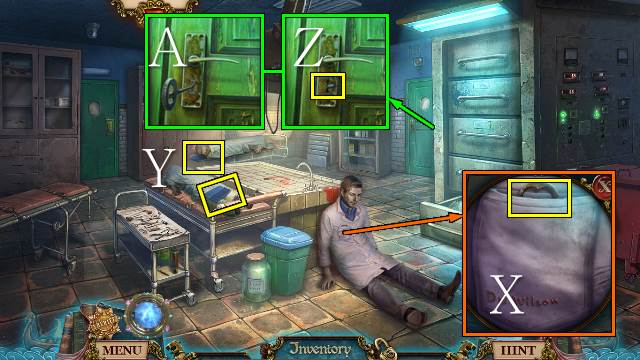
- Talk to Jones (E).
- Take the SCISSORS (F).
- Take the POISON (G).
- Take the Evidence; place the LEATHER BELT. Take the SHEET and GOLF CLUB (H).
- Use the SCISSORS and take the LATCH (I).
- Walk down.
- Use the NIPPERS (J).
- Go forward.
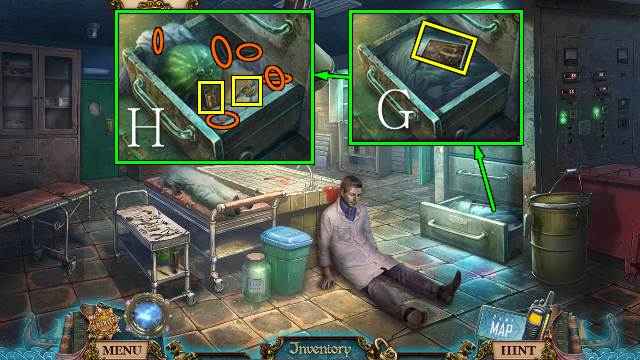
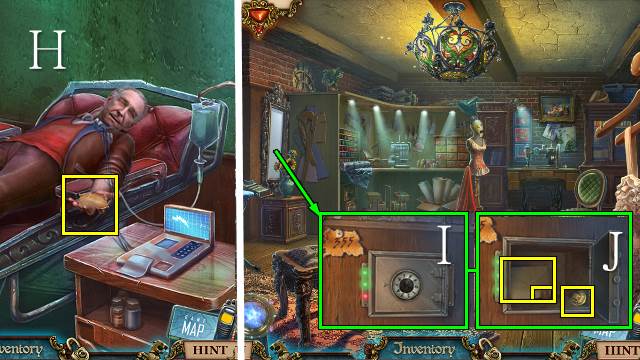
- Give the TOY BAT to the dog, use the NIPPERS, open the crate and take the SCREWDRIVER and CARDIOGRAPH WIRES; remove the cloth, place the SHEET and take the STRETCHER (K).
- Go forward.
- Take PLATE 2/2 (L).
- Take the LIGHTER (M).
- Go to the Kitchen.
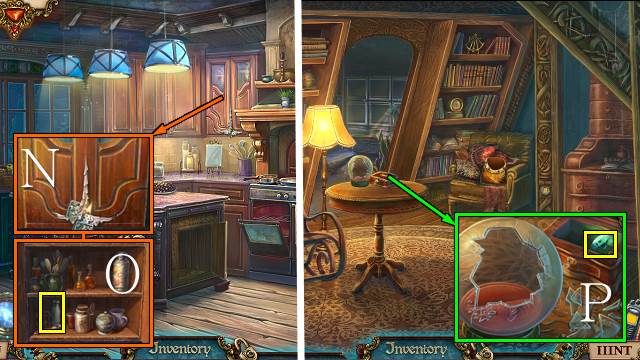
- Use the LIGHTER (N), open the cabinet, place the BOTTLE LID and take the MILK (O).
- Go to the Attic.
- Open the box with the JEWELRY KEY; take the Evidence and JEWEL 3/3 (P).
- Walk down.
- Play the HOP to receive a REMOTE (Q).
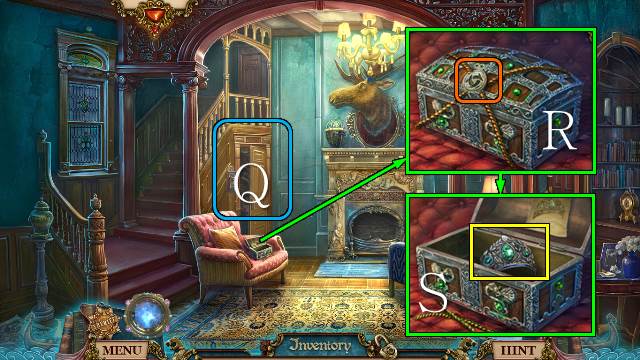
- Use the TRINITY BLADE (R); place the JEWELS and take the DIADEM (S).
- Walk down.
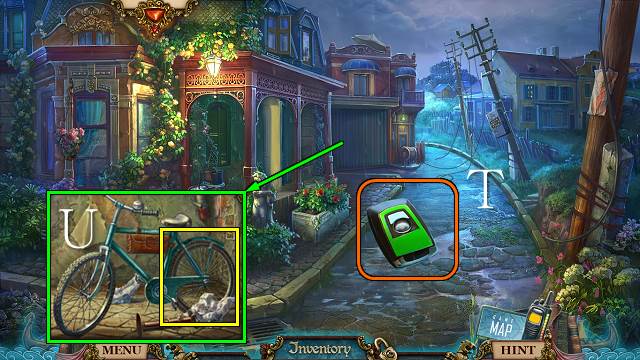
- Use the REMOTE (T).
- Take the BICYCLE WHEEL with the SCREWDRIVER (U).
- Go forward and right.
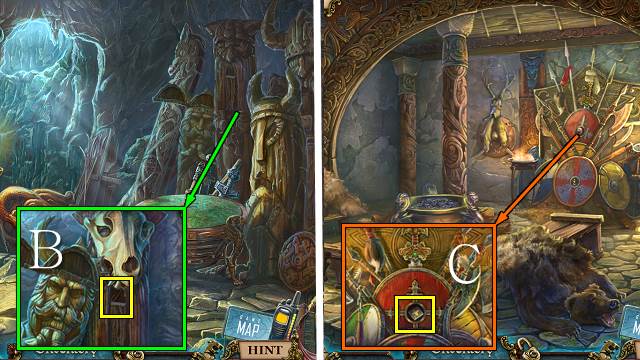
- Place the DIADEM; take the VIKING SYMBOL (V).
- Use the FEATHER DUSTER (W).
- Put Norny on the STRETCHER (X).
- Place the WHEEL, put the chair upright and put the break on (Y).
- Use the GOLF CLUB and take the ELECTRONIC CHIP (Z).
- Put the drip in Norny's arm, place the CARDIOGRAPH WIRES (A).
- Put the POISON in the chemical analyzer; turn the book to IV and take the RECIPE (B).
- Walk down.
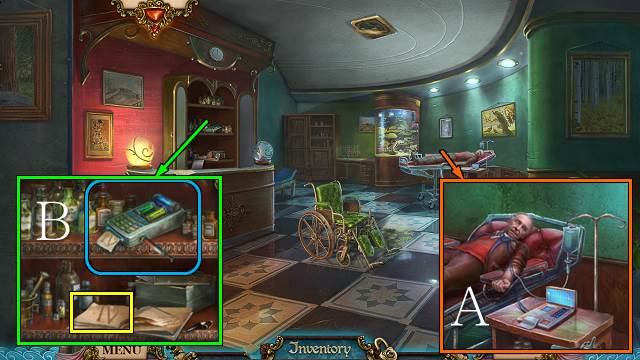
- Put the MILK in the bowl (C), use the GOLF CLUB (D) and take the AMBULANCE KEY (E).
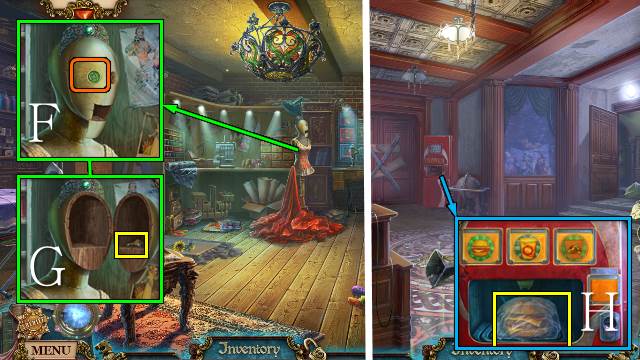
- Use the AMBULANCE KEY; play the HOP to receive the FLASKS (F).
- Walk forward.
- Place the RECIPE and FLASKS for a mini-game.
- Turn the tubes to allow the liquids to move to the syringe; start with the top color.
- Take the ANTIDOTE INJECTOR (G).
- Use the ANTIDOTE INJECTOR on the i.v. bag; take the SAFE CODE (H).
- Go to the Basement.
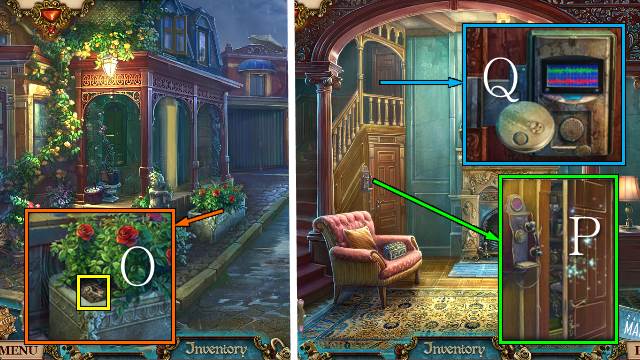
- Place the SAFE CODE (I); turn the dial to 3, 5, and 5; take all the evidence and the TOKEN, MAP PART 1/3 and TWO DOLLARS (J).
- Walk down.
- Use the TOKEN to receive the VIKING PHOTO (K).
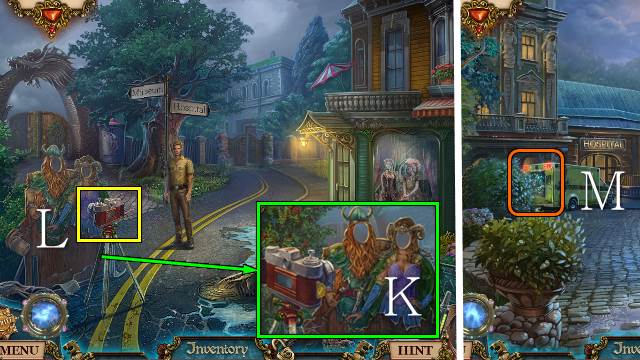
- Take the CAMERA (L).
- Go forward.
- Play the HOP to receive a BANDAGE (M).
- Walk down.
- Give the BANDAGE to Jones and receive a TICKET (N).
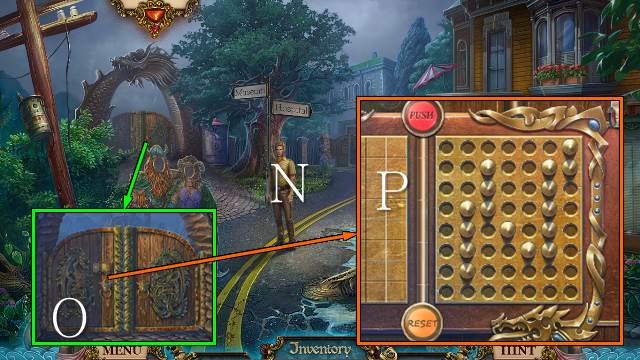
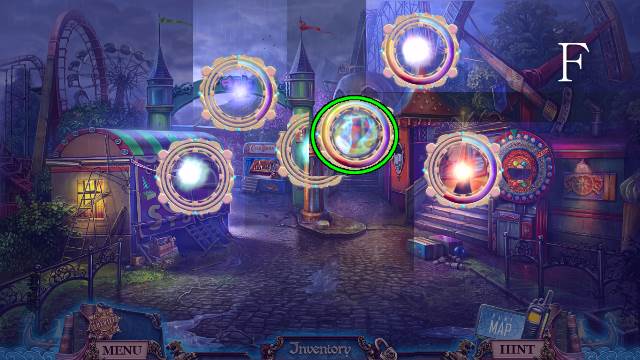
- Place the TICKET for a mini-game (O).
- Check the pattern and place the pins in mirror image on the right panel; select 'Push' (P).
- Before you go through the gate, put all Evidence on the board (Q).
- Go through the gate.
Chapter 6: A Chase Through the Museum
- Talk to Jones.
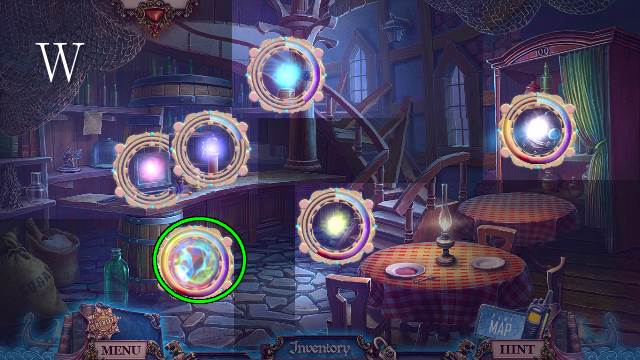
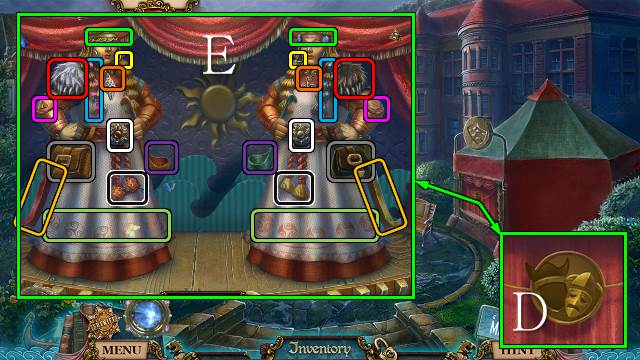
- Place the PLATES for a mini-game.
- Casual solution: Wx3, Xx3, Sx3, Ux3, Zx3, Ax3.
- Hard solution: Vx3, Wx3, Xx3, Yx3, Tx2, S, Ux3, Ax2, Zx3, Bx3.
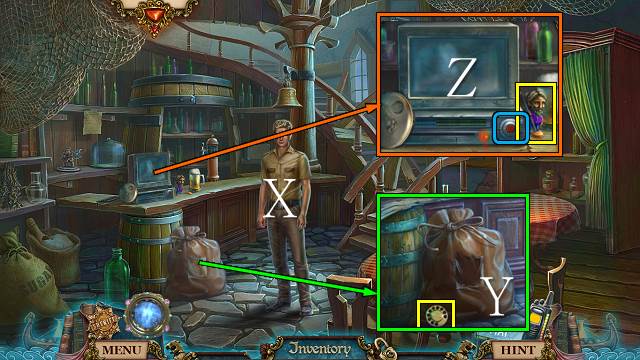
- Take VIKING SYMBOL 2/3 (C).
- Use the SCREWDRIVER, take VIKING SYMBOL 3/3 and place the ELECTRONIC CHIP (D).
- Take the BUTTON (E).
- Walk down and right.
- Remove the button and place the BUTTON (F); take the IGNITION KEY (G).
- Go to the School.
- Select the burger, use the TWO DOLLARS and take the CHEESEBURGER (H).
- Go to the Museum Entrance.
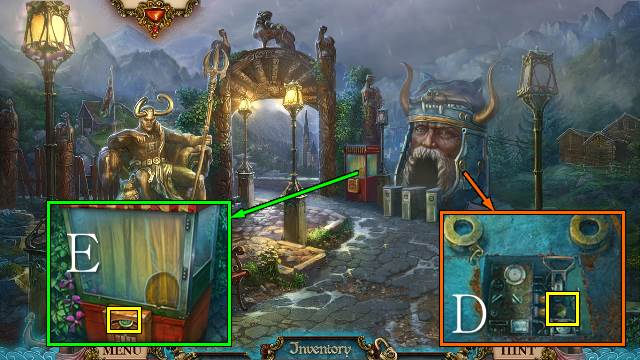
- Place the IGNITION KEY and pull the lever (I).
- Turn the helmet and take the FORTUNE TOKEN, TRINKET and OLD HELMET; turn the key (J).
- Go right.
- Talk to Jones (K).
- Play the HOP to receive a HEAVY AXE (L).
- Use the OLD HELMET to receive a HELMET WITH EMBERS (M).
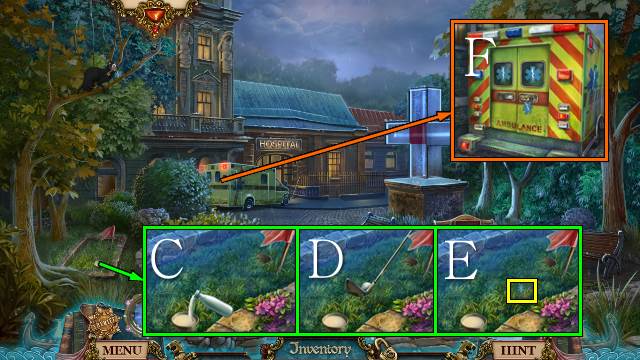
- Take the ARROW, BELLOWS, SULFUR and NET CARTRIDGE (N).
- Walk down and forward.
- Give the CHEESEBURGER to the dog (O).
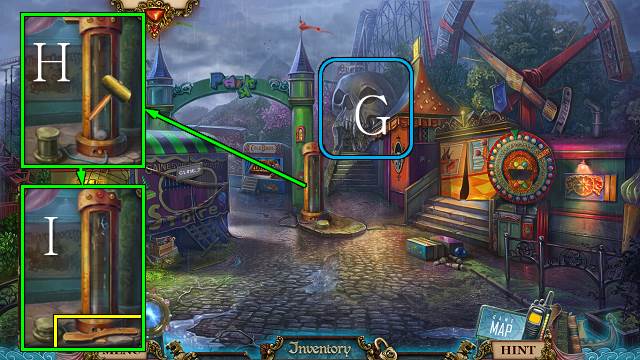
- Take the DECK KEY (P).
- Play the HOP to receive a TORCH (Q).

- Use the FORTUNE TOKEN and pull the lever three times; take the GIFT CERTIFICATE (R).
- Take the ONE DOLLAR (S).
- Take the CUP (T).
- Walk down.
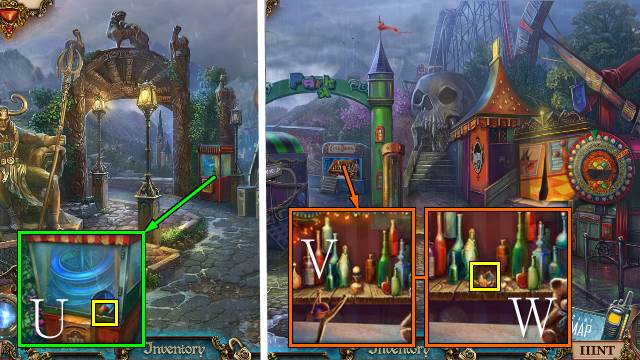
- Open the curtains and use the GIFT CERTIFICATE to get the GOLDEN DEER; take the BALL (U).
- Walk forward.
- Use the BALL (V) and take MAP PART 2/3 (W).
- Go to the School.
- Select the coffee, place the CUP and use the ONE DOLLAR; take the STEAMING COFFEE (X).
- Go down and left.
- Place the TRINKET and take the REVOLVER (Y).
- Go to the Hospital Yard.
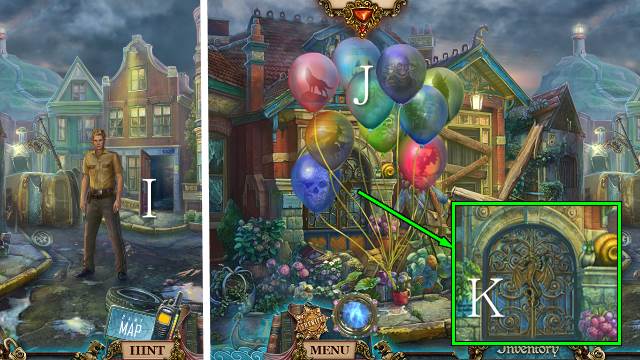
- Place the LATCH, open the suitcase and place the ARROW; take the BOW EMBLEM (Z).
- Go forward.
- Use the STEAMING COFFEE and the napkin; use the CAMERA and receive a PHOTO CODE (A).
- Go to the Viking Museum.
- Light the TORCH to get a BURNING TORCH (B).
- Go right.
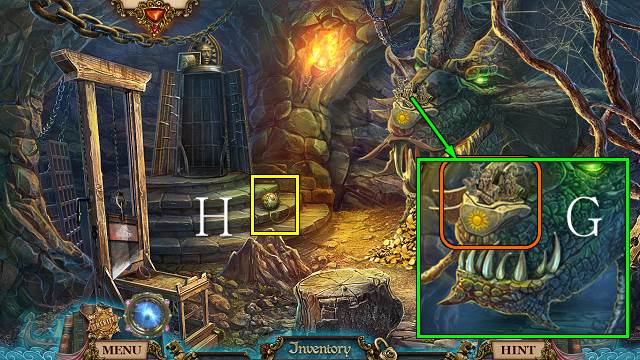
- Place the BOW EMBLEM, open the sphere and use the HELMET WITH EMBERS and SULFUR (C).
- Take the GUN BRUSH (D); use the BURNING TORCH to receive a GRINDSTONE (E).
- Take PLANK 1/3 (F).
- Walk down.
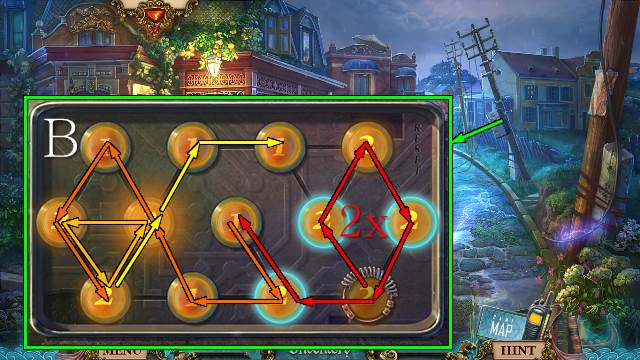
- Place the VIKING SYMBOLS for a mini-game.
- Use the numbered buttons to slide the symbols across the board; the numbers indicate how far from the button the tile will slide.
- Solution: P-N-P-H-J-K-I-L-N-P-H-G-L-N-P-G-O-M.
- Go forward.
- Place the NET CARTRIDGE, GUN and GUN BRUSH to receive a LOADED NET GUN (N); take MAP PART 3/3 (O).
- Place the STONE HEAD (P).
- Take PLANK 2/3 and use the HEAVY AXE (Q).
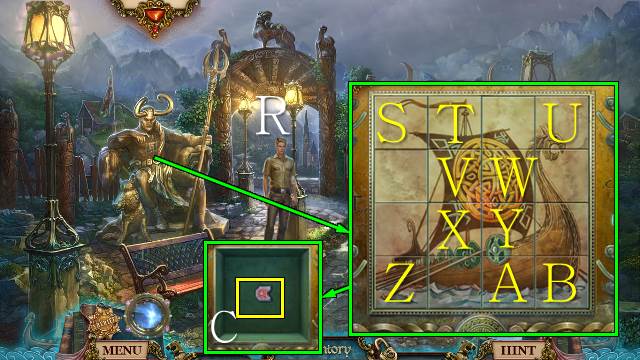
- Place the MAP PARTS for a mini-game.
- Swap the tiles to restore the labyrinth (R).
- Go forward.
Chapter 7: The Real Story Revealed
- Play the HOP to receive a STONE VIKING (S).
- Take the PADLOCK KEY (T).
- Take RUNE 1/2 (U).
- Walk down twice.
- Play the HOP to receive a SWORD (V).
- Use the PADLOCK KEY (W), open the cart and take the STONE VIKING (X).
- Go right.
- Place the SWORD and take the WOODEN HAMMER (Y).
- Go to the Grotto.
- Place the two STONE VIKINGS (Z).
- Go forward.
- Use the Spirit Detector (A).
- Take the BOWLING BALL (B).
- Place the BOWLING BALL; take RUNE 2/2 and the GOLD MEDALLION (C).
- Walk down twice.
- Remove the cover and place the GOLD MEDALLION (D); take the BADGE (E).
- Go to the Attractions.
- Use the Spirit Detector (F).
- Play the HOP to receive a MOLD (G).
- Use the WOODEN HAMMER (H); take the AXE HANDLE (I).
- Go to the Torture Chamber.
- Place the AXE HANDLE and take the BLUNT AXE (J).
- Go to the Hall.
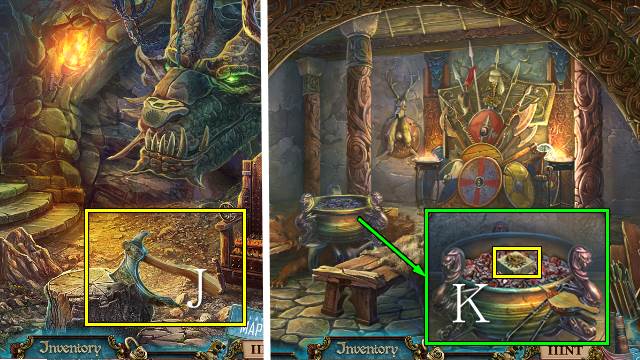
- Place the MOLD and GOLDEN DEER; use the BELLOWS and take the SUN RUNE with the tongs (K).
- Walk down.
- Place the GRINDSTONE and sharpen the BLUNT AXE; you receive a SHARP AXE (L).
- Go to the Torture Chamber.
- Use the SHARP AXE; take PLANK 3/3 and the NAIL PULLER (M).
- Place the RUNES and PHOTO CODE and push the runes (N); use the NAIL PULLER 8 times to get the NAILS (O).
- Walk down.
- Play the HOP to receive the LOKI STATUE (P).
- Place the PLANKS and NAILS and use the SHARP AXE (Q).
- Go into the ship.
- Take the SKULL MASK (R).
- Use the SHARP AXE and take the DECK KEY (S).
- Place the two DECK KEYS, turn them and turn the left cross (T).
- Go right.
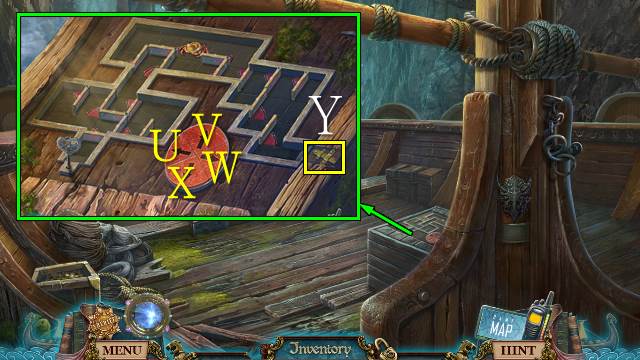
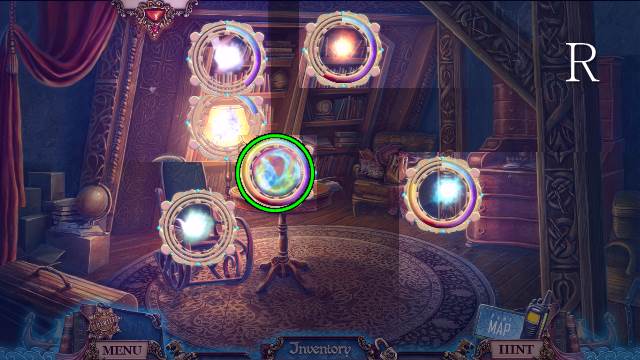
- Place the BADGE for a mini-game.
- Guide the crab trough the maze, to the decoration and to the key.
- To decoration: Wx2-X-U-V-X-U-V-Wx2-X-V-Ux2-X-Wx3-X-Wx2-Xx2-Wx2.
- Take the DECORATION (Y).
- Back to start: U-Vx2-Ux2-V-Ux3.
- To key: Ux2-V-Wx2-X-U-W-V-Ux2-X-W-Xx2-Ux2-X-Wx3-V-Ux3-X-Wx2-Ux2-V-Wx3-X-U-Xx2.
- Place the PHOTO (Z); take the ODIN STATUE (A).
- Walk down three times.
- Place the SKULL MASK and take the HOOK (B).
- Go down and right.
- Place the DECORATION and turn it three times; take the BADGE (C).
- Go to the Grotto.

- Use the BURNING TORCH, open the box and place the HOOK to get a CHAIN WITH HOOK (D).
- Go to the Deck.
- Retrieve the bag with the CHAIN WITH HOOK (E); place the BADGE and take the THOR STATUE (F).
- Go to the Torture Chamber.
- Place the SUN RUNE, the LOKI STATUE, THOR STATUE and ODIN STATUE (G).
- Take the amulet (H).
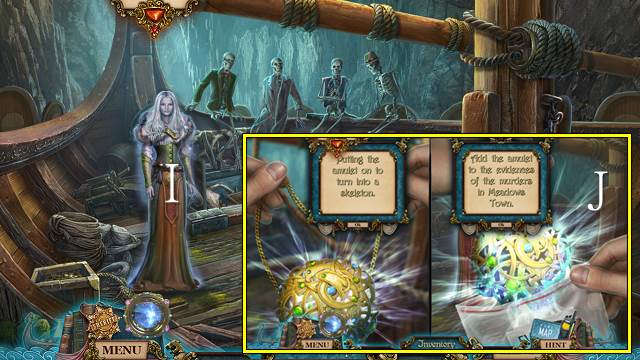
- Talk to Valkiris (I).
- Select an ending (J).
- Congratulations, you've completed Ghosts of the Past: Bones of Meadows Town.
Created at: 2014-09-08