

Walkthrough Menu
- General Tips
- Chapter 1: The Mage's Decree
- Chapter 2: Lisa's Secret
- Chapter 3: The Gardens
- Chapter 4: The Young Girl's House
- Chapter 5: The Resistance
- Chapter 6: The Mage's House
General Tips
- This is the official guide for Grim Façade: The Artist and the Pretender.
- This guide will not mention each time you have to zoom into a location; the screenshots will show each zoom scene.
- Hidden-object puzzles are referred to as HOPs. This guide will not show screenshots of the HOPs, but it will mention when a HOP is available and the inventory item you'll collect from it.
- This guide will give step-by-step solutions for all puzzles that are not random. Please read the instructions in the game for each puzzle.
Chapter 1: The Mage's Decree
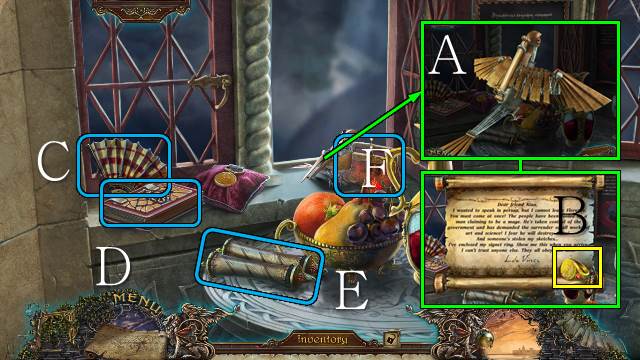
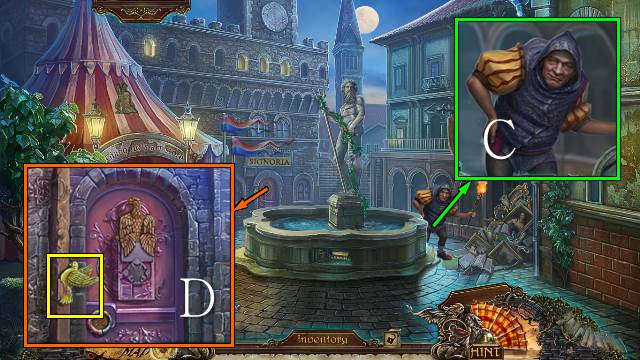
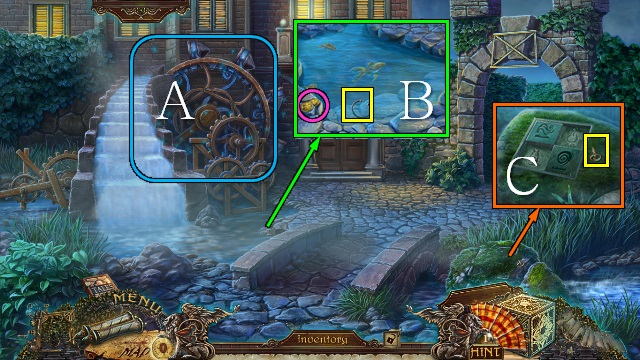
- Take the note (A); take LEONARDO'S RING (B).
- Take the Hint Fan (C), Tales Book (D) and Journal Scroll (E).
- Take the purse with two coins (F).
- Select either option.
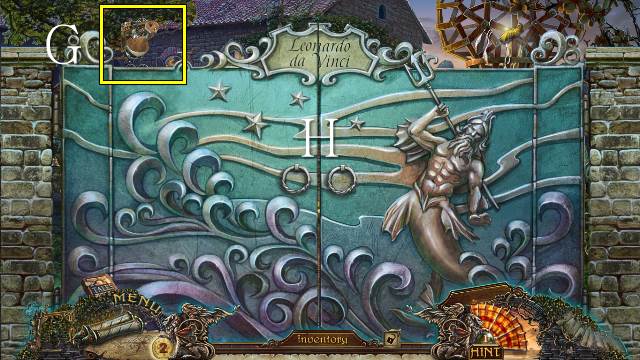
- Take the MECHANICAL PIGEON (G).
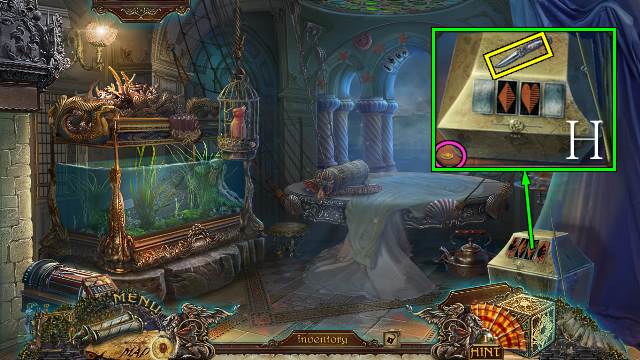
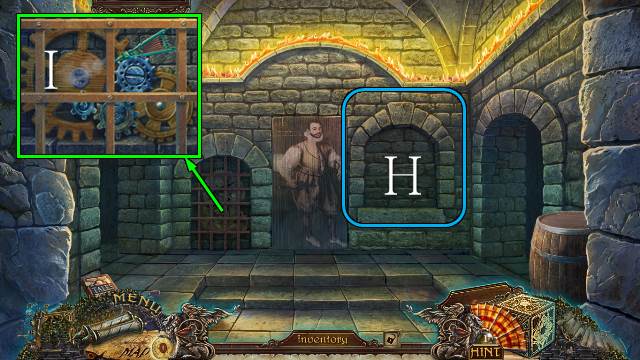
- Open the gate (H).
- Try to walk forward.
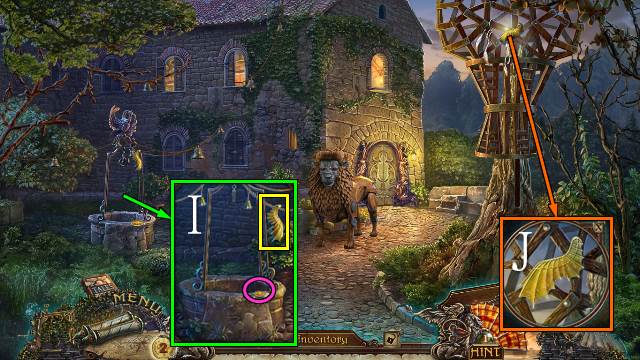
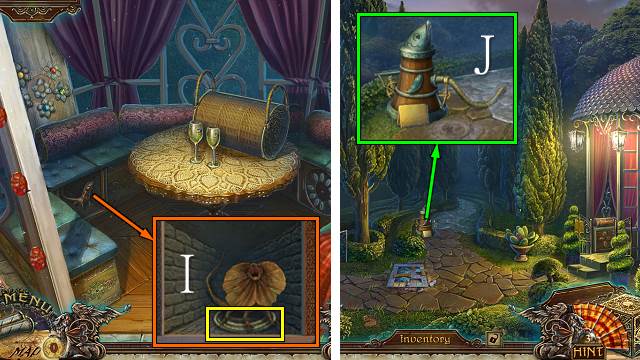
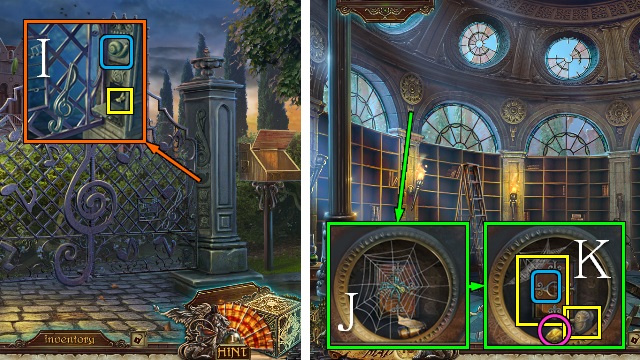
- Take the HANDLE and coin (I).
- Send the MECHANICAL PIGEON to get the second HANDLE (J).
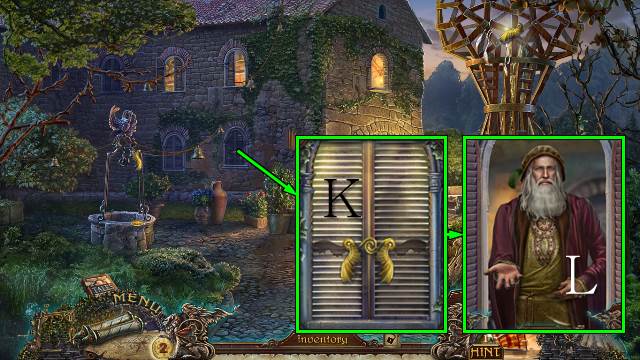
- Place the two HANDLES (K).
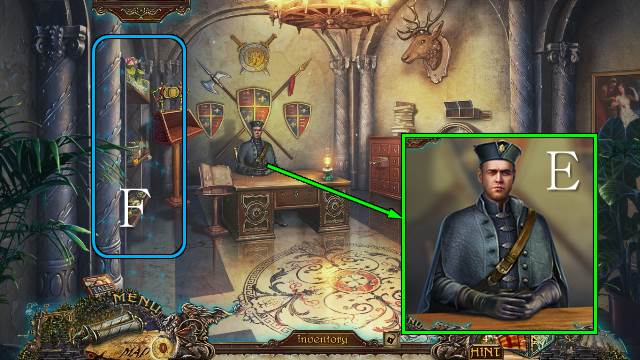
- Give LEONARDO'S RING to Leonardo (L).
- Go forward.
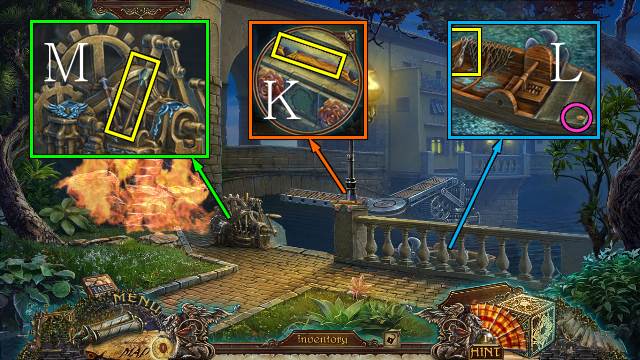
- Talk to Leonardo (M).
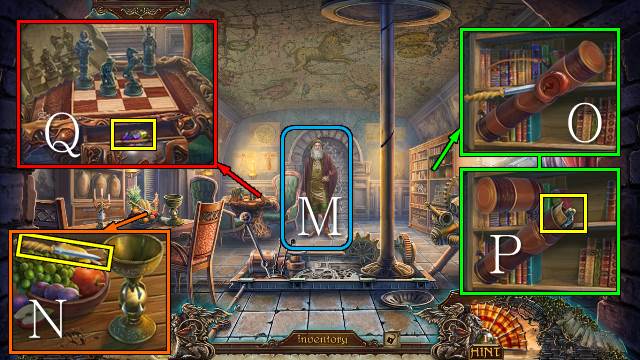
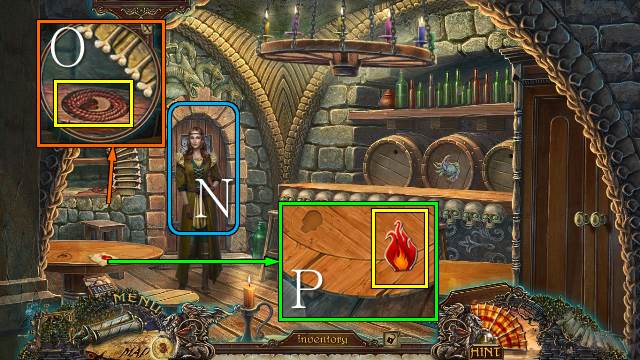
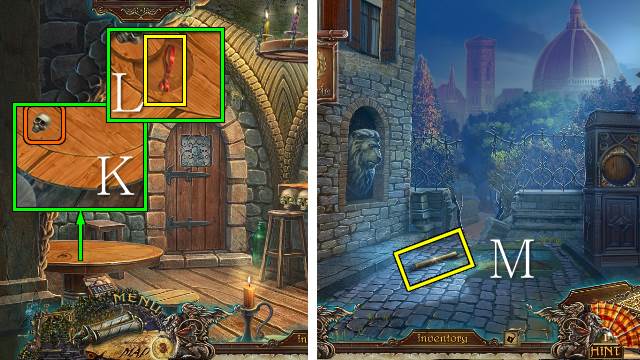
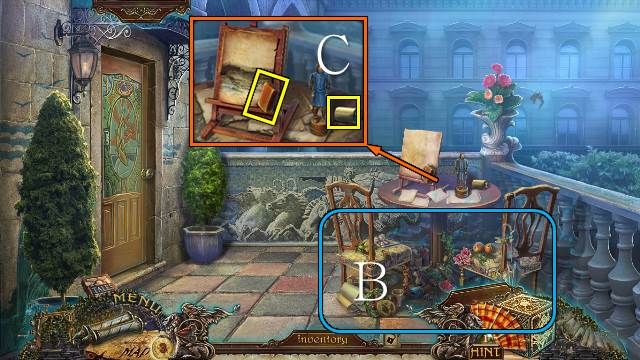
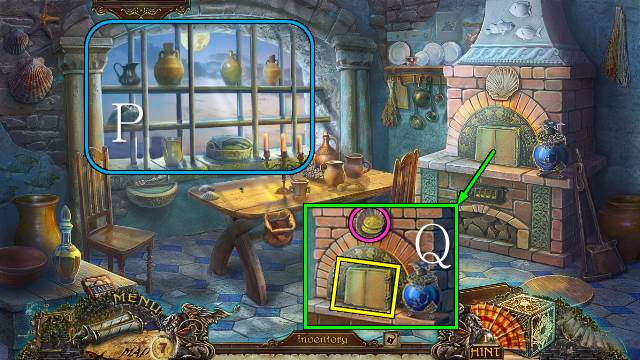
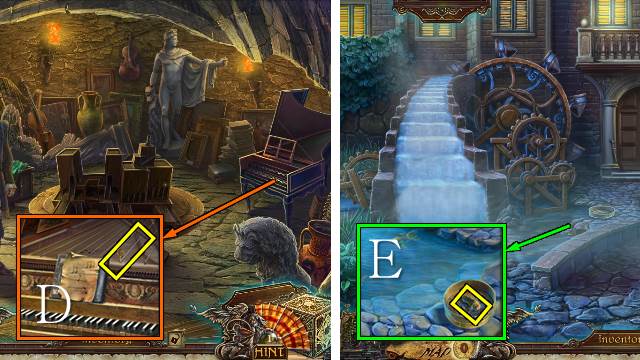
- Take the LETTER OPENER (N).
- Take the tube, use the LETTER OPENER (O), open the tube and take the PAWN (P).
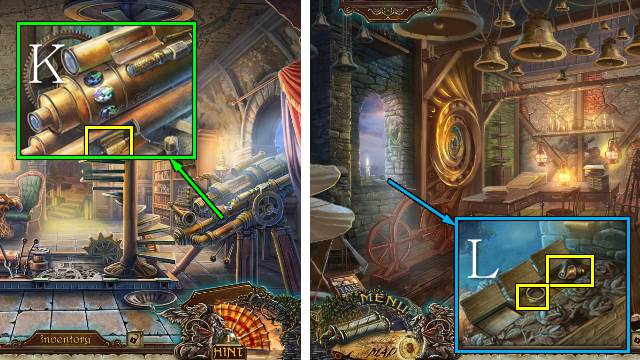
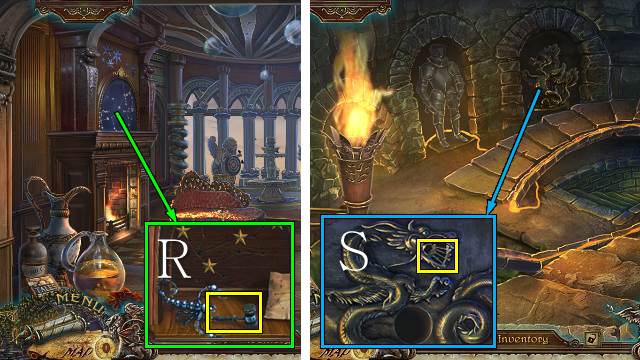
- Place the PAWN, move the pieces according to the clue and take the TELESCOPE LENS (Q).
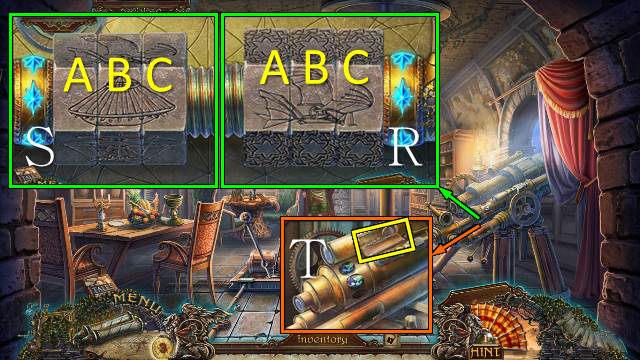
- Place the TELESCOPE LENS for a mini-game.
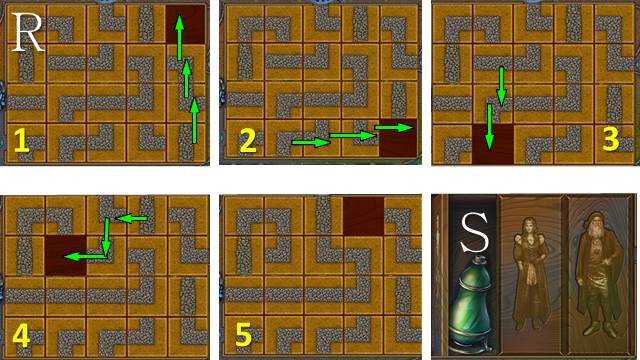
- Casual solution (R): A left x3, C right x6, B right x7, A right x12.
- Hard solution (S): A left x3, B left x3, C right x7, C left x12.
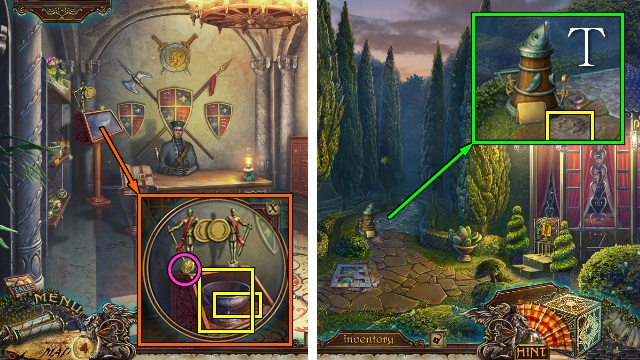
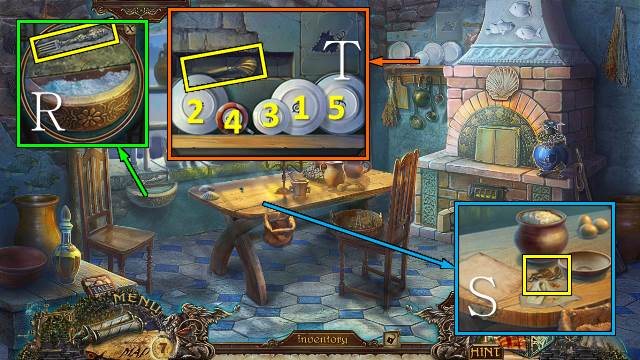
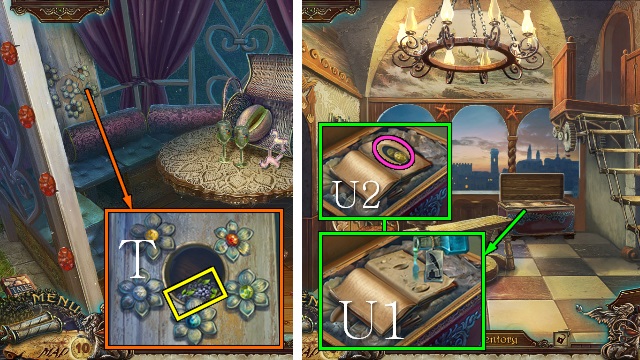
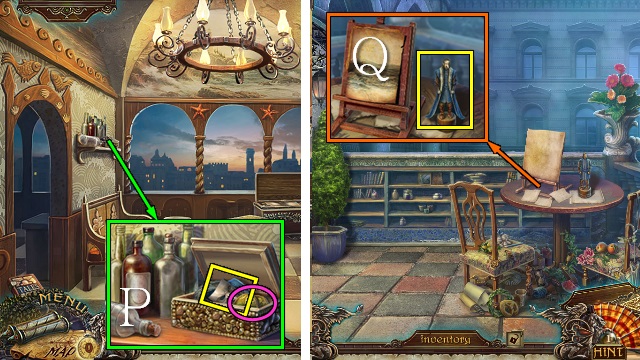
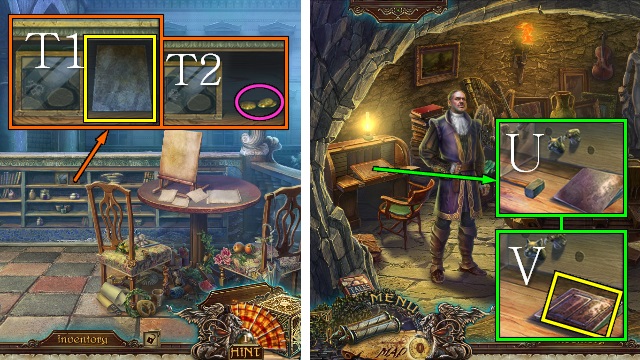
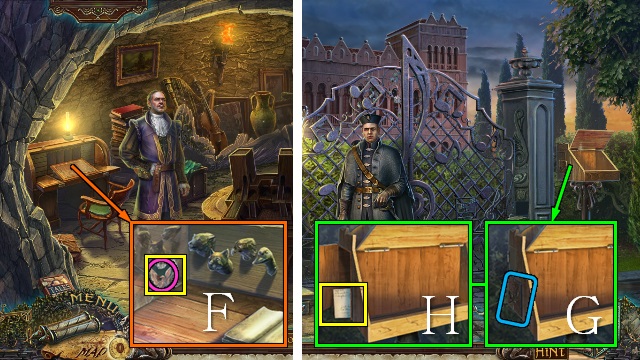
- Take the MAGNIFYING GLASS (T).
- Talk to Leonardo.
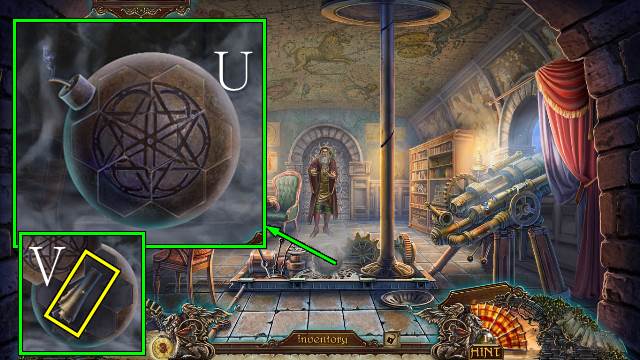
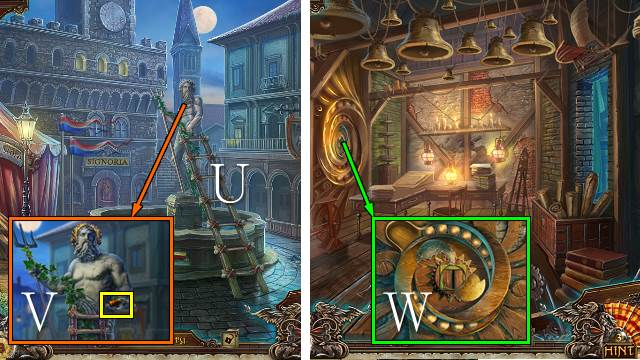
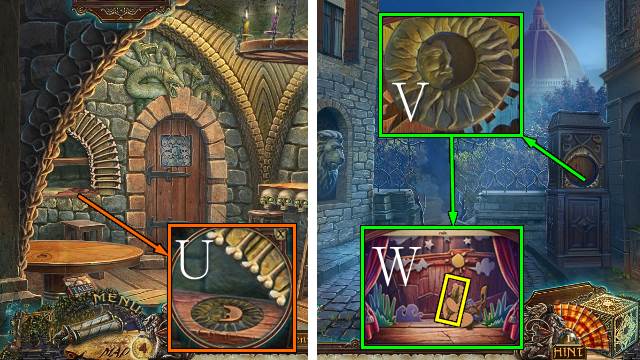
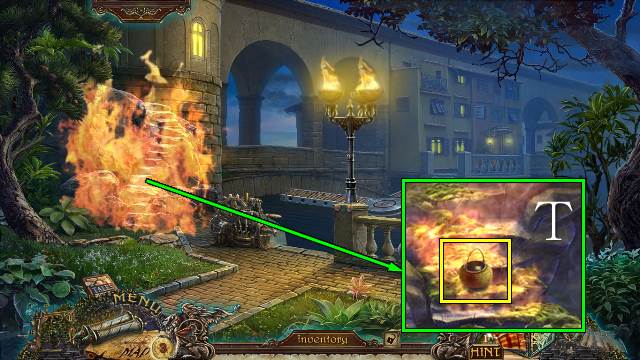
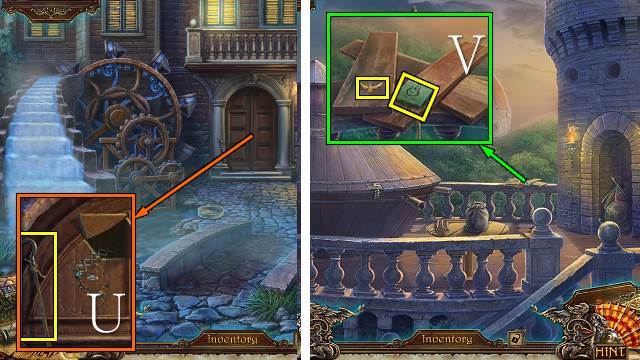
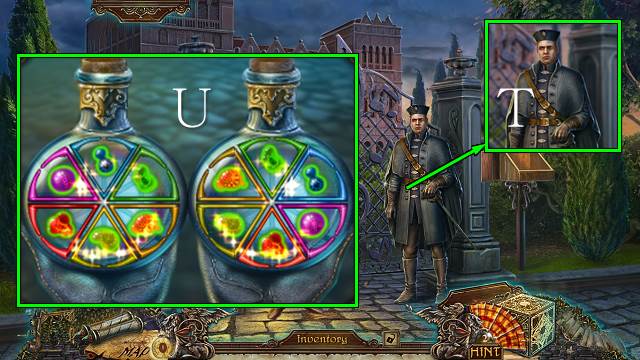
- Access the bomb for a mini-game (U).
- Take the note (V).
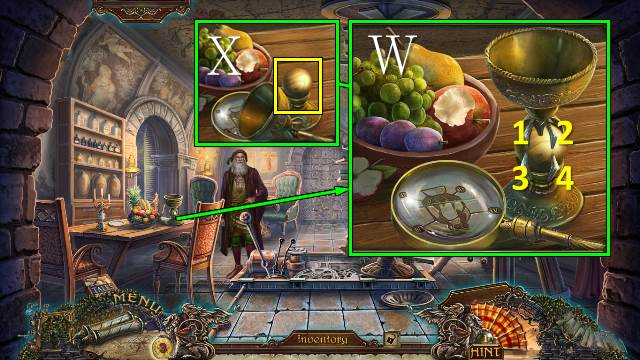
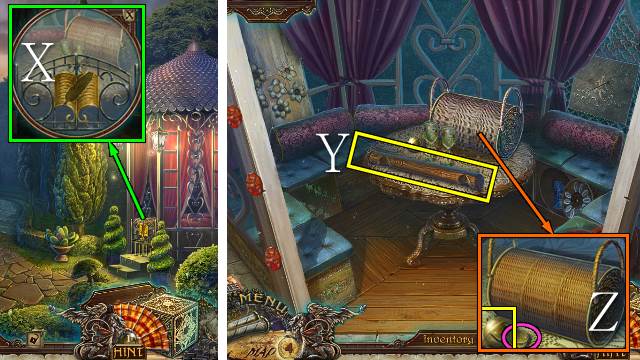
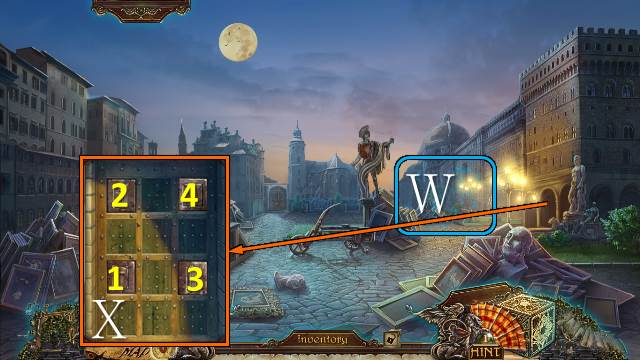
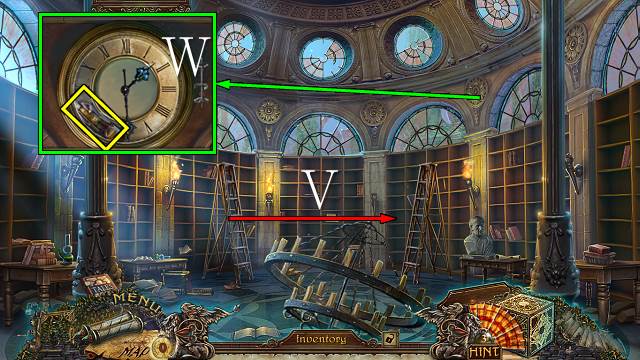
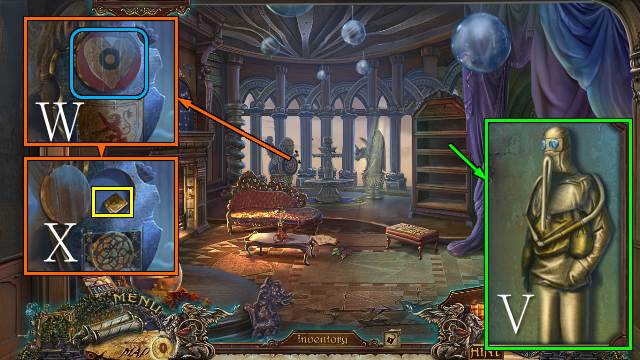
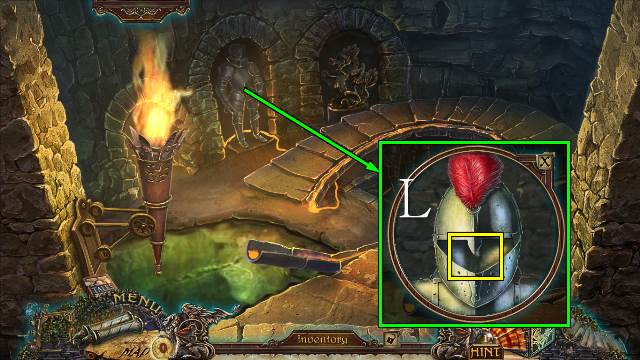
- Use the MAGNIFYING GLASS, select the clasps in numerical order (W) and take the WOODEN BALL (X).
- Go up.
- Talk to Lisa.
- Talk to Leonardo.
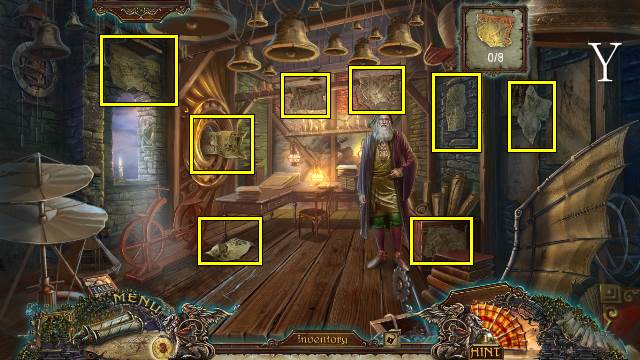
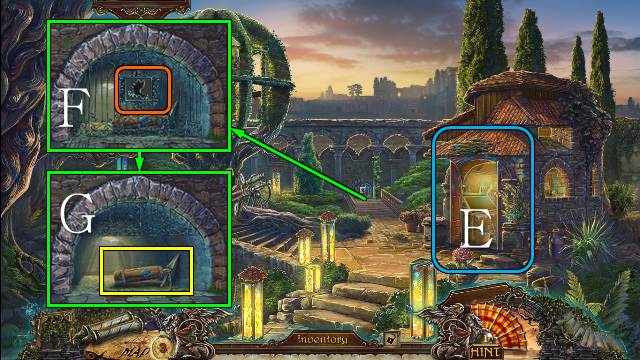
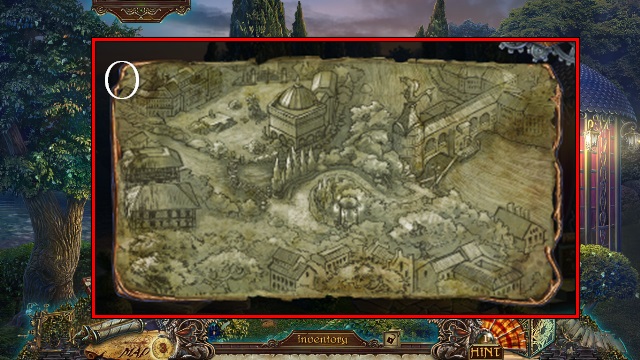
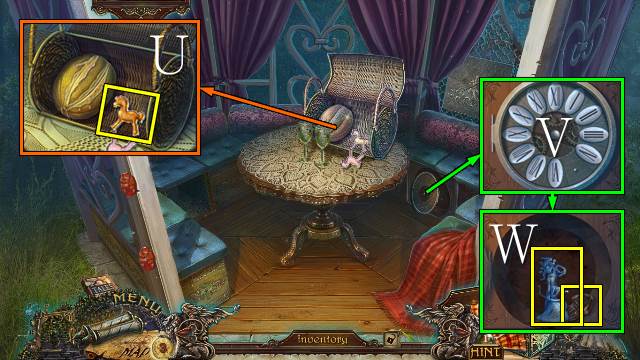
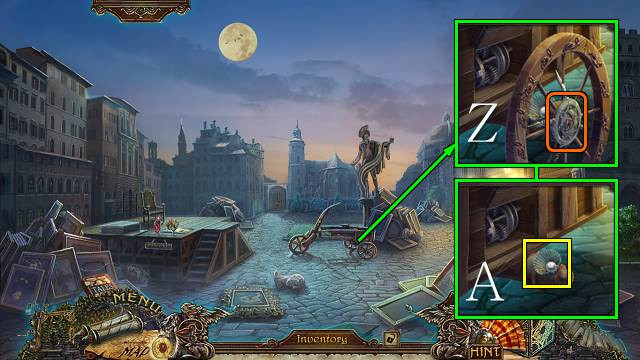
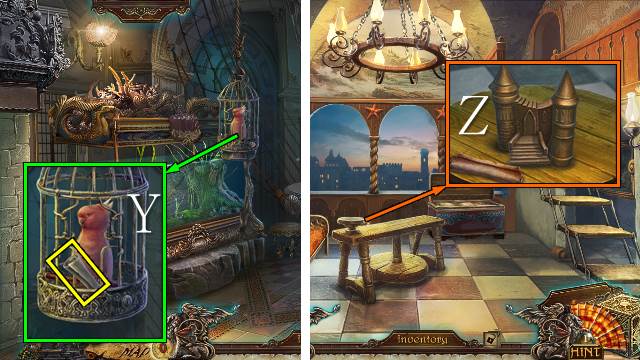
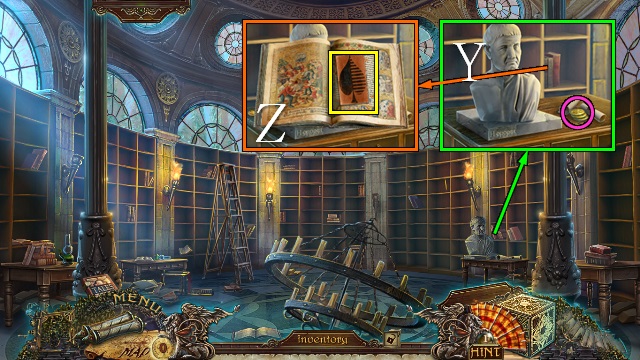
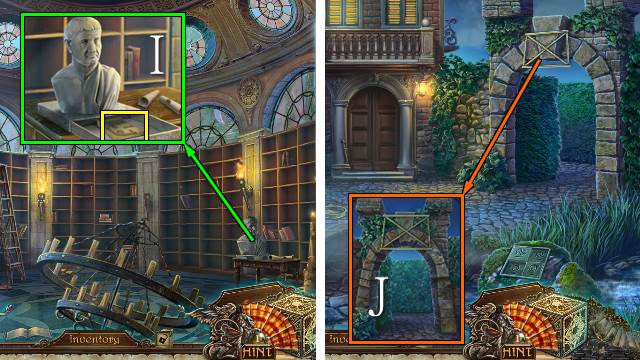
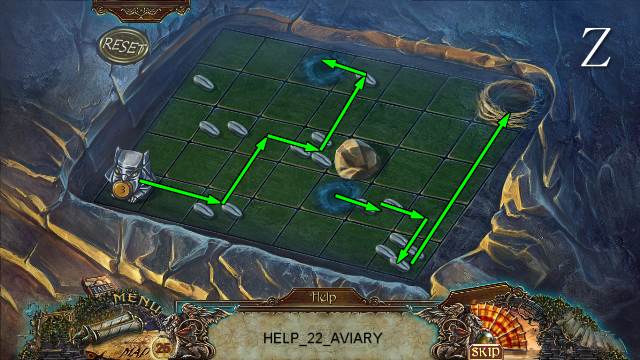
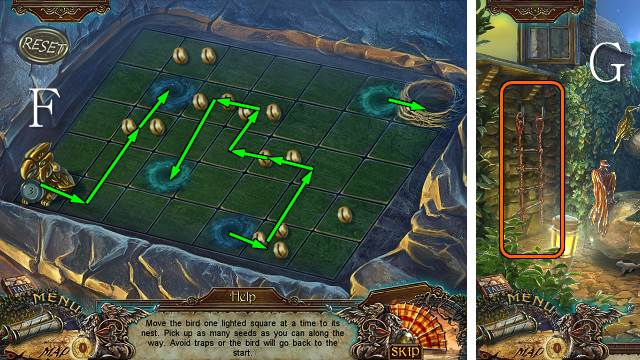
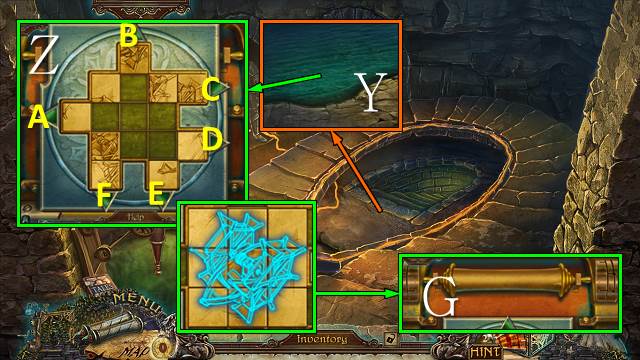
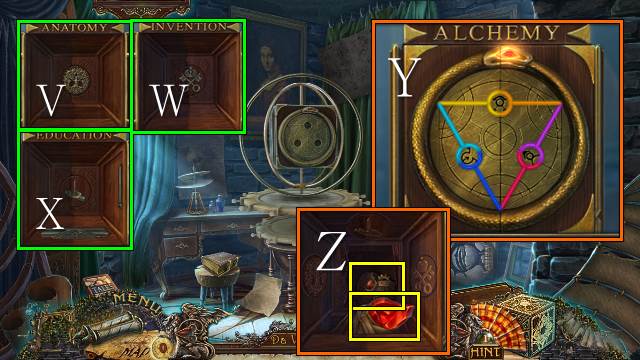
- Find the 8 map pieces (Y).
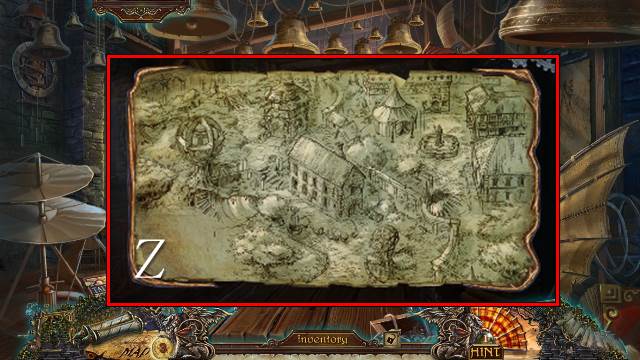
- Play the mini-game to get the Map (Z).
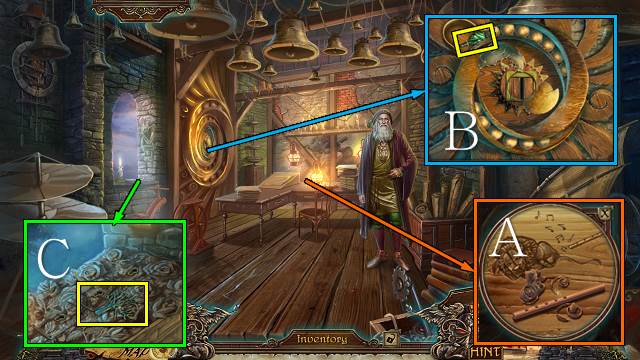
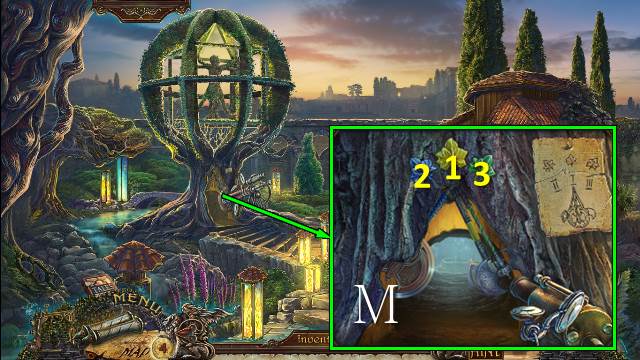
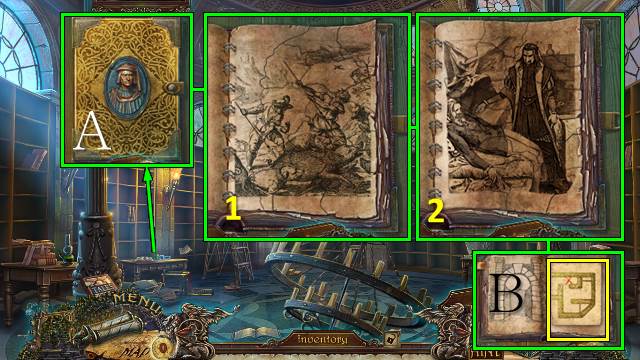
- Use the LETTER OPENER and take the FLUTE (A).
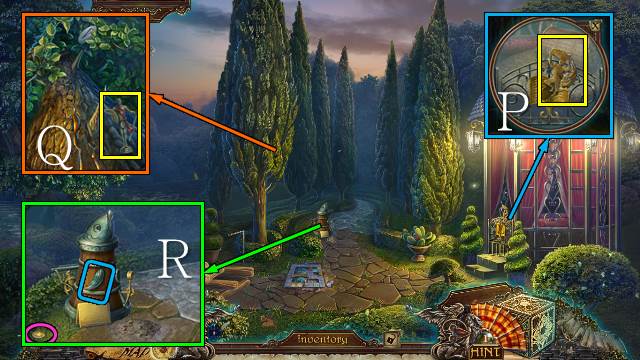
- Place the WOODEN BALL and take the SWORD IN STONE (B).
- Take the METAL TREE (C).
- Walk down and down again.
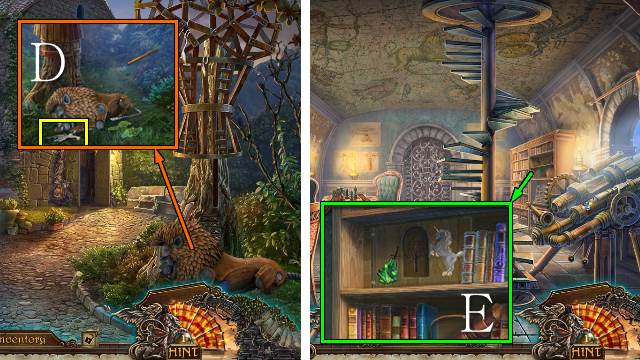
- Use the FLUTE and take the UNICORN (D).
- Go forward.
- Move the books and place the SWORD IN STONE, then the UNICORN, then the METAL TREE (E).
- Go forward.
- Chase off the cat (F).
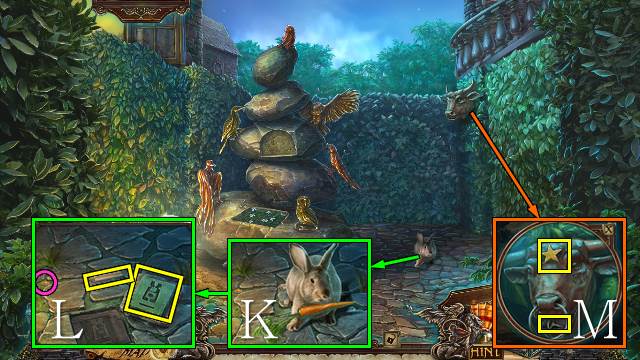
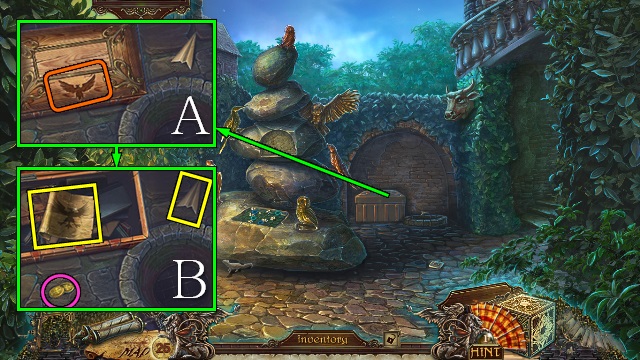
- Open the doors and play the HOP (G) to receive a PET SHEEP, which you can name.
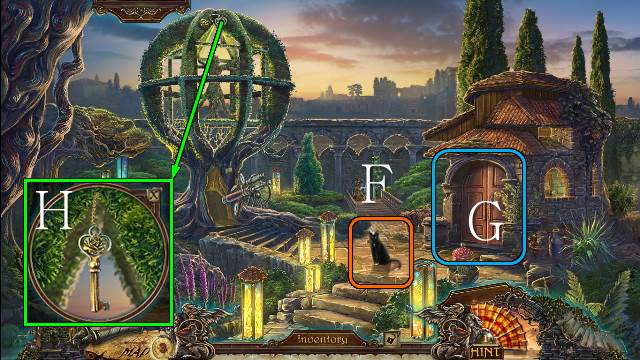
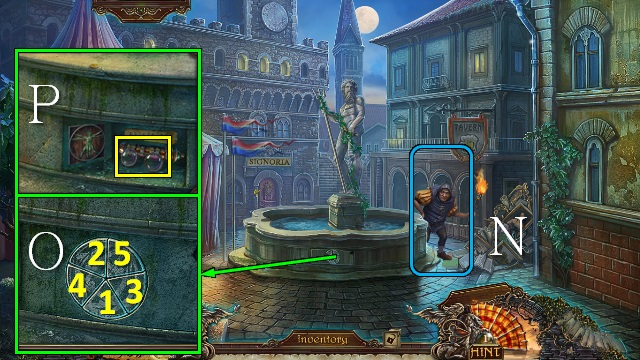
- Send the MECHANICAL PIGEON to retrieve the ROSE KEY (H).
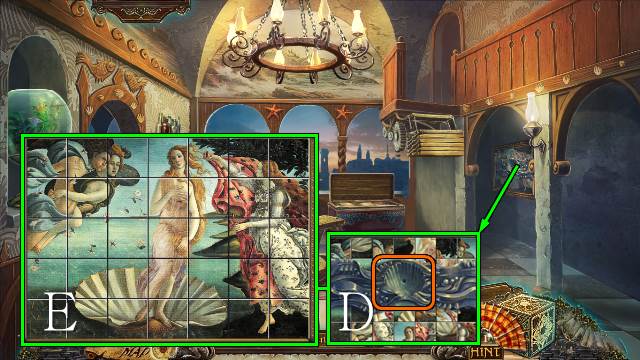
- Use the PET SHEEP and take the HARP (I).
- Place the HARP to receive the JEWELED LENS and take the coin (J).
- Walk down.
- Place the JEWELED LENS; take the SOLUTION PART (K).
- Go up.
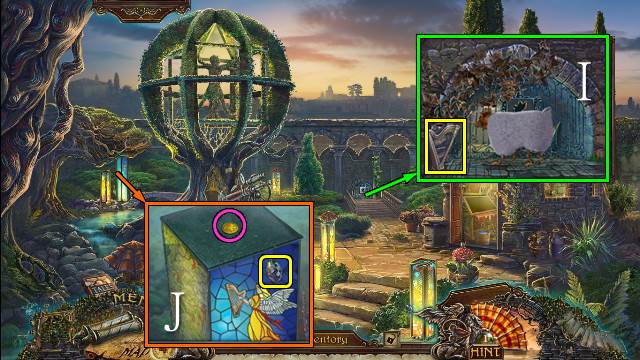
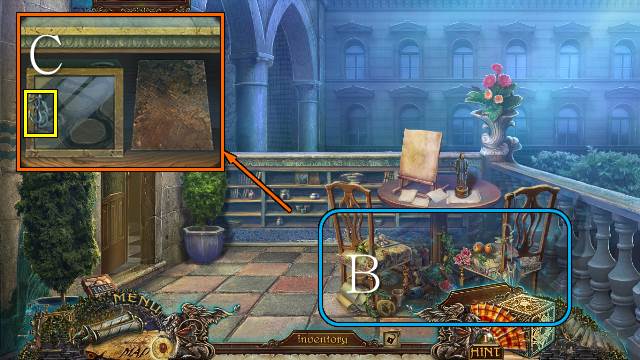
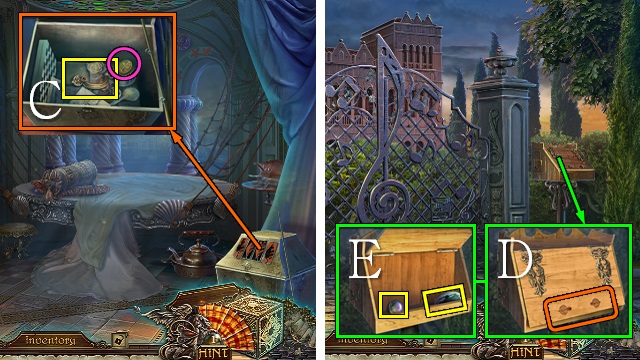
- Place the ROSE KEY and take the BROWN PAINT and METAL RING 1/3 (L).
- Walk down and forward.
- Look through the telescope, place the SOLUTION PART, push the leaves in numerical order and go forward (M).
Chapter 2: Lisa's Secret
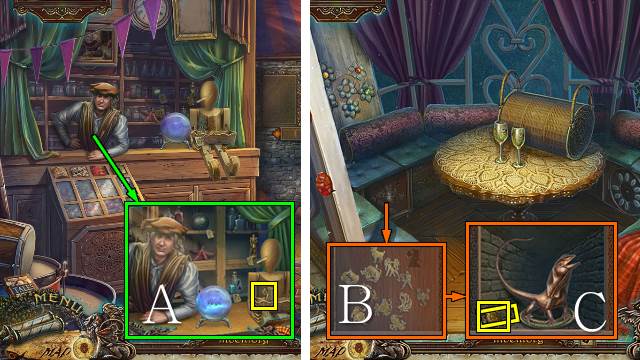
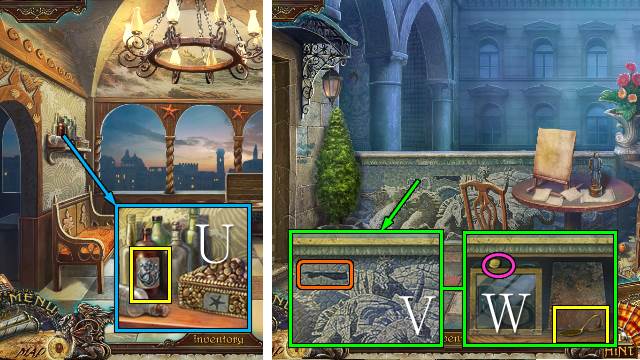
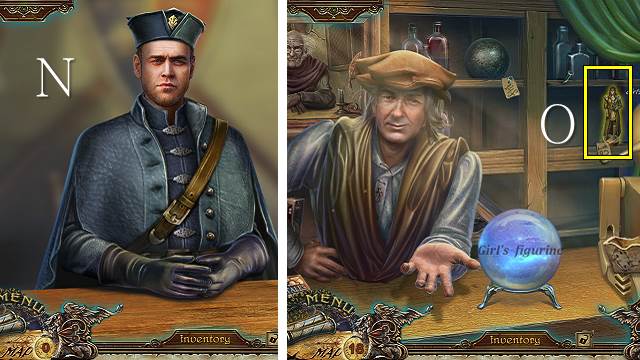
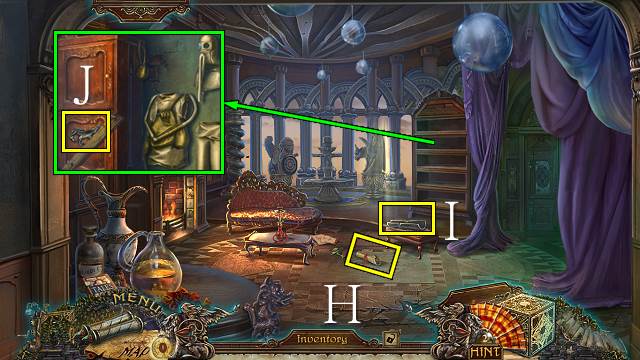
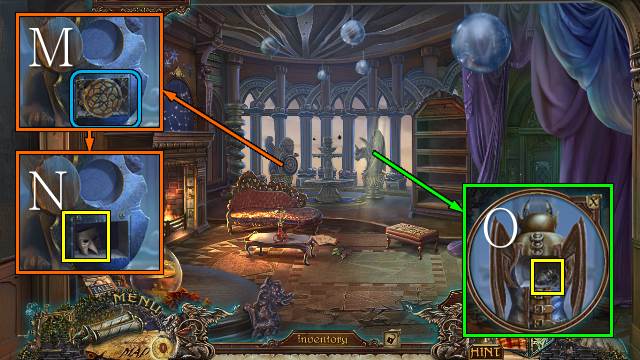
- Talk to Gobbo (N).
- Push the buttons until the compartment opens (O); take the GLASSES (P).
- Go left.
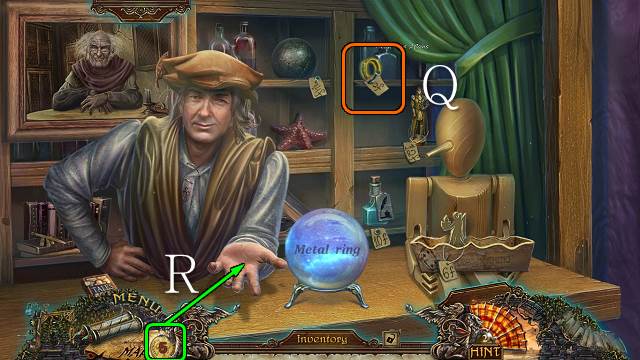
- Talk to the Vendor.
- Select the ring (Q) and give some coins to the Vendor (R) to buy METAL RING 2/3.
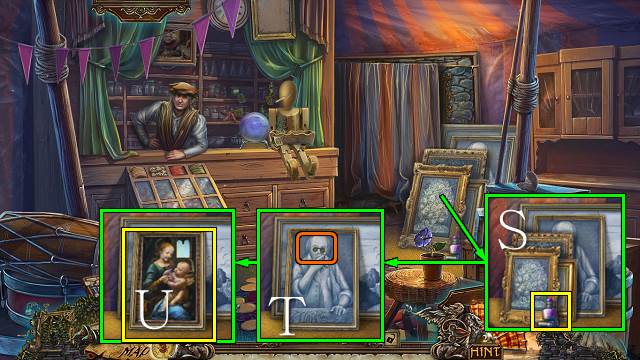
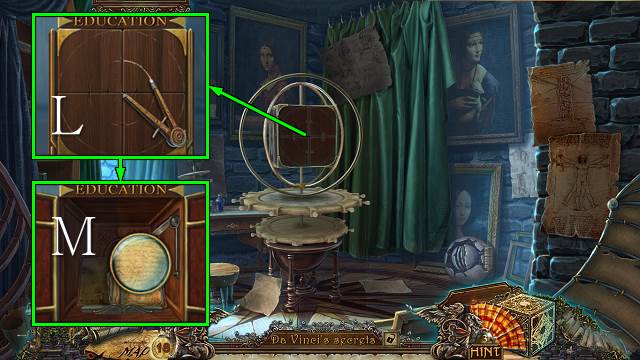
- Take the PURPLE PAINT (S), move the paintings and place the GLASSES (T); take DA VINCI'S BENOIS MADONNA (U).
- Select 'Make a replica of the painting'.
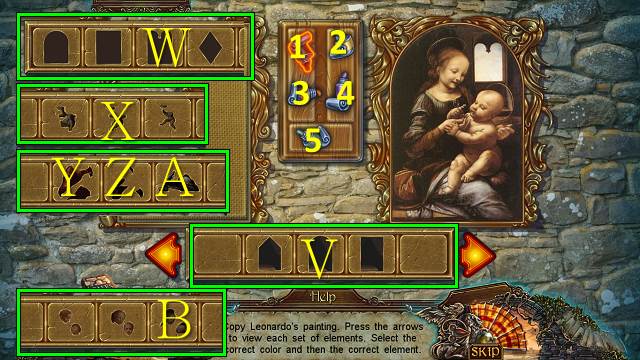
- Place DA VINCI'S BENOIS MADONNA and the PURPLE PAINT and BROWN PAINT for a mini-game.
- Solution: 1V, 2W, 2X, 5Y, 3Z, 4A, 2B.
- Take the PAINTING REPLICA and DA VINCI'S MADONNA BENOIS.
- Walk down.
- Give the PAINTING REPLICA to Gobbo (C).
- Take the GOLDEN PIGEON (D).
- Walk down.
- Play the HOP to receive METAL RING 3/3 (E).
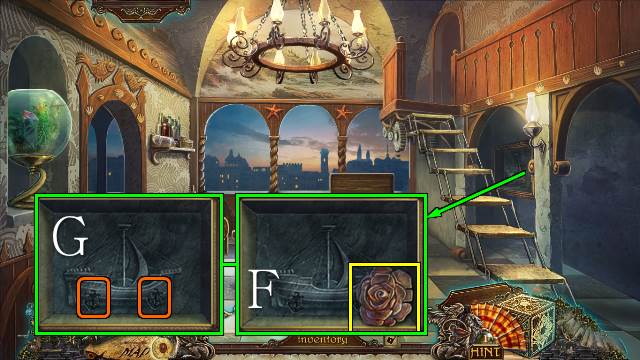
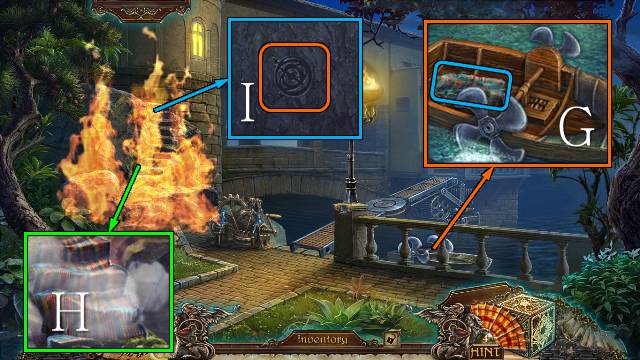
- Place the GOLDEN PIGEON (F) and take the FIRE EXTINGUISHER (G).
- Go left.
- Place the METAL RINGS for a mini-game (H).
- Take the note and MIRROR LANTERN; take the note and DA VINCI'S VITRUVIAN KEY (I).
- Use the FIRE EXTINGUISHER (J).
- Go right.
- Remove the rags and play the HOP to receive the SCISSORS (K).
- Use the MIRROR LANTERN (L).
- Go left.
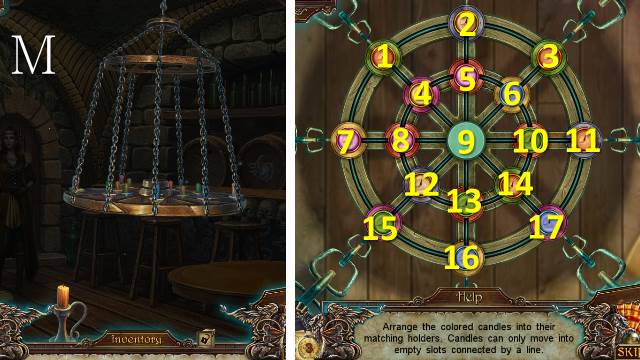
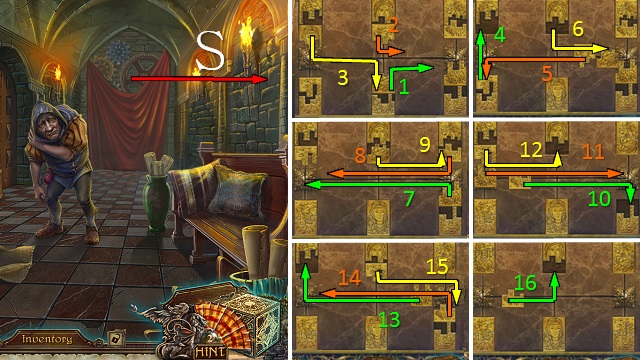
- Play the mini-game (M).
- Solution: 13, 12, 15, 16, 13, 12, 8, 7, 15, 12, 8, 4, 1, 7, 8, 4, 9, 5, 2, 1, 4, 9, 6, 10, 11, 3, 6, 10, 9, 12, 13, 14, 17, 11, 10, 9, 14, 17, 11, 10, 9, 14, 17, 11, 10, 9, 6, 5, 9, 12, 13, 14, 9, 12, 13, 9.
- Talk to Lisa (N).
- Take the ROPE (O).
- Use the SCISSORS and take the FIRE SYMBOL (P).
- Walk down.
- Place the rungs and use the ROPE; take the LADDER (Q).
- Place the FIRE SYMBOL; take the GREEN GEM (R).
- Go left.
- Place the GREEN GEM to receive a FANG (S).
- Walk down.
- Place the FANG and take the WREATH (T).
- Walk down.
- Place the LADDER (U).
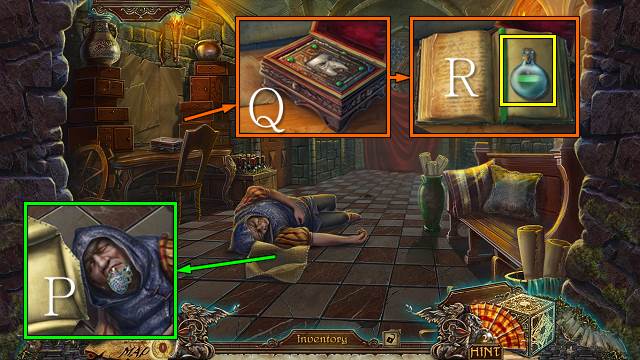
- Place the WREATH and take the note; take the POISON (V).
- Go to Leonardo's Workshop.
- Place DA VINCI'S VITRUVIAN KEY (W).
- Go right.
- Take the note (X).
- Use the POISON (Y); take the PHARMACIST'S NOTE and UNIVERSAL ANTIDOTE (Z).
- Go to the Tavern.
- Talk to Lisa (A).
- Select either option.
- Try to go forward.
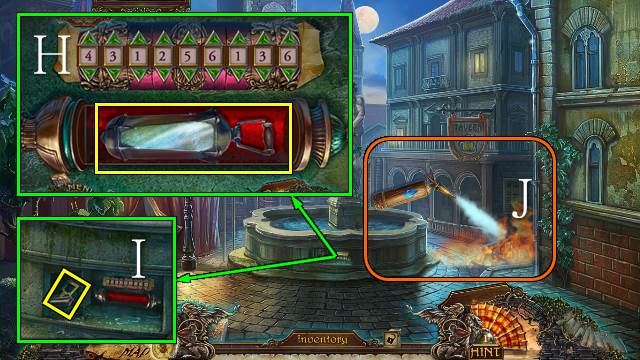
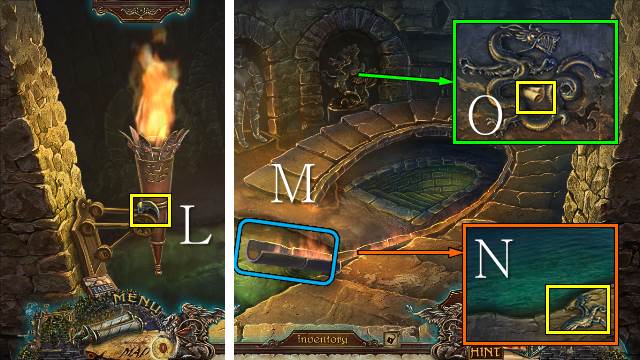
- Take the note and FLINT AND STEEL (B).
- Walk down.
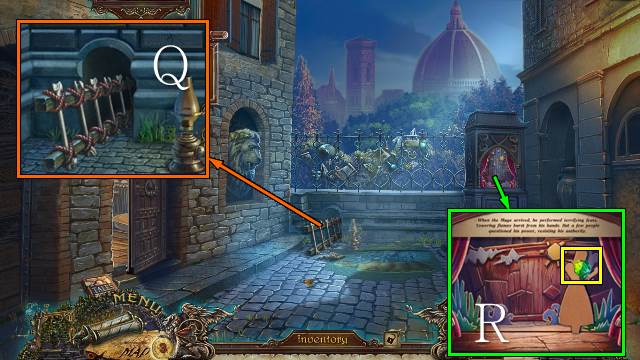
- Play the HOP to receive an EAGLE MEDAL (C).
- Use the FLINT AND STEEL and take the SIGNORIA ACCESS CARD (D).
- Walk down.
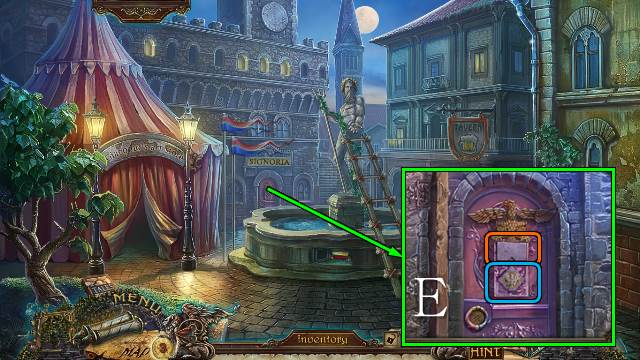
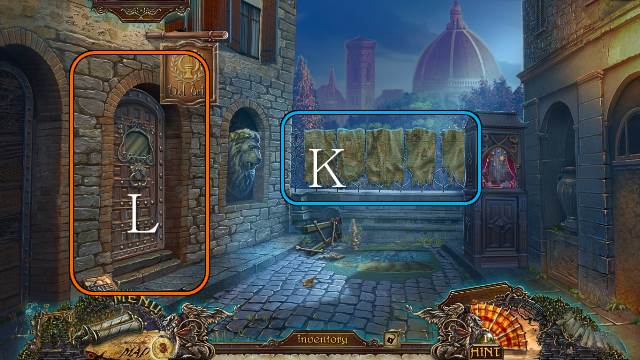
- Place the EAGLE MEDAL, open the flap and place the SIGNORIA ACCESS CARD; go forward (E).
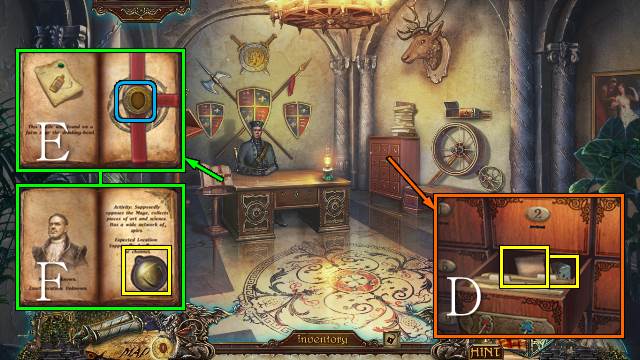
- Talk to the Mayor and give him the PHARMACIST'S NOTE; you receive a PUMP HANDLE (F).
- Play the HOP to receive the SIGNORIA KEY (G).

- Place your PET SHEEP and take the ARIES symbol (H).
- Use the UNIVERSAL ANTIDOTE (I), open the book and take the SKULL (J).
- Go to the Tavern.
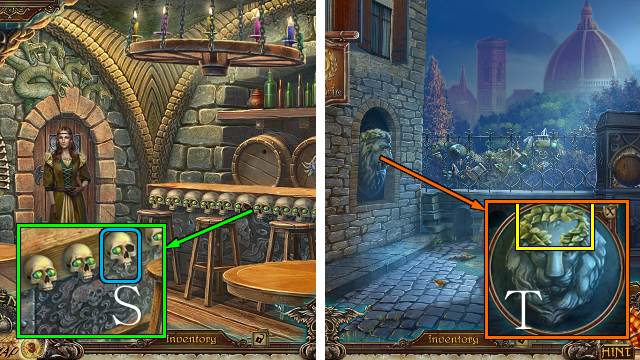
- Place the SKULL (K) and take the SCARLET RIBBON (L).
- Walk down.
- Take BRIDGE TIMBER 1/3 (M).
- Walk forward.
Chapter 3: The Gardens
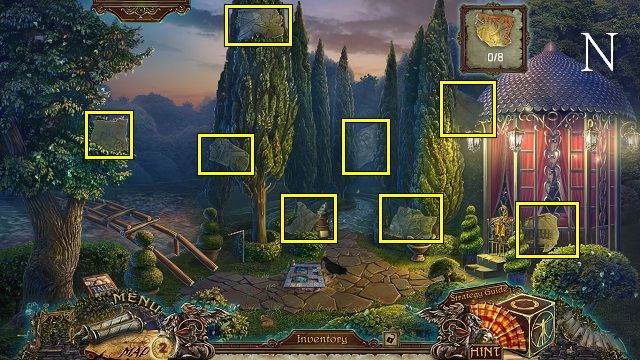
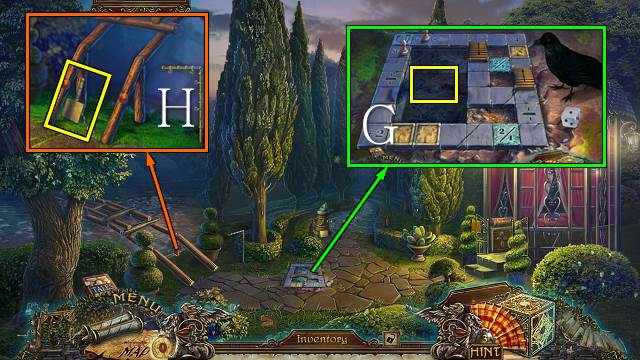
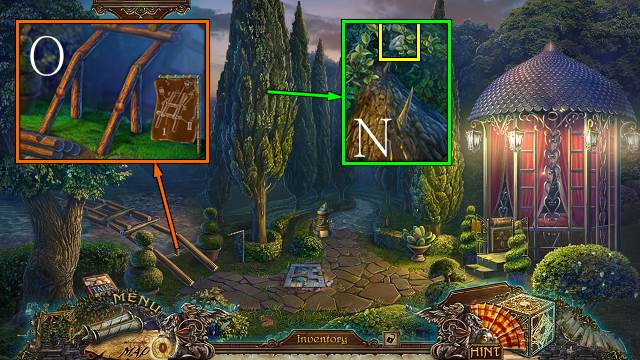
- Collect the map pieces (N).
- Play the mini-game to receive a new Map (O).
- Take the AQUARIUS SYMBOL (P).
- Take the TRIUMPHANT WARRIOR (Q).
- Take the coin and place the PUMP HANDLE (R).
- Go to Signoria.
- Place the TRIUMPHANT WARRIOR and SCARLET RIBBON; take the coin, BOWL and BRIDGE SCHEMATIC (S).
- Go to the Garden.
- Collect some CLAY in the BOWL (T).
- Go down and left.
- Use the CLAY and take the SUN (U).
- Walk down.
- Place the SUN (V); take the BRONZE FEATHER (W).
- Go forward.
- Place the BRONZE FEATHER (X).
- Go right.
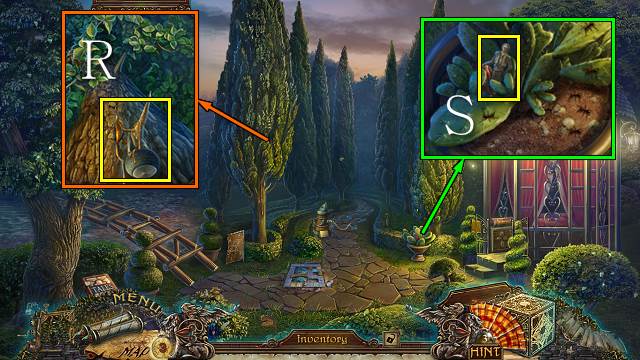
- Take BRIDGE TIMBER 2/3 (Y).
- Take BELL 1/2 and two coins (Z).
- Go to the Store.
- Buy the VIRGO symbol (A).
- Go to the Gazebo.
- Place the ARIES, VIRGO and AQUARIUS SYMBOL (B); take the SIGNORIA KEY and MAYOR'S BADGE (C).
- Go to Signoria.
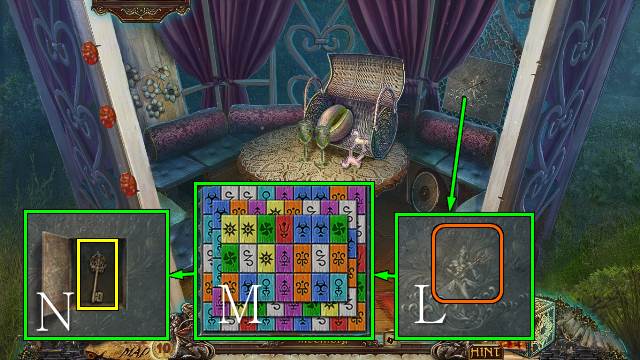
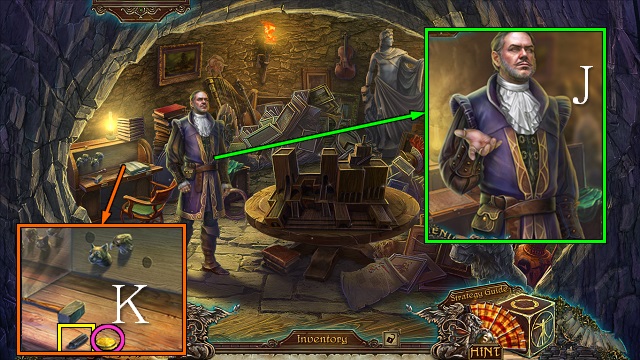
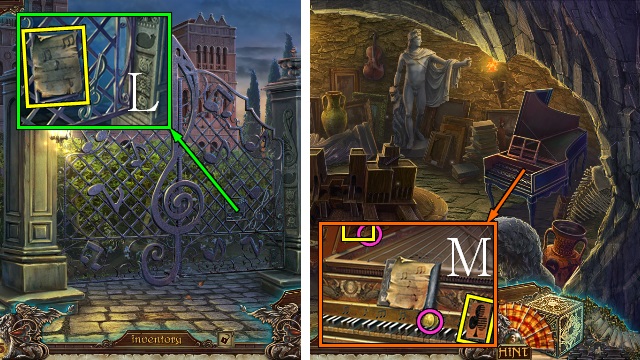
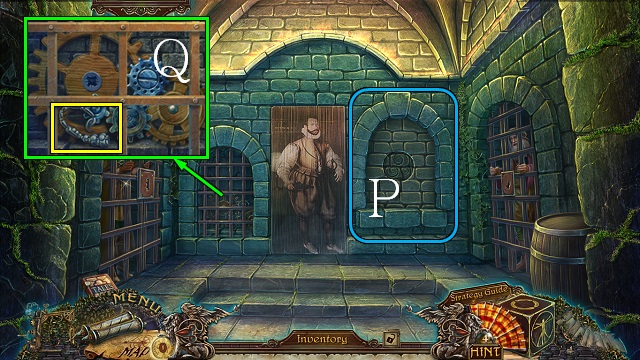
- Place the two SIGNORIA KEYS, open the drawer and take the note and RAVEN'S DICE (D).
- Place the MAYOR'S BADGE (E), turn the page and take BELL 2/2 (F).
- Go to the Garden.
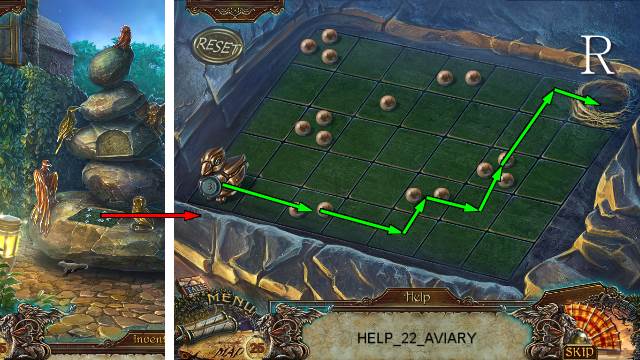
- Place the RAVEN'S DICE for a mini-game (G).
- Take the X.
- Place the BELLS to receive a PADDLE DRUM (H).
- Go right.
- Use the PADDLE DRUM and take the HOSE (I).
- Walk down.
- Place the HOSE and pull the handle (J).
- Go forward.
- Talk to the man.
- Take BRIDGE TIMBER 3/3 (K).
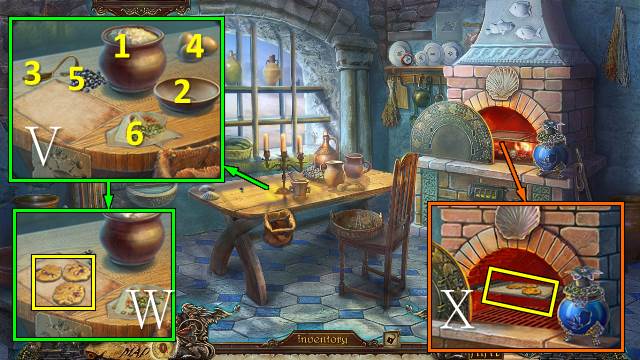
- Take the coin and PASTRY SERVER (L).
- Take the FRUIT PICKER (M).
- Walk down.
- Take the V with the FRUIT PICKER (N).
- Place the BRIDGE SCHEMATIC and BRIDGE TIMBER and assemble the bridge (O).
- Go left.

- Play the HOP to receive a POT (P).
- Take the coin and GLOVE (Q).
- Walk down.
- Place the POT and take the POT WITH TAR (R).
- Take the TOREADOR FIGURINE with the GLOVE (S).
- Go forward.
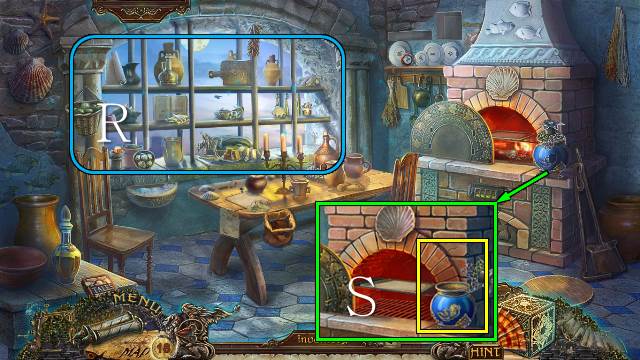
- Put the POT WITH TAR on the fire and take the MOLTEN TAR (T).
- Go down and right.
- Open the basket and horse mold, use the MOLTEN TAR and take the SMALL HORSE and note (U).
- Place the X and V (V); take the GORGON and BLACK JELLYFISH 1/3 (W).
- Go down and left.
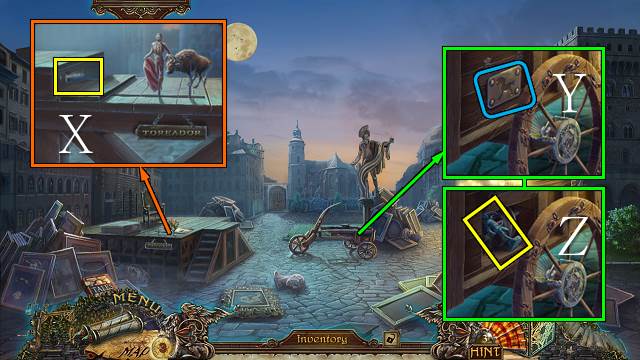
- Place the TOREADOR FIGURINE and take WEIGHT 1/2 (X).
- Place the SMALL HORSE (Y); take PERSEUS (Z).
- Go to the Canal.
- Place the GORGON and PERSEUS and pull the two levers (A).
- Go right.
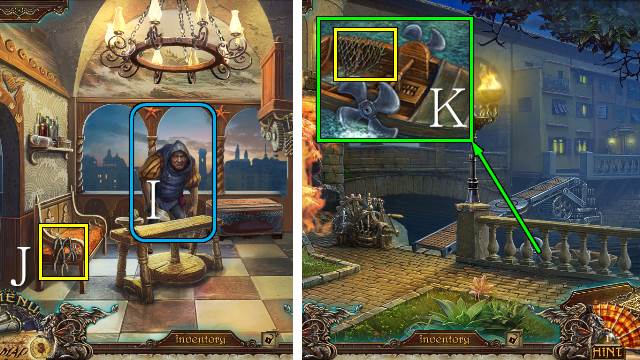
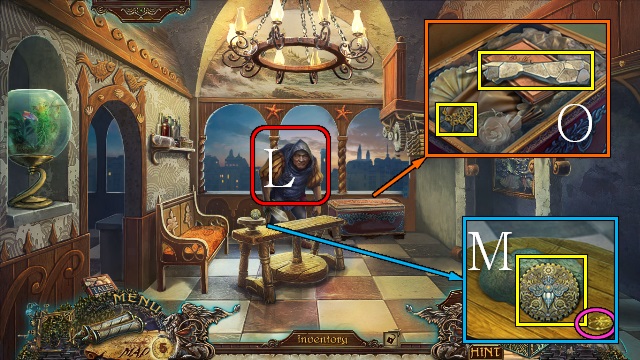
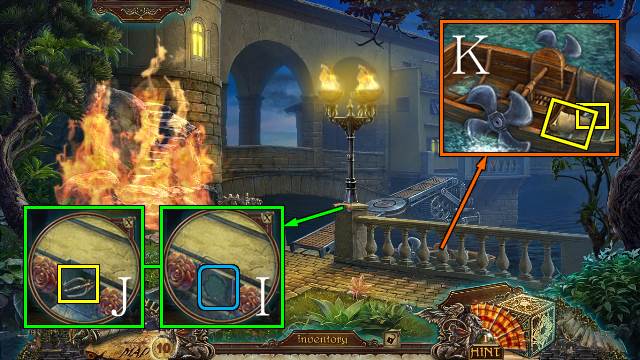
- Play the HOP to receive a PROPELLER (B).
- Take the SOAP and WEIGHT 2/2 (C).
- Walk down.
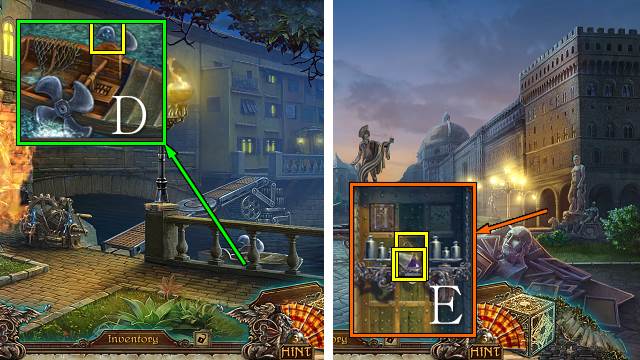
- Place the PROPELLER and take BLUE JELLYFISH 2/3 (D).
- Go to the Square.
- Place the WEIGHTS; take PURPLE JELLYFISH 3/3 and the MOON (E).
- Walk down twice.

- Place the MOON (F); move the banner and take the CLOTH (G).
- Go forward twice and right.
- Place the JELLYFISH (H).
- Go left.
Chapter 4: The Young Girl's House
- Talk to Gobbo (I).
- Take the PIECE OF NETTING (J).
- Walk down twice.
- Place the PIECE OF NETTING and take the NET (K).
- Go right and left.
- Throw the NET (L).
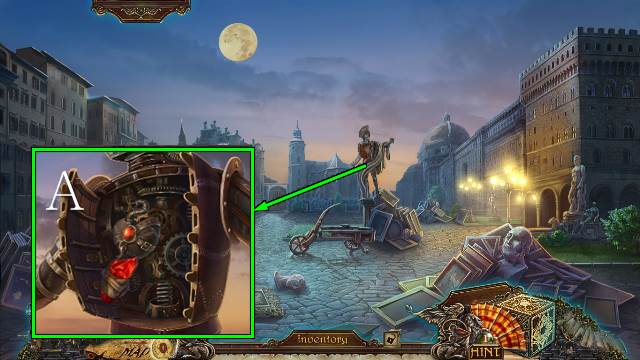
- Take DA VINCI'S GEAR and the coin (M).
- Open the chest; take the STONE ARM and CIPHER KEYS (O).
- Go left.
- Play the HOP to receive a FLASK (P).
- Use the PASTRY SERVER and take the TEMPLATE OF OPENED BOOK and coins (Q).
- Take the DESSERT FORK and put the SOAP and CLOTH in the water to receive a SOAPY CLOTH (R).
- Take the RABBIT (S).
- Select the crockery in the right order; take the SCRAPER (T).
- Walk down.
- Use the SOAPY CLOTH and take ANCHOR 1/2 (U).
- Walk down.
- Place the STONE ARM (V); take the MEASURING SPOON and coins (W).
- Walk down twice.
- Collect the ANTS in the FLASK (X).
- Go right.
- Use the DESSERT FORK and take the SEEDS (Y).
- Go down and left.
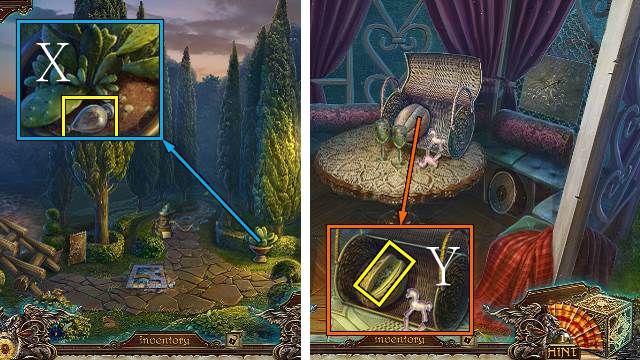
- Place the RABBIT (Z), remove the wheel and take the SHELL WITH PEARL (A).
- Go to the Balcony of Canal House.
- Play the HOP to receive a BAKING TRAY (B).
- Place the ANTS and take ANCHOR 2/2 (C).
- Go left.
- Place the SHELL WITH PEARL (D) for a mini-game (E).
- Take the STONE ROSE (F); place the ANCHORS (G).
- Go right.
- Take LISA'S KNIFE and the coin (H).
- Go to the Canal.
- Place the STONE ROSE (I); take the GOLDEN TRIDENT (J).
- Use LISA'S KNIFE; take the PARCHMENT and HARPSICHORD KEY 1/2 (K).
- Go to the Gazebo.
- Place the GOLDEN TRIDENT (L) for a mini-game (M).
- Open the compartment and take the note and OLD QUARTER KEY (N).
- Go to the Square.
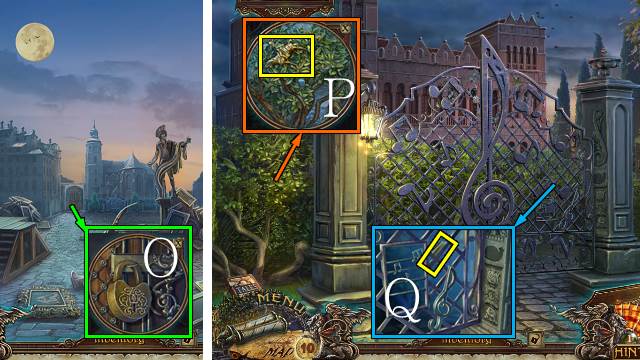
- Use the OLD QUARTER KEY (O).
- Go forward.
- Take the VALUABLE SCULPTURE (P).
- Take HARPSICHORD KEY 2/2 (Q).
- Go to Signoria.

- Place DA VINCI'S GEAR and take the STONE PETALS (R).
- Go to the Store.
- Buy the INK DEVELOPER (S).
- Go to the Gazebo.
- Place the STONE PETALS; take the BLUEBERRIES (T).
- Go to the Young Girl's Living Room.
- Open the book, use the INK DEVELOPER and take the RECIPE (U1) and coins (U2).
- Go left.
- Place the MEASURING SPOON, SEEDS, BLUEBERRIES and RECIPE (V); put flour (1) in the bowl (2) with the spoon (3), then add the egg (4), the blueberries (5) and the seeds (6), mix and turn out the dough and take the UNBAKED COOKIES (W).
- Put the BAKING TRAY and UNBAKED COOKIES in the oven; take the COOKIE (X).
- Go down and right.
- Give the COOKIE to the parrot and take the CASTLE DRAWING (Y).
- Walk down.
- Place CASTLE DRAWING, model the clay according to the drawing and take the CASTLE MODEL (Z).
- Go right.

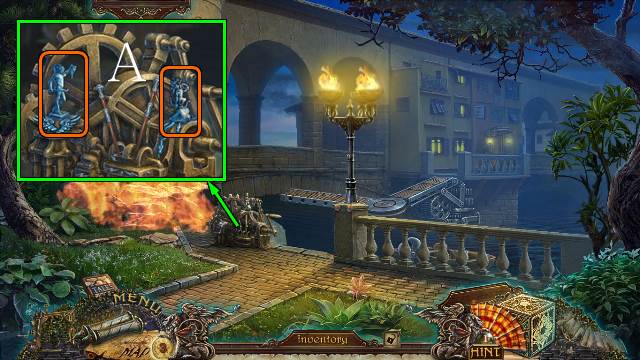
- Place the CASTLE MODEL for a mini-game (A).
- Take the ENCRYPTED DOCUMENT.
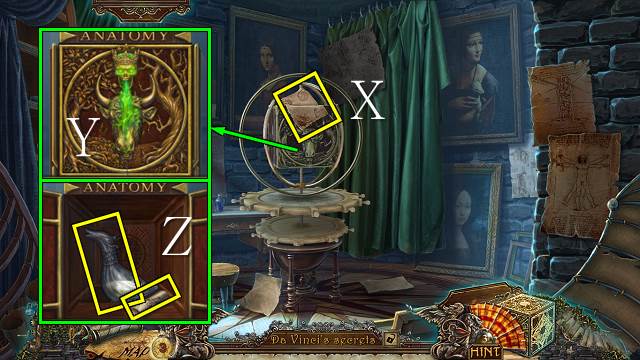
- Use the cube to go to Leonardo's Secret Chamber (B).
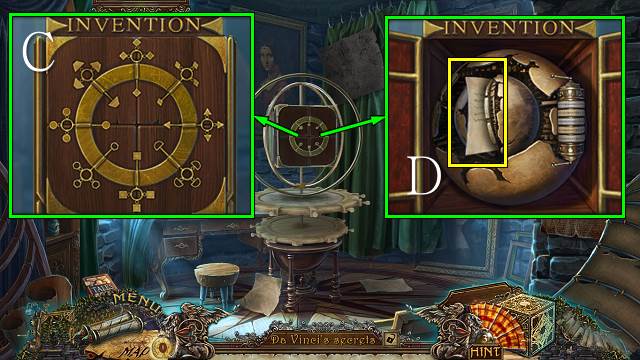
- Turn the Infinity Cube to the Invention side.
- Place the CIPHER KEYS for a mini-game (C).
- Place the ENCRYPTED DOCUMENT and take the VATICAN DOCUMENT (D).
- Go to Signoria.
- Give the VATICAN DOCUMENT to the Mayor; you receive a RESISTANCE SYMBOL (E).
- Play the HOP to receive a CARPET (F).
- Go to the Canal.
- Put the CARPET in the boat and take the WET CARPET (G).
- Put the WET CARPET on the fire (H).
- Place the RESISTANCE SYMBOL (I).
Chapter 5: The Resistance
- Talk to the man and give him the VALUABLE SCULPTURE; you receive LEONARDO'S COMPASS (J).
- Take the COAL and coins(K).
- Go to the Front Yard Mage House.
- Place the PARCHMENT and use the COAL; take the SHEET WITH MUSICAL NOTES (L).
- Go to the Cave in the Rock.
- Take the coin and place the HARPSICHORD KEYS and SHEET WITH MUSICAL NOTES; take the GOLDEN KEY, coin and CLUBS CARD 1/2 (M).
- Go to the Young Girls Bedroom.

- Use the GOLDEN KEY and take the CLOSED METAL BOOK and coin (N).
- Go to the Store.
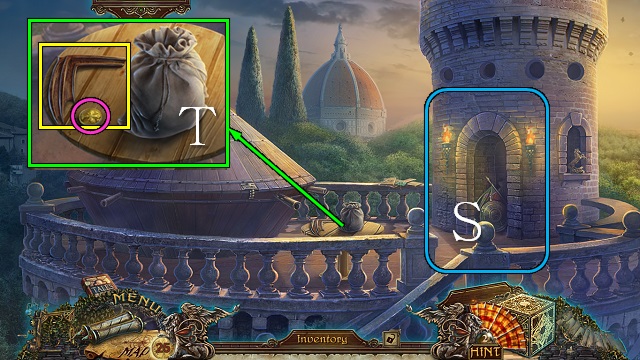
- Buy the STARFISH (O).
- Go to the Young Girls Living Room.
- Place the STARFISH; take the DOLL CLOTHES (P).
- Walk down twice.
- Place the DOLL CLOTHES and take the MAGE MODEL (Q).
- Go to the Cave in the Rock.
- Place the MAGE MODEL for a mini-game (R).
- Take the ACID (S).
- Go down and right.
- Use the ACID; take the COPPER SHEET (T1) and coins (T2).
- Go down and left.
- Place the TEMPLATE OF OPEN BOOK and COPPER SHEET (U); use the hammer and take the OPEN METAL BOOK (V).
- Go to the Square.
- Play the HOP to receive LORENZO DE MEDICI'S CAMEO (W).
- Place the OPEN METAL BOOK and CLOSED METAL BOOK; push the books in order (X).
- Go right.
- Take the coins (Y), open the book and take SPADES CARD 2/2 (Z).
- Place LORENZO DE MEDICI'S CAMEO and open the book for a mini-game (A).
- Take MAP OF LABYRINTH 1/2 (B).
- Go to the Young Girls Bedroom.
- Place the CARDS; take the HANDLE and coin (C).
- Go to the Front Yard Mage House.
- Place the HANDLE (D) and take the MONK TILE and ECLIPSE MEDALLION (E).
- Go to the Young Girls Bedroom.
- Place the MONK TILE; take the WOODEN GRAPES (F).
- Go down and left.
- Place the WOODEN GRAPES (G) and take the STONE SNAIL, SIEVE and coin (H).
- Go to the Front Yard Mage House.
- Place the STONE SNAIL; take the METAL FLY (I).
- Go to the Library.
- Place the METAL FLY and take the FISHING LINE (J); take the GOLDEN FISH and coin, place the ECLIPSE MEDALLION and take the DUKE'S TORN DIARY (K).
- Go to Leonardo's Secret Chamber.
- Turn the cube to the Education side.
- Use LEONARDO'S COMPASS (L), place the DUKE'S TORN DIARY, move the magnifier and take DE MEDICI'S WARRANT (M).
- Go to Signoria.
- Give DE MEDICI'S WARRANT to the Mayor; you receive a GREEK INSCRIPTION (N).
- Go to the Store.
- Buy the GIRL FIGURINE (O).
- Go to the Cave in the Rock.

- Place the GIRL FIGURINE for a mini-game (P).
- Take the HOOK (Q).
- Go to the Young Girls Kitchen.
- Play the HOP to receive a CARROT (R).
- Place the GOLDEN FISH and take the FISH FOOD (S).
- Go down and right.

- Place the FISHING LINE and HOOK and take the FISHING ROD (T).
- Go to the Cave in the Rock.
- Use the FISHING ROD and take the DIAMOND RING (U).
- Go to the Library.
- Move the ladder (V).
- Use the DIAMOND RING; take the LEONARDO FIGURINE (W).
- Go to the Cave in the Rock.
- Place the LEONARDO FIGURINE for a mini-game (X1, X2).
- Take the PRUNING SHEARS (X3).
- Go to the Front Yard Mage House.
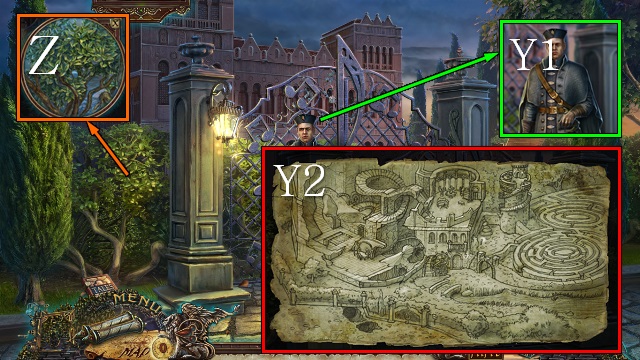
- Talk to the Mayor; you receive a SMOKE BOMB (Y1).
- Take the map pieces for a mini-game (Y2).
- Use the PRUNING SHEARS and go forward (Z).
Chapter 6: The Mage's House
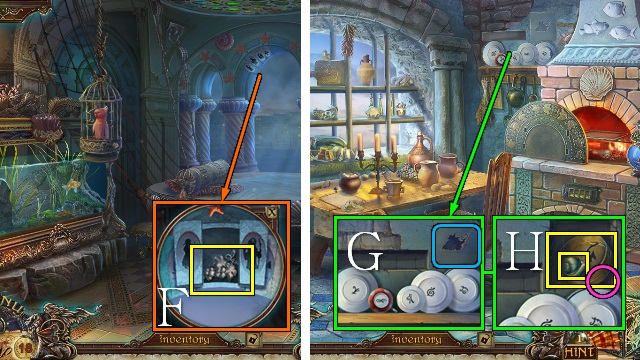
- Play the HOP to receive a WOLF HEAD (A).
- Use the FISH FOOD and take the RING and coins (B).
- Use the SCRAPER and take the TURNING KEY (C).
- Go to the Cave in the Rock.
- Place the TURNING KEY and take the WIRE (D).
- Go to the Yard.
- Place the SIEVE, fix it with the WIRE and take the GOOSE HEAD (E).
- Go to the Cave in the Rock.
- Place the WOLF HEAD and GOOSE HEAD; take the HOMING PIGEON and coin (F).
- Go to the Front Yard Mage House.
- Place the HOMING PIGEON (G); take the GREEK INSCRIPTION (H).
- Go to the Library.
- Place the two GREEK INSCRIPTIONS; take MAP OF LABYRINTH 2/2 (I).
- Go to the Yard.
- Place the MAP OF LABYRINTH (J).
- Go right.
- Give the CARROT to the rabbit (K); turn the tile and take the coins, CORRECT TIME and EARTH SYMBOL (L).
- Place the RING and take the WINDING KEY and STAR 1/3 (M).
- Go to the Library.
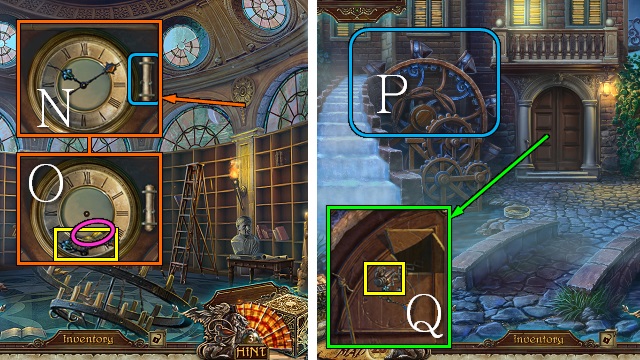
- Move the ladder, place the CORRECT TIME and set the time (N); take the CLOCK HANDS and coins (O).
- Go to the Yard.
- Play the HOP to receive the ROPE LADDER (P).
- Place the CLOCK HANDS and WINDING KEY; take the CUCKOO (Q).
- Go right.
- Place the CUCKOO for a mini-game (R).
- Go right.
- Throw the SMOKE BOMB.
- Play the HOP to receive the HOOK (S).
- Take GARGOYLE'S WING 1/2 and coin (T).
- Walk down twice.
- Place the HOOK and take the LONG HOOK (U).
- Go right twice.
- Use the LONG HOOK and take the PHOENIX and FIRE SYMBOL (V).
- Walk down twice.

- Place the EARTH SYMBOL and FIRE SYMBOL and push them in the right order (W); take STAR 2/3, the coins and the GLUE (X).
- Go right twice.
- Open the bag, use the GLUE and take the OWL (Y).
- Walk down.
- Place the OWL for a mini-game (Z).
- Place the PHOENIX (A) and take the CONSTELLATION DIAGRAM, coins and note (B).
- Go to the Store.
- Buy the CANNONBALL (C).
- Go to the Observation Platform.
- Play the HOP to receive an EAGLE (D).
- Use the CANNONBALL to receive STAR 3/3 (E).
- Walk down.
- Place the EAGLE for a mini-game (F).
- Place the ROPE LADDER (G).
- Go left.
- Take the note and the VATICAN'S CROSSED KEYS (H).
- Take the GUTTER (I).
- Take DRAGON CLAWS 1/2 (J).

- Place the STARS and CONSTELLATION DIAGRAM and place the stars according to the diagram (K).
- Go left.
- Take the SHARP CLAW (L).
- Place the GUTTER (M).
- Take DRAGON CLAWS 2/2 (N).
- Place the DRAGON CLAWS and take DIVING SUIT DRAWING 1/2 (O).
- Go right.
- Play the HOP to receive TILE NUMBER 2 (P).
- Take the SCORPION'S TAIL (Q).
- Walk down twice.
- Place the SCORPION'S TAIL and take the HAMMER (R).
- Go left.
- Use the HAMMER and take the CELL KEYS (S).
- Go right.

- Use the CELL KEYS to receive DIVING SUIT DRAWING 2/2 (T).
- Use the CELL KEYS to receive the DART and YGGDRASIL (U).
- Walk down twice.
- Place the DIVING SUIT DRAWING; put the suit together and take the DIVING SUIT (V).
- Throw the DART (W) and take TILE NUMBER 8 (X).
- Go left.
- Use the DIVING SUIT (Y).
- Place the two MOSAIC TILES for a mini-game (Z).
- Solution: D, Fx2, Ex3, Dx2, E, A, Ex3, Ax3, Ex2, Dx2, B, Cx2, B, Dx2, Bx2, Cx2, B.
- Take the MACHINE SCHEMATIC (G).
- Go right.
- Place the MACHINE SCHEMATIC and play the HOP to receive a BELLOWS (H).
- Use the BELLOWS (I).
- Go forward.

- Open the package with the SHARP CLAW; take GARGOYLE'S WING 2/2 (J).
- Take the HELMET FEATHER (K).
- Walk down twice.
- Place the HELMET FEATHER and take the ALCHEMY SYMBOL (L).
- Walk down.
- Place the ALCHEMY SYMBOL (M) and take the HARLEQUIN MASK (N).
- Place the GARGOYLE'S WINGS and take the SMELLING SALTS (O).
- Go to the Secret Room.
- Use the SMELLING SALTS on Gobbo; you receive the ALCHEMICAL SIGNS (P).
- Open the box, place the HARLQUIN MASK (Q), open the book and take the POISON (R); you receive the MAGE'S DIARY.
- Play the mini-game (S).
- Go forward.
- You receive the ENLIGHTENMENT SYMBOL.
- Give the MAGE'S DIARY and POISON to the Mayor (T).
- Play the mini-game (U).
- Go to Leonardo's Secret Chamber.
- Place YGGDRASIL on the Anatomy side (V), the VATICAN CROSSED KEYS on the Invention side (W) and ENLIGHTENMENT SYMBOL on the Education side (X).
- Turn the cube to the Alchemy side.
- Place the ALCHEMICAL SIGNS and play the mini-game (Y).
- Take the PHILOSOPHER STONE and MECHANICAL HEART (Z).
- Go to the Square.
- Open the statue, place the MECHANICAL HEART and touch it with the PHILOSOPHER STONE (A).
- Congratulations, you've completed Grim Facade: The Artist and the Pretender.
Created at: 2014-10-17