

Walkthrough Menu
- General Tips
- Chapter 1: Madame Esperance
- Chapter 2: The Town Square
- Chapter 3: The Museum
- Chapter 4: Mordamo Harbor
General Tips
- This is the official guide for Grim Facade: The Message.
- This guide won't tell you when to zoom into a location; the screenshots show each zoom scene.
- Hidden-object puzzles are referred to as HOPs. Only the locations of the HOPs will be shown.
- Use the Map to fast travel to a location.
Chapter 1: Madame Esperance

- Take BULL KEY (A).
- Read; take CROCODILE KEY (B).
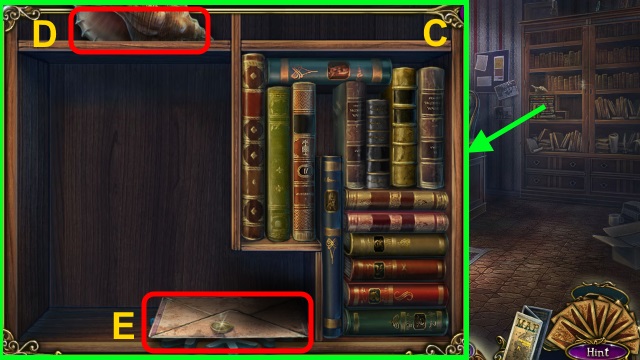
- Remove leaves; take EAGLE KEY (C).
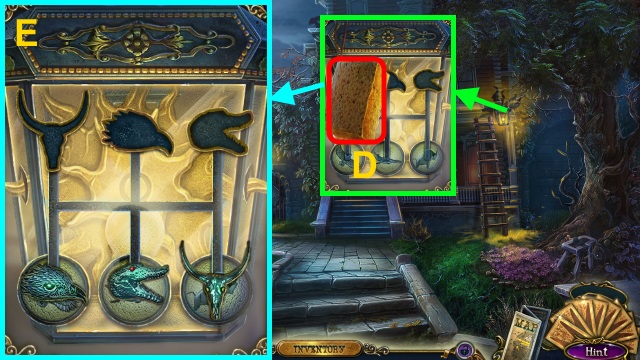
- Take SPONGE (D); place BULL KEY, EAGLE KEY, and CROCODILE KEY.
- Solution (E).
- Take SUN.

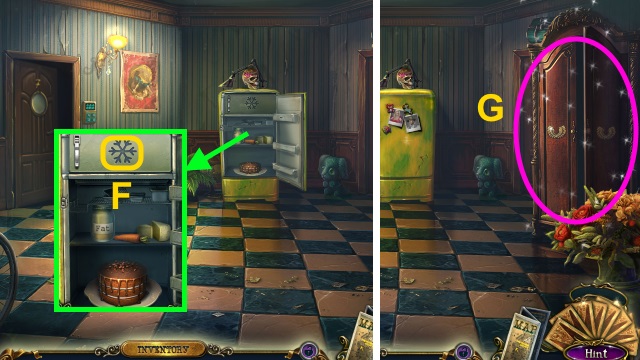
- Examine (F).
- Solution (G).
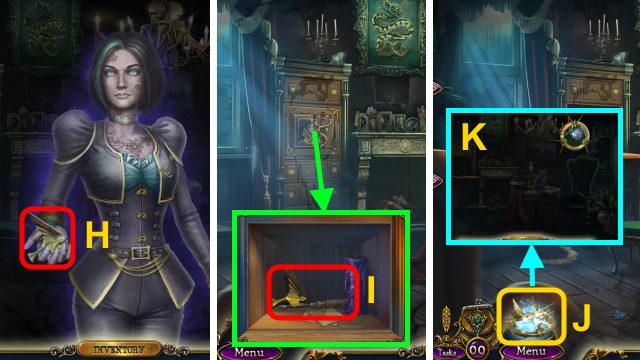
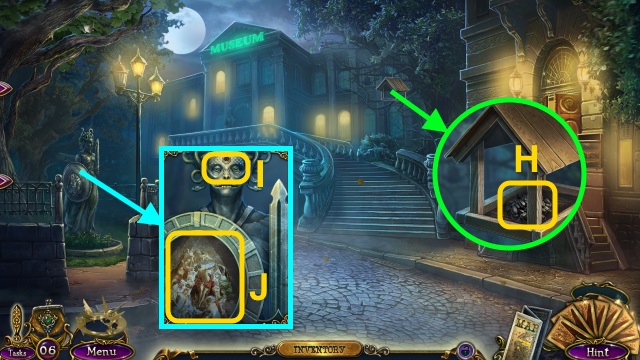
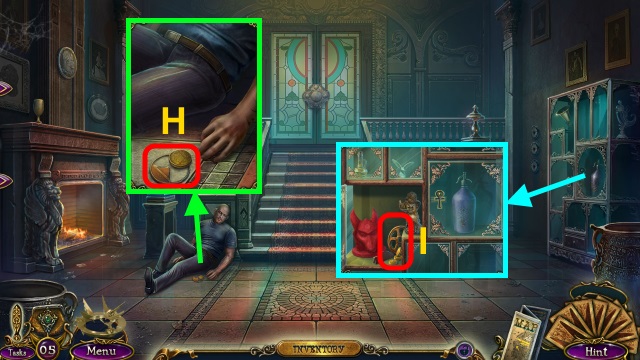
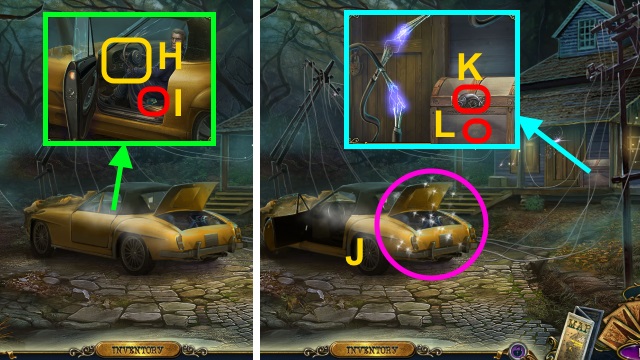
- Place SUN (H); examine.
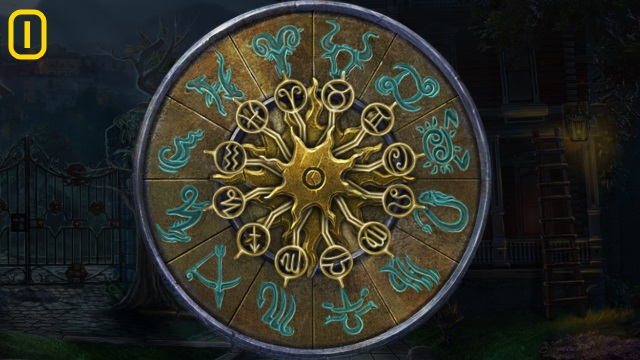
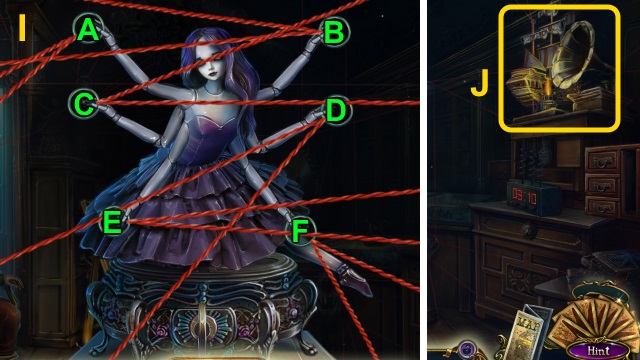
- Solution (I).
- Go through window.
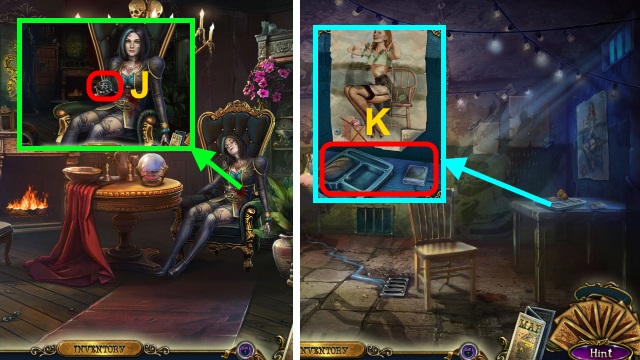
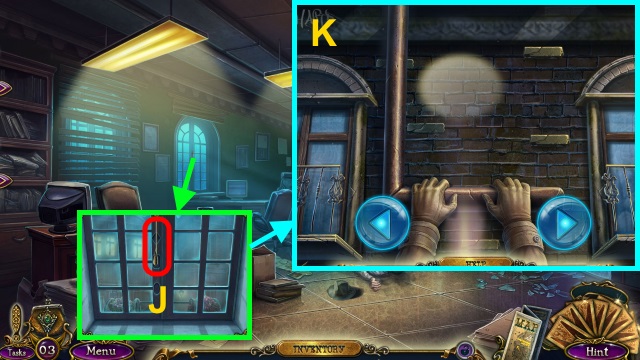
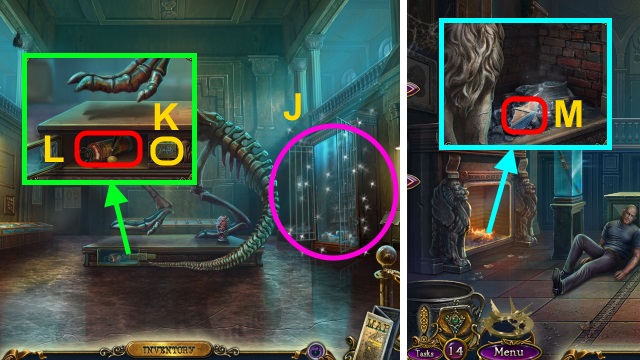
- Talk; take SNAKE HEAD (1/3) (J).
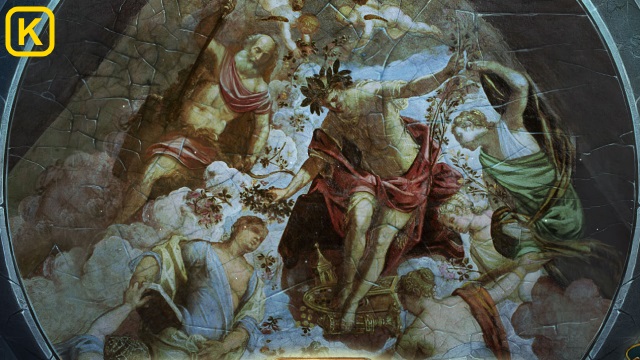
- Examine scene 8x.
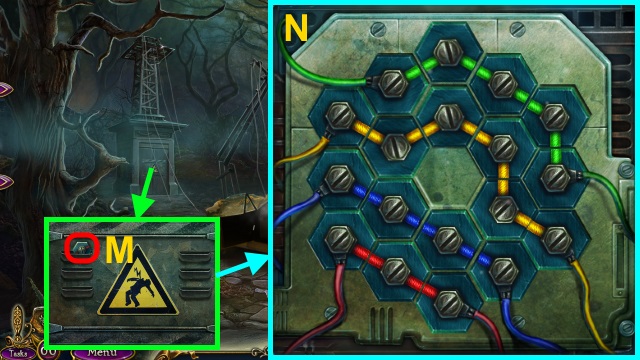
- Take TRAY and PHOTOS (K).
- Examine PHOTOS; take PAPER CLIP.
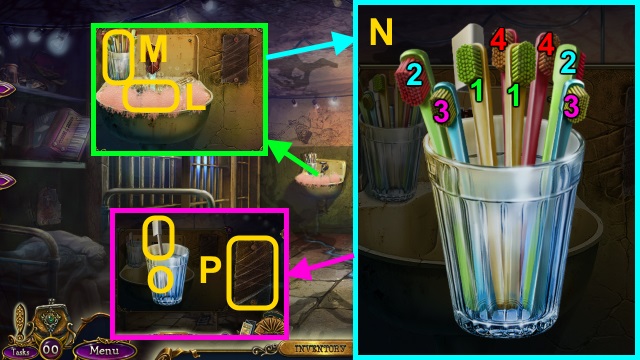
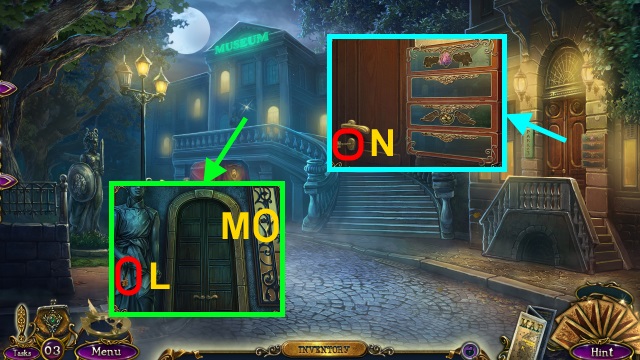
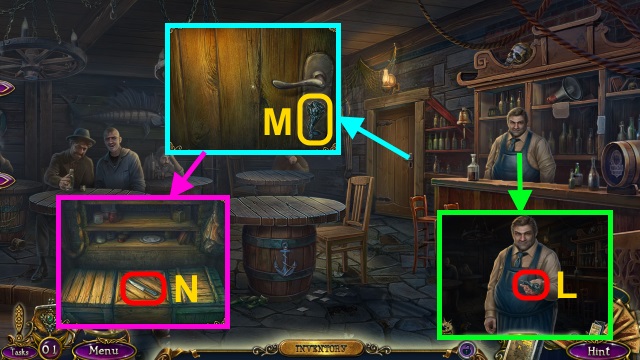
- Use SPONGE (L); receive SOAPY SPONGE. Examine (M).
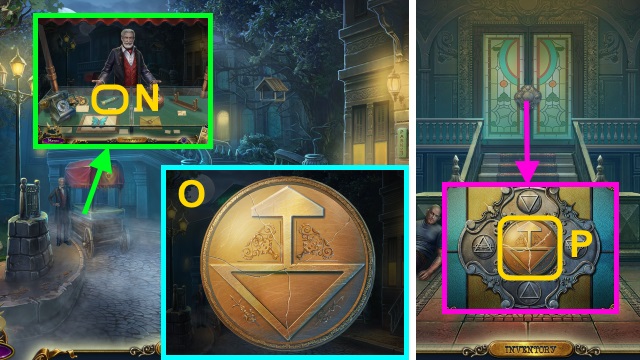
- Solution (N).
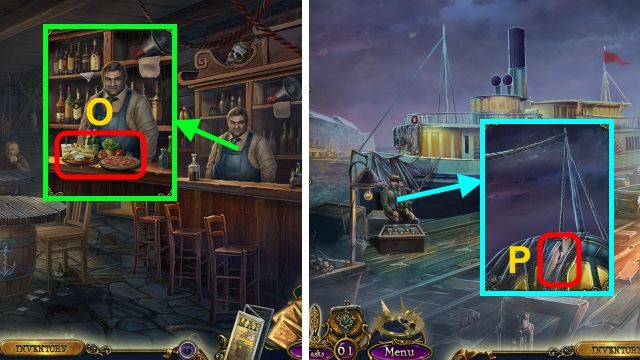
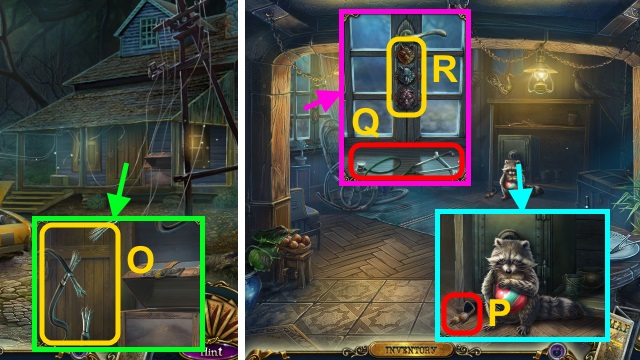
- Examine (O); sharpen screwdriver (P). Receive SCREWDRIVER.
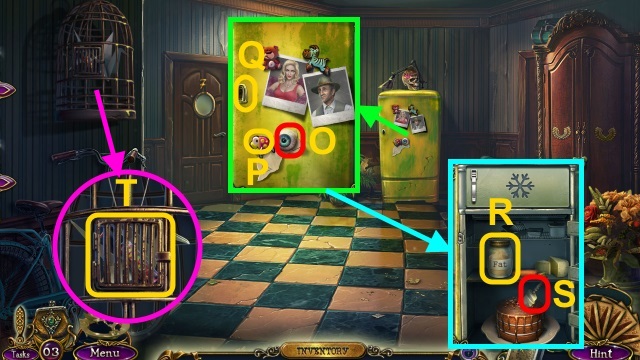
- Examine TRAY. Examine bread; take BUTTERFLY KEY (1/2). Turn tray; use SOAPY SPONGE. Take MIRROR.
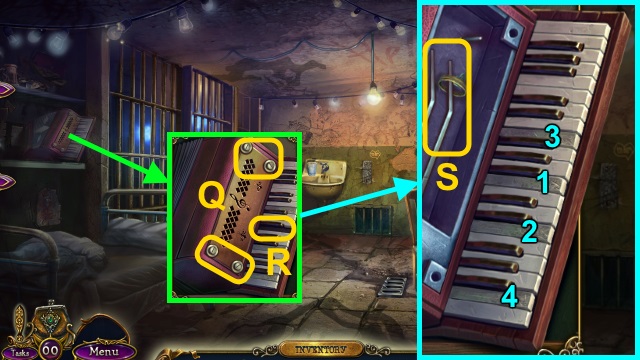
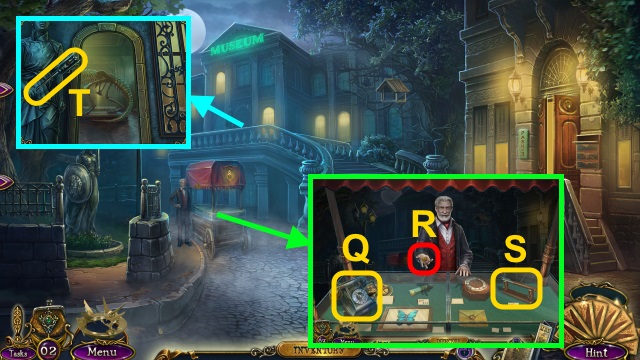
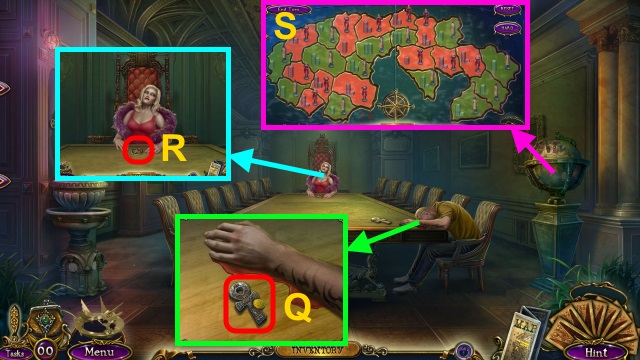
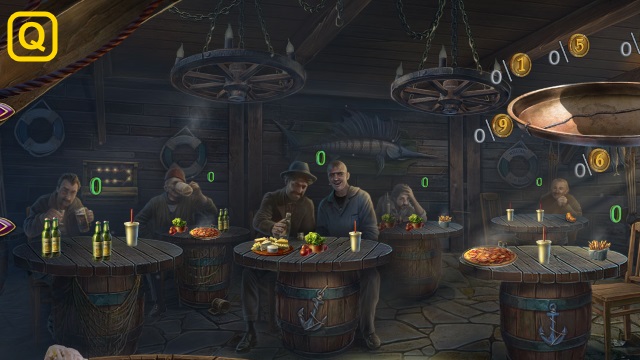
- Use SCREWDRIVER; open (Q). Place key (R).
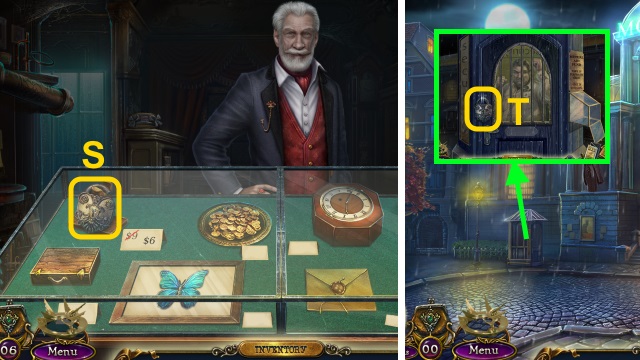
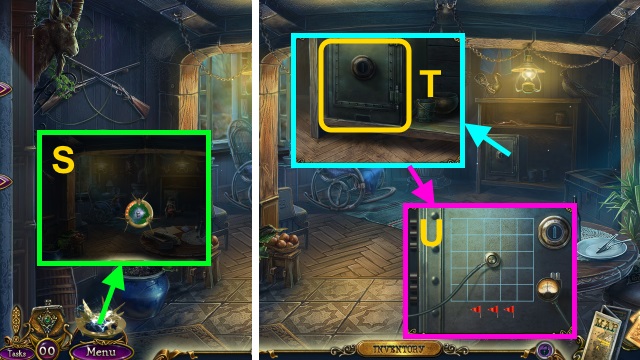
- Solution (S).
- Take WEDDING RING and LOCKPICK PARTS.
- PAPER CLIP on LOCKPICK PARTS; take LOCKPICK.
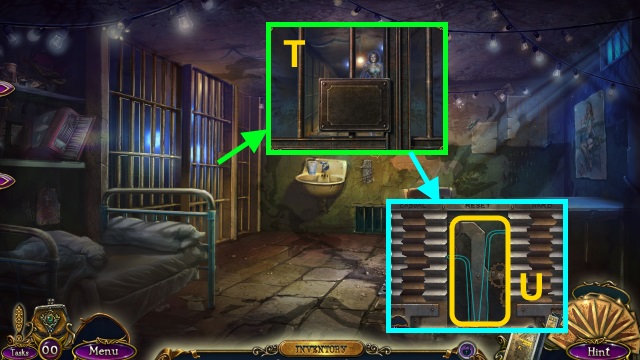
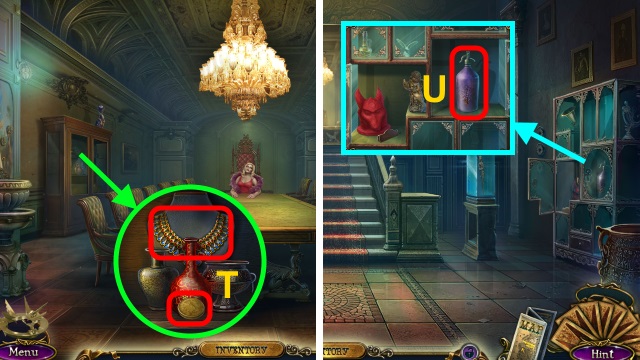
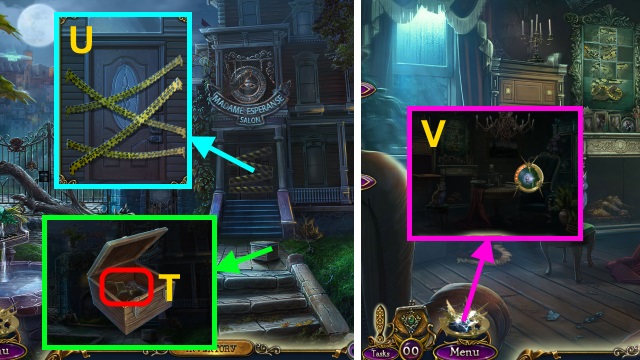
- Examine (T). Use MIRROR; examine.
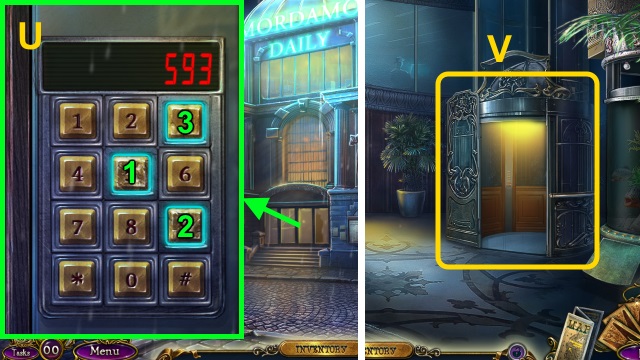
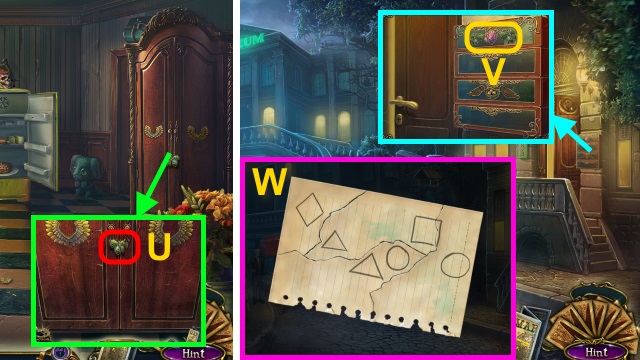
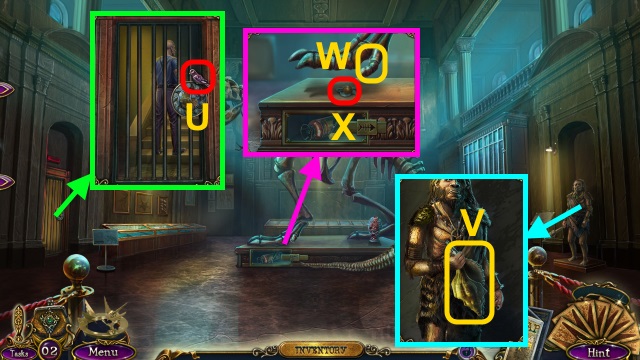
- Use LOCKPICK (U).
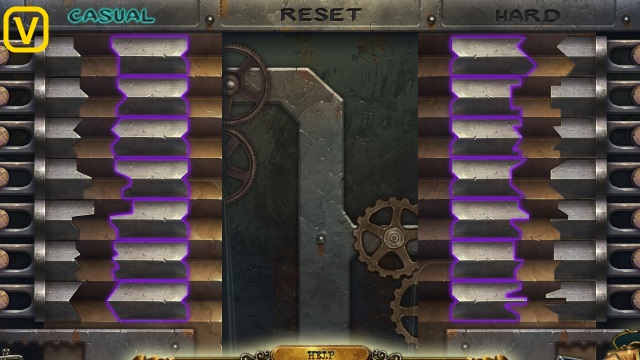
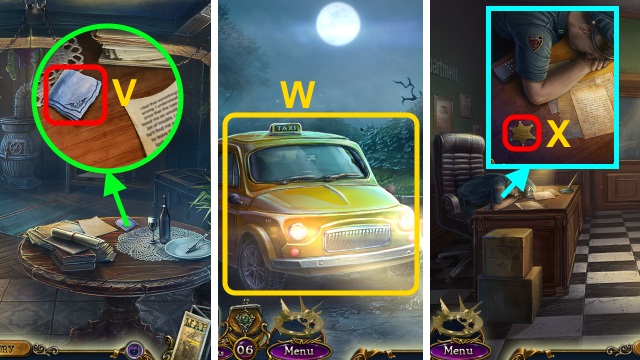
- Solution (V).
- Exit cell.
- Examine scene.
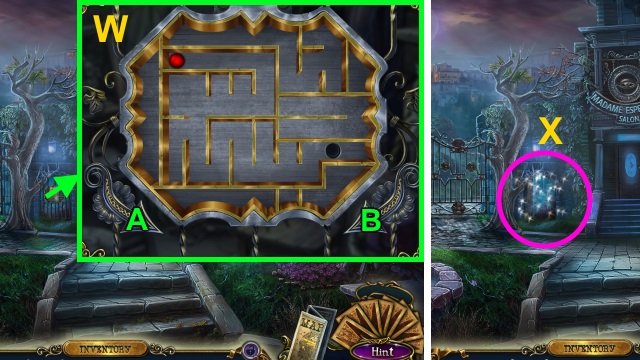
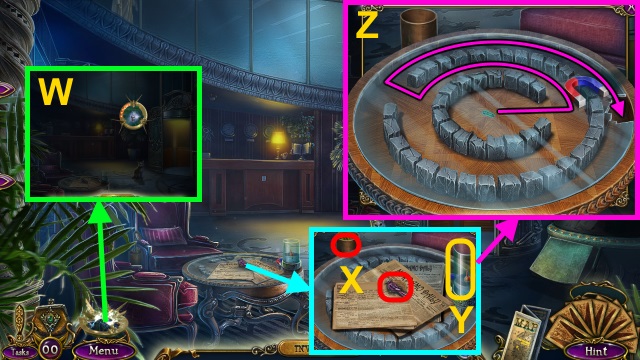
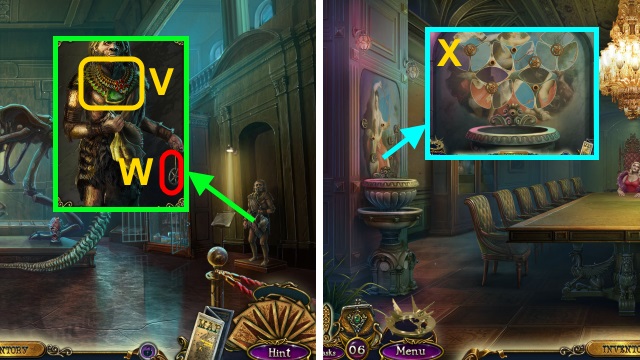
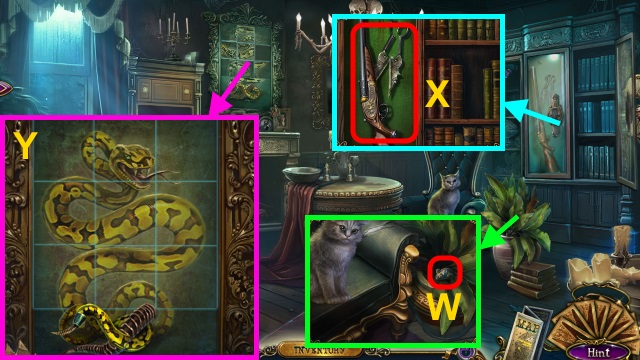
- Remove note. Solution (W): B-Ax5-Bx2-Ax2-Bx2-A.
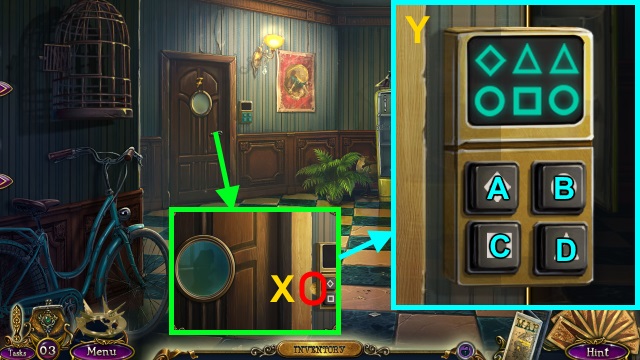
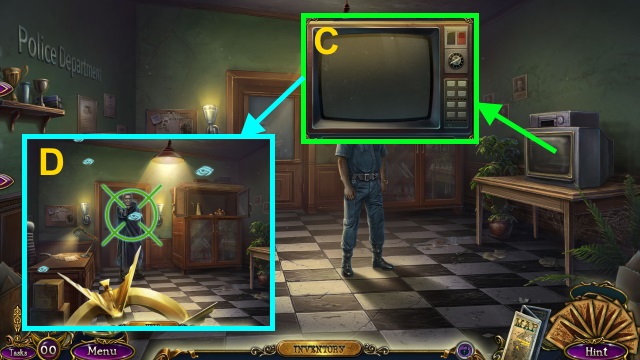
- Play HOP; receive KEYS (X).
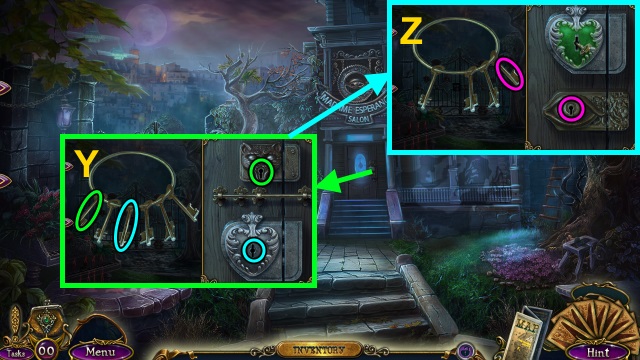
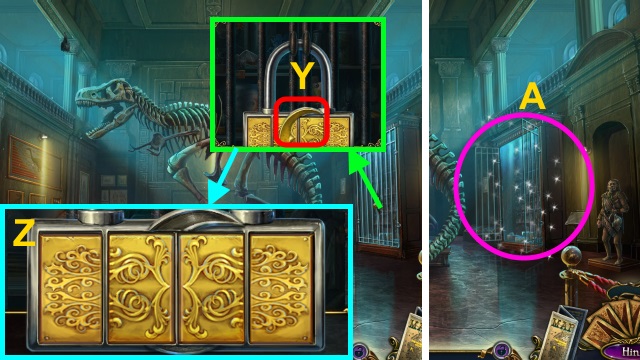
- Use KEYS; turn (Y-Z). Open door.
- Walk forward.
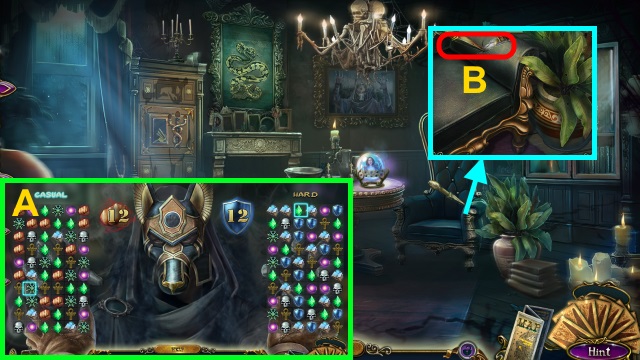
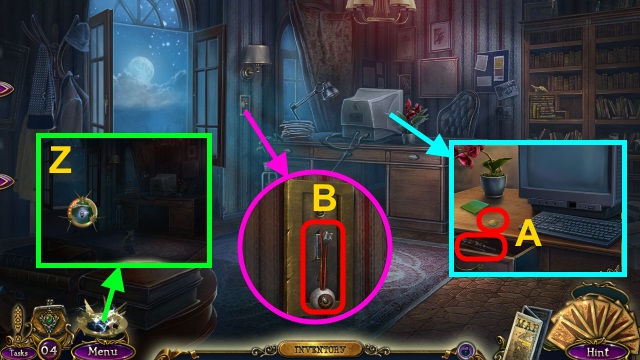
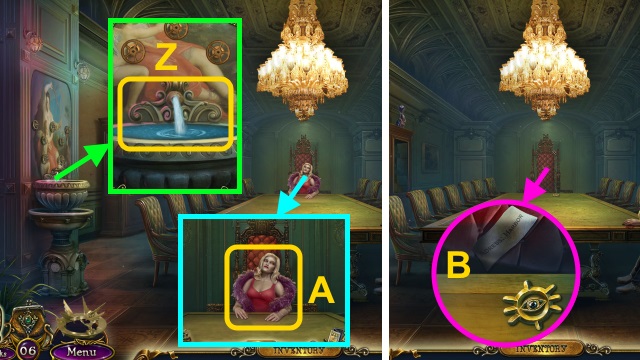
- Examine scene 2x.
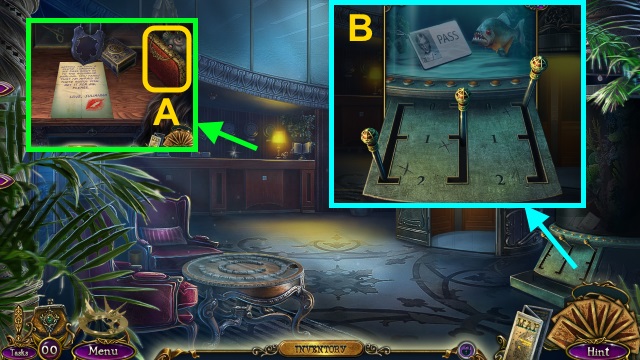
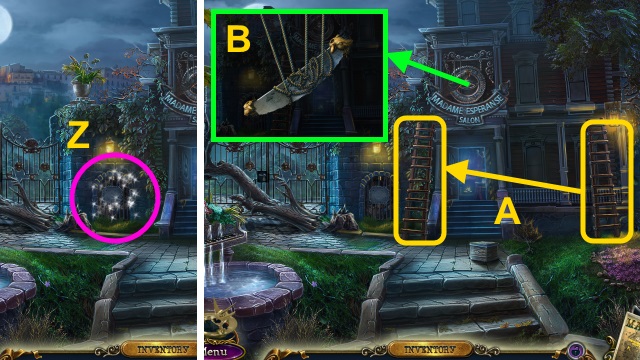
- Solution is random (A).
- Take SNAKE HEAD (2/3) and WEDDING RING (B).
- Combine 2 WEDDING RINGS; take CABINET KEY.
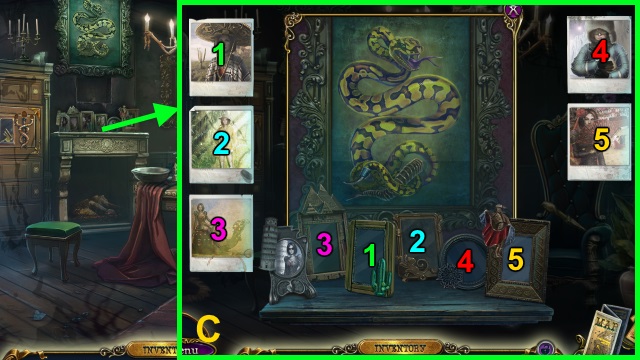
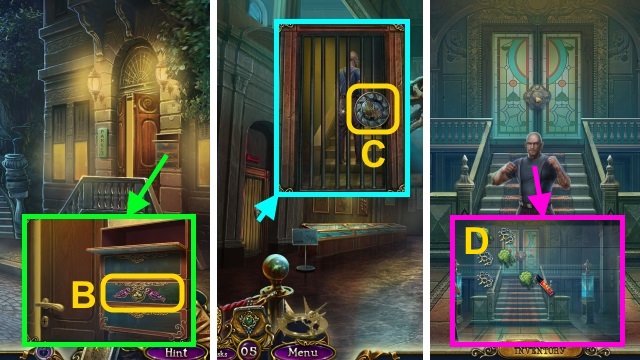
- Use PHOTOS; solution (C).
- Take SNAKE HEAD (3/3).
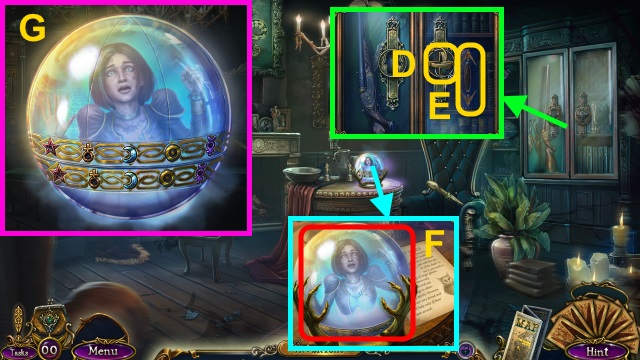
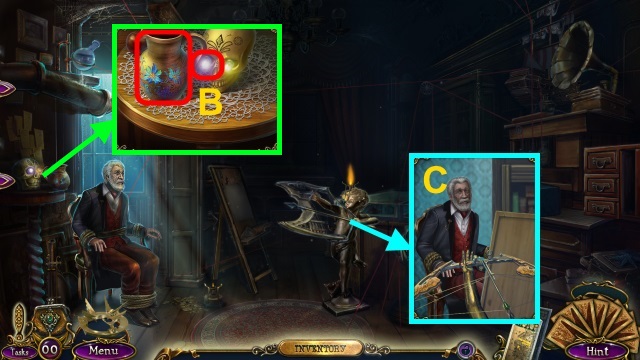
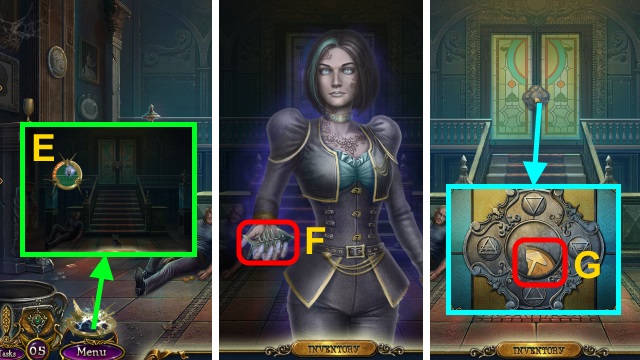
- Use CABINET KEY (D); turn. Read book (E); take RAVEN.
- Take CRYSTAL BALL (F). Examine 3x; take PRISM OF SOULS.
- Turn CRYSTAL BALL 2x (G); examine.
- Take RAVEN (2/3) (H).
- Place SNAKE HEAD (3/3); open. Take SCREWDRIVER and RAVEN (3/3) (I).
- RAVEN (3/3) on PRISM OF SOULS.
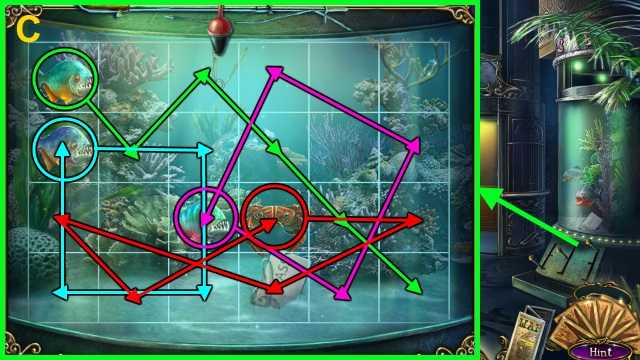
- Use Prism of Souls (J).
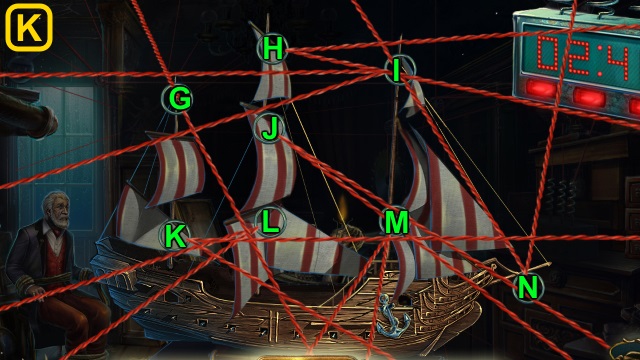
- Solution is random (K).
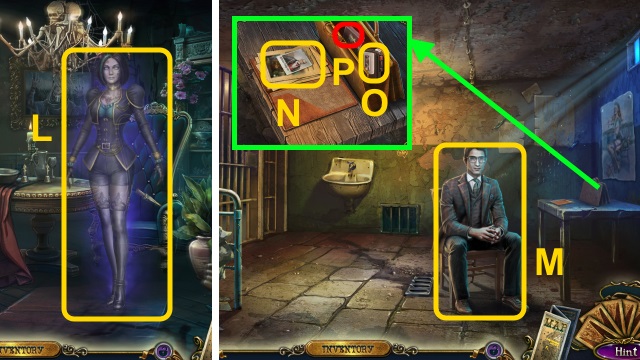
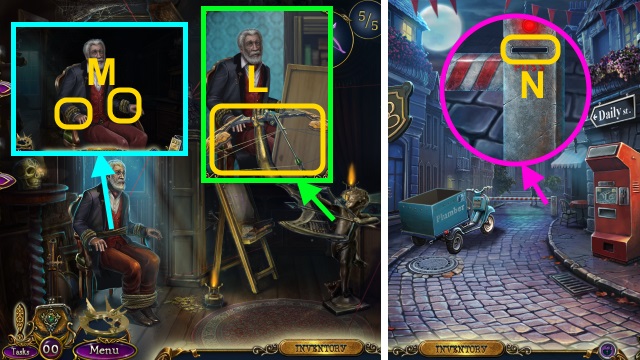
- Talk; play HOP (L).
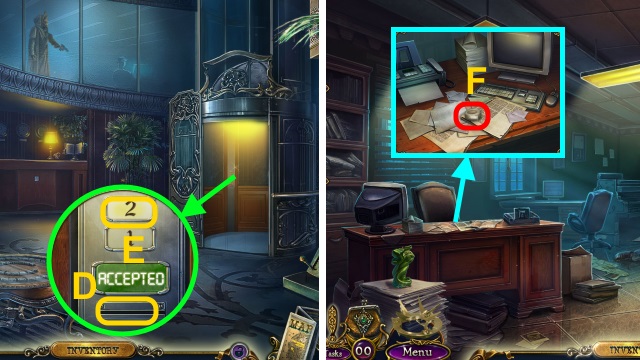
- Talk (M).
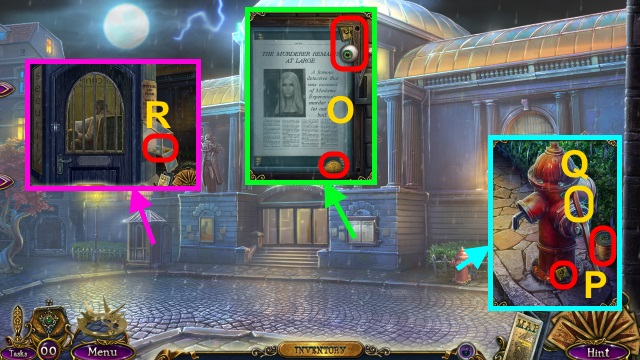
- Open; examine (N). Take ADDRESS. Open; examine recorder (O). Take money (P).
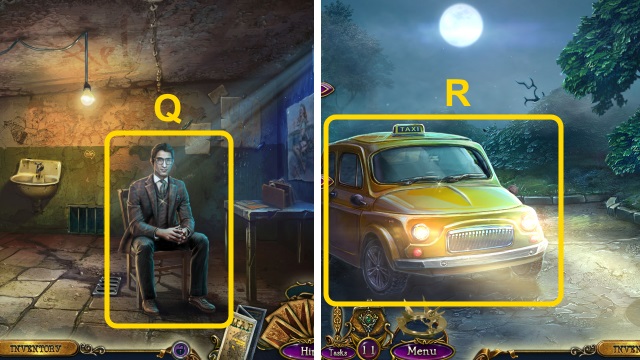
- Talk (Q).
- Walk left.
- Use ADDRESS (R); examine. Select 'Buy'.
Chapter 2: The Town Square
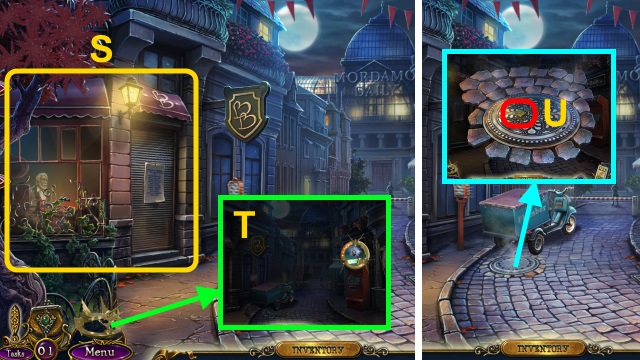
- Examine (S).
- Use Prism of Souls; solution is random (T).
- Take BUTTON (1/3) and money (U).
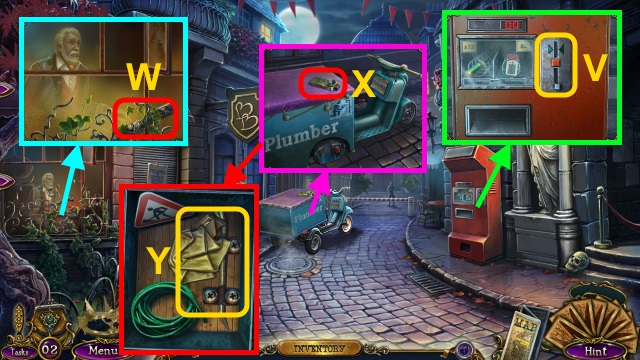
- Examine (V); buy batteries. Press button; take BATTERIES.
- Take KNIFE (W).
- Take FLASHLIGHT COMPASS (X); use KNIFE 3x. Remove cover; examine.
- Remove cloth; take HANDLE (1/3). Use SCREWDRIVER 4x (Y); examine. Take CROWBAR.
- BATTERIES on FLASHLIGHT COMPASS.
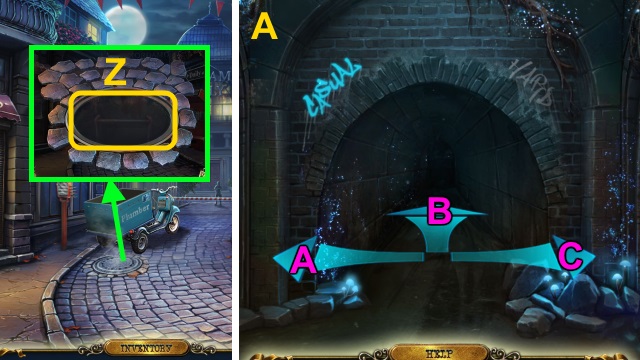
- Use CROWBAR and FLASHLIGHT COMPASS (Z).
- Go forward.
- Solution (A).
- Casual: Bx2-C-Ax3-C-B.
- Hard: A-C-Bx3-C-B-Cx2-Ax2-B-A-Bx2.
- Examine scene.
- Take PITCHER and UV LIGHTBULB (B).
- UV LIGHTBULB on FLASHLIGHT COMPASS.
- Examine (C).
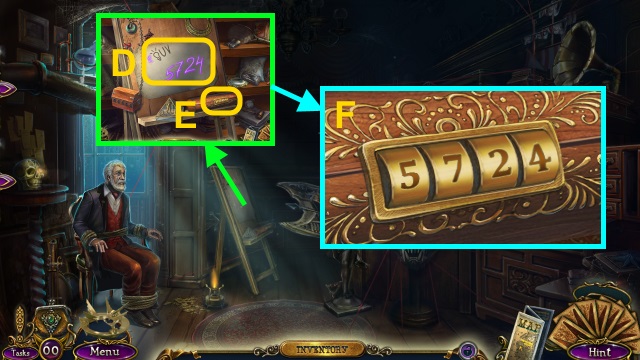
- Use FLASHLIGHT COMPASS (D); examine (E).
- Enter code (F); examine papers.

- Play HOP; receive KEY (G).
- Use KEY (H).
- Solution (I): (A-B)-(B-C)-(D-E).
- Examine (J).
- Solution (K): (J-N)-(K-M)-(J-I)-(J-G)-(L-K)-(I-H).
- Examine (L).
- Talk; use KNIFE (M). Take PASS.
- Walk down.
- Use PASS (N).
- Walk forward.
- Examine scene.
- Take BUTTON (2/3), EYE (1/3), and money (O).
- Take BUTTON (3/3) and FISHING LINE (P). Place PITCHER; pull lever (Q). Take PITCHER OF WATER.
- Open; take money (R).
- Walk down, then left.
- Buy PADLOCK (S).
- Walk down, then forward.
- Place PADLOCK (T).
- Place BUTTON (3/3); solution (U).
- Walk forward.
- Examine scene.
- Examine elevator (V).
- Use Prism of Souls; solution is random (W).
- Take BIRD KEY, newspapers, and UMBRELLA (X).
- Pour PITCHER OF WATER (Y); take FLOAT.
- Solution (Z).
- Receive PIN.
- Examine purse (A). Play HOP; receive SCISSORS.
- Examine FISHING LINE 2x; use SCISSORS. Receive STRING.
- Examine UMBRELLA 3x; use STRING, FLOAT, and PIN; take FISHING ROD.
- Solution (B).
- Use FISHING ROD.
- Solution (C).
- Receive JULIANNA'S PASS.
- Use JULIANNA'S PASS (D); select (E).
- Examine scene 3x.
- Take TAPE (F); remove papers. Take HANDLE (2/3) and money.

- Examine (G).
- Open wallet; take ID and KEY (H).
- Open; take money and HANDLE (3/3) (I).
- Examine; take SHOEHORN (J). Place HANDLE (3/3); open. Examine.
- Go through window.
- Solution (K): dodge lights. Solution is random.
Chapter 3: The Museum
- Examine scene.
- Take KEY PART (L). Use SHOEHORN (M); receive HANDLE.
- KEY PART on KEY.
- Use KEY (N); open.
- Enter Hallway.
- Examine scene.
- Take EYE (2/3) (O). Move magnet (P); receive NOTE. Use HANDLE (Q); open.
- Open jar; take FAT (R). Take CAKE SHOVEL (S).
- Use FAT (T); open. Take TEAR GAS. Unfold crane; receive NOTE (1/3).
- Take BUTTERFLY KEY (2/2) (U); open. Play HOP; receive NOTE (2/3).
- Walk down.
- Place BUTTERFLY KEY (2/2) (V); open. Take NOTE (3/3).
- NOTE (3/3) on NOTE; arrange (W). Use TAPE.
- Walk right.
- Take money (X); use NOTE.
- Solution (Y): A-Dx2-B-C-B.
- Go forward.
- Examine scene.
- Use Prism of Souls; solution is random (Z).
- Take money. Use CAKE SPATULA; take WAND (A).
- Take EYE (3/3) (B).
- Solution (C).
- Take CONCH (D), money, letter, and SNOWFLAKE KEY (E).
- Walk down.
- Place SNOWFLAKE KEY (F); open. Take CASKET.
- Play HOP; receive WING KEY (G).
- WING KEY on CASKET; open. Take SCOOP and COMPUTER MOUSE.
- Walk down.
- Use SCOOP (H); receive SEEDS.
- Place EYE (3/3) (I); examine (J).
- Solution (K).
- Open; take money and FLASH DRIVE.
- Walk right, then left.
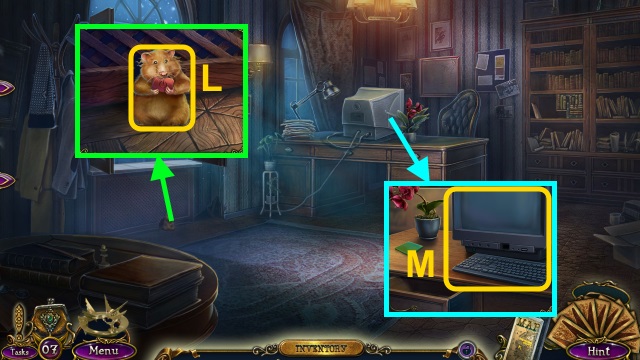
- Give SEEDS (L); receive POWER BUTTON.
- Place COMPUTER MOUSE and POWER BUTTON (M).
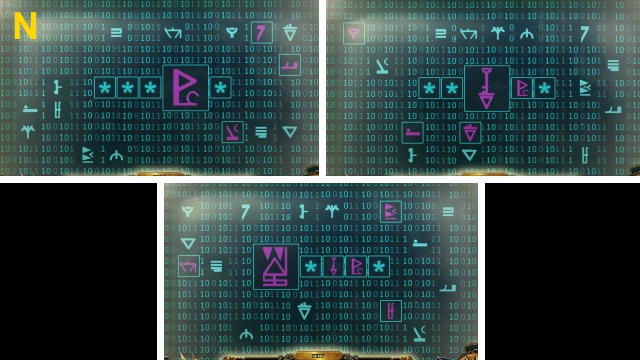
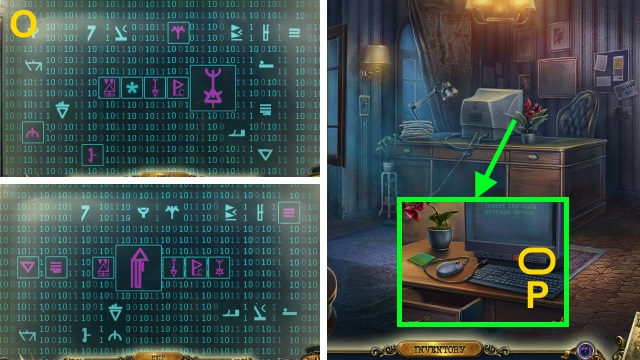
- Solution (N-O): Symbol order and locations are randomized.
- Use FLASH DRIVE (P); scroll down. Receive JULIANNA'S NUMBER.
- Examine scene; use JULIANNA'S NUMBER (Q). Take money (R); buy WAND HANDLE (S).
- WAND HANDLE on WAND.
- Give WAND (T).
- Go forward.
- Examine scene.
- Take KEY BIRD (2/2) (U).
- Give CONCH (V); receive BONE.
- Place BONE (W); take money and STARFISH SYMBOL (X).
- Take MOON KEY (Y); solution (Z). Examine lock.
- Play HOP; receive SPONGE SYMBOL (A).
- Walk down.
- Place BIRD KEY (2/2) (B); open. Take TURTLE SYMBOL.
- Walk left.
- Examine (C); place STARFISH SYMBOL, SPONGE SYMBOL, and TURTLE SYMBOL. Open door.
- Go left.
- Use TEARGAS (D); solution is random.
- Examine scene.
- Use Prism of Souls; solution is random (E).
- Take FISH KEY (F).
- Examine door; take MEDALLION PART (1/3) (G).
- Take money and KEY (H).
- Open; take money and VALVE (1/3) (I).
- Walk down.
- Play HOP; receive MEDALLION PART (2/3) (J).
- Place FISH KEY (K); open. Take money and FIRE EXTINGUISHER (L).
- Walk left.
- Use FIRE EXTINGUISHER; take MEDALLION PART (3/3) (M).
- Walk down twice.
- Buy GLUE (N).
- MEDALLION PART (3/3) on KEY; arrange (O). Use GLUE.
- Go left twice.
- Use KEY (P); open.
- Walk forward.
- Take money and KEY SHOWCASE (Q).
- Take VALVE (2/3) (R).
- Solution is random (S); take COMPASS ROSE and NECKLACE (1/2).
- Take money; move items. Take NECKLACE (2/2) (T).
- Walk down.
- Place KEY SHOWCASE; open. Take EMPTY BOTTLE (U).
- Walk down.
- Place NECKLACE (2/2) (V); take VALVE (3/3) (W).
- Walk left, then forward.
- Place VALVE (3/3) (X).
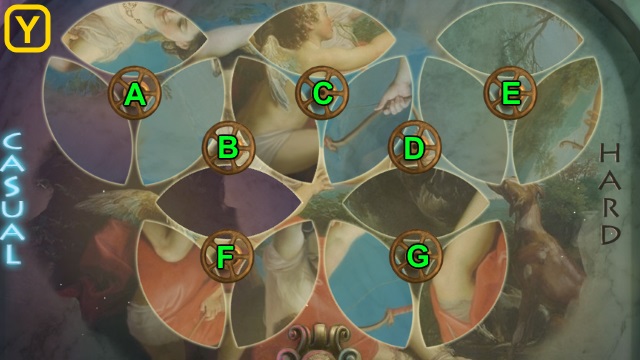
- Solution (Y).
- Casual: B-F-C-E-F-G-A-C-D-B.
- Hard: A-F-G-D-Bx2-F-C-E-F-G-A-C-D-B.
- Use EMPTY BOTTLE (Z); receive FILLED BOTTLE.
- Use FILLED BOTTLE (A).
- Take ADDRESS: MORDAMO HARBOR and SYMBOL J (B).
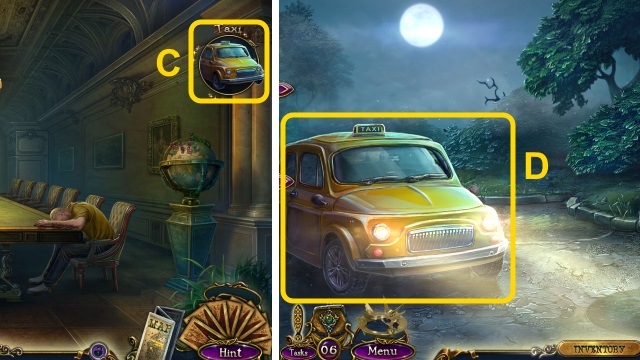
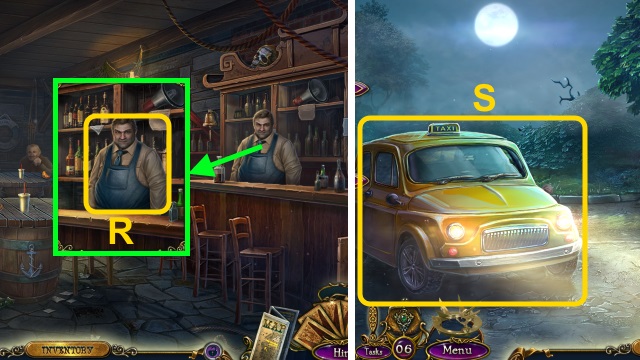
- Go to Taxi (C).
- Use ADDRESS: MORDAMO HARBOR (D); examine. Select 'Buy'.
Chapter 4: Mordamo Harbor
- Examine scene.
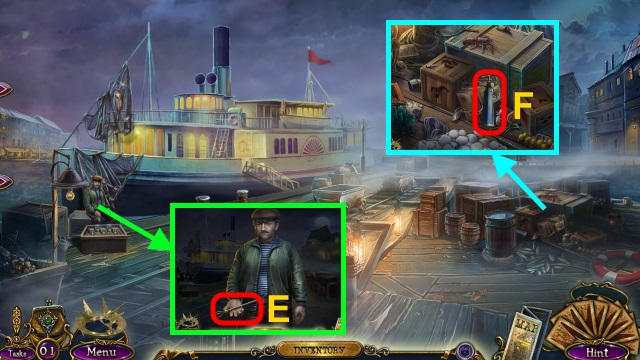
- Give SYMBOL J; take SPEARGUN ARROW (E).
- Take BLOWTORCH (F); place COMPASS ROSE.
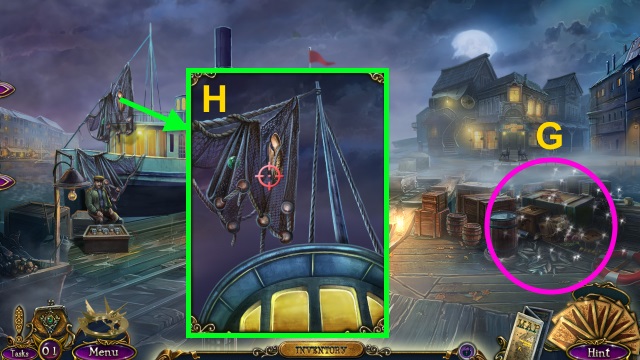
- Play HOP; receive SPEARGUN (G).
- SPEARGUN ARROW on SPEARGUN.
- Use SPEARGUN. Solution (H): stop marker over net.
- Take LUCKY SHELL.
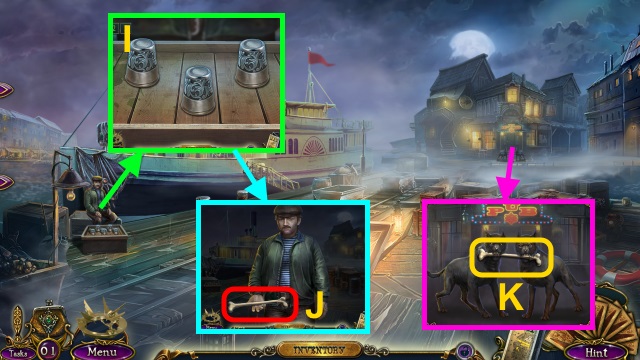
- Give LUCKY SHELL (I); solution is random.
- Take BONE (J).
- Give BONE (K).
- Go forward.
- Talk; take VAULT KEY (L).
- Use VAULT KEY (M); open.
- Take KNIFE (N). Open crates; take CAN OPENER. Collect bottles, grains, and vegetables; take FOOD.
- Give FOOD; take DISHES (O).
- Walk down.
- Use KNIFE; take BAR TRAY (P).
- Examine BAR TRAY; use BLOWTORCH and DISHES.
- Walk right.
- Use BAR TRAY on scene.
- Solution (Q).
- Receive EMPTY TRAY.
- Give EMPTY TRAY (R); take ADDRESS: FOREST and money.
- Go to Taxi.
- Use ADDRESS: FOREST (S); examine. Select 'Buy'.
- Examine scene.
- Open latches; open box. Take HANDCUFFS and HAND KEY (T).
- Remove police tape (U); open.
- Walk forward.
- Examine scene.
- Use Prism of Souls; solution is random (V).
- Examine plant; take MOUSE (W).
- Place HAND KEY; take GUN and WIRE CUTTERS (X).
- Solution (Y); take HORN (1/2).
- Walk down.
- Play HOP; receive GRINDSTONE (Z).
- Place ladder (A).
- Use WIRE CUTTERS (B); take SAW BLADE.
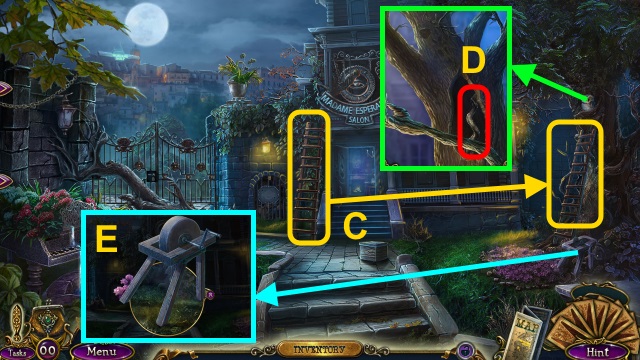
- Place ladder (C).
- Give MOUSE; take HORN (2/2) (D).
- HORN (2/2) on SAW BLADE; take RUSTY SAW.
- Place GRINDSTONE; turn handle (E). Use RUSTY SAW; receive SHARP SAW.

- Use SHARP SAW 3x (F); open.
- Use GUN (G).
- Go forward.
- Open door. Use HANDCUFFS (H); take CIRCUIT TILE (1/3) (I).
- Play HOP; receive LATEX GLOVES (J).
- Take WINDOW KEY (K); place MOON KEY. Open; take CIRCUIT TILE (2/3) (L).
- Take CIRCUIT TILE (3/3) (M). Use LATEX GLOVES; place CIRCUIT TILE (3/3).
- Solution (N).
- Pull handle; take CROWBAR.
- Remove wires (O); use CROWBAR.
- Go forward.
- Take WINDOW KEY (P).
- Take STETHOSCOPE (Q). Place bone and 2 WINDOW KEYS (R); open.
- Use Prism of Souls; solution is random (S).
- Use STETHOSCOPE (T).
- Solution is random (U).
- Open; take money and VIDEOTAPE.
- Take HANDKERCHIEF and money (V).
- Go to Taxi.
- Examine (W); select 'Buy'.
- Remove papers; take BADGE KEY (X).

- Place BADGE KEY (Y). Open; take AMMONIA (Z).
- CAN OPENER and HANDKERCHIEF on AMMONIA; take AMMONIA HANDKERCHIEF.
- Use AMMONIA HANDKERCHIEF (A).
- Take TV REMOTE (B).
- Use TV REMOTE and VIDEO TAPE (C).
- Solution (D): stop symbols inside target.
- Congratulations! You have completed Grim Facade: The Message.
Created at: 2018-01-26