

Walkthrough Menu
- General Tips
- Chapter 1: School Porch
- Chapter 2: Secret Passage
- Chapter 3: School Hall
- Chapter 4: Ancient Hall
- Chapter 5: Mansion Hall
General Tips
- This is the official guide for Grim Tales: The White Lady.
- This guide won't mention when to zoom into a location; the screenshots will identify closeups.
- Hidden-object puzzles are referred to as HOPs. Only the locations of the HOPs will be shown.
- Use the Map to fast travel to a location.
Chapter 1: School Porch

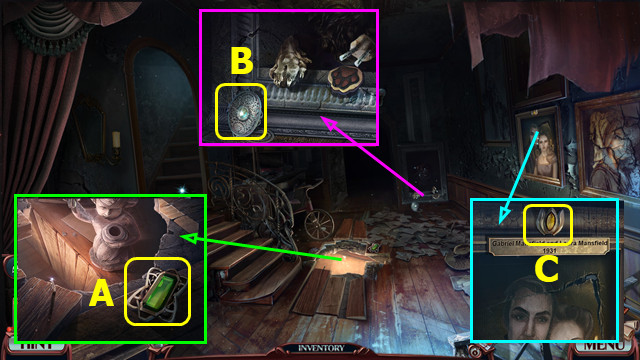
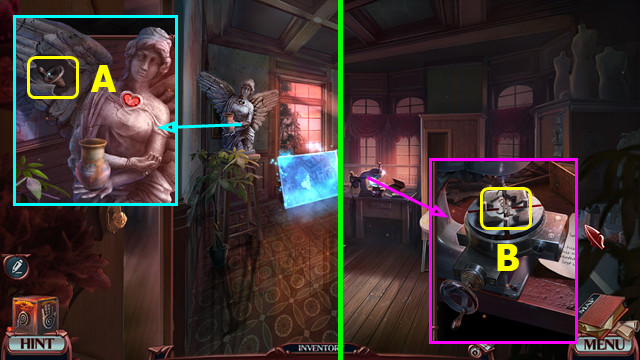
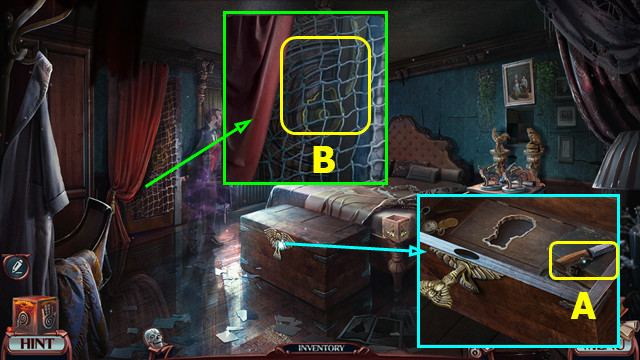
- Open car; take HANDBAG (A).
- Open HANDBAG; move items; take CORKSCREW and RICHARD'S SPIRIT.
- Select RICHARD'S SPIRIT (B); earn GLOVE BOX KEY.
- Use GLOVE BOX KEY (C).
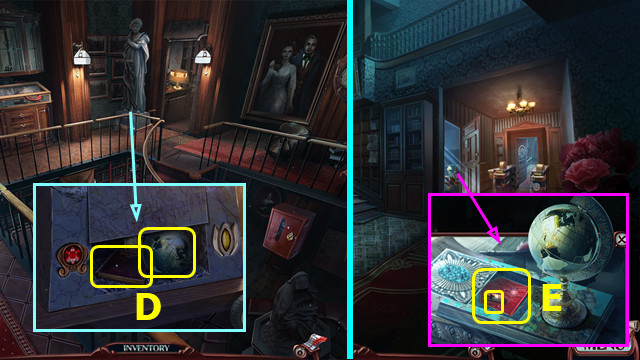
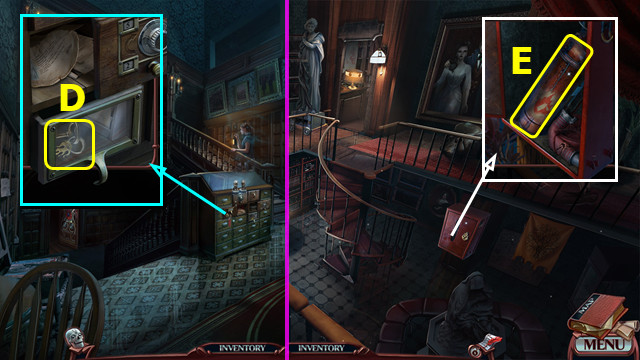
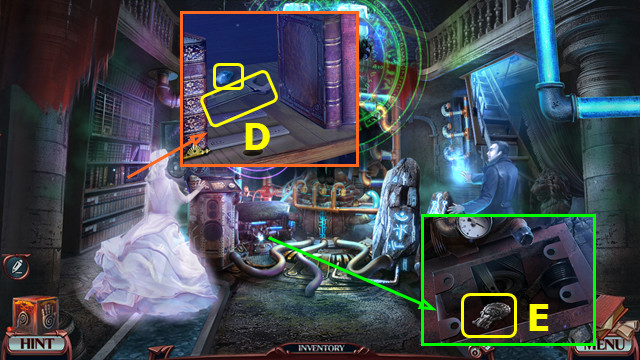
- Play HOP; earn ID (D).
- Show ID (E); restore image(@).
- Go forward.
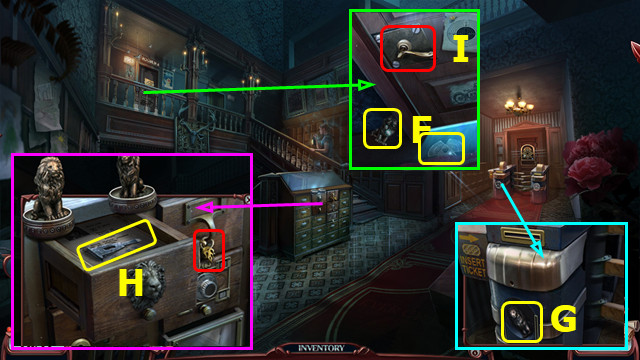
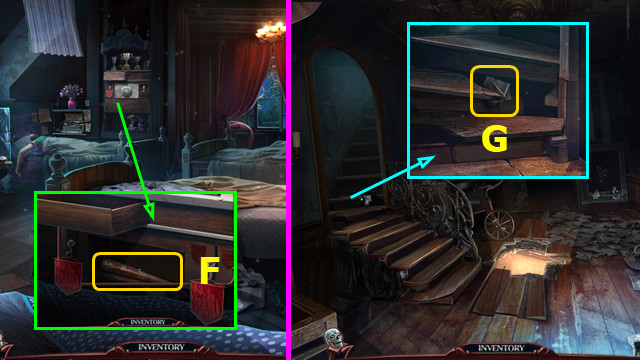
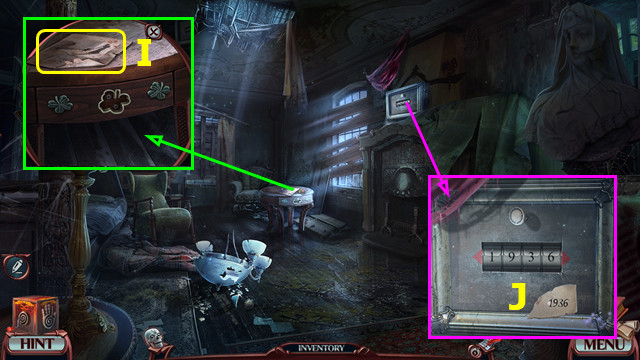
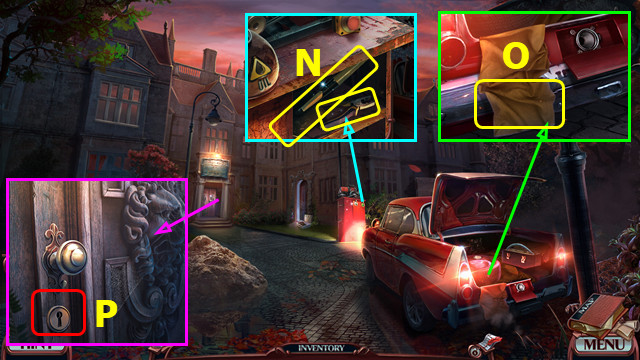
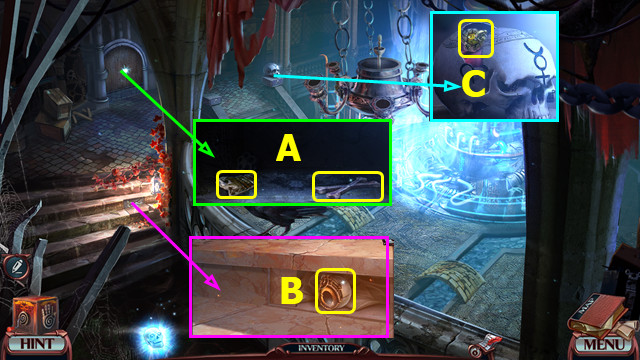
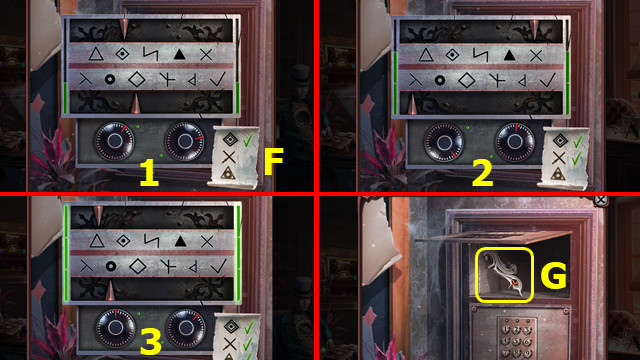
- Take 1/2 DECORATIVE LIONS, METAL DISK (F).
- Place METAL DISK; take 2/2 DECORATIVE LIONS (G).
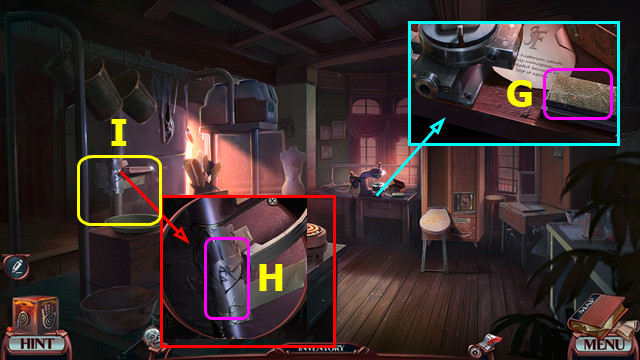
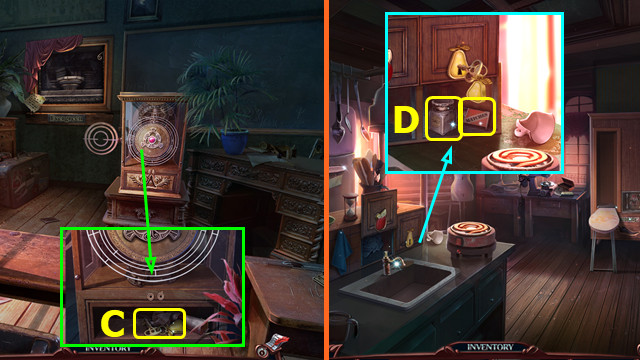
- Place DECORATIVE LIONS; take SCREWDRIVER; close drawer and select key (H).
- Remove handle; use SCREWDRIVER (I).
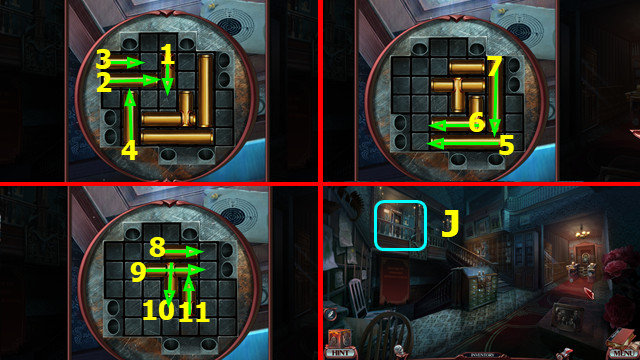
- Solution: (1-11).
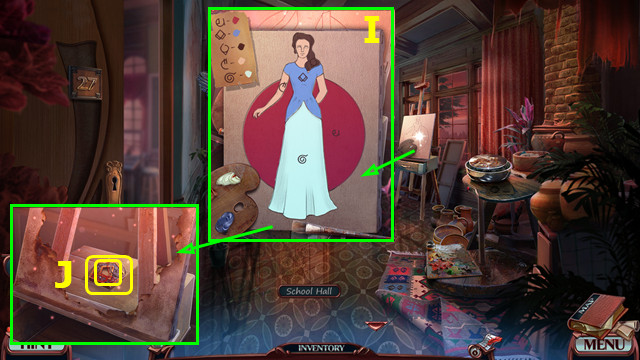
- Go (J).
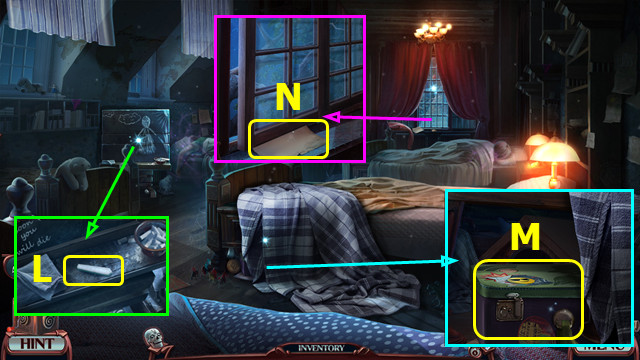
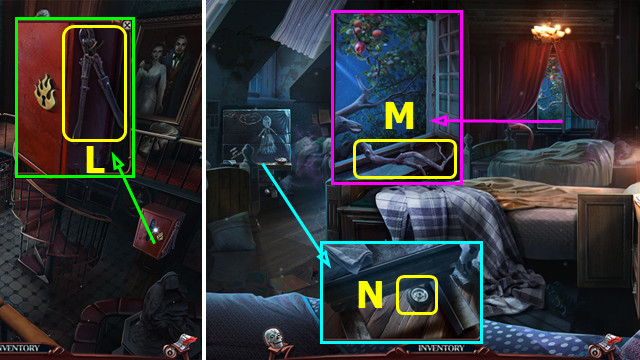
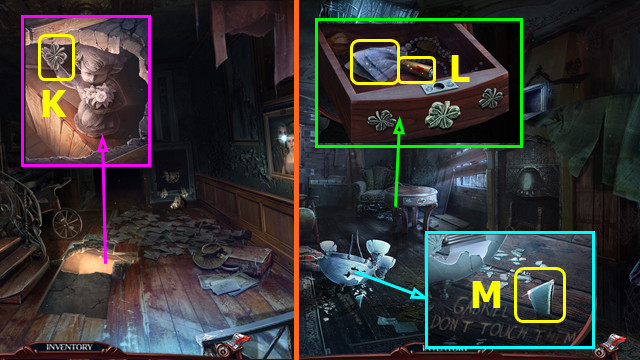
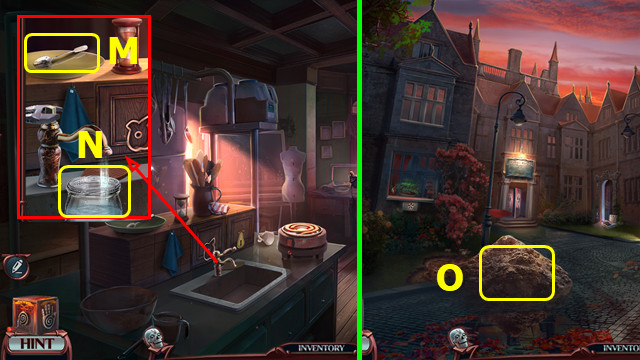
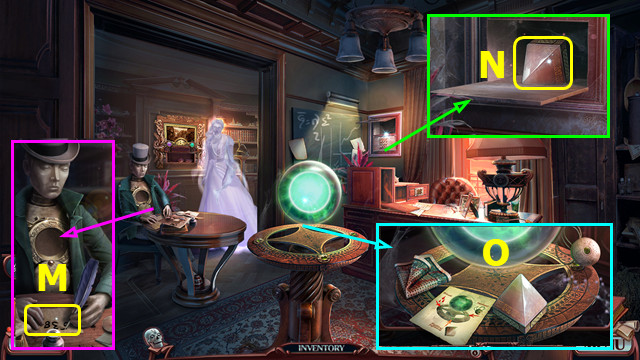
- Take CHALK (L).
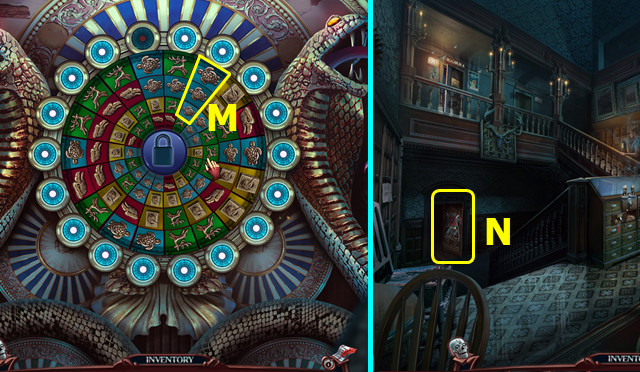
- Move blanket; take SPY SET (M).
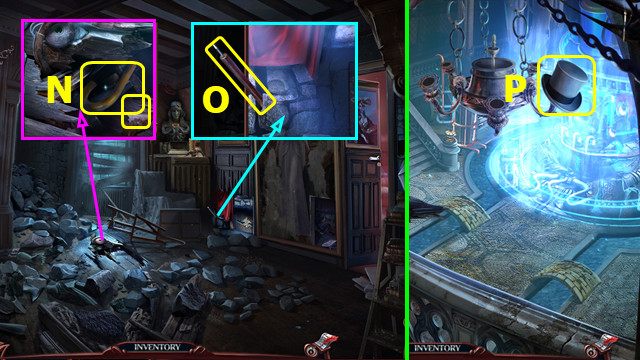
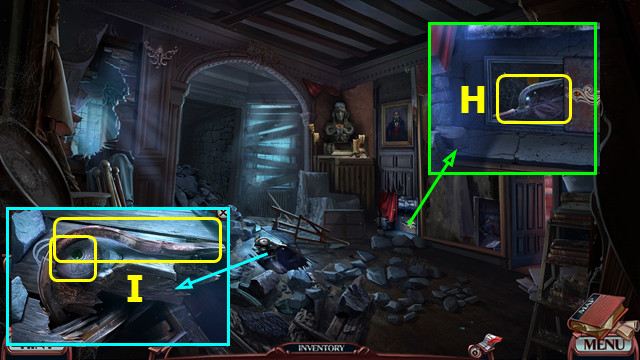
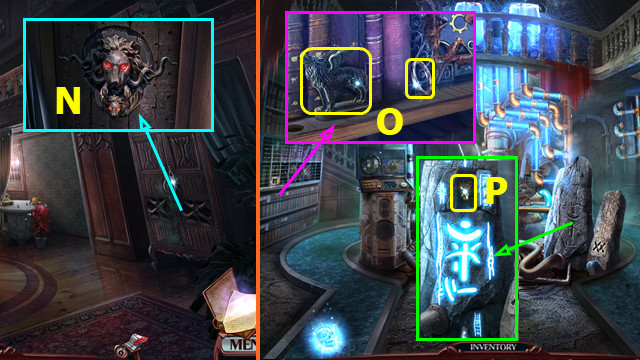
- Take PAPER; open window (N).
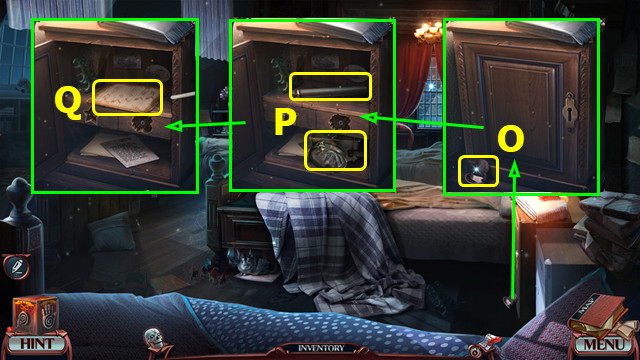
- Take 1/2 HAT PIECE (O).
- Look at SPY SET.
- Select RICHARD'S SPIRIT; earn 2/2 HAT PIECE.
- 2 HAT PIECES become TOP HAT.
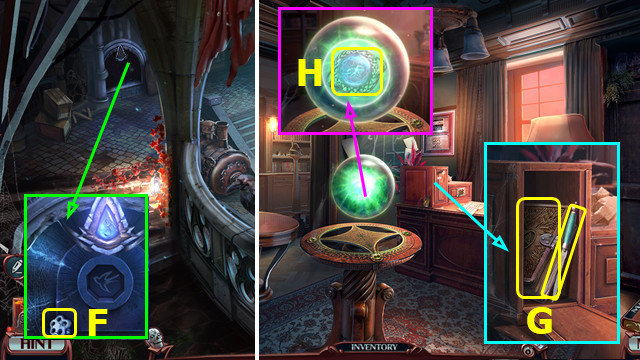
- TOP HAT on SPY SET; read note; take ARROW, ALBUM PIECE, and BILLY'S KEY.
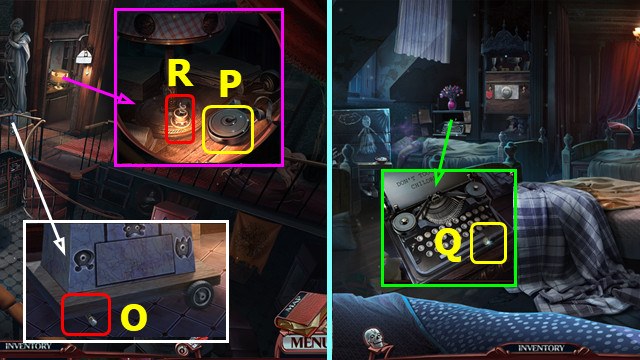
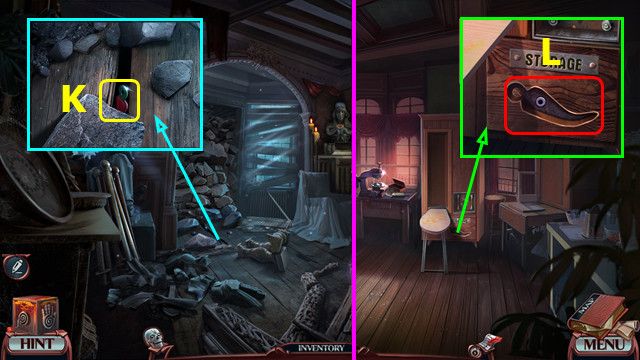
- Use BILLY'S KEY; take 1/2 TYPEWRITER PIECE and BROKEN FLASHLIGHT (P).
- Use PAPER and CHALK; take CODE (Q).
- Walk down.
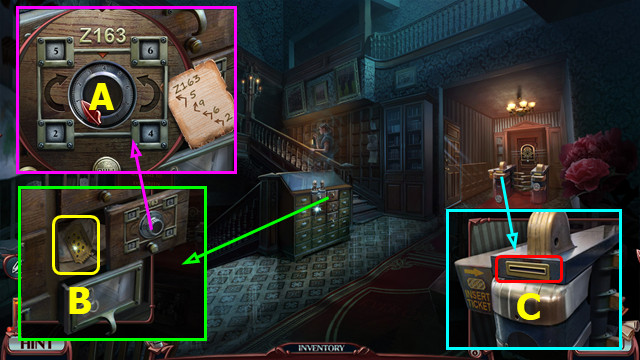
- Place CODE; rotate left 5x to 5, right 9x to 6, left 6x to 2, and left 2x to 4 (A).
- Take TICKET (B).
- Use TICKET (C).
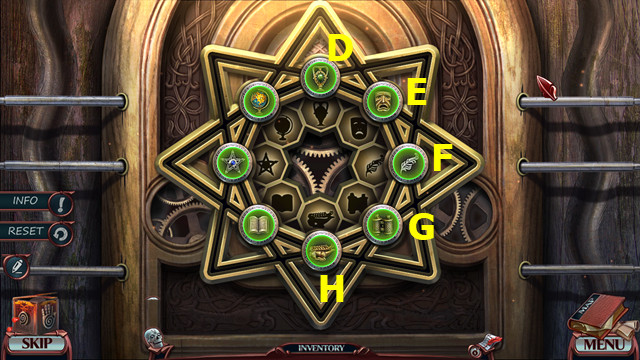
- Select Dx2-E-F-G-Hx2.
- Go right.
- Take BOLT CUTTER (L).
- Walk down, left.
- Use BOLT CUTTER; take THICK BRANCH (M).
- Use THICK BRANCH; take SMALL WHEEL (N).
- Walk down, right.
- Place SMALL WHEEL (O).
- Take 2/2 TYPEWRITER PIECE (P).
- Walk down, left.
- Place TYPEWRITER PIECES; take BUTTON (Q).
- Return to School Museum.
- Use BUTTON (R).
- Play HOP; earn OLD ALBUM (S).
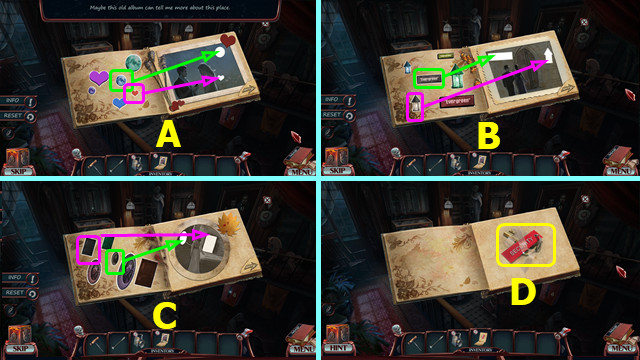
- ALBUM PIECE on OLD ALBUM.
- Restore images (A-C).
- Take SECURITY KEY (D).
- Walk down.
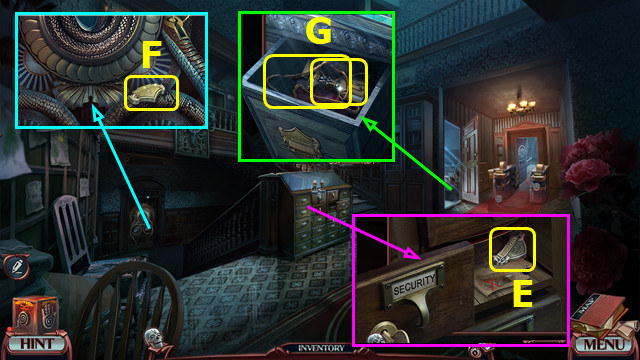
- Use SECURITY KEY; take 1/2 EMBLEM PART (E).
- Earn 1/3 SNAKE HEAD.
- Remove sign; take 2/2 EMBLEM PART (F).
- Place EMBLEM PARTS; take STRING and TROPHY (G).
- Go left.
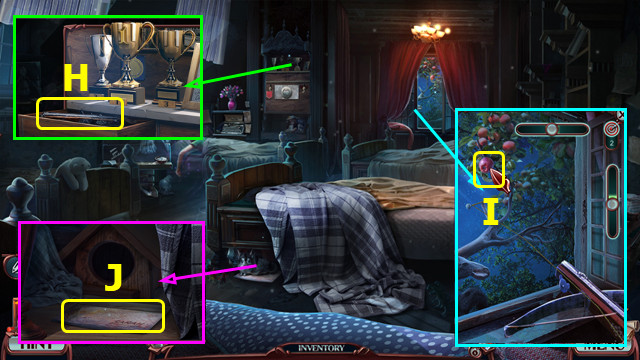
- Place TROPHY; take CROSSBOW (H).
- STRING and ARROW on CROSSBOW; take LOADED CROSSBOW.
- Use LOADED CROSSBOW; select when 2 areas in green x3; earn APPLE (I).
- Use APPLE; take BILLY'S LETTER (J).
- Open BILLY'S LETTER; take 2/3 SNAKES HEAD and BILLY'S MONOGRAM.
- Place BILLY'S MONOGRAM; take 3/3 SNAKES HEAD (K).
- Walk down.
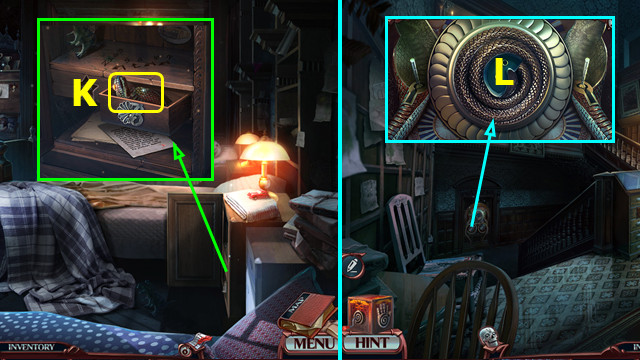
- Place SNAKE HEADS (L).
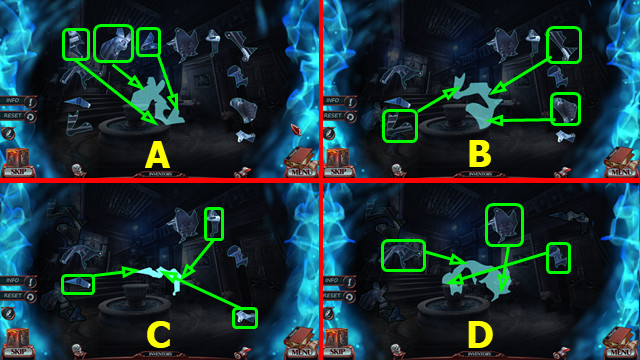
- Create sets of three (M); fill all lights.
- Mini-game is random.
- Go (N).
Chapter 2: Secret Passage
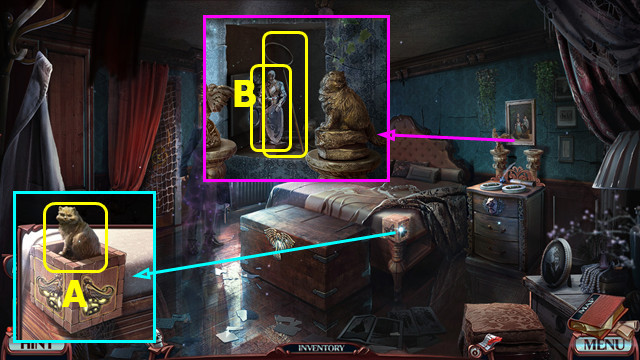
- Take 1st GEM (A).
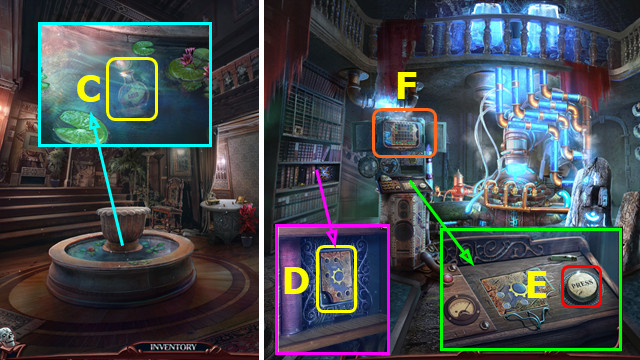
- Take OLD LOCKET (B).
- Open OLD LOCKET; take 2nd GEM and 1/2 CODE PIECE.
- Take 3rd GEM (C).
- Walk down, right.
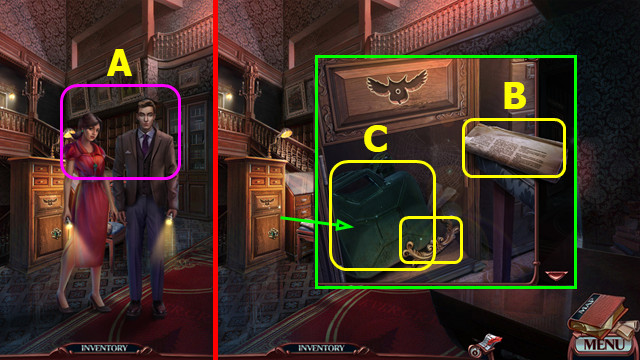
- Place 3 GEMS; take GLOBE and LAURA'S DIARY (D).
- Walk down.
- Place GLOBE; take 1/2 BATTERIES and PENNANT (E).
- Go to Dormitory.
- Place PENNANT; take BASEBALL BAT (F).
- Return to Secret Passage.
- Use BASEBALL BAT; earn DIARY PAGE (G).
- DIARY PAGE on LAURA'S DIARY.
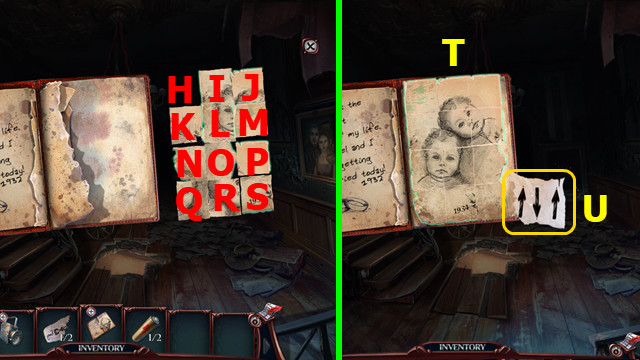
- Solution: K-L-M-P-O-R-Q-N-K-L-I-H-K-L-I-J-M-L-O-R-S.
- Final (T).
- Take 2/2 CODE PIECE (U).
- Walk down, right.
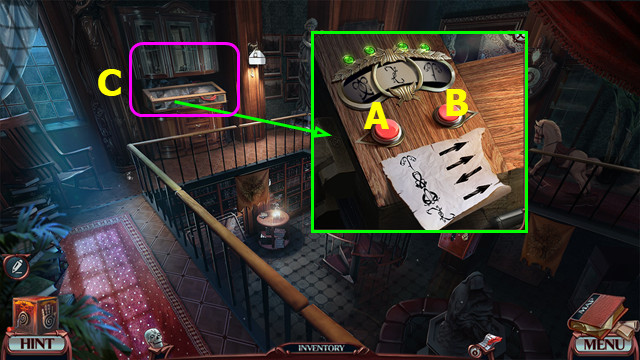
- Place CODE PIECES (C).
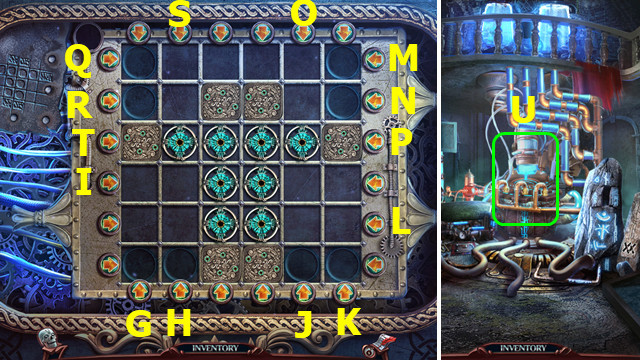
- Solution A-B-Bx3-Ax4-Bx2.
- Select (C).
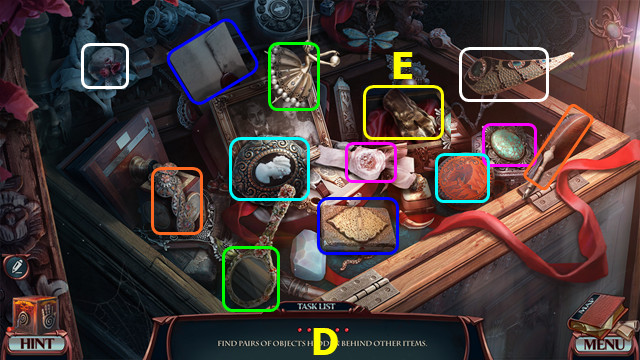
- Select pairs (D).
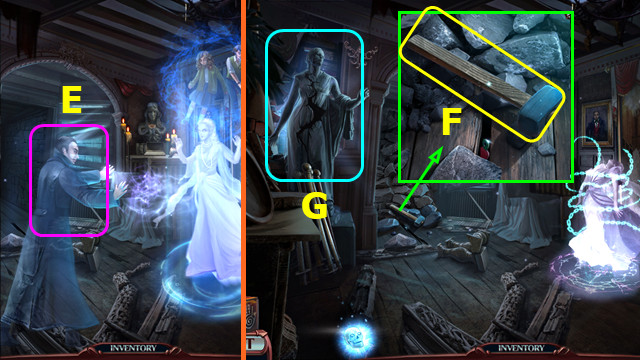
- Take LION'S PAW (E).
- Go to Secret Passage.
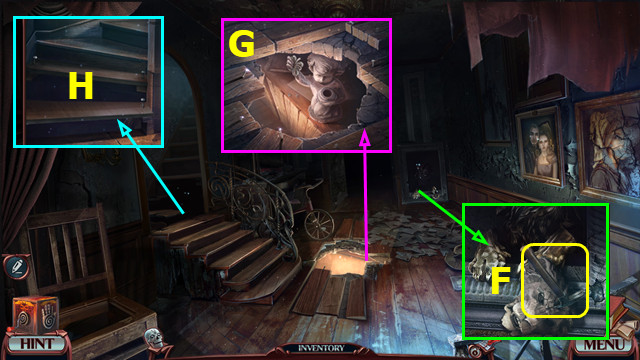
- Place LION'S PAW; take HAMMER (F).
- Use HAMMER; earn BOARDS (G).
- Use BOARDS and HAMMER (H).
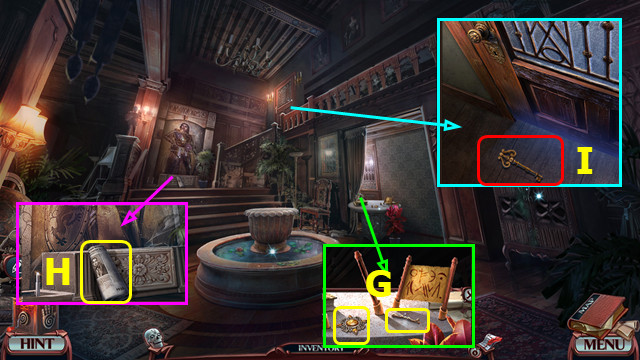
- Go left.
- Take DIARY PAGE (I).
- DIARY PAGE on LAURA'S DIARY; take SAFE CODE.
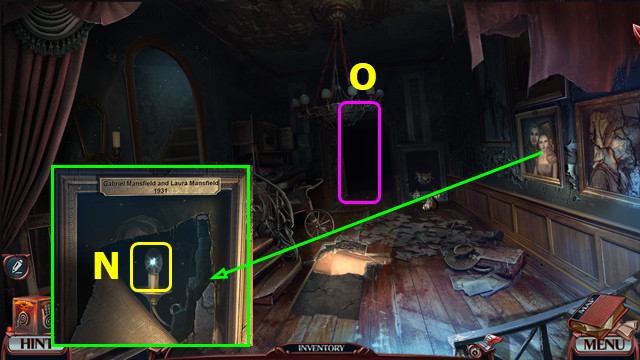
- Place SAFE CODE; enter 1-9-3-6; take FADED FLOWERS (J).
- Walk down.
- Place FADED FLOWERS; take CLOVER AMULET (K).
- Go left.
- Place CLOVER AMULET; take 2/2 BATTERIES and HANDKERCHIEF (L).
- Use HANDKERCHIEF; earn GLASS SHARD (M).
- Walk down.
- Use GLASS SHARD; take LIGHTBULB (N).
- BATTERIES and LIGHTBULB on BROKEN FLASHLIGHT; take FLASHLIGHT.
- Use FLASHLIGHT (O).

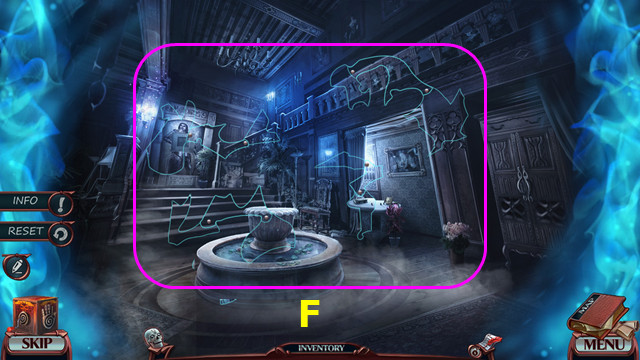
- Select (P-S) along path.
- Exit (T).
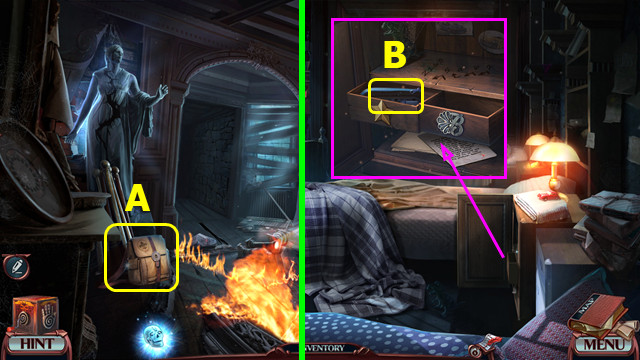
- Select RICHARD'S SPIRIT; earn 1/2 BADGE PIECE and SCOUT'S BADGE.
- Take BILLY'S BACKPACK (A).
- SCOUT'S BADGE on BILLY'S BACKPACK; play HOP; earn 2/2 BADGE PIECE.
- 2 BADGE PIECES become DETECTIVE BADGE.
- Go to Dormitory.
- Place DETECTIVE BADGE; take BILLY'S CASE (B).
- Open BILLY'S CASE; take MAGNET.
- Walk down.
- Use MAGNET; earn RED KEY (D).
- Walk right.
- Use RED KEY; take FIRE EXTINGUISHER (E).
- Go to Old Gallery.
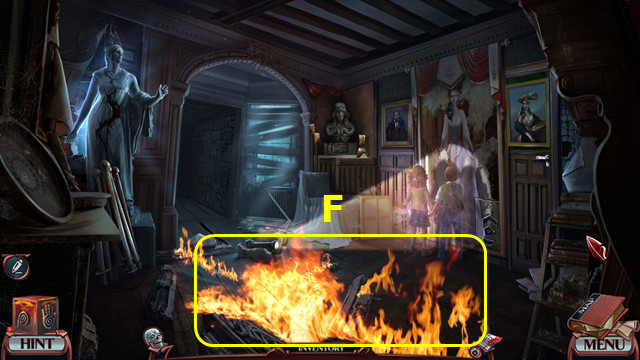
- Use FIRE EXTINGUISHER (F).
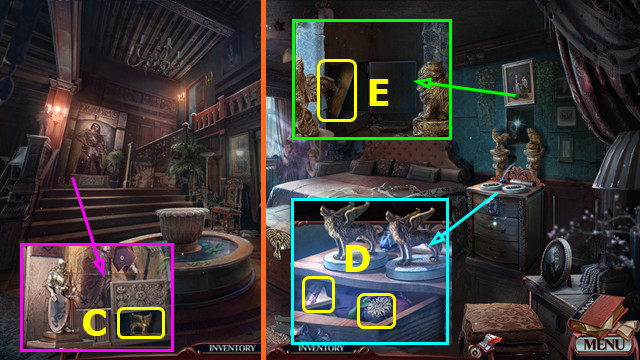
- Select RICHARD'S SPIRIT; earn 1/3 BAS-RELIEF.
- Take METAL PIECE and DECORATIVE FLOWER (G).
- Place DECORATIVE FLOWER; take SPRAY and 2/3 BAS-RELIEF (H).
- Use SPRAY; take 3/3 BAS-RELIEF (I).
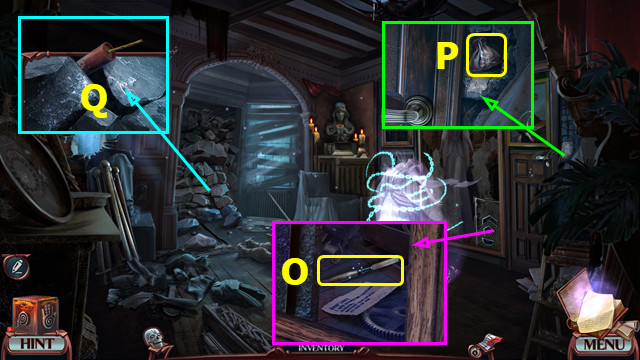
- Place BAS-RELIEFS; take 1/2 LOCK PART and JACK (J).
- Use JACK; take PRUNERS (K).
- Use PRUNERS (L).
- Play HOP; earn 2/2 LOCK PART (M).
- Place LOCK PARTS; take PLIERS and SPADE (N).
- Use PRUNERS; take DUSTER (O).
- DUSTER and PLIERS on METAL PIECE; take PICKLOCK.
- Use PICKLOCK (P).
- Go forward.
Chapter 3: School Hall
- Talk (A).
- Take NEWSPAPER (B).
- Open NEWSPAPER; take CABINET KEY.
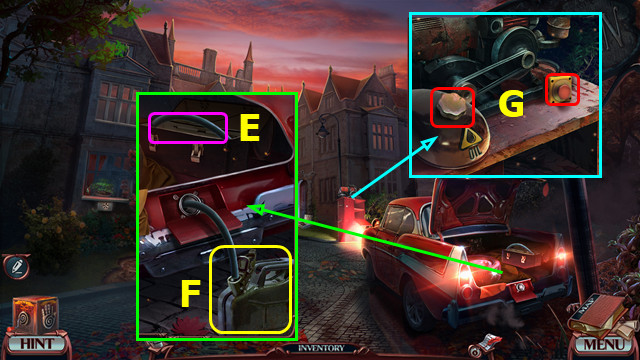
- Use CABINET KEY and PLIERS; take 1/2 ORNAMENT PIECE and GAS CAN (C).
- Walk down.
- Select (E).
- Use GAS CAN; take GAS CAN (F).
- Use GAS CAN; select button (G).
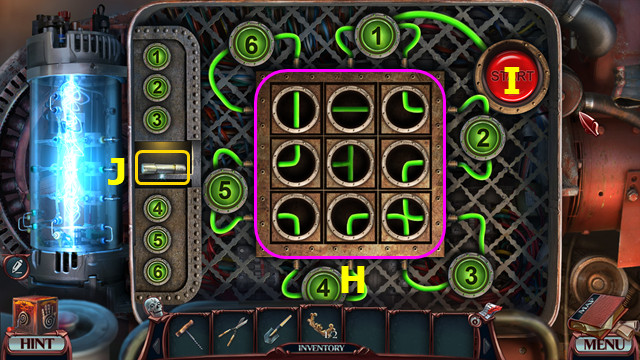
- Solution (H).
- Select (I).
- Take FUSE (J).
- Go forward.
- Open door; replace FUSE (K).
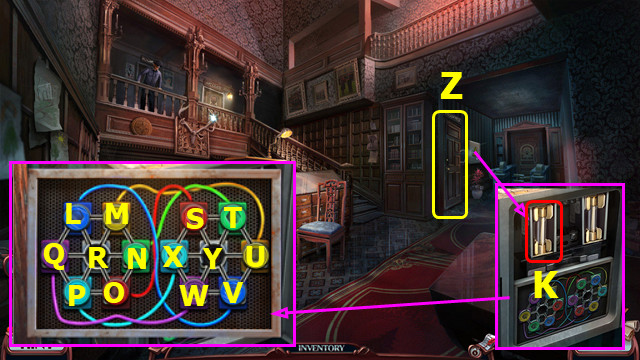
- Select Q-L-R-O-N-M-L-R-P-O-N-R-O-P-R.
- -W-X-Y-U-T-S-X-Y-V-U-Y.
- Go (Z).
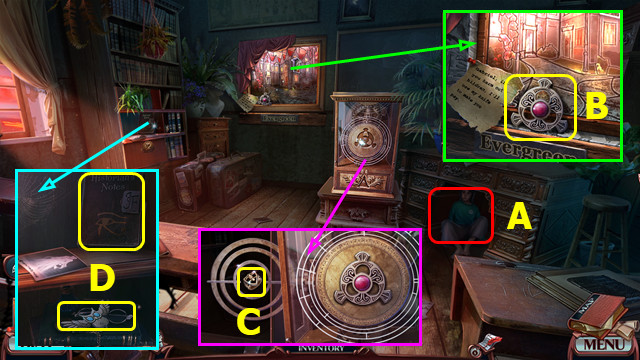
- Talk; earn TRAP RECIPE (A).
- Take SYMBOL (B).
- Select RICHARD'S SPIRIT; take 1/3 CANVAS PART.
- Place SYMBOL; take SIGNET (C).
- Take HISTORIAN'S NOTES; place SIGNET; take GUARD STATION HANDLE (D).
- Walk down.
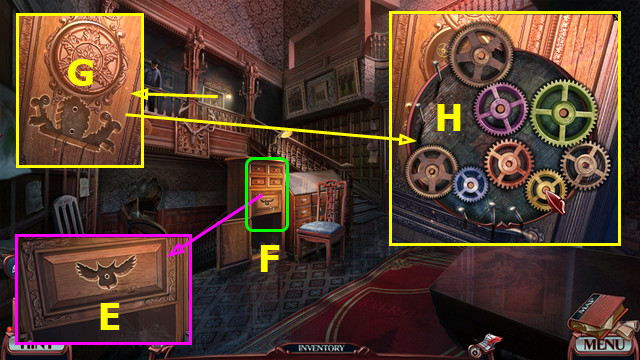
- Place GUARD STATION HANDLE (E).
- Play HOP; earn 2/2 ORNAMENT PIECE (F).
- Place ORNAMENT PIECE (G).
- Solution (H).
- Go forward.
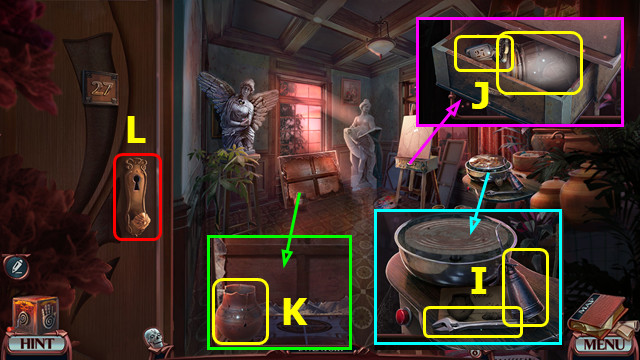
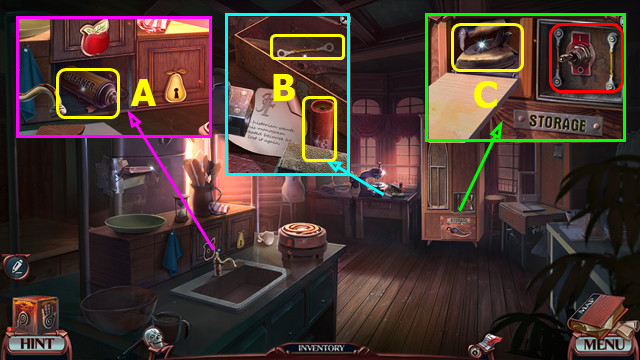
- Take WRENCH and OIL (I).
- Use OIL; open drawer. Take EMPTY JAR and SEWING ROOM KEY; select palette (J).
- Take BROKEN VASE (K).
- Use SEWING ROOM KEY; go (L).
- Take SPOON (M).
- Remove lever; use WRENCH and EMPTY JAR; take JAR WITH WATER (N).
- Walk down 3x.
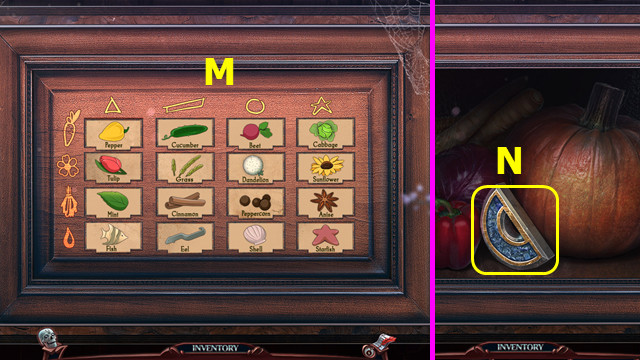
- Use SPADE; earn CLAY (O).
- CLAY and SPOON in JAR WITH WATER; take WET CLAY.
- Go forward 2x.
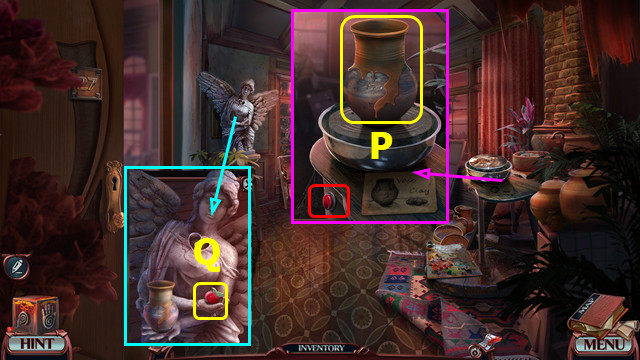
- Place BROKEN VASE; push button. Use WET CLAY; take RESTORED VASE (P).
- Place RESTORED VASE; take APPLE AMULET (Q).
- Go left.
- Place APPLE AMULET; take CLEANING SOLUTION and 2/3 CANVAS PART (A).
- Take EMPTY DYNAMITE and use CLEANING SOLUTION; take WIRES (B).
- Replace WIRES; select switch; take IRON (C).
- Take GLASS WINDOW PIECE from IRON.
- Walk down 2x; go right.
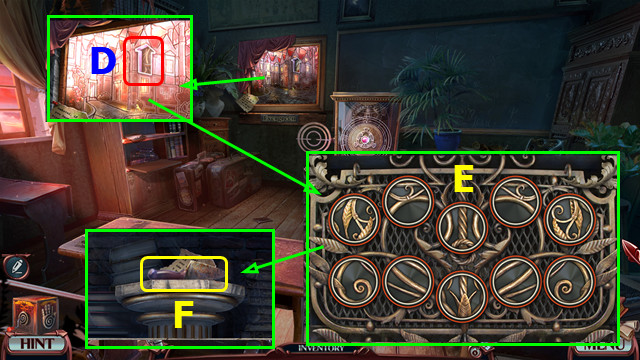
- Place GLASS WINDOW PIECE (D).
- Solution (E).
- Read note; take BLUNT KNIFE (F).
- Walk down, forward, and left.
- Use BLUNT KNIFE; earn SHARP KNIFE (G).
- Use SHARP KNIFE (H).
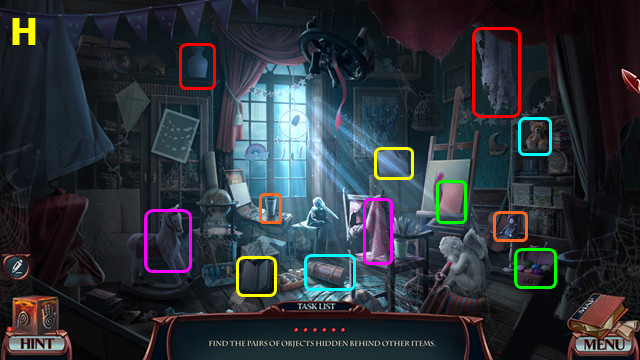
- Play HOP; earn 3/3 CANVAS PART (I).
- Walk down.
- Place CANVAS PARTS; solution (J).
- Go (K).
- Talk (L).
- Take CANDLE (M).
- Walk down, left.
- Select switch; use CANDLE; earn BURNING CANDLE (N).
- Walk down, forward.
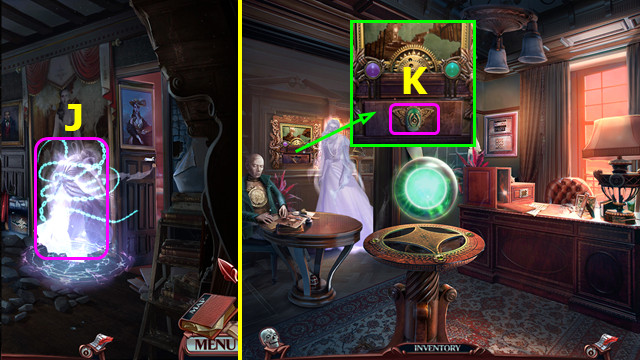
- Use BURNING CANDLE; take ROPE, PHOSPHORUS, and PAINTS (O).
- SHARP KNIFE on ROPE; take WICK and LASSO.
- Use LASSO; select when meter is green x3; earn ANCIENT DECORATION (P).
- Place ANCIENT DECORATION; take PENDANT (Q).
- Walk down.
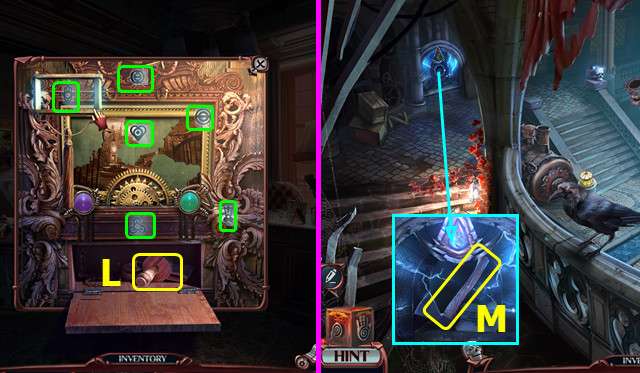
- Place PENDANT; take TURNING KNOB (A).
- Go left.
- Use TURNING KNOB; take MONOGRAM (B).
- MONOGRAM on HISTORIAN'S NOTES; take SILVER TRIANGLE.
- Walk down 2x; go right.
- Place SILVER TRIANGLE; take KITCHEN KEY (C).
- Go down, forward, and left.
- Use KITCHEN KEY; take SALT and MATCHES (D).
- PHOSPHORUS and SALT on TRAP RECIPE; take TRAP FOR WHITE LADY.
- Walk down, forward.
- Give TRAP FOR WHITE LADY (E).
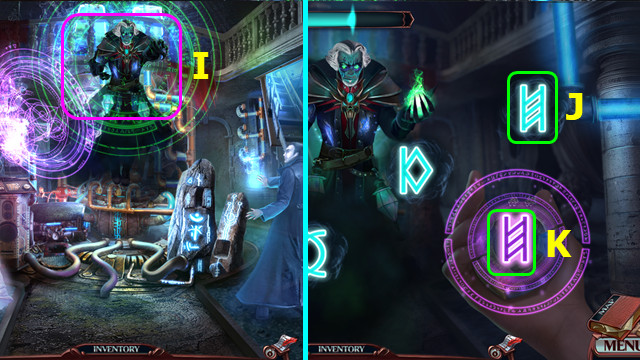
- Select RICHARD'S SPIRIT; earn 1/3 STONE PIECE.
- Take SLEDGE HAMMER (F).
- Use SLEDGE HAMMER; select (G).
- Select pairs; earn BRUSHES (H).
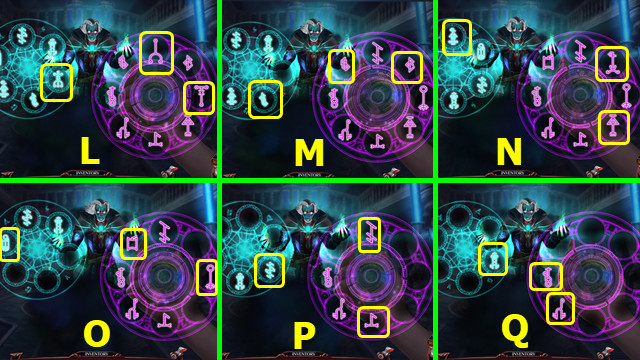
- Walk down.
- Place PAINTS and BRUSHES; solution (I).
- Take HOOK and 2/3 STONE PIECE (J).
- Go forward.
- Use HOOK; take VEGETABLE EMBLEM (K).
- Walk down, left.
- Place VEGETABLE EMBLEM (L).
- Solution (M).
- Take 3/3 STONE PIECE (N).
- Walk down, forward.
- Place STONE PIECES; take CHISEL (O).
- Use CHISEL; take GUNPOWDER (P).
- GUNPOWDER and WICK in EMPTY DYNAMITE; take DYNAMITE.
- Use DYNAMITE and MATCHES (Q).
Chapter 4: Ancient Hall
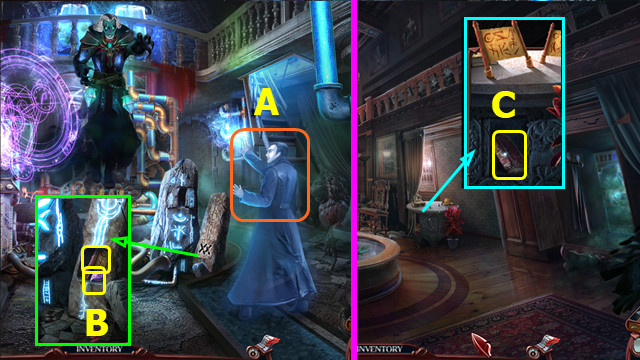
- Select RICHARD'S SPIRIT; earn 1/2 EYE.
- Use CORKSCREW; take 1/3 PORTRAIT FRAGMENT and BONES AMULET (A).
- Place BONES AMULET take 2/2 EYE (B).
- Place EYES; take GABRIEL'S STUDY KEY (C).
- Walk down.

- Use GABRIEL'S STUDY KEY (D).
- Go right.
- Take GLOWING RUNE (E).
- Walk down, forward.
- Place GLOWING RUNE; take DRAWER HANDLE (F).
- Walk down, right.
- Replace DRAWER HANDLE; take LETTER OPENER and SPELL NOTES (G).
- Take ABYSS SPELL from SPELL NOTES.
- Use ABYSS SPELL; take ABYSS KEY (H).
- Walk down.
- Use ABYSS KEY. Talk; earn WHITE LADY'S PENDANT (J).
- Go right.
- Place WHITE LADY'S PENDANT (K).
- Select symbols; take SEAL (L).
- Walk down, forward.
- Place SEAL; take AXE (M).
- Walk down.
- Use AXE; take CANE HANDLE and 2/3 PORTRAIT FRAGMENT (N).
- Use CANE HANDLE; earn CANE (O).
- Go forward.
- Use CANE; earn HAT (P).
- Walk down, right.

- Place HAT; take GABRIEL'S STAMP and 1/2 PATTERN (A).
- Use GABRIEL'S STAMP; take ENVELOPE and GABRIEL'S BLOODY HANDKERCHIEF (B).
- LETTER OPENER on ENVELOPE; take 3/3 PORTRAIT FRAGMENT.
- Place PORTRAIT FRAGMENTS (C).
- Play HOP; take TUBE (D).
- GABRIEL'S STAMP on TUBE; take GABRIEL'S PICTURE.
- Select (E).
- Place GABRIEL'S PICTURE (F).
- Set dials (1-3).
- Take 2/2 PATTERN (G).
- Select RICHARD'S SPIRIT; earn RITUAL LIST.
- Walk down.
- Place PATTERNS; take HACKSAW (H).
- Use HACKSAW; take ROD and GABRIEL'S PENDANT (I).
- Go forward.
- Use ROD; take SKULL KEY (J).
- Use SKULL KEY; take WHISTLE (K).
- Use WHISTLE; take FEATHER (L).
- Walk down, right.
- Place FEATHER; take GABRIEL'S CODE (M).
- Place GABRIEL'S CODE; enter 5-3-8; take MYSTIC PYRAMID (N).
- Place RITUAL LIST, GABRIEL'S BLOODY HANDKERCHIEF, GABRIEL'S PENDANT, and MYSTIC PYRAMID (O).
- Restore (A-D).

- Move pieces (E).
- Rotate pieces to blend (F).
Chapter 5: Mansion Hall
- Take 1st BED DECORATION and HAIRPIN (G).
- Take NEWSPAPER (H).
- Use NEWSPAPER and HAIRPIN; select newspaper; select key (I).
- Go forward.

- Take 2nd BED DECORATION (J).
- Place 2 BED DECORATIONS (K).
- Solution (L).
- Take BOX (M).
- GABRIEL'S STAMP on BOX; take PATTERN HANDLE and 1/2 BED DECORATION.
- Walk down.
- Open door, move coat, and place PATTERN HANDLE (N).
- Go right.
- Select RICHARD'S SPIRIT; earn ACTIVATOR.
- Use GABRIEL'S STAMP; take 1/2 WOLF STATUE and GABRIEL'S RING (O).
- Use ACTIVATOR; take 2/2 BED DECORATION (P).
- Walk down, forward.
- Place BED DECORATIONS; take STATUE (A).
- Place STATUE; take KNIGHT and SCOOP NET FRAME (B).
- Walk down.
- Place KNIGHT; take 2/2 WOLF STATUE (C).
- Go forward.
- Place WOLF STATUES; take 1/2 BAS-RELIEF and GABRIEL'S LOCKET (D).
- Use GABRIEL'S LOCKET and GABRIEL'S RING; take DRAWINGS (E).
- Take SYMBOL SET from DRAWINGS.
- Walk down, right.

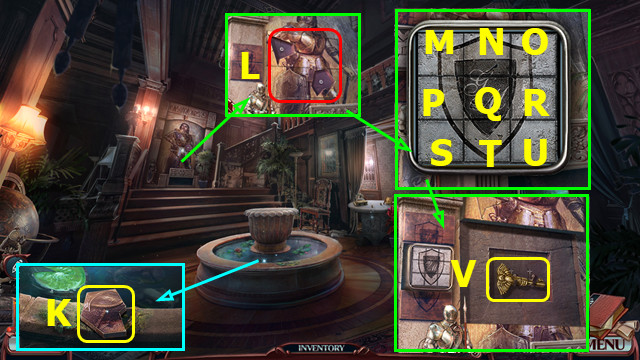
- Place SYMBOL SET; select (1-4); take GEAR.
- Place GEAR; take PIPE PIECE (G).
- Use PIPE PIECE (H).
- Play HOP; earn LOCK ADJUSTER (I).
- Replace LOCK ADJUSTER; take SCRAPER (J).
- Walk down.
- Use SCRAPER; take 2/2 BAS-RELIEF (K).
- Place 2 BAS-RELIEF (L).
- Drag (N-M)-(T-N)-(T-S)-(Q-R)-(O-R)-(Q-P)-(N-O)-(R-O)-(N-M)-(U-O).
- Take GOLDEN KEY (V).
- Go forward.
- Use GOLDEN KEY; take KNIFE (A).
- Move drape; use KNIFE; earn NET and 1st GLOWING STONE (B).
- NET on SCOOP NET FRAME; take SCOOP NET.
- Walk down.
- Use SCOOP NET; earn ACID (C).
- Go right.
- Use ACID; take BROKEN PUNCH CARD (D).
- Place BROKEN PUNCH CARD; press button (E).
- Select (F).
- Solution Gx2-Hx2-1x2-J-K-Lx2-M-N-O-P-O-Q-R-S-T-S.
- Select (U).
- Talk; earn OLD ARTIFACT (A).
- Remove ANCIENT MARK from OLD ARTIFACT.
- Place ANCIENT MARK; take SCROLL (B).
- Walk down.
- Place SCROLL; take ANCIENT FOLIO (C).
- Go right.
- Place ANCIENT FOLIO; take WRENCH and 2nd GLOWING STONE (D).
- Use WRENCH; move items; take DEATH AMULET (E).
- Walk down, forward.

- Place DEATH AMULET; take GOLDEN FRAGMENT (F).
- Place GOLDEN FRAGMENT (G).
- Play HOP; earn 3rd GLOWING STONE (H).
- 3 GLOWING STONES on OLD ARTIFACT; take AMULET OF PROTECTION.
- Walk down, right.
- Use AMULET OF PROTECTION (I).
- Select random symbols (J) as they appear (K).
- Select sets L-Q.
- Congratulations! You have completed Grim Tales: The White Lady!
Created at: 2017-09-01