
Walkthrough Menu
Tips and General Information
- After the game logos you will be asked to create a profile. This profile will be auto-saved throughout the game unless you start a new game or switch profiles if more than one. Click on the “Player Profile” button (located at the bottom of the screen), to add or delete profiles.
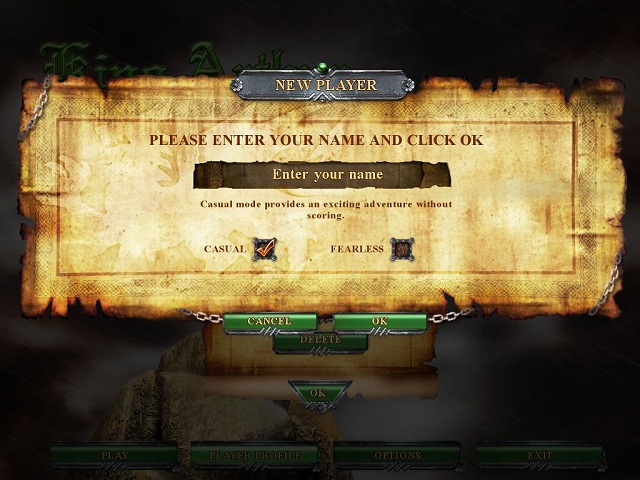
- Once you type in your name you can either default to casual mode (already selected) or switch to fearless mode. Fearless mode is definitely that. You will not receive any hints and you will also play for points. Mistakes will also cost you points.
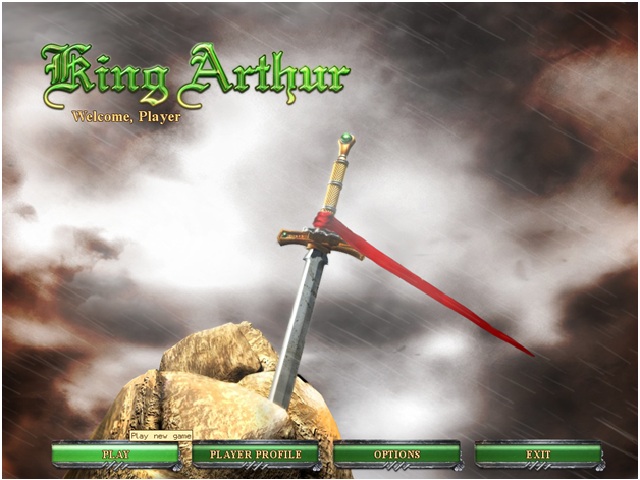
- The main menu is your "home" page. Here you can select the options for the game.
- Sound and Music can be addressed by individual sliders.
- You have the option to choose an in game special cursor.
- Full Screen is the default, it is switchable to windows mode.
- High Score: Fearless mode only, keeps track of the points you receive.
- Credits: Everyone who had fun making the game.
- You cannot exit the game during a mini game. You can however, skip it (once the bar at the bottom of the screen is full) to progress on.
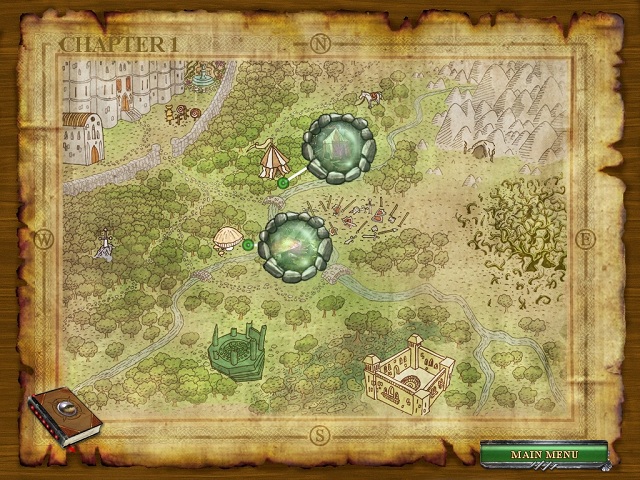
- Game Map: Once you assemble the map, you can access it to go to your next tasks. Active locations are shown on the map and are non-linear within a chapter. When you begin play and when you exit a screen you will revert to the game map. This allows you to try different quests at the same time and complete them later.
- Menu: to exit the game or access game options, click on the menu button.
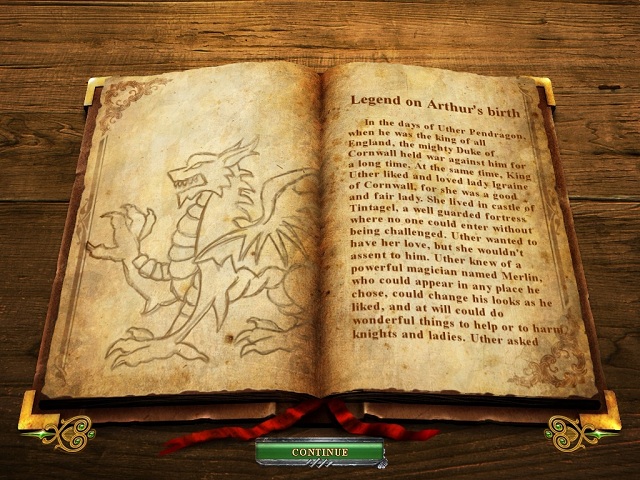
- Journal: During the beginning of the game progression, Merlin will give you access to his journal. At certain points during the game will note that the journal has been updated and you can read the extra parts of the story there. The journal can be accessed at any time at the left corner of the game map.
- Hints: King Arthur uses a unique hint system. The player accomplishes a few tasks before they are rewarded with hints. The hints are active in screen 3. The player is not entirely alone prior to then. Pieces of the staff and the runes are illuminated by sparkles to give them the hang of things at the start. After that they must ask for a hint to get one. To replenish spells, there are runes scattered throughout the screen (except for the mini games). The game will only allow the player to pick up the runes that are needed. There is no specific order needed. However, if you use a spell, you can immediately in the same game screen (before advancing) load up your spell again, so it is ready when you need it again.
- At the launch of each mini game you will be given a short gameplay description that can be accessed at any time during the mini game by the ? at the bottom of the screen.
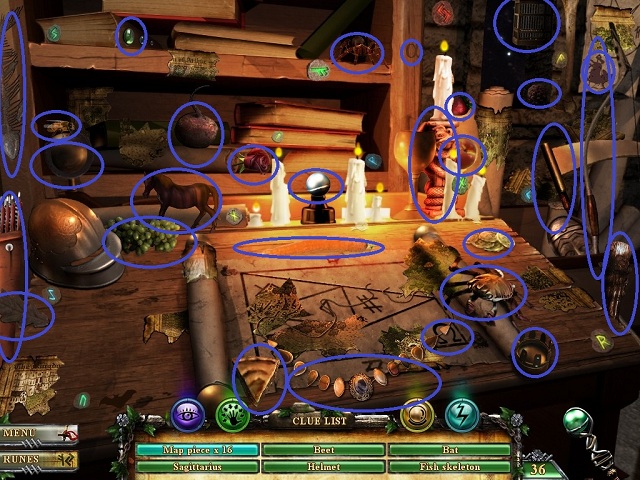
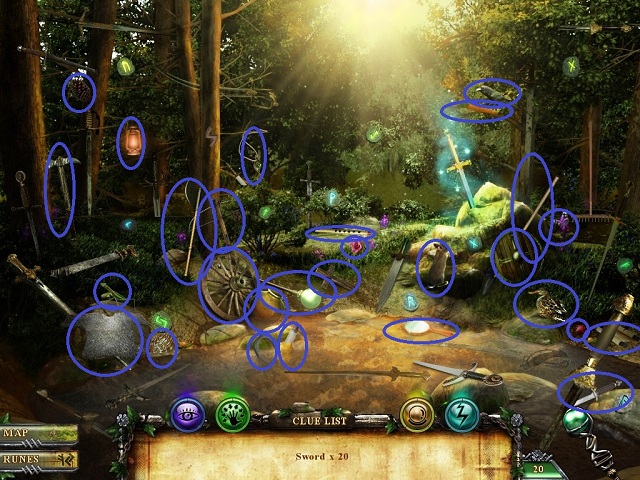
- Note: This walkthrough shows all the screens of the game, but because of the somewhat non-linear map system, it may not be the same order as played. Also, because of the random selection of objects in the screen, all potential objects have been circled, but you will be asked to find only a certain number of them for each game. Please use this walkthrough sparingly as there are no soft hints here, only massive spoilers!
- King Arthur is a hidden object puzzle game with two modes of gameplay. Merlin is the guide throughout the adventure. He will tell pieces of the story and early on the player is given the opportunity to read a little further text. Merlin will also give some explanations to upcoming gameplay.
Chapter 1
- Your first task is to help find and set up Merlin's magic staff:
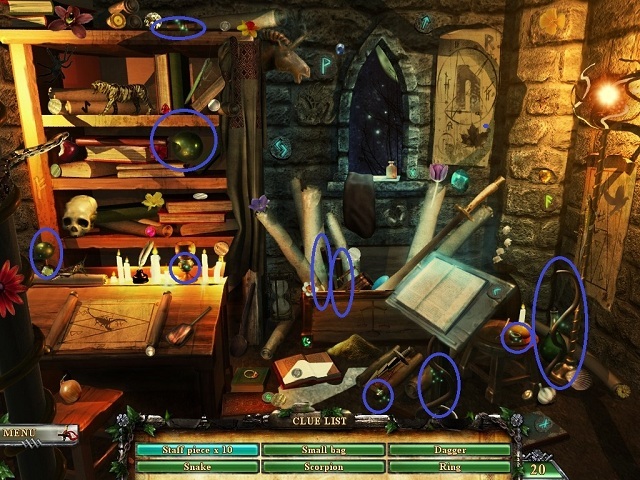
- After you find all the pieces of the staff you will be asked to find several objects in the room.

- Merlin has another task for you. You must find 12 runes.
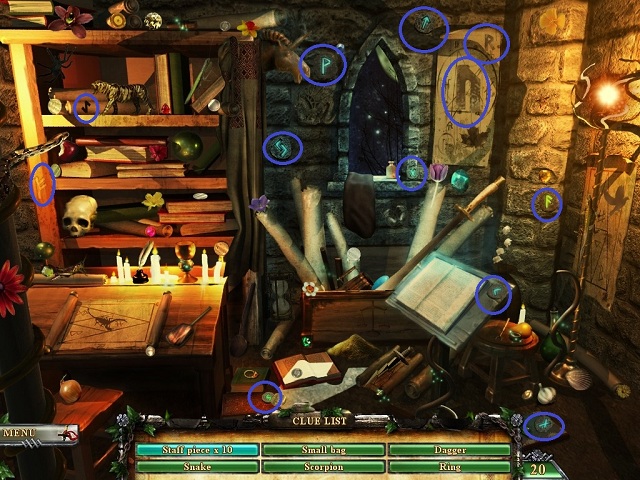
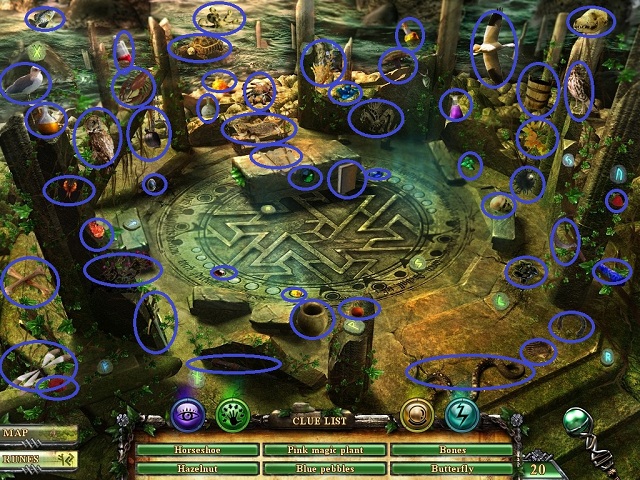
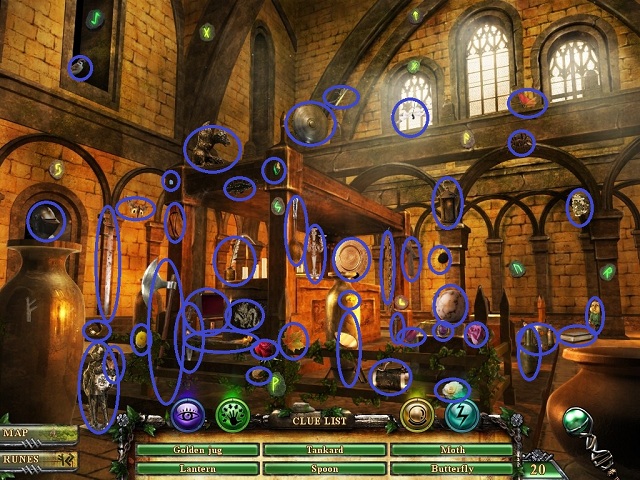
- You will now need to find objects according to the clue list. See previous screenshot (combined objects).
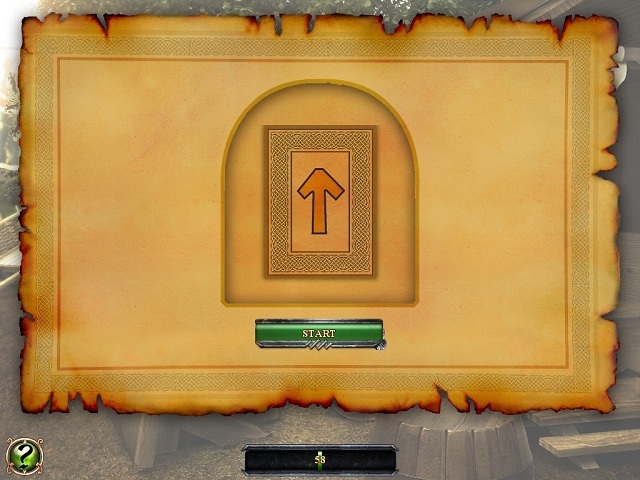
- You see a series of rune cards and must decide whether the next matches or doesn't match. (In fearless mode you will lose points for every wrong answer.)
- After Merlin speaks, click on the desk.
.jpg)
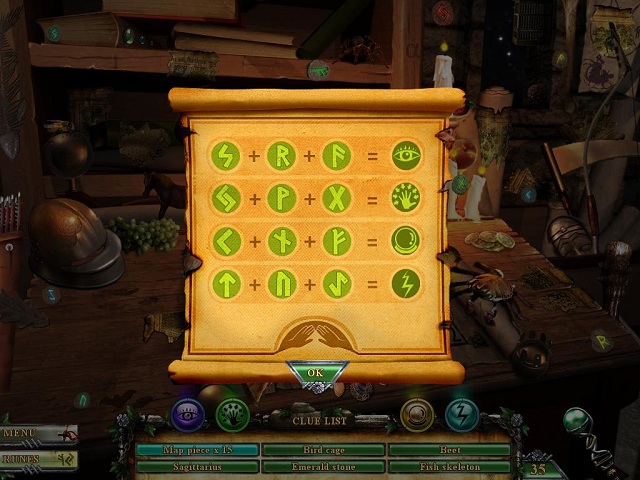
- Merlin explains the hint system based on runes. From this point on you can use 1 of 4 spells in order to find objects. The spells can be replenished by finding the correct combination of runes shown in the runes menu.
- Now in this game screen you will see some glowing orbs above the clue list. These orbs are your hint spells. When you want to use a hint, simply click on the spell you would like to use and then select the object you would like it to find. If you click on each spell, Merlin will explain them as well.
- Blue Glowing Eye: Visibility spell. When you use this spell Merlin's staff will shoot some magic dust that will circle the object. This is brief so watch carefully.
- Green Hand: Drawn spell. When you use this spell it will draw all outstanding objects to you.
- Yellow Crystal Ball Spell: Vision Spell. Magic will shoot out of the wand and land on the object with a circle.
- Blue Lightning: This will zap the object you need to find.
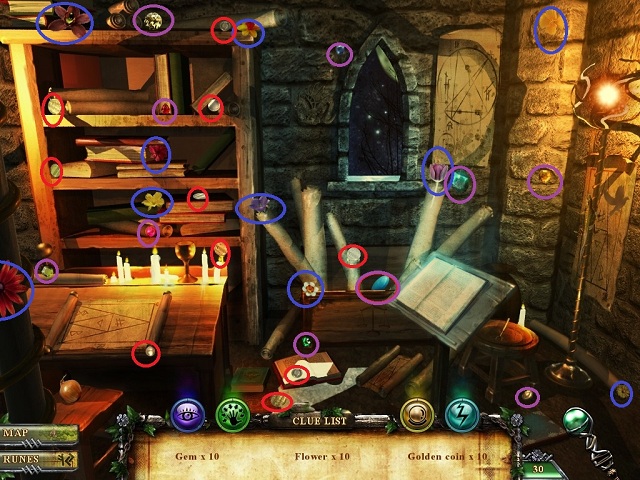
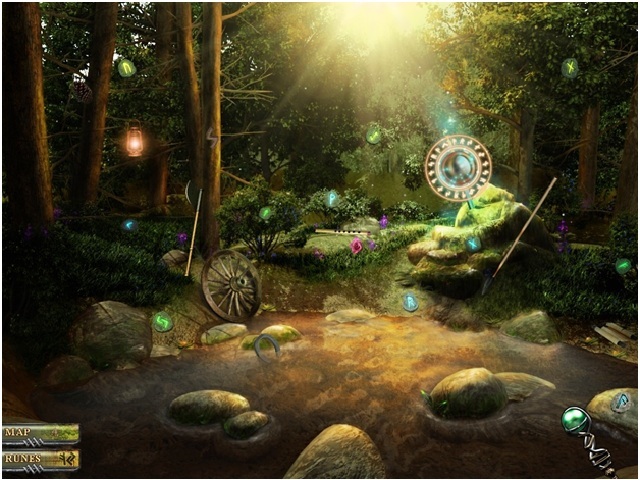
- There are 15 map pieces to find in this screen.
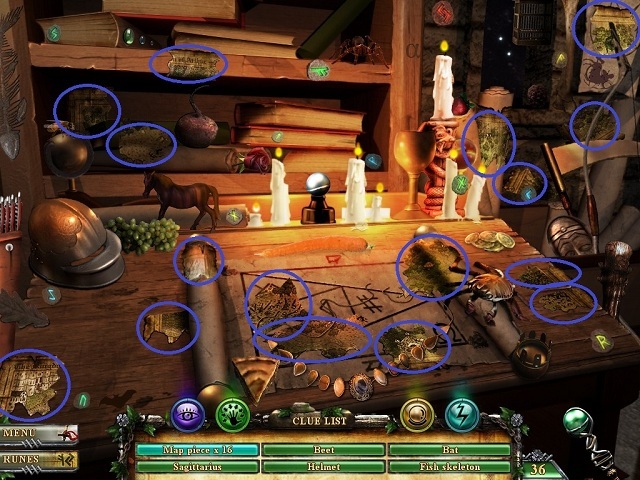
- Find the objects in the clue list.
- Merlin will ask you to assemble the map.
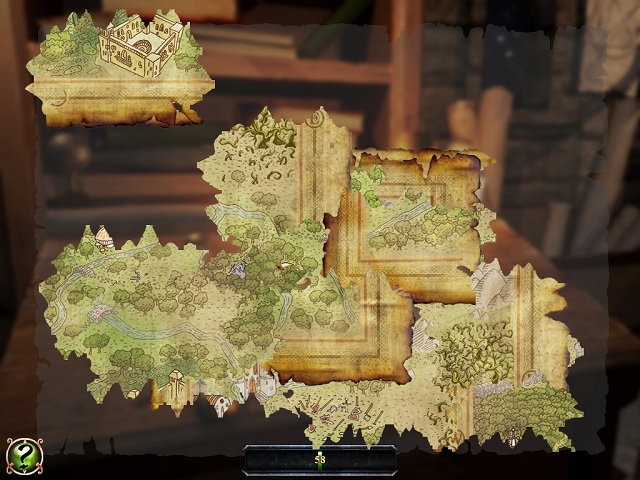
- Once the map is assembled you will enter the game from that point to go back into the game. You can exit to the map at any time. The game will save your progress in the quest and you can go back to it at any time even if you choose another quest. You must finish all quests available in order to progress in the game however.
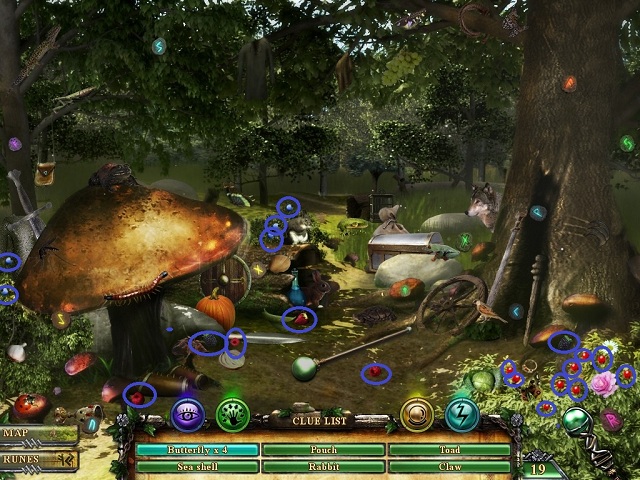
- Find the objects that pictured in the clue list.
- Find objects as per the named items in the clue list.
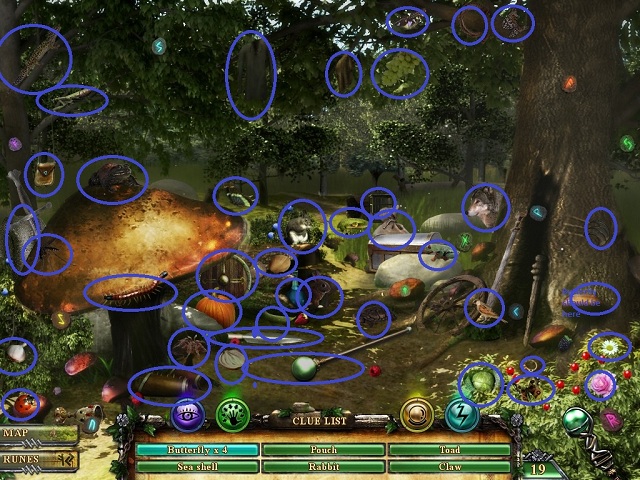
- Find and collect 20 berries in the picture.
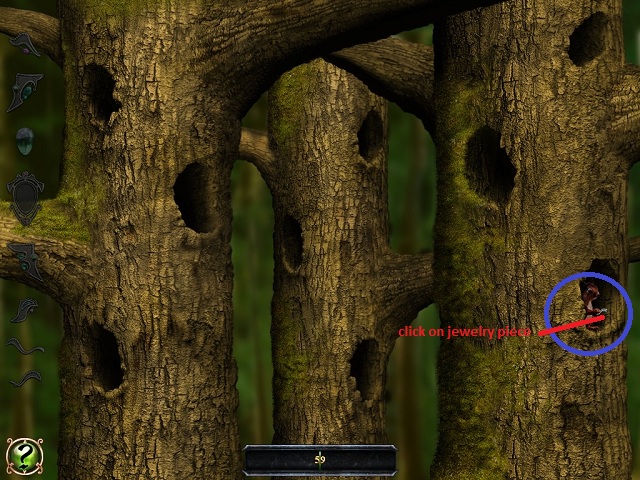
- The playful squirrel has taken pieces of a necklace. Try to grab the pieces quickly before he goes back into the hole and comes out another one.
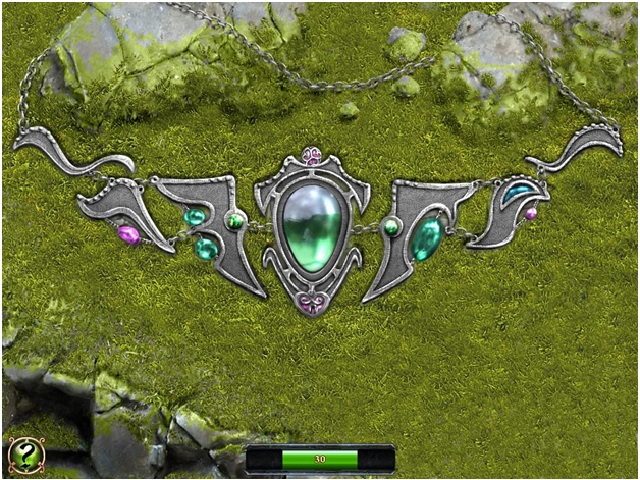
- Assemble the necklace by placing the pieces in the designated spots as per the shapes in the grassless areas.
- Find and gather 10 flowers, 10 gems, and 10 coins.
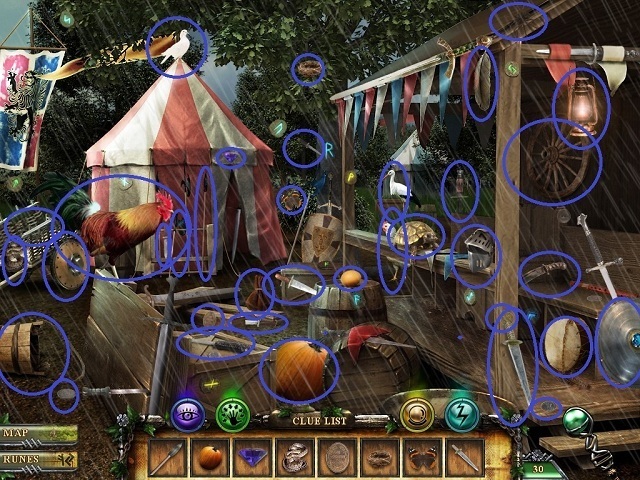
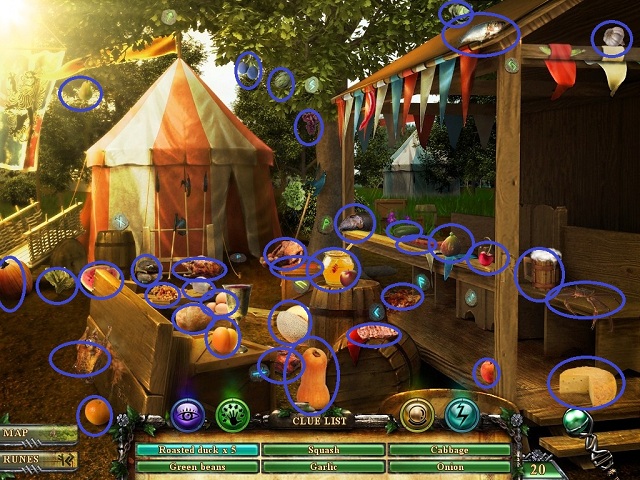
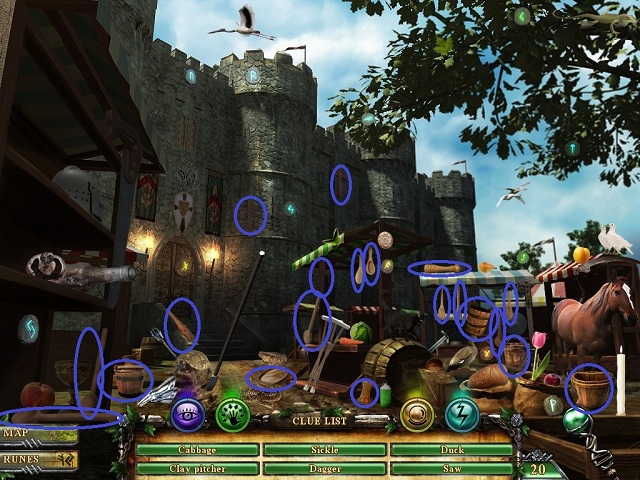
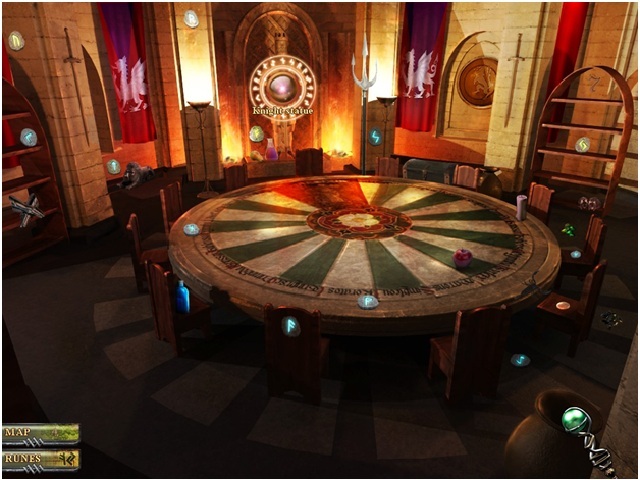
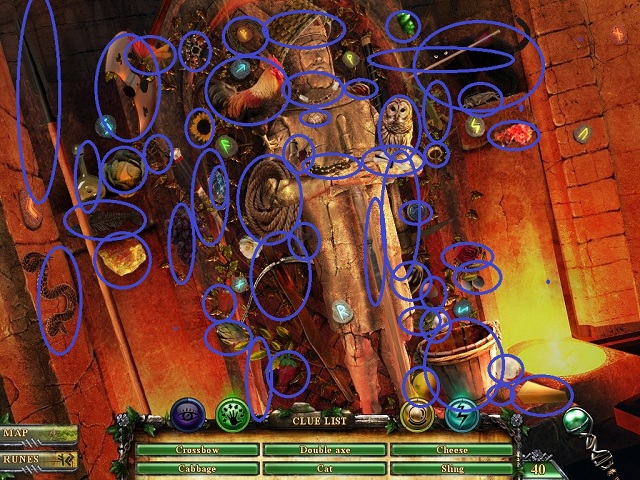
- The Knights in the tournament need to keep up their strength. Find the named food objects in the clue list to feed the hungry knights.
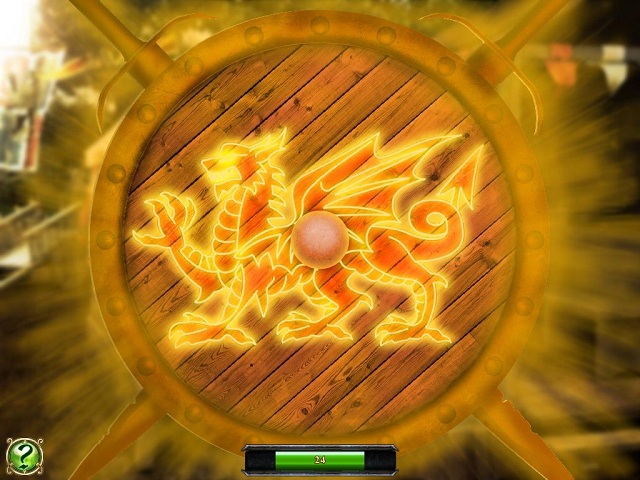
- You need to rotate the dials to complete the picture by clicking and dragging with your mouse to turn the dials.
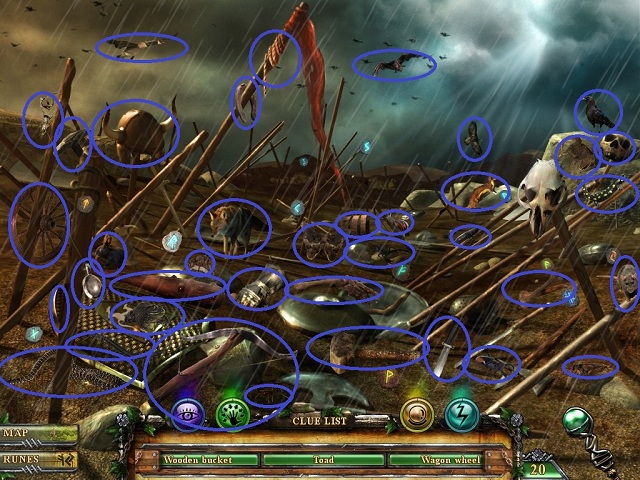
- Find 20 hidden swords in the wood. (This symbolizes some of the many valiant knights that tried to pull the sword out of the stone and failed).

- Find the objects shown in the clue list.
- You can now pull the sword out of the stone! Click on the glowing area around the sword.
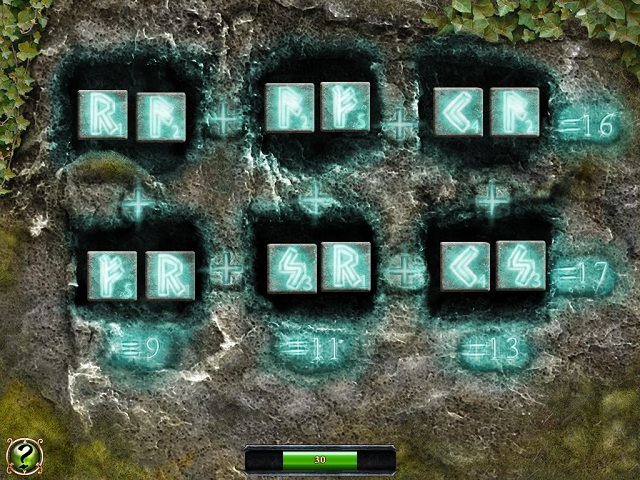
- Shuffle the runes by clicking on two of the runes to swap them until all fields are lit and equal to the numbers given. This is similar to a magic square but with some fields missing. The numbers should add up horizontally and vertically. The numbers will light up when they are correct.
- Merlin has added more of the story to the journal. Click to continue.
Chapter 2
- Find the objects in the clue list.

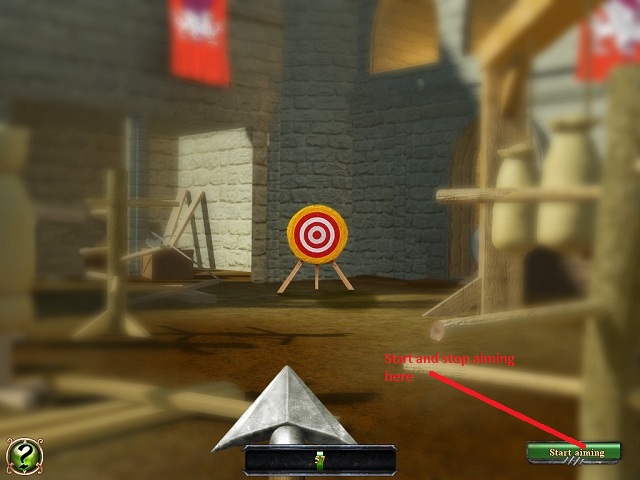
- This game is fairly simple and at casual level has no penalties. Just for fun, try to aim for the bullseye by starting and stopping the aim as vertically and horizontally you reach the middle line.
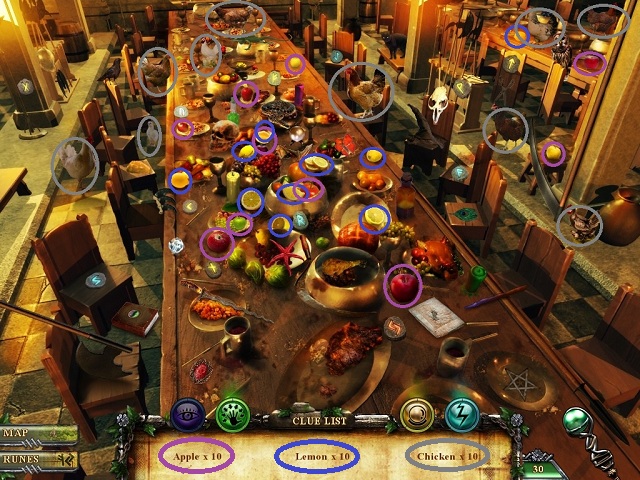
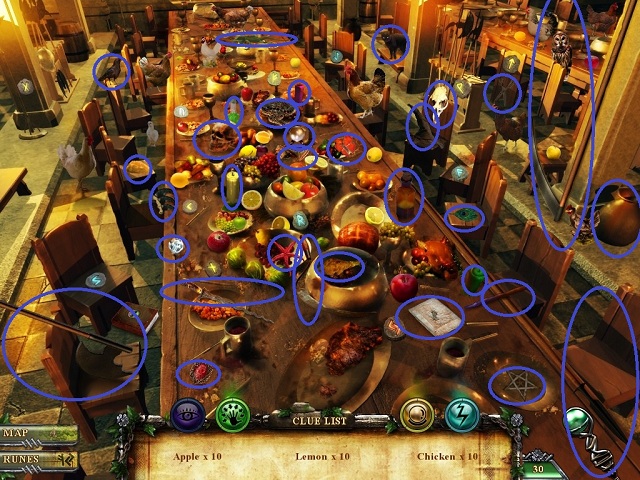
- Join the knights in the feast. Find 10 Apples, 10 Lemons, and 10 Chickens.
- Find the objects as per the clue list.
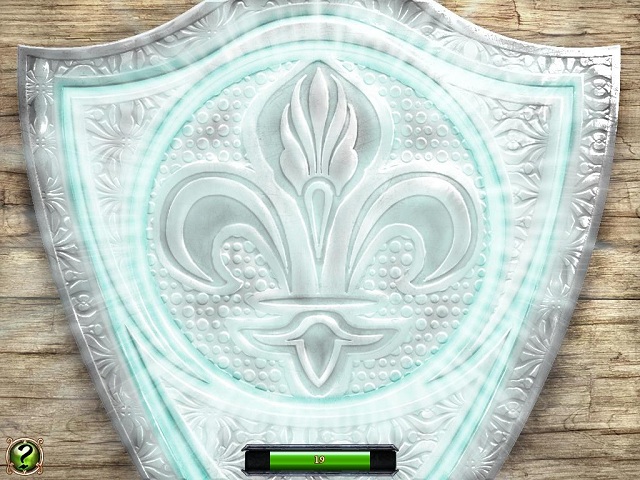
- Rotate the dials by clicking and dragging with your mouse to complete the picture.
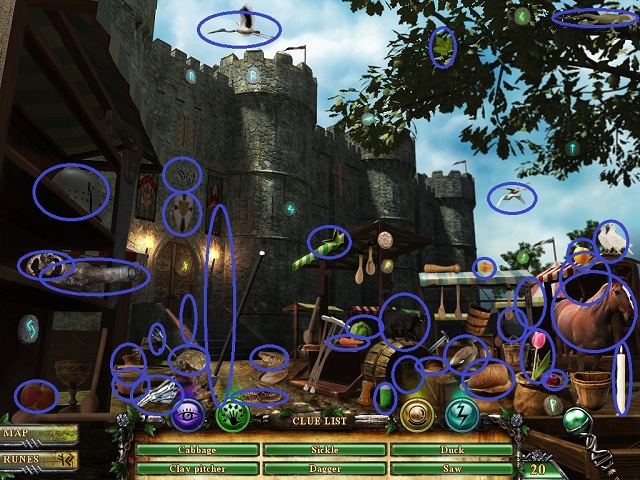
- Find objects as per the clue list given.
- Find 20 wooden objects in the picture.
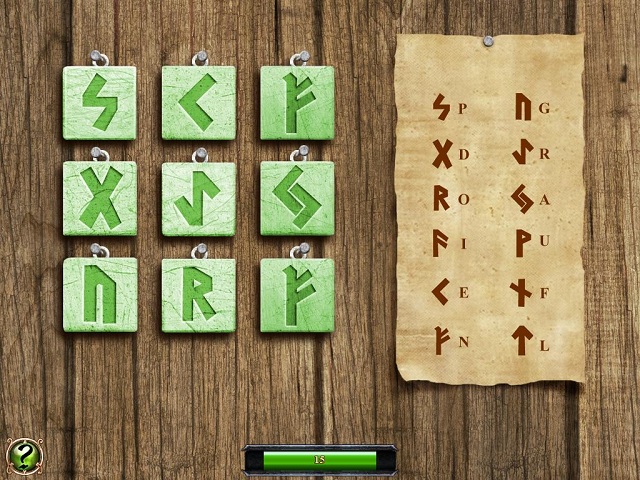
- Translate the runes on the left using the code on the right to spell Arthur's lineage: Pendragon. Click on two runes to make them swap position.
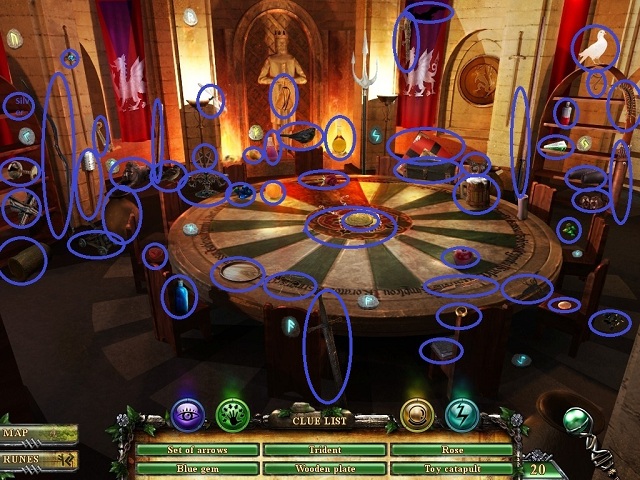
- Find the objects in the scene by following the clue list.
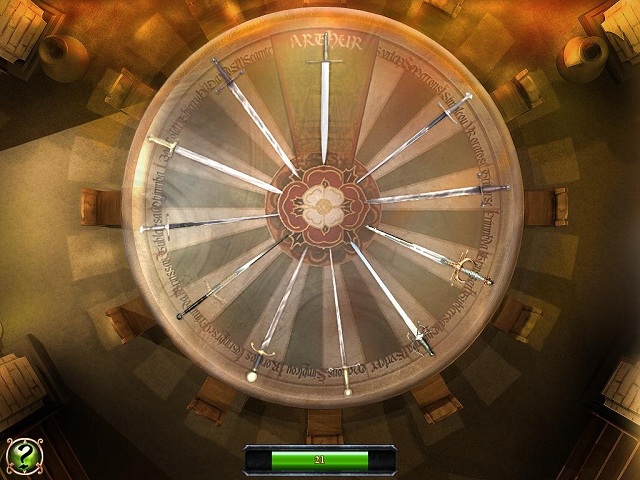
- Rotate the dials by clicking and dragging with your mouse to line up the swords to complete the picture of Arthur's round table.
- This is another match/no match game.
- After you have completed the mini game, click on the now glowing statue of the Knight.
- Find the objects as per the clue list.
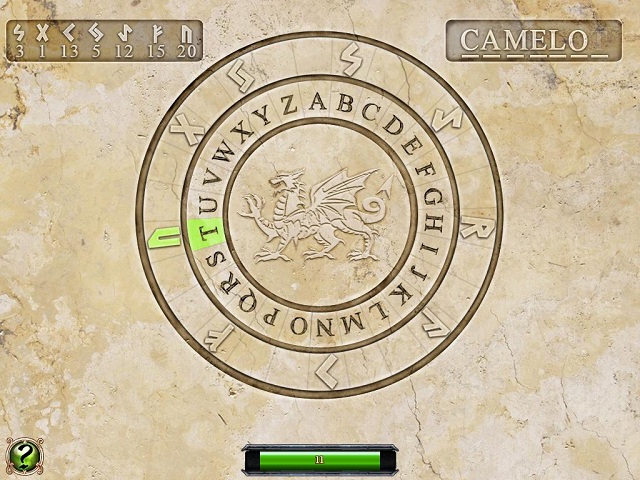
- Translate the runes into letters as per the key code on the top left. The numbers represent the position of the letter in the 26 letter alphabet. The first letter is C and so on until you spell Camelot. Turn the top dial with your mouse using the first rune. It will light up and create a letter on the top right. Continue with the following letters until the entire name is spelled out.
Chapter 3
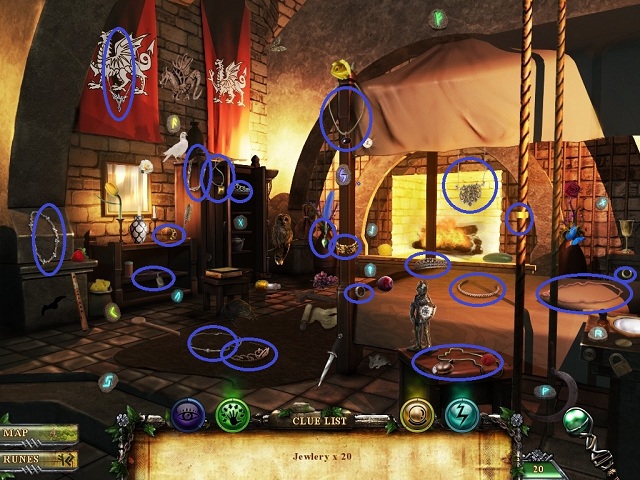
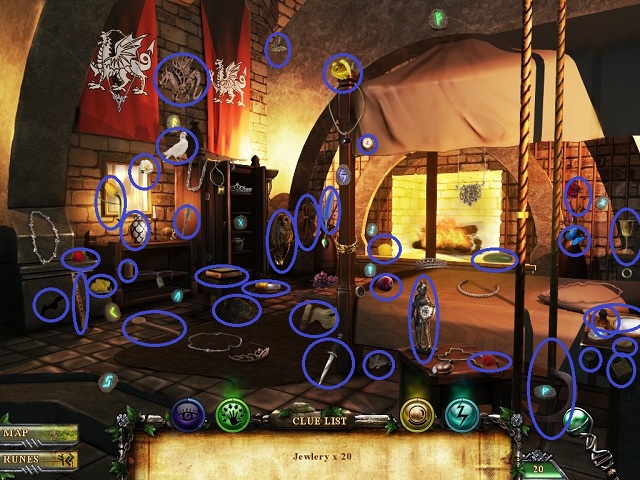
- Find Queen Guinevere's jewelry.
- Find certain objects as per the clue list.
- With your mouse drag the cipher wheel to the top (over the P) using the following combination, 4, 6, 2, 12, 9, 11. The runes must light up consecutively. If you hear a "clunk" noise you have to start over.

- When the puzzle is complete, the compartment will open up and give you a (virtual) key.
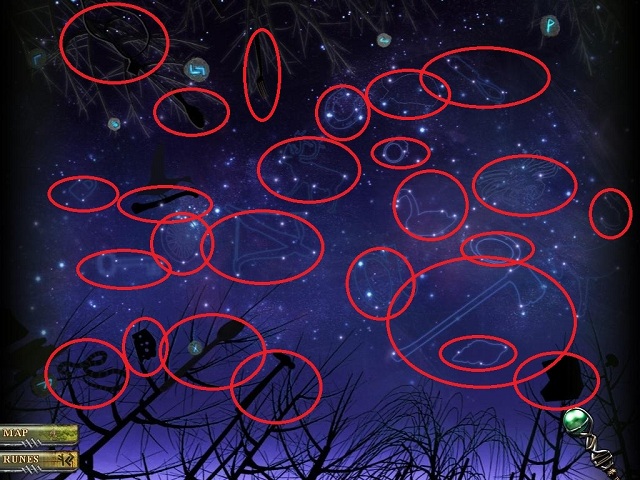
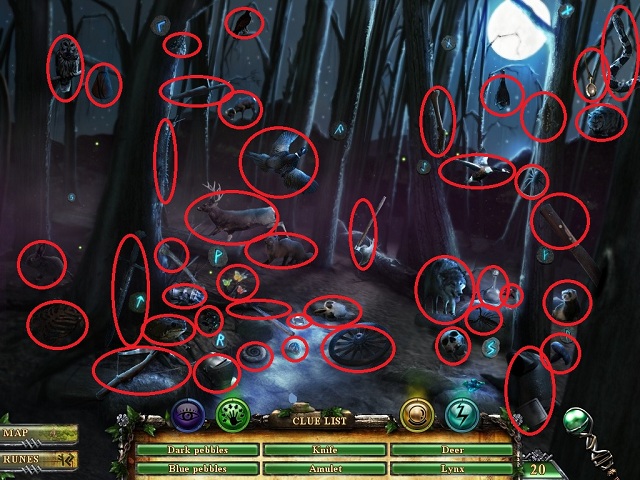
- This is a hidden object challenge with a twist. The night sky is constantly moving. Find the objects in the clue list and click on them before the sky turns.

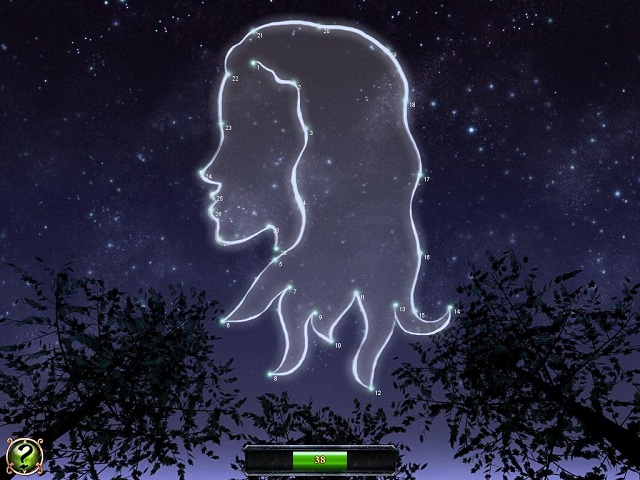
- Follow the dots by clicking and dragging your mouse to draw who Lancelot is thinking about as he wanders through the wooded night.
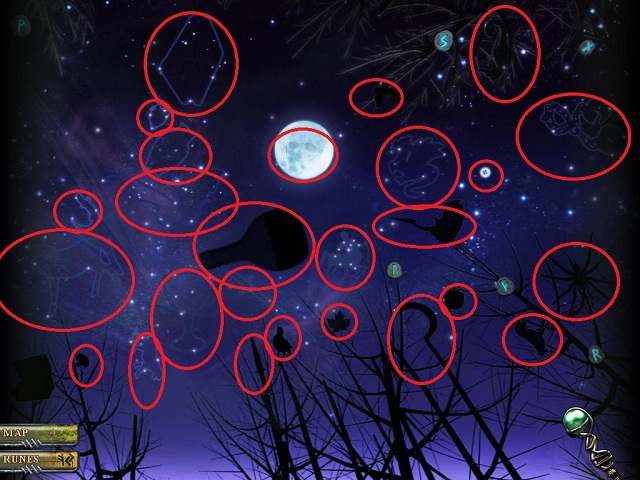
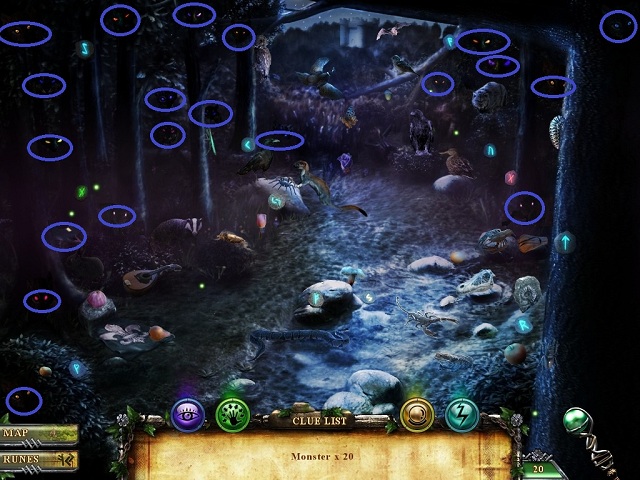
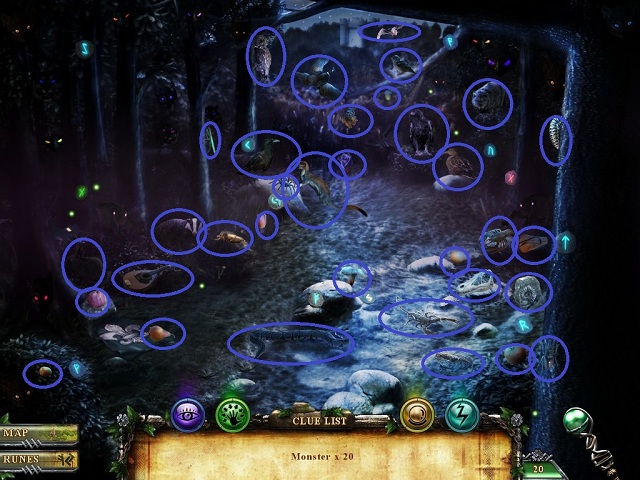
- While in the forest dreaming about his lady love, Lancelot must slay 20 monsters. Help Lance find the monsters. Look for their glowing eyes.
- Find the objects in the clue list.
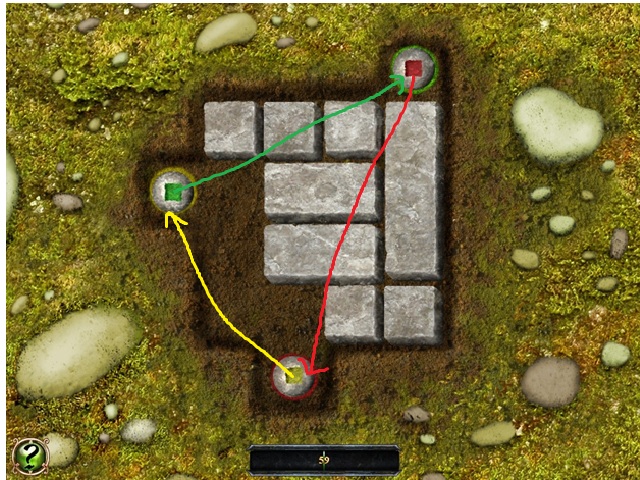
- Click on the colored pieces and blocks with your mouse and drag them into position in this slider puzzle. You must get each colored square into its corresponding color niche. There is no one solution as there are various paths to take.
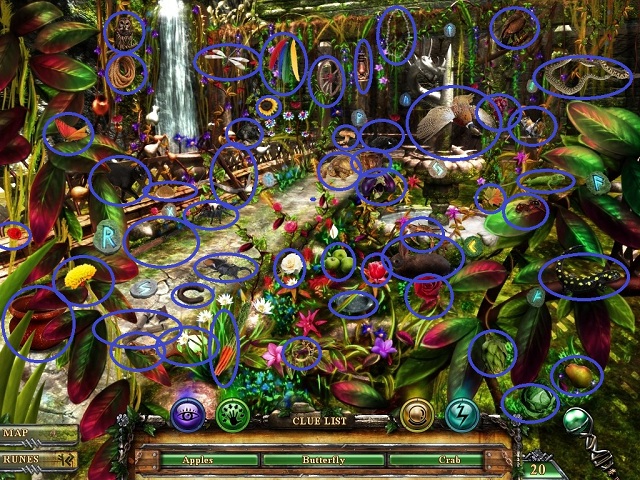
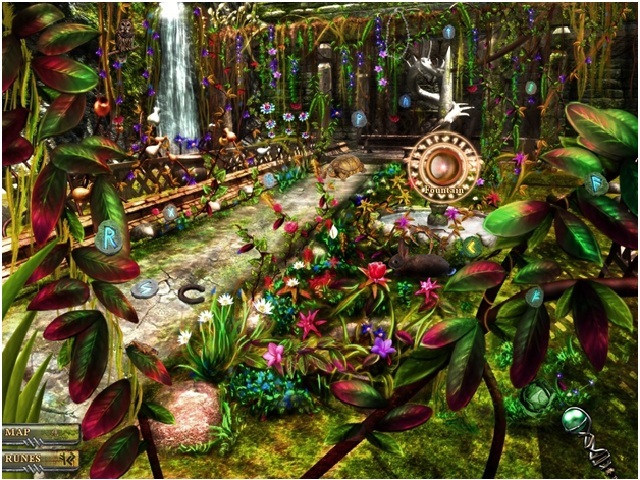
- Find the objects in the garden as per the clue list.
- The object of this puzzle is to guess how many triangles are in the picture. Turn the left dial to count up and the right dial to count down. The correct answer is 18.
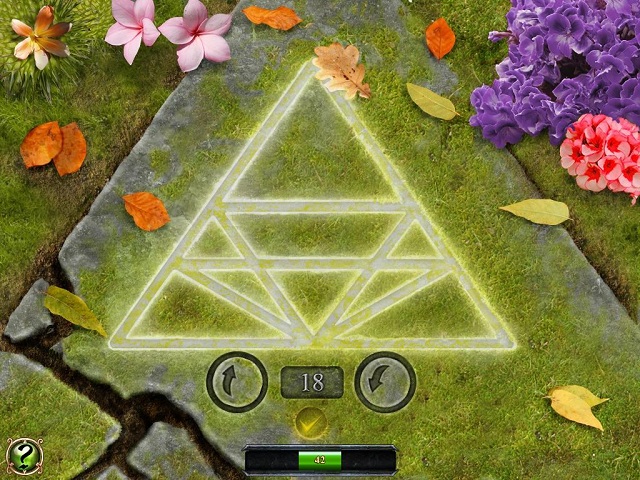
- After you complete the triangle puzzle you will be shown a secret in the fountain. Click on the glowing orb.
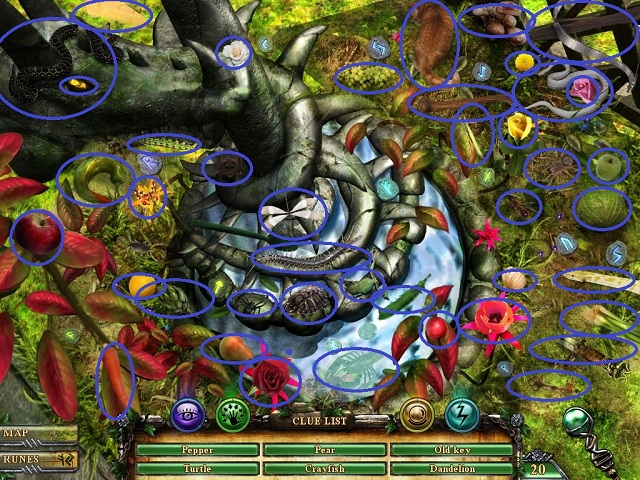
- Find the objects in the clue list.
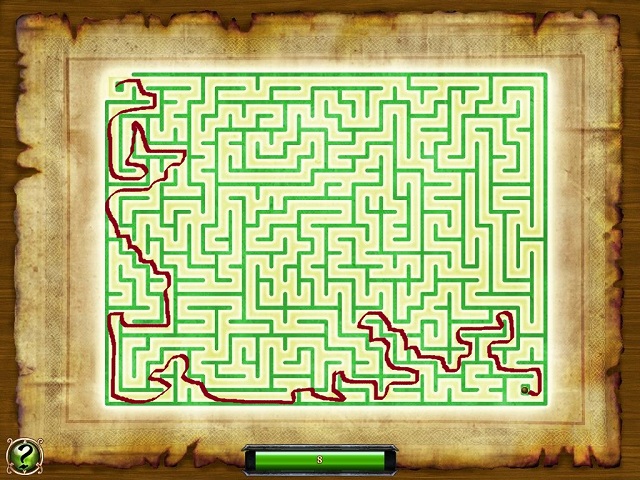
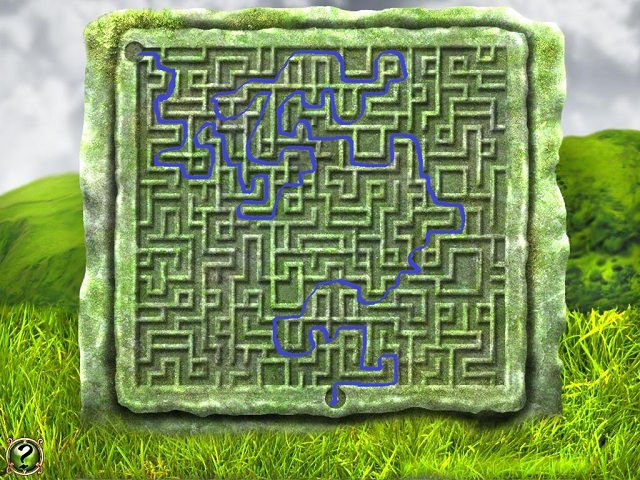
- Using your mouse, click and drag a path through the maze from the top (start) to the bottom right (end).
Chapter Four
- Find the objects in the scene as per the given clue list.
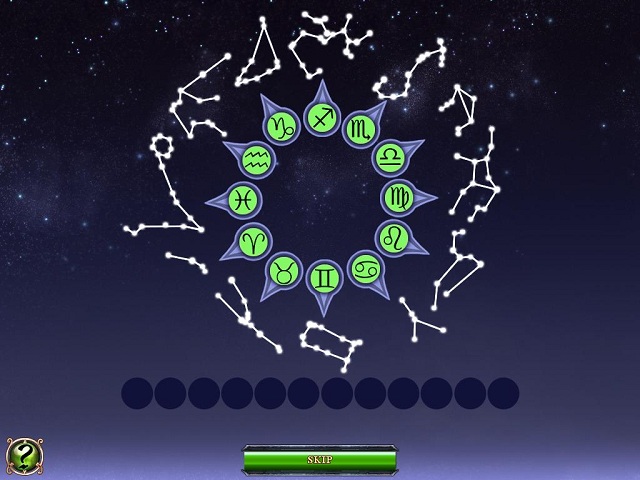
- Match the zodiac symbol with the correct constellation by selecting an astrological symbol and placing it in the correct slot. The symbol will light up when correct.
- Find the objects in the clue list.
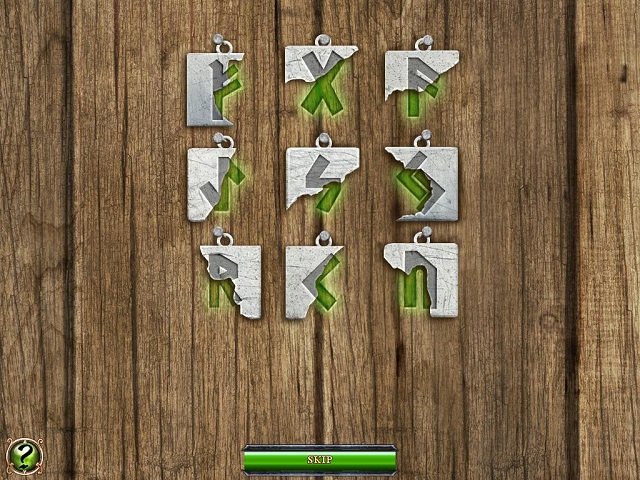
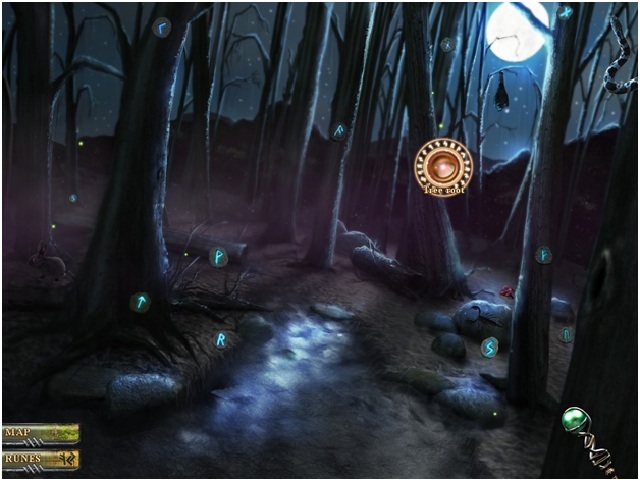
- There are nine broken runes. Click on two runes to make them change position. When the runes are in the correct position completing the rune correctly, they will light up and no further movement will be possible.
- After completing the split rune puzzle you will have access to the tree root. Click on the glowing orb.
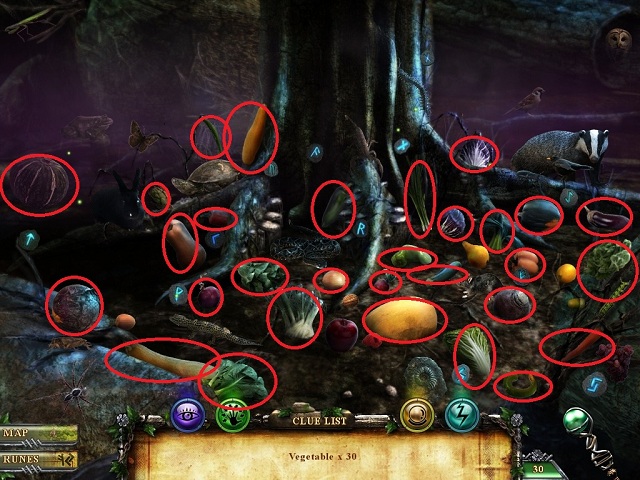
- Find 30 vegetables to feed the soldiers.
- Find all the objects in the clue list.
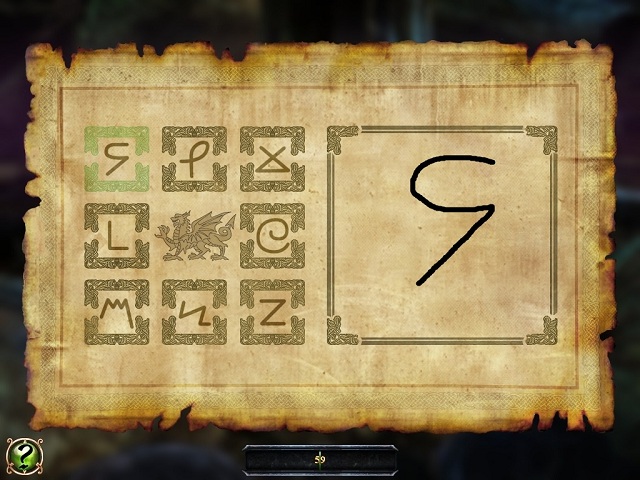
- There are eight runes to learn. The first rune will glow - starting with the top left - and you must copy it on the right by dragging the mouse in the empty square in order to draw it. The drawing has to be somewhat exact to move on to the next. But once you let go of the mouse it will reset if incorrect. Once you have successfully drawn all the runes you have learned the magic.
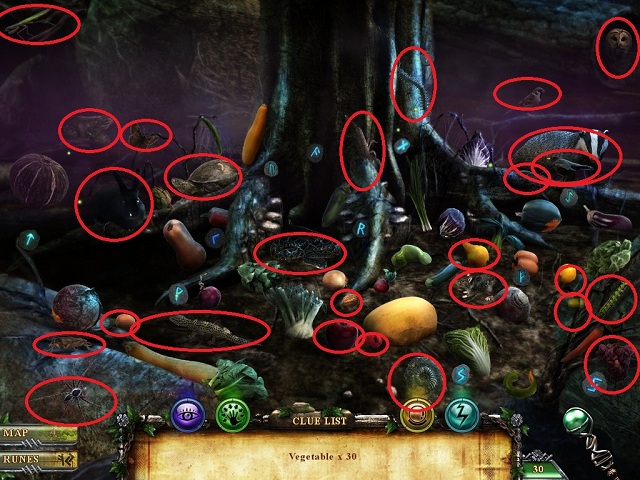
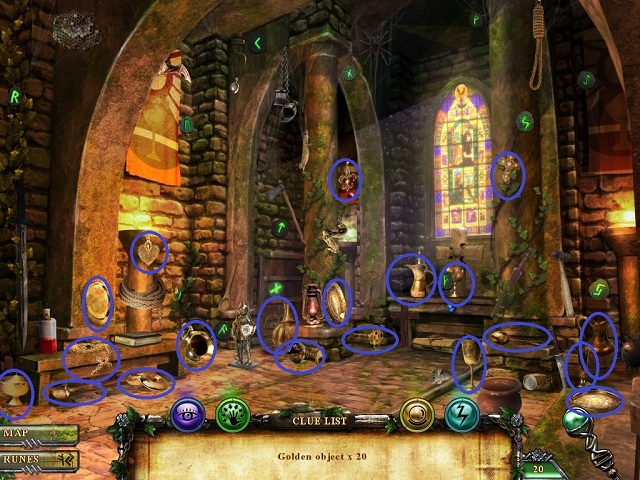
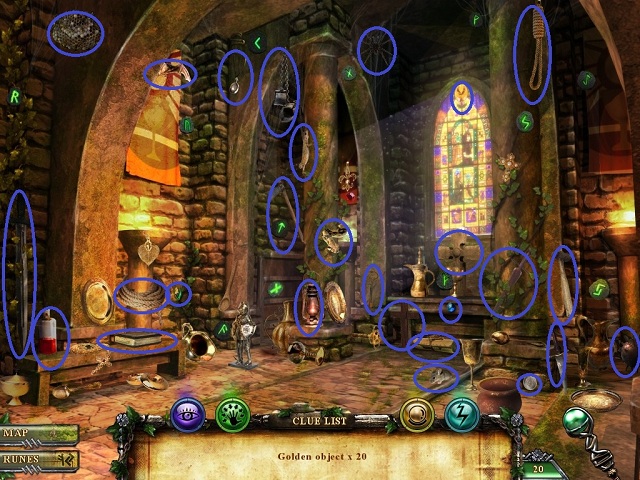
- Find 20 golden objects in the scene.
- Find the hidden objects in the scene as per the clue list.
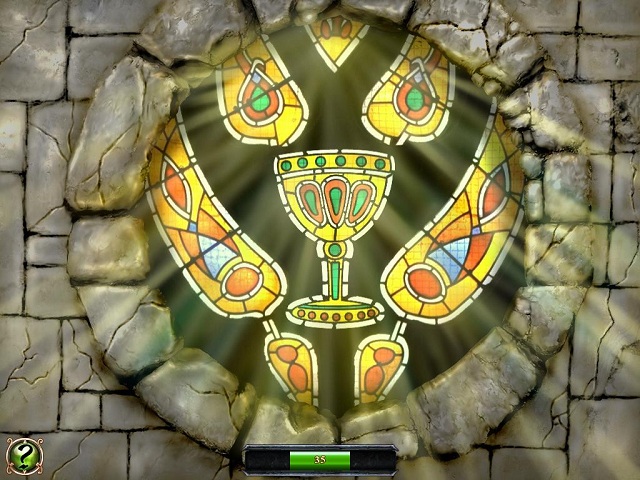
- Turn the dials by clicking and dragging with your mouse to match the picture. It will glow when correctly placed and completed.
Chapter Five
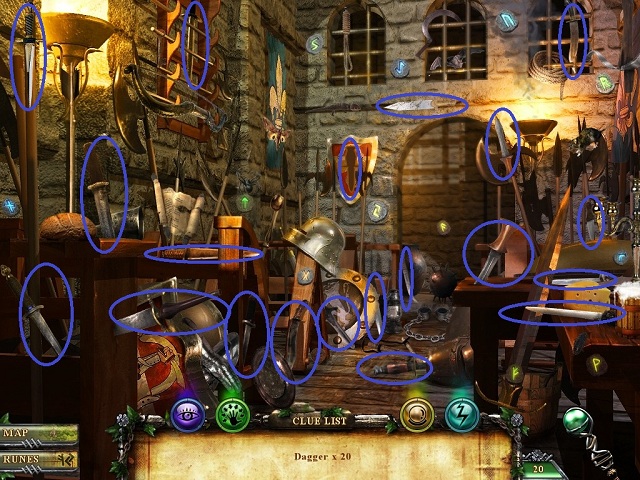
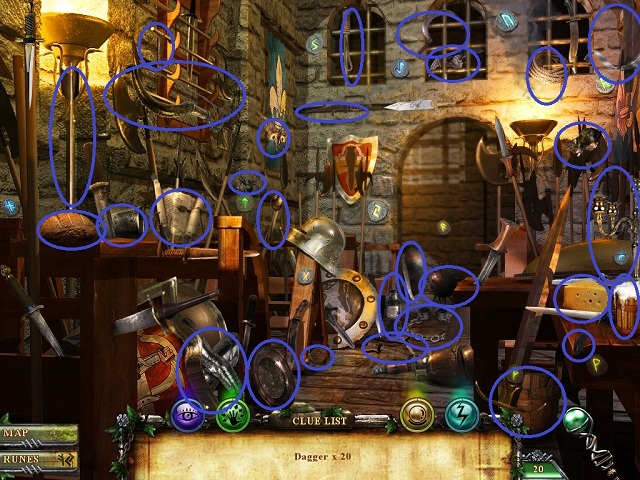
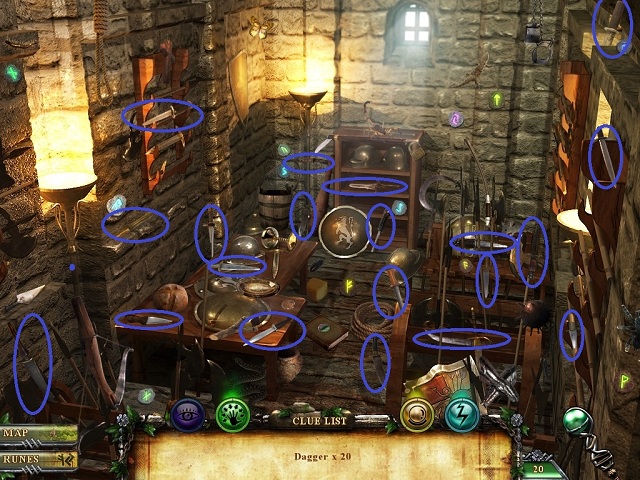
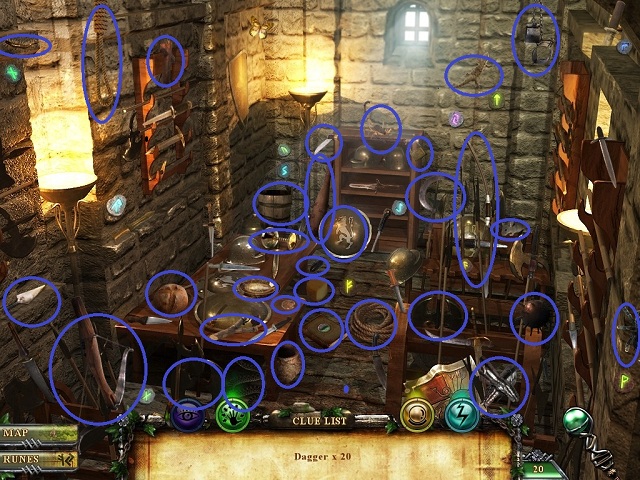
- Find 20 daggers hidden in the scene.
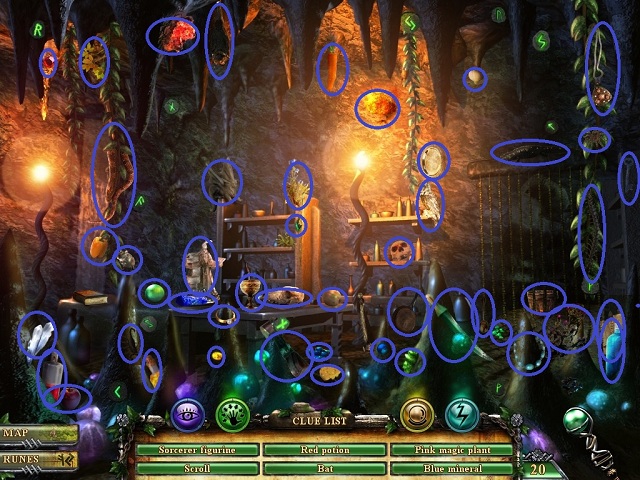
- Find the hidden objects as per the clue list.
- Find the objects from the clue list hidden in the scene.
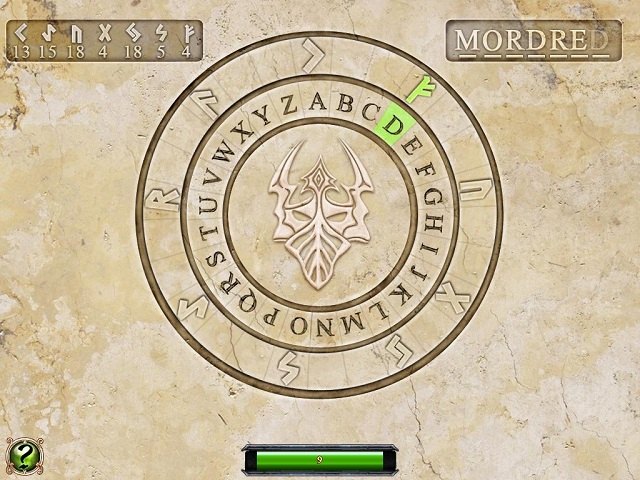
- Translate the runes into letters as per the key code on the top left. The numbers represent the position of the letter in the 26 letter alphabet. The first letter is M and so on until you spell Mordred. Turn the top dial with your mouse using the first rune. It will light up and create a letter on the top right. Continue with the following letters until the entire name is spelled out.
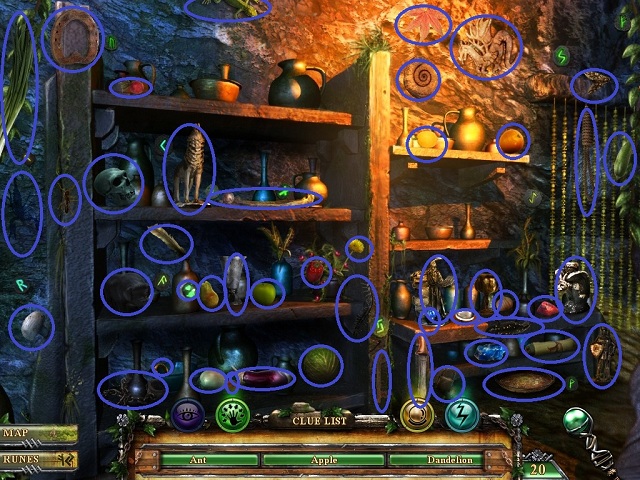
- Find the hidden objects in the scene per the clue list.
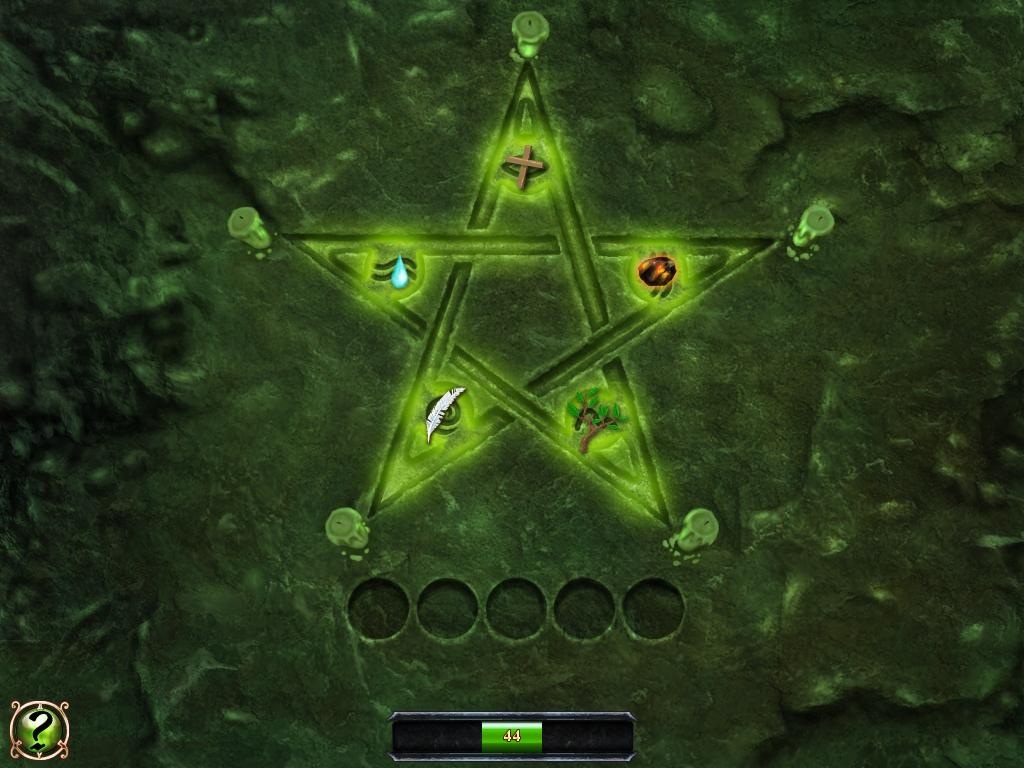
- The five points of the earth must be active in order for the magic to work. You must correctly place the elements in the right spot to light the candles. Pick up one of the elements with your mouse and place over the correct symbol. The candle will light when correct. When all five are correctly place the star will glow.
- Equip the Knights with weapons. Collect 20 daggers.
- Find the objects in the scene according to the clue list.
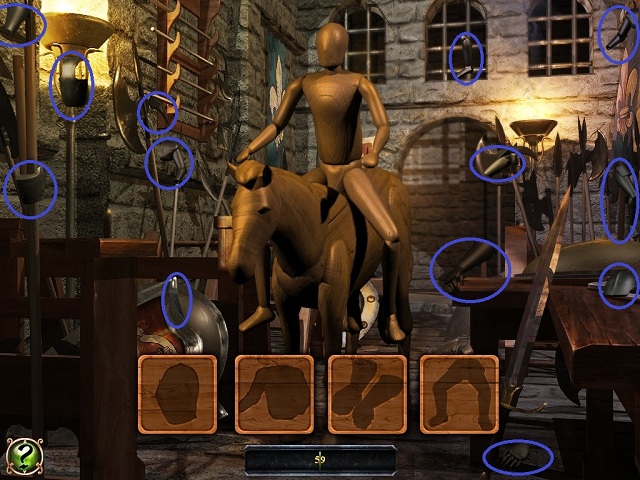
- Collect the pieces of armor in the scene and dress the knight by clicking on the completed pieces (headpiece, chest piece and so on) and clicking on the correct area on the knight.
- Find the objects in the scene according to the clue list.
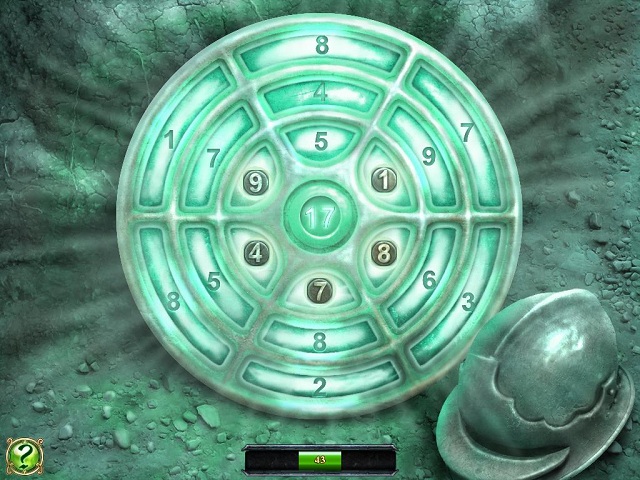
- There are five numbers to swap out. Click on two of the numbers to swap their positions. When all columns add up to 17, the puzzle is complete.
- Find all the objects listed in the clue list hidden within the scene.
- Find your way out of the maze before the fog rolls in. Starting at the top left click and drag your mouse, drawing a path through the maze to the exit at the other end.
 Congratulations! You have completed King Arthur the game.
Created at: 2010-10-08