

Walkthrough Menu
- General Tips & Information
- Part One – Wood Spirit
- Part Two – Fire Spirit
- Part Three – Water Spirit
- Part Four – Metal Spirit
- Part Five – Aether Spirit
- Part Six – End Game
General Tips & Information
- You may play this game in both full screen or windowed mode.
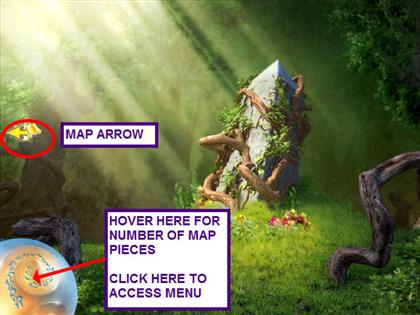
- There are two types of arrows. A standard arrow will take you to another location. An arrow with a map scroll will take you to the map.
- Locate Chromatic Lenses for hints. You will also find Scrying orbs that allow you to skip mini-games.
- Hovering over the Lightstone in the lower left corner will show the number of map pieces needed. Click on the Lightstone to bring up the menu.
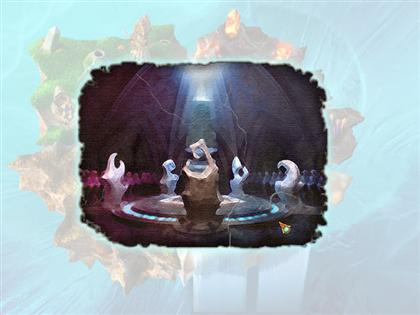
Part One – Wood Spirit
Wood Glyphstone
- There is nothing to do here in the beginning.
- Move the cursor to the edge of the screen and click when you see a map arrow.
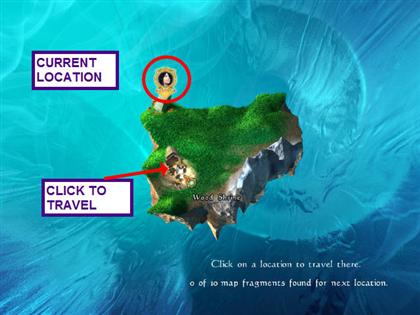
- You will now see an overhead view of a map.
- Select the Wood Shrine.
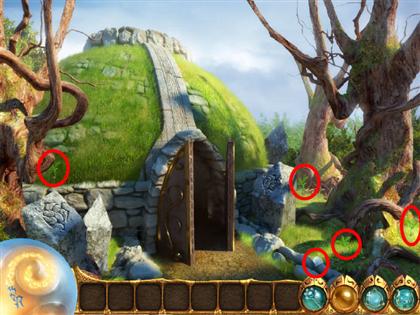
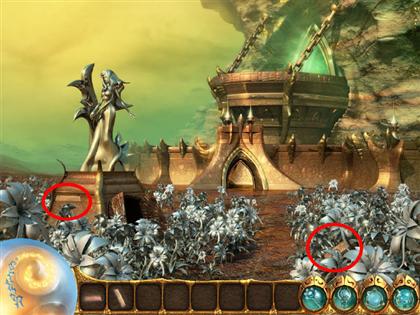
The Wood Shrine
- Select the leather tote to bring up the hidden object bubbles.
- Locate the items and drag them to the matching bubbles to create a tool.
- Use the tool to retrieve the bag. You now will have inventory spaces.
- Move the cursor to the right edge of the scene and click on the arrow to exit.

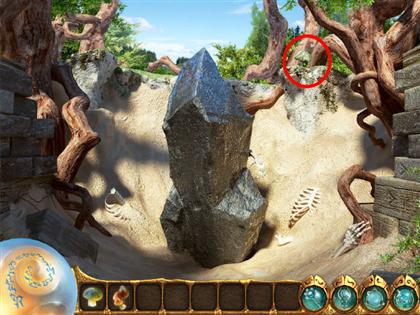
- Collect the chromatic lens.
- Collect the eight crystals.
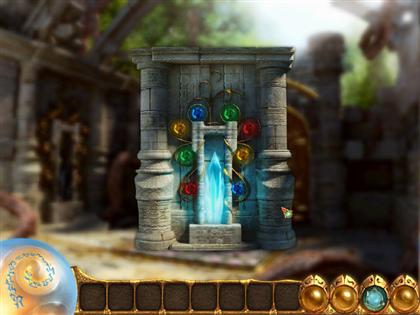
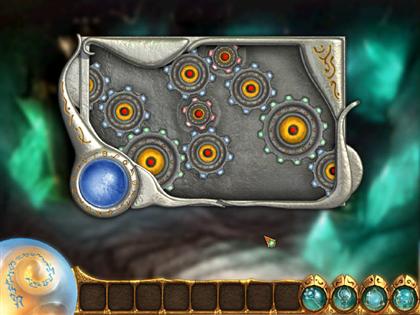
- Note the location of each flashing color; then, click on the shrine.
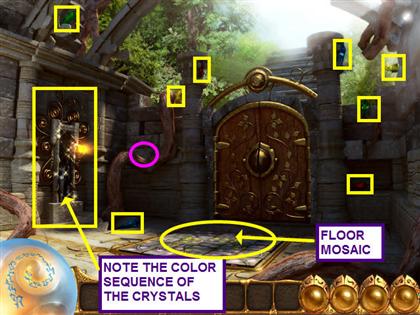
- Place the crystals in the empty slots according to the earlier flashes.
- Placing a crystal incorrectly will reset and close the puzzle.
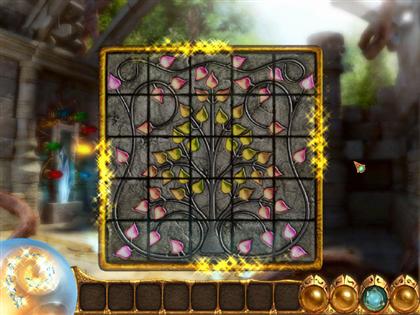
- Select the now-glowing floor mosaic.
- Click on each tile to rotate it to complete the design.
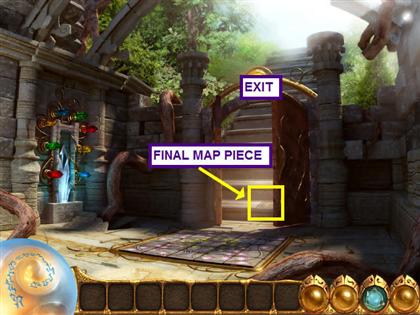
- The door opens and reveals a map piece.
- Take the final map piece.
- Click on the map arrow through the door.
- Place the pieces together, jigsaw-style, to complete the map.
- After you complete the puzzle, you are taken to the map screen.
- Select “Ancient Barrow.”
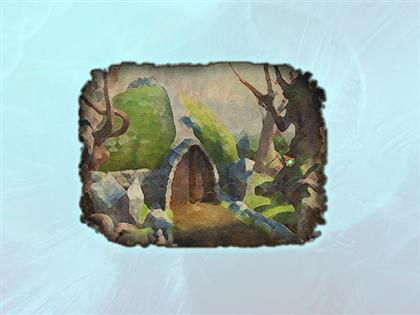
Ancient Barrow
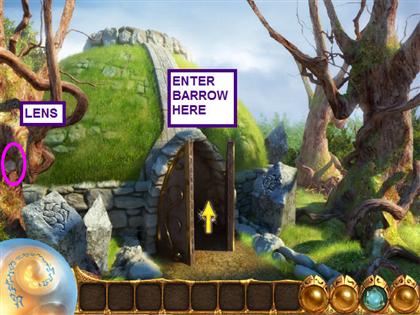
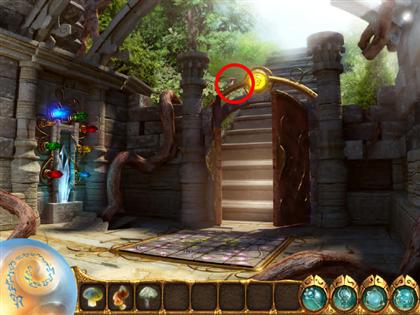
- Talk to the tree-man. He will reveal his name to you, if you retrieve his wand.
- Take the chromatic lens.
- Click on the arrow and enter the barrow.
- The door slams, and you are locked inside the barrow.
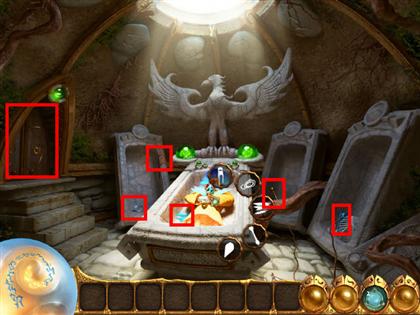
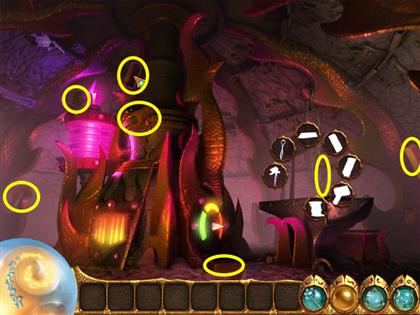
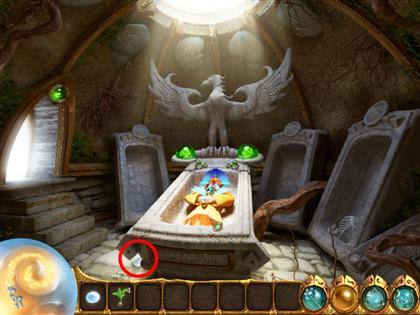
- Locate the eight statue pieces and replace them on the statue.
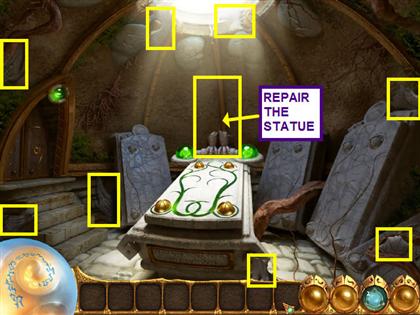
- Select the wand in the mummy's hands to activate a hidden object bubble.
- Locate all the hidden objects and place them in the bubbles.
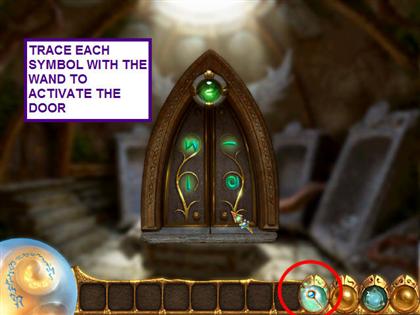
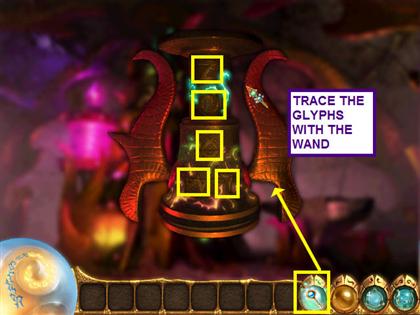
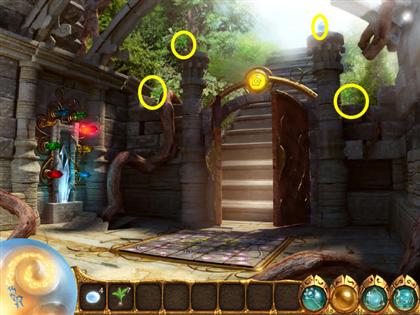
- Click on the door.
- Use your wand to trace each glyph to activate the door.
- Exit the barrow.
- Talk to the tree-man; he wants a different wand.
- Find the map arrow on the center, right edge of the screen.
- Place the pieces together, jigsaw-style, to complete the map.
- Select Oracle's Hermitage on the map.
Oracle's Hermitage
- Select the bridge control mechanism on the lower right.
- There are three puzzles here. Each one will elevate a section of the bridge.
- Swap the pieces to match the solution picture by clicking on adjacent pieces.
- Take the chromatic lens.
- Take the four map pieces.
- Click on the stair controls and locate the hidden items.
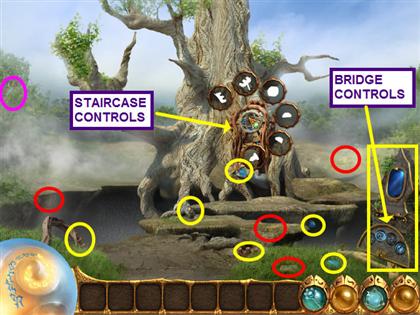
- There are four puzzles here, each one activating a section of stairs.
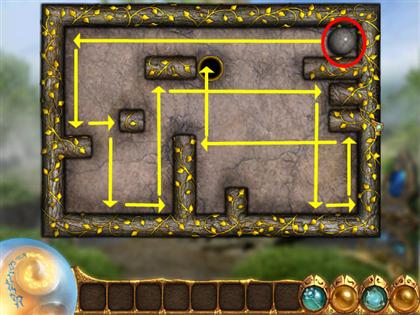
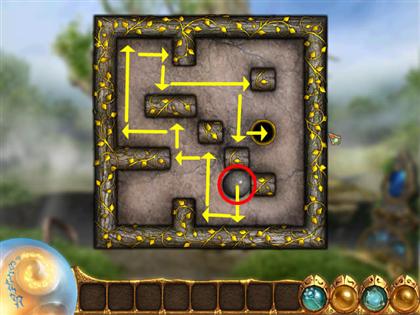
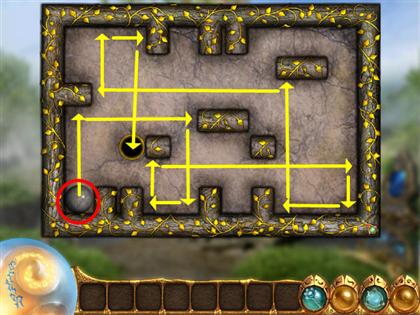
- The object of these mini-games is to move the sphere to the keyhole.
- Click in front of the sphere to make it roll forwards.

- Take the two map pieces that appeared near the first and third sections of stairs.
- Click on the up arrow to enter the tree house.
- Click on your wand to use as a flashlight.
- Locate the six glass orbs and place them in the sconces.
- Take the two map pieces.
- Locate the six musical compositions.
- Place a musical composition on the organ.
- In this mini-game, play the key that corresponds with the dropping ball when it is in the lower section.
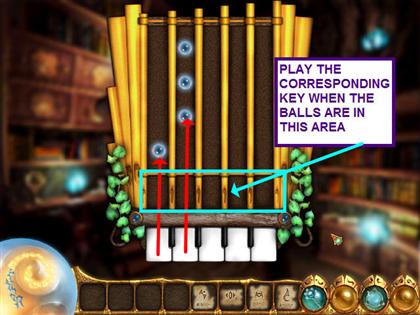
- Play the remaining five musical compositions.
- The completion of each mini-game opened a cupboard.
- Take the map piece.
- Click on the telescope and locate the hidden objects.
- Take the key and unlock the window.
- Look through the telescope and take the map piece.
- You learn your name is Katya and you are instructed to return to the Glyphstone.
- Click on the down arrow to exit the tree house.
- Click on the down arrow to go to the map.
- Assemble the map pieces.
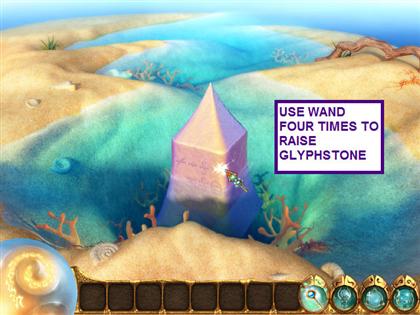
Wood Glyphstone
- Take the Scrying orb.
- Use your wand four times on the roots covering the Glyphstone.
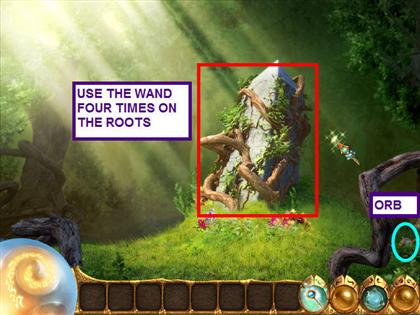
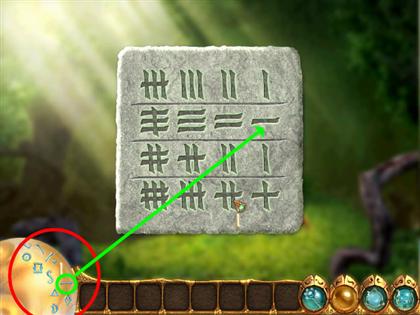
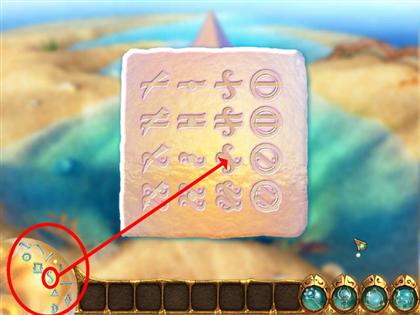
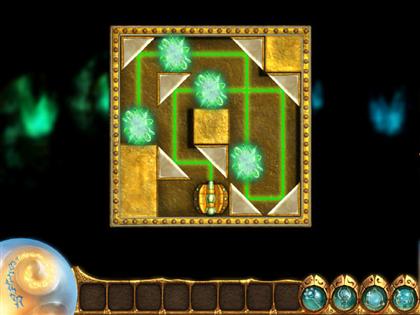
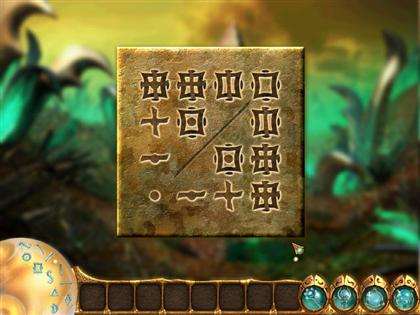
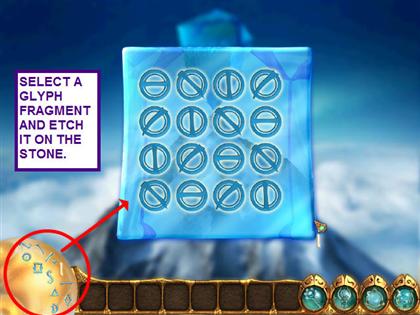
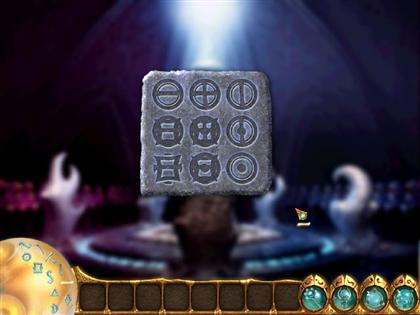
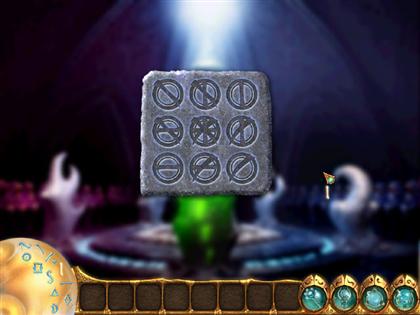
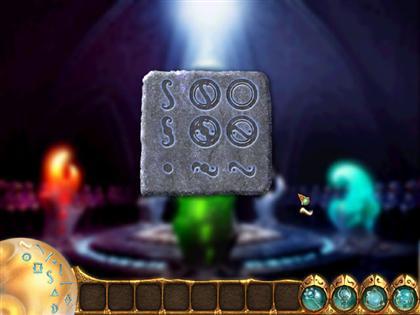
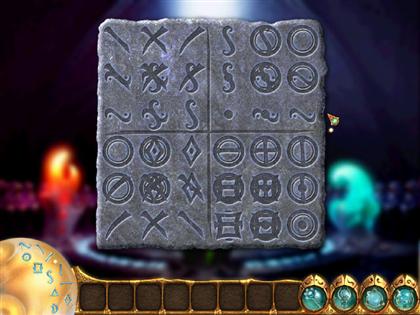
- Click on the symbols on the Glyphstone to open a mini-game.
- Select symbols from the lightstone to etch into the Glyphstone that complete the pattern.
- The wood spirit thanks you and transports you to the realm of the Fire Spirit.
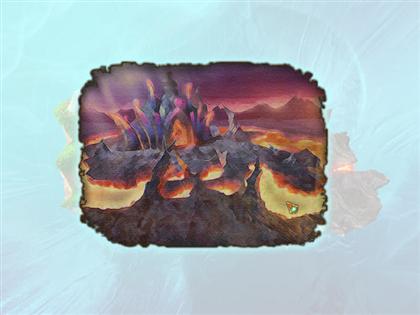
Part Two – Fire Spirit
Fire Glyphstone
- Take the chromatic lens.
- Take the five map pieces.
- Click on the map arrow on either side of the screen.
Hall of Brotherhood
- Take the five map pieces.
- Click on the map arrow at the bottom of the screen.
- Assemble the map pieces.
- Select the Hearth of Burning Power on the map.
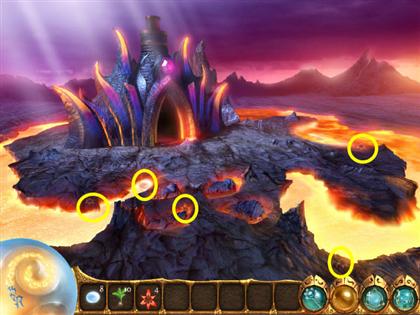
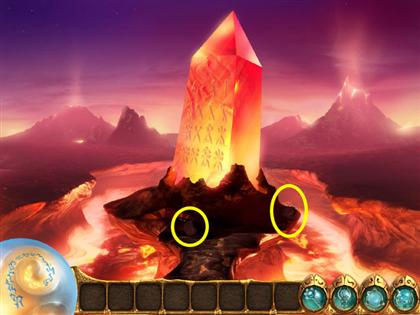
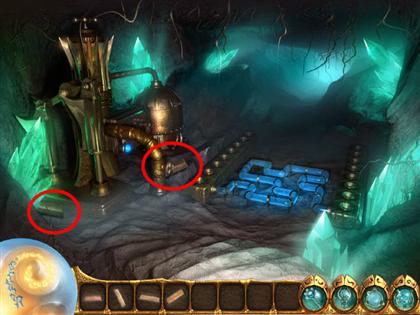
Hearth of Burning Power
- Take the five map pieces.
- Take the hammers and break all the jagged rocks. You will find more as you progress.
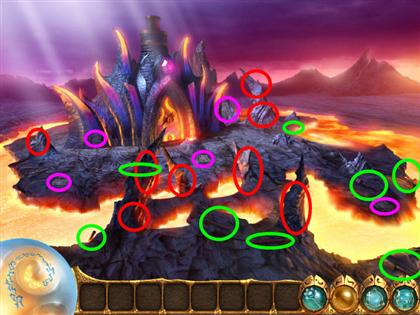
- Click on the door to activate a hidden object bubble.
- Locate all the hidden objects.

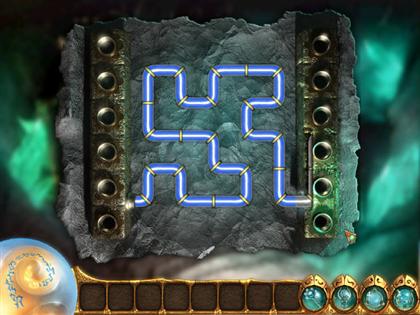
- Click on the door to activate a mini-game.
- The object of the mini-game is to turn the lock so that both pieces are horizontal.
- Click on the left side four times, twice on the right, and two more times on the left.
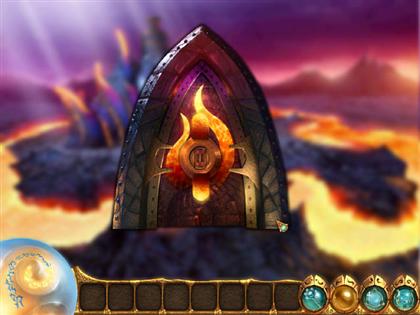
- Click on the open door to enter.
- Take the five map pieces.
- Find the 10 coal lumps and place them into the furnace.
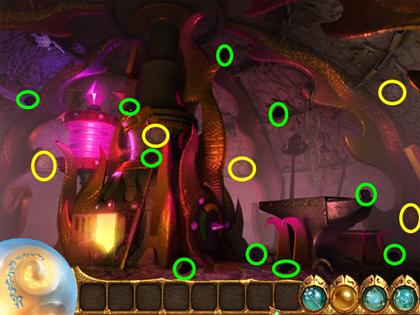
- Cracks appear at the top of the furnace.
- Use your wand to repair the cracks.
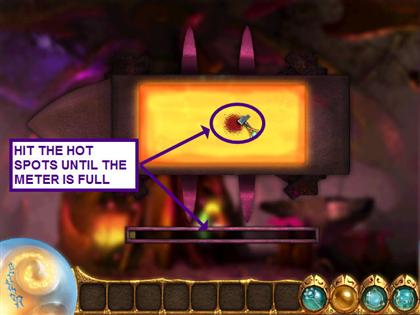
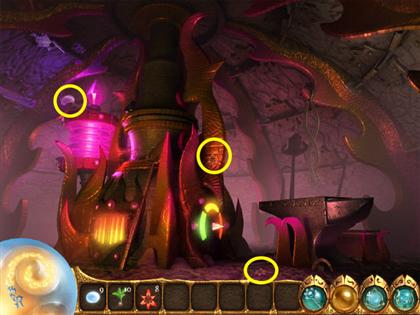
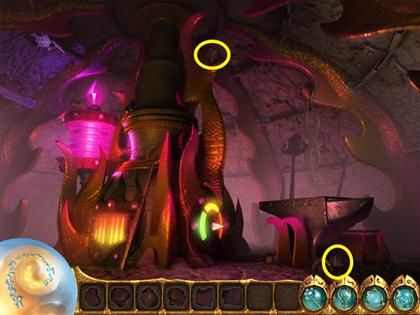
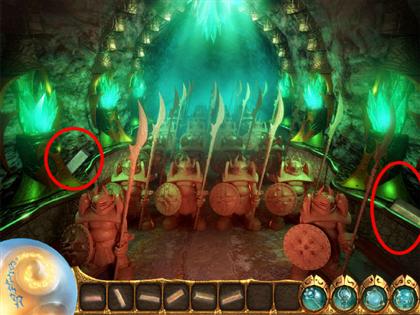
- Select the anvil and locate the seven hidden objects.
- Select the anvil again to activate a mini-game.
- Use the hammer to hit the hot spots until the meter is full.
- The Orichalcum Rod will go into your inventory automatically.
- Exit the hearth.
- Click on the map arrow at the bottom of the screen.
- Assemble the map pieces.
- Select the Fire Glyphstone.

Hall of Brotherhood
- Return to the Hall of Brotherhood and the Orichalcum Rod will go to the oracle automatically.
- Exit the Hall.
- Return to the map and select the Ancient Barrow.
Scepter Mission
- Talk to Mr. Oakbeard. He wants 10 seeds of renewal, 10 firebloom flowers, and 10 Kurosian crystals.
- Take the crystal and four seeds of renewal.
- Enter the barrow and take the crystal.
- Exit the barrow and return to the map.
- Select the Oracle's Hermitage.
- Take the crystal and three seeds.
- Enter the tree house.

- Take the crystal.
- Exit the tree house and return to the map.
- Select the Wood Shrine.

- Use the right arrow to go to the shrine from the sinkhole.
- Take the crystal and four seeds.
- Exit to the map and select the Fire glyphstone.
- Take the two crystals and three flowers.
- Exit to the map and select the Hall of Brotherhood.
- Take the crystal and the flower.
- Exit to the map and select the Hearth of Power.
- Take the crystal and the four flowers.
- Enter the Hearth.
- Take the crystal and two flowers.
- Exit the Hearth and return to the map.
- Select the Ancient Barrow.
- Oakbeard will automatically take the crystals, seeds, and flowers.
- The three scepter parts will go into your inventory automatically.
- Return to the map and select the Hall of Brotherhood.
- You receive the scepter as a new tool.
- Exit the hall and return to the map.
- Select the Fire Glyphstone.
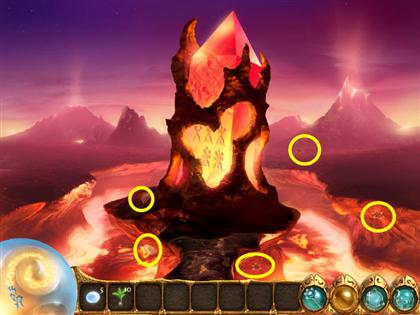
Fire Glyphstone
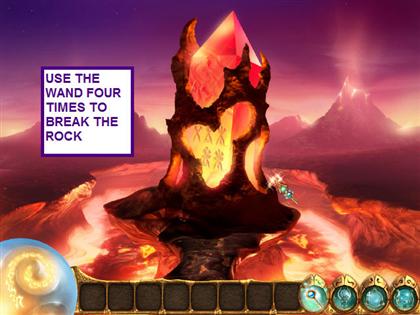
- Use the wand four times to break away the rock.
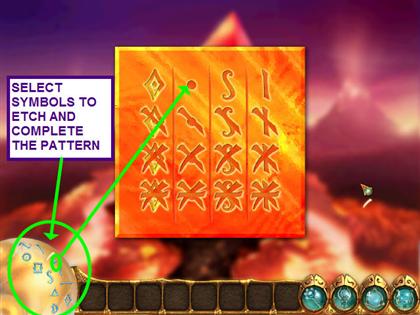
- Click on the Glyphstone to open a mini-game.
- Select a symbol from the Lightstone to etch and complete the patterns.
- You are automatically transported to the Water Realm.
Part Three – Water Spirit
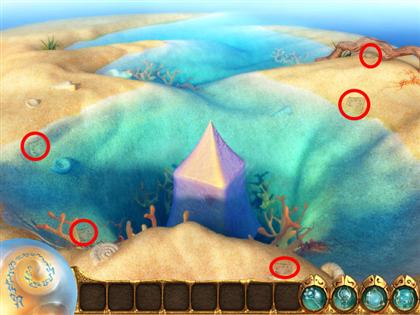
Water Glyphstone
- Take the five map pieces.
- Use the map arrow on the upper left side of the screen.
- Select the Frozen Obelisk.
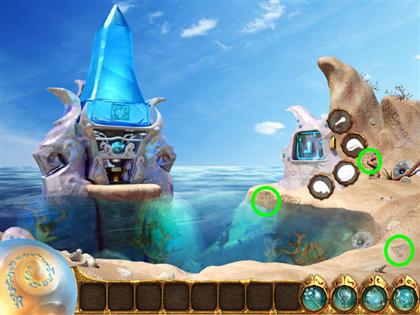
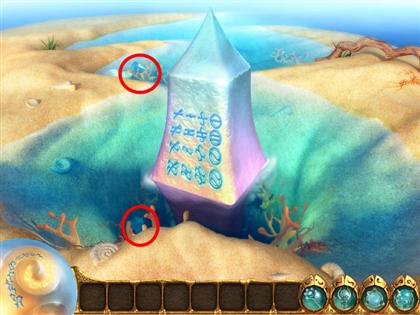
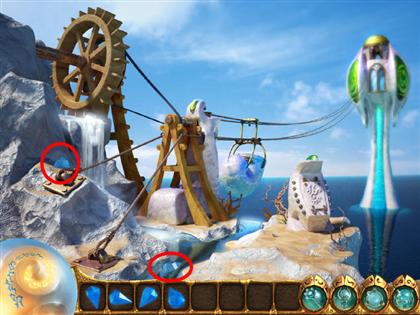
Frozen Obelisk
- Take the three map pieces.
- Select the bridge mechanism on the right.
- Collect the hidden objects.
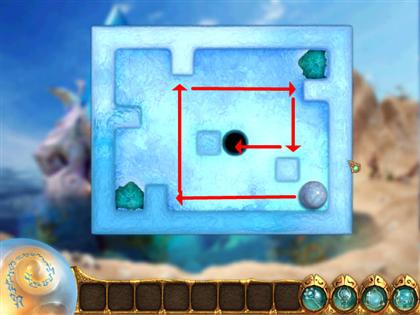
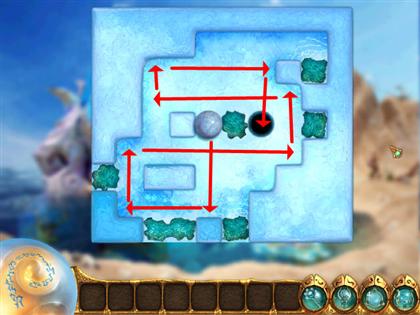
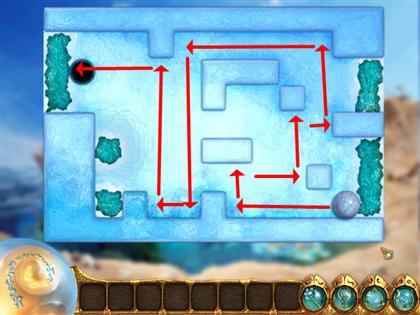
- Select the lever to activate the mini-game.
- The object of these mini-games is to move the sphere to the keyhole.
- Click in front of the sphere to make it roll forwards.
- Repeat this process three times.
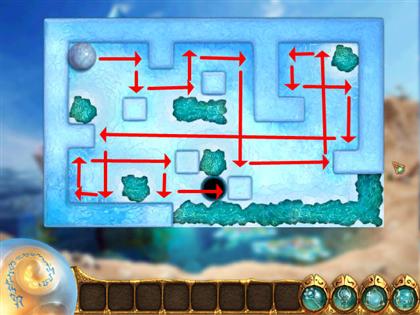
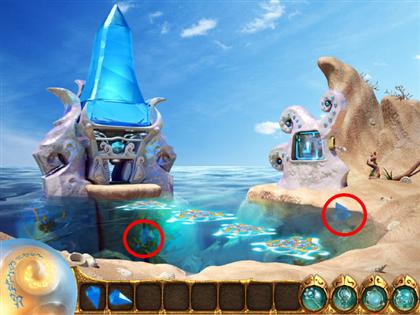
- Now that the bridge is up, take the map piece in the water.
- Use the scepter on the obelisk to break the ice.
- Take the map pieces that were frozen in the ice.
- Take the bucket and use it to collect water.
- Return the bucket of water to the machine to make ice.
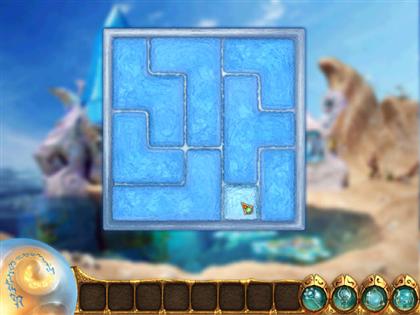
- Take the ice and use it on the broken obelisk to open a mini-game.
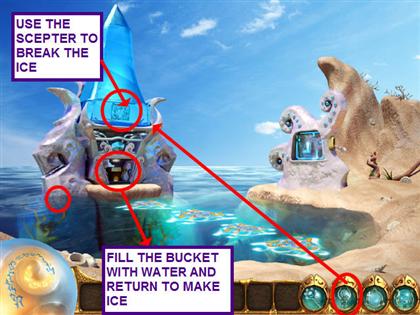
- Place the all the ice pieces inside the square.
- Exit the Frozen Obelisk by using the map arrow at the top of the screen.
- Place the pieces together, jigsaw-style, to complete the map.
- After you complete the puzzle, you are taken to the map screen.
- Select “Farseer's Tower.”
Farseer's Tower
- Collect the five map pieces.
- Select the wheel and locate the hidden objects.
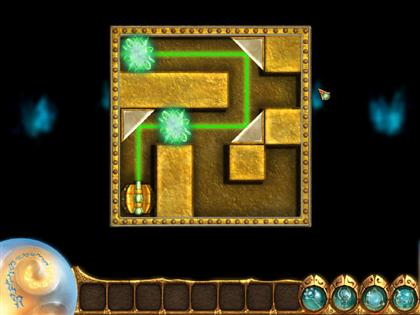
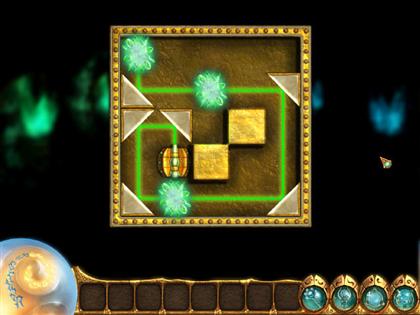
- Use the scepter on the gondola control box to activate a mini-game.
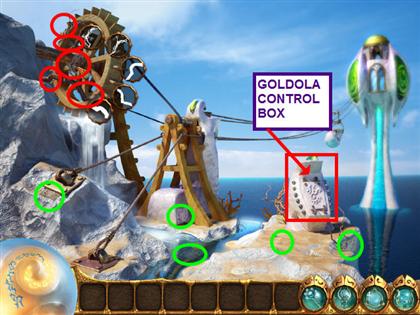
- The object of this mini-game is to turn the pipes so that water flows from one end to the other.
- Select the gondola to enter the tower.

- Take the four map pieces.
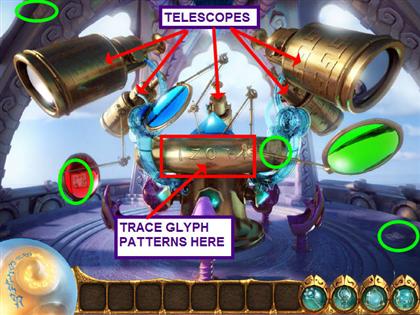
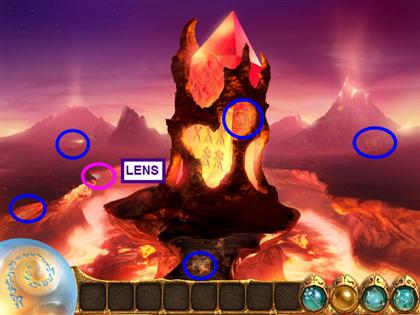
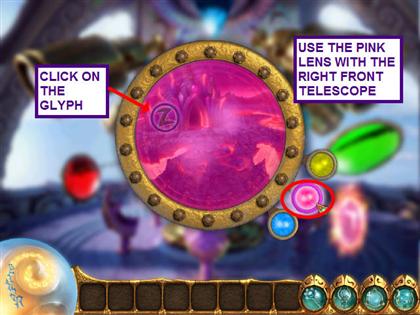
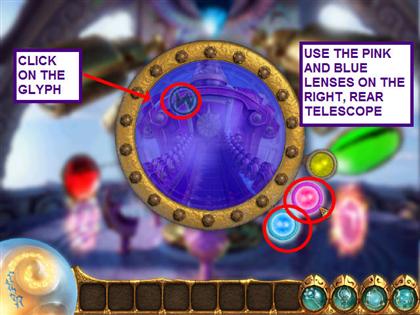
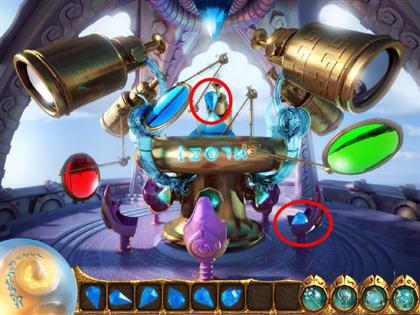
- Help the Farseer by looking in each telescope and finding the glyphs.
- Use a different combination of lenses to be able to see the glyph.
- Click on each glyph when it becomes visible.
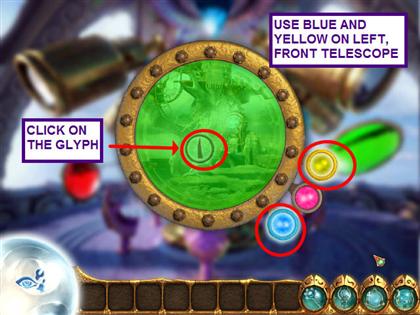
- For the left front telescope, use the yellow and blue lenses.
- Use all three lenses on the left rear telescope.
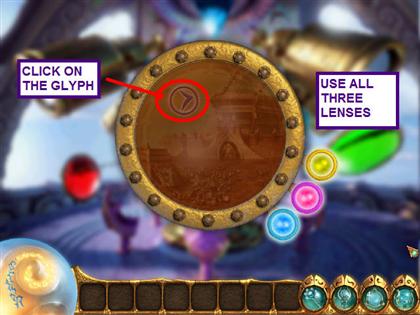
- Use the pink lens with the front right telescope.
- For the right rear telescope, use the blue and pink lenses.
- Use the blue lens with the center rear telescope.

- Use the wand to trace the glyphs on the center console.
- The Farseer gives you the last map piece.
- Click on the down arrow to exit the tower.
- Use the map arrow at the top of the screen.
- Assemble the map pieces.
- Select the Water Glyphstone.
Water Glyphstone
- Use the wand on the Glyphstone four times to make it rise from the water.
- Click on the Glyphstone to open a mini-game.
- Select a symbol from the Lightstone to etch and complete the patterns.
- You are automatically transported to the Metal Realm.
Part Four – Metal Spirit
Metal Glyphstone
- There is nothing to do here in the beginning.
- Move the cursor to the edge of the screen and click when you see a map arrow.
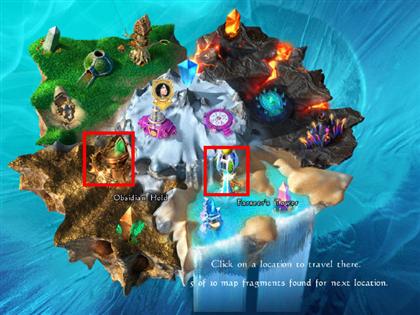
- Select Obsidian Hold.
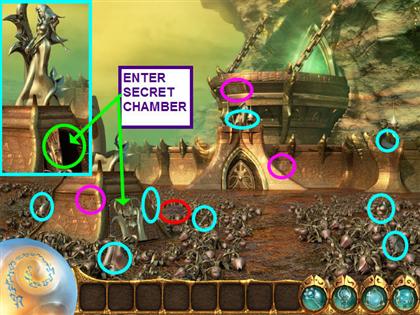
- Take the three map pieces.
- Find and replace the eight statue pieces.
- A secret door will open.
- Click on the arrow to enter the room.
- Take the three map pieces.
- Locate the eight gears.
- Click on the pump mechanism to open a mini-game.
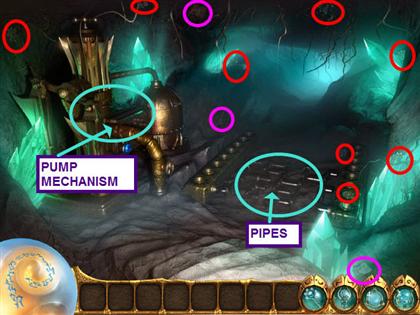
- Place the eight gears into the mechanism.
- Select the floor pipes for a mini-game.
- Rotate the pipes so that water flows through all pipes and out the right side.
- Click the down arrow to exit the room.
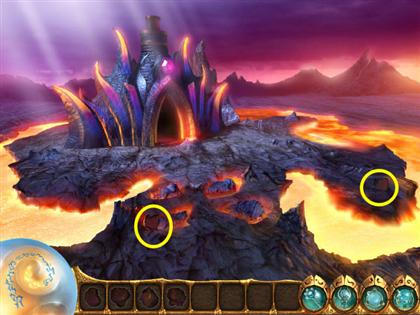
- The guardian wants a lily to prove you have repaired the field.
- Take a flower from the field and give it to the guardian.
- The way to the Obsidian Hold is now open.
- Click on the up arrow to enter the hold.
Obsidian Hold
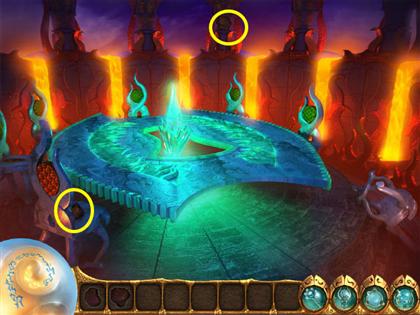
- Starting from left to right, click on the six crystals to open mini-games.
- Place the mirrors so that the laser beam breaks all the crystals.


- Take the three map pieces.
- Locate and replace the eight pieces needed to complete the stone generals.
- Exit the Obsidian Hold.
- The Guardian gives you the final map piece.
- Click on the map arrow to exit the scene.
- Assemble the map pieces.
- Click on the Metal Glyphstone.
Metal Glyphstone
- Use the wand on the Glyphstone four times to remove the rock.
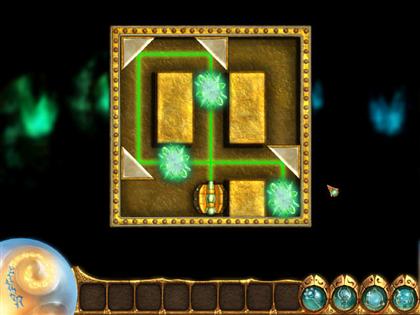
- Click on the Glyphstone to open a mini-game.
- Select a symbol from the Lightstone to etch and complete the patterns.
- You are automatically transported to the Aether Realm.
Part Five – Aether Spirit
Aether Glyphstone
- Take the five map pieces.
- Click on the map arrow in the upper left or right to go to the map.

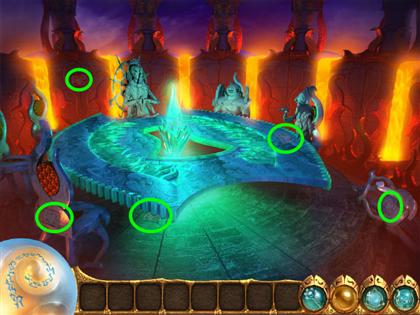
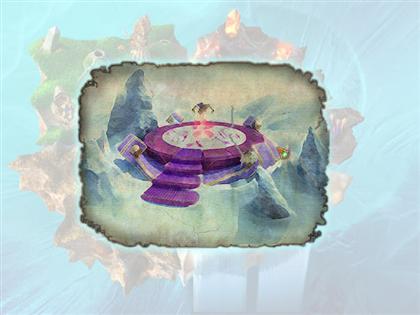
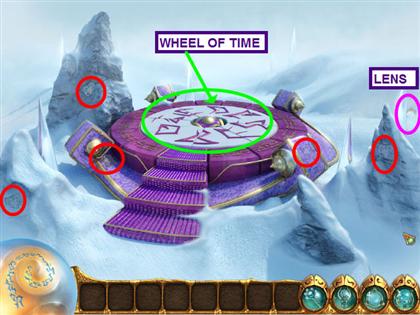
- Select the Wheel of Time.
- Take the Chromatic lens.
- Take the five map pieces.
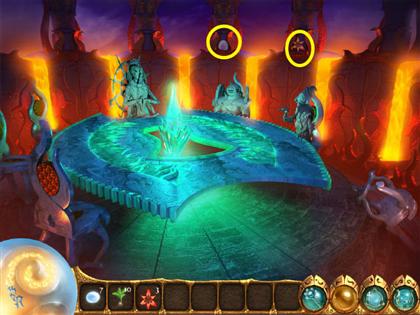
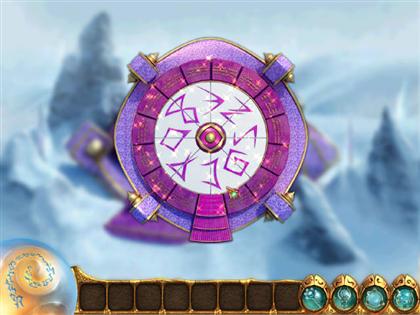
- Select the Wheel of Time to activate a mini-game.
- The object of this mini-game is to align the symbols.
- Swap adjacent pieces to complete all the symbols.
- Your solution may be differently positioned.
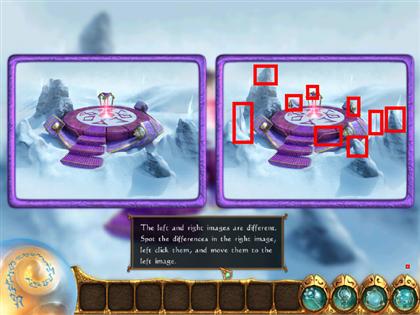
- Select the center of the wheel for a Spot the Differences mini-game.
- Find the differences in the right picture and place them in the left picture.
- A time is given as being important, “08:30:10.”
- Click on the map arrow to exit the scene.
- Assemble the map pieces.
- Select the Library of the Old Ones.
The Library of the Old Ones
- Take the five map pieces.
- Select the bag and locate the hidden items.
- Take the key that appears.
- Select the map arrow to exit the scene.

- Select the Farseer's Tower on the map.
- Take the gondola to the tower.
- The Farseer will give you a key.
- Click the down arrow to exit the tower.
- Select the map arrow to exit the scene.
- Click on the Obsidian Hold.
- The Guardian will give you the third key.
- Select the map arrow and return to the map.
- Click on the Library of the Old Ones.
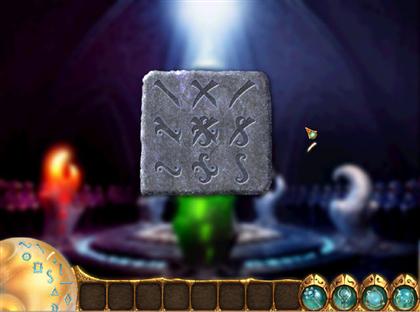
- Select the door to activate a mini-game.
- Remember the clue “08:30:10?”
- The blue key represents the hour, so place it in the square corresponding to 8.
- The green key represents minutes, so place it in the circular 6 slot.
- The red key is seconds. It goes in the diamond-shaped 2 slot.

- Enter the library.
- Take the five map pieces.
- Take the five punch cards.
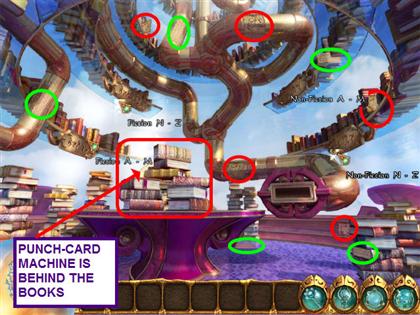
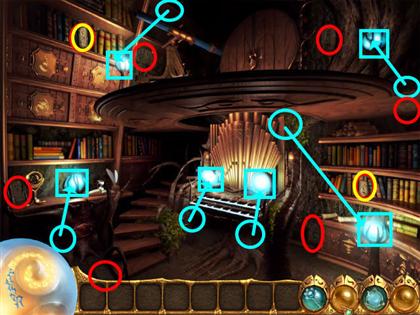
- Take the books from the table and place them in the proper section.
- Hover your cursor over each plaque.
- Place the books in the following locations:Grave Robbing for Fun and Profit - Non-fiction A-M Lord of the Glyphs - Fiction A-M The Odyssey, Part 2 - Fiction N-Z War and Peace and More War - Fiction N-Z Killer Cake Recipes - Non-Fiction A-M Prophecies for Fun and Prophets - Non-Fiction N-Z How to be a Super Grandparent - Non-Fiction A-M Navigating the Winds of Trade - Non-Fiction N-Z Pirate Talk for Beginners - Non-Fiction N-Z
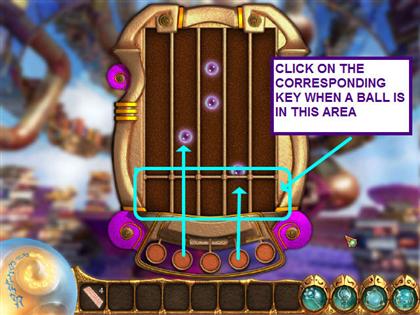
- Place a punch card in the machine to activate a mini-game.
- In this mini-game, play the key that corresponds with the dropping ball when it is in the lower section.
- Repeat this process with the four remaining cards.
- Click the down arrow to exit the library.
- Select the map arrow to return to the map.
- Assemble the map pieces.
- Select the Aether Glyphstone.
Aether Glyphstone
- Use the wand four times to clear away the clouds on the Glyphstone.
- Click in the inscription to activate the mini-game.
- Click on the Glyphstone to open a mini-game.
- Select symbols from the Lightstone to etch and complete the patterns.
- You are automatically transported to the Acropolis.
Part Six – End Game
Acropolis
- In order to save Kuros, you must find the missing pieces for each Glyphstone in the Acropolis.
- Eight pieces are needed for each Glyphstone.
- The first set is mushrooms.
- Select the map arrow to return to the map.
Mushrooms
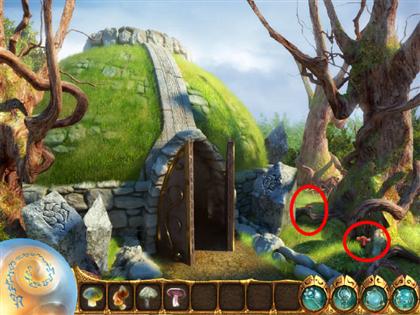
- Go to the Wood Glyphstone.
- Take the two mushrooms.
- Return to the map and select the Wood Shrine.
- Take the mushroom.
- Select the right arrow to exit the sinkhole.
- Take the mushroom.
- Exit to the map.
- Select Ancient Barrow.
- Take the two mushrooms.
- Exit to the map.
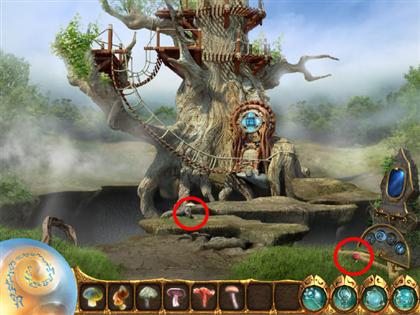
- Select the Oracle's Hermitage.
- Take the two mushrooms.
- Exit to the map and return to the Acropolis.
- Place the mushrooms in the Glyphstone.
- Click on the Glyphstone to open a Symbols mini-game.
- Select symbols from the Lightstone to etch and complete the patterns.
Carbon
- Exit to the map and select the Fire Glyphstone.
- Take the two lumps of carbon.
- Exit to the map and go to the Hall of Brotherhood.
- Take the two lumps of carbon.
- Exit to the map and select the Hearth of Burning Power.
- Take the two lumps of carbon.
- Enter the Hearth.
- Take the two lumps of carbon.
- Exit the Hearth and select the map arrow.
- Select the Acropolis.
- Place the lumps of carbon in the Glyphstone.
- Click on the Glyphstone to open a symbols mini-game.
- Select symbols from the Lightstone to etch and complete the patterns.
Crystals
- Exit to the map and select the Water Glyphstone.
- Take the two crystals.
- Exit to the map and go to the Frozen Obelisk.
- Take the two crystals.
- Return to the map and select the Farseer's Tower.
- Take the two crystals.
- Click on the gondola to enter the tower.
- Take the two crystals.
- Exit the tower and select the map arrow.
- Return to the Acropolis.
- Place the crystals with the Glyphstone.
- Click on the Glyphstone to open a symbols mini-game.
- Select symbols from the Lightstone to etch and complete the patterns.
Bars
- Exit to the map and select the Metal Glyphstone.
- Take the two bars.
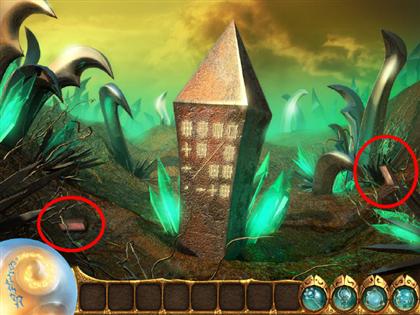
- Exit to the map and go to Obsidian Hold.
- Take the two bars.
- Enter the secret room under the statue.
- Take the two bars.
- Exit the room.
- Enter Obsidian Hold.
- Take the two bars.
- Exit the hold and select the map arrow.
- Return to the Acropolis.
- Place the bars with the Glyphstone.
- Click on the Glyphstone to open a Symbols mini-game.
- Select symbols from the Lightstone to etch and complete the patterns.
Snowflakes
- Exit to the map and select the Aether Glyphstone.
- Take the three snowflakes.
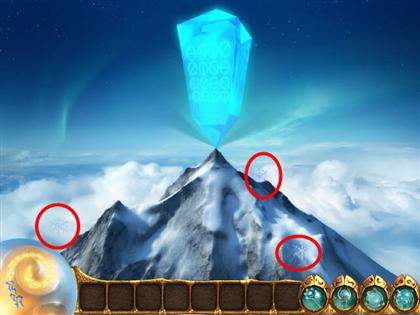
- Exit to the map and go to the Wheel of Time.
- Take the three snowflakes.
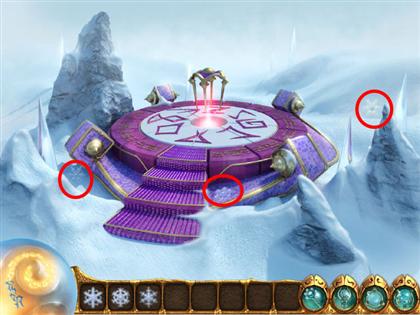
- Exit to the map and go to the Library of the Old Ones.
- Take the two snowflakes.
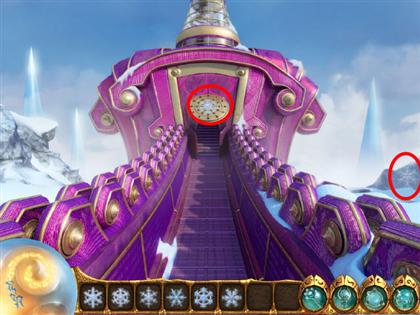
- Select the map arrow.
- Return to the Acropolis.
- Place the snowflakes with the Glyphstone.
- Click on the Glyphstone to open a Symbols mini-game.
- Select symbols from the Lightstone to etch and complete the patterns.
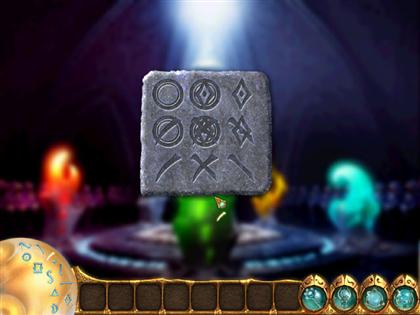
- Click on the center Glyphstone to open a Symbols mini-game.
- Select symbols from the Lightstone to etch and complete the patterns.
 Congratulations! You have just completed Kuros!
Created at: 2009-07-13