
Walkthrough Menu
- General Tips
- Chapter 1: The Temple of Time
- Chapter 2: Suraj and Asha
- Chapter 3: Hester and Ingvar
- Chapter 4: Todd and Christie
General Tips
- This is the official guide for Redemption Cemetery: The Stolen Time.
- This guide won't tell you when to zoom into a location; the screenshots show each zoom scene.
- Hidden-object puzzles are referred to as HOPs. Only the locations of the HOPs will be shown.
- Use the map for fast travel to a location.
Chapter 1: The Temple of Time
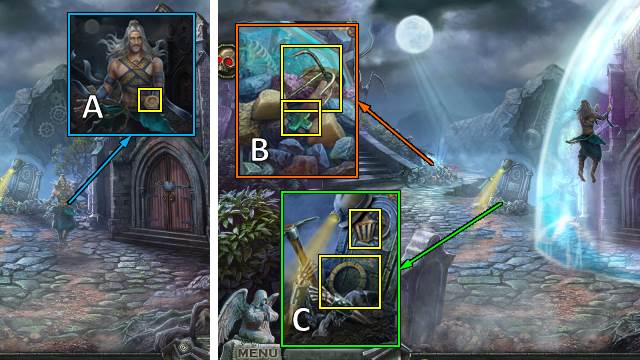
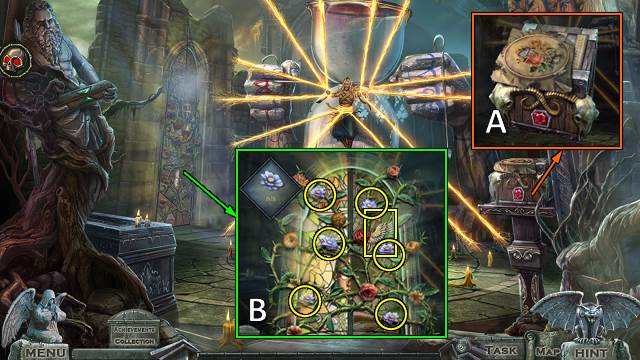
- Talk; take BOOK DISC 1/2 (A).
- Take MEDICAL CROSS and HOOK (B).
- Take BOOK DISC 2/2 and LOCK PART (C).
- Take LOCK PART (D).
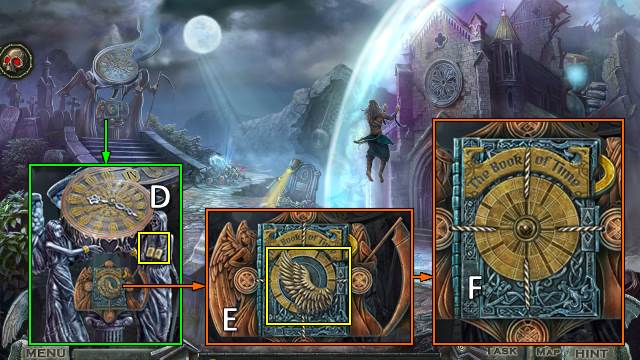
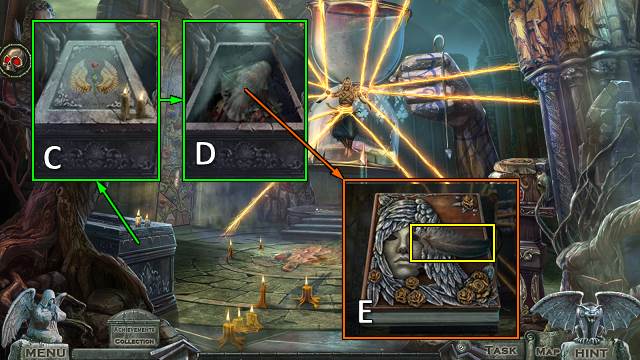
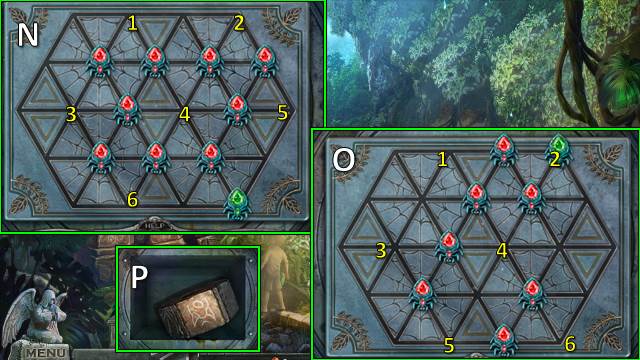
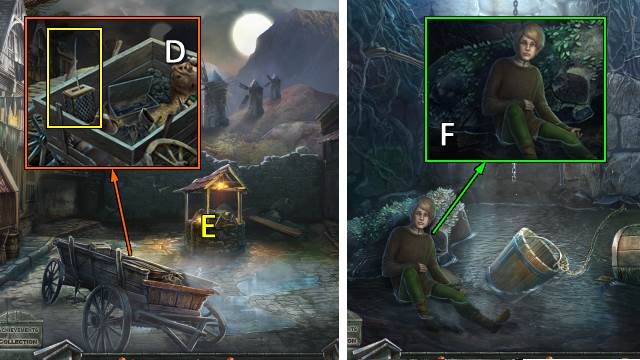
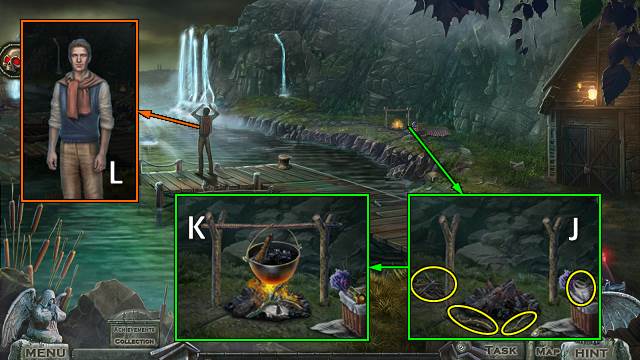
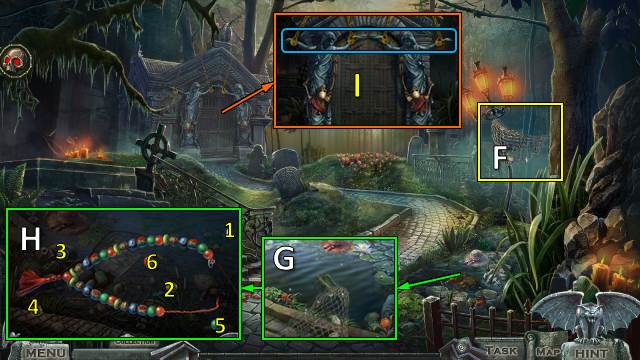
- Take CRYPT WING 1/2; place BOOK DISC (E).
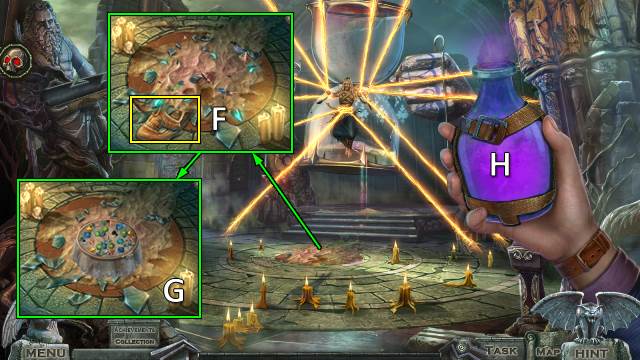
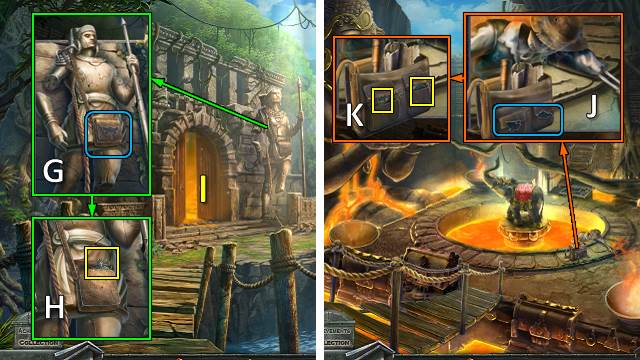
- Solution (F).
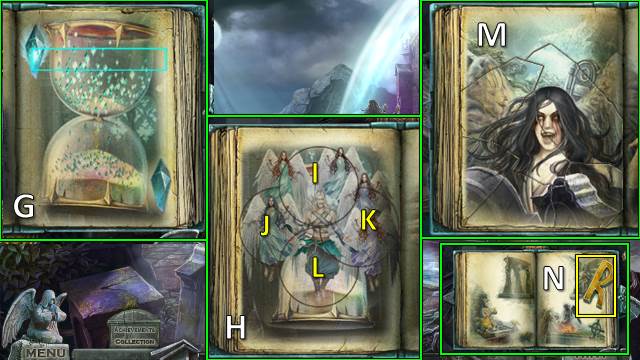
- Solution (G).
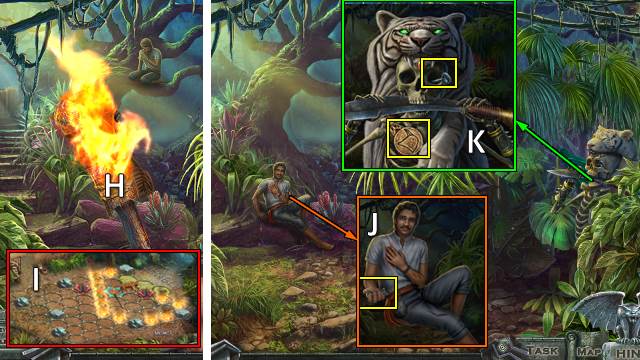
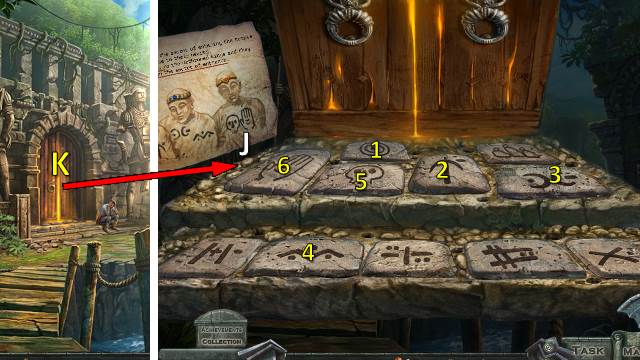
- Solution (H): Ix2-Jx3-Kx2-L.
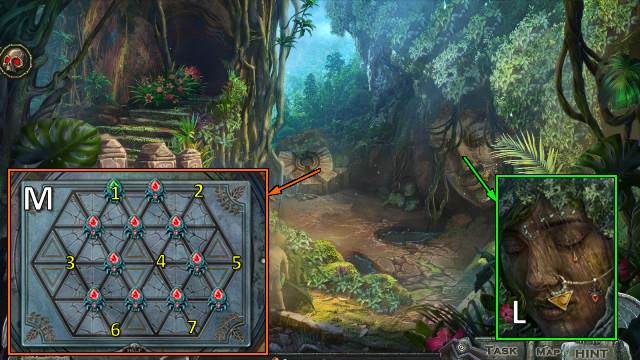
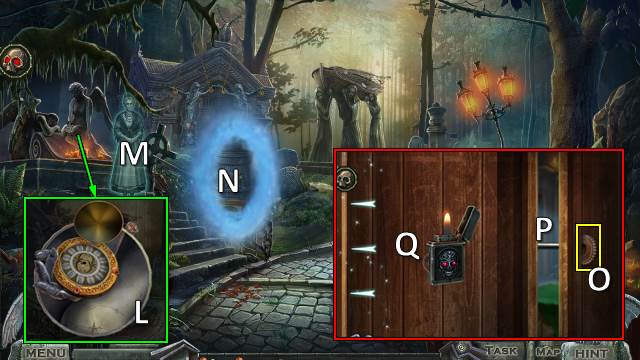
- Solution (M).
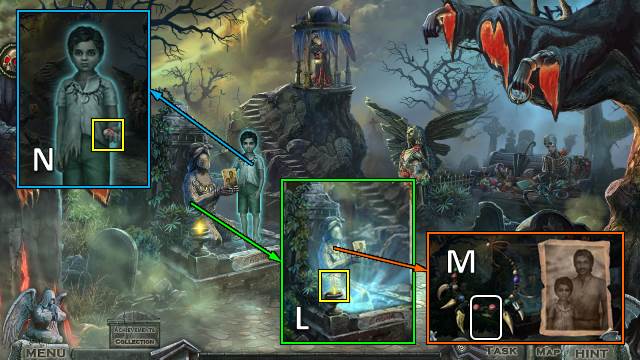
- Take LETTER TILE 1/2 (N).
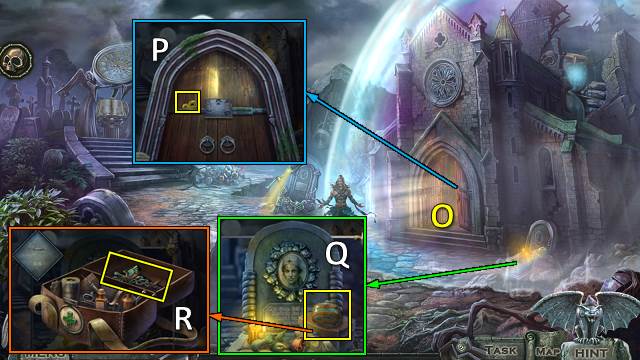
- Go (O).
- Take LETTER TILE 2/2 (P).
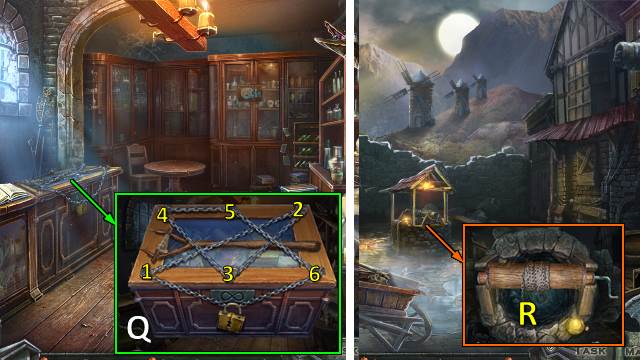
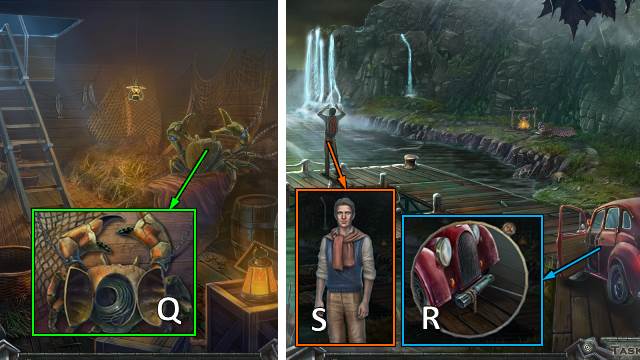
- Take WATER FLASK (Q).
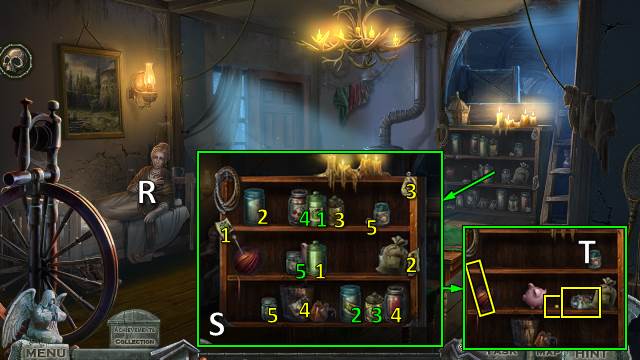
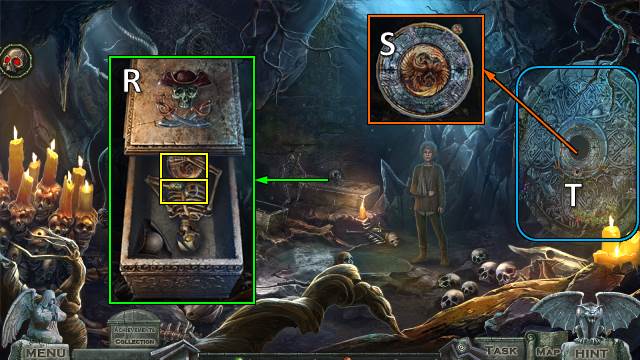
- Place MEDICAL CROSS. Find items; receive LOCK PART (R).
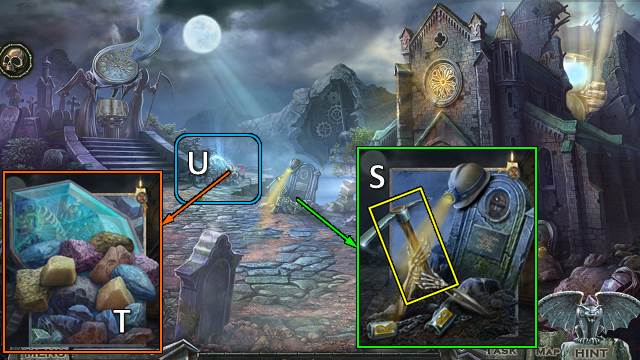
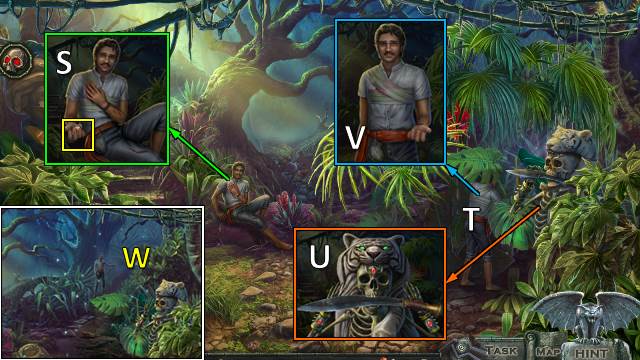
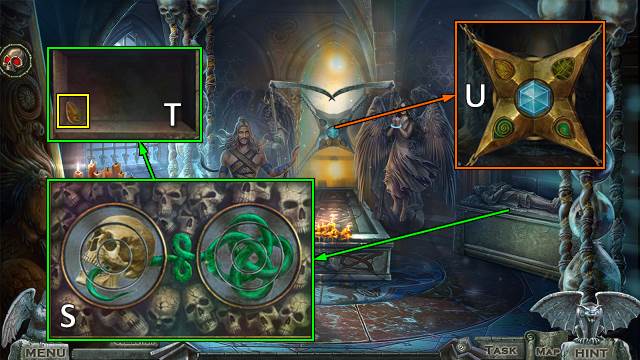
- Place LETTER TILE; take PICKAXE (S).
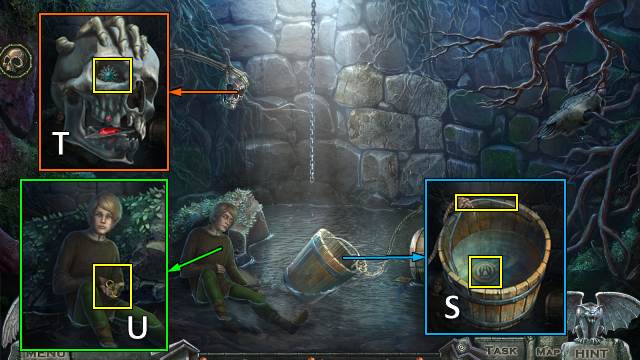
- Use PICKAXE (T).
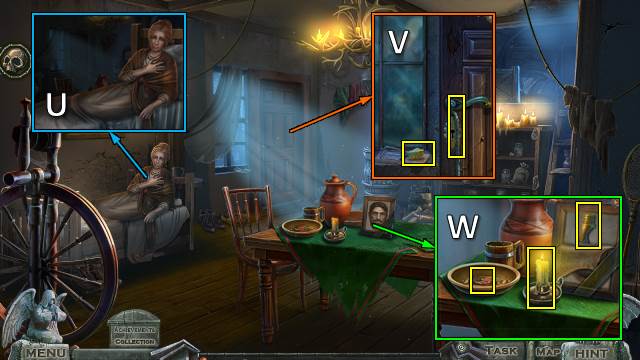
- Play HOP (U); receive LOCK PART.
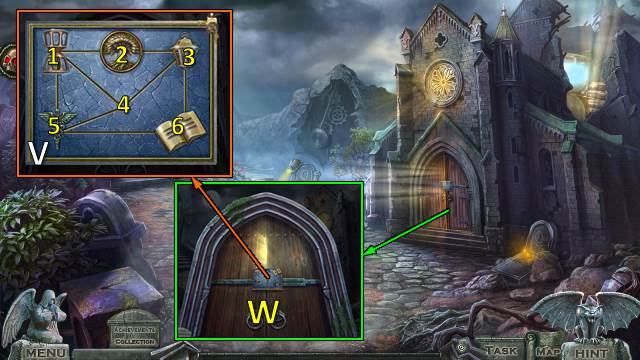
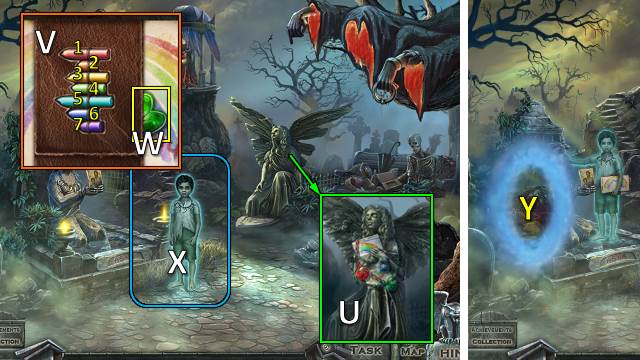
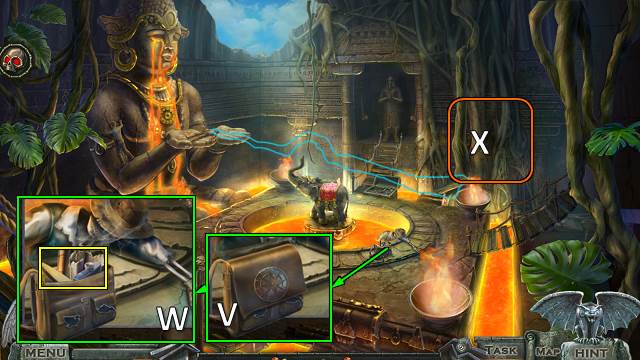
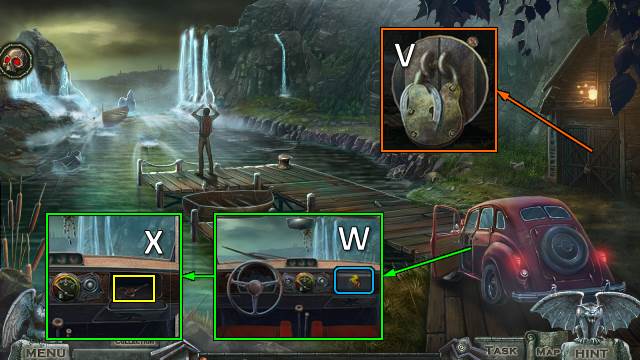
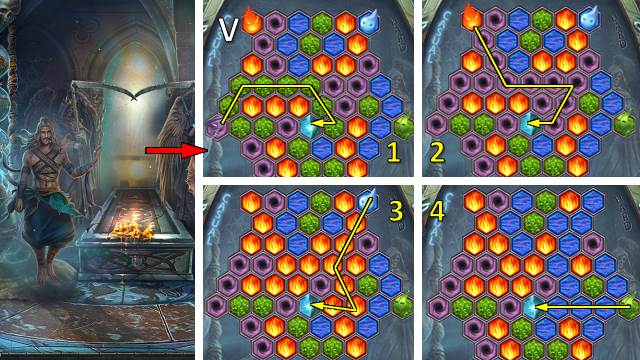
- Place LOCK PART x4 (V).
- Solution: 1-4-3-2-1-4-3-2-1-4-5-6-3-2-1-5-6-3-4.
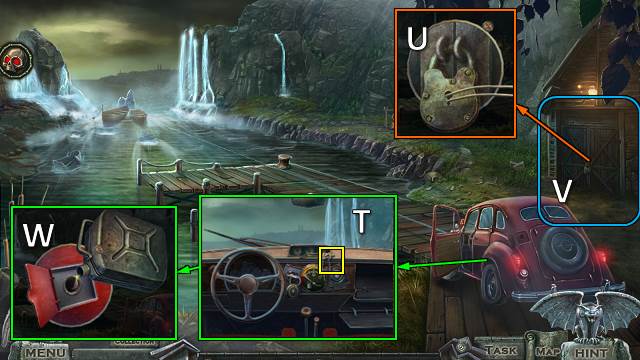
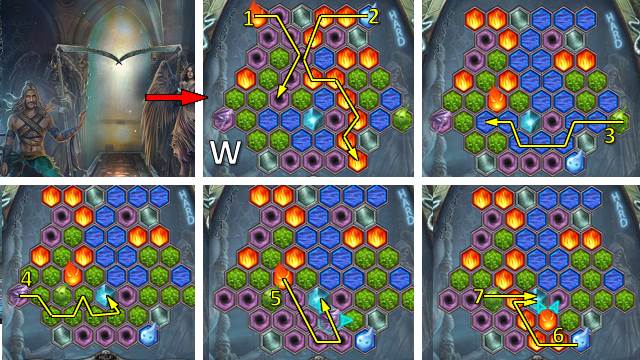
- Go (W).
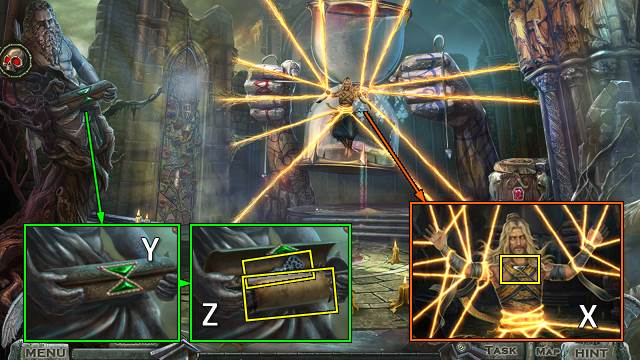
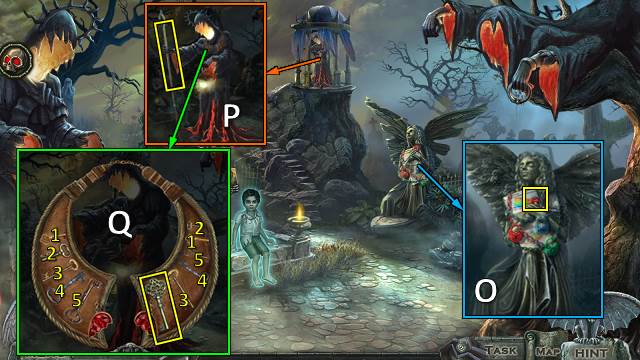
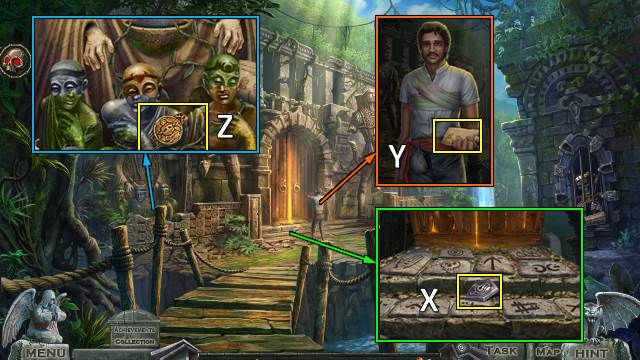
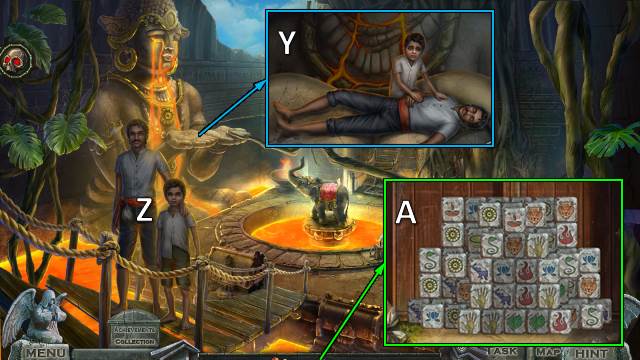
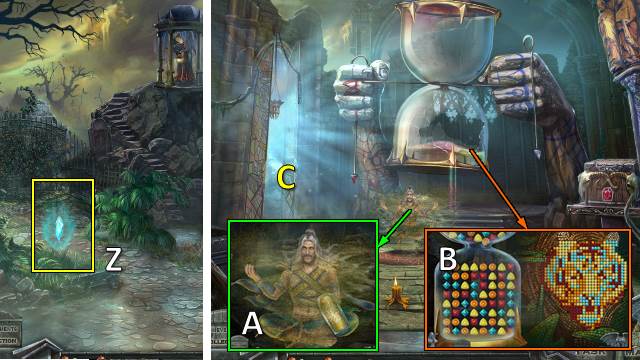
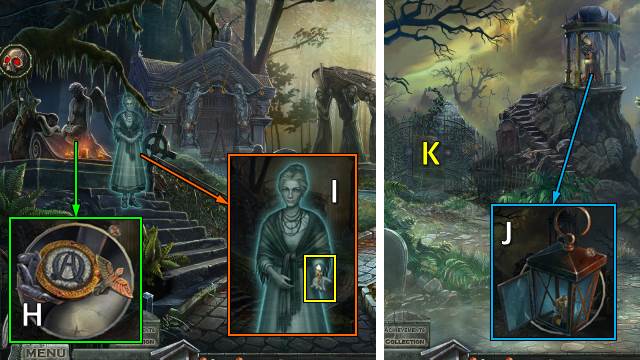
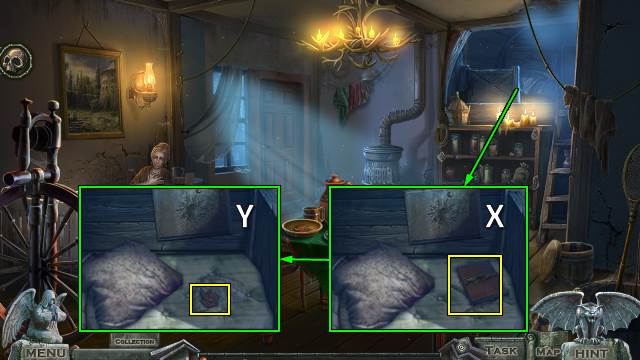
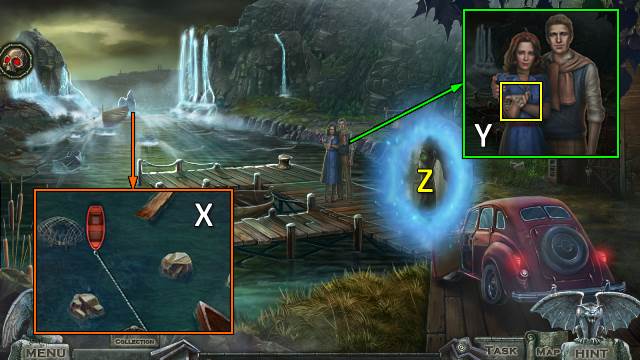
- Talk; take LOCKET (X).
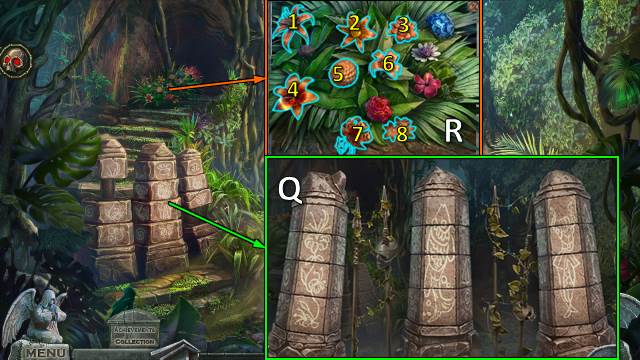
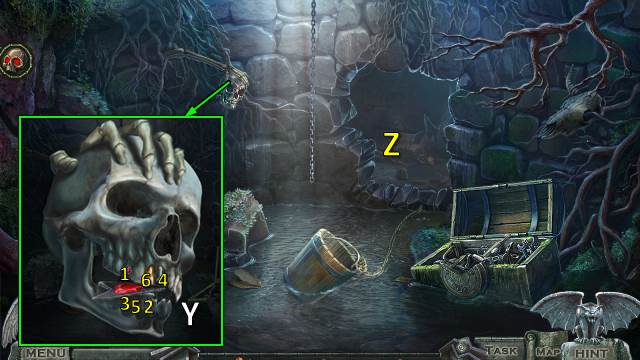
- Place LOCKET (Y); take RAINBOW KEY 1/3 and SPELL RECIPE (Z).
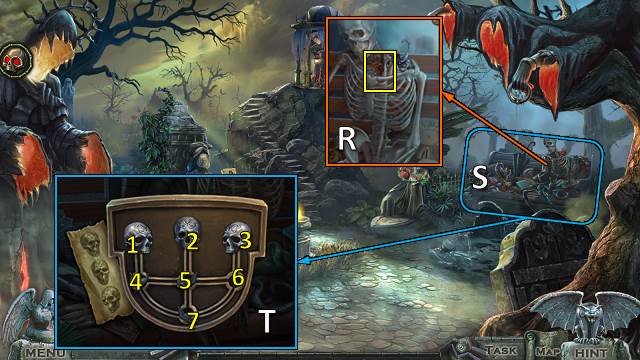
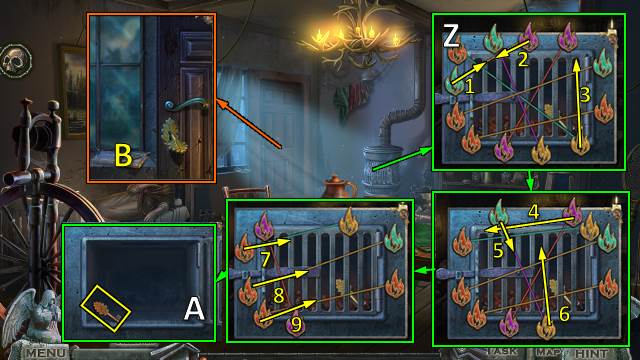
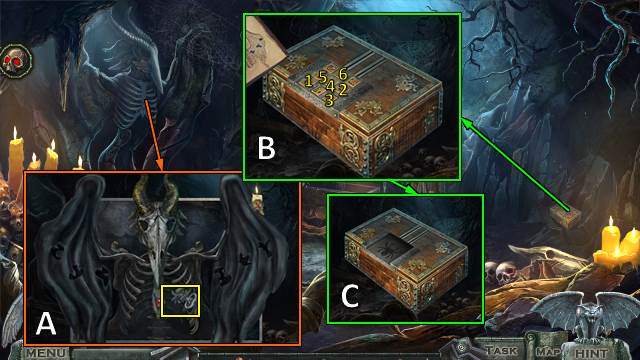
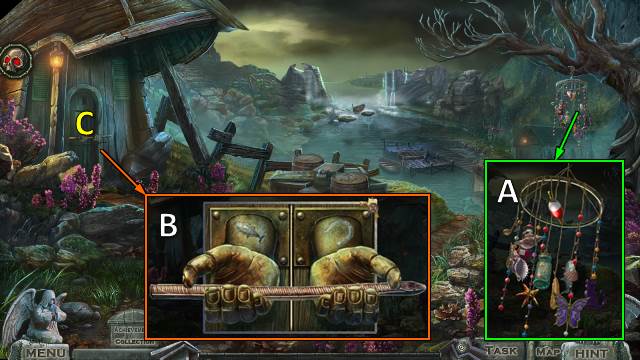
- Take HOOP (A).
- SCISSORS from HOOP.
- Place SCISSORS; take CRYPT WING 2/2 and BLUE FLOWERS x6 (B).
- Place CRYPT WING (C); take VEIL (D).
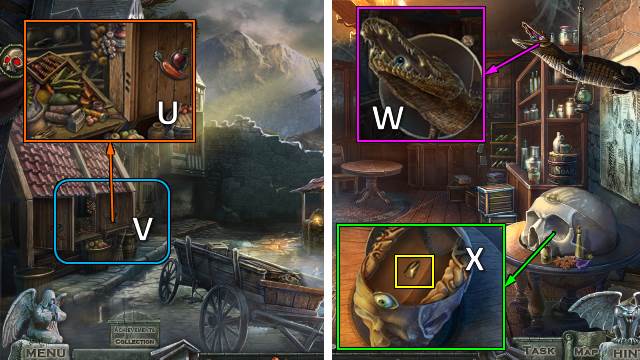
- Take FEATHER 1/3. Open book for HOP; take FEATHER 2/3, CRAYON and FEATHER 3/3 (E).
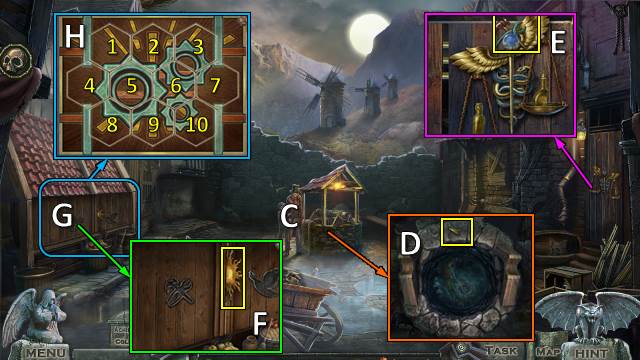
- VEIL on HOOP; take SIEVE.
- Take MASK HALF (F). Use SIEVE; take SIEVE WITH CRYSTALS (G).
- TIME PYRAMIDS x5 and CRYSTALS OF LIFE x7 from SIEVE WITH CRYSTALS.
- WATER FLASK, FEATHER, BLUE FLOWERS and TIME PYRAMIDS on SPELL RECIPE.
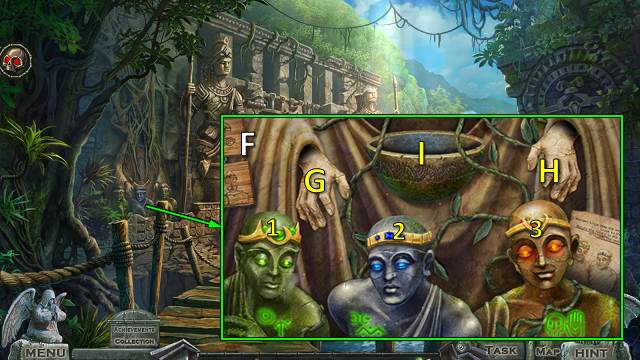
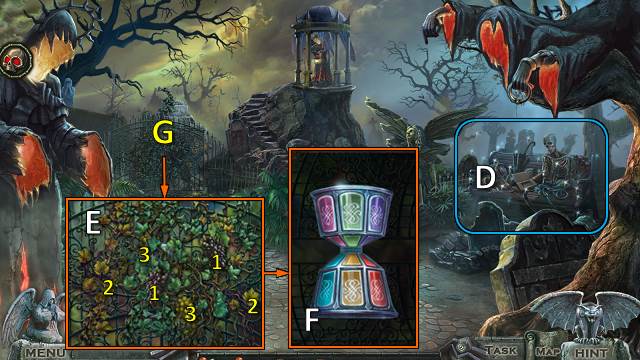
- Select spell (H).
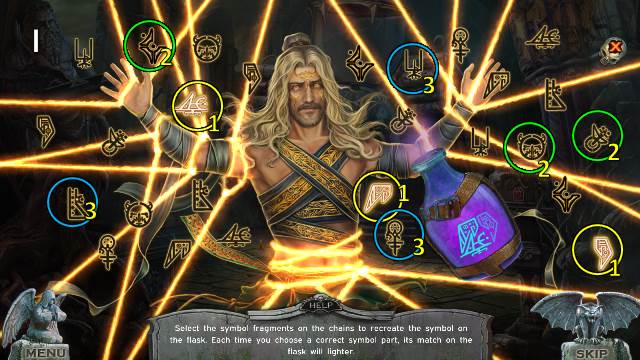
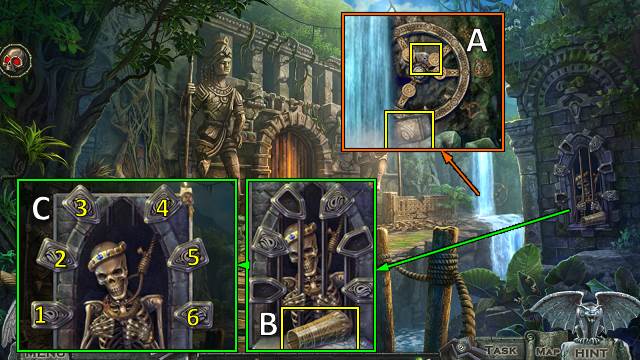
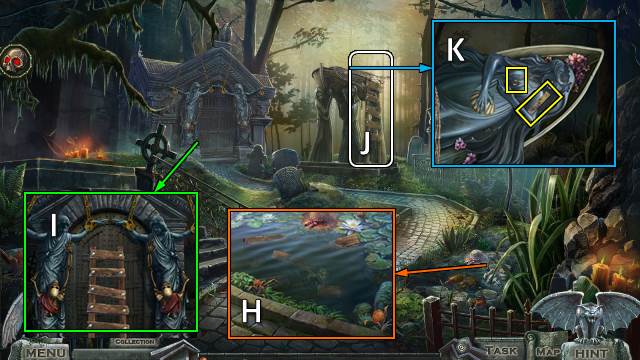
- Solution (I).
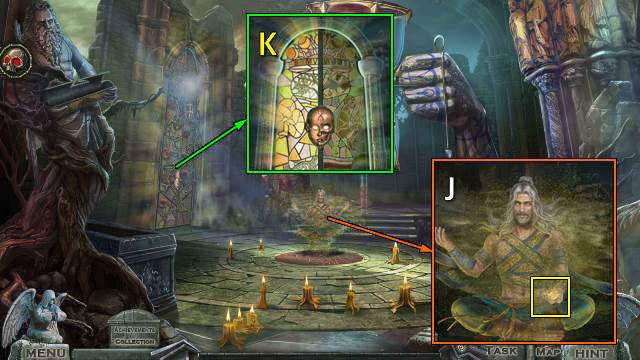
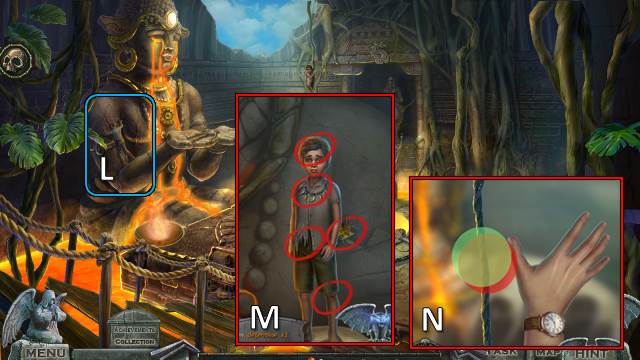
- Talk. Offer CRYSTALS OF LIFE; take TIGER CLAW (J).
- Place MASK HALF; go (K).
Chapter 2: Suraj and Asha
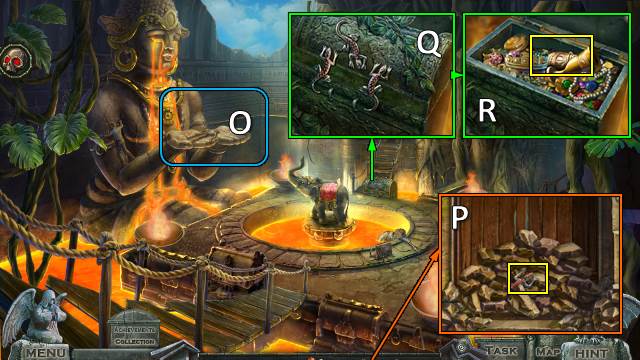
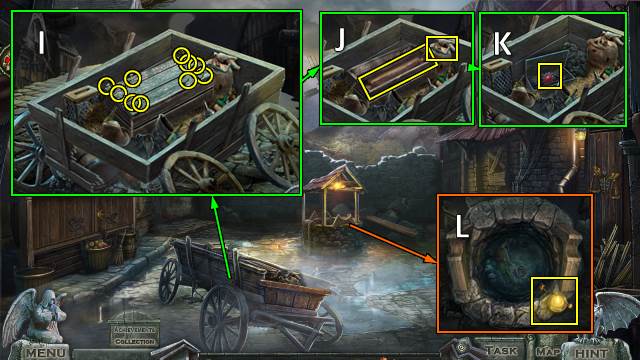
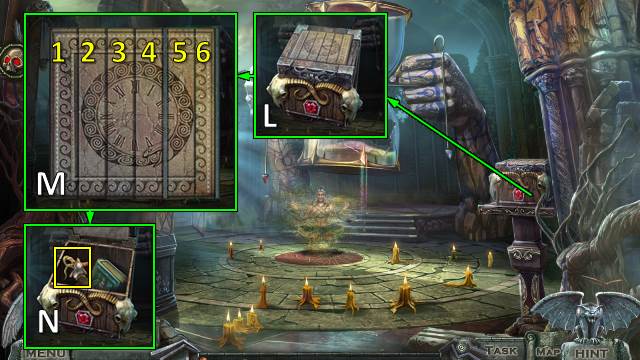
- Take WHEEL SPOKE 1/5 (L).
- Place TIGER CLAW (M).
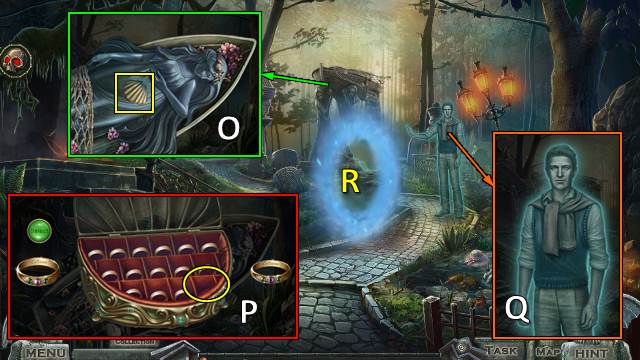
- Talk; take NECKLACE PART 1/2 (N).
- Take NECKLACE PART 2/2 (O).
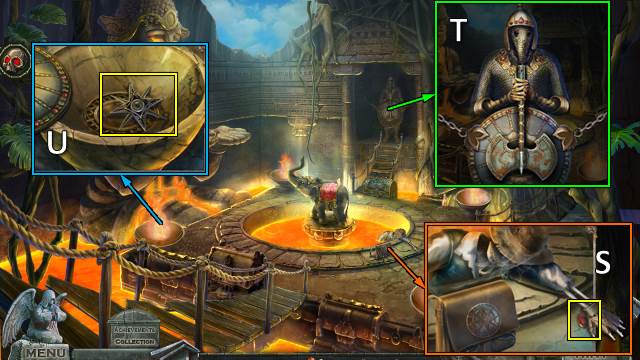
- Take STAFF (P).
- Place NECKLACE PART; find pairs (Q). Take RAINBOW KEY 2/3.
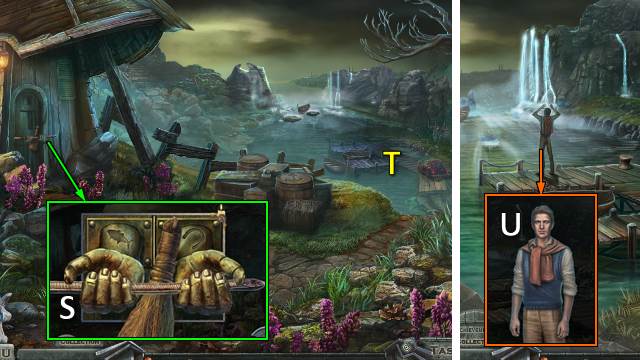
- Use STAFF (R).
- Play HOP (S).
- Solution (T): (5-6-3)-(4-5-2)-(7-4-1).
- Receive RAINBOW KEY 3/3.
- Use RAINBOW KEY (U); receive ALBUM.
- CRAYON on ALBUM.
- Solution (V): (1-5)-(2-4)-(3-7)-(4-7)-(6-7).
- Take HEART KEY 1/2 and OPEN ALBUM (W).
- Offer OPEN ALBUM for HOP (X).
- Go (Y).
- Talk (Z).
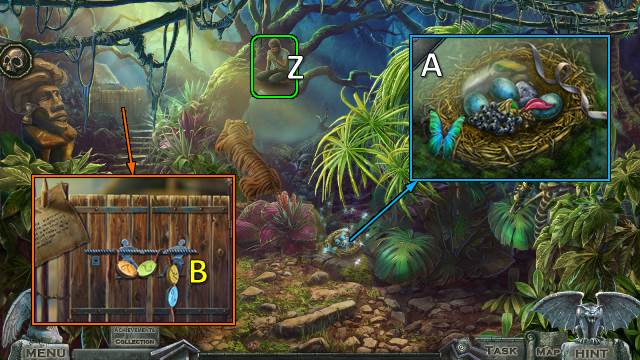
- Find items; take NATIVE TILE (A).
- Take BEADS; place NATIVE TILE. Go (B).
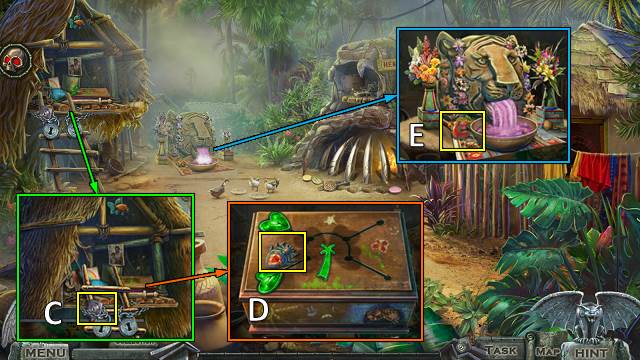
- Take IRON TILE 1/3 (C).
- Take SPIDER TOKEN 1/4 (D).
- Take LOTUS GEM 1/2 (E).
- Take WHEEL SPOKE 2/5; place BEADS (F).
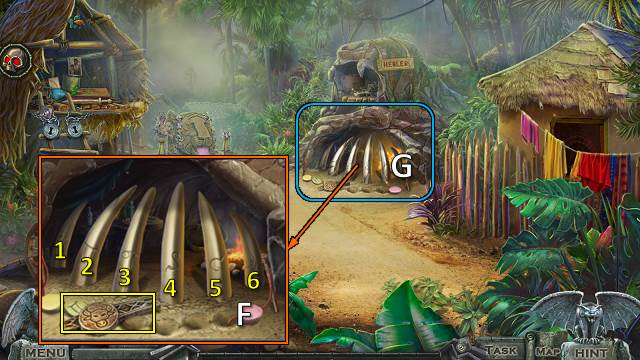
- Select 2-1-3-5-6-4.
- Play HOP (G); receive BURNING TORCH.
- Walk down.
- Use BURNING TORCH (H).
- Chase tiger into the jungle (random) (I).
- Talk; take LADDER KEY 1/2 (J).
- Take LADDER KEY 2/2 and WHEEL SPOKE 3/5 (K).
- Go to Village.
- Use LADDER KEY (L).
- Move ladder (M).
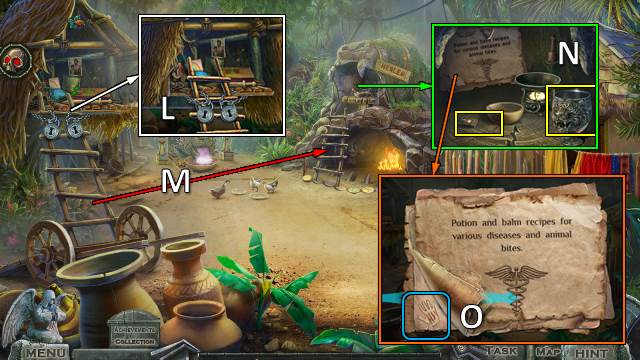
- Take BROKEN LIGHTER and SACRED CHALICE (N).
- Find recipe (O).
- Play HOP (P); receive OINTMENT INGREDIENTS.
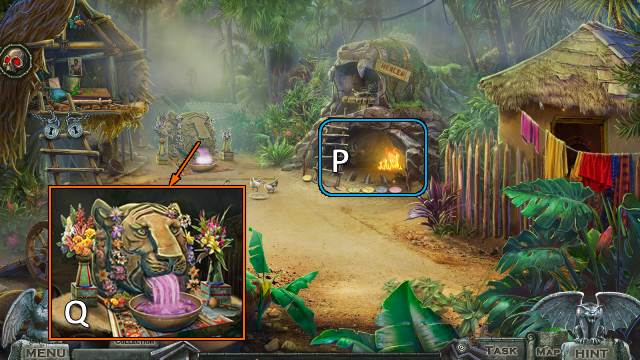
- Take RITUAL WATER with SACRED CHALICE (Q).
- GEMS 1/2 from RITUAL WATER.
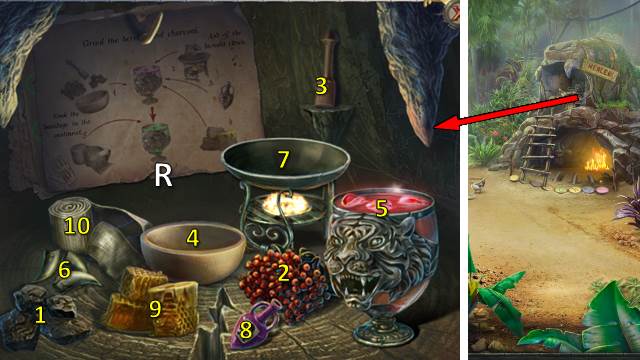
- Place RITUAL WATER and OINTMENT INGREDIENTS (R).
- Solution: 1-2-3 on 4, 4 on 5, 6 on 7, 7-8-9-10 on 5.
- Take BANDAGE WITH HEALING OINTMENT.
- Walk down.
- Offer BANDAGE WITH HEALING OINTMENT; take GEMS 2/2 (S).
- Talk (T).
- Place GEMS; take MACHETE (U).
- Offer MACHETE (V).
- Go (W).
- Play HOP.
- Take IRON TILE 2/3 (X).
- Talk; take ANCIENT MANUSCRIPT (Y).
- Take WHEEL SPOKE 4/5 (Z).
- Take STONE BLOCK 1/2 and IRON TILE 3/3 (A).
- Take BRACER 1/2; place IRON TILE (B).
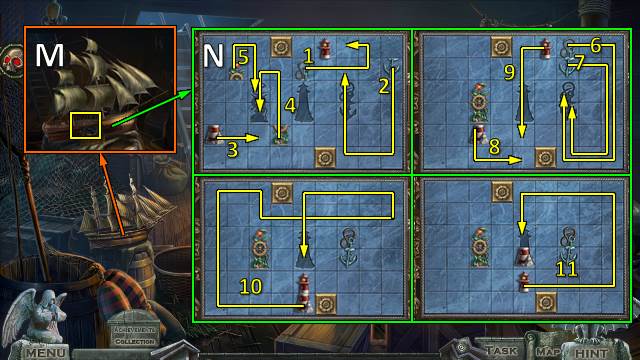
- Select 2 and 6; take CROWN 1/3 and ROPE (C).

- HOOK on ROPE; take GRAPPLING HOOK.
- Use GRAPPLING HOOK; take WHEEL SPOKE 5/5 and CROWN 2/3 (D).
- Place WHEEL SPOKE. Turn wheel; take CROWN 3/3 (E).
- Place CROWN (F).
- Solution: G-1-I-2-1; H-3-2-I-3-3-I-2-3; G-1-2-I-1.
- Receive SYMBOLS CLUE.
- Select 1-6 (J).
- Go (K).
- Follow x2 (L).
- Find differences (M).
- Select when circles overlap (N).
- Talk; receive LIZARD PART 1/2 (O).
- Take LIZARD PART 2/2 (P).
- Place and turn LIZARD PARTs (Q); take BRACER 2/2 (R).
- Take LOTUS GEM 2/2 (S).
- Place LOTUS GEM; receive SHIELD. Place BRACER; receive RUSTY HALBERD (T).
- Place SHIELD; take WIND ROSE (U).
- Place WIND ROSE (V); take WATER FLASK and GRINDSTONE (W).
- GRINDSTONE on RUSTY HALBERD; take SHARPENED HALDBERD.
- Use SHARPENED HALBERD (X).
- Offer WATER FLASK (Y).
- Talk (Z).
- Clear blocks (A).

- Talk twice; play HOP (B).
- Talk (C).
- Take WARRIOR EMBLEM (D).
- Take METAL BIRD (E).
- Take METAL FISH (F).
- Walk down.
- Place WARRIOR EMBLEM (G); take SPIDER TOKEN 2/4 (H).
- Go (I).
- Place METAL BIRD and METAL FISH (J); take SPIDER TOKEN 3/4 and CRESCENT GEM (K).
- Go to Cave.
- Place CRESCENT GEM (L); receive SPIDER TOKEN 4/4.
- Place SPIDER TOKEN (M). Solution: 4-3-6-4-7-5-4-2-1-3.
- Solution continued (N): 4-5-2-4-1-3-6-4-3.
- Solution continued (O): 4-6-5-3-4-1-2.
- Take STONE BLOCK 2/2 (P).
- Place STONE BLOCK; solution (Q).
- Select 1-2-3-4-5-6-7-8; 1-2-4-6-7; 4-6-7; 7 (R).
- Go to Village.

- Talk (S); receive HEART KEY 2/2.
- Move ladder (T).
- Place HEART KEY; select all hearts (U).
- Find pairs; take KNIFE (V).
- Go to Cave.

- Open KNIFE.
- Use KNIFE; take WOOD RESIN (W).
- Go to Village.
- Place WOOD RESIN (X); receive CRYPT KEY 1/4.
- Go (Y).
- Take CRYSTAL OF LIFE (Z).
- Walk down.
- Offer CRYSTAL OF LIFE (A).
- Play match-3 (B); receive MONOGRAM.
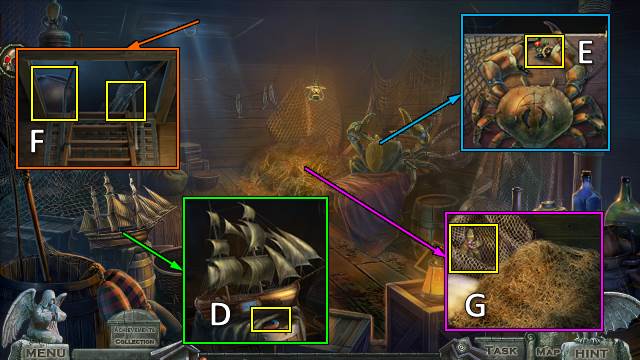
- Talk; take GLASS PANEL 1/2 (A).
- Go (C).
Chapter 3: Hester and Ingvar
- Play HOP (D); receive GLASS PANEL 2/2.
- Remove vines in pairs (E).
- Place GLASS PANEL; swap panels (F).
- Go (G).
- Take BIRD EMBLEM; place MONOGRAM (H).
- Talk; take CANDLE EMBLEM (I).
- Walk down.
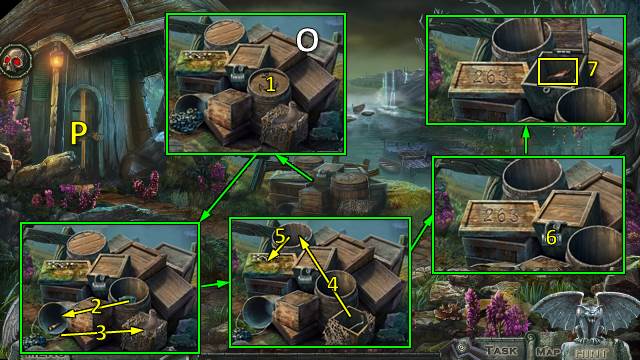
- Place CANDLE EMBLEM; take BOTTLE FRAGMENT 1/4 and CLOCK HANDS (J).
- Go (K).
- Place CLOCK HANDS (L).
- Talk (M).
- Go (N).
- Take GEAR (O).
- Look (P).
- GEAR on BROKEN LIGHTER; take LIGHTER.
- Use LIGHTER (Q). Play HOP; receive KNIFE.
- Use KNIFE (P).
- Talk (R); receive LABEL HALF.
- Move labels; remove pairs (S).
- Place LABEL HALF; take KNITTING NEEDLE, COIN and MEDICINE (T).
- Offer MEDICINE (U); receive FLAME EMBLEM 1/3.
- Take POKER. Use KNITTING NEEDLE; receive CHEESE (V).
- Use LIGHTER; take LIT CANDLE. Remove paper; take BOTTLE FRAGMENT 2/4. Offer CHEESE; take FLAME EMBLEM 2/3 (W).
- Take DIARY (X). Use KNIFE; take FLAME EMBLEM 3/3 (Y).
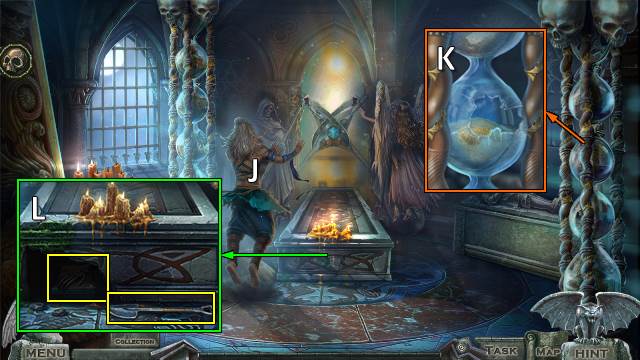
- Place FLAME EMBLEM (Z).
- Solution: follow 1-9.
- Use POKER x3; take DOOR KEY (A).
- Use DOOR KEY; go (B).
- Talk (C).
- Take BOTTLE FRAGMENT 3/4 (D).
- Take SHOP KEY (E).
- Take SUN EMBLEM; place SHOP KEY (F).
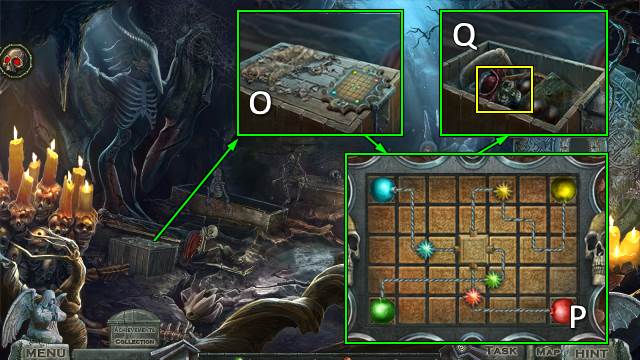
- Play HOP (G).
- Solution (H): (8-10)-(2-9)-(3-10)-(6-7)-(1-7)-(5-3)-(1-4)-(1-3)-(2-3).
- Receive PLIERS.
- Use PLIERS; find NAILS x10 (I).
- Take CRANKSHAFT x2 (J).
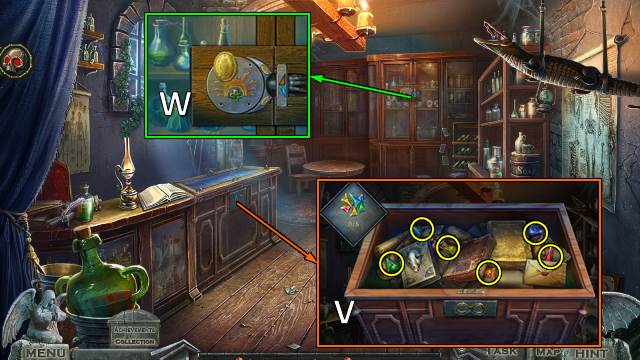
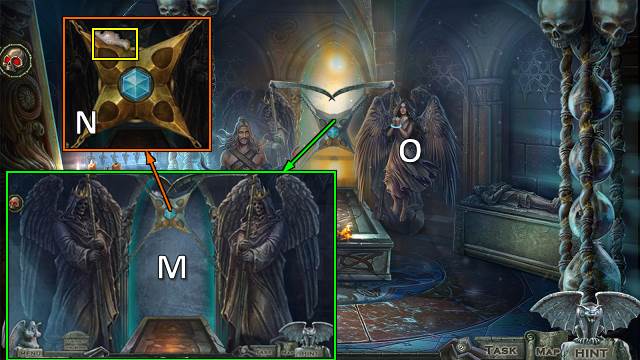
- Place BIRD EMBLEM; take SPARK AMULET 1/3 (K).
- Place LIT CANDLE; use PLIERS (L). Receive BOOK KEY.
- Walk down.

- Place SUN EMBLEM; take BOTTLE FRAGMENT 4/4 (M).
- Go (N).
- Place BOTTLE FRAGMENT. Move bottles as shown (O).
- Go (P).
- Use BOOK KEY (Q).
- Select 1-6; receive CHAIN. Take CRUTCH.
- Walk down.
- Place CRANKSHAFT and CHAIN; go (R).
- Take POCKET WATCH and HOOK (S).
- Take SPARK AMULET 2/3 (T).
- Talk. Offer POCKET WATCH; take INFINITY SYMBOL (U).
- Go to Pharmacy.
- Place INFINITY SYMBOL. Find RAINBOW GEMS x6 (V).
- Use COIN x4; place RAINBOW GEMS (W).
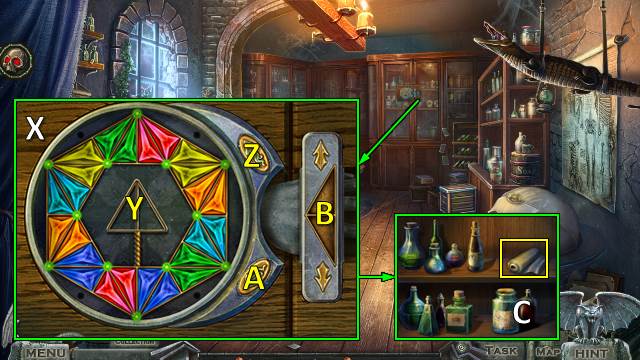
- Solution (X): Y-Z-Y-Z-Y-Zx3-Y-A-Y-A-Y-A-B-A-B-A-B-A-B-Ax2-B-Z-B.
- Take BANDAGE (C).
- Walk down.
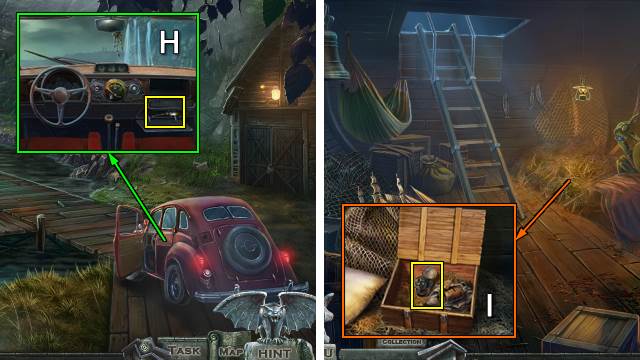
- Take CHEST TILE PART 1/2 with HOOK (D).
- Go (E).
- Offer BANDAGE (F).

- Talk; take CHEST TILE PART 2/2 (G).
- Place CHEST TILE PART; solution (H).
- Take MALLET (I).
- Use MALLET; select pairs. Go (J).
- Use LIGHTER x3 (K).
- Talk; take DIARY KEY (L).
- Take SPARK AMULET 3/3 (M).
- Take CROSSED SWORDS (N).
- Place SPARK AMULET (O).
- Solution (P).
- Take SKULL TOKEN (Q).
- Place SKULL TOKEN and CROSSED SWORDS; take PIRATE HOOK and GOLDEN DISC (R).
- Place GOLDEN DISC (S).
- Play HOP (T).
- Go to City Square.
- DIARY KEY on DIARY; take SHOP KEY.
- Place SHOP KEY (U).
- Play HOP (V); receive BRUSH.
- Go right.
- PIRATE HOOK on CRUTCH; take HOOKED CRUTCH.
- Use HOOKED CRUTCH (W); receive EYE.
- Place EYE. Find objects; take GOLDEN TOOTH (X).
- Go to Well.
- Place GOLDEN TOOTH; select 1-6. Take ARROWHEAD (Y).
- Go (Z).
- Use BRUSH and ARROWHEAD; take SPIDER KEY (A).
- Select 1-6 (B).
- Place SPIDER KEY (C). Find items; receive CRYPT KEY 2/4.

- Go (D).
- Take CRYSTAL OF LIFE (E).
- Walk down twice.

- Offer CRYSTAL OF LIFE (F).
- Play match-3 (G).
- Receive GOLDEN BRACELET.
- Talk; take DOUBLE RINGS (F).
- Go to Garden of Lost Hopes.
Chapter 4: Todd and Christie
- Take RUNGS with HOOKED CRUTCH (H).
- Place RUNGS, NAILS and MALLET. Take LADDER (I).
- Place LADDER (J).
- Place GOLDEN BRACELET; take METAL PLATE 1/2 and CHRISTIE'S RING (K).
- Receive METAL PLATE 2/2.
- Walk down twice.
- Place METAL PLATE (L).
- Solution (M): (1-6)-(2-5)-(3-4).
- Take DIADEM (N).
- Go to Garden of Lost Hopes.
- Place DIADEM; take SHELL BOX (O).
- DOUBLE RINGS and CHRISTIE'S RING on SHELL BOX; select (P). Receive WEDDING RING.
- Offer WEDDING RING (Q).
- Go (R).
- Take BRUSH (S).
- Go (T).
- Talk (U); receive HORSE EMBLEM.
- Take HORSESHOE (V).
- Place HORSE EMBLEM (W); take SCISSORS (X). Scroll left.

- Take SHRIMP 1/2 (Y).
- Take LOBSTER TONGS (Z).
- Walk down.
- Use SCISSORS (A); find items. Receive FISH EMBLEM.
- Place HORSESHOE and FISH EMBLEM; take ROD (B).
- Go (C).
- Take MAGNET (D).
- Use LOBSTER TONGS; take SHIP CHIP HALF 1/2 (E).
- Use HOOKED CRUTCH; take PITCHFORK and POT (F).
- Take LOTUS EMBLEM (G).
- Go to Dock.
- Place LOTUS EMBLEM; take OILER (H).
- Go to Dockhouse.
- Use PITCHFORK and OILER; take HARD RESIN (I).
- Go to Dock.
- Move sticks, paper and kindling (J).
- Use ROD, POT, LIGHTER, HARD RESIN and BRUSH. Take RESIN (K).
- Offer RESIN (L); receive SHIP CHIP HALF 2/2.
- Go to Dockhouse.
- Place SHIP CHIP HALF (M).
- Solution (N): follow 1-11.
- Take ANCHOR EMBLEM (M).
- Walk down.
- Place ANCHOR EMBLEM (1), follow 2-5, select 6, take SHRIMP 2/2 (7) (O).
- Go (P).
- Place SHRIMP; take STEEL CABLE (Q).
- Go to Dock.
- Scroll left; place STEEL CABLE (R).
- Offer STEEL CABLE (S); receive CAR KEY.
- Use CAR KEY; take HAIRPIN (T).
- Use HAIRPIN (U).
- Play HOP (V); receive GAS.
- Scroll right. Open; use GAS. Close (W).
- Scroll left; use key (T).
- Avoid obstacles (X).
- Talk; take CRYPT KEY 3/4 (Y).
- Go (Z).
- Take CRYSTAL OF LIFE (A).
- Walk down twice.
- Offer CRYSTAL OF LIFE (B).
- Play match-3 (C).
- Receive AIR SYMBOL.
- Talk (A); receive BOOK PENDANT.
- Place BOOK PENDANT (D); take CRYPT KEY 4/4 (E).
- Go to Garden of Lost Hopes.
- OILER on DIRTY KNIFE; take KNIFE.
- Take FISHNET with KNIFE (F).
- Use FISHNET (G); play HOP.
- Solution (H).
- Receive CROWN.
- Place and turn CRYPT KEY x4. Go (I).
- Talk (J); receive STONE DOVE 1/2.
- Use MAGNET (K); receive EARTH SYMBOL.
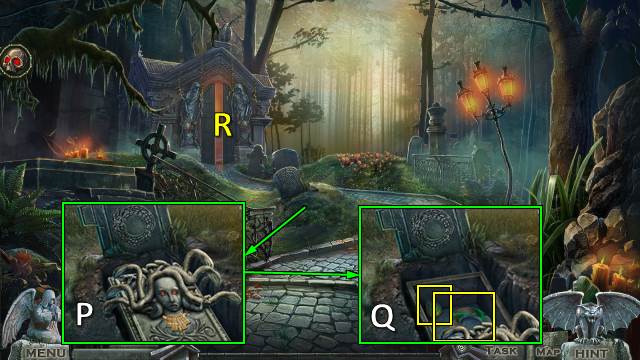
- Remove stones; take JOURNAL and GARDEN SHOVEL (L).
- Place CROWN. Match crown, chain and wings (M).
- Take STONE DOVE 2/2 (N).
- STONE DOVE on JOURNAL; take GORGON NECKLACE and OPEN JOURNAL.
- Offer OPEN JOURNAL (O); receive CRYSTAL OF LIFE.
- Walk down.
- Use GARDEN SHOVEL; place GORGON NECKLACE (P). Take WATER SYMBOL and OUROBOROS DISC (Q).
- Go (R).
- Place OUROBOROS DISC; solution (S).
- Take FIRE SYMBOL (T).
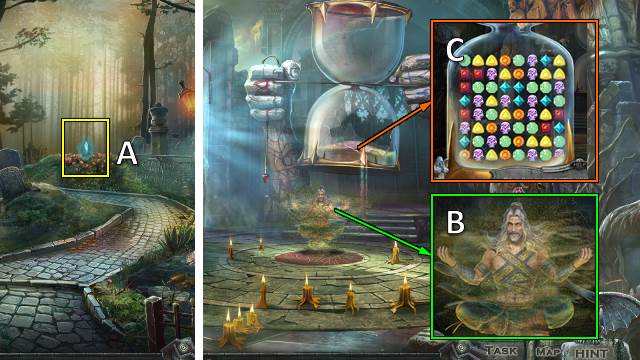
- Place AIR SYMBOL, EARTH SYMBOL, WATER SYMBOL, FIRE SYMBOL and CRYSTAL OF LIFE (U).
- Casual solution (V): 1-4.
- Hard solution (W): 1-7.
- Congratulations, you have completed Redemption Cemetery: The Stolen Time.
Created at: 2019-12-15