

Walkthrough Menu
- General Tips
- Chapter 1: Room 101
- Chapter 2: The Hackamore Grimoire
- Chapter 3: Emma Lynch
- Chapter 4: The Grey Lands
- Chapter 5: The Devourer
General Tips
- This is the official guide for Rite of Passage Hackamore Bluff.
- This guide won't tell you when to zoom into a location; the screenshots show each zoom scene.
- Hidden-object puzzles are referred to as HOPs. Only the locations of the HOPs will be shown.
- Use the Map to fast travel to a location.
Chapter 1: Room 101
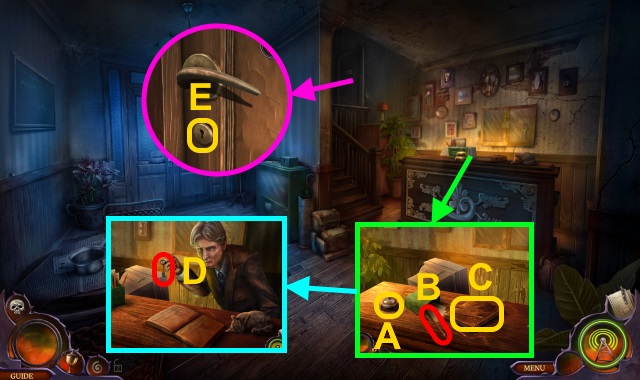
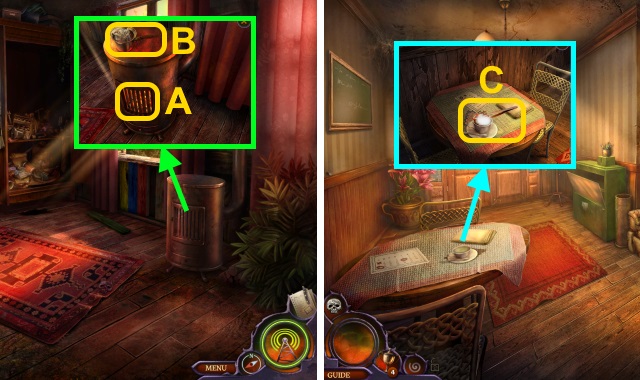
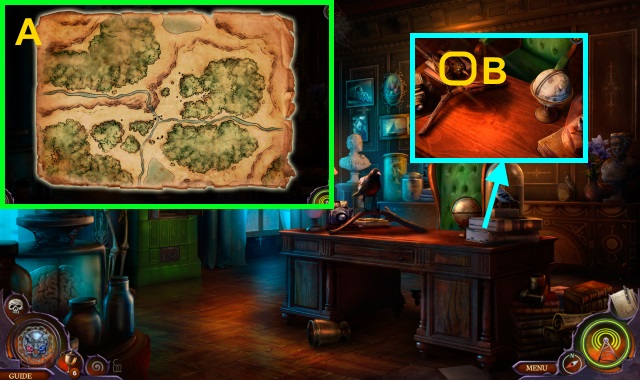
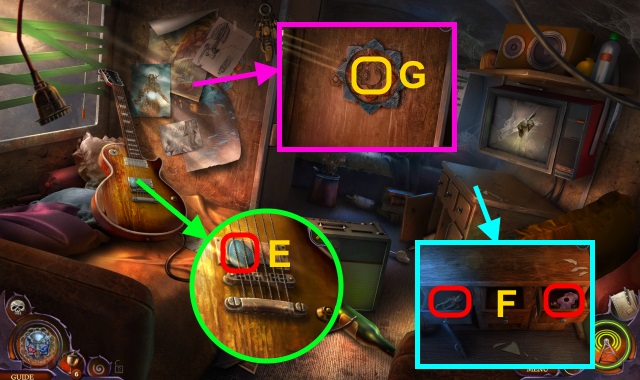
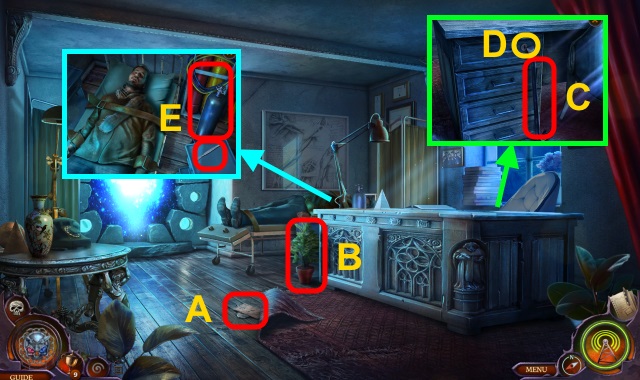
- Ring bell (A). Take PENCIL (B); examine pencil holder. Open (C); take clue.
- Talk; take HOTEL ROOM KEY (D).
- Use HOTEL ROOM KEY (E); open.
- Walk forward.
- Examine bed (F).
- Turn on light; take TWEEZERS, WATER BOTTLE, and CLOTH RAG (G).
- Take FIRE POKER (H).
- CLOTH RAG on FIRE POKER; receive MAGNETIZED POKER.
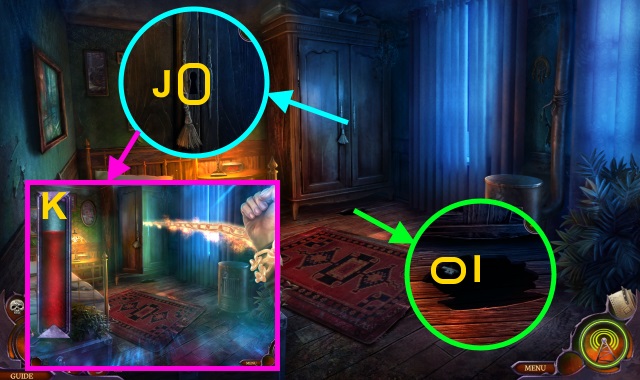
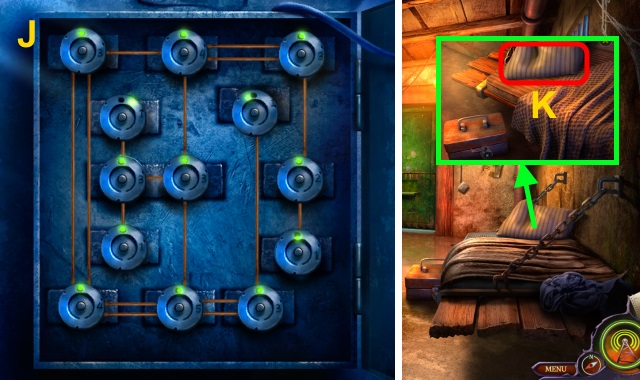
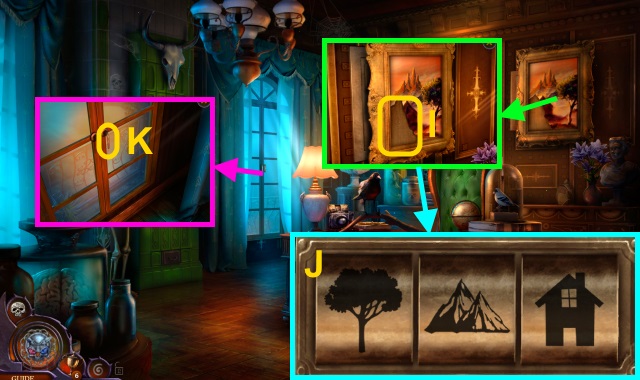
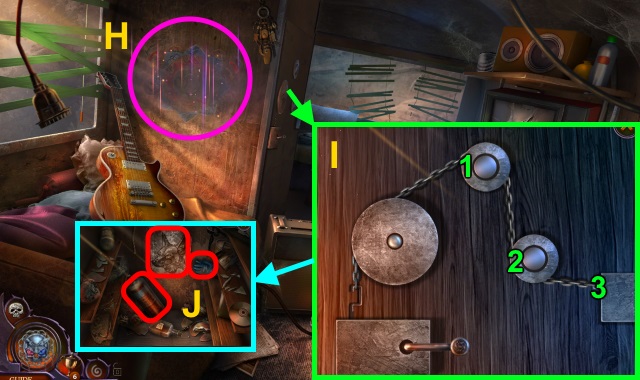
- Use MAGNETIZED POKER (I); receive WARDROBE KEY.
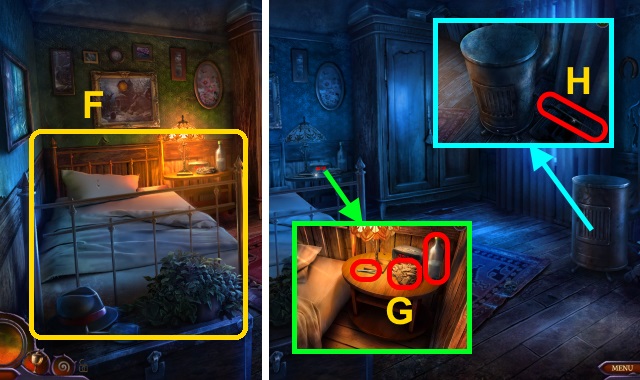
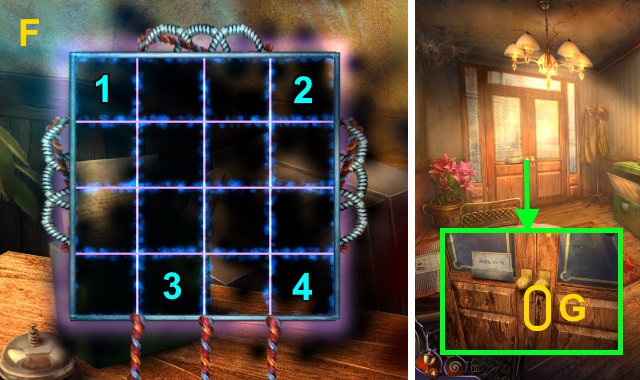
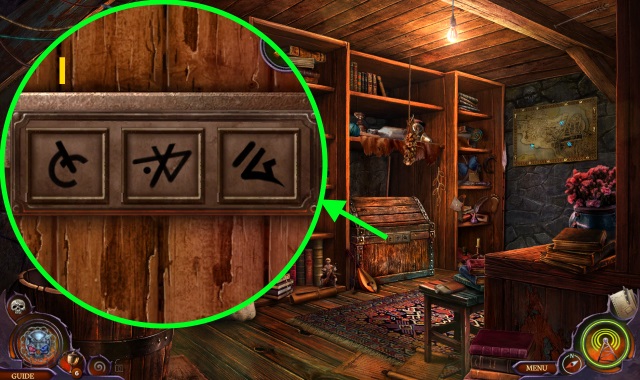
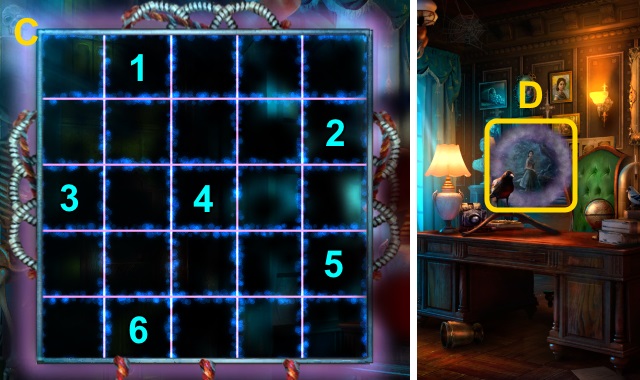
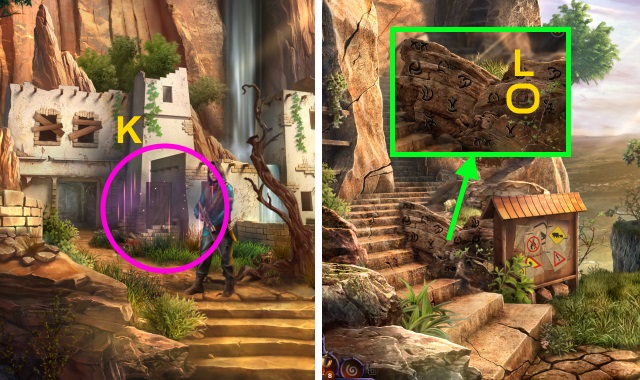
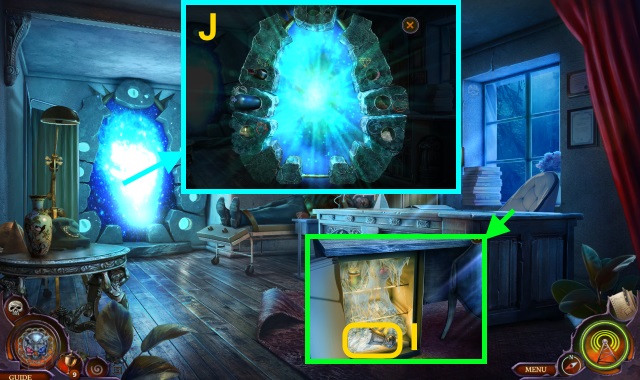
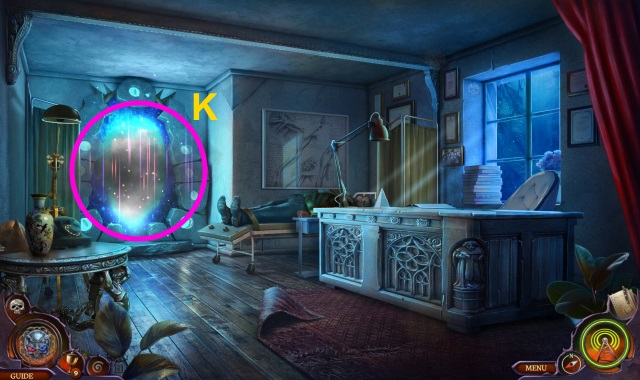
- Use WARDROBE KEY (J).
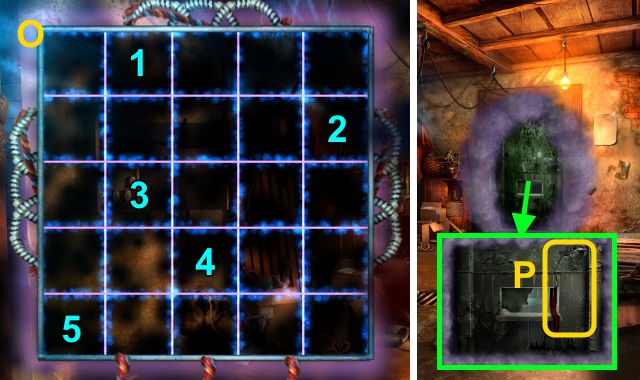
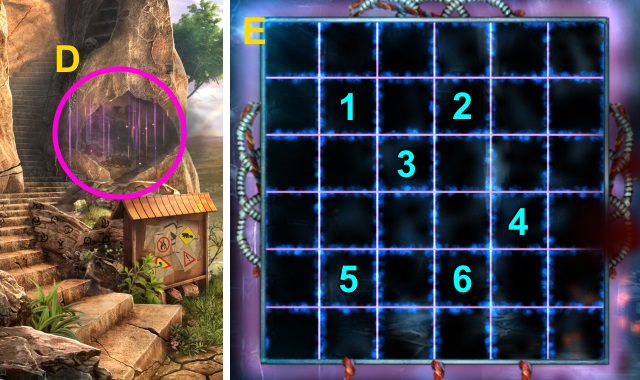
- Solution (K): select scene until bar is full.
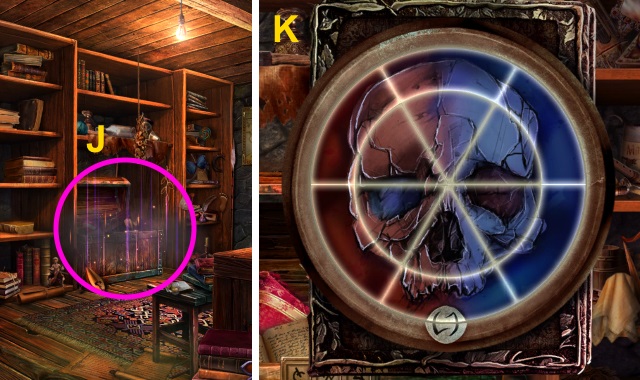
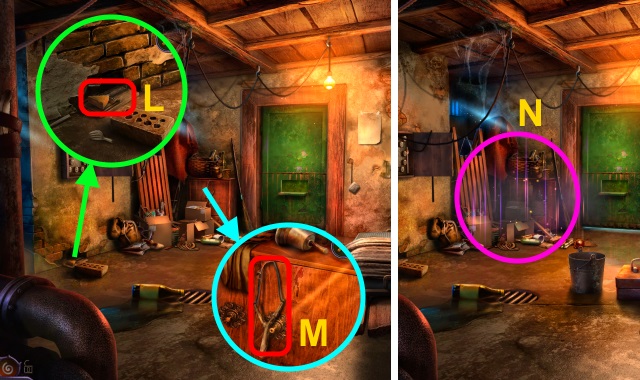
- Open; play HOP. Receive WOODEN BOX (L).
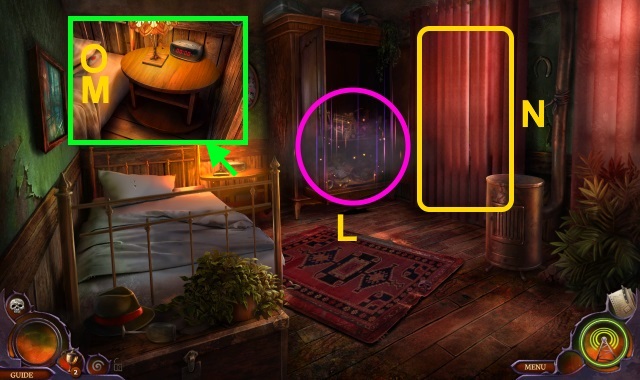
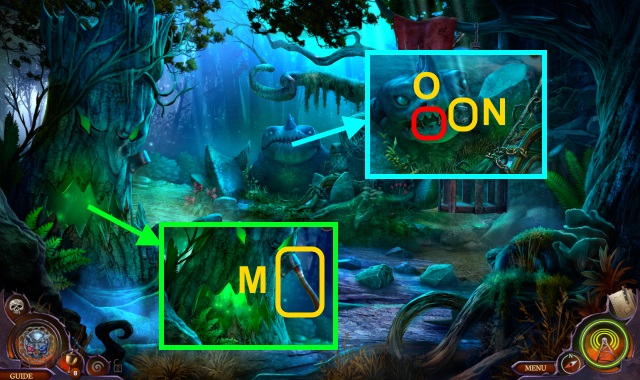
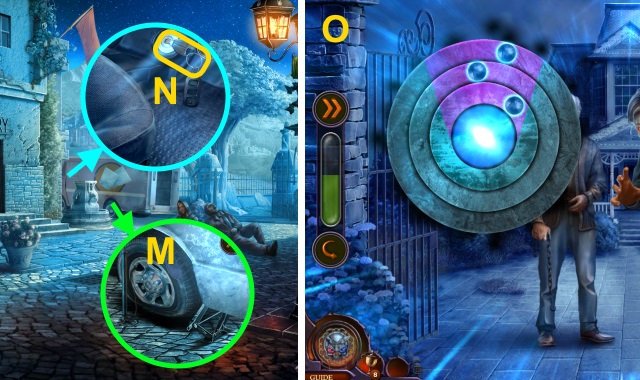
- Take clue (M).
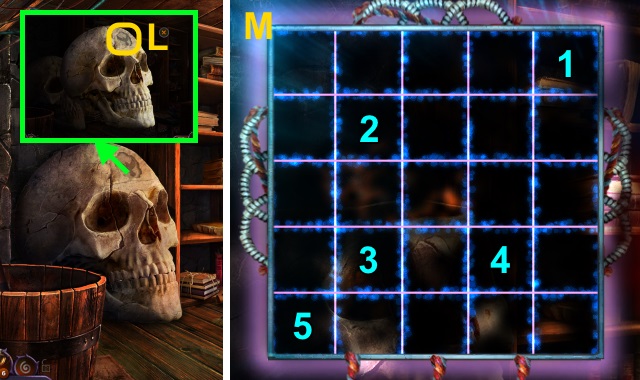
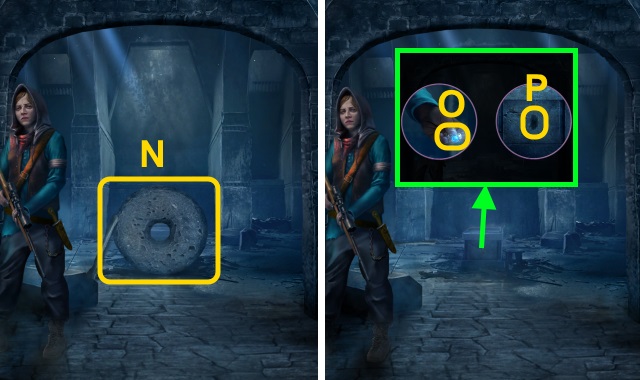
- Open curtain (N).
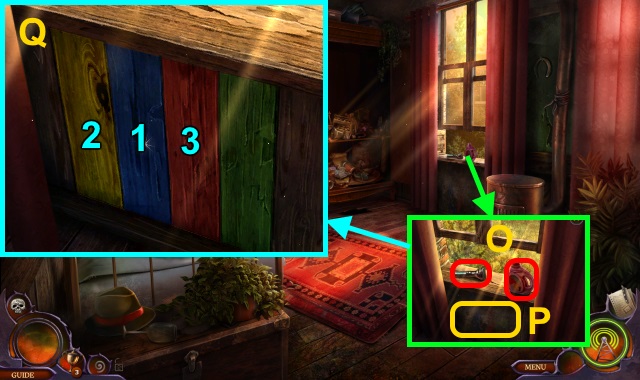
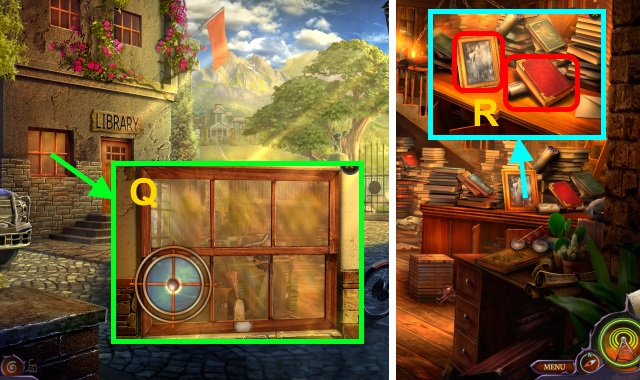
- Take OLD FLASHLIGHT and DETERGENT (O). Use WATER BOTTLE and CLOTH RAG (P).
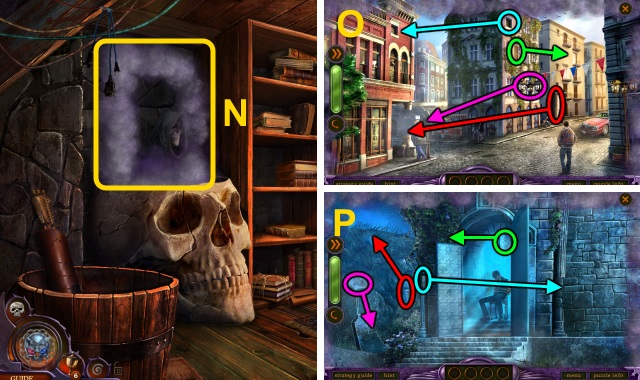
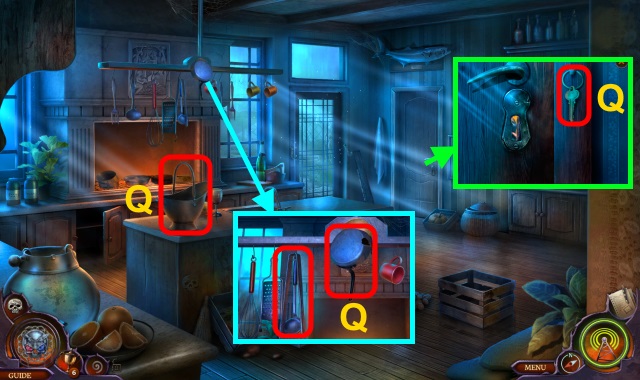
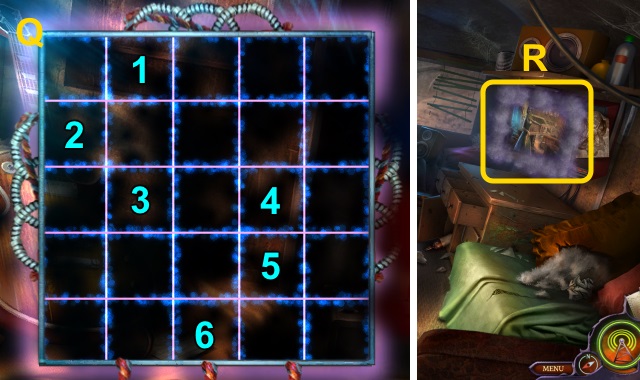
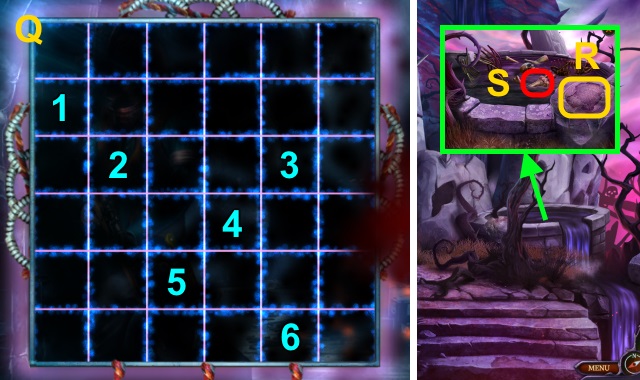
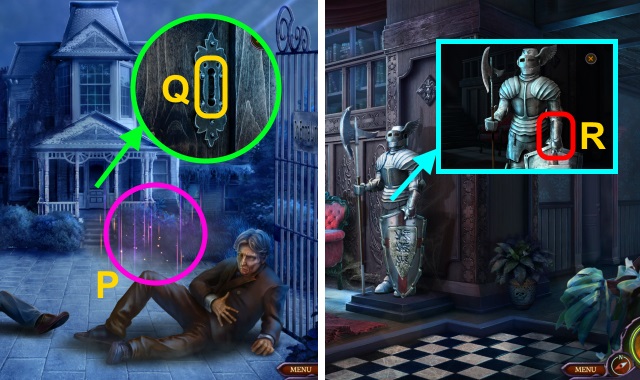
- Solution (Q).
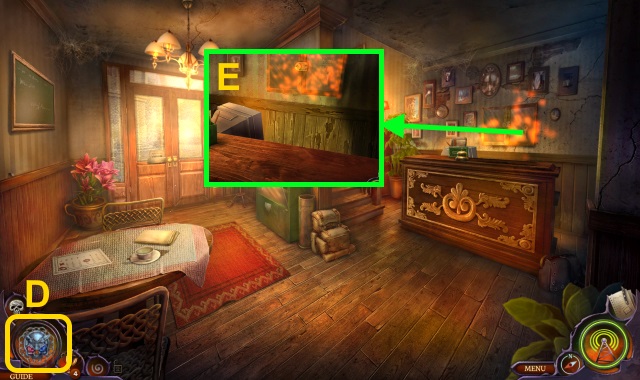
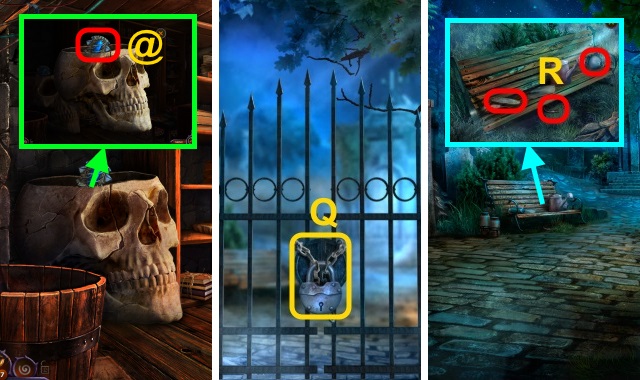
- Examine paper; take BOX KEY.
- BOX KEY on WOODEN BOX.
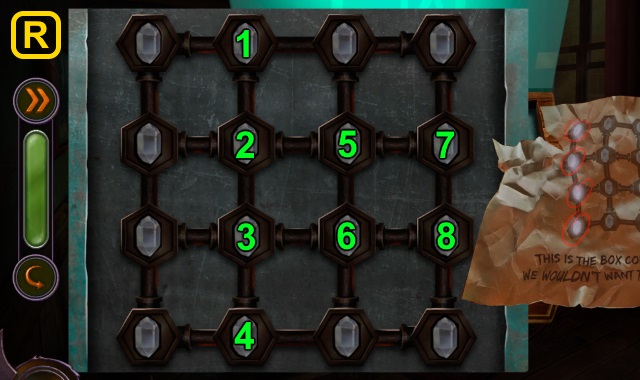
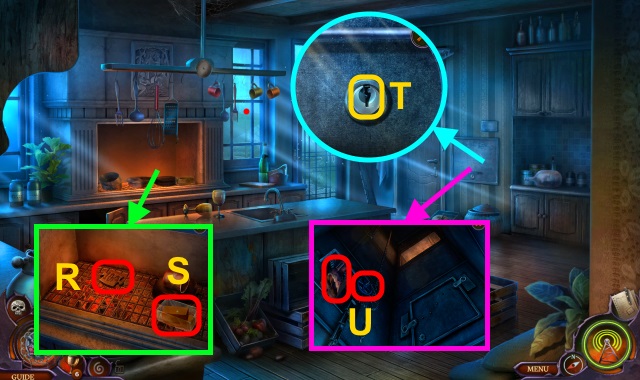
- Solution (R).
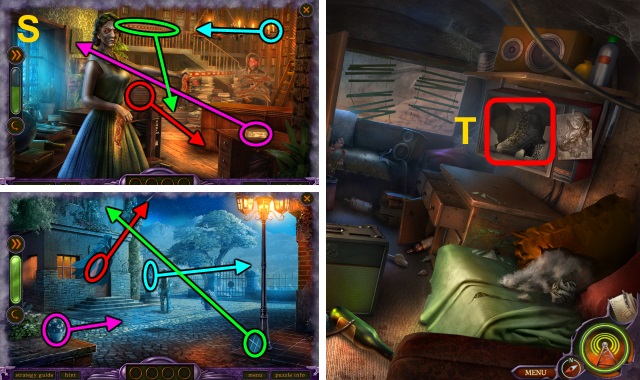
- Examine notes and camera; press play. Take clue and TALISMAN FRAME.
- Walk down.
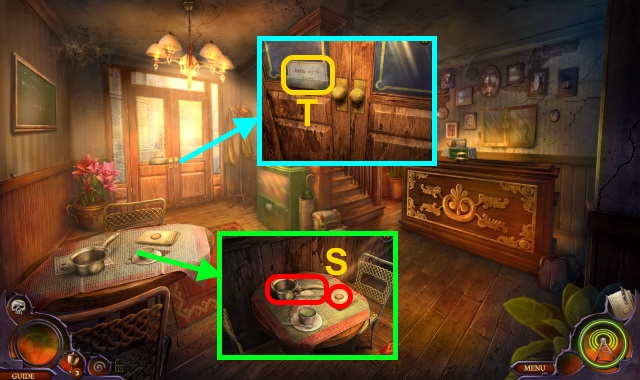
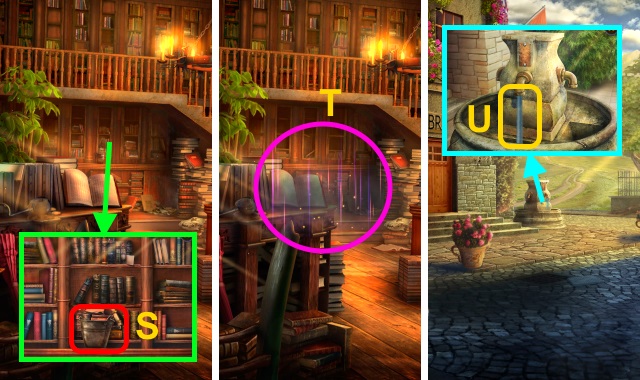
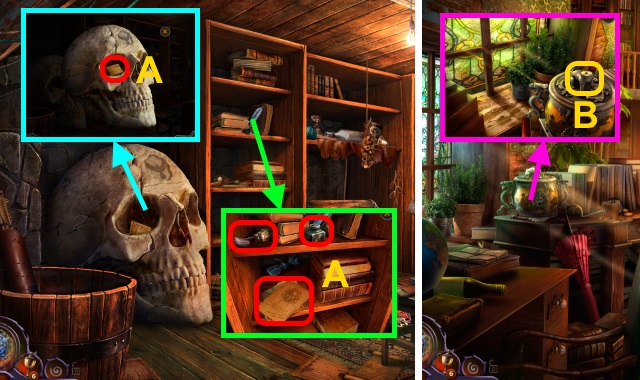
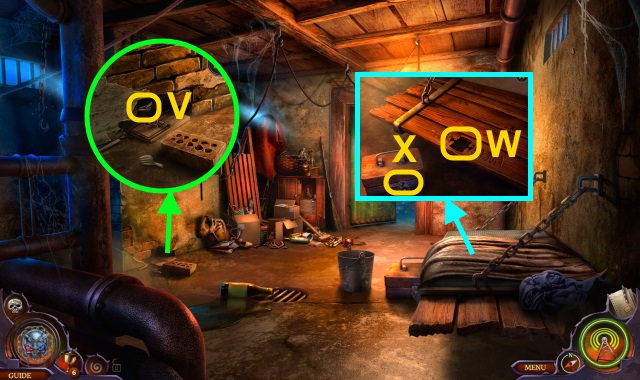
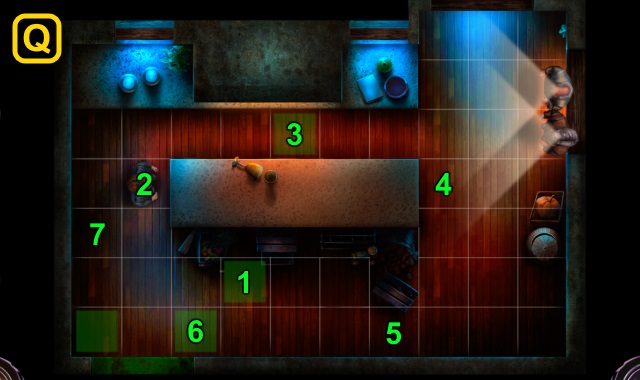
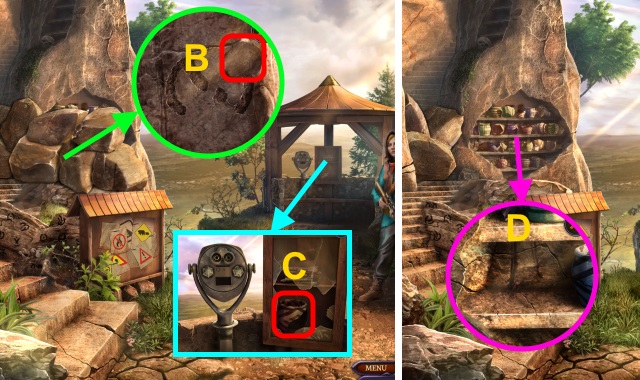
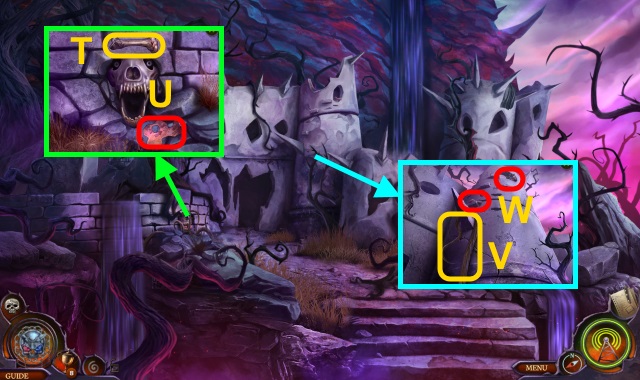
- Take COIN (1/3) and POT (S).
- Examine note (T); take COIN (2/3).
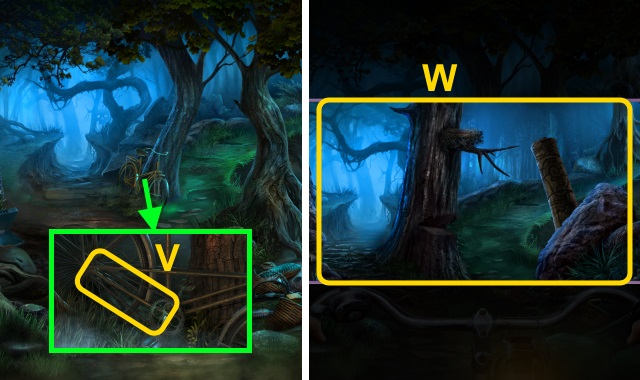
- Take UMBRELLA, COIN (3/3) and SCRUB BRUSH (U).
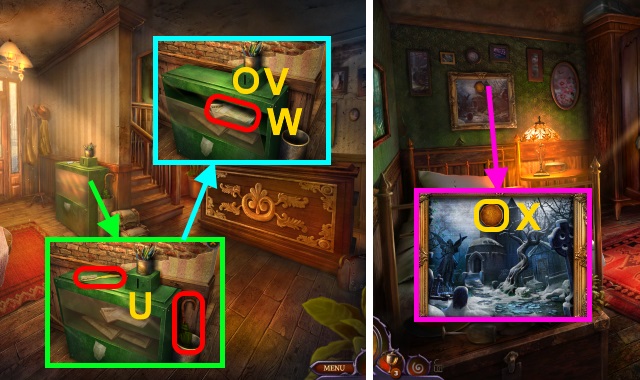
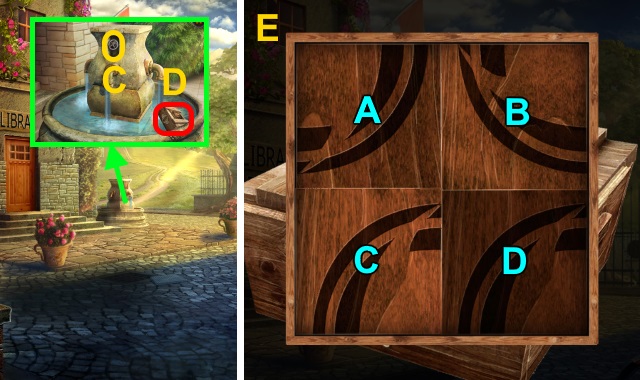
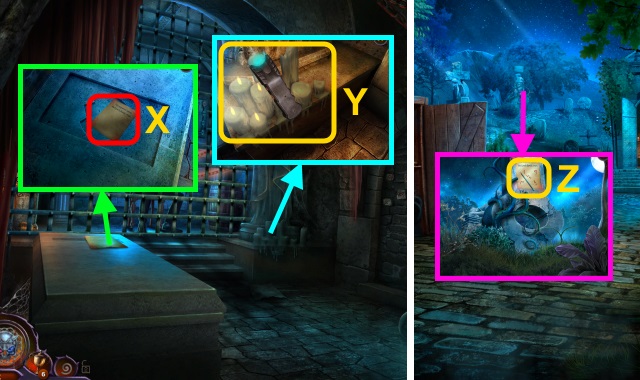
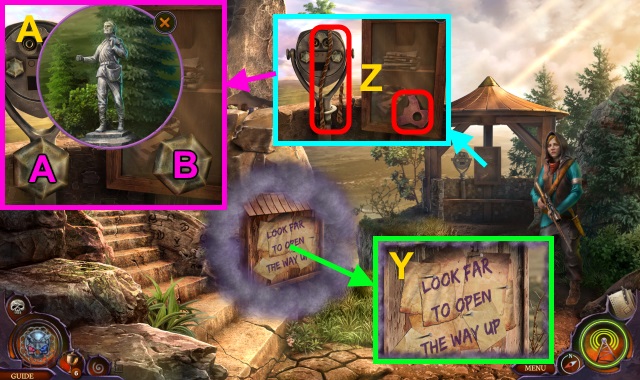
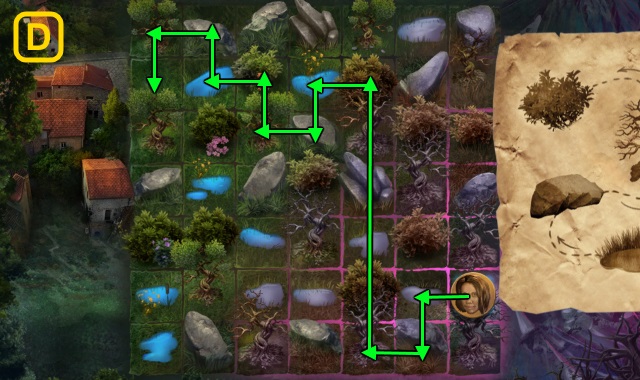
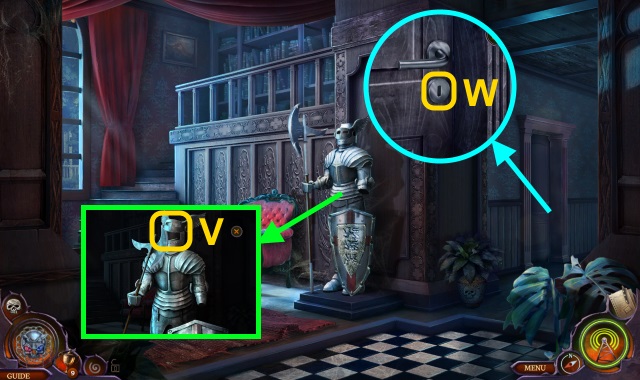
- Use COIN (3/3) (V); take Map, NEWSPAPER, and CLOCK PLATE (W).
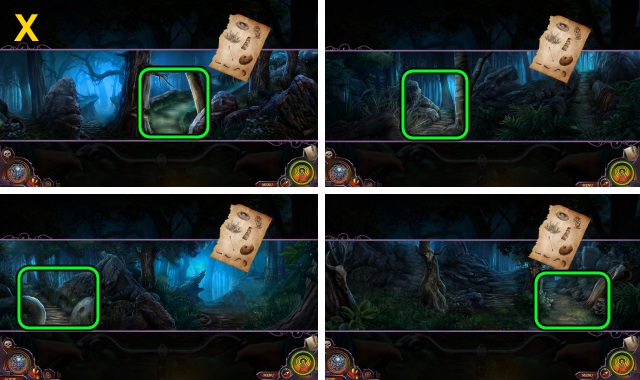
- Walk right.
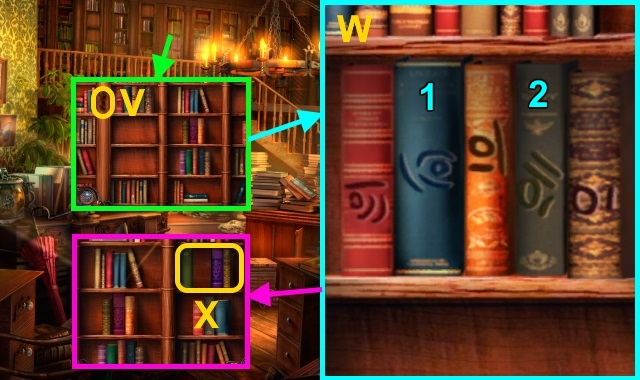
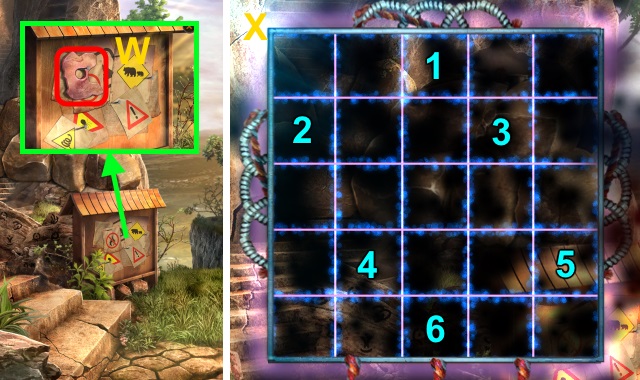
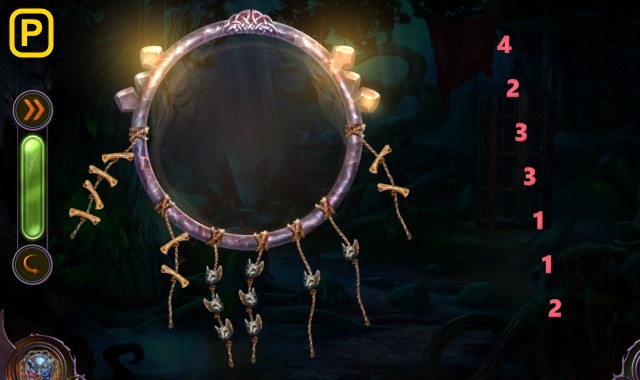
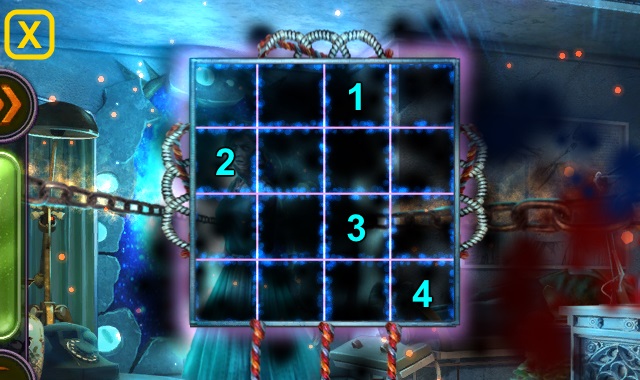
- Place CLOCK PLATE (X).
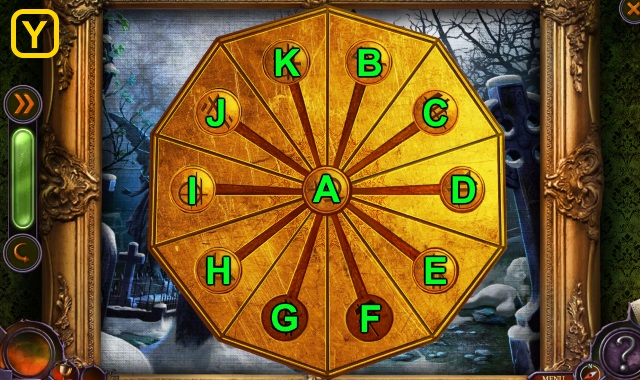
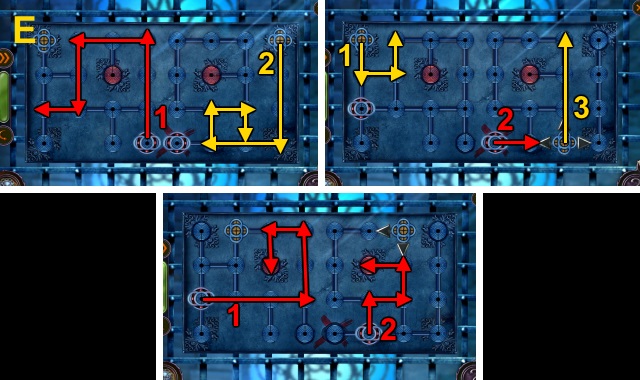
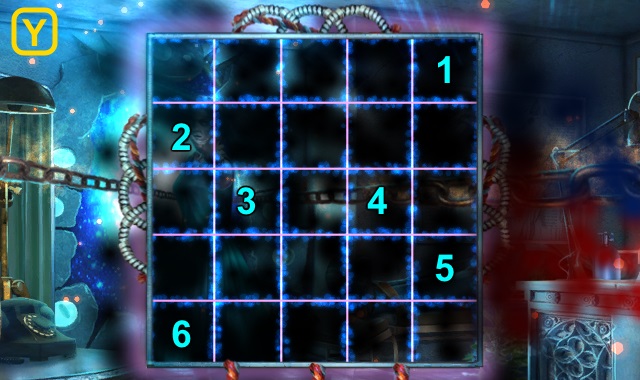
- Solution (Y): (A-G)-(C-A-F)-(D-A-C)-(E-A-D).
- (G-A-E)-(K-A-G)-(J-A-K)-(I-A-J)-(E-A-I).
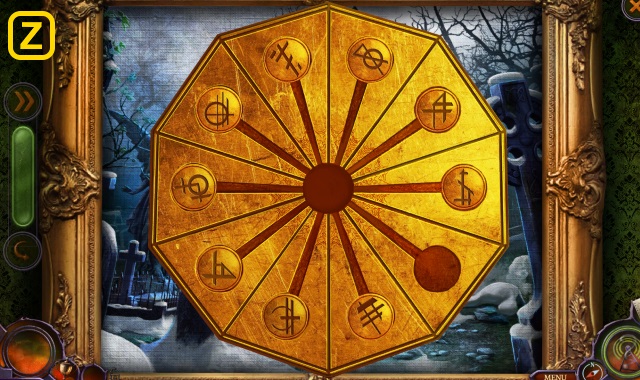
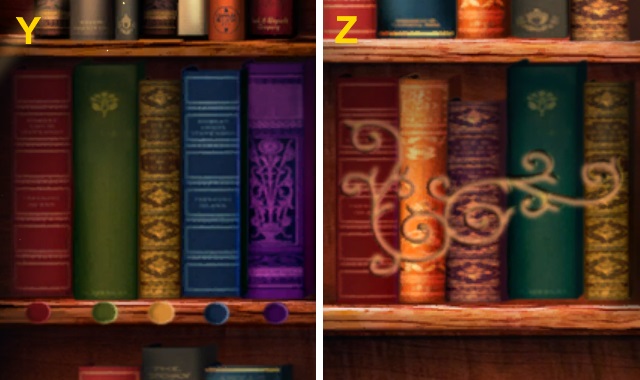
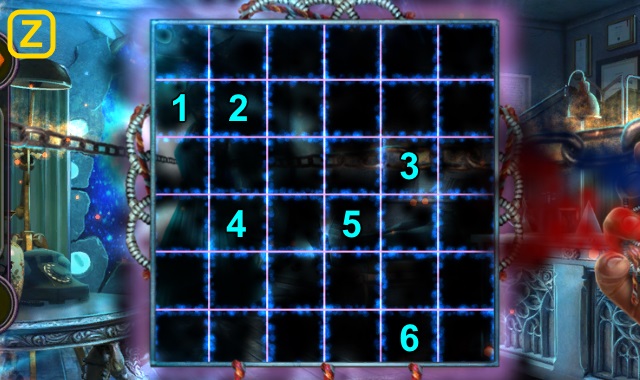
- Solution (Z).
- Take MATCHES and WAX-ENCRUSTED TALISMAN PART.
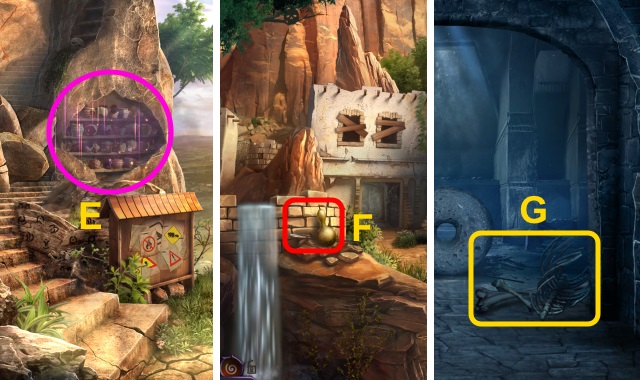
- Open; place NEWSPAPER and wood (A). Use MATCHES. Place POT and WAX-ENCRUSTED TALISMAN PART (B); use TWEEZERS. Receive HOT TALISMAN PART.
- Walk down.
- Place HOT TALISMAN PART (C); receive SILVER SKULL and TWEEZERS.
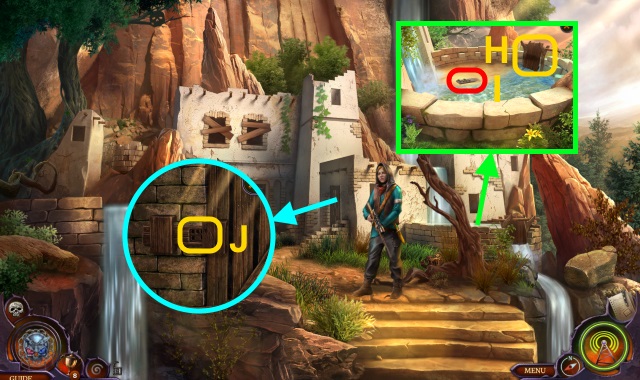
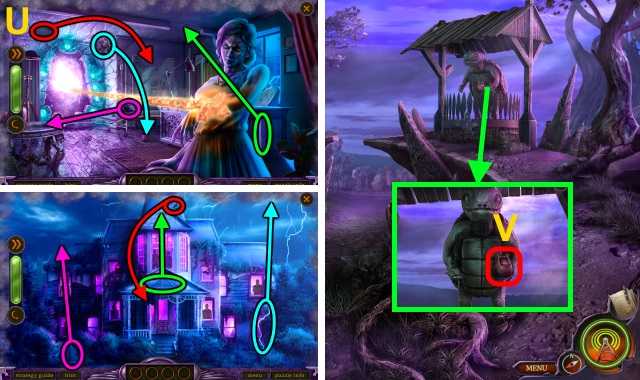
- SILVER SKULL on TALISMAN FRAME; take Talisman.
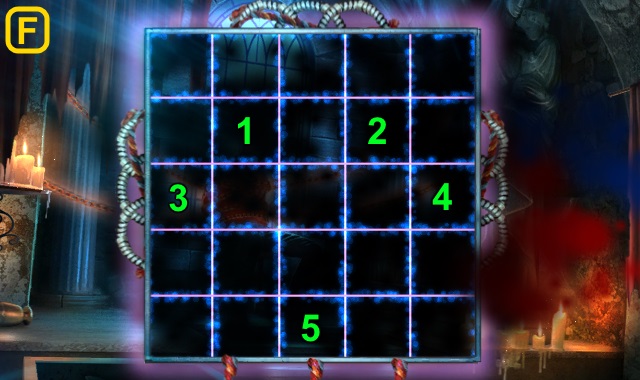
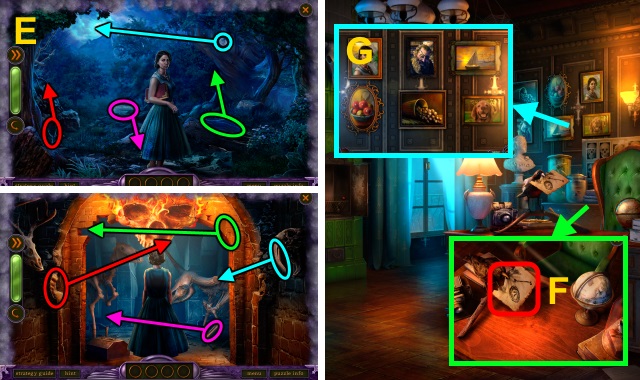
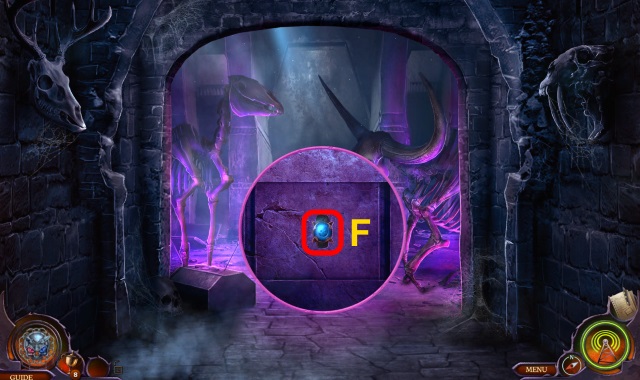
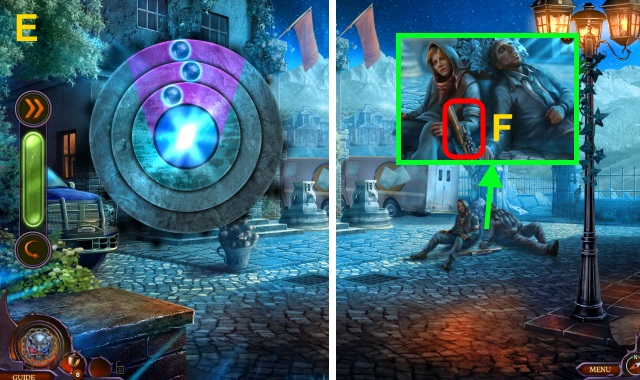
- Use Talisman (D) on scene (E).
- Solution (F).
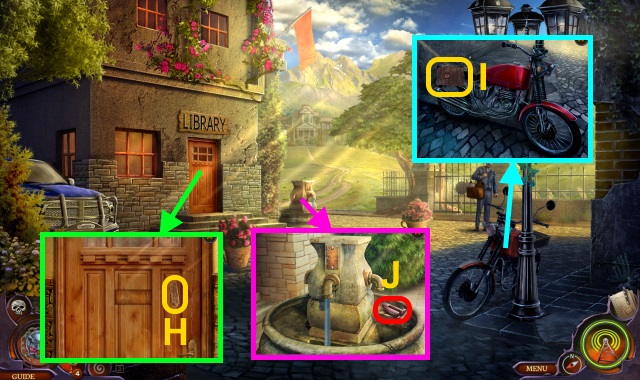
- Examine scene 2x; receive FRONT DOOR KEY.
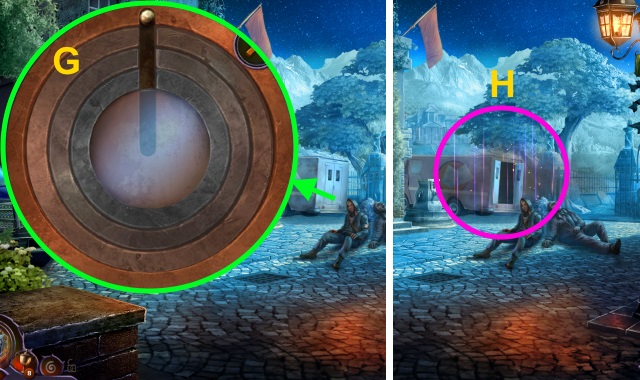
- Use FRONT DOOR KEY (G).
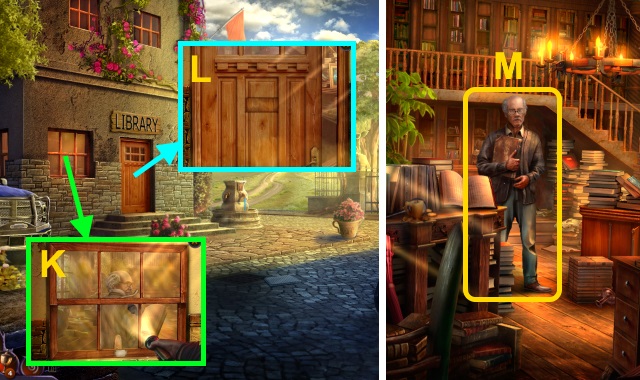
- Walk left.
Chapter 2: The Hackamore Grimoire
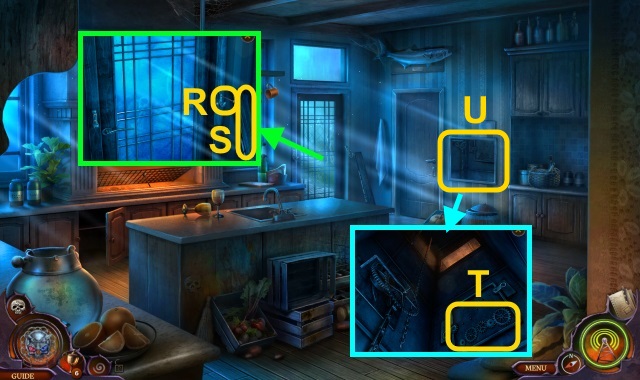
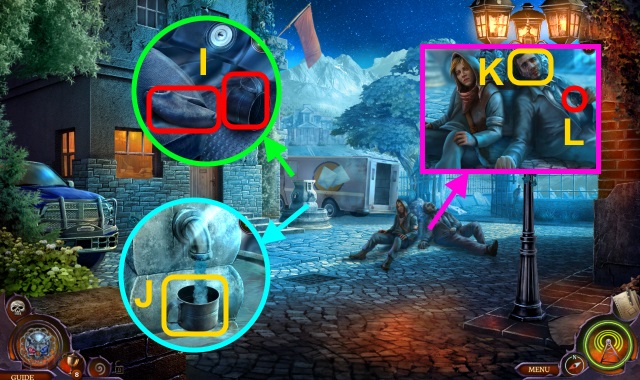
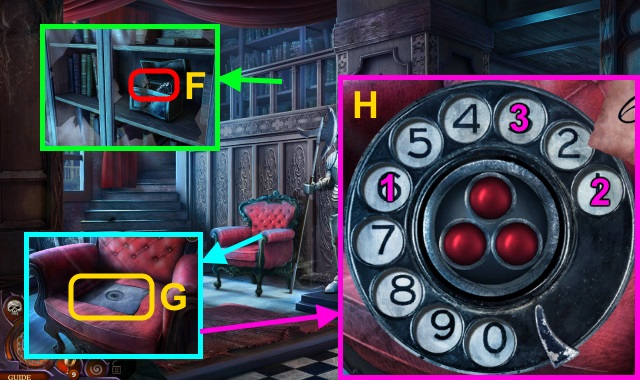
- Examine door. Use TWEEZERS (H); receive RAZOR BLADE.
- Examine bag (I); use RAZOR BLADE. Open; move items. Take ELECTROSHOCK DEVICE and WRENCH. Open; take BATTERY.
- BATTERY on OLD FLASHLIGHT; receive WORKING FLASHLIGHT.
- Take STAPLER (J).
- Examine; use WORKING FLASHLIGHT (K).
- Examine (L).
- Walk forward.
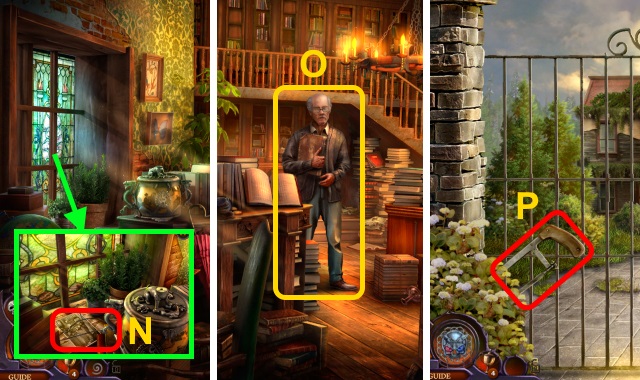
- Talk (M).
- Take WIRE HANGER and clue (N).
- Examine WIRE HANGER 2x; receive WIRE HOOK.
- Talk (O).
- Walk forward.
- Take HACKSAW (P).
- Walk down.
- Use WIRE HOOK. Solution (Q): stop balls inside target.
- Go left.
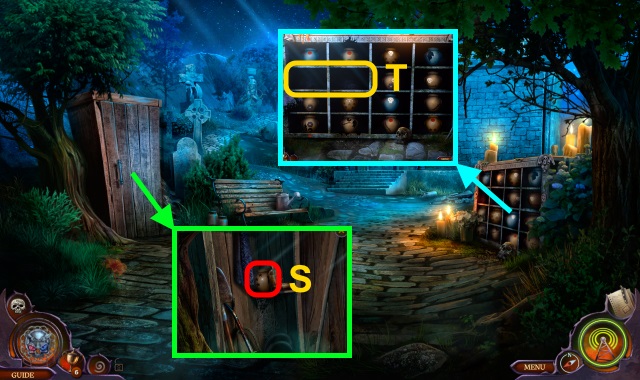
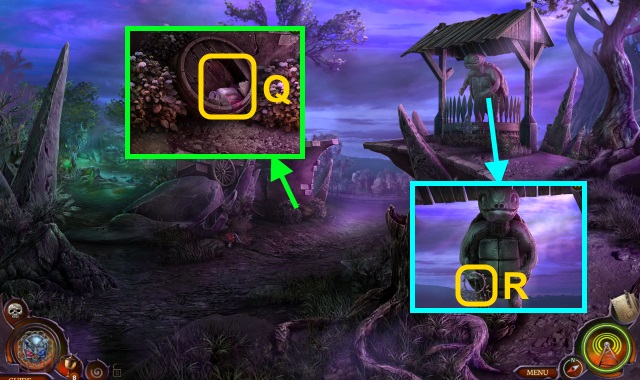
- Take clue, MAP PIECES (1/4), and RED BOOK (R).
- Take EMPTY BUCKET (S); examine book.
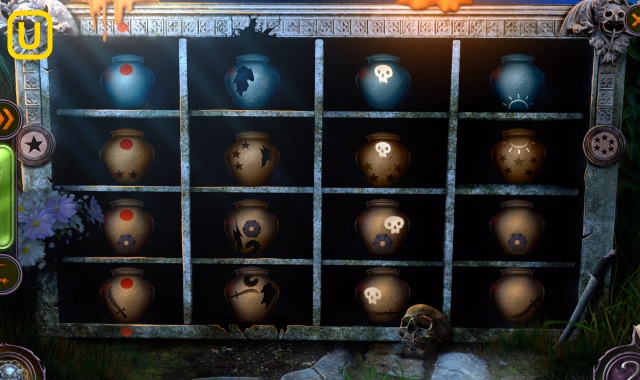
- Play HOP; receive BLUE BOOK (T).
- Walk down.
- Use EMPTY BUCKET (U); receive FULL BUCKET.
- DETERGENT and SCRUB BRUSH on FULL BUCKET; receive SOAPY WATER WITH BRUSH.
- Walk left.
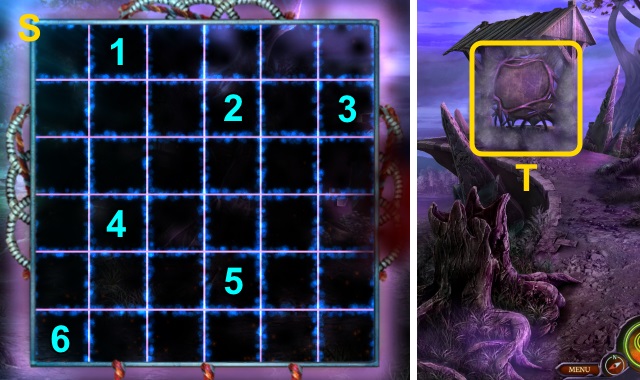
- Use SOAPY WATER WITH BRUSH (V).
- Solution (W).
- Place RED BOOK and BLUE BOOK (X).
- Solution (Y).
- Solution (Z).
- Pull switch.
- Walk forward.
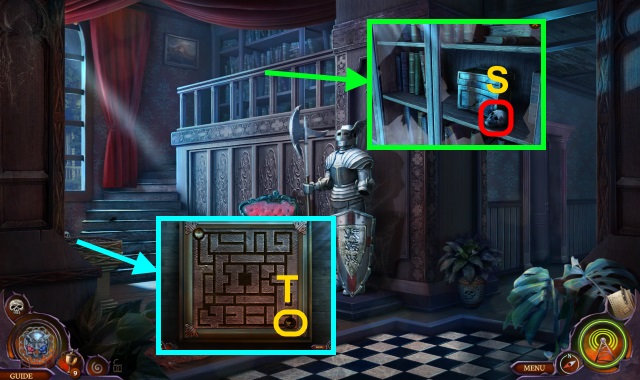
- Move items; take clue, MAP PIECES (2/4), QUILL AND INK, BEAST HEAD, and MAP PIECES (3/4) (A).
- Walk down.
- Place BEAST HEAD (B); take FOUNTAIN VALVE.
- Walk down.
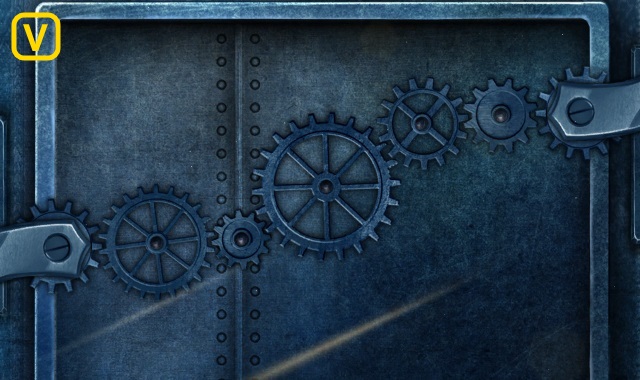
- Use WRENCH; place FOUNTAIN VALVE (C). Take PUZZLE BOX (D).
- Examine PUZZLE BOX.
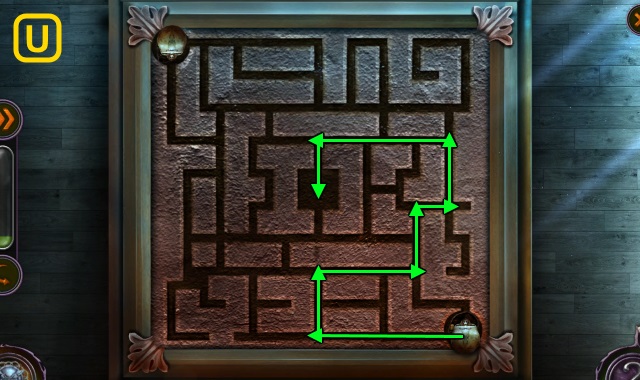
- Solution (E): D-B-A-C-D-Bx2-Ax2-Cx2.
- Dx2-C-A-Bx2-Ax2-Cx2-A-B.
- Take MAP PIECES.
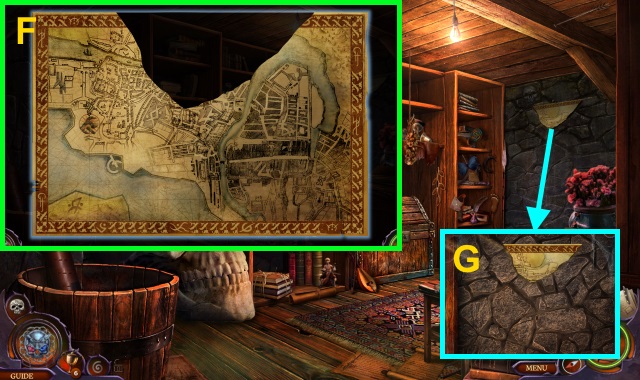
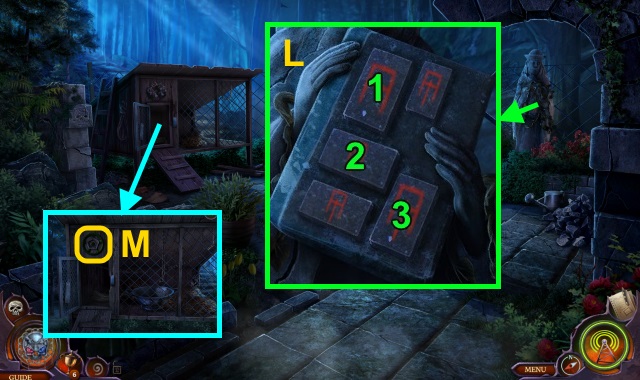
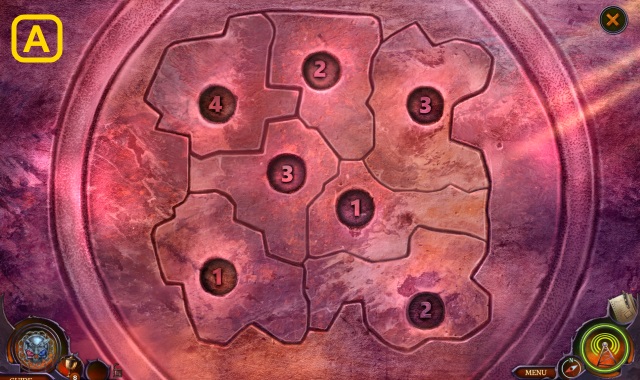
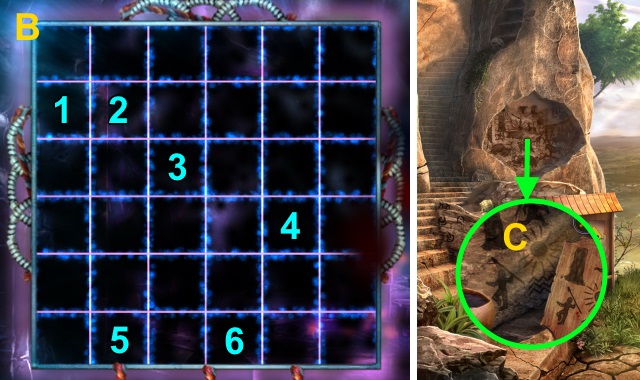
- Examine MAP PIECES; solution (F).
- Receive TORN MAP.
- Walk left, then forward.
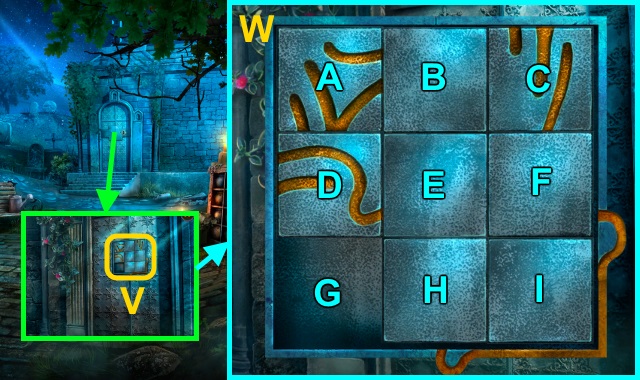
- Place TORN MAP (G); use QUILL AND INK.
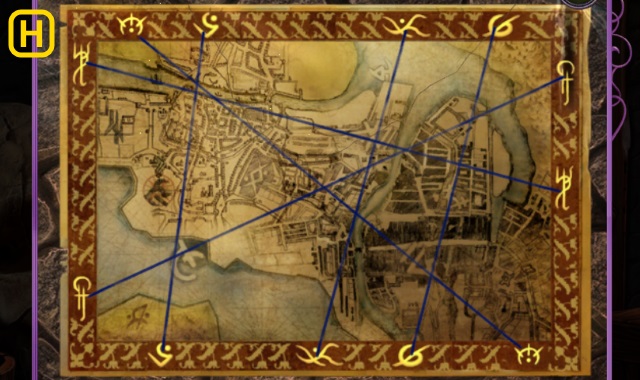
- Solution (H).
- Solution (I).
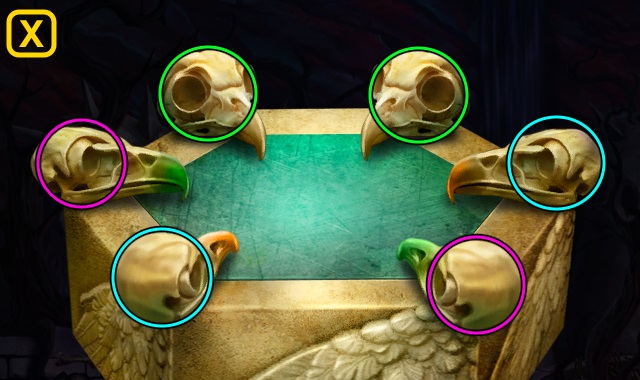
- Play HOP; receive EAGLE SEAL (J).
- HOP mini-game solution (K).
- Place EAGLE SEAL (L).
- Use Talisman.
- Solution (M).
- Examine (N).
- Solution (O-P).
- Take TOMB KEY (@).
- Walk down twice, then right.
- Use HACKSAW (Q).
- Walk right.
- Move items; take GRINDSTONE, URN (1/2), and CROWBAR (R).
- Use CROWBAR; take URN (2/2) (S).
- Place URN (2/2) (T).
- Solution (U).
- Take CRYPT KEY.
- Use CRYPT KEY; examine (V).
- Solution (W): H-I-F-C-B-A-D-E-F-I-H.
- E-D-A-B-E-D-A-B-C-F-E-D.
- Go forward.
- Take INVISIBLE INK NOTE; place TOMB KEY (X). Use UMBRELLA; receive RUSTY SICKLE.
- GRINDSTONE on RUSTY SICKLE; receive SHARPENED SICKLE.
- Use ELECTROSHOCK DEVICE (Y); use INVISIBLE INK NOTE. Take INVISIBLE INK NOTE.
- Walk down.
- Use SHARPENED SICKLE, INVISIBLE INK NOTE, and PENCIL (Z); receive INVISIBLE INK NOTE.
- Walk forward.
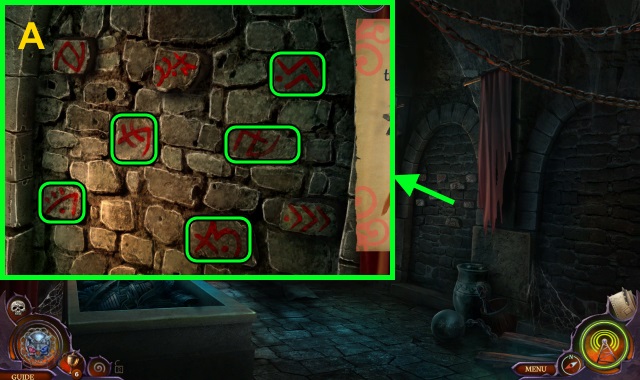
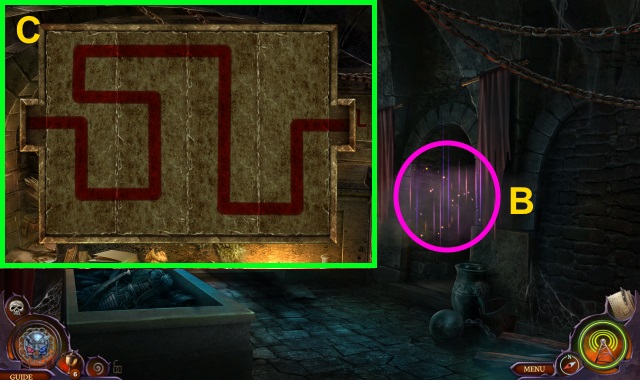
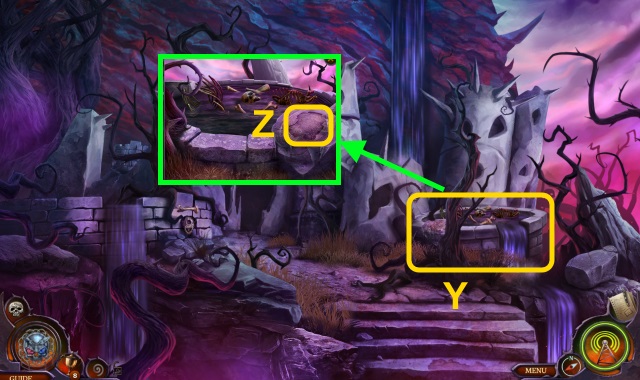
- Place INVISIBLE INK NOTE; solution (A).
- Play HOP; receive GATE SLIDER (B).
- HOP solution (C).
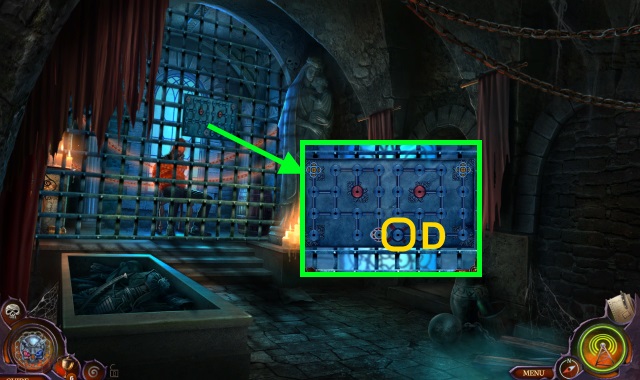
- Scroll up; place GATE SLIDER (D).
- Solution (E).
- Use Talisman.
- Solution (F).
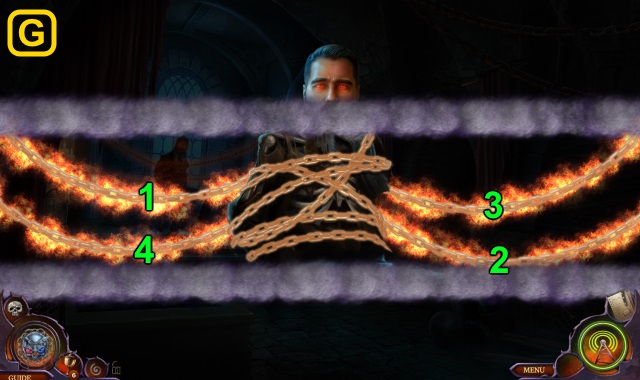
- Remove chains (G).
- Walk forward.
Chapter 3: Emma Lynch

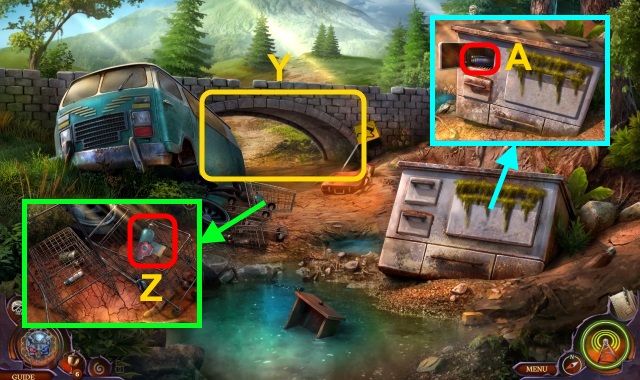
- Take CIRCUIT BREAKER (H).
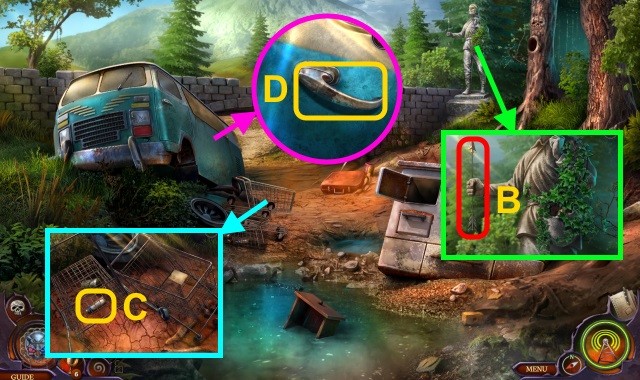
- Take PLASTIC FORK (I); place CIRCUIT BREAKER.
- Solution (J).
- Take PILLOWCASE (K).
- Open PILLOWCASE; take KNOB and CLOTH STRIP.
- Use PLASTIC FORK; take CHEESE and SPRING (L).
- Take SLINGSHOT (M). Use KNOB; open.
- Play HOP; receive PLIERS (N).
- CLOTH STRIP and PLIERS on SPRING; take IMPROVISED GRABBER.
- Use Talisman.
- Solution (O).
- Use IMPROVISED GRABBER (P); examine.
- Walk forward.
- Take DUMBWAITER KEY, COAL SCUTTLE, LEAKY SAUCEPAN, TONGS, and LADLE (Q).
- CHEESE on LEAKY SAUCEPAN; receive SAUCEPAN.
- Move items; take WOODEN PUZZLE PIECE (R). Take BUTTER (S); move items. Use LADLE and COAL SCUTTLE; receive HOT COALS.
- Use DUMBWAITER KEY (T).
- Take BLUE VALVE, CANVAS SCRAP, and RULER (U).
- Walk down.
- Use TONGS; receive NAIL PULLER (V).
- Remove mattress. Place WOODEN PUZZLE PIECE (W); examine (X).

- Solution (Y).
- Take GEAR (1/4) and SCREWDRIVER.
- Walk forward.
- Use SCREWDRIVER (Z); receive LONG SCREW. Take GEAR (2/4).
- Use NAIL PULLER (A).
- Go forward.
- Take SPRAY BOTTLE (B).
- Place BLUE VALVE (C). Use SAUCEPAN (D); receive SAUCEPAN WITH WATER.
- Play HOP; receive RED EYE (E).
- Use HOT COALS and SAUCEPAN WITH WATER; take STRAINER (F).

- Examine; use RULER (G). Take GEAR (3/4) and ROPE (H). Examine (I); use STRAINER. Take CASE KEY.
- Walk down twice.
- Use CASE KEY (J).
- Play HOP; receive HERBICIDE (K).
- HERBICIDE on SPRAY BOTTLE; receive HERBICIDE SPRAY.
- Walk forward twice.
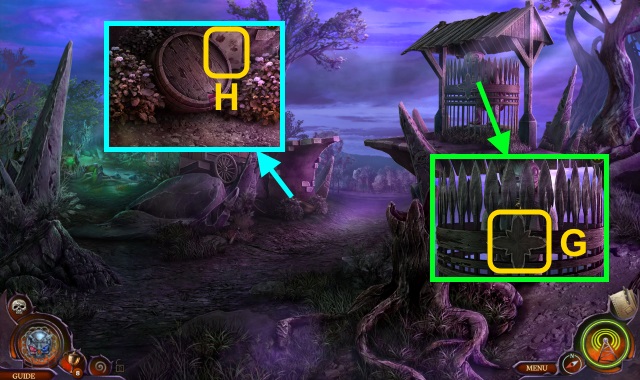
- Use HERBICIDE SPRAY; solution (L).
- Take PENTAGON WRENCH.
- Remove wreath (M). Use PENTAGON WRENCH; take GREEN VALVE.

- Place GREEN VALVE (N).
- Play HOP; receive CANVAS BAG (O).
- Examine CANVAS BAG; remove items. Take GEAR (4/4) and MARBLE.
- MARBLE on SLINGSHOT ; take LOADED SLINGSHOT.
- Use LOADED SLINGSHOT (P).
- Walk down.
- Solution (Q).
- Use LONG SCREW and SCREWDRIVER (R); examine board (S).
- Use GEAR (4/4) (T).
- Examine (U).
- Solution (V).
- Go right.
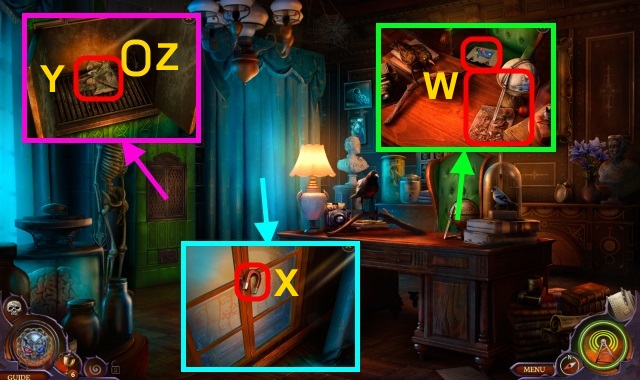
- Examine chair; take CREDIT CARD, PICTURE HALF, DULL LETTER OPENER, clue, and LEVER (W).
- Move curtain; take MAGNET (X).
- Open; move items. Gather pieces; take MAP PIECES (Y). Place LEVER (Z). Use MAGNET (Y); receive MELON BALLER.
- Arrange MAP PIECES (A); use STAPLER.
- Examine (B). Use MELON BALLER; receive BEAD. Place RED EYE.
- Use Talisman.
- Solution (C).
- Examine (D).
- Solution (E).
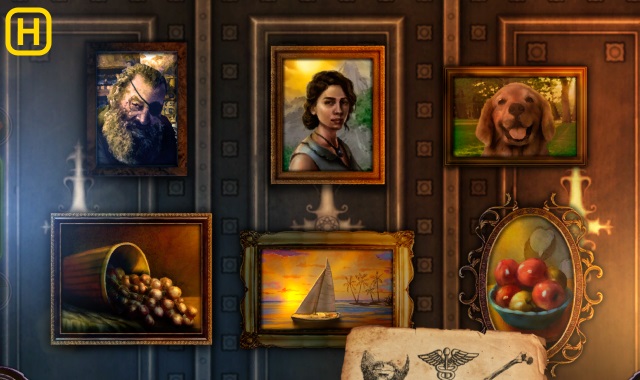
- Take TORN PICTURE (F).
- PICTURE HALF on TORN PICTURE; take PAINTING CLUES.
- Use PAINTING CLUES (G).
- Solution (H).
- Place CANVAS SCRAP (I); move painting. Examine safe.
- Solution (J).
- Open; take HACKAMORE GRIMOIRE and WINDOW HANDLE.
- Open HACKAMORE GRIMOIRE; take FOREST CLUE.
- Place WINDOW HANDLE (K); use ROPE.
- Go forward.
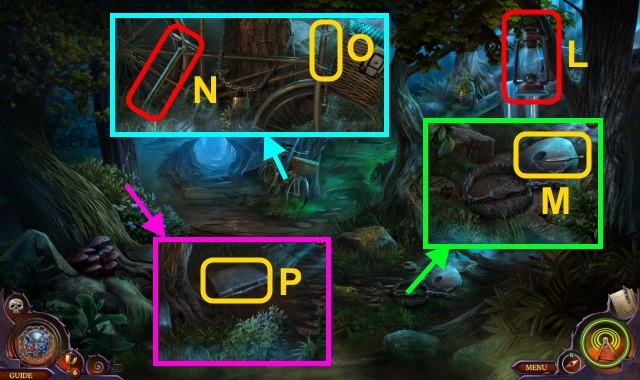
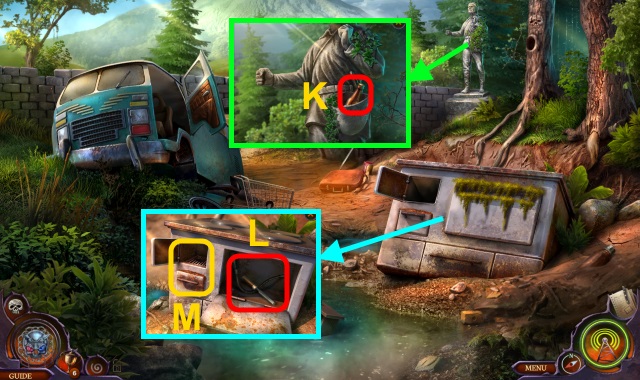
- Take LANTERN (L).
- Use DULL LETTER OPENER (M); receive SHARPENED LETTER OPENER.
- Take BICYCLE PUMP (N). Use CREDIT CARD (O); receive LOCKED BASKET.
- Use SHARPENED LETTER OPENER; examine (P).
- Solution (Q).
- Open; take DUCT TAPE, FLINT WITH STEEL, and BICYCLE KEY.
- Move plants; take WICK (R).
- Place LOCKED BASKET. Move items; take LIGHTER FLUID (S).
- Use BICYCLE KEY (T); take CHAIN (U).
- LIGHTER FLUID, WICK, and FLINT WITH STEEL on LANTERN; receive LIT LANTERN.
- Use BUTTER; examine (V).
- Use LIT LANTERN on scene.
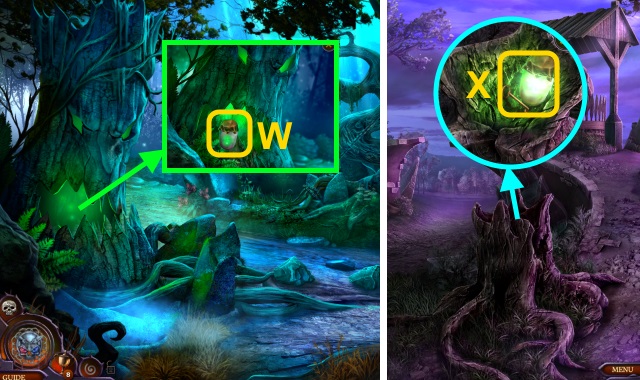
- Use FOREST CLUE (W).
- Solution (X).
Chapter 4: The Grey Lands
- Examine (Y).
- Take JIGSAW PIECE (1/7) and SPRAY BOTTLE (Z).
- Open; take LUBRICANT (A).
- Use LUBRICANT; take ARROW (B).
- Use ARROW (C); receive BLUE PAINT.
- Use LUBRICANT (D).
- Walk left.
- Take GUITAR PICK (E).
- Open drawers; take JIGSAW PIECE (2/7), RED PAINT, NIPPERS, and MANDALA PART (F).
- Move papers; place MANDALA PART (G).
- Play HOP; receive METAL BOX (H).
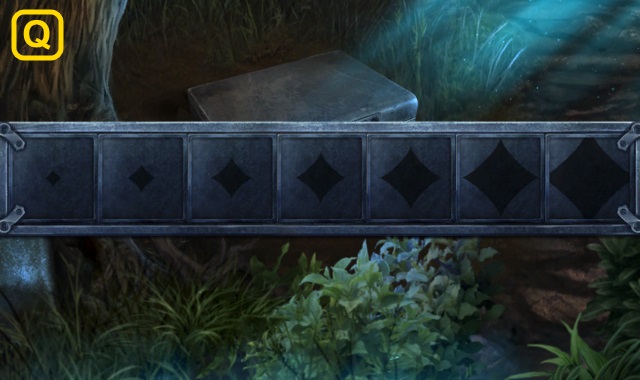
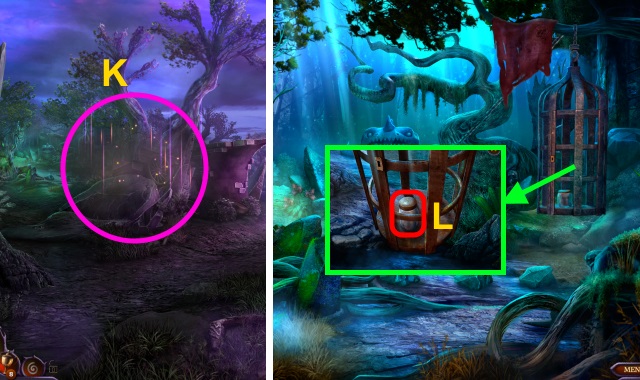
- Use CHAIN; solution (I).
- Turn handle.
- Take RUBBER GLOVE, COYOTE CLUE, and FIRE EXTINGUISHER CANISTER (J).
- Walk down.
- Use NIPPERS; take BEER BOTTLE (K).
- BEER BOTTLE on SPRAY BOTTLE; receive BEER SPRAY.
- Use BEER SPRAY; open. Take CHISEL and HOSE (L).
- DUCT TAPE and FIRE EXTINGUISHER CANISTER on HOSE; receive FIRE EXTINGUISHER.
- Use FIRE EXTINGUISHER (M); take YELLOW PAINT.
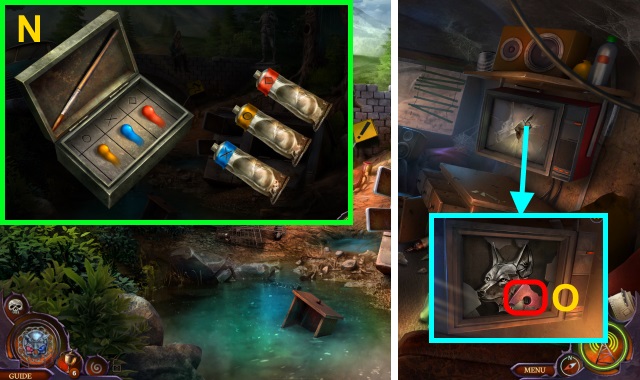
- GUITAR PICK on METAL BOX; open. Place BLUE PAINT, RED PAINT, and YELLOW PAINT; use paints (N). Receive PAINT SET.
- Walk left.
- Use RUBBER GLOVE; take JIGSAW PIECE (3/7) (O). Use COYOTE CLUE and PAINT SET.
- Solution (P).
- Use Talisman.
- Solution (Q).
- Examine (R).
- Solution (S).
- Take CLIMBING SHOES (T).
- Walk down.

- Use CLIMBING SHOES (U); examine.
- Solution (V).
- Take JIGSAW PIECE (4/7) (W).
- Use Talisman.
- Solution (X).
- Examine (Y).
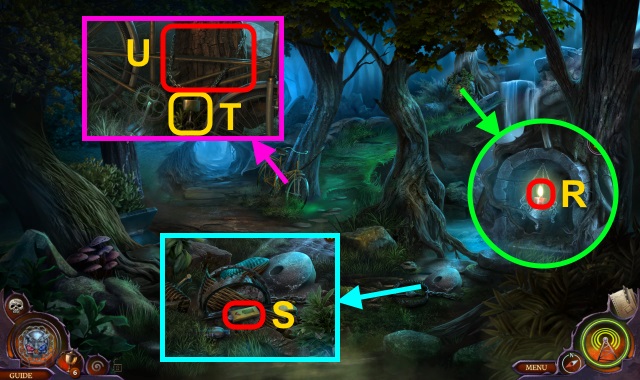
- Take JIGSAW PIECE (5/7) and TWINE (Z). Examine binoculars.
- Solution (A): Ax3-Bx2.
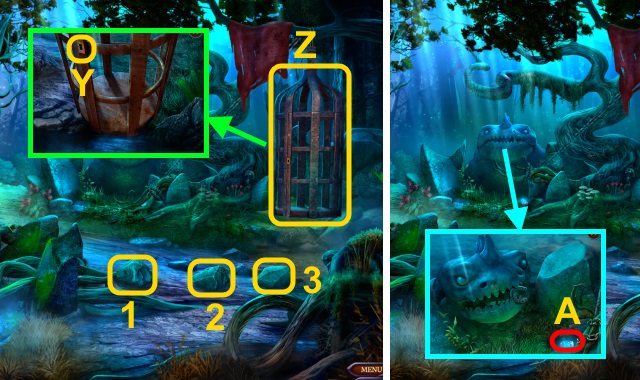
- Use CHISEL; take ROCK (B).
- Use ROCK; take BROKEN POT (C).
- Place BROKEN POT (D).
- Play HOP; receive STONE KNIFE (E).
- Walk left.
- Take BOTTLE GOURD and SHORT SPEAR (F).
- STONE KNIFE on BOTTLE GOURD; receive GOURD HALF.
- Walk forward.
- Move bones (G); take BISON FEMUR.
- BISON FEMUR and TWINE on SHORT SPEAR; receive EXTENDED ROD.
- Walk down.
- Use EXTENDED ROD (H); take STONE KEY (I).
- Use STONE KEY (J).
- Play HOP; receive GLYPH (K).
- Walk down.
- Place GLYPH (L).

- Solution (M).
- Take MALLET.
- Walk left, then forward.
- Use MALLET (N).
- Place ring (O) in slot (P).
- Use Talisman.
- Solution (Q).
- Walk down.
- Examine stone 3x (R); examine well. Take BONE (S); use GOURD HALF. Receive GOURD WITH INK.
- Take DARK ROOTS. Place BONE (T); take JIGSAW PIECE (6/7) (U).
- Use DARK ROOTS (V); take JIGSAW PIECE (7/7) and BONE CHEST (W).
- Examine BONE CHEST.
- Solution (X).
- Open; take DARK LENS.
- DARK LENS on HACKAMORE GRIMOIRE; receive clue.
- Place JIGSAW PIECE (7/7) (Y).
- Examine (Z).
- Solution (A).
- Open; take clue and CARVING.
- Walk forward.
- Use Talisman.
- Solution (B).
- Walk down twice.
- Use CARVING and GOURD WITH INK (C).
- Play HOP; receive GEM-ENCRUSTED KEY (D).
- Walk left, then forward.
- Use Talisman.
- Solution (E).
- Take SILVER RING (F).
- Use SILVER RING on scene.
Chapter 5: The Devourer
- Place GEM-ENCRUSTED KEY (G); take BRAIDED ORNAMENTS.
- Take PATH CLUE (H).

- Take HORSESHOE (I).
- Solution (J).
- Play HOP; receive HATCHET HANDLE (K).
- Walk left.
- Take JAR (L).
- Use HATCHET HANDLE (M); receive HATCHET.
- Use HORSESHOE (N); take STEEL RING (O).
- BRAIDED ORNAMENTS on STEEL RING.
- Solution (P); receive RITUAL RING.
- Walk down.
- Use HATCHET and JAR (Q); receive JAR WITH HONEY.
- Place RITUAL RING (R).
- Use Talisman.
- Solution (S).
- Examine (T).
- Solution (U).
- Take SMALL POUCH (V).
- Open SMALL POUCH; take ENCHANTED PINCE-NEZ and EMPTY POUCH.
- ENCHANTED PINCE-NEZ on HACKAMORE GRIMOIRE; receive clue.
- Walk left.
- Use JAR WITH HONEY and EMPTY POUCH (W); receive GLOWING JAR.
- Walk down.
- Use GLOWING JAR; take RUSTED KEY (X).
- Walk left.
- Use RUSTED KEY (Y).
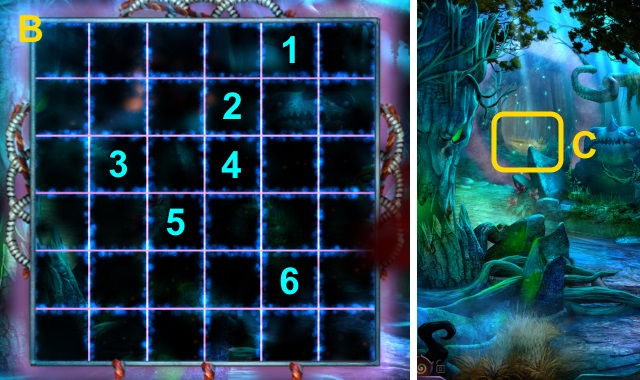
- Place stones (1-3) in cage (Z).
- Take ring (A).
- Use Talisman.
- Solution (B).
- Use PATH CLUE (C); examine.
- Solution (D).
- Solution (E): stop balls inside purple section.
- Take RIFLE (F).
- Place BEAD; solution (G).
- Play HOP; receive CAR JACK (H).
- Take TIRE PATCH and TIN CUP (I).
- Use TIN CUP (J); receive CUP OF WATER.
- Pour CUP OF WATER (K); take TRUCK KEY (L).
- Use CAR JACK, TIRE PATCH, and BICYCLE PUMP (M).
- Use TRUCK KEY (N).
- Walk forward.
- Solution (O): stop balls inside purple section.
- Play HOP; receive MANSION KEY (P).
- Use MANSION KEY (Q).
- Walk forward.
- Take GAUNTLET (R).
- Use GAUNTLET; take CERAMIC SKULL (S).
- Place CERAMIC SKULL (T).
- Solution (U).
- Take WING ORNAMENT.
- Place WING ORNAMENT; examine helmet (V). Take RIFLE BULLET.
- RIFLE BULLET on RIFLE; receive LOADED RIFLE.
- Use LOADED RIFLE (W).
- Walk right.
- Use Talisman.
- Solution (X-Z).
- Move rug; take DESK KEY and SAFE CODE (A).
- Take FLOWERPOT (B).
- Examine FLOWERPOT; take POT OF DIRT.
- Take CROWBAR (C). Use DESK KEY (D); open. Take RUM.
- Take OXYGEN TANK and SURGICAL SCALPEL (E); examine Carlos.
- Walk down.
- Use CROWBAR; take LIGHTER and SAFE DIAL (F).
- Use SURGICAL SCALPEL and SAFE DIAL (G); use SAFE CODE.
- Solution (H).
- Take SILVER CUP and DIAMOND NECKLACE.
- Walk right.
- Use CROWBAR and SILVER CUP (I); receive ICE.
- Place POT OF DIRT, OXYGEN TANK, RUM, ICE, DIAMOND NECKLACE, and LIGHTER (J).
- Play HOP (K).
- Congratulations! You have completed Rite of Passage: Hackamore Bluff.
Created at: 2018-06-10