

Walkthrough Menu
- General Tips
- Chapter 1: Burglary at the Museum
- Chapter 2: The Burglar
- Chapter 3: Edgar
- Chapter 4: The Shadowrealm
- Chapter 5: The Skull of Darkness
General Tips
- This is the official guide for Shadowplay: Whispers of the Past.
- This guide won't tell you when to zoom into a location; the screenshots show each zoom scene.
- Hidden-object puzzles are referred to as HOPs. Only the locations of the HOPs will be shown.
- Use the Map to fast travel to a location.
Chapter 1: Burglary at the Museum
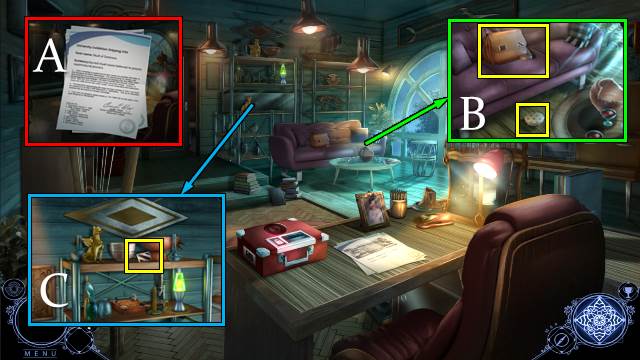
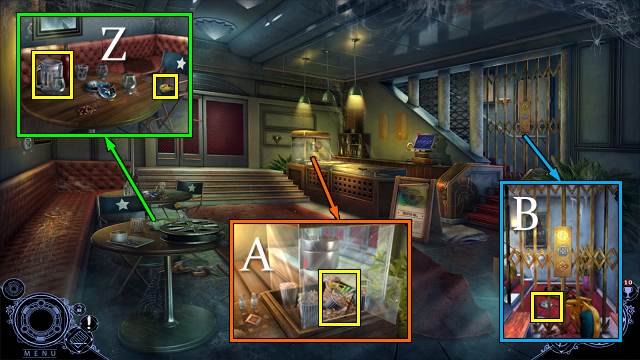
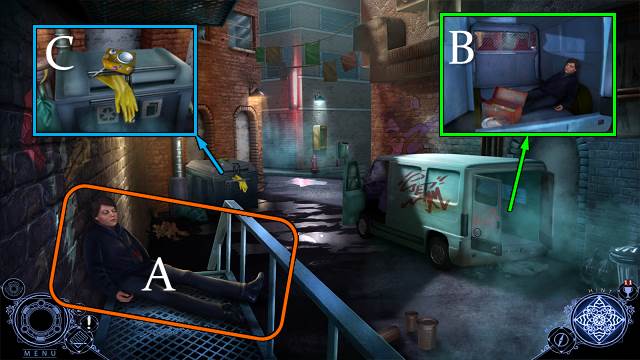
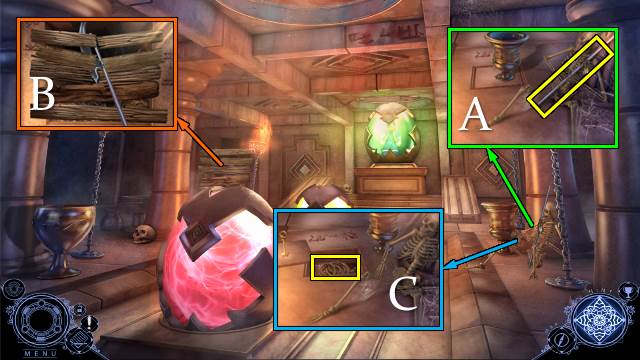
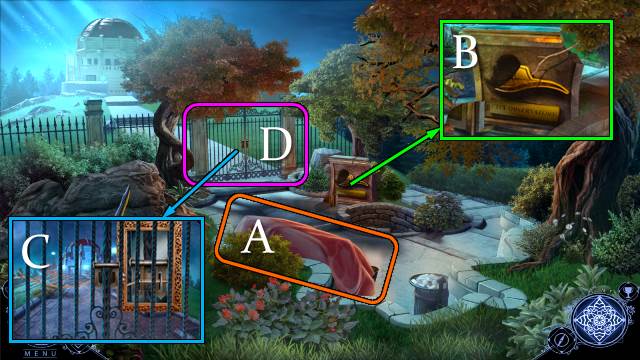
- Read papers (A).
- Move table; take POWDER BOX and LEATHER PURSE (B).
- Move items; take PURSE BUCKLE (C).
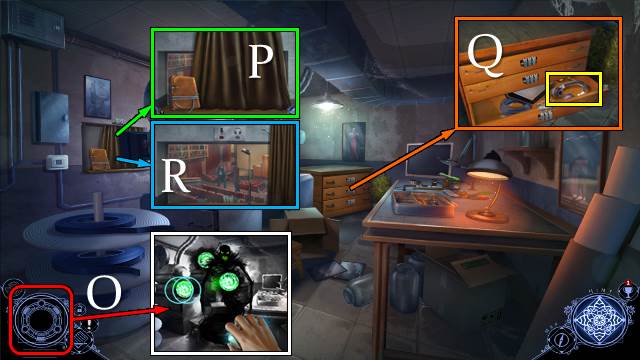
- PURSE BUCKLE on LEATHER PURSE; take CAR KEYS, journal and MUSEUM ID.
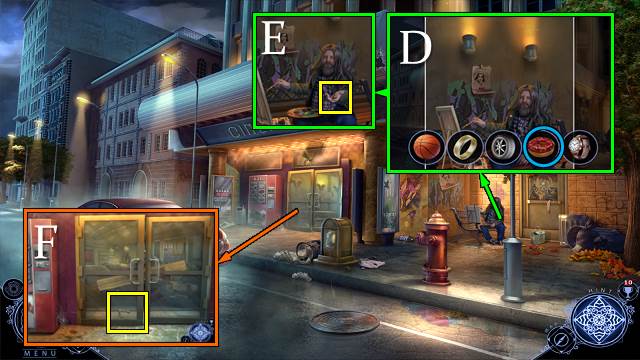
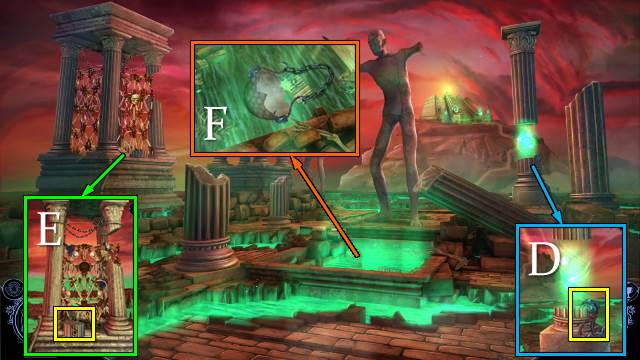
- Use MUSEUM ID; move items and read note. Take ANCIENT SPEARHEAD (D).
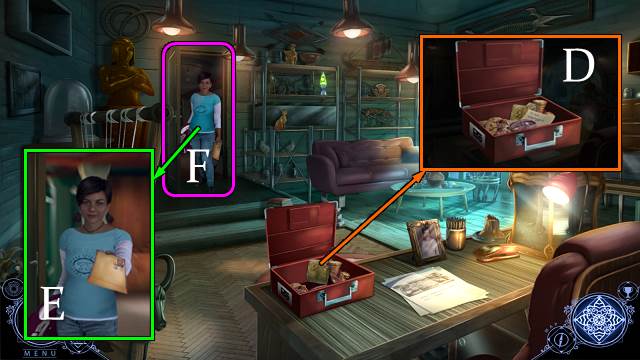
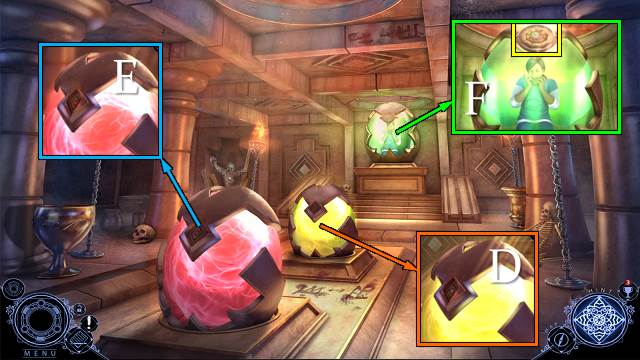
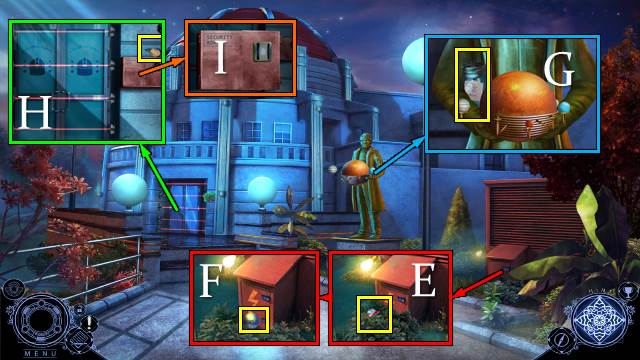
- Talk; take YELLOW ENVELOPE (E).
- METAL PIECE 1/2 from YELLOW ENVELOPE.
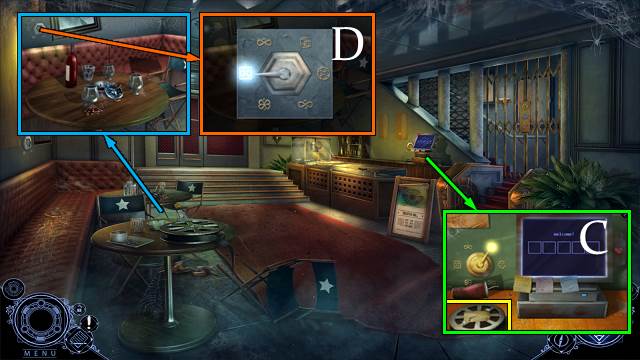
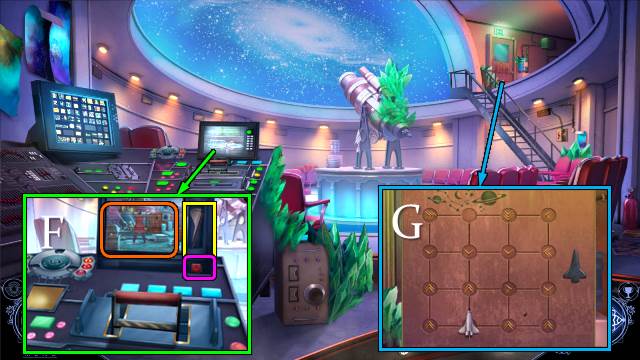
- Go (F).
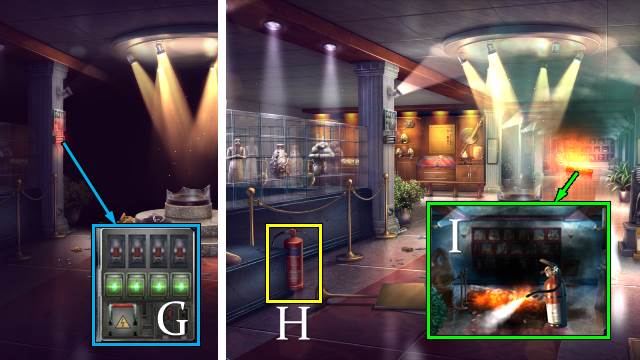
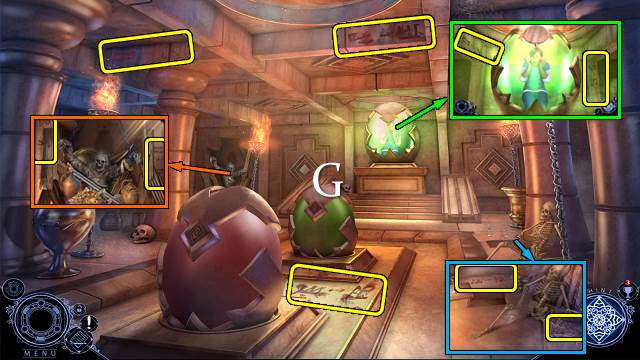
- Flick switches (G).
- Pull lever (G).
- Take FIRE EXTINGUISHER (H).
- Use FIRE EXTINGUISHER; go (I).
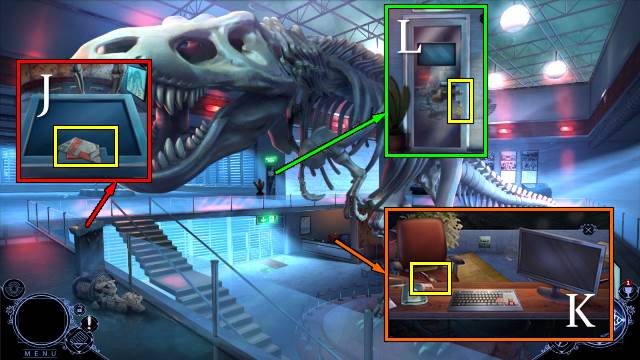
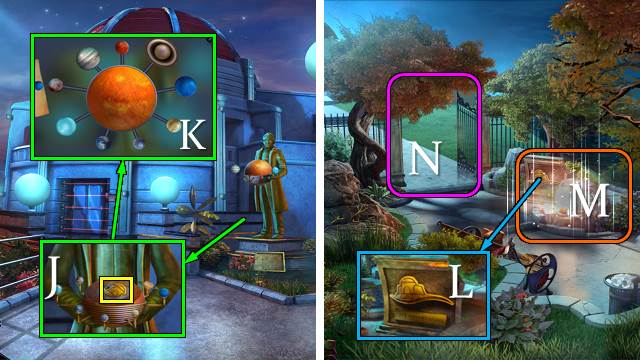
- Take METAL PLATE 1/5. Push button (J).
- Move screen, keyboard and chair. Unplug extension cable. Take SCREWDRIVER (K).
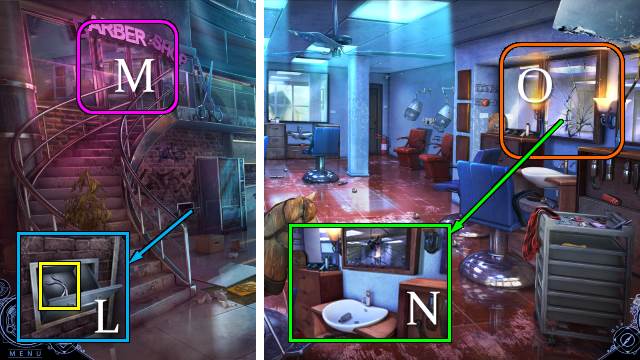
- Turn key; take MUSEUM EMBLEM (L).
- Walk down.
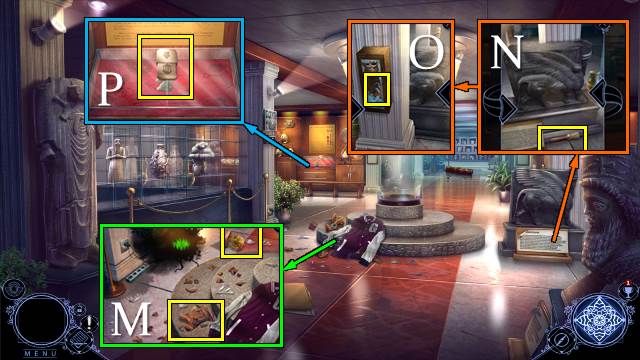
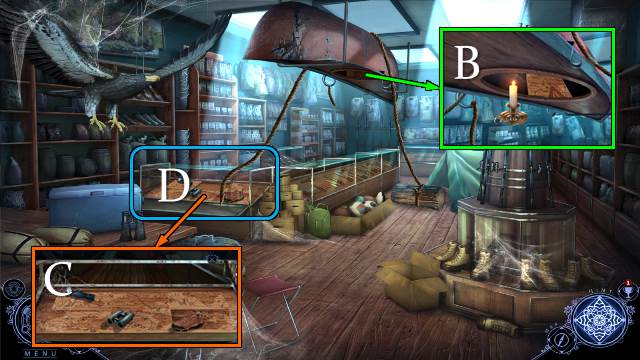
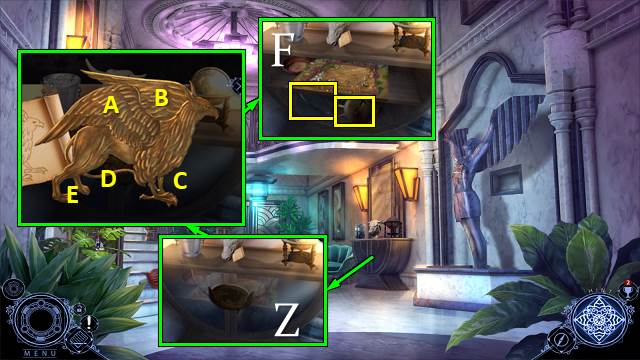
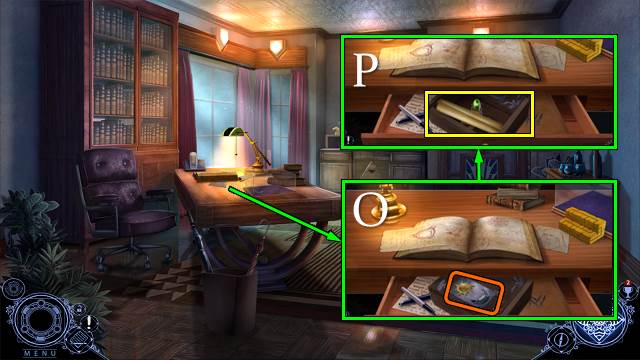
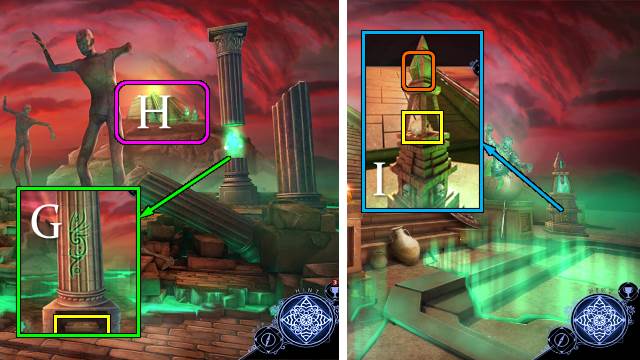
- Take STATUE SHARD and HEAVY PAPERWEIGHT (M).
- Move sign; take ARCHEOLOGICAL BRUSH. Turn (N).
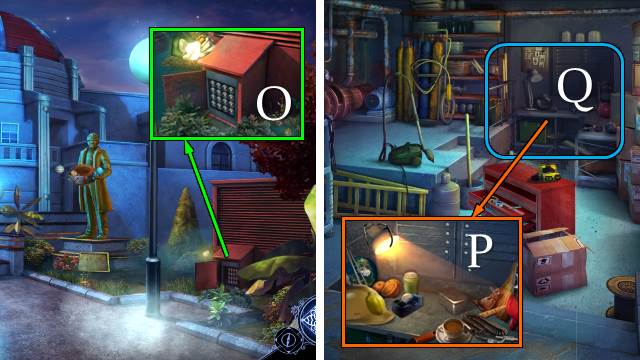
- Break handle; use HEAVY PAPERWEIGHT. Take KNIGHT FIGURINE 1/2 (O).
- Place MUSEUM EMBLEM; take KNIGHT FIGURINE 2/2 (P).
- Walk down.
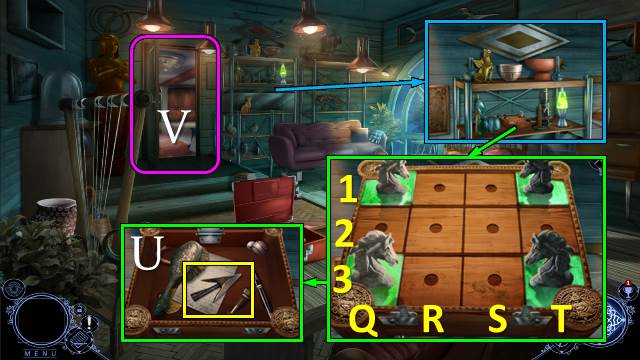
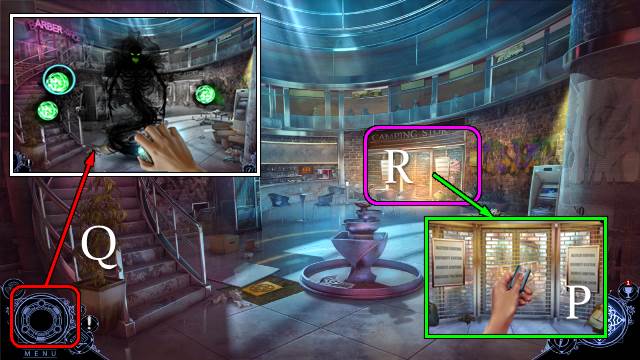
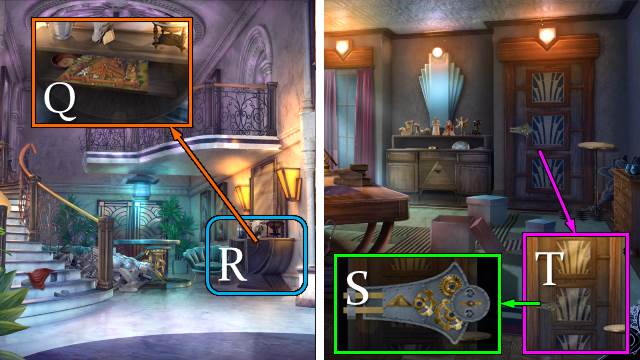
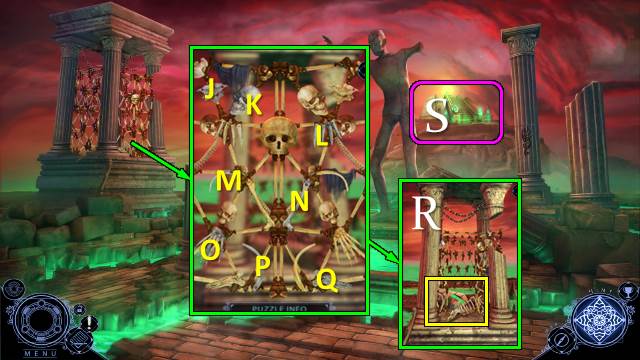
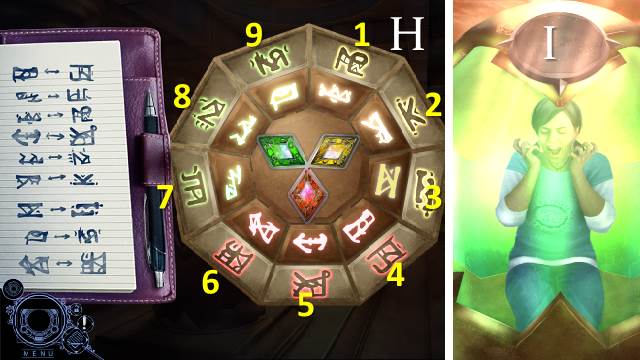
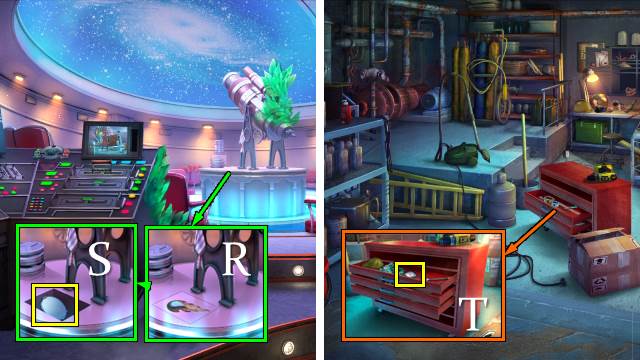
- Place KNIGHT FIGURINE. Solution: (Q1-R3-T2)-(T3-S1-R3-Q1)-(T2-R3-S1-T3)-(Q3-R1-T2)-(T1-S3-R1-Q3)-(T2-R1-S3-T1).
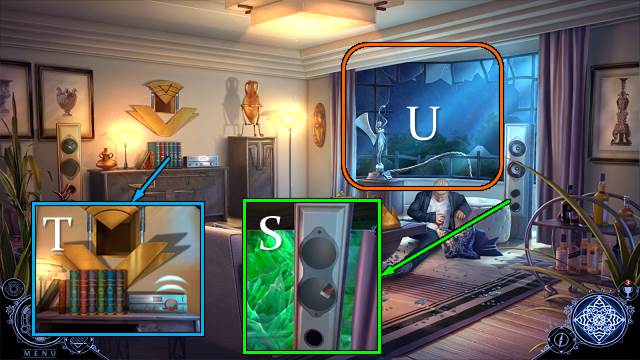
- Take PERSIAN ARROWHEAD (U).
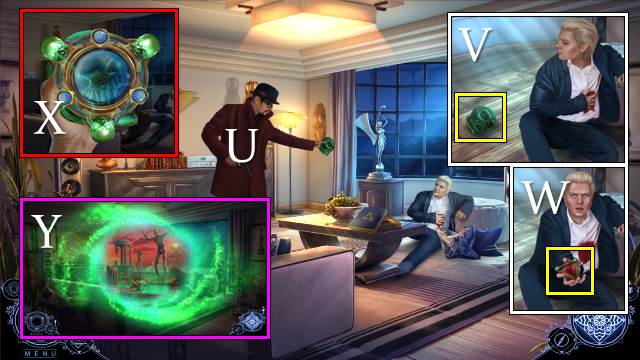
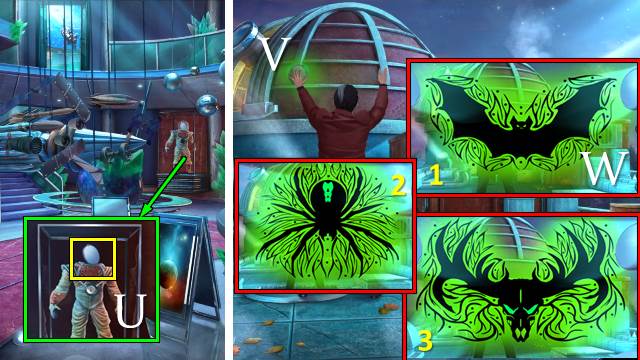
- Go (V).

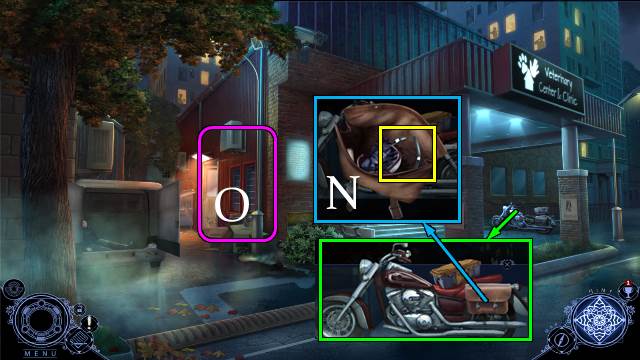
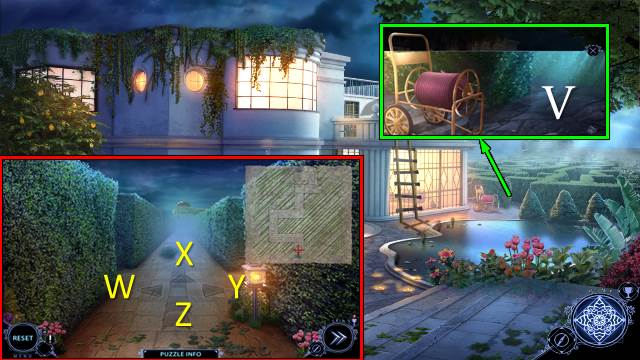
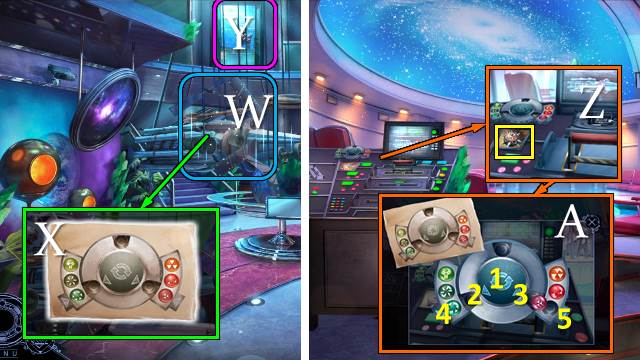
- Place ANCIENT SPEARHEAD and PERSIAN ARROWHEAD (W).
- Play HOP (X); receive METAL PIECE 2/2.
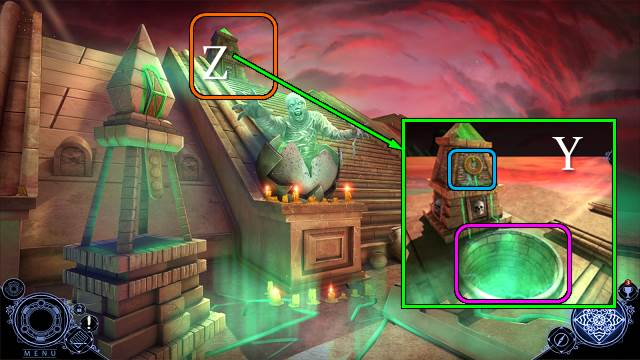
- METAL PIECE on STATUE SHARD; receive Magical Lens.
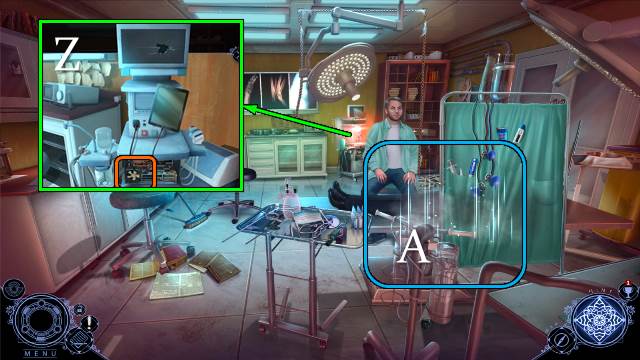
- Use Magical Lens (Y). Take EXTENSION CABLE (Z).
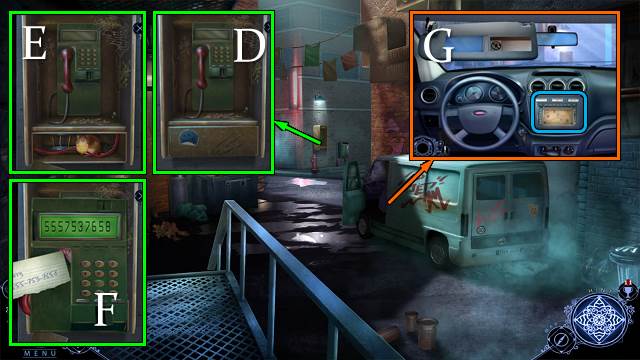
- Go (A).
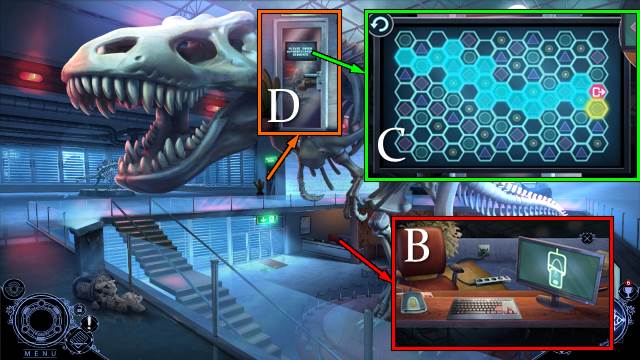
- Place EXTENSION CABLE; use MUSEUM ID. Select 'security code' (B).
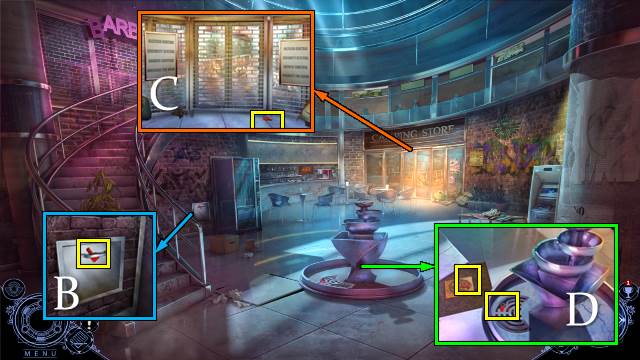
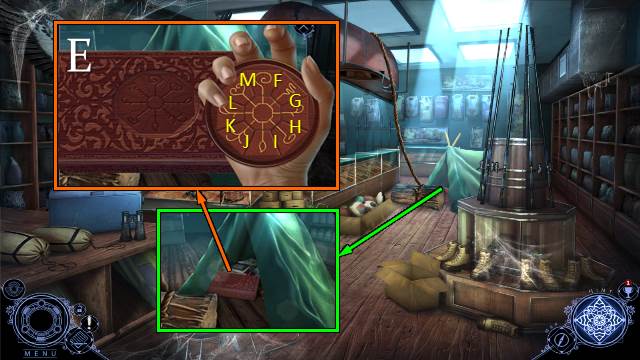
- Touch screen. Solution (C).
- Go (D).
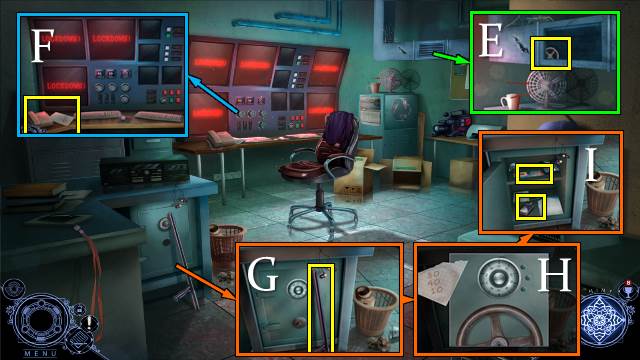
- Use SCREWDRIVER; take SAFE ROTATOR (E).
- Move phone; take NOTEPAD (F).
- POWDER BOX then ARCHEOLOGICAL BRUSH on NOTEPAD; take ROTATION SEQUENCE.
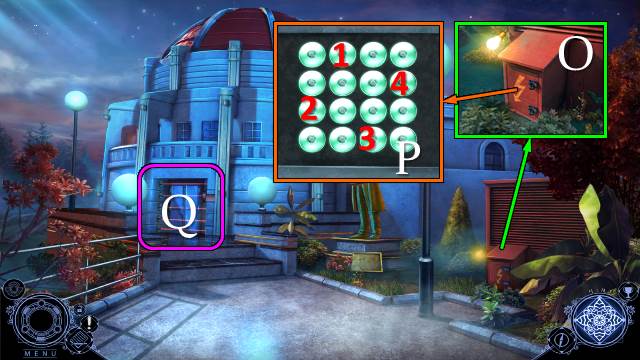
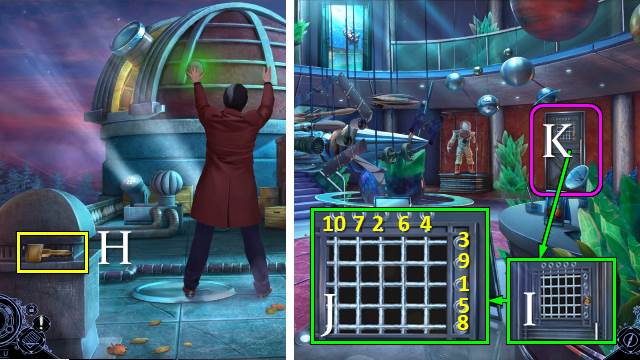
- Take NIGHTSTICK (G); place SAFE ROTATOR and ROTATION SEQUENCE. Enter code (H).
- Move items; take METAL PLATE 2/5 and LOCKDOWN DEVICE (I).
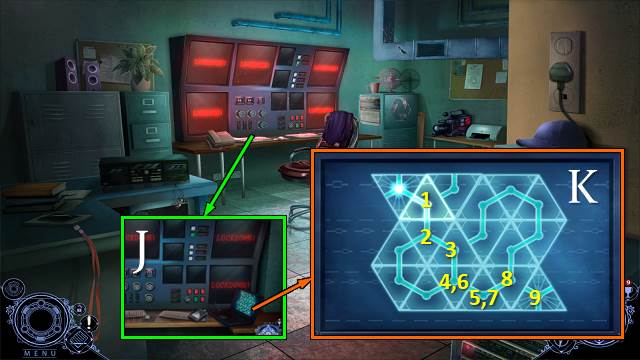
- Place LOCKDOWN DEVICE (J).
- Solution (K).
- Walk down.

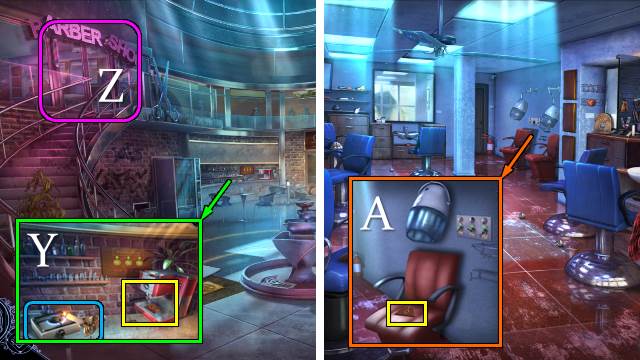
- Go (L).
- Use Magical Lens (M).
- Go (L).
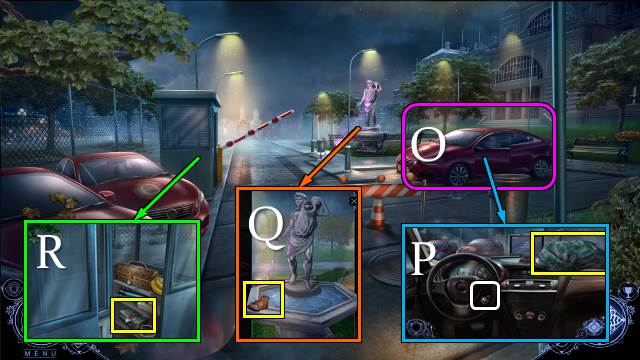
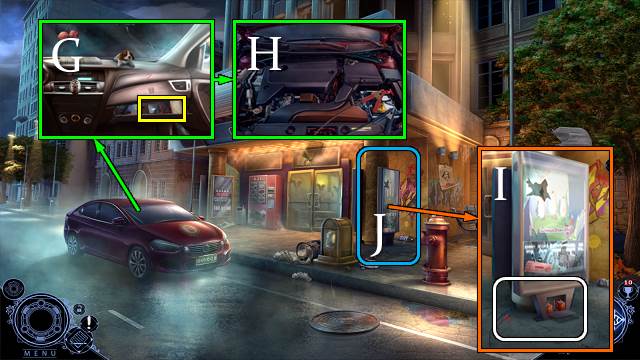
- Use CAR KEYS (O).
- Take BACKPACK and TOUR TICKET. Place CAR KEYS; select 'locate all cars' (P).
- Take SHOELACE and METAL PLATE 3/5 (Q).
- Use NIGHTSTICK; take METAL PLATE 4/5 (R).
- Walk down.
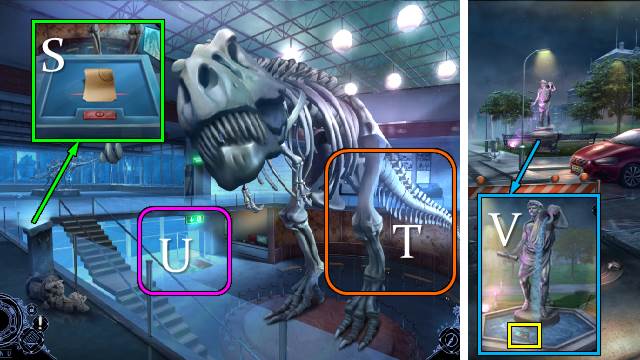
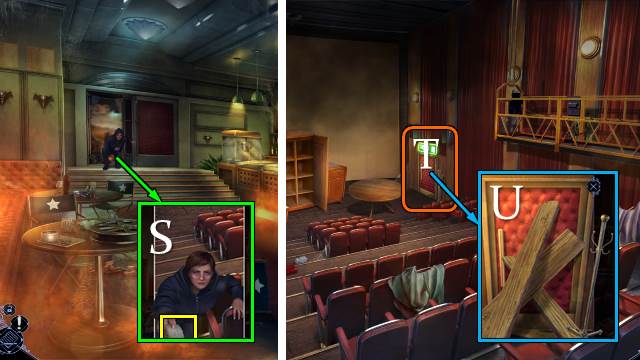
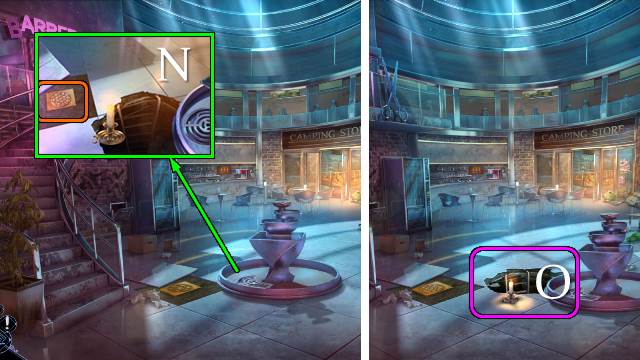
- Place TOUR TICKET (S).
- Play HOP (T); receive STONE SCROLL.
- Go (U).
- Place STONE SCROLL; take METAL PLATE 5/5 (V).
- Go to Surveillance Room.

- Place METAL PLATES (W). Solution (X): (1-8)-(2-7)-(3-6)-(4-5).
- Open pockets; take LUNCH BOX KEY (Y).
- Go to Parking Lot.
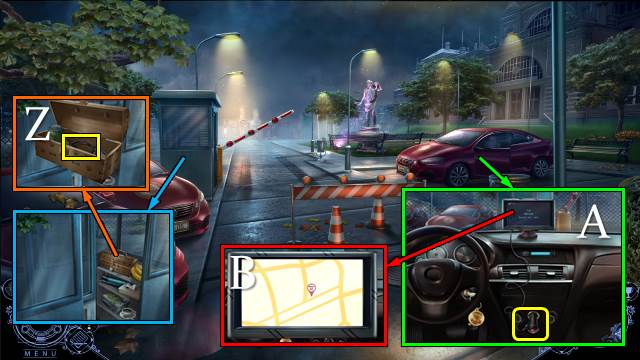

- Use LUNCH BOX KEY; move items and take GPS CHARGER (Z).
- Remove lighter; place GPS CHARGER. Select 'locate all cars' (A).
- Find car number 4 (B).
- Play mini-game (C).
Chapter 2: The Burglar
- Talk. Select donut (D).
- Take SAFETY PIN (E).
- Open BACKPACK with SAFETY PIN. Move items; take HAND CREAM and SELFIE STICK.
- Take PLIERS with SELFIE STICK (F).
- Use PLIERS; move items, take CAR CLAMPS and push button (G).
- Place CAR CLAMPS (H).
- Open hatch; place clamps (I).
- Play HOP (J); receive VENDING MACHINE COUPON.
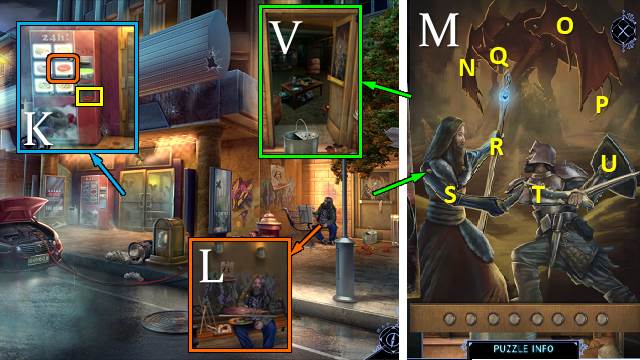
- Place VENDING MACHINE COUPON. Select and take DONUT (K).
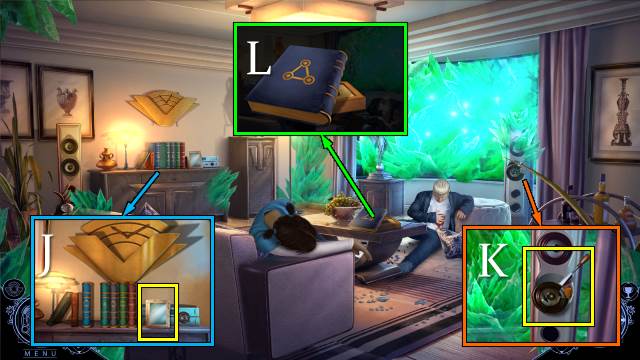
- Offer DONUT. Take ABSTRACT PAINTING (L).
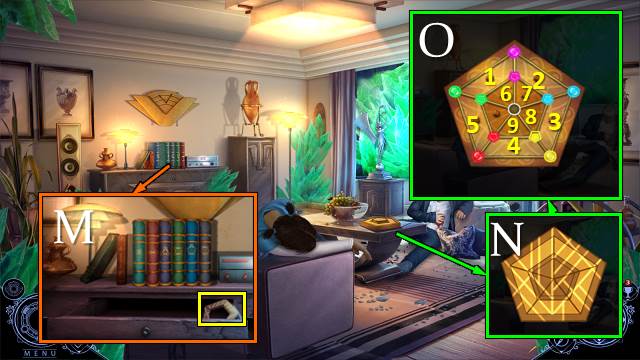
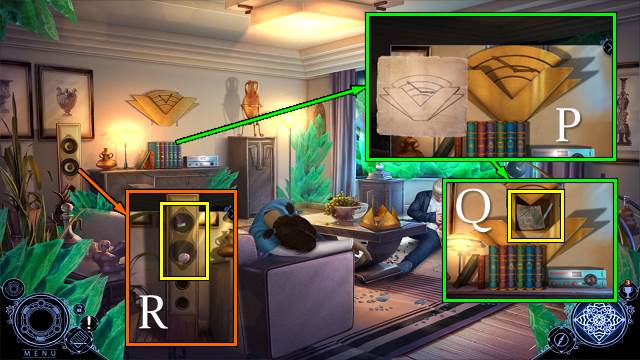
- Place ABSTRACT PAINTING (M).
- Solution: 2N-2O-2P-1Q-1R-1S-2T-1U.
- Go (V).
- Move items; switch on lamp and take WOODEN ORNAMENT 1/2 (W).
- Use PLIERS and move items; take PAINTING BOX and SAW (X).
- Walk down.
- Use SAW. Go (Y).
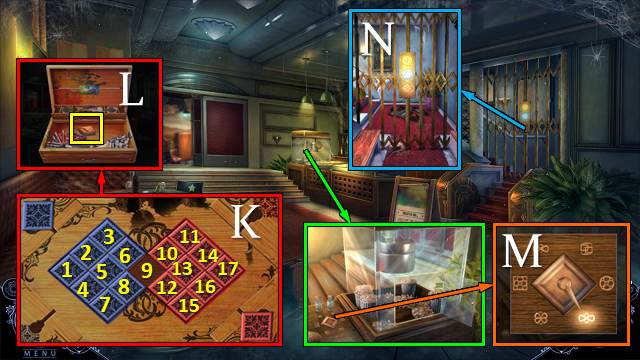
- Move chair; take THICK GLASS and GOLD SWITCH (Z).
- Move items; take STICKY GUN (A).
- Open STICKY GUN; place SHOELACE. Receive GUN WITH ROPE.
- Use GUN WITH ROPE; take SILVER SWITCH (B).
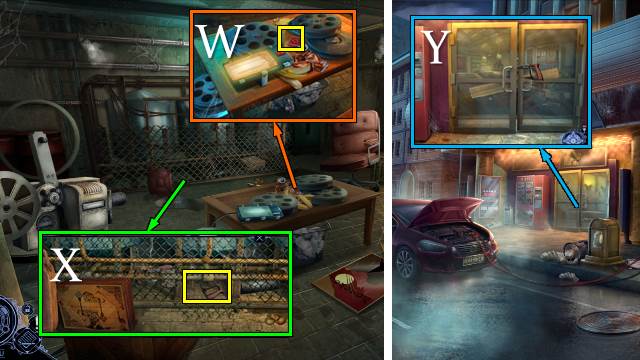
- Take MOVIE ROLL; place and turn GOLD SWITCH (C).
- Place and turn SILVER SWITCH (D).
- Go to Cinema Basement.
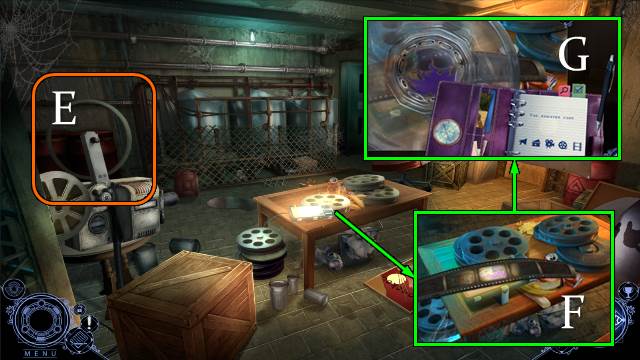
- Place MOVIE ROLL. Take BURNED ROLL (E).
- Place BURNED ROLL (F) and THICK GLASS (G).
- Go to Cinema Lobby.

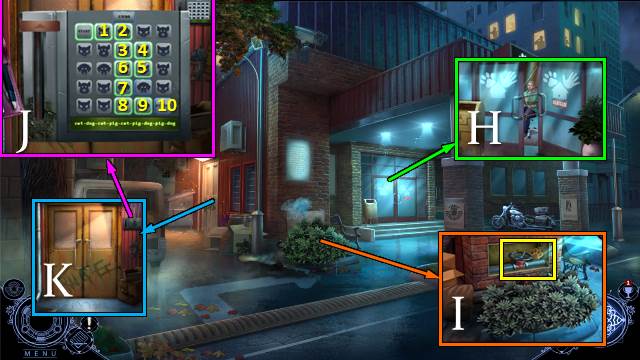
- Enter code. Take COIN and MOVIE HALL KEY (H).
- Use MOVIE HALL KEY (I).
- Play HOP (J); receive WOODEN ORNAMENT 2/2.
- WOODEN ORNAMENT on PAINTING BOX; slide tiles.
- Solution (K): 12-6-9-10-8-9-7-8-9-11-10-8-2-1-7-9-3-6-9
- 15-17-11-10-8-2-3-9-15-16-10-8-9-15-12-6-4-7-9-12-14-11-9-12
- 6-9-10-13-12-9-6-5-8-10-13-12-6-9.
- Move items; take BRONZE SWITCH (L).
- Place and turn BRONZE SWITCH (M).
- Open doors. Go (N).
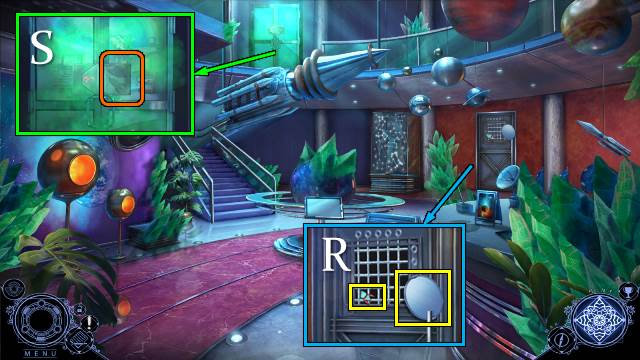
- Use Magical Lens (O).
- Move curtain. Open diary and play HOP (P); take DRAWER KEY.
- Use DRAWER KEY to open and search all drawers; take HEADSET (Q).
- Place HEADSET (R).
- Walk down.
- Turn left.
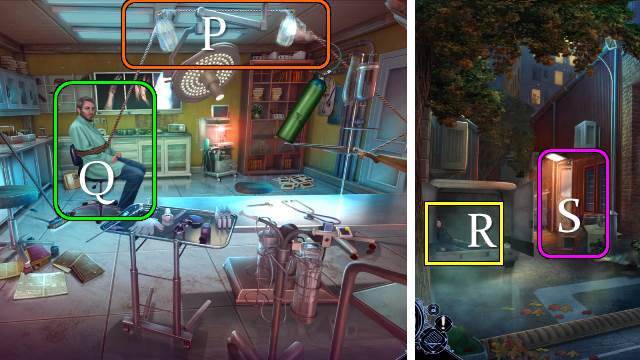
- Talk; receive PHONE NUMBER (S).
- Go (T).
- Move boards with hat stand. Go (U).
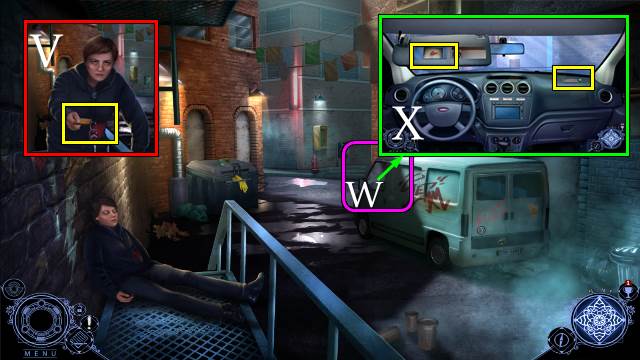
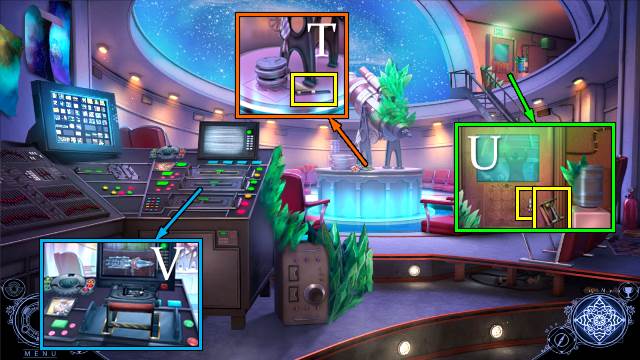
- Take VAN KEYS (V).
- Use VAN KEYS (W).
- Take LIGHTER. Open mirror; take clue (X).
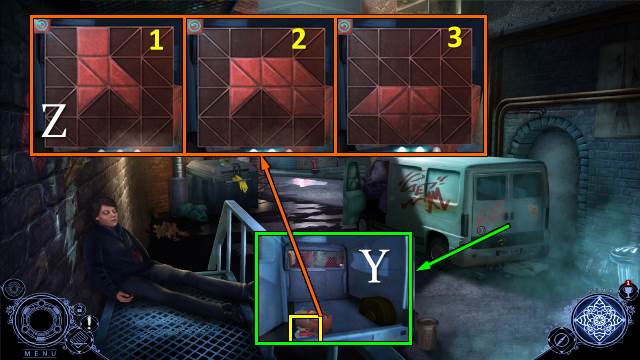
- Use VAN KEYS. Take METAL FORK and POCKET BLOWTORCH (Y).
- Solution (Z).
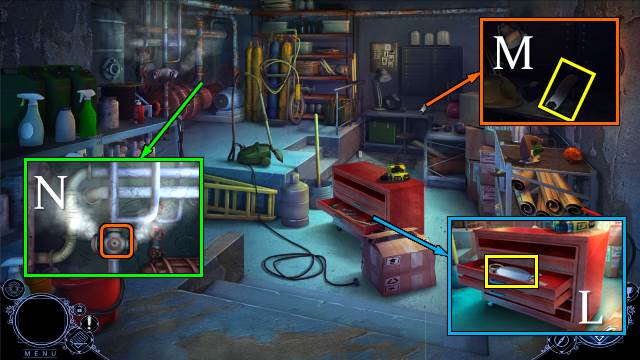
- Move items; take WRENCH and DUCT TAPE.
- Lift burglar (A).
- Place burglar (B).
- LIGHTER on POCKET BLOWTORCH.
- Take BROKEN RADIO and TORN RUBBER GLOVE; use POCKET BLOWTORCH and take CHAIN. Play mini-HOP; receive BAG OF CRACKERS (C).
- METAL FORK on TORN RUBBER GLOVE; receive ISOLATED FORK.
- Use COIN, PHONE NUMBER and ISOLATED FORK (D).
- Use BAG OF CRACKERS and DUCT TAPE (E).
- Place PHONE NUMBER and dial (F).
- Select 'a gunshot wound to the torso'.
- Start van. Play HOP (G).
- Talk (H).
- Move shrubs; use WRENCH twice. Take VALVE and VETERINARIAN'S LOGO 1/3 (I).
- Use HAND CREAM; move slider. Enter code (J).
- Go (K).
- Take MAGNET, BATTERIES and ANTENNA from BROKEN RADIO.
- Use MAGNET. Take SURGERY SCALPEL and VETERINARIAN'S LOGO 2/3 (L).
- Take NITROGEN (M).
- Walk down.
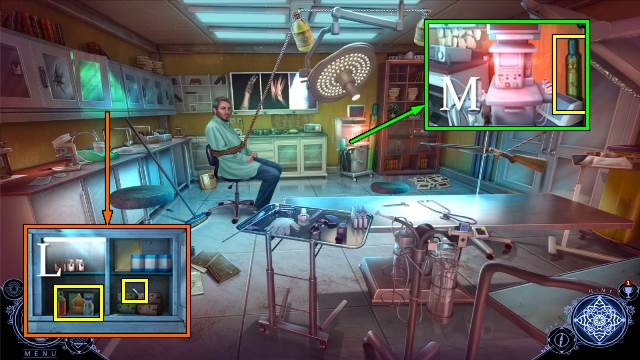
- Use SURGERY SCALPEL; take HOSE (N).
- Go (O).
- VALVE and HOSE on NITROGEN. Receive LIQUID NITROGEN.
- Use LIQUID NITROGEN (P).
- Use SURGERY SCALPEL (Q).
- Walk down.
- Open van; lift burglar (R).
- Go (S).
- Drop burglar (T).
- Take CLOSET KEYS (U).
- Use CLOSET KEYS; move items and take CAT BELL and VETERINARIAN'S LOGO 3/3 (V).
- Walk down.
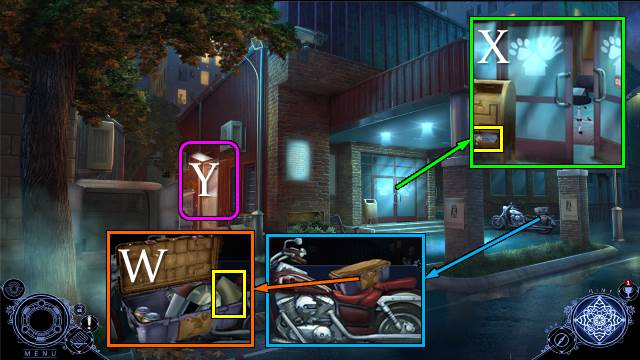
- Place VETERINARIAN'S LOGO; take OLD TABLET (W).
- Place CAT BELL for mini-game. Take FAN (X).
- Go (Y).
- Replace FAN; place OLD TABLET (Z).
- Play HOP (A); take map.
- Walk down.
Chapter 3: Edgar
- Remove police tape.
- Take TRIANGULAR KEY 1/3 (B).
- Move items; take TRIANGULAR KEY 2/3 (C).
- Take TRIANGULAR KEY 3/3 with ANTENNA. Move tile and take SEAL PART 1/5 (D).
- Place TRIANGULAR KEYS (E).
- Solution: F8-G5-H5.
- Go (I).
- Take SCISSORS (J).
- Take BROOM (K).
- Walk down.
- Use BROOM. Move items and take MIRROR HANDLES (L).
- Go (M).
- Place MIRROR HANDLES (N).
- Play HOP (O); receive REMOTE CONTROL.
- Walk down.
- BATTERIES in REMOTE CONTROL.
- Read note; use REMOTE CONTROL (P).
- Use Magical Lens (Q).
- Go (R).
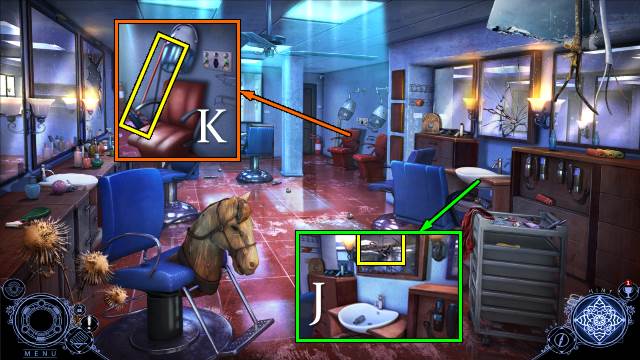
- Take notes and HAIR DRYER SWITCH (S).
- Use SCISSORS; take ROPE (T).
- Place ROPE (U).

- Move rope (V).
- Tie rope (W).
- Open tent; take COFFEE MACHINE HANDLE, CANDLE and ORNAMENTED SEAL (X).
- Walk down.
- Place COFFEE MACHINE HANDLE; take SEAL PART 2/5. Light burner and use CANDLE; receive LIT CANDLE (Y).
- Go (Z).
- Place and flick DRYER SWITCH; take SEAL PART 3/5 (A).
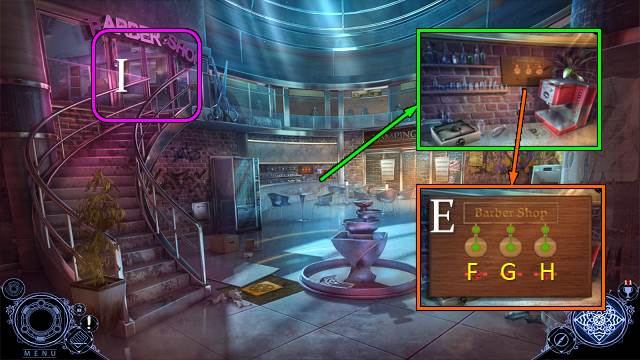
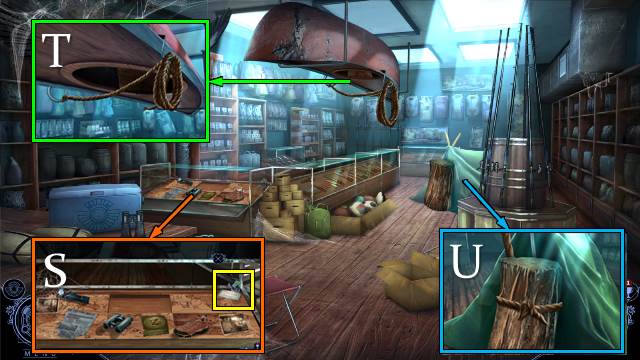
- Go to Camping Store.
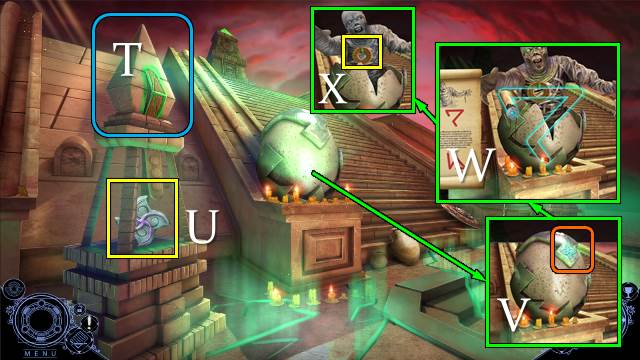
- Use LIT CANDLE; take SEAL PART 4/5 and MAP PIECE (B).
- Place MAP PIECE (C).
- Play HOP (D); receive SEAL PART 5/5.
- SEAL PARTS on ORNAMENTED SEAL (E).
- Place ORNAMENTED SEAL. Solution: L-M-H-J-I-K-J-L-K.
- Play HOP in box; receive FOUNTAIN CIRCLE.
- Walk down.
- Place FOUNTAIN CIRCLE. Use LIT CANDLE (N).
- Go (O).
- Solution (P).

- Take EMPTY LANTERN (Q).
- Take NEWEL POSTS and GARDENING KNIFE (R).
- Take PEBBLES and ROD. Unroll HOSE and cut with GARDENING KNIFE (S).
- PEBBLES and HOSE on EMPTY LANTERN. Receive IMPROVISED BATTERING RAM.
- Remove planter; hang IMPROVISED BATTERING RAM (T).

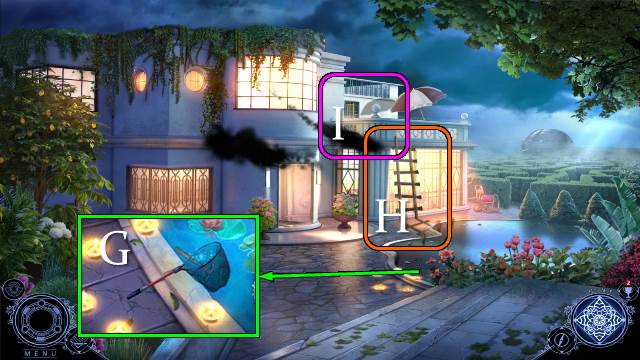
- Use Magical Lens (U).
- Play HOP (V); receive WOODEN PLANKS.
- Take ICE PICK; move horn and take note (W).

- Move tile and stones; take STATUE HANDLE with ROD and take MOON CREST (X).
- Take GRYPHON PENDANT with ICE PICK (Y1). Place and pull STATUE HANDLE; take ZIGGURAT PART 1/3 (Y2).
- Place GRYPHON PENDANT (Z).
- Solution: 2A-B-C2-D-E2.
- Take NET and MESOPOTAMIAN NAILS (F).
- Walk down.
- ROD on NET; receive POOL NET.
- Take HAMMER with POOL NET (G).
- NEWEL POSTS and MESOPOTAMIAN NAILS on WOODEN PLANKS; place planks and nails and use HAMMER. Receive IMPROVISED LADDER.
- Place IMPROVISED LADDER (H).
- Go (I).
- Take ANCIENT FIGURINE PIECE 1-3/5 (J).
- Take ANCIENT FIGURINE PIECE 4/5 and METAL CUBE (K).
- Place METAL CUBE (L).
- Solution (M).
- Take BASEBALL and ANCIENT FIGURINE PIECE 5/5 (L).
- Place and move ANCIENT FIGURINE PIECES. Take SUN CREST and ZIGGURAT PART 2/3 (N).
- Use ICE PICK; place MOON CREST and SUN CREST (O).
- Take ANCIENT SCROLL and ZIGGURAT PART 3/3 (P).
- Go to Mansion Ground Floor.
- Place ZIGGURAT PARTS (Q).
- Play HOP (R); receive LOUNGE KEY.
- Go to Mansion Office.
- Use LOUNGE KEY (S).
- Go (T).
- Throw BASEBALL (U).
- Take SKULL (V) and LENS ADD ON (W).
- Place LENS ADD ON and SKULL (X).
- Go (Y).
Chapter 4: The Shadowrealm
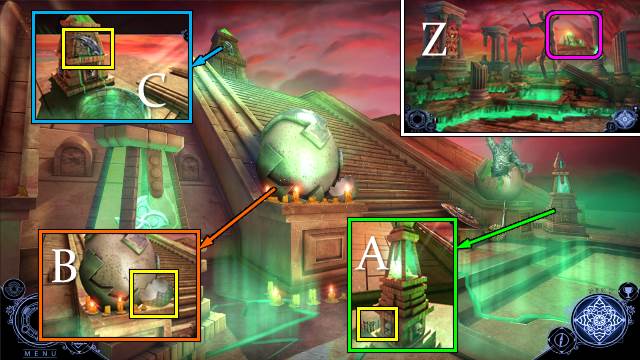
- Go (Z).
- Take MARBLE SEGMENT 1/3 (A).
- Take OBSIDIAN EGGSHELL (B).
- Take POLEARM BLADE; remove stone (C).
- Walk down.
- Take HOOKS (D).
- Take MARBLE SEGMENT 2/3 (E).
- Hooks and CHAIN on OBSIDIAN EGGSHELL; receive EGGSHELL BUCKET.
- Take MARBLE SEGMENT 3/3 with EGGSHELL BUCKET (F).
- Place MARBLE SEGMENT. Solution (G).
- Open box and play HOP; take CLAY PLATE.
- Go (H).
- Place CLAY PLATE; take SKULL (I).
- Walk down.
- Place SKULL. Solution: J-2K-3L-M-2N-2O-2P-2Q.
- Take PYLON TOP (R).
- Go (S).
- Place PYLON TOP and CLAY PLATE (T).
- Take EGG ORNAMENT (U).
- Place EGG ORNAMENT (V).
- Use ANCIENT SCROLL; play mini-game (W).
- Take STONE CIRCLE (X).
- Place STONE CIRCLE (Y).
- Play HOP (Z).
- Go (Y).
- Move urn; take METAL BAR (A).
- Take EMPTY YELLOW PENDANT from METAL BAR. Place POLEARM BLADE. Take POLEARM.
- Use POLEARM; play mini-HOP (B). Receive STAR KEY.
- Use STAR KEY; take THICK ROPE and EMPTY RED PENDANT (C).
- Place EMPTY YELLOW PENDANT; receive YELLOW PENDANT (D).
- Place EMPTY RED PENDANT; receive RED PENDANT (E).
- Take EGG KEY (F).
- RED PENDANT and YELLOW PENDANT on EGG KEY.
- Collect all symbols (G).
- EGG KEY solution (H): (5-4)-(7-3)-(1-3)-(5-3)-(8-2)-(2-9)-(3-6)-(6-9).
- Receive RUNESTONE.
- Place RUNESTONE (I).
- Take SMALL MIRROR (J).
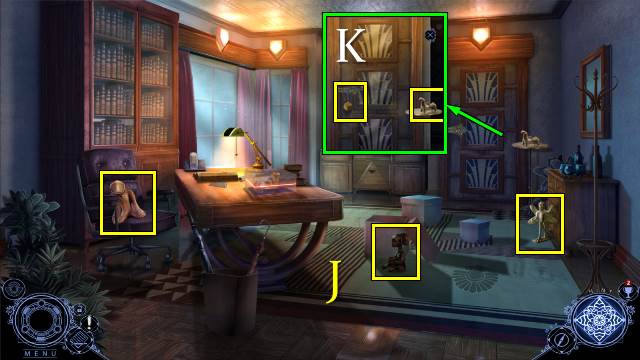
- Take CHISEL; remove speaker and take ASTRONOMICAL PLATE 1/2 (K).
- Take COMMODE BOOK (L).
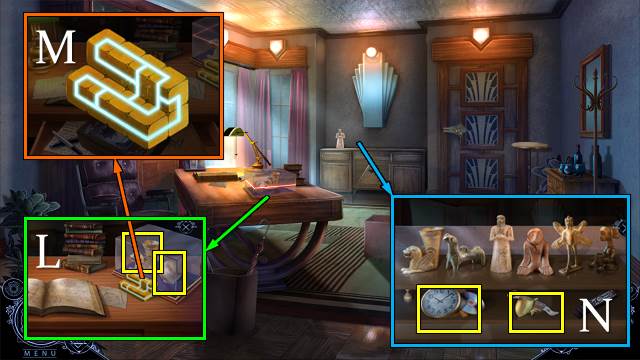
- Place COMMODE BOOK; solution shown. Take ASTRONOMICAL PLATE 2/2 (M).
- Place ASTRONOMICAL PLATE; solution 1 (N).
- Solution 2 (O): 3-4-4-8-8-7-1-6-1-7-2-7-7-8-8-3-3-3-8.
- Take TAPE and CLOCK CLUE.
- Place CLOCK CLUE. Solution (P).
- Take HEDGE MAZE MAP and SPEAKER KEY (Q).
- Use SPEAKER KEY; take SPEAKER PART and VOLUME BUTTON (R).
- Place SPEAKER PART (S).
- Place VOLUME BUTTON (T).
- Use THICK ROPE. Go (U).
- Use HEDGE MAZE MAP (V).
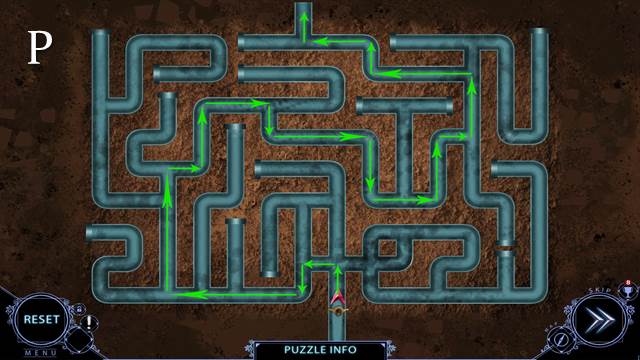
- W=left, X=forward, Y=right, Z=back: X-W-W-X-Y-Y-Y-Z-Y-Y-X-X, take clippers, Z-Z-W-W-X, use clippers, X-W-X-X-Y-Y-Y-X, take hammer, Z-W-W, use hammer, X-W-X.
Chapter 5: The Skull of Darkness
- Remove cloth (A). Play mini-HOP; receive POWDER BUCKET.
- Take THIN BRANCH and STONE ORNAMENT (B).
- Take note and use SMALL MIRROR and THIN BRANCH (C).
- Go (D).
- Take UFO (E), move branches and take PLANET 1/2 (F).
- Take VACUUM FLASK (G).
- TAPE and POWDER BUCKET on VACUUM FLASK; take TAPE WITH FINGERPRINT.
- Use CHISEL and STONE ORNAMENT; take PLANET 2/2 (H).
- Use TAPE WITH FINGERPRINT; take note and SUBSTATION KEY 1/2 (I).
- Place PLANETS (J).
- Solution (K).
- Take LOGO ELEMENT (J).
- Walk down.
- Place LOGO ELEMENT (L).
- Play HOP (M); receive SUBSTATION KEY 2/2.
- Go (N).
- Use SUBSTATION KEY (O).
- Solution (P).
- Go (Q).
- Take CONCAVE MIRROR 1/4 and ROCKET (R).
- Place UFO and ROCKET; go (S).
- Move items; take SPACESHIP PART 1/2 (T).
- Take CONSOLE HANDLE and SPACESHIP MODEL (U).
- Place CONSOLE HANDLE (V).
- Walk down.
- Play HOP (W).
- HOP puzzle solution (X); receive CODE SEQUENCE.
- Go (Y).
- Place CODE SEQUENCE (Z).
- Solution (A): 5-1-5-1-5-1-3-1-1-4-1-3-1-1-4-1-3-1-1-4-1-1-2-1-5-1-2-1-5-1-2-3-1-1-3.
- Take SUN'S CORE (Z).
- Walk down twice.

- Place SUN'S CORE; take STAR CONSTELLATION (B).
- Go (C).
- Place STAR CONSTELLATION. Solution (D). Take CONSOLE DISC.
- Go (E).
- Push button; place CONSOLE DISC. Play HOP; take SPACESHIP PART 2/2 (F).
- SPACESHIP PART on SPACESHIP MODEL; take SPACESHIP.
- Place SPACESHIP (G). Go.
- Take STORAGE KEY (H).
- Walk down.
- Use STORAGE KEY (I).
- Solution (J).
- Go (K).
- Open drawer; take CONCAVE MIRROR 2/4 (L).
- Take VALVE HANDLE (M).
- Use VALVE HANDLE; play mini-HOP. Receive PROTECTIVE GLOVE (N).
- Walk down twice.
- Take LIGHTBULB with PROTECTIVE GLOVE (O).
- Go to Storage Room.
- Place LIGHTBULB (P).
- Play HOP (Q); receive TELESCOPE INSET.
- Go to Observatory Auditorium.
- Place TELESCOPE INSET (R); take CONCAVE MIRROR 3/4 and DRAWER HANDLE (S).
- Go to Storage Room.
- Use DRAWER HANDLE; move items and take ASTRONAUT DIAL (T).
- Walk down.
- Place ASTRONAUT DIAL; take CONCAVE MIRROR 4/4 (U).
- Go to Observatory Roof.
- Place CONCAVE MIRROR (V).
- Solution (W). Starting positions are random.
- Congratulations, you have completed Shadowplay: Whispers of the Past.
Created at: 2017-08-25