

Walkthrough Menu
General Tips
- This is the official guide for Spirit of Revenge: Florry's Well.
- This guide will not show when you have to zoom into a location; the screenshots will show each zoom scene.
- Hidden-object puzzles are referred to as HOPs. This guide will not show screenshots of the HOPs, however, it will mention when an HOP is available and the inventory item you'll collect from it.
- Use the Map to fast travel to a location.
Chapter 1: The Red Dragon
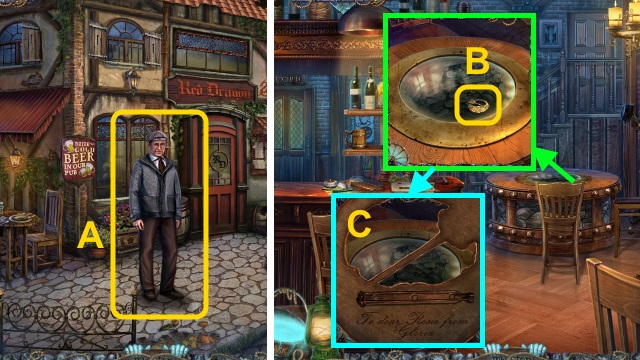
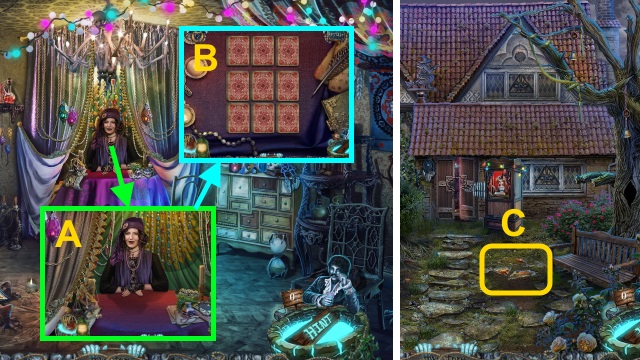
- Talk to Bolton (A).
- Examine the brooch (B); turn it over. Take the BROOCH (C).
- Walk right.
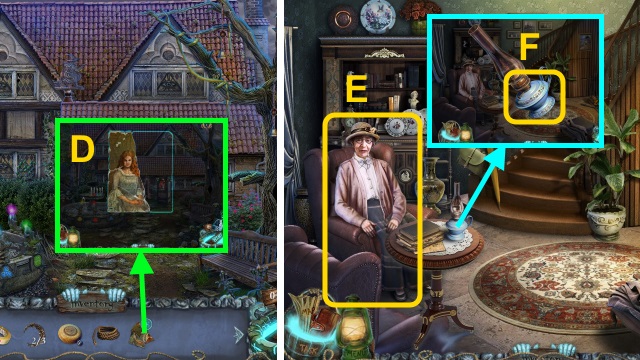
- Give the BROOCH (D).
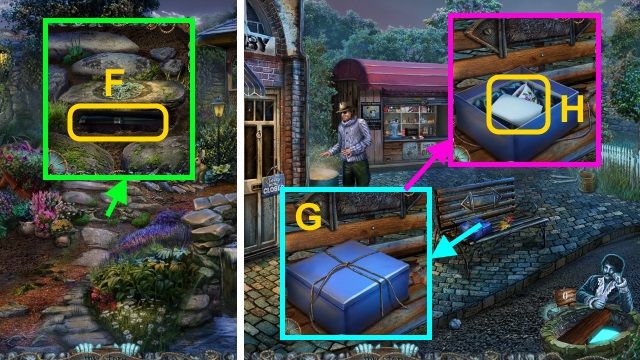
- Take the REGIONAL MAP (E) and WOODEN MUG (F).
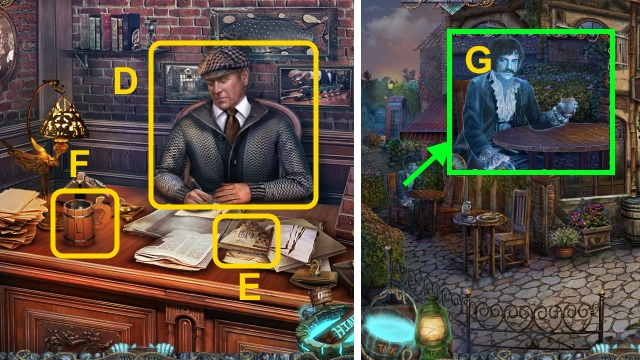
- Walk down twice.
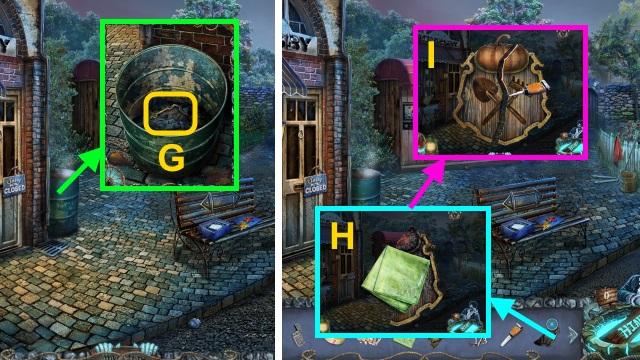
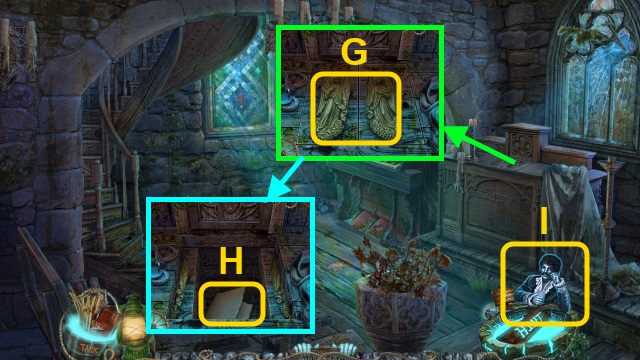
- Talk to Oscar (G).
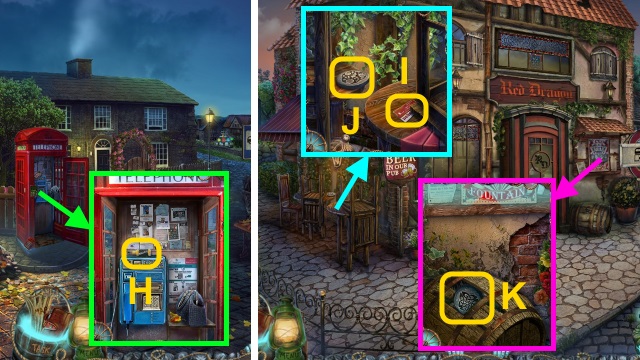
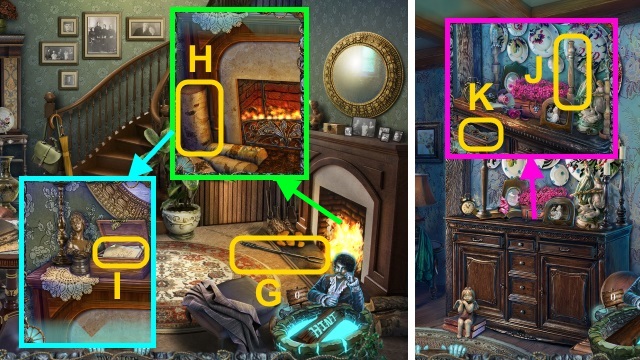
- Take the TRAVEL BAG (H).
- Take the LAMP TOKEN (I).
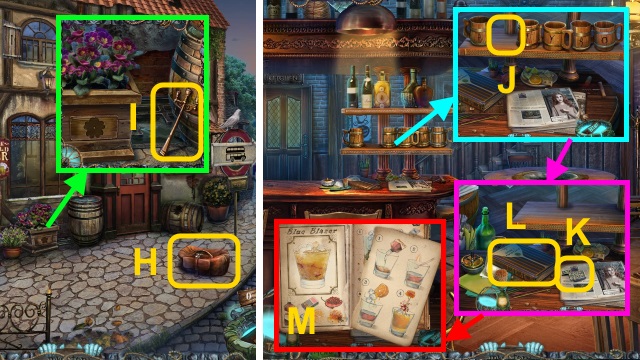
- Walk forward.
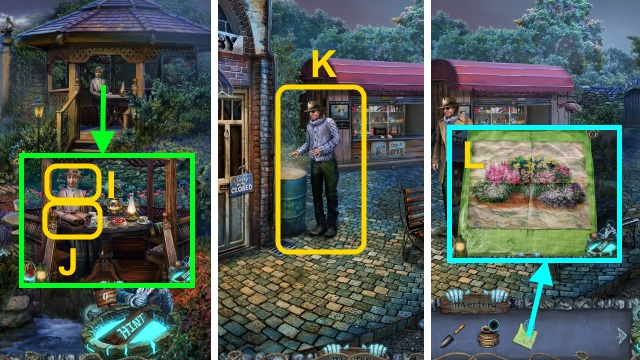
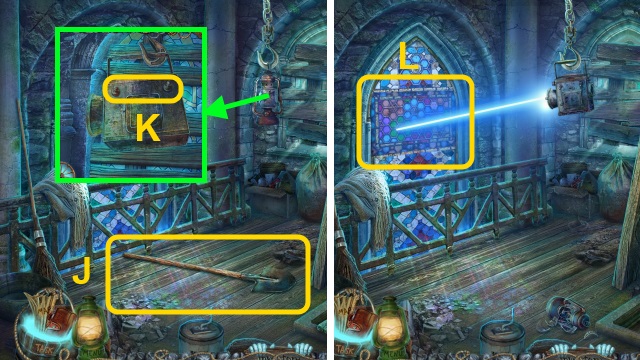
- Place the WOODEN MUG (J).
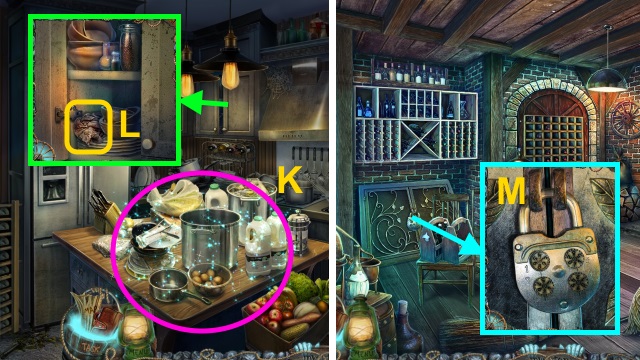
- Take the LIGHTER (K).
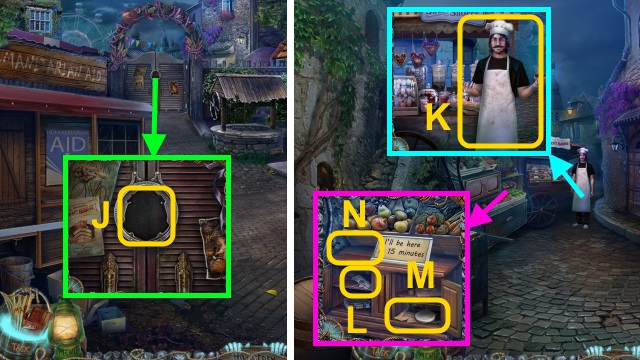
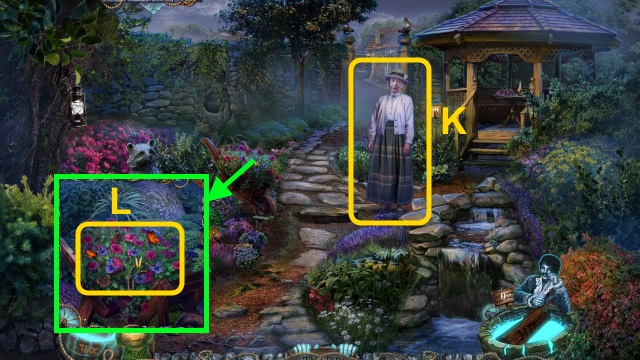
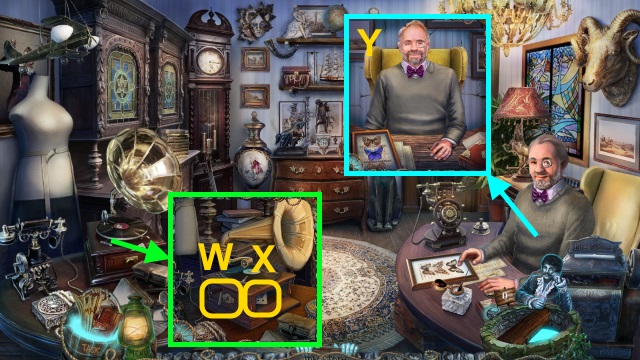
- Read the book (L); receive the PAPER CLIP.
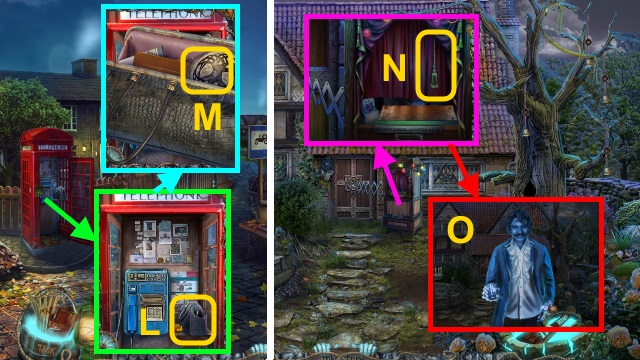
- Examine the recipe (M).
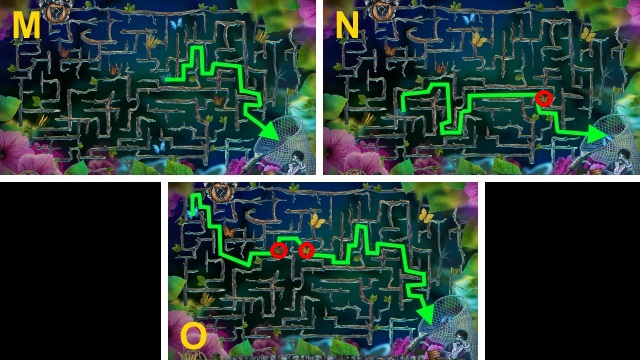
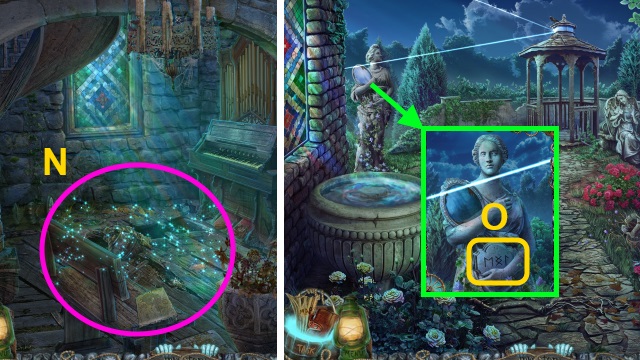
- Play the HOP; receive the BLUE BLAZER COCKTAIL (N).
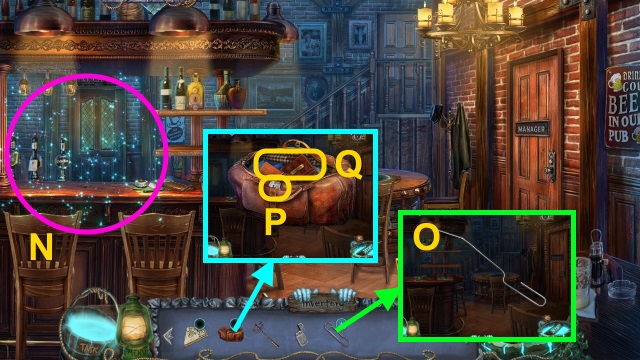
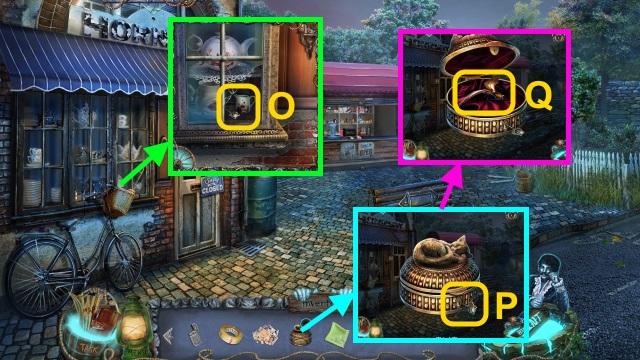
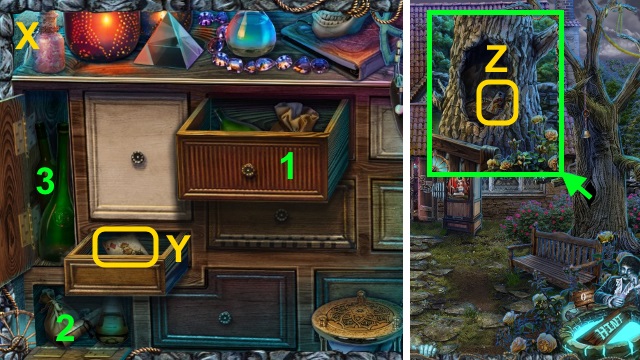
- Examine the PAPER CLIP 3x (O); take the WIRE.
- Combine the TRAVEL BAG and WIRE (P); take the COSMETICS BAG and DIARY (Q).
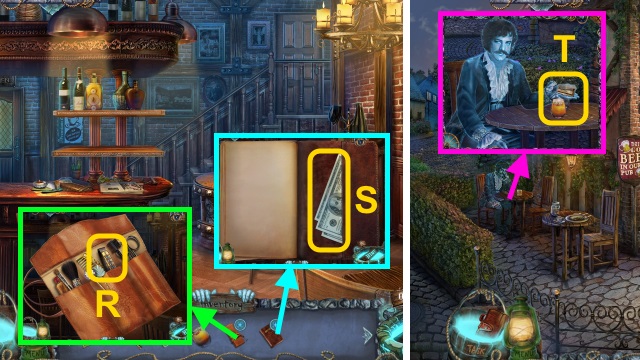
- Open the COSMETICS BAG; take the TWEEZERS (R).
- Read the DIARY; take the DOLLARS (S).
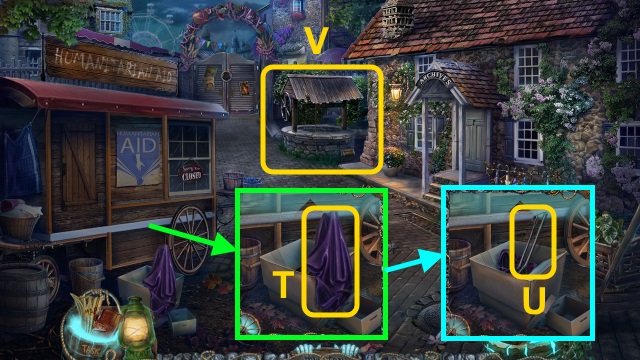
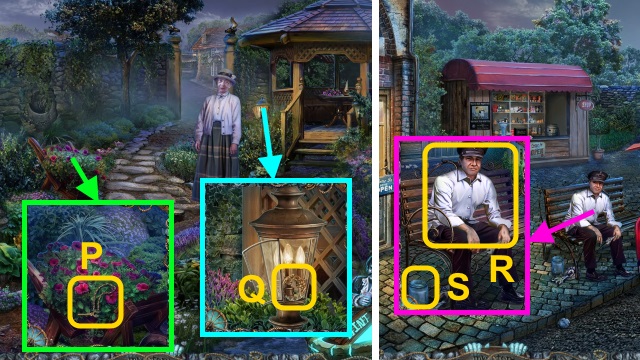
- Walk down.
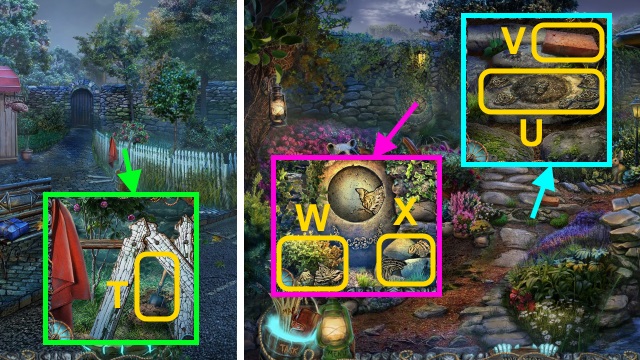
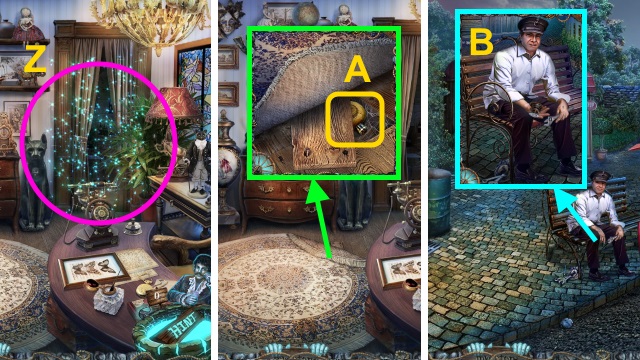
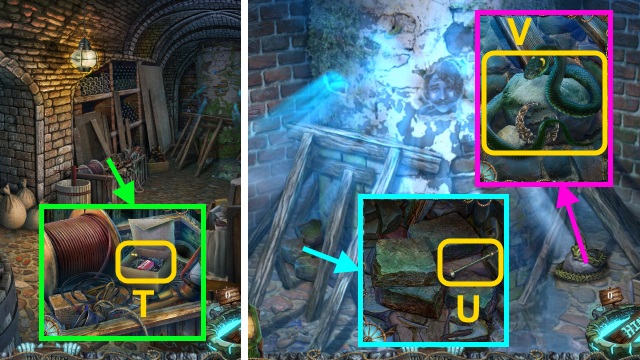
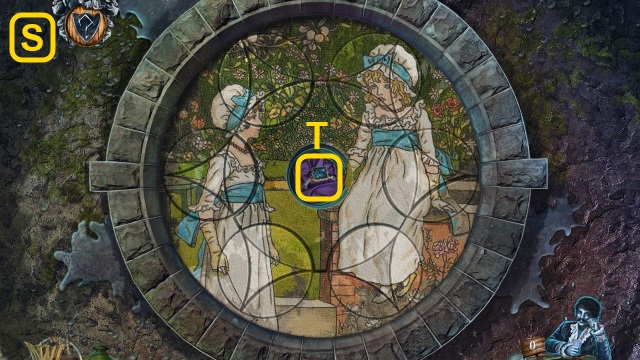
- Give the BLUE BLAZER COCKTAIL; take the MAP PART (1/2) (T).

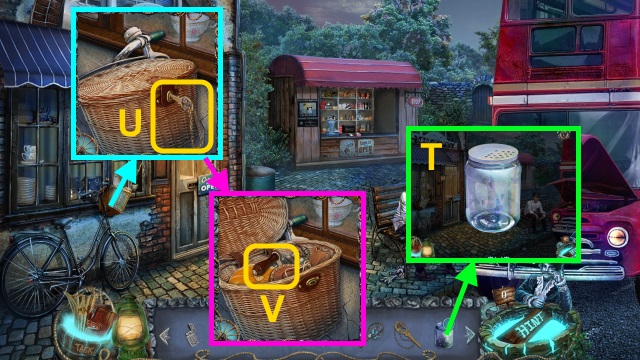
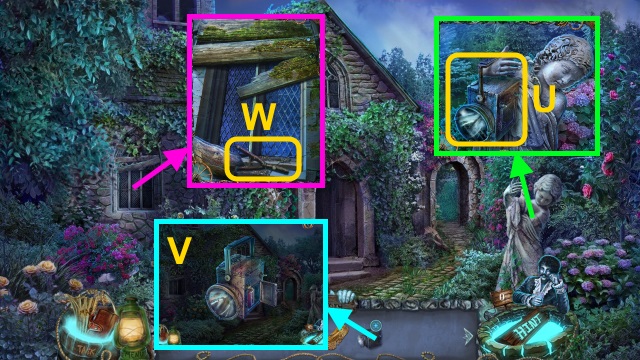
- Talk to the driver (U).
- Walk right.
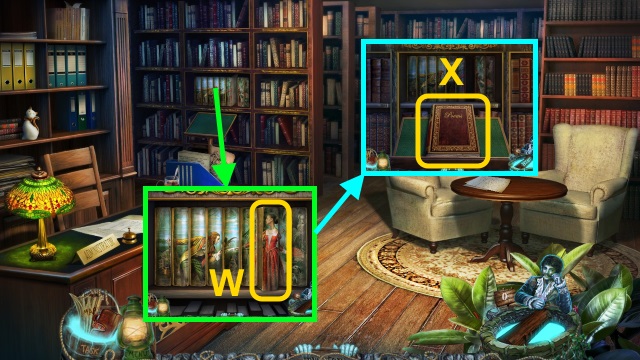
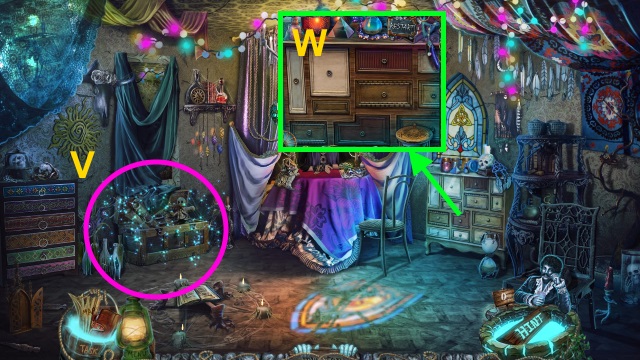
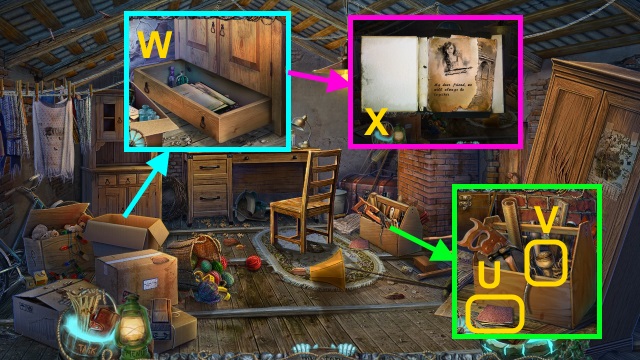
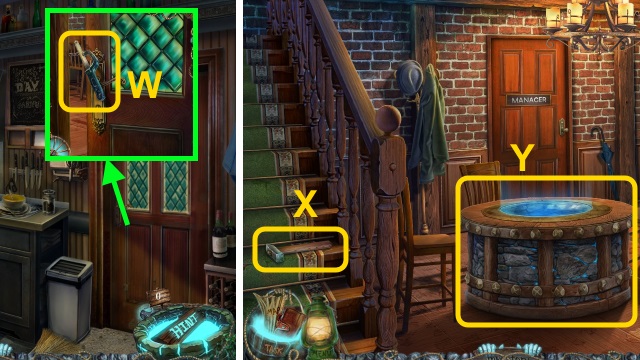
- Take the BOOK (V).
- Read the BOOK (W); play the HOP. Receive the STUCK PAGES.
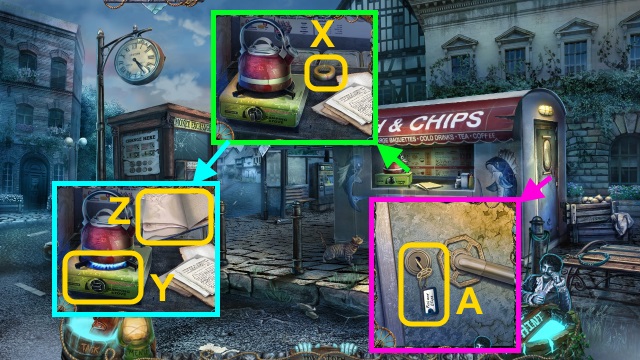
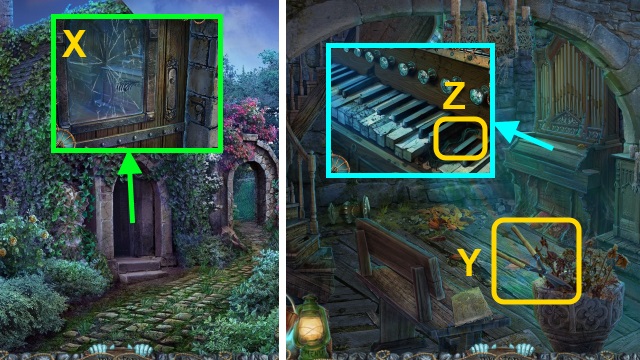
- Take the TAPE (X).
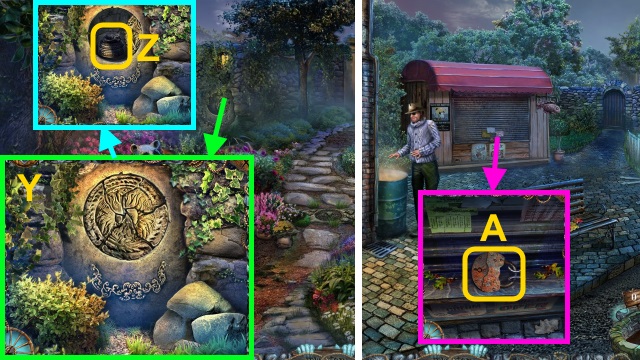
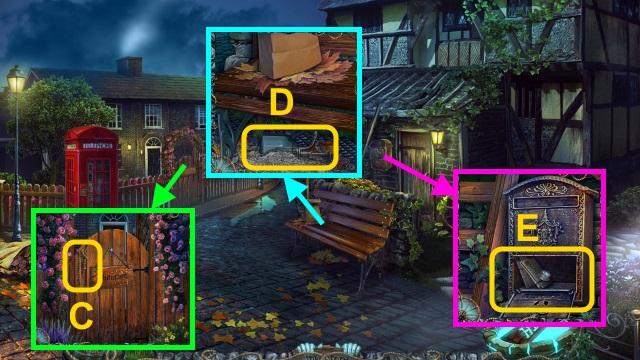
- Use the LIGHTER (Y) and STUCK PAGES (Z); receive the FOOD STAND KEY.
- Use the FOOD STAND KEY (A).
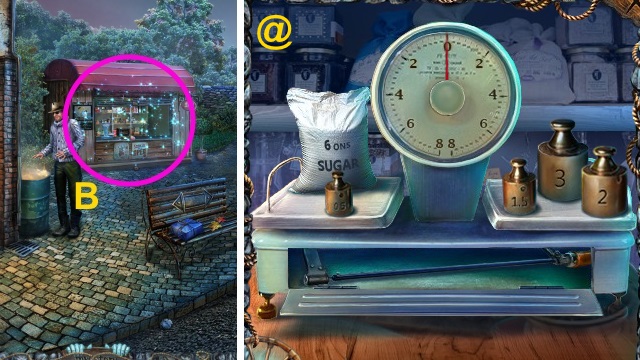
- Play the HOP; receive the FISH (B).
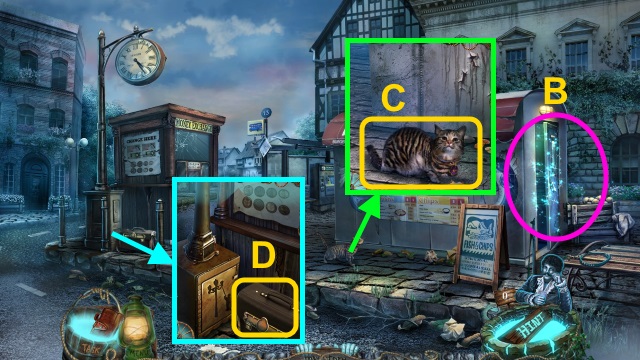
- Examine the cat; give the FISH. Take the FORGET-ME-NOT DECORATION (C).
- Take the TOOLBOX (D).
- Walk down.
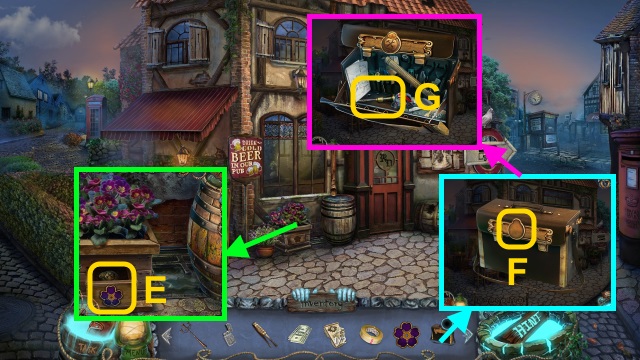
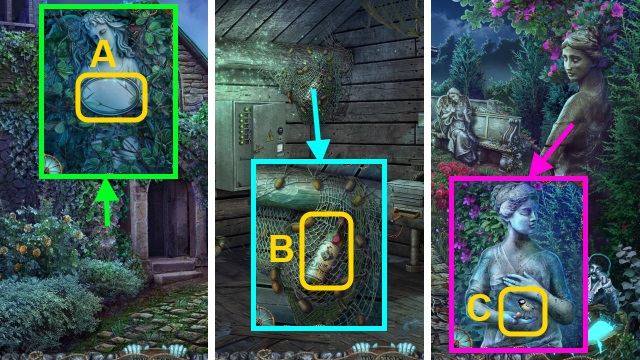
- Place the FORGET-ME-NOT DECORATION; take the CARPENTER BADGE (E).
- Combine the TOOLBOX and CARPENTER BADGE (F).
- Move the tools; take the SCREWDRIVER (G).

- Use the SCREWDRIVER (H); take the LAMPLIGHTER TOKEN (I).
- Walk right.
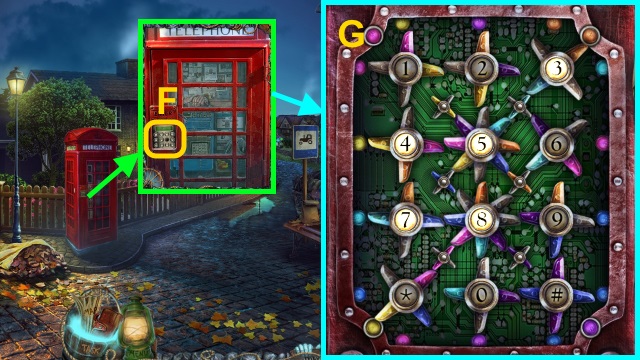
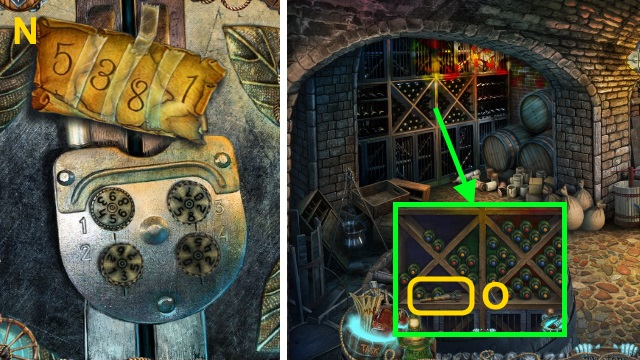
- Place the LAMP TOKEN and LAMPLIGHTER TOKEN for a mini-game (J).
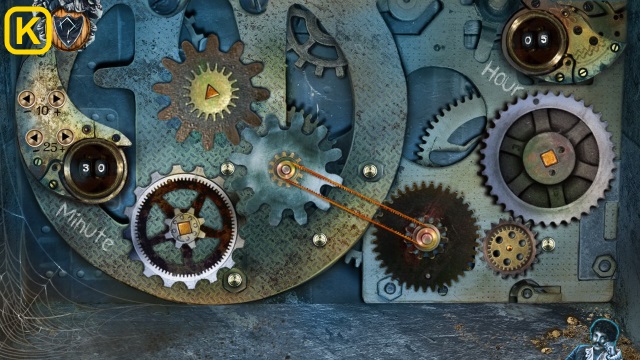
- Solution (K).

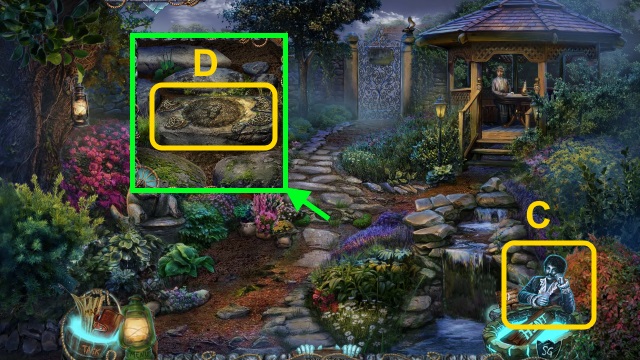
- Talk to the man. Give the DOLLARS; take the POUNDS (L).
- Walk forward.
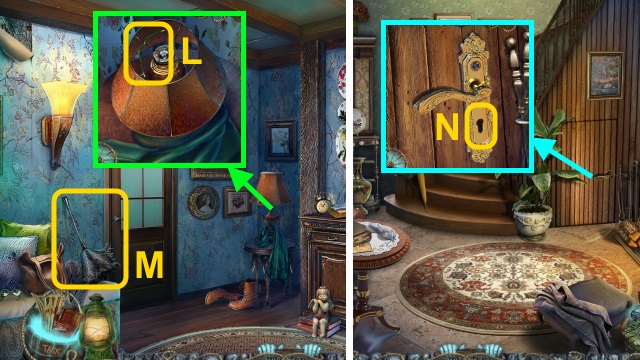
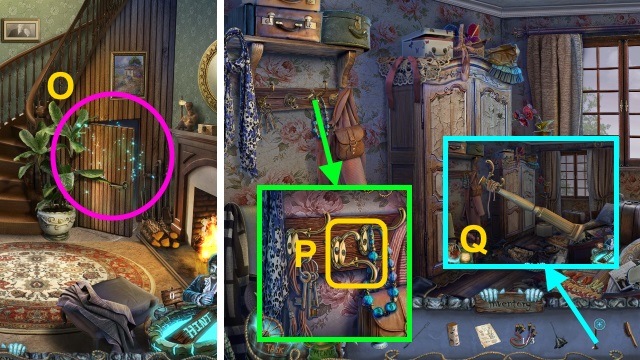
- Move the book; use the TWEEZERS (M). Receive the MAP PART (2/2).
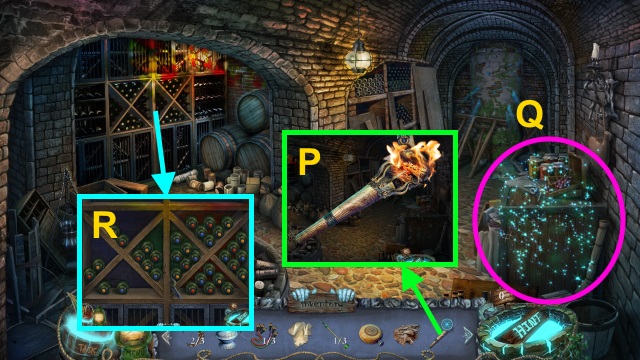
- Combine the REGIONAL MAP, MAP PART (2/2), and TAPE (N); receive the REGIONAL MAP.
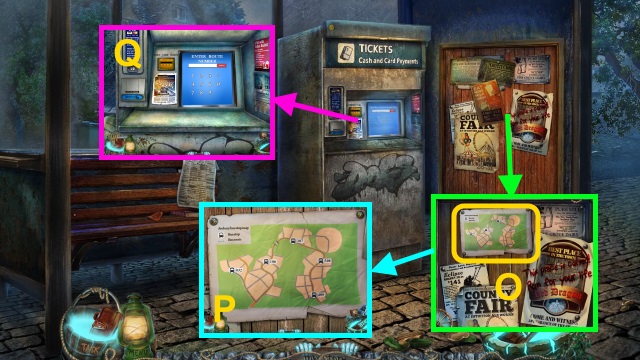
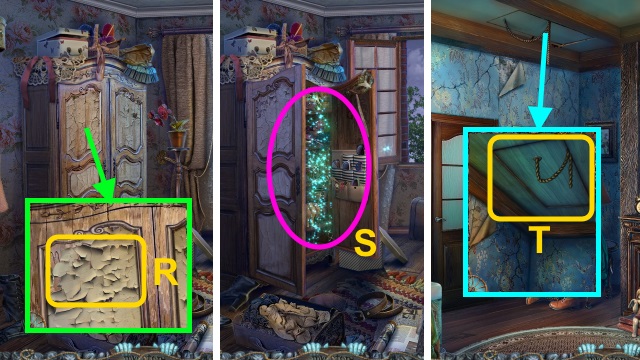
- Remove the posters; examine the map (O).
- Place the REGIONAL MAP (P).
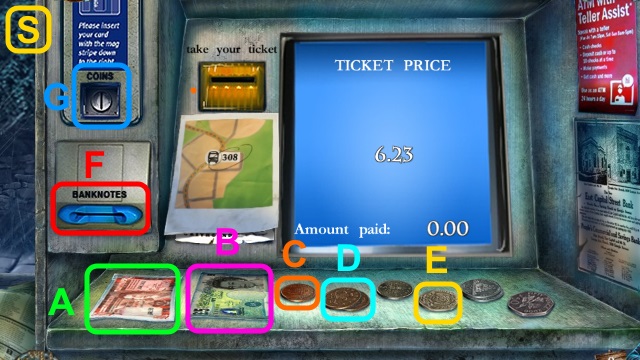
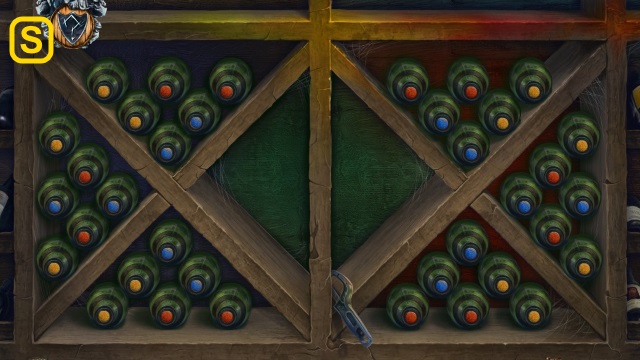
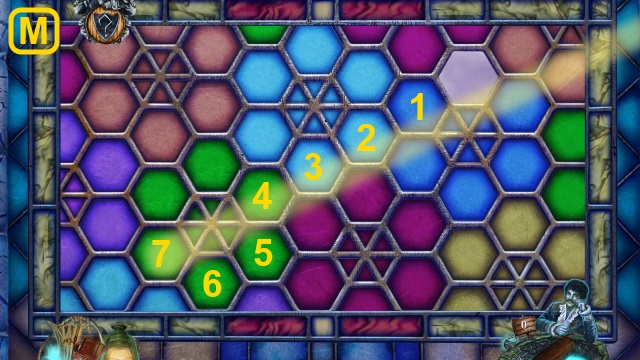
- Use the POUNDS for a mini-game (Q).
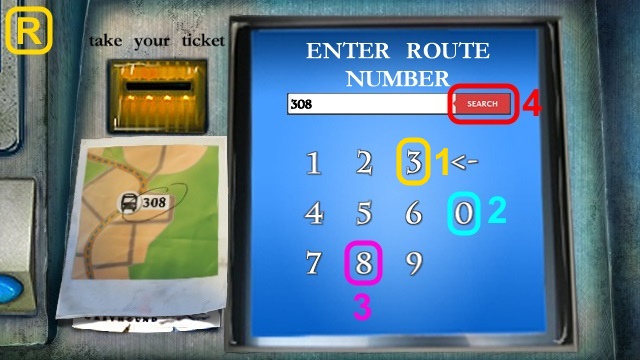
- Solution (R).
- Solution (S): (A-F)-(B-F)-(E-G)-(D-G)-(C-G).
- Receive the BUS TICKET.
- Walk forward.
Chapter 2: Rosie
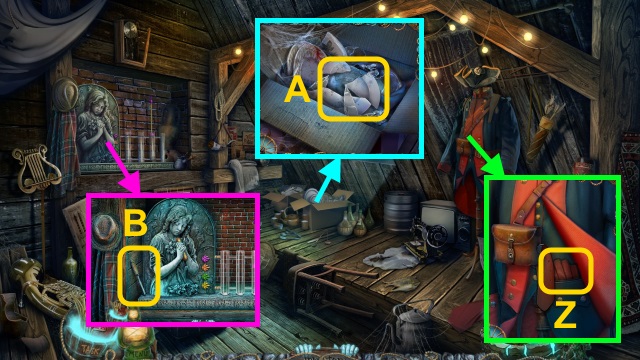
- Move the pickets; take the TROWEL (T).
- Walk right.
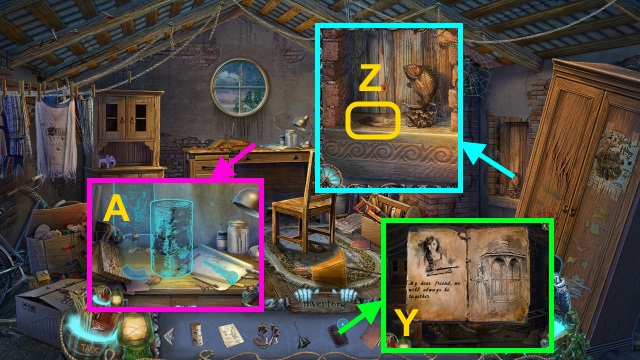
- Examine the symbols (U); take the BRICK (V).
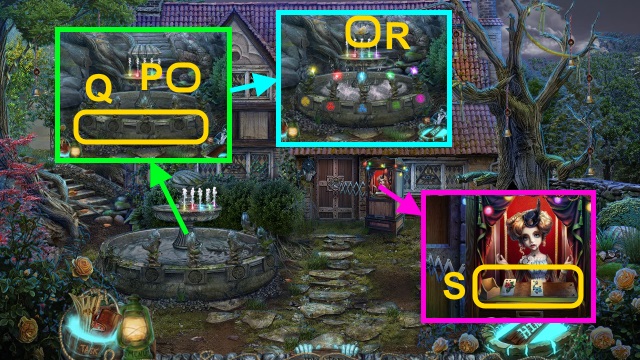
- Examine the wall for a mini-game; move the bush (W) and rock (X).
- Solution (Y).
- Take the MUSIC BOX (Z).
- Walk down.
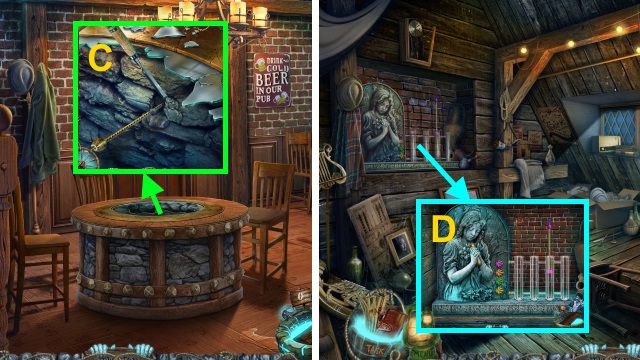
- Use the BRICK (A).
- Play the HOP; receive the WHISKEY (B).
- HOP mini-game solution (@).
- Walk right.
- Give the WHISKEY (C); examine the symbols for a mini-game (D).
- Solution (E).
- Take the CELTIC KNIFE (F).
- Walk down.
- Examine the string 2x; use the CELTIC KNIFE (G).
- Read the note; take the CHINA CUP (H).
- Walk right.
- Talk to Gloria; give the CHINA CUP (I). Take the COAT (J).
- Walk down.
- Talk to the man; give the COAT (K). Receive the HANDKERCHIEF.
- Open the HANDKERCHIEF; take the FLOWER BED BLUEPRINT and HANDKERCHIEF (L).
- Walk right.

- Use the FLOWER BED BLUEPRINT and TROWEL (M).
- Arrange the flowers; take the PLUNGER (N).
- Walk down.
- Use the PLUNGER; take the WINDING KEY (O).
- Combine the MUSIC BOX and WINDING KEY (P).
- Take the SEAGULL FIGURINE (Q).
- Walk right.

- Place the SEAGULL FIGURINE (R).
- Play the HOP (S).
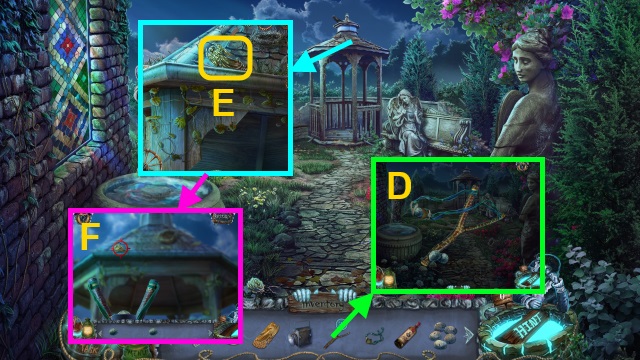
- Scroll down; move the cloth (T). Take the TONGS (U).
- Examine the well for a mini-game (V).
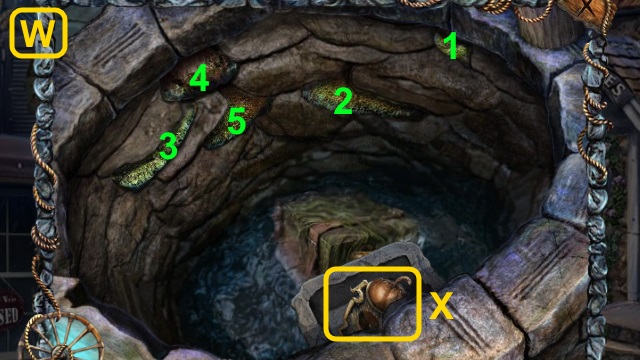
- Solution (W).
- Take the FAIR GATE TOKEN PART (X).
- Walk right.
- Talk to Bolton (Y).
- Take the ID CARD; read the file (Z).
- Take the BALL LEG (1/3) (A).
- Talk to the woman (B).
- Walk down.
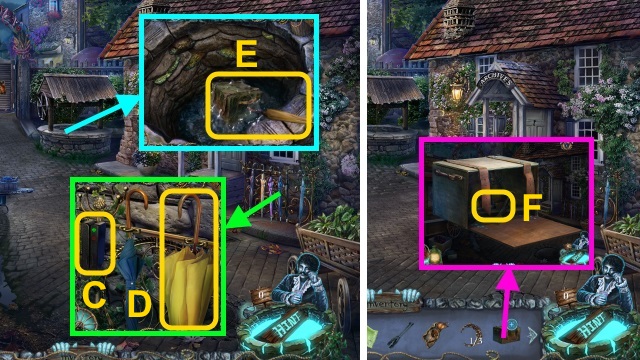
- Use the ID CARD (C); take the UMBRELLA (D).
- Use the UMBRELLA; receive the WOODEN BOX (E).
- Examine the WOODEN BOX 3x; take the GLUE (F).
- Walk down twice.
- Use the TONGS; receive the FAIR GATE TOKEN PART (G).
- Combine the FAIR GATE TOKEN PART and HANDKERCHIEF (H); clean the token.
- Combine the 2 FAIR GATE TOKEN PARTS and GLUE (I); take the FAIR GATE TOKEN.
- Walk right, then forward.
- Place the FAIR GATE TOKEN (J).
- Walk forward.
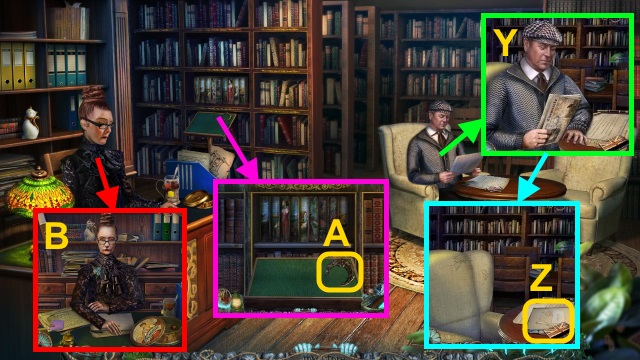
- Talk to Mr. Bonmarito (K).
- Open the cupboard; take the ENVELOPE DECORATION (L) and JAR LID (M); read the newspaper.
- Place the POUNDS (N).

- Play the HOP; receive the RECIPE AND INGREDIENTS (O).
- Give the RECIPE AND INGREDIENTS (P); receive the RUM.
- Read the book (Q); take the ENVELOPE (R).
- Take the 'NOSTALGIA' CHOCOLATE (S).
- Walk down, then right.
- Give the 'NOSTALGIA' CHOCOLATE (T); receive the 'YORK AND LANCASTER' SEEDS.
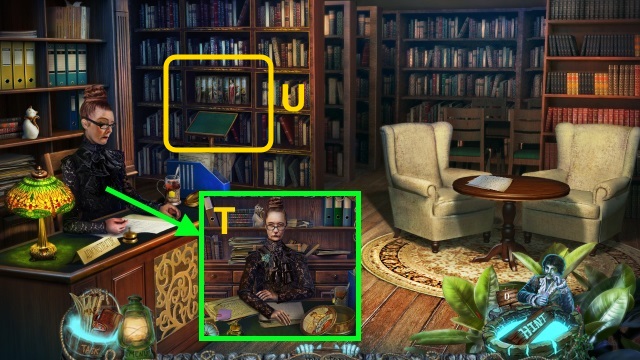
- Examine the bookshelf for a mini-game (U).
- Solution (V).
- Examine the book (W).
- Read the book for a mini-game (X).
- Solution (Y).
- Give the RUM (Z).
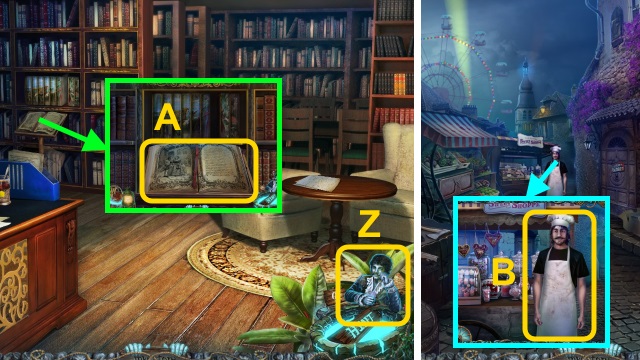
- Examine the book; receive the POEM (A).
- Walk down, then forward.
- Give the POEM (B); receive the SIGNED POEM.

- Open the ENVELOPE; place the SIGNED POEM and 'YORK AND LANCASTER' SEEDS (C).
- Place the ENVELOPE DECORATION; take BONMARITO'S PRESENT (D).
- Give BONMARITO'S PRESENT (E); read the newspaper (F).
- Walk down.
- Talk to Rosie (G).
Chapter 3: The Psychic
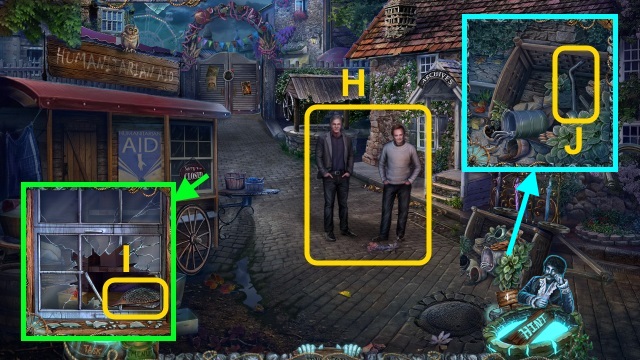
- Talk to the men (H).
- Take the BUTTERFLY NET (I).
- Examine the tools; take the NAIL PULLER (J).
- Walk down.
- Talk to Gloria (K).
- Use the BUTTERFLY NET for a mini-game (L).
- Solution (M-O).
- Receive the NET WITH BUTTERFLIES.
- Take the BIKE BASKET KEY (P).
- Take the BALL LEG (2/3) (Q).
- Walk down.
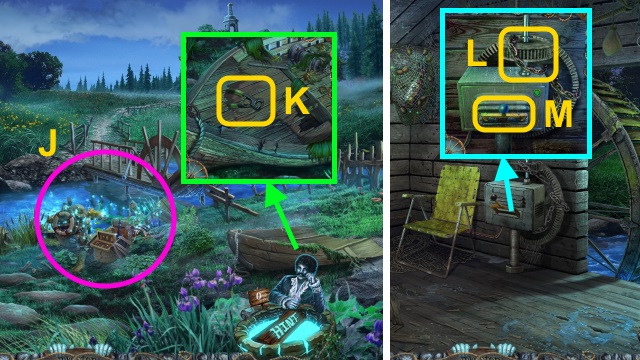
- Talk to the driver (R); take the EMPTY JAR (S).
- Combine the EMPTY JAR and NET WITH BUTTERFLIES (T); place the JAR LID. Take the JAR WITH BUTTERFLIES.
- Use the BIKE BASKET KEY (U); take the PHONOGRAPH HANDLE (V).
- Walk left.
- Use the PHONOGRAPH HANDLE (W); take the ANSWER CARDS (1/3) (X).
- Talk to the man; give the JAR WITH BUTTERFLIES (Y).
- Play the HOP; receive the BUS PART (Z).
- Use the NAIL PULLER; take the EMPTY FLASK (A).
- Walk down.
- Give the BUS PART (B).
- Take the ROPE (C).
- Use the LIGHTER; take the ANTI-RUST SOLUTION (D).
- Use the ANTI-RUST SOLUTION; open the mailbox. Take the PHONE BOOTH BUTTON (E).
- Place the PHONE BOOTH BUTTON for a mini-game (F).
- Solution (G).
- Move the cloth; take the WHISKEY (H).
- Walk right.
- Take the PUB'S DISCOUNT CARD (I) and FOUNTAIN EMBLEM (1/4) (J).
- Scroll down; move the BOARD. Take the FOUNTAIN EMBLEM (2/4) (K).
- Walk left.
- Examine the bag (L).
- Use the PUB'S DISCOUNT CARD; take the FOUNTAIN EMBLEM (3/4) (M).
- Walk forward.
- Examine the cord (N).
- Give the WHISKEY (O); receive the ANSWER CARD (2/3).
- Take the FOUNTAIN EMBLEM (4/4) (P); place the FOUNTAIN EMBLEM (4/4) for a mini-game (Q).
- Solution is random; take the ANSWER CARD (3/3) (R).
- Examine the box; give the ANSWER CARD (3/3) for a mini-game (S).
- Solution (T).
- Walk forward.
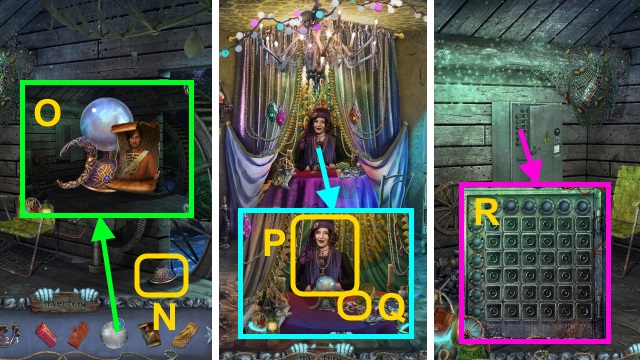
- Talk to the psychic (U).
- Play the HOP; receive the FLASHLIGHT (V).
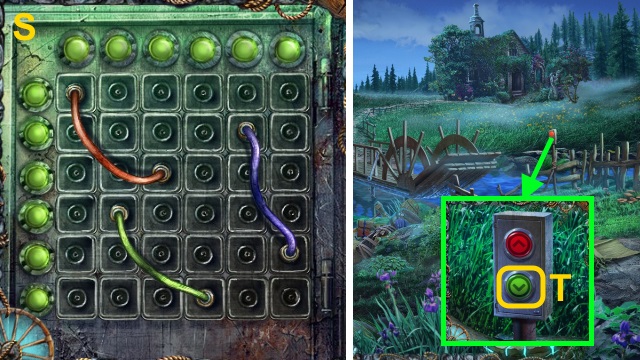
- Examine the drawers for a mini-game (W).
- Solution (X).
- Take the CARD (1/2) (Y).
- Walk down.
- Use the FLASHLIGHT; take the CARD (2/2) (Z).
- Walk forward.
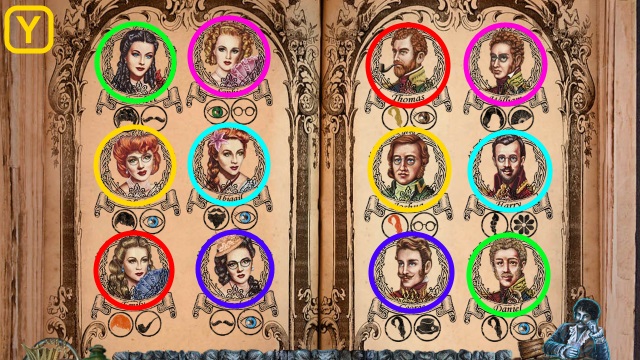
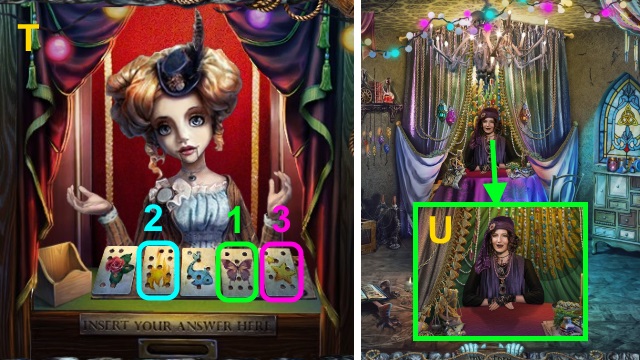
- Give the CARD (2/2) for a mini-game (A); solution is random (B).
- Receive the PORTRAIT.
- Walk down.
- Take the RIPPED PORTRAIT (C).
- Examine the RIPPED PORTRAIT; place the pieces. Use the TAPE; take the RIPPED PORTRAIT (D).
- Walk down, then left.
- Give the RIPPED PORTRAIT (E).
- Examine the lamp; take the KEROSENE (F).
- Take the POKER (G).
- Take the LOG (H); scroll up.
- Open the box; take the STATUE BLUEPRINT (I).
- Walk forward.
- Take the CANDLESTICK (J).
- Open the drawer; take the PANTRY KEY (K).
- Take the WIRE (L).
- Take the FEATHER DUSTER (M).
- Walk down.
- Use the PANTRY KEY (N).
- Play the HOP; receive the WIRE BRUSH (O).
- Walk forward, then left.
- Take the COAT HOOK (P).
- Combine the CANDLESTICK, ROPE, and COAT HOOK (Q); receive the STICK WITH HOOK.
- Use the WIRE BRUSH (R).
- Play the HOP; receive MARY'S DIARY (S).
- Walk down.
- Use the STICK WITH HOOK (T).
- Go up.
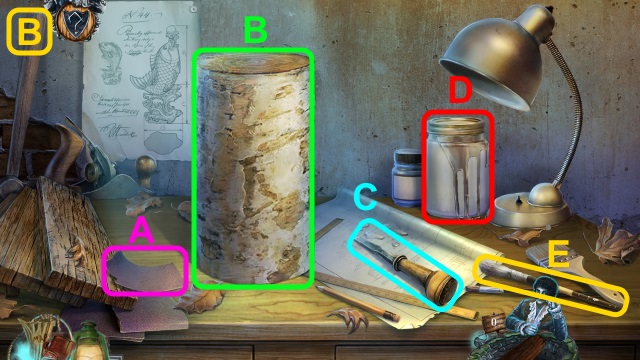
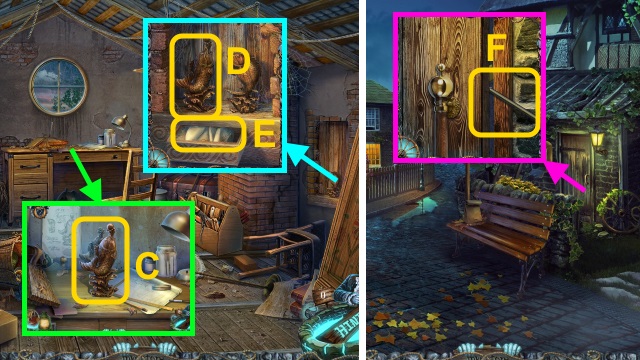
- Take the SANDPAPER (U) and CHISEL (V).
- Move the items; open the drawer (W).
- Read the book; take the DIARY PAGES (X).
- Combine MARY'S DIARY and the DIARY PAGES (Y); read the diary.
- Examine the shelf (Z).
- Place the CHISEL, SANDPAPER, STATUE BLUEPRINT, and LOG for a mini-game (A).
- Solution (B): (C-B)-(A-B)-(D)-(E-D)-(E-B).
- Take the FISH (C).
- Place the FISH (D); take the HANDKERCHIEF (E).
- Walk down three times.
- Use the POKER (F).
- Go through the door.
Chapter 4: Florry

- Use the FEATHER DUSTER; take the PLUNGER (1/3) (G) and LIGHT SWITCH (H).
- Remove the lid; use the EMPTY FLASK (I). Receive the FLASK WITH WATER.
- Walk right.
- Place the LIGHT SWITCH; pull it (J).
- Play the HOP; receive the CODE (K).
- Open the cupboard; take the CLOTH (L).
- Walk down.
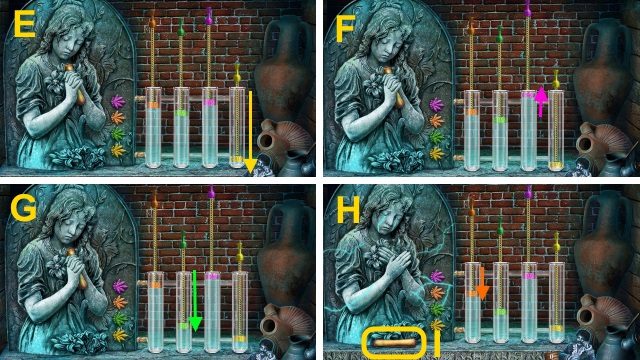
- Use the CODE for a mini-game (M).
- Solution (N).
- Walk left.
- Take the TORCH (O).
- Combine the TORCH, CLOTH, KEROSENE, and LIGHTER (P); take the BURNING TORCH.
- Play the HOP; receive the BOTTLE (Q).
- Place the BOTTLE for a mini-game (R).
- Solution (S).
- Receive the HANDSAW.
- Open the box; take the WIRE (2/3) and PROJECTOR LANTERN BATTERY (T).
- Walk right.
- Move the stones; take the PLUNGER (2/3) (U).
- Use the BURNING TORCH; take the BALL LEG (3/3) (V).
- Walk down twice, then right.
- Open the door; use the HANDSAW (W).
- Walk right.
- Take the HAMMER (X).
- Use the HANDKERCHIEF (Y).
- Walk left.
- Move the clothes; take the GLOVE (Z).
- Use the GLOVE (A); receive the CRYSTAL BALL.
- Take the CHISEL (B).
- Walk down.
- Use the CHISEL and HAMMER (C); receive the PLUNGER (3/3).
- Walk left.
- Use the PLUNGER (3/3) and FLASK OF WATER for a mini-game (D).
- Solution (E-H).
- Take the HUSBAND'S PORTRAIT (I).
- Walk down four times, forward, then left.
- Play the HOP; receive the ANGEL EMBLEM (J).
- Move the board; take the PLIERS (K).
- Walk left.
- Use the PLIERS (L); pull the lever (M).
- Take the CRYSTAL BALL BASE (N).
- Combine the CRYSTAL BALL, CRYSTAL BALL BASE, BALL LEG (3/3), and HUSBAND'S PORTRAIT; take the CRYSTAL BALL WITH PORTRAIT (O).
- Walk down twice, then forward.
- Give the CRYSTAL BALL WITH PORTRAIT (P); take the WIRE (3/3) (Q).
- Walk down, then left twice.
- Place the WIRE (3/3) for a mini-game (R).
- Solution (S).
- Press the button (T).
- Walk forward.
- Take the PROJECTOR LANTERN (U).
- Combine the PROJECTOR LANTERN and PROJECTOR LANTERN BATTERY (V); take the PROJECTOR LANTERN.
- Take the SLINGSHOT (W).
- Use the GLOVE (X).
- Walk forward.
- Take the PRUNERS (Y).
- Open the cover; take the ELASTIC BAND (Z).
- Walk down.
- Use the PRUNERS; take the MAIDEN'S MIRROR (A).
- Walk down, then left.
- Use the PRUNERS; take the RUM (B).
- Walk down, forward, then right.
- Take the STONES; give the MAIDEN'S MIRROR (C).
- Combine the SLINGSHOT, ELASTIC BAND, and STONES (D); take the SLINGSHOT WITH STONES.
- Use the SLINGSHOT WITH STONES for a mini-game (E).
- Shoot the emblem with the slingshot (F).
- Receive the ANGEL EMBLEM.
- Walk down, then forward.
- Place the 2 ANGEL EMBLEMS (G); examine them.
- Read the note (H).
- Give the RUM (I).
- Walk left.
- Take the SHOVEL (J).
- Move the lamp; place the PROJECTOR LANTERN. Press the switches (K).
- Examine the window for a mini-game (L).
- Solution (M).
- Walk down.
- Play the HOP; receive the ANGEL'S MIRROR (N).
- Walk down, then right.
- Examine the symbols (O).

- Give the ANGEL'S MIRROR (P).
- Scroll down; use the SHOVEL. Take the LION SYMBOL (Q).
- Place the LION SYMBOL for a mini-game (R).
- Solution (S).
- Take the Ring (T).
- Congratulations! You have completed Spirit of Revenge: Florry's Well.
Created at: 2016-07-24