
Walkthrough Menu
- General Tips
- Chapter 1: A Royal Wedding
- Chapter 2: Into the Kingdom of Arken
- Chapter 3: The Elvish Tower
- Chapter 4: The Library
- Chapter 5: The Arrow of Light
General Tips
- This is the official guide for Spirits of Mystery: Chains of Promise.
- This guide will not mention each time you have to zoom into a location; the screenshots will show each zoom scene.
- Hidden-object puzzles are referred to as HOPs. This guide will not show screenshots of the HOPs, but it will mention when a HOP is available and the inventory item you'll collect from it.
- This guide will give step-by-step solutions for all puzzles that are not random. Please read the instructions in the game for each puzzle.
Chapter 1: A Royal Wedding
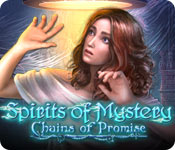
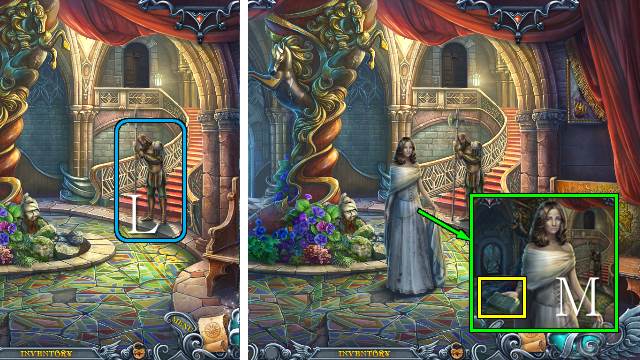
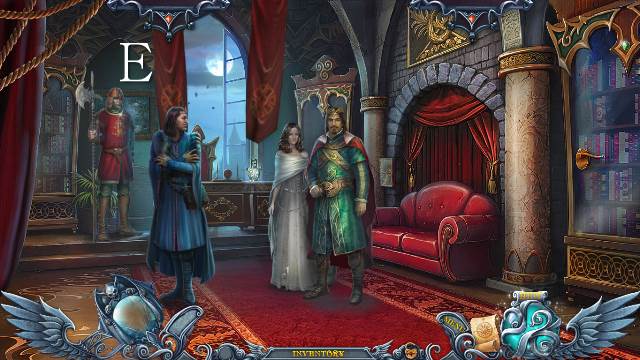
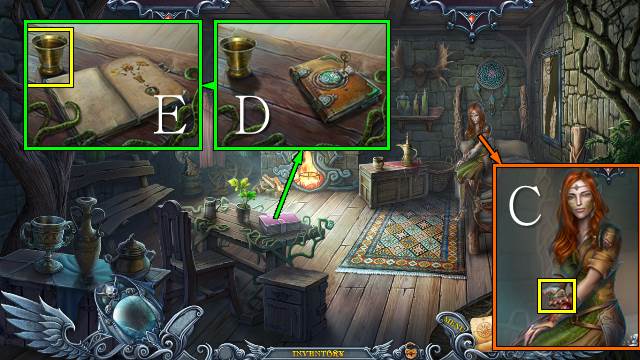
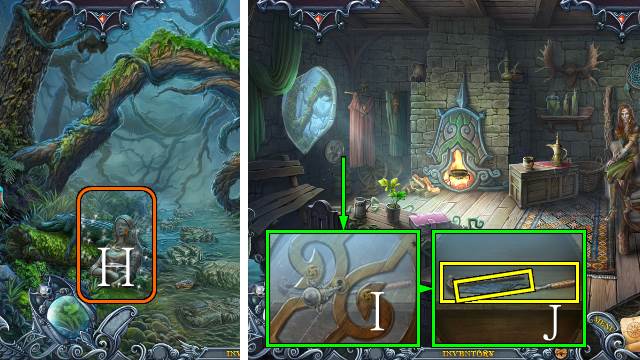
- Talk to Nanny; take the mirror (A) and invitation (B).
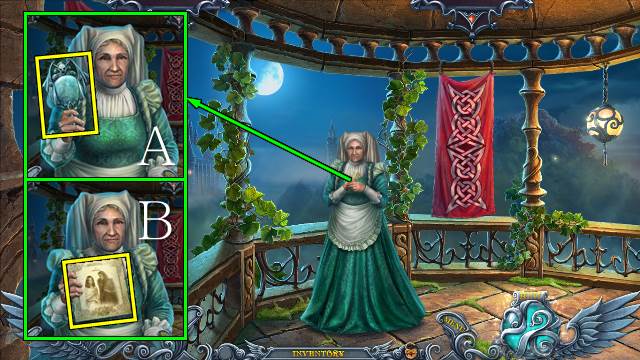
- Interact with Isa (C).
- Read the note, open the box and take the TWEEZERS (D).
- Take the STONE SYMBOL with the TWEEZERS (E).
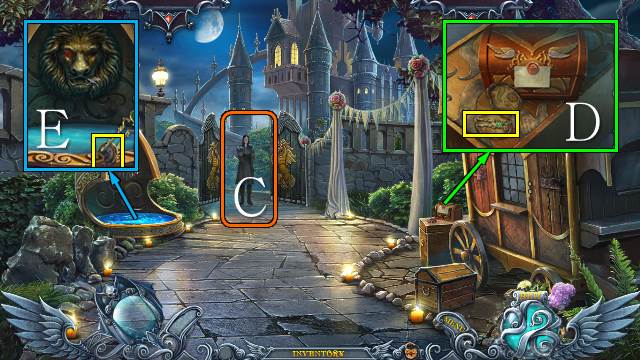
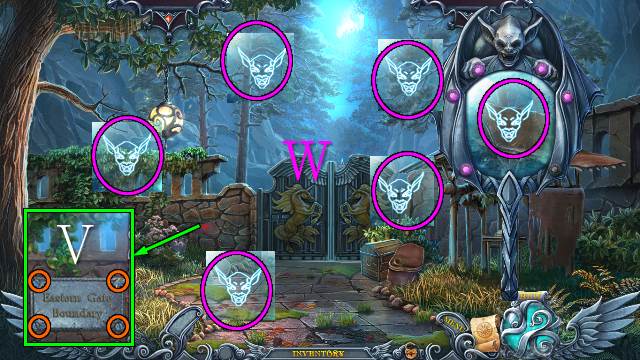
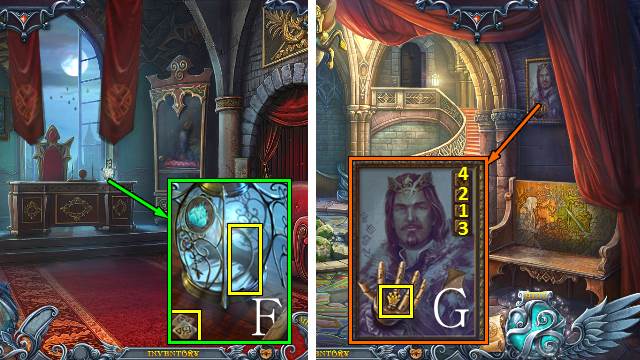
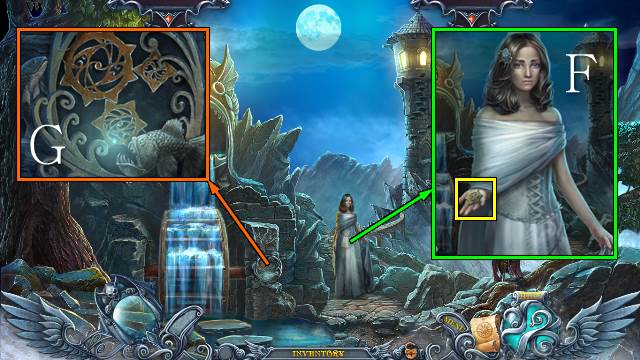
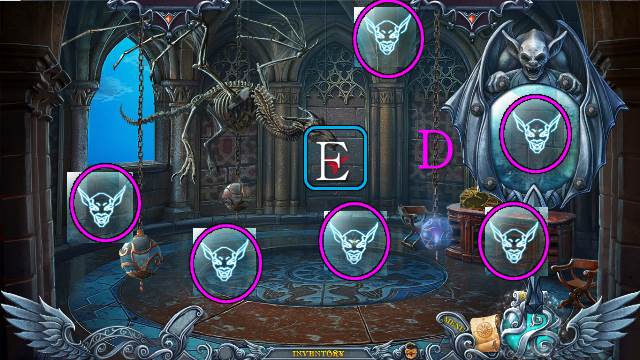
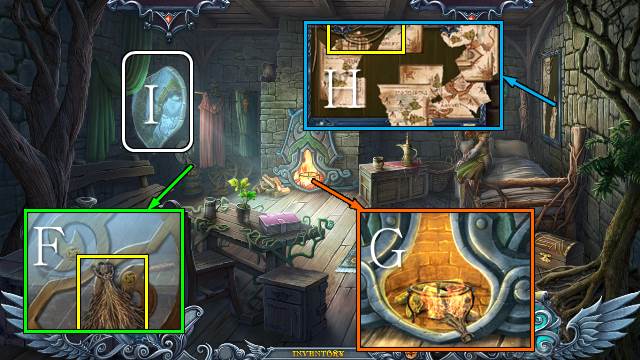
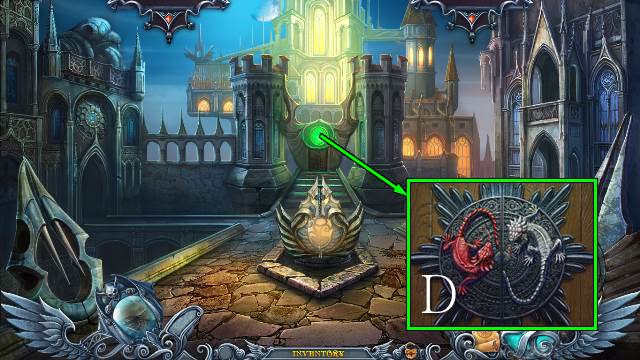
- Zoom into the window (F) and select the mirror (G).
- Find the six gargoyle symbols to charge the mirror (H).
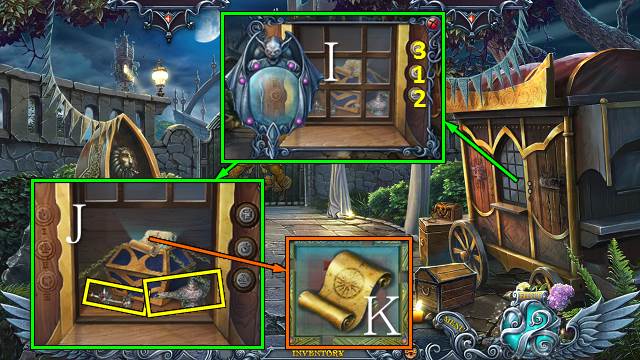
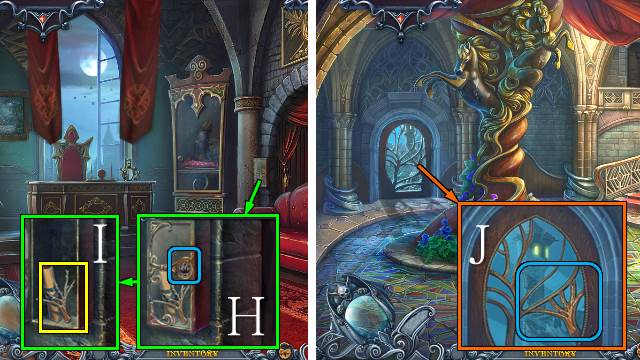
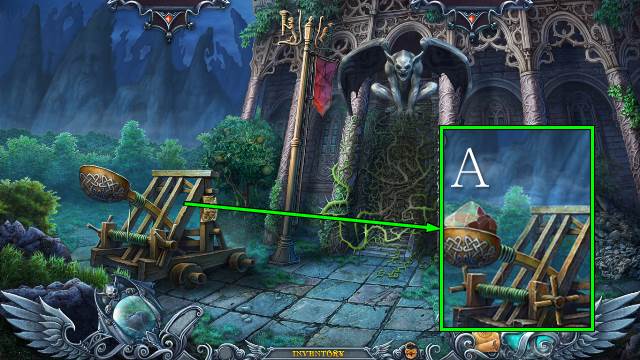
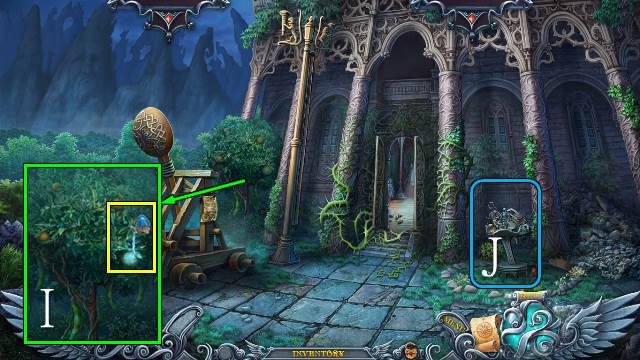
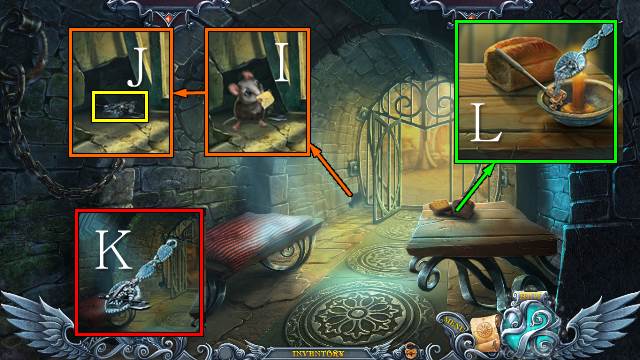
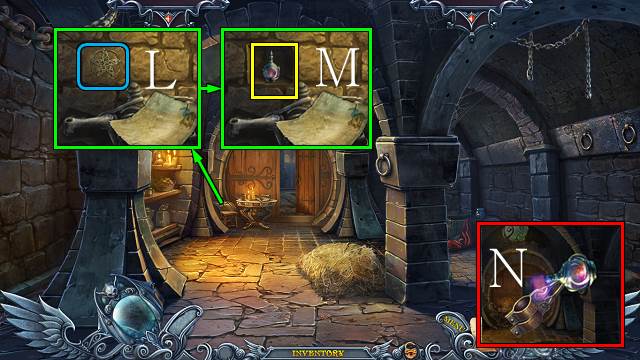
- Use the mirror on the hidden image, place the STONE SYMBOL and push the buttons in order (I); take the BRIDLE, OIL LAMP (J) and map (K).
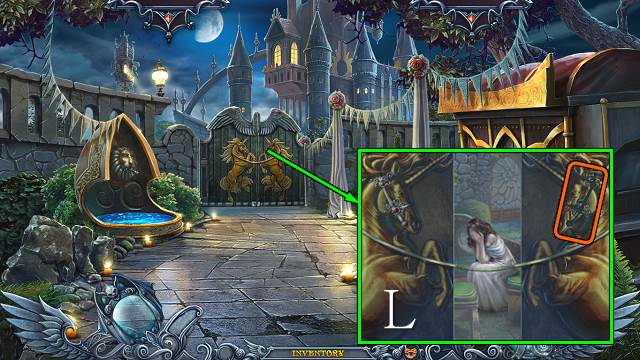
- Interact with the gate; place the BRIDLE (L).
- Open the gate.
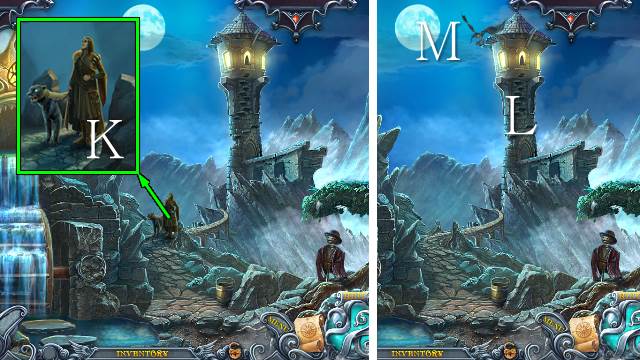
- Go forward.
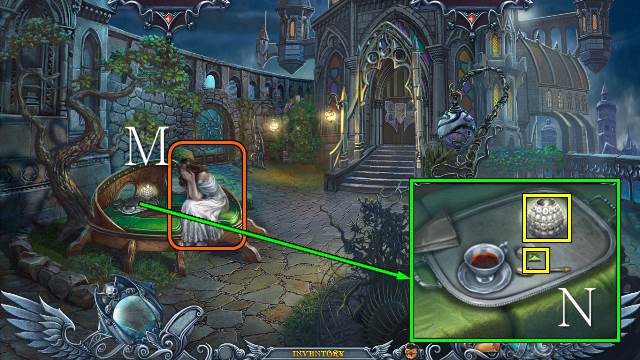
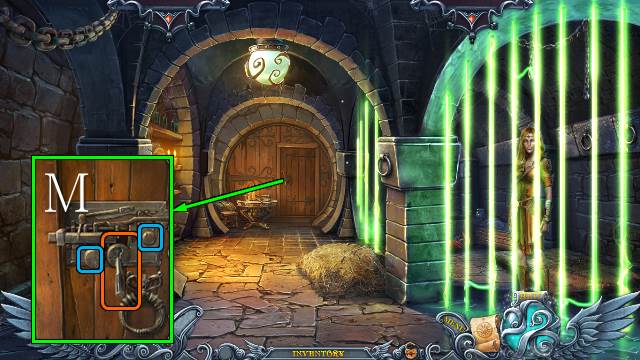
- Talk to Adele (M).
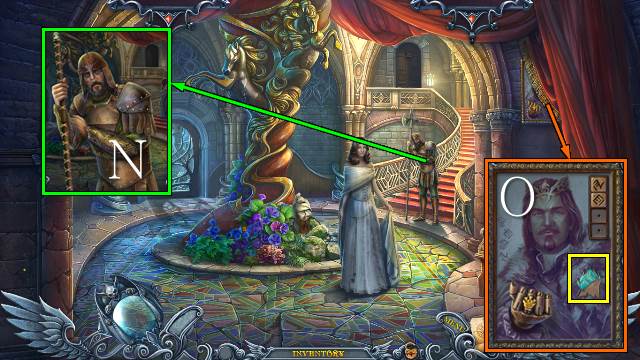
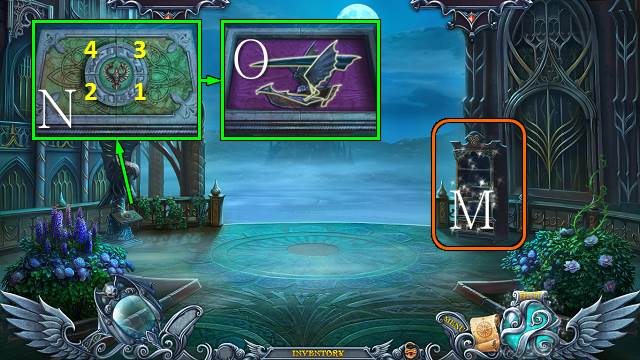
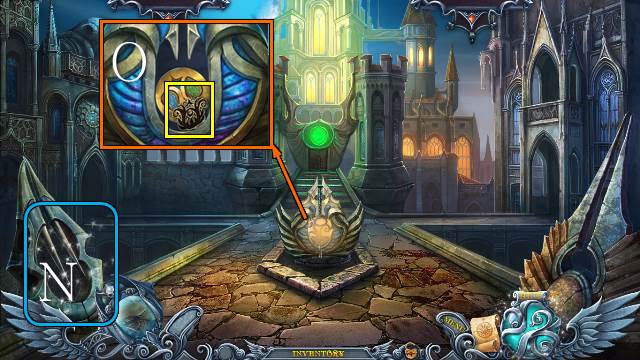
- Take the GREEN GEM and CANDLE (N).
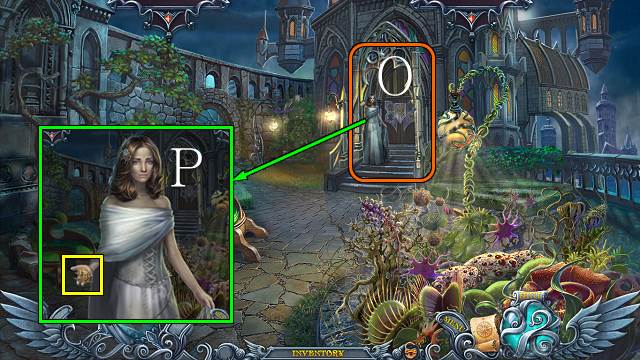
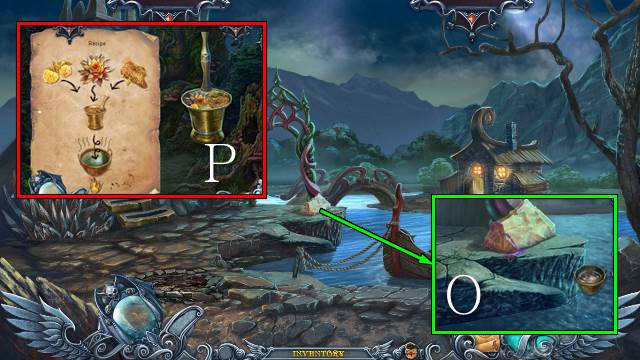
- Interact with the door twice (O).
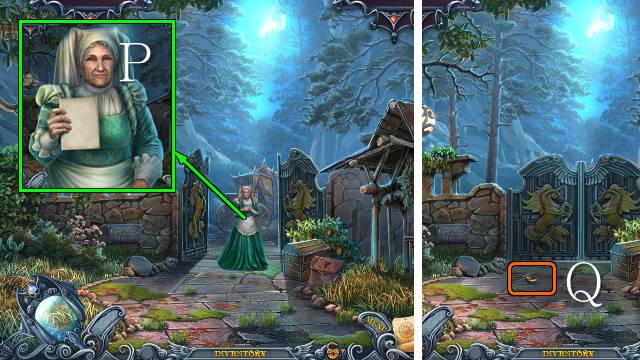
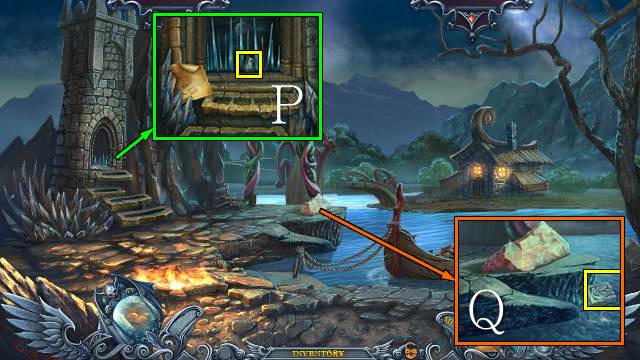
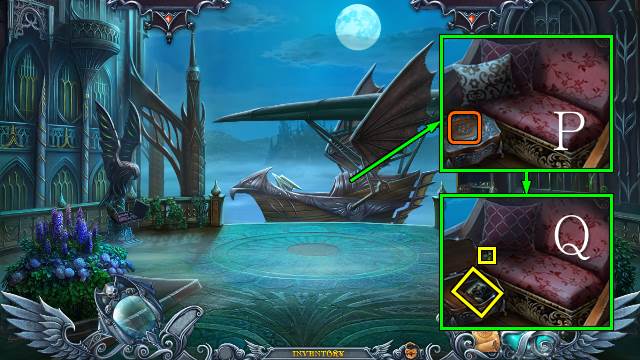
- Talk to Adele; take HERALDIC SYMBOL 1/4 (P).
- Walk down.
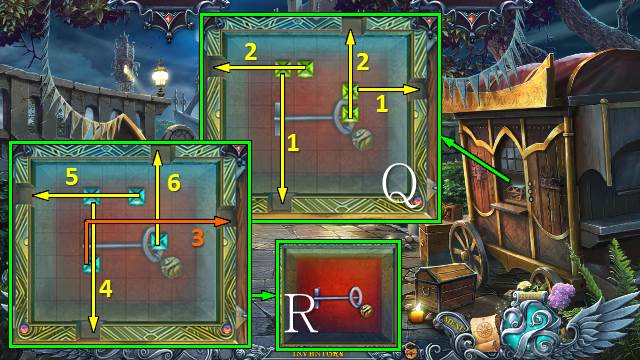
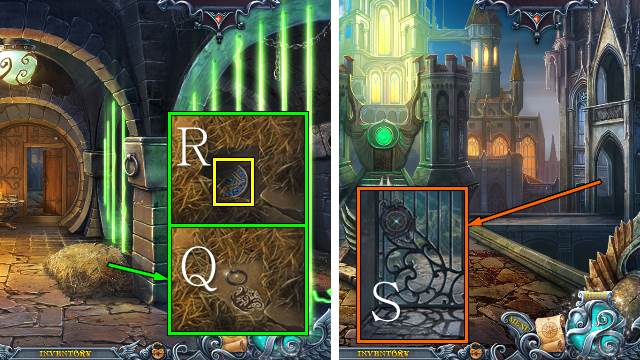
- Place the GREEN GEM for a mini-game (Q).
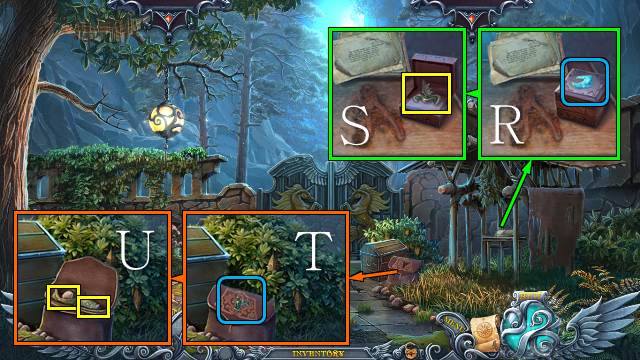
- Take the KEY (R).
- Walk forward.
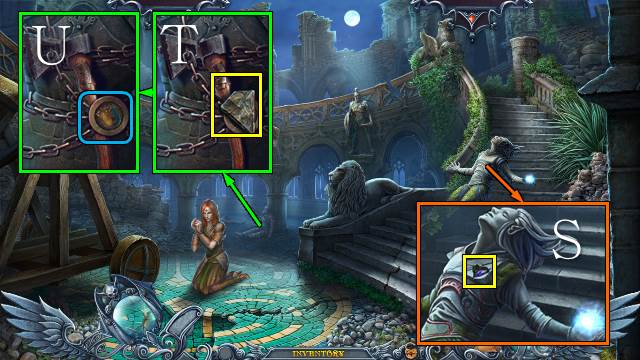
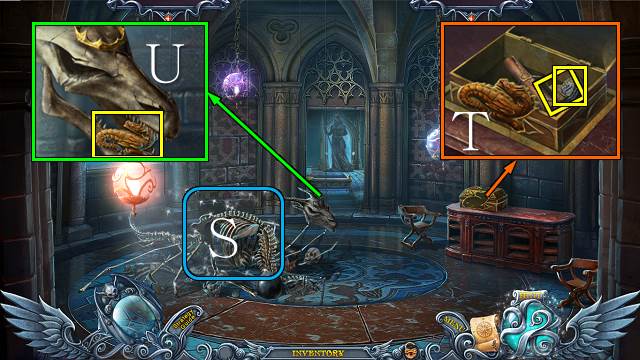
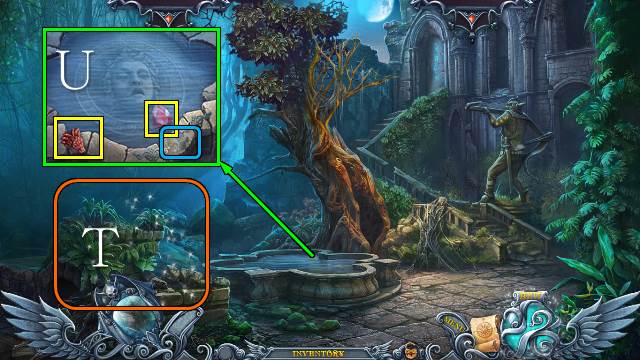
- Use the KEY and open the lamp (S); take HERALDIC SYMBOL 2/4 and place the CANDLE (T).
- Play the HOP (U).
- You receive a LION'S EYE.
- Walk down.
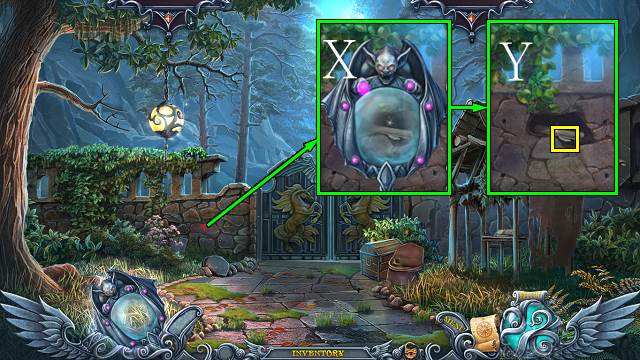
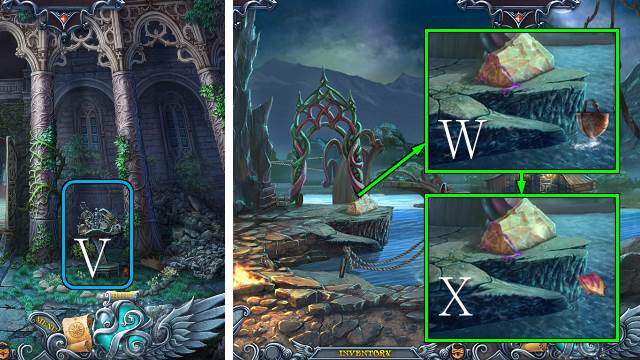
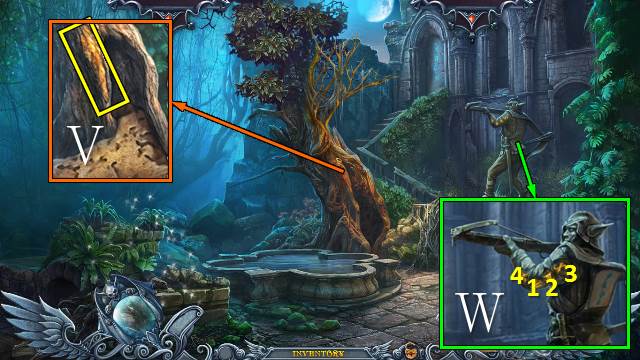
- Place the LION'S EYE; take the CHEST KEY (V).
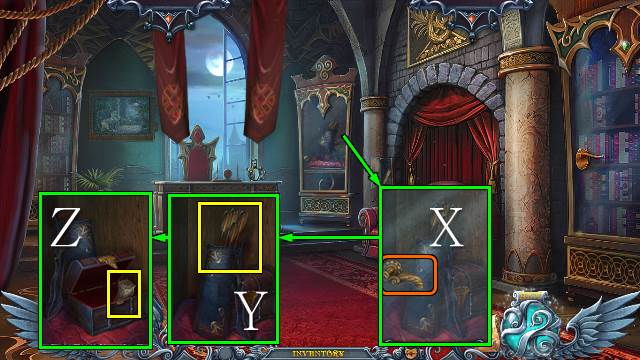
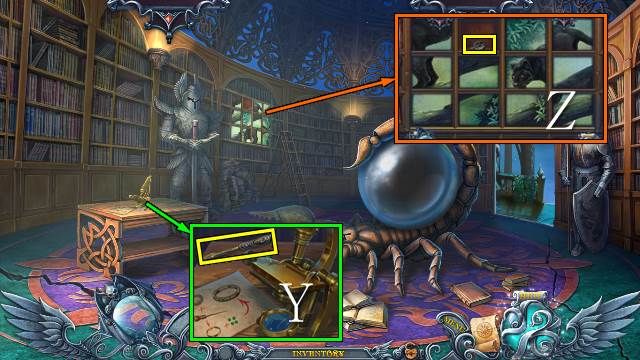
- Use the CHEST KEY and take HERALDIC SYMBOL 3/4 (W); open the book, turn the pages and take the PHOENIX (X).
- Walk forward.
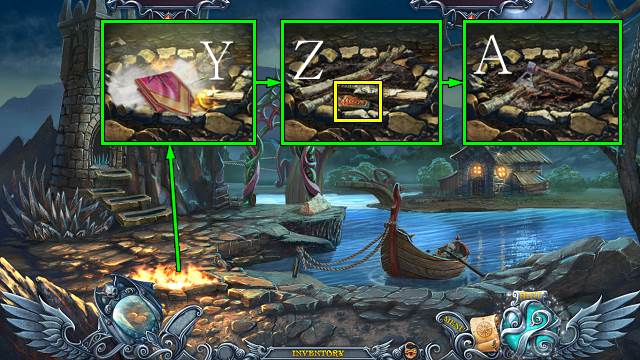
- Remove the vine and place the PHOENIX; turn the handle (Y).
- Go left.
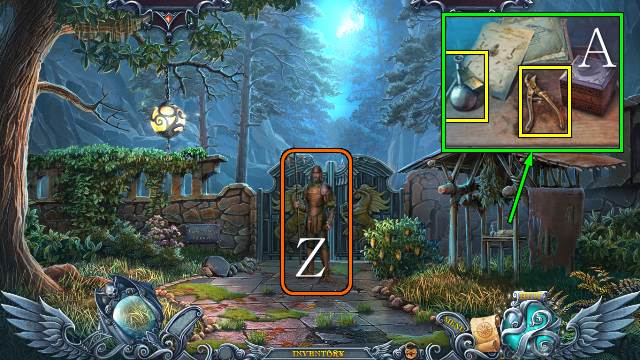
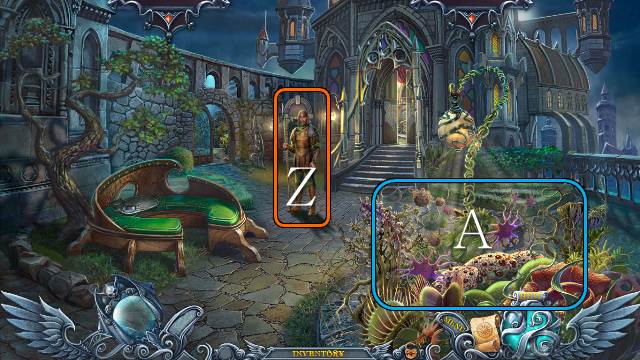
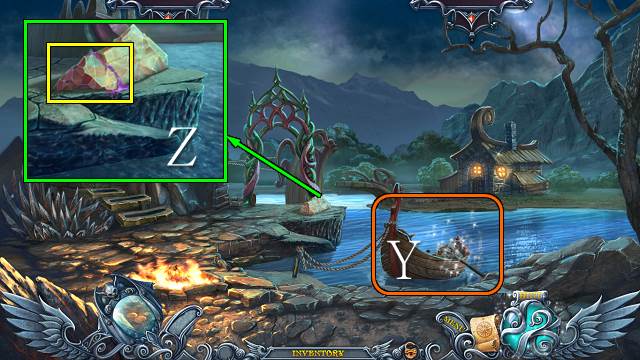
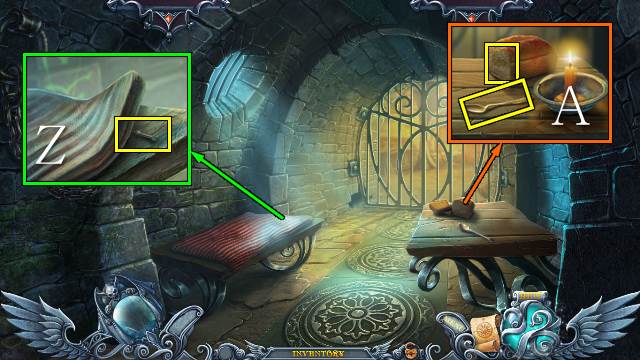
- Talk to the guard (Z).
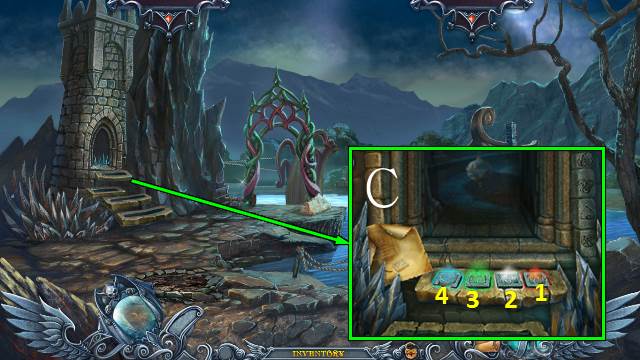
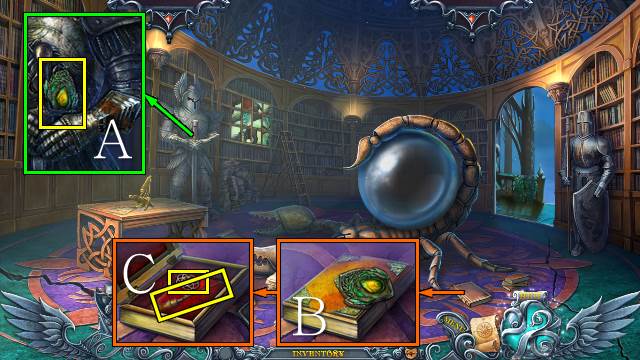
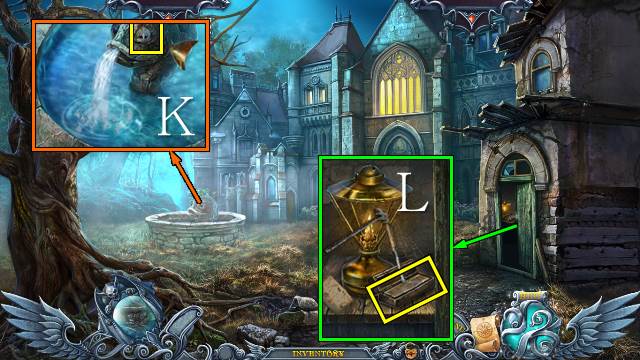
- Take the RUSTY PRUNER and POTION; read the note (A).
- Walk down.
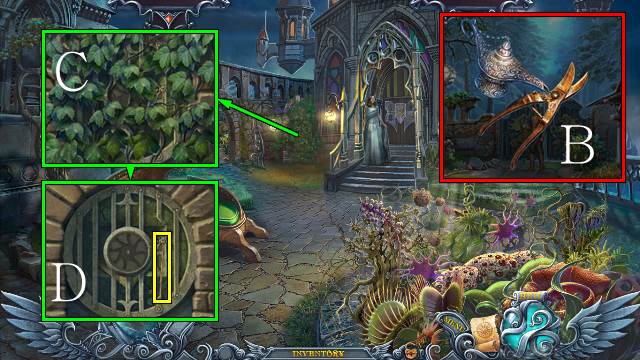
- Access the RUSTY PRUNER and use the OIL LAMP; take the PRUNER (B).
- Use the PRUNER three times (C); take the KNITTING NEEDLE (D).
- Go left.
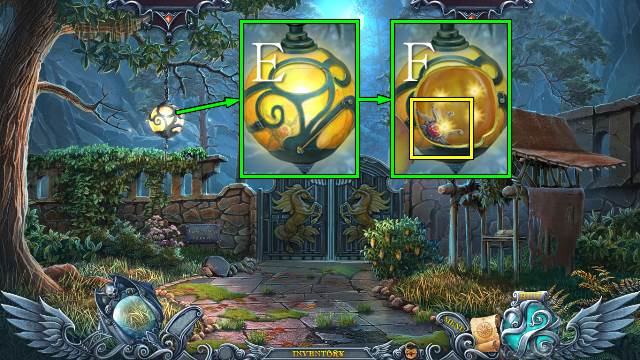
- Use the KNITTING NEEDLE (E); open the lamp and take the SHIELD LOCK (F).

- Interact with the gargoyle (G).
- Take the ARROW (H).
- Walk down.
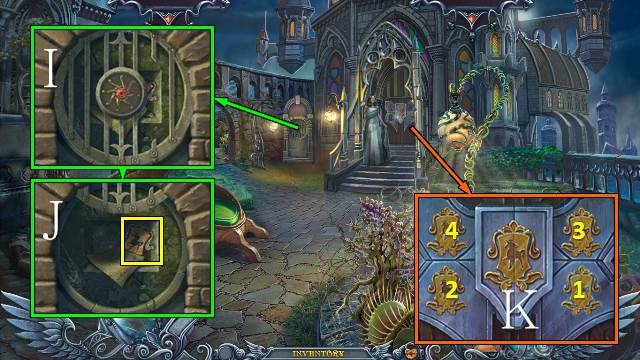
- Use the SHIELD LOCK (I); read the note and take HERALDIC SYMBOL 4/4 (J).
- Place the HERALDIC SYMBOLS and push them in the order in which they light up (K).
- Go forward.
- Interact with the guard (L).
- Talk to Adele; take the ALBUM (M).
- Give the ALBUM to the guard for a HOP (N).
- You receive a DRAGON SYMBOL.
- Move the drape, tear the painting and take the CAGE KEY (O).
- Go down and left.
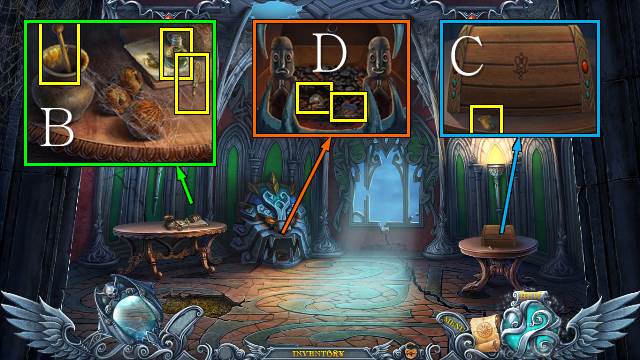
- Talk to Nanny; take and open the note (P).
- Try to take the ring twice (Q).
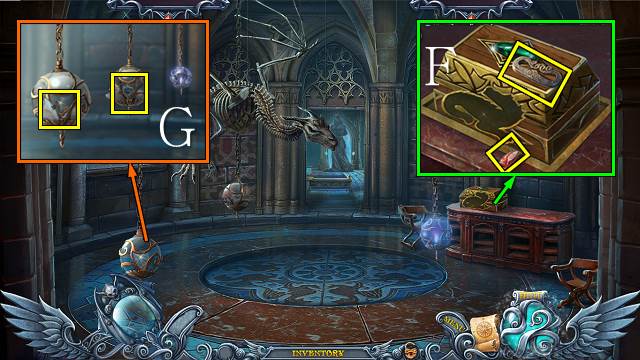
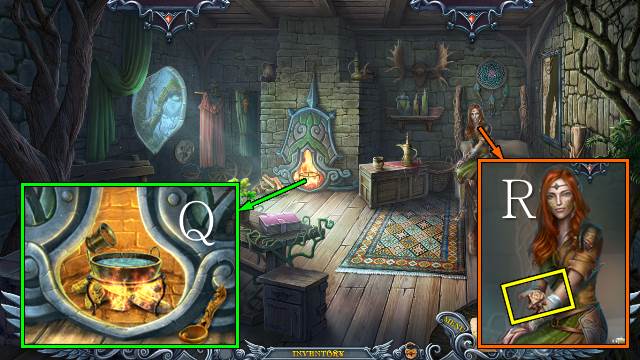
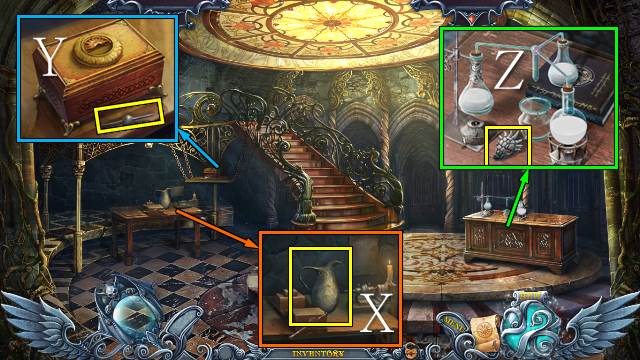
- Place the DRAGON SYMBOL (R), open the box and take the FIGURINE (S).
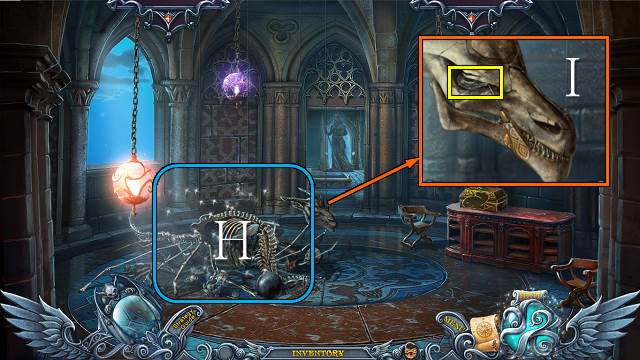
- Place the FIGURINE and open the bag (T); open the sack and take the COIN and BROKEN MEDALLION (U).
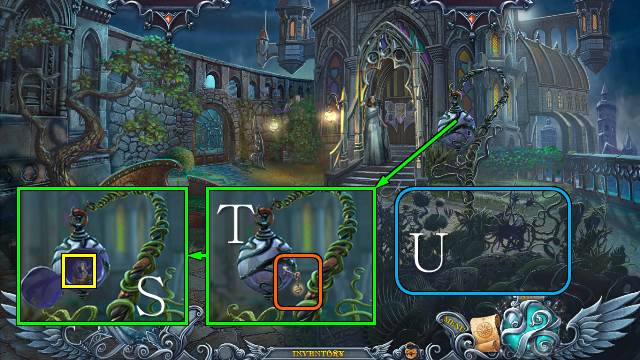
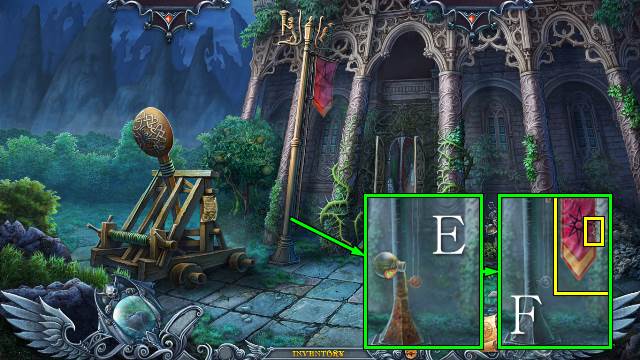
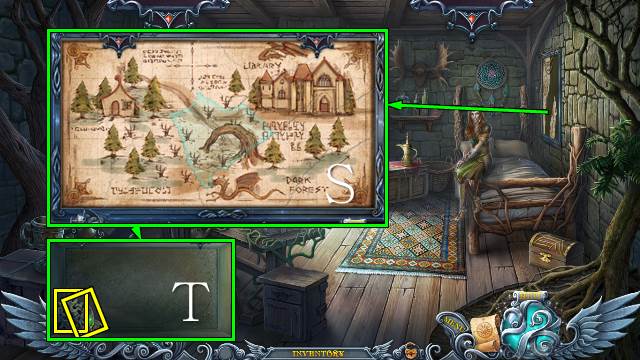
- Use the COIN four times (V); select your mirror and find the six gargoyle symbols (W).
- Use the charged mirror (X); read the note and take the MEDALLION PIECE (Y).
- Walk down.
- Talk to the guard (Z).
- Play the HOP (A).
- You receive a MEDALLION PIECE.
- Walk forward.
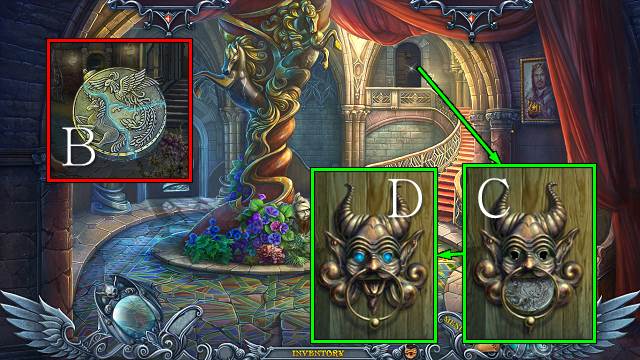
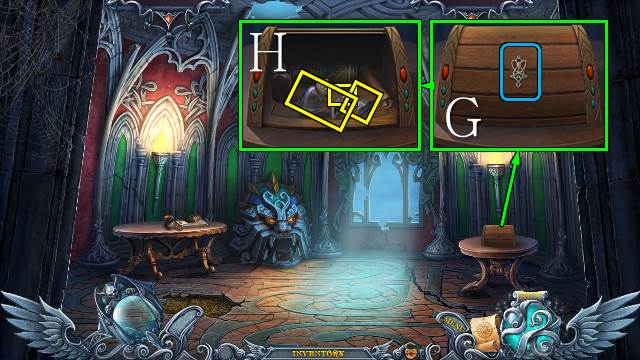
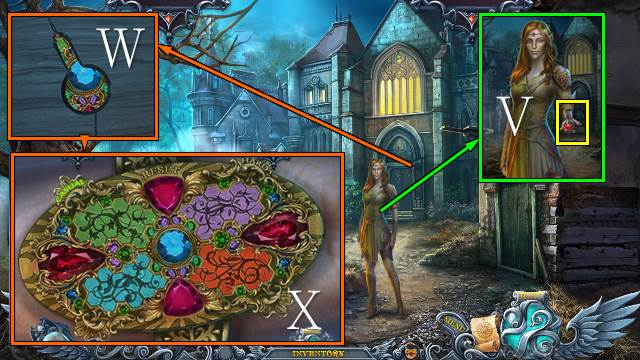
- Access the BROKEN MEDALLION and place the two MEDALLION PIECES; take the MEDALLION (B).
- Interact with the knocker and place the MEDALLION (C); knock (D).
- Walk forward.
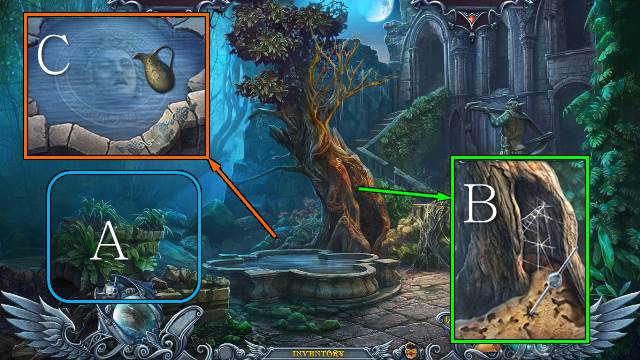
- Interact with the scene (E).
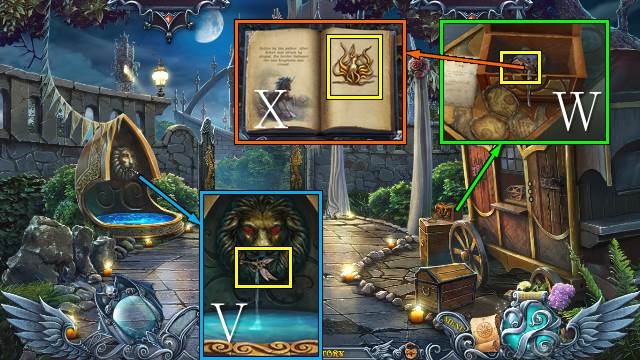
- Take the RUNES; place the CAGE KEY, open the cage and take the FISH LAMP (F).
- Walk down.
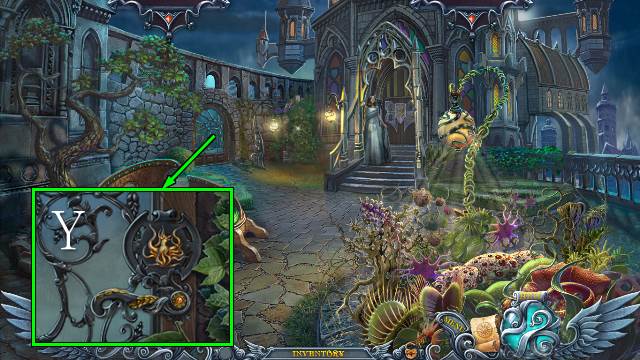
- Place the RUNES and select them in the indicated order; take the KING'S RING (G).
- Walk forward.
- Use the KING'S RING (H); read the note and take the KEY (I).
- Walk down.
- Move the bars twice, place the KEY and move the branches (J).
- Go left.
Chapter 2: Into the Kingdom of Arken
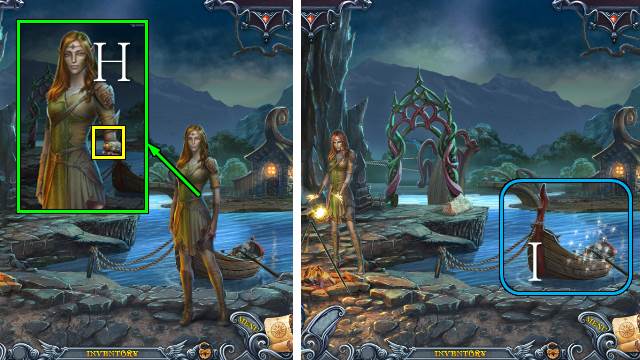
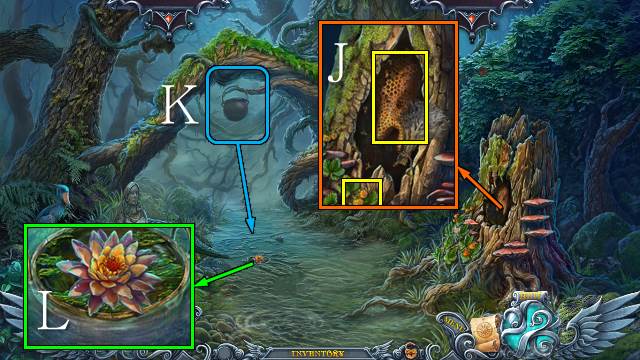
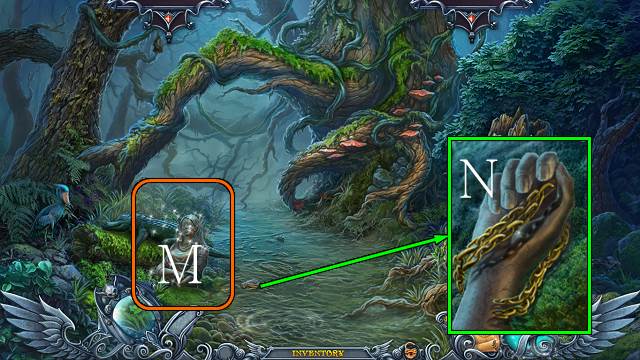
- Interact with Isa (K).
- Interact with the tower (L).
- Interact with the gargoyle (M).
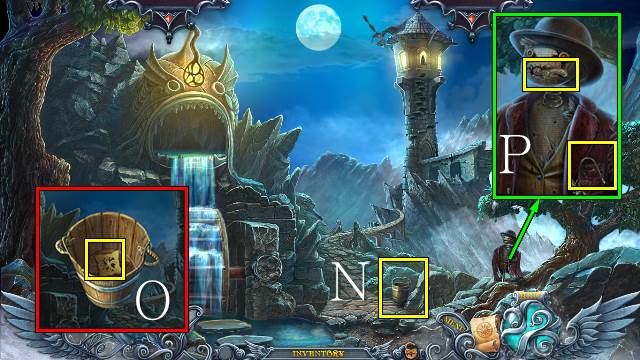
- Take the BUCKET (N).
- Access the BUCKET and take GEAR 1/2 and the BUCKET (O).
- Open the mouth and take the HANDLE and HOOK (P).
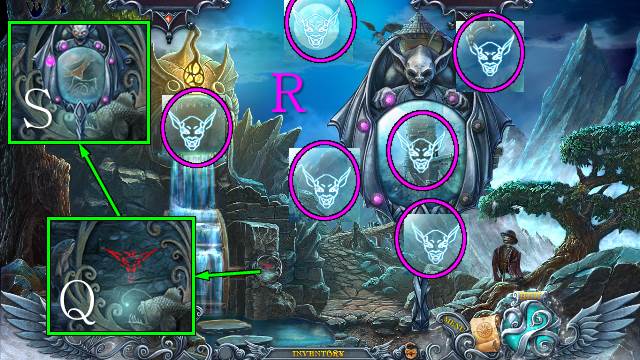
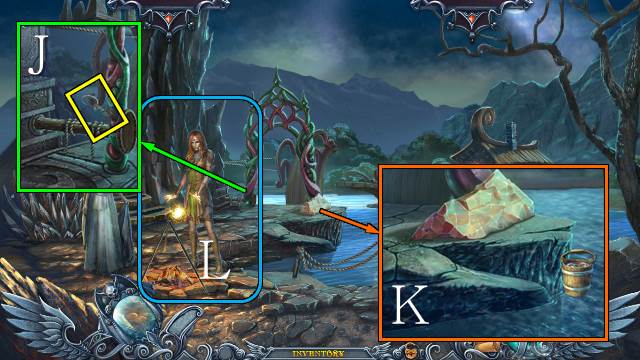
- Place the FISH LAMP (Q); select the mirror and find the six gargoyle symbols (R).
- Use the charged mirror (S).
- Walk down.
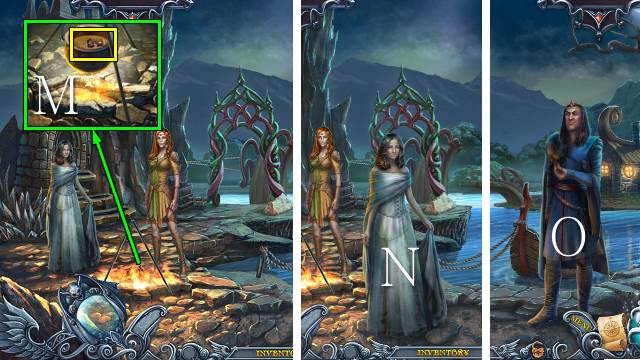
- Talk to the guard; take the CADUCEUS (T).
- Take the UNICORN FIGURINE with the HOOK (U).
- Go upstairs.
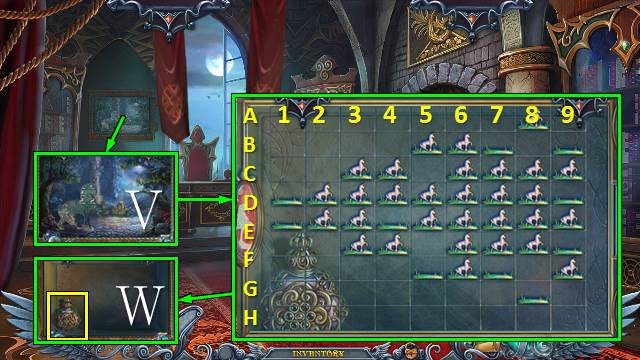
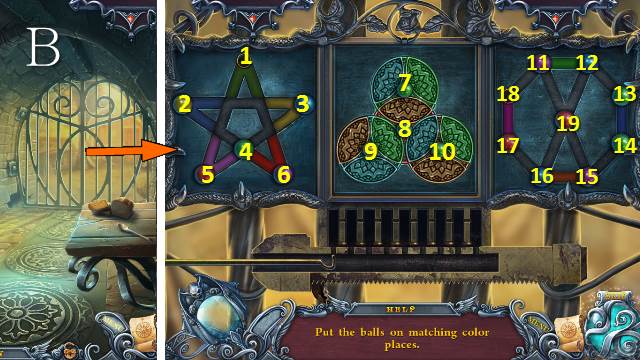
- Place the UNICORN FIGURINE for a mini-game (V).
- Solution: D5-B7, A8-C6, B5-B7, B7-D9, D9-B9, E6-C8, B9-D7, E7-C9, G9-E7.
- C6-C8, C9-C7, E8-E6, C7-E7, E6-E8, E9-E7, F7-D7, G6-E6, D7-D5, E6-E4.
- D3-D1, F3-D3, D1-F3, C3-E3, D5-D3, F4-D4, D4-D2, F3-D3, D2-D4, C4-E4.
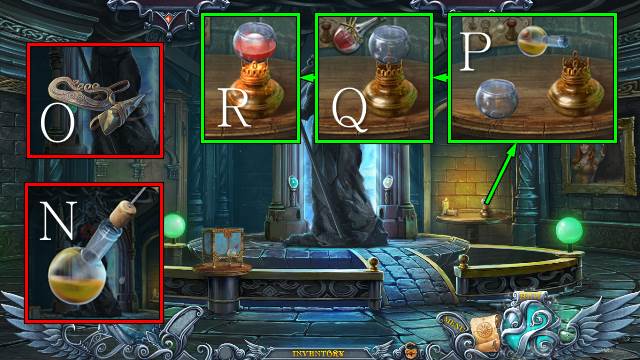
- Take the VIAL (W).
- Place the HANDLE (X), open the cabinet and take the ARROWS (Y); place the CADUCEUS and take the BANDAGE (Z).
- Walk down.
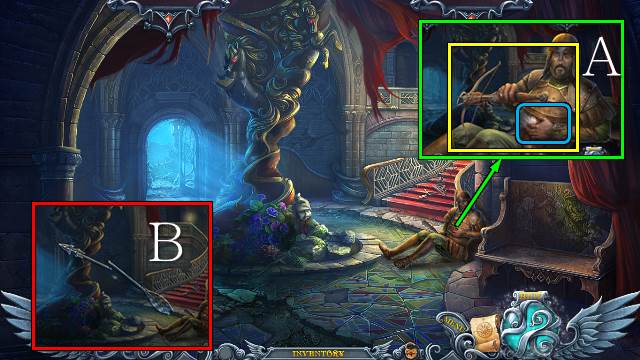
- Use the BANDAGE; take the CROSSBOW (A).
- Access the ARROW, break it and take the BROKEN ARROW (B).
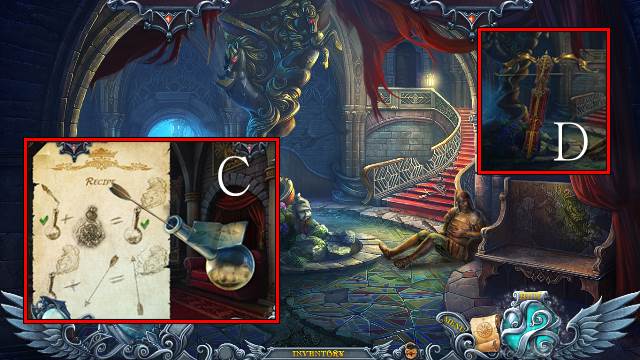
- Access the POTION and use the BROKEN ARROW, VIAL and ARROWS; take the POISONED ARROWS (C).
- Access the CROSSBOW and place the POISONED ARROWS; take the CROSSBOW (D).
- Go left.
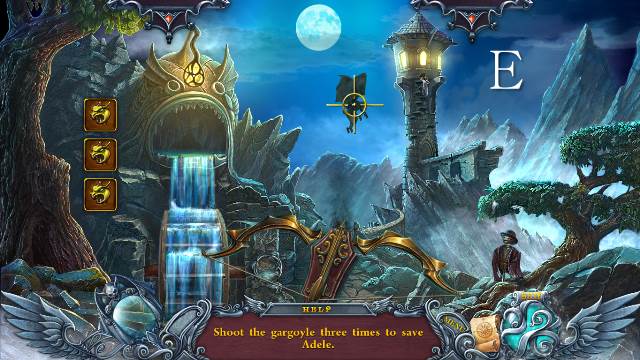
- Use the CROSSBOW for a mini-game (E).
- Talk to Adele; take GEAR 2/2 (F).
- Place the GEARS (G).
- Go forward.
- Talk to Lilian; take the BOTTLE (H).
- Play the HOP (I).
- You receive a POTION.
- Take the PARTIAL SHEERS (J).
- Get WATER with the BUCKET (K).
- Interact with Lilian (L).
- Place the POTION and add the WATER; take the POTION with the BOTTLE (M).
- Talk to Adele and give her the POTION; you receive LILIAN'S CUP (N).
- Talk to Isa (O).
- Read the note and take the BRICK WAVE (P).
- Put the BRICK WAVE in the water to get ACTIVATED PLATE 1/4 (Q).
- Go left.
- Try to open the door (R).
- Use LILIAN'S CUP to get a CUP OF POISON (S).
- Open the pod and take the BEAN (T).
- Read the note (U).
- Take the TONG PART (V).
- Access the SHEARS PART and attach the TONG PART; take the PARTIAL SHEARS (W).
- Use the SHEARS PART and take the ROPE (X).
- Walk down.
- Play the HOP (Y).
- You receive ACTIVATED PLATE 2/4.
- Use the CUP OF POISON and take the BOULDER (Z).
- Go left.
- Remove the old rope, place the ROPE and turn the handle; place the BOULDER and release the handle (A).
- Go forward.
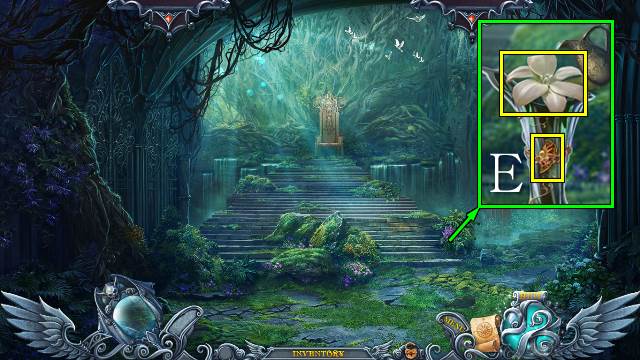
Chapter 3: The Elvish Tower
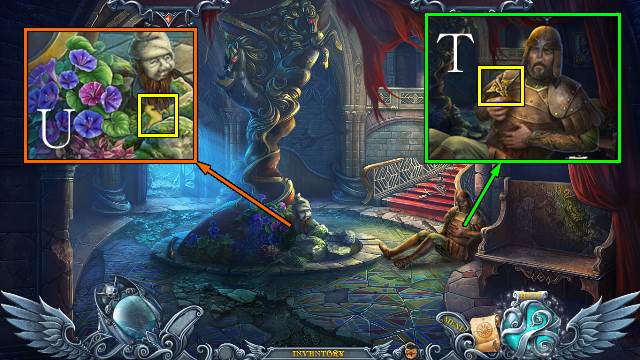
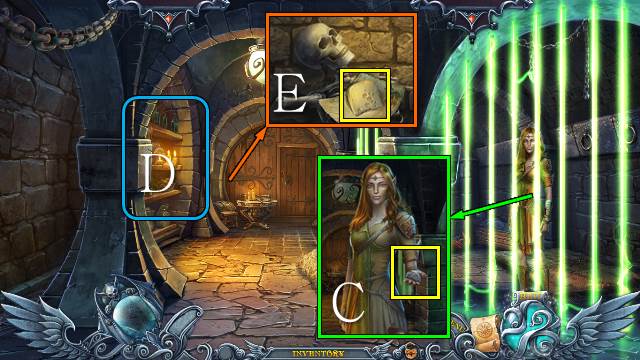
- Take the AWL, GREEN FIRE and HONEY and read the note (B).
- Take the SHIELD (C).
- Take the HEART and MEDALLION PART 1/5 (D).
- Walk down.
- Use the GREEN FIRE and pull the rope (E); take the STAR and BANNER (F).
- Walk forward.
- Use the STAR and open the cabinet (G); take the POTION and MEDALLION PARTS 2/5 and 3/5 and read the note (H).
- Walk down.
- Use the POTION and take the ORANGE (I).
- Play the HOP (J).
- You receive a DAGGER.
- Walk forward.
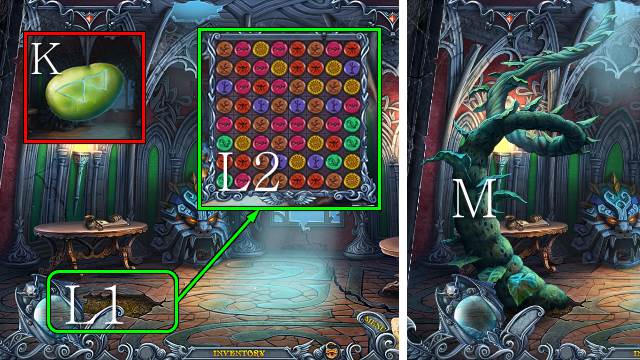
- Access the BEAN and use the DAGGER; take the BEAN RUNE (K).
- Plant the BEAN RUNE (L1) for a mini-game (L2).
- Go up (M).
- Talk to Lilian (N).
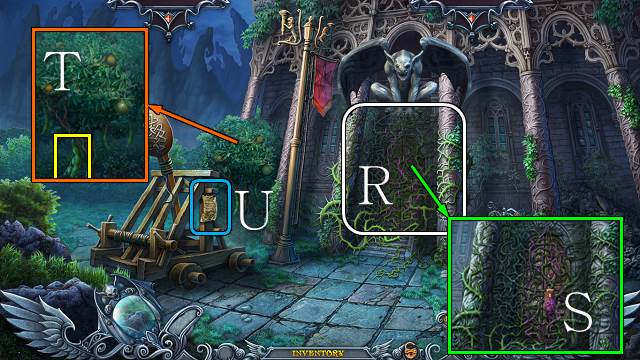
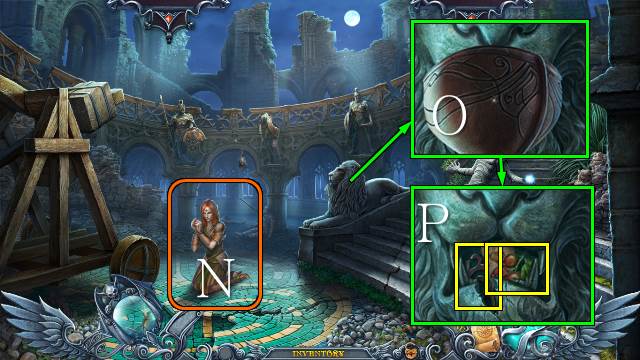
- Take the HELMET (O); read the note and take the BRIAR (P).
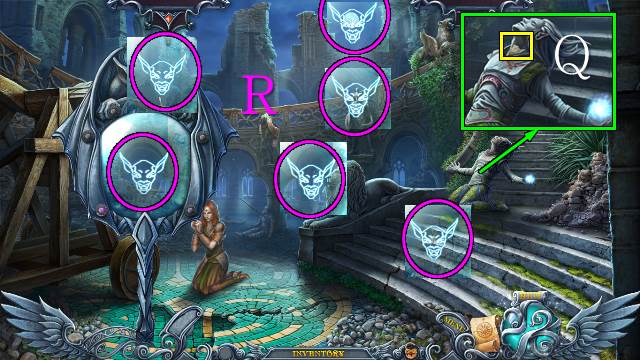
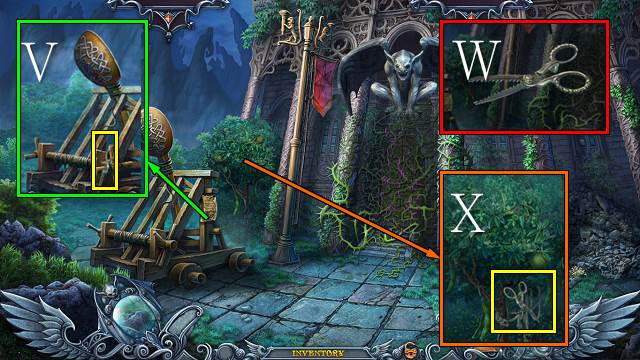
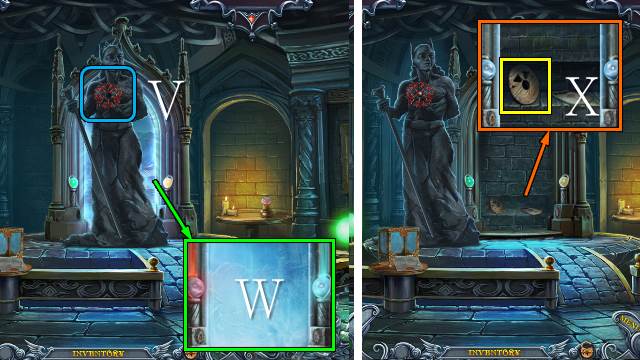
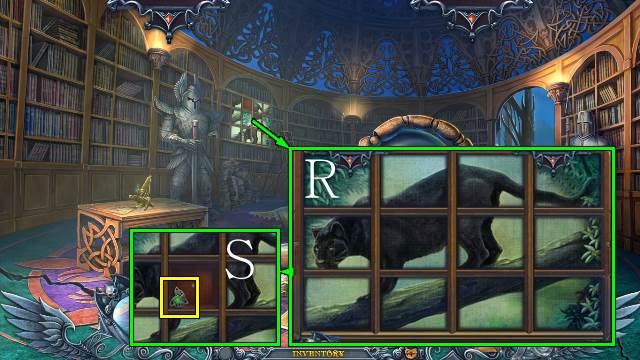
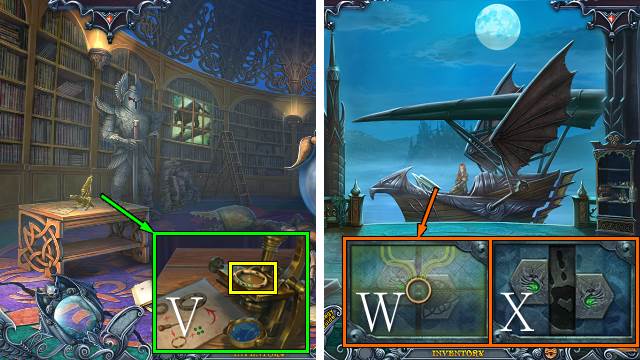
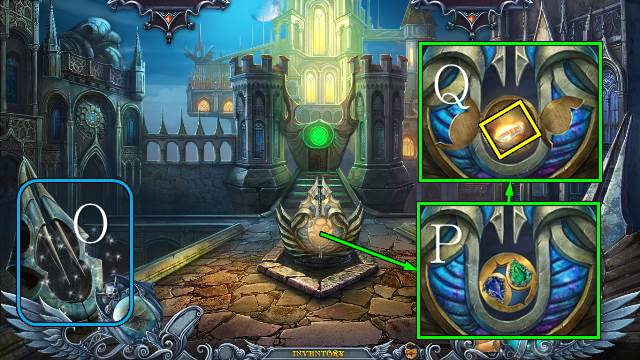
- Take MEDALLION PART 4/5 (Q); access your mirror and find the six gargoyles (R).
- Use the charged mirror; take the LANTERN STONE (S).
- Take MEDALLION PART 5/5 and place the SHIELD (T); take the AXE (U).
- Walk down twice.
- Play the HOP (V).
- You receive a KEY.
- Walk down.
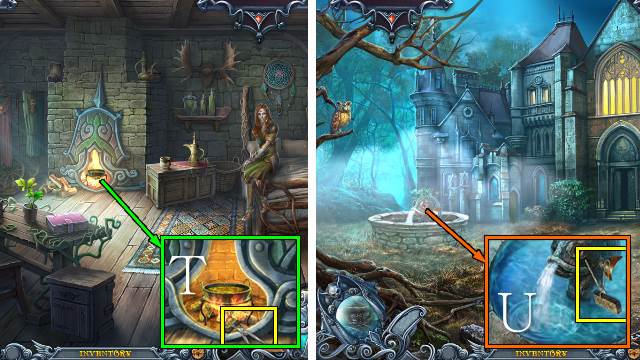
- Use the HELMET to get a HELMET WITH WATER (W); place the BANNER to get a WET BANNER (X).
- Use the WET BANNER (Y), move the sticks and take ACTIVATED PLATE 3/4 (Z); use the AXE and take the WOOD (A).
- Go left, forward and up.

- Talk to Lilian and use the KEY; take ACTIVATED PLATE 4/4 (B).
- Walk down three times.
- Place the ACTIVATED PLATES and push them in order (C).
- Go into the tower.
- Interact with the scene.
- Select your mirror and find the six gargoyles (D).
- Use the charged mirror (E).
- Take the LANTERN STONE and FLINT (F).
- Open the first two lanterns and take the CORKSCREW and UNICORN FIGURE; place the two LANTERN STONES (G).
- Play the HOP (H).
- You receive an ISA FIGURE.
- Use the AWL and take the COLORLESS RUNE (I).
- Go forward.

- Take the BALL and place the UNICORN FIGURE (J); take the FIRESTONE and SEALED BOTTLE (K).
- Open the cupboard (L).
- Place the ISA FIGURE for a mini-game; the solution is random.
- Take the RED DYE and BONE CROWN (M).
- Access the SEALED BOTTLE, remove the wax and use the CORKSCREW; take the BOTTLE OF OIL (N).
- Access the FLINT and place the FIRESTONE; take the FLINT AND FIRESTONE (O).
- Remove the glass, use the BOTTLE OF OIL and replace the glass (P), use the RED DYE and FLINT AND FIRESTONE (Q); place the COLORLESS RUNE to get a RED RUNE and place the BALL to get a RED BALL (R).
- Walk down.
- Play the HOP (S).
- You receive DRAGON FIGURE 1/2.
- Place the BONE CROWN and take DRAGON FIGURE 2/2 (T).
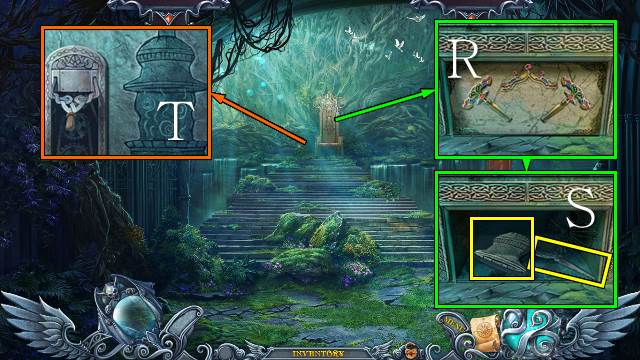
- Place the DRAGON FIGURE, open the box, read the note and take the BLUE RUNE and MAP PIECE 1/2 (U).
- Walk forward.
- Place the RED BALL (V).
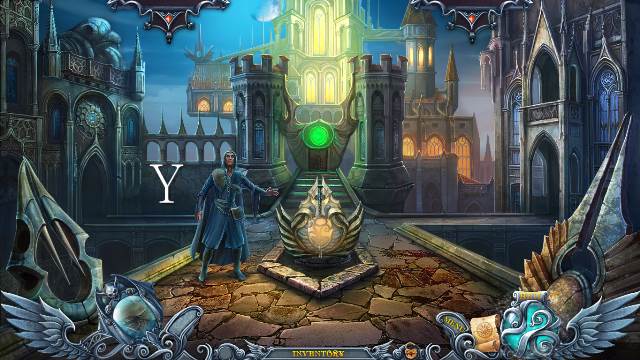
- Place the BLUE RUNE and RED RUNE and interact with the doorway (W).
- Read the note and take the BRIDGE PART (X).
- Walk down twice and go left and forward.
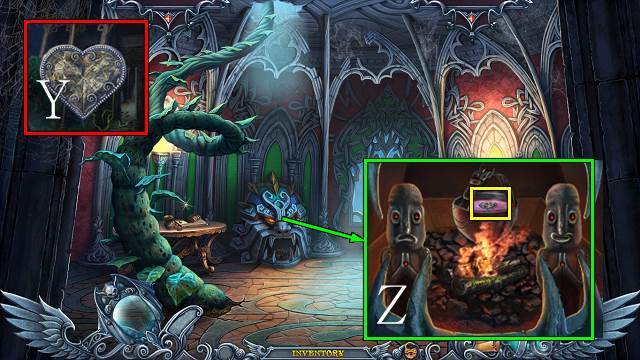
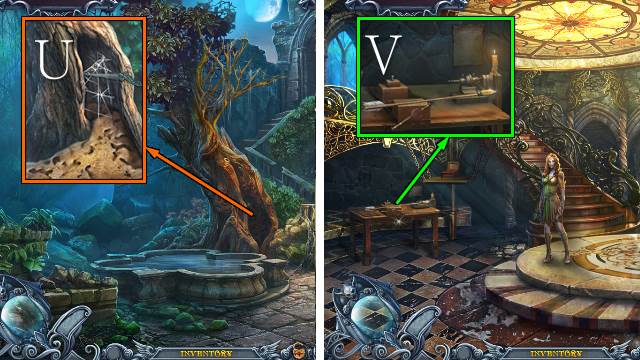
- Access the HEART and place the MEDALLION PARTS; reassemble the STONE HEART and take it (Y).
- Place the WOOD, HELMET WITH WATER, ORANGE, BRIAR, HONEY, FLINT AND FIRESTONE and STONE HEART; move the statuettes and take the HEART (Z).
- Go up.
- Place the HEART and take the BRIDGE HANDLE (A).
- Walk down three times.
- Place the BRIDGE PART and BRIDGE HANDLE and turn the handle (B).
- Go right.
Chapter 4: The Library
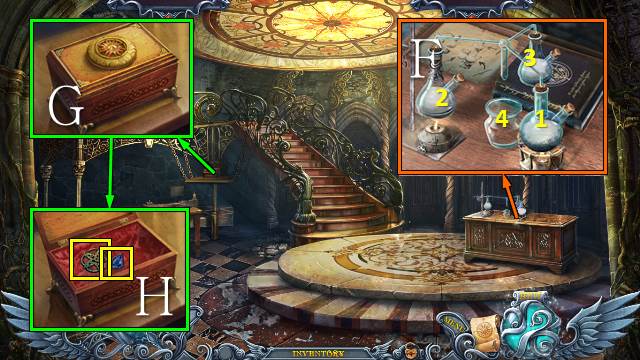
- Talk to Lilian; take the BOOK KEY (C).
- Use the BOOK KEY (D); open the book, read the recipe and take the MORTAR (E).
- Take the BROOM (F).
- Light the BROOM to get a SMOKING BROOM (G).
- Take the ROPE (H).
- Open the window (I).
- Go left.
- Use the SMOKING BROOM and take the HONEYCOMB and CLOUDBERRY (J).
- Move the kettle (K).
- Take the LILY and KETTLE (L).
- Use the ROPE on the statue and move it; play the HOP (M).
- You receive a PESTLE.
- Take the GOLD CHAIN (N).
- Walk down twice.
- Use the KETTLE to get a KETTLE WITH WATER (O).
- Access the MORTAR and place the LILY, HONEYCOMB, CLOUDBERRY and PESTLE; take the MEDICAL MIXTURE (P).
- Go right.
- Place the KETTLE WITH WATER and add the MEDICAL MIXTURE; you receive a FILLED SILVER CUP (Q).
- Give the FILLED SILVER CUP to Lilian; take MAP PIECE 2/2 (R).
- Place the PIECE OF MAP for a mini-game (S).
- Take ORNAMENT 1/2 and the GEAR PART (T).
- Go left.

- Place the GEAR PART and move the lever (U).
- Go forward.
- Talk to Lilian; take the VIAL OF BLOOD (V).
- Place the VIAL OF BLOOD (W) for a mini-game (X).
- Open the door.
- Go forward.
- Take the SCREWDRIVER (Y).
- Take the FALCON (Z).
- Take the MEDALLION (A).
- Place the MEDALLION (B), open the book and take the CHISEL and ELF SIGN (C).
- Go forward.
- Try to walk forward (D).
- Play the HOP (E).
- You receive an OILER.
- Walk down.
- Use the OILER and SCREWDRIVER and take the ARMOR GLOVE (F).
- Go forward.
- Use the ARMOR GLOVE and take the LATCHKEY (G).
- Walk down three times.
- Play the HOP (H).
- You receive a FIN.
- Walk down.
- Use the LATCHKEY and open the cabinet (I); take the HAMMER AND CHISEL and WING (J).
- Go left and forward.
- Place the FIN; take the MEDALLION (K).
- Open the door, use the HAMMER AND CHISEL and GOLD CHAIN, close the box and take the FORM WITH MATERIAL (L).
- Go forward twice.
- Play the HOP (M).
- You receive the CRUCIBLE TONGS.
- Place the FALCON and push the segments in the indicated order (N); place the WING (O).
- Place the ELF SIGN, open the box and move the cushion (P); take the JEWELS, open the compartment and take the PUZZLE PIECE (Q).
- Walk down.
- Place the PUZZLE PIECE for a mini-game (R).
- Take ORNAMENT 2/2 (S).
- Walk down three times.
- Place the FORM WITH MATERIAL and take the FORM IN TONGS with the CRUCIBLE TONGS (T).
- Go left and forward.
- Place the FORM IN TONGS to receive the RING BILLET (U).
- Go forward.
- Place the RING BILLET, use the CHISEL and place the JEWELS; take the HANDMADE RING (V).
- Go forward.
- Place the HANDMADE RING (W) and ORNAMENT (X).
- Go forward.
Chapter 5: The Arrow of Light
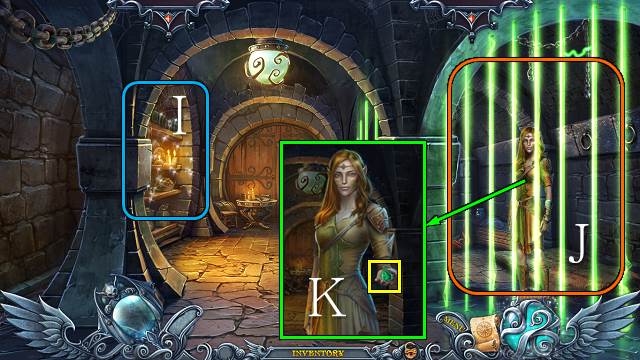
- Talk to Isa (Y).
- Lift the mattress and take the LOCKPICK (Z).
- Take the BREAD and SPOON (A).
- Place the LOCKPICK for a mini-game (B).
- Solution 1: 5-4-6-1-5-4-3-2-4.
- Solution 2: 8-7-7-10-10-9-8-8.
- Solution 3: 11-19-12-13-14-15-19-11-12-13-14-15-16-19-12-13-14-15-16-17-18-11-19-12-13-14-15-16-19-11-18-17-16-15-14-13-12-19.
- Go forward.
- Talk to Lilian; take GARDEN KEY 1/2 (C).
- Play the HOP (D).
- You receive the HANDCUFFS.
- Take the CHEESE and read the note; remove the skull (E).
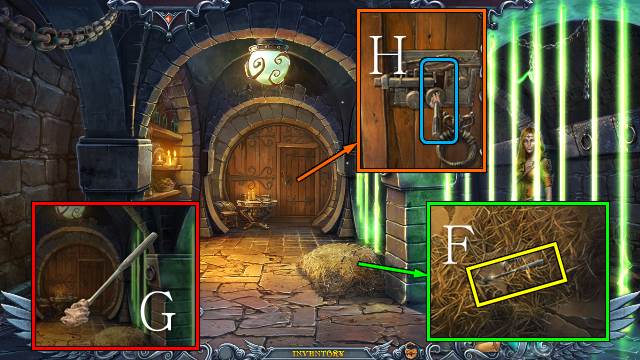
- Remove the hay and take the RASP (F).
- Access the RASP and use the BREAD; take the KEY BLANK (G).
- Use the KEY BLANK and take the CAST KEY (H).
- Walk down.
- Use the CHEESE (I); take the SOLDIER EMBLEM (J).
- Access the SPOON and place the SOLDIER EMBLEM (K).
- Place the SPOON and CAST KEY; take the KEY (L).
- Walk forward.
- Use the KEY, move the two buttons on the latch and open the door (M).
- Go forward.
- Play the HOP (N).
- You receive a CODE.
- Take the SYMBOL (O).
- Go left.
- Place the SYMBOL (Q), pull the handle and take GARDEN KEY 2/2 (R).
- Go forward.
- Place the GARDEN KEY and open the gate (S).
- Go right.
- Play the HOP (T).
- You receive an ARROW SHAFT.
- Place the MEDALLION and take the ELF TEAR and DRAGON HEAD (U).
- Take the GOLDEN BARK (V).
- Place the CODE and push the symbols (W).
- Go forward.
- Take the PITCHER and place the ARROW SHAFT (X).
- Take the GLASS STICK (Y).
- Take the DRAGON HEAD (Z).
- Walk down.
- Play the HOP (A).
- You receive some FEATHERS.
- Take some FORMIC ACID with the GLASS STICK (B).
- Use the PITCHER and take the PITCHER OF WATER (C).
- Walk down.
- Place the two DRAGON HEADS (D).
- Go forward.
- Use the PITCHER OF WATER and take the ROYAL LILY and CASKET PART (E).
- Go down, right and forward.
- Place the FORMIC ACID (1), ROYAL LILY (2) and GOLDEN BARK (3), then place the ELF TEAR (4) and take the POTION (F).
- Place the CASKET PART (G); open the casket and take the STONE and STAR (H).
- Walk down twice and go left.
- Play the HOP (I).
- You receive a CROWN.
- Use the POTION (J).
- Take the STONE (K).
- Place the STAR (L); move the stone, read the note and take the MAGIC (M).
- Access the HANDCUFFS and use the MAGIC; take the HANDCUFFS (N).
- Go forward.
- Play the HOP (O).
- You receive a SCEPTER.
- Place the two STONES (P); take the STONE (Q).
- Go forward.
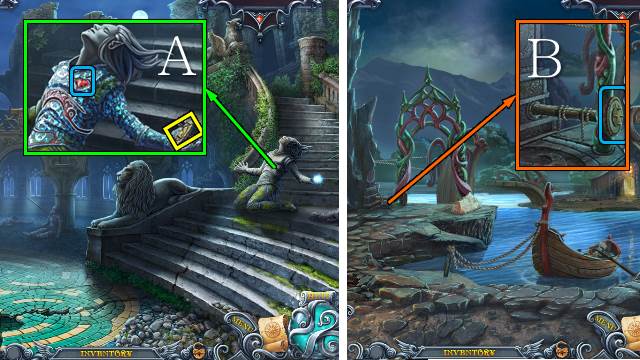
- Place the SCEPTER and CROWN (R); take the BASRELIEF PART and DIAMOND SAW (S).
- Place the BASRELIEF PART and pull the lever (T).
- Go down and right.
- Use the DIAMOND SAW and take the WEB (U).
- Go forward.
- Place the FEATHERS, STONE and WEB; take the ARROW OF LIGHT (V).
- Walk down.

- Place the GLOVE and ARROW OF LIGHT; take the CROSSBOW (W).
- Go down and twice forward.
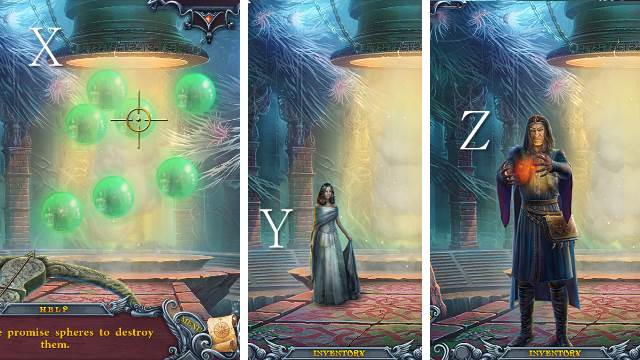
- Place the CROSSBOW and shoot the bubbles (X).
- Talk to Adele (Y).
- Use the HANDCUFFS (Z).
- Congratulations, you have completed Spirits of Mystery: Chains of Promise.
Created at: 2015-09-11