

Walkthrough Menu
- General Tips
- Chapter 1: Spectra
- Chapter 2: The Enchanted Forest
- Chapter 3: The Labyrinth
- Chapter 4: The Sandman
General Tips
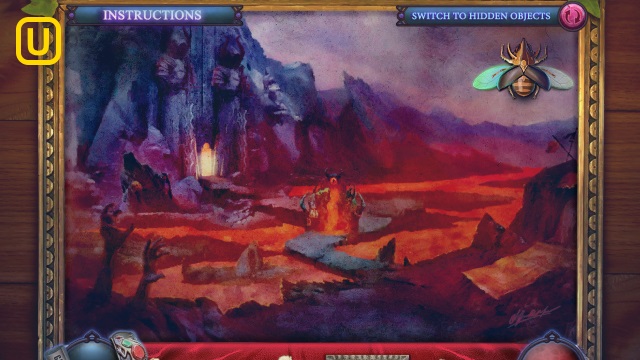
- This is the official guide for The Forgotten Fairy Tales: The Spectra World.
- This guide won't tell you when to zoom into a location; the screenshots show each zoom scene.
- Hidden-object puzzles are referred to as HOPs. Only the locations of the HOPs will be shown.
- Use the Map to fast travel to a location.
Chapter 1: Spectra
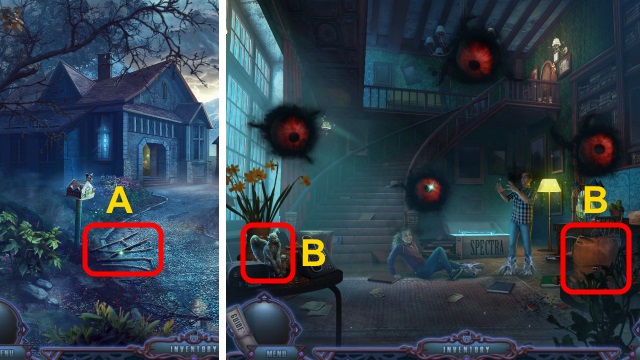
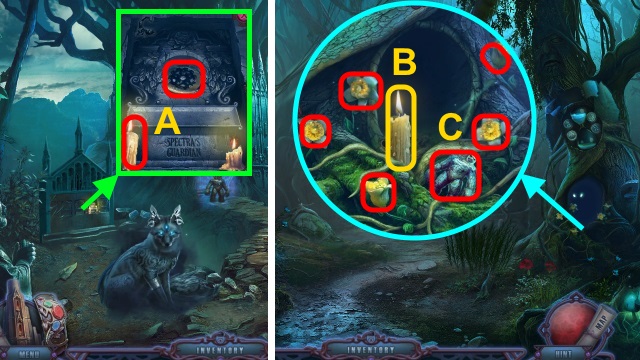
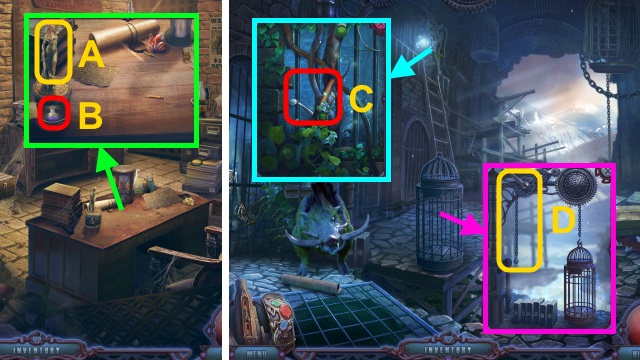
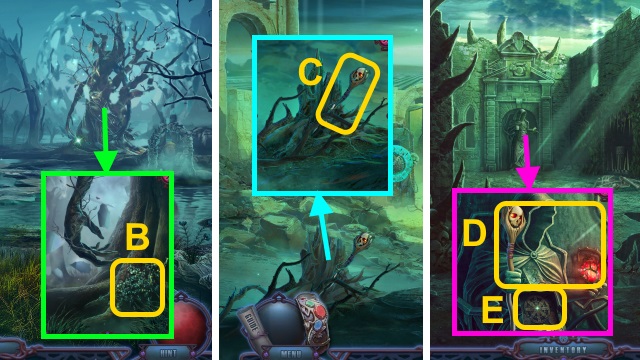
- Take BRANCHES (A).
- Walk forward.
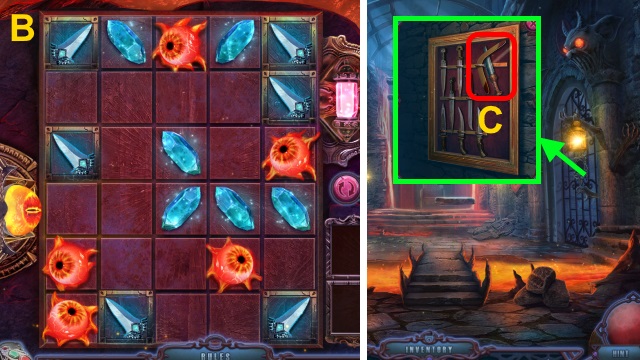
- Take GARGOYLE FIGURINE and MARY'S BACKPACK (B).
- Open MARY'S BACKPACK; take notebook, BOX CUTTER, and LUNCHBOX.
- Open LUNCHBOX; take GRANOLA CEREAL.
- Walk down.
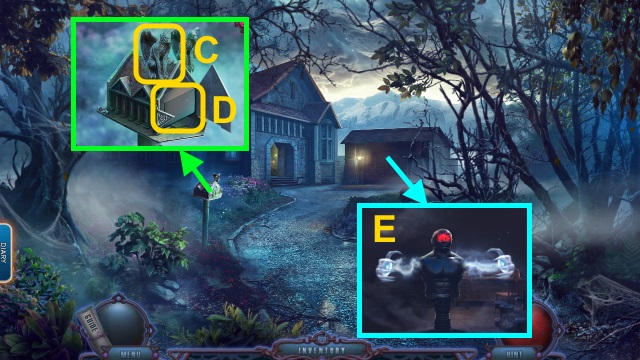
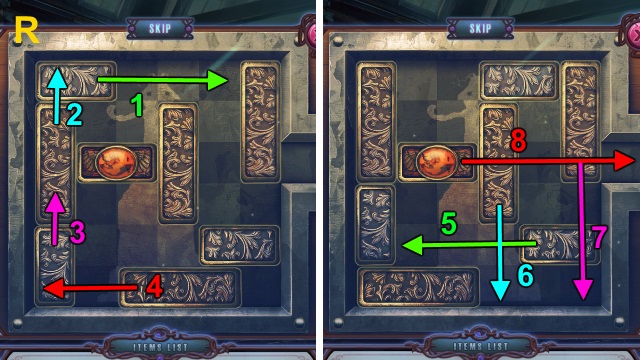
- Place GARGOYLE FIGURINE (C). Open package; take BOXING GLOVES (D).
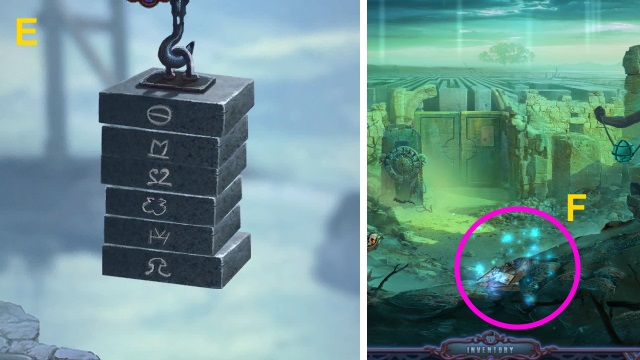
- Open door; use BOXING GLOVES (E).
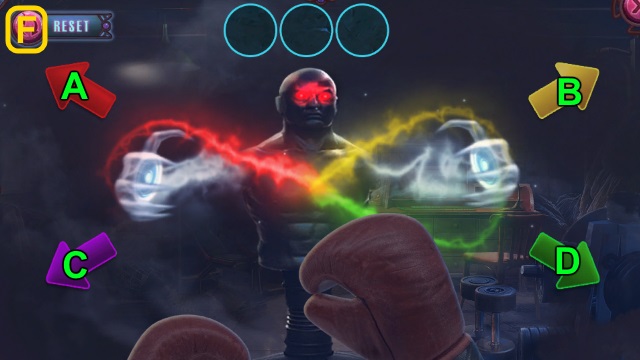
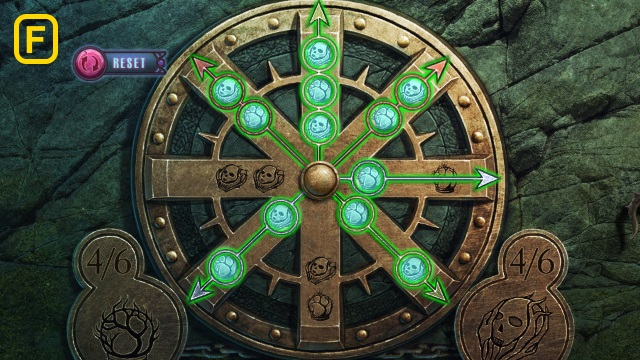
- Solution (F): (B-A-D)-(C-A-B-C).
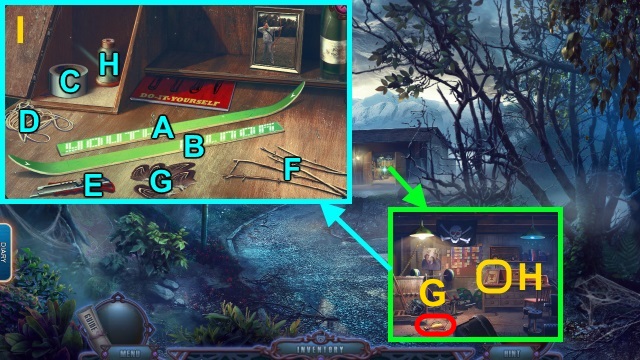
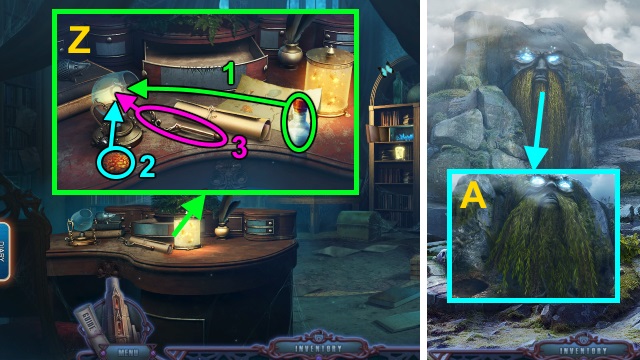
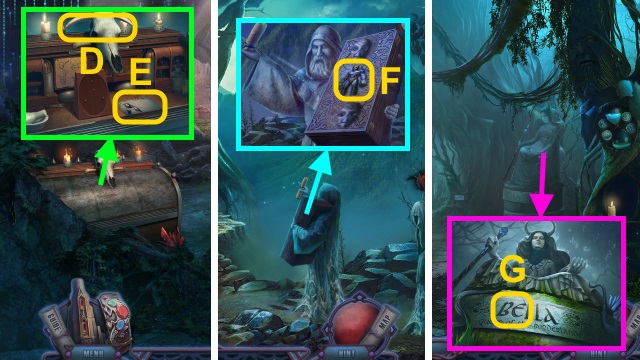
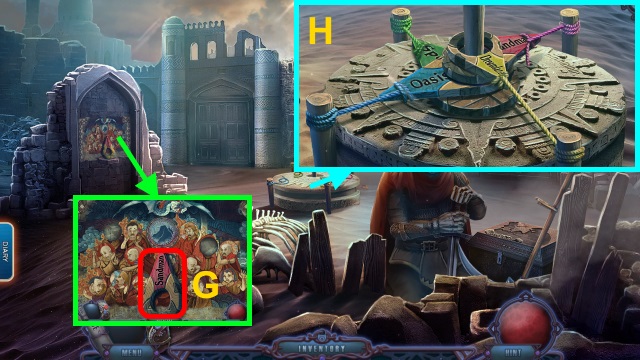
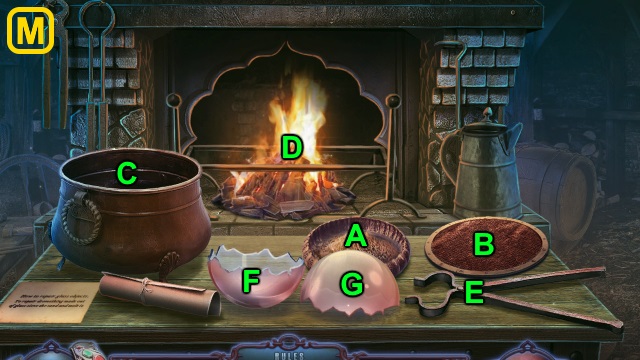
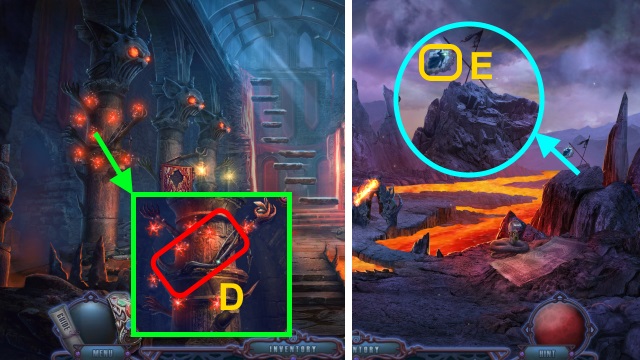
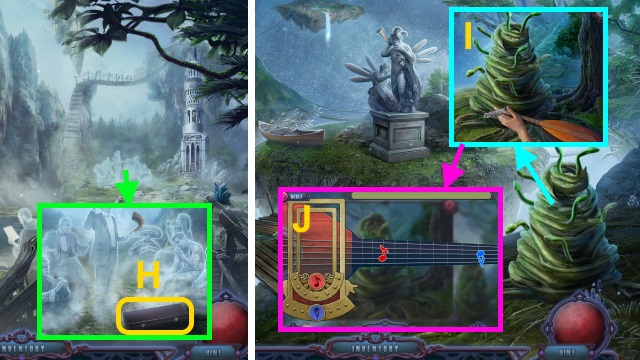
- Take TROPHY EMBLEM (G); examine desk (H).
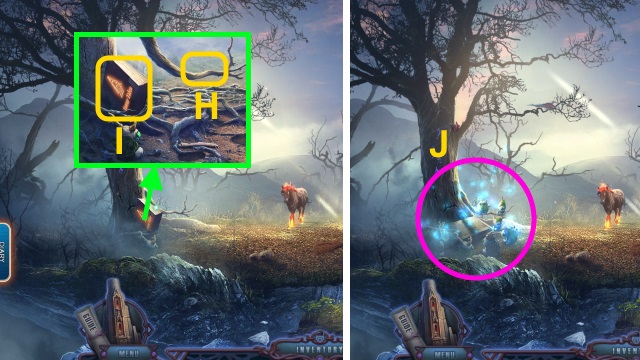
- Take YELLOW CHALK; place TROPHY EMBLEM, BRANCHES, and BOX CUTTER.
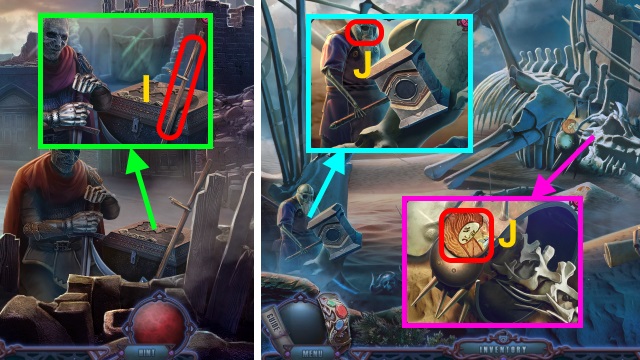
- Solution (I): (A-B)-(C-B)-(D-B)-(E-F)-(G-F)-(H-F).
- Take BOW WITH ARROWS.
- Go forward.
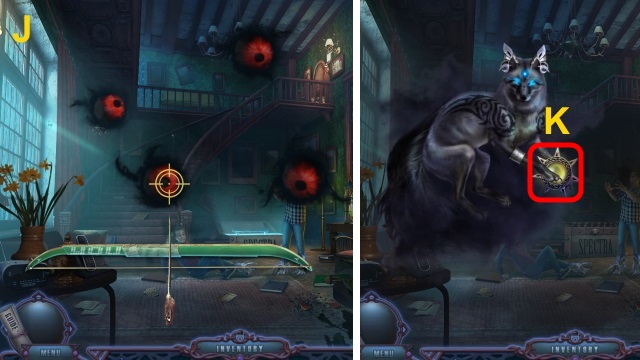
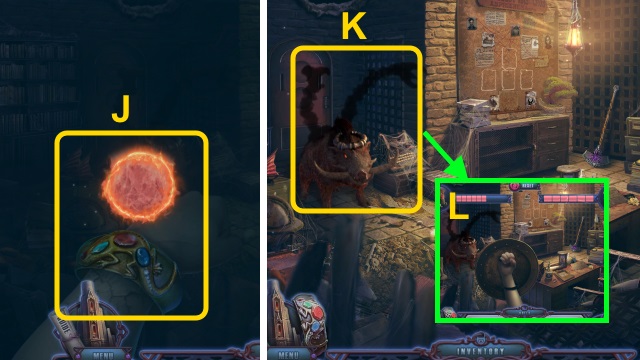
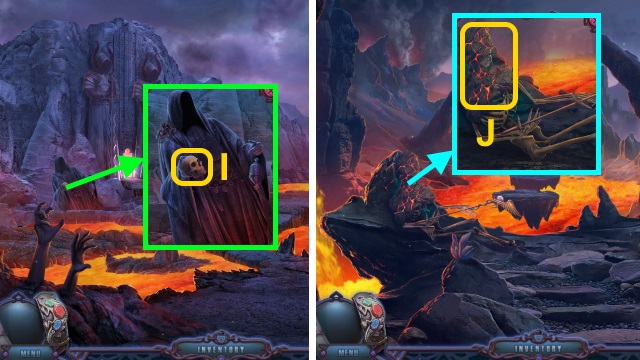
- Use BOW WITH ARROWS; shoot orbs (J).
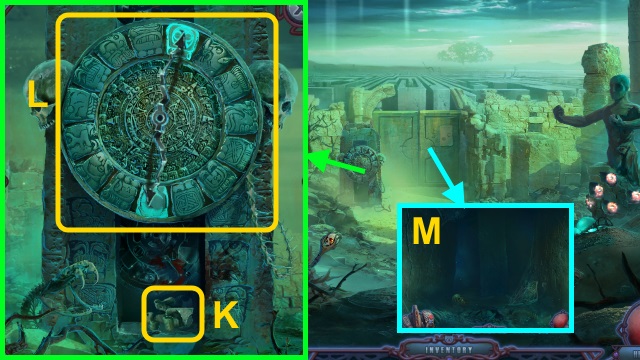
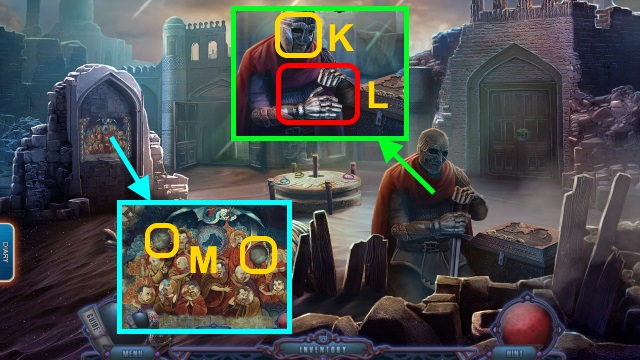
- Take SUN AMULET (K).
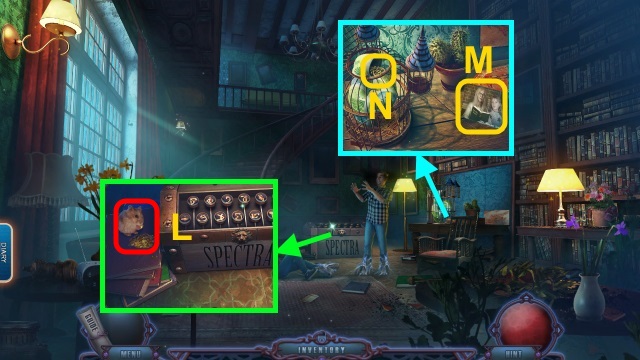
- Use SUN AMULET; examine HAMSTER. Give GRANOLA CEREAL; take MARY'S HAMSTER (L).
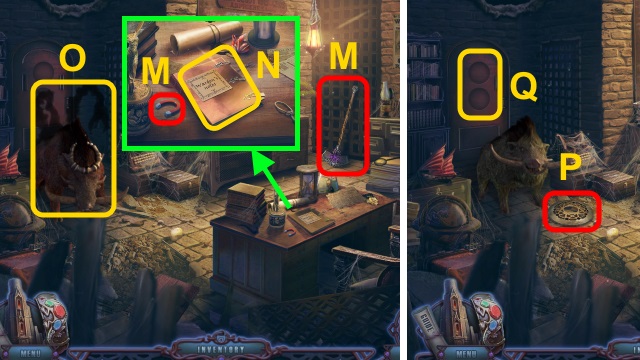
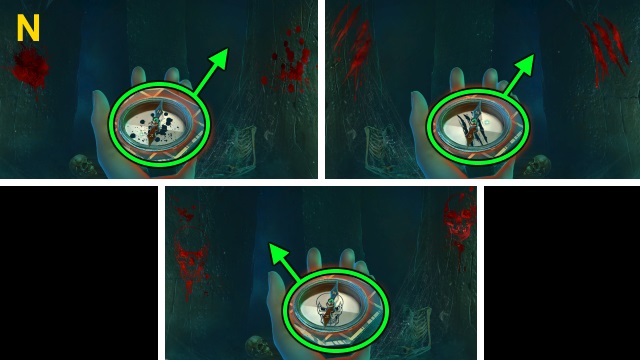
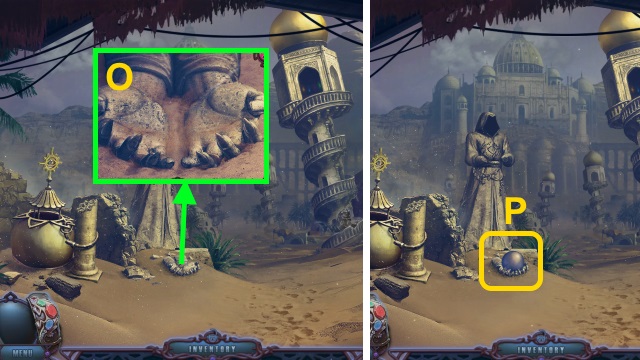
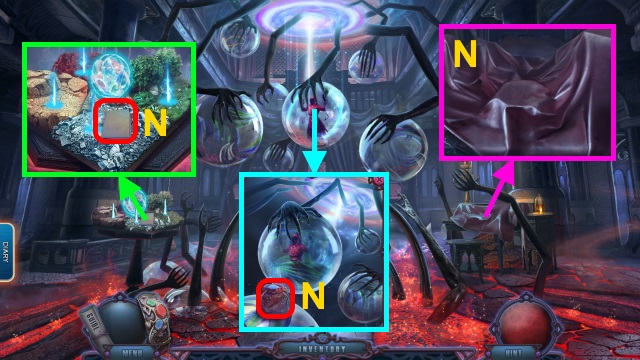
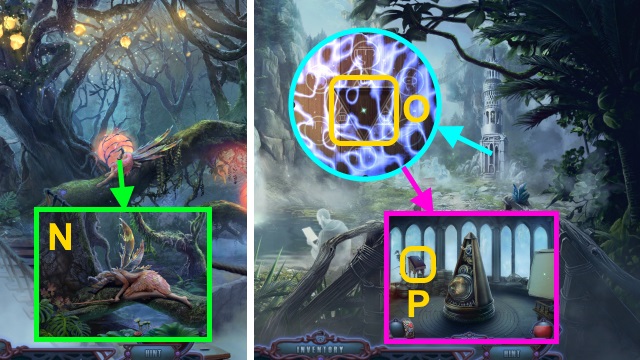
- Examine picture (M). Examine key (N); use MARY'S HAMSTER. Take ATTIC KEY.
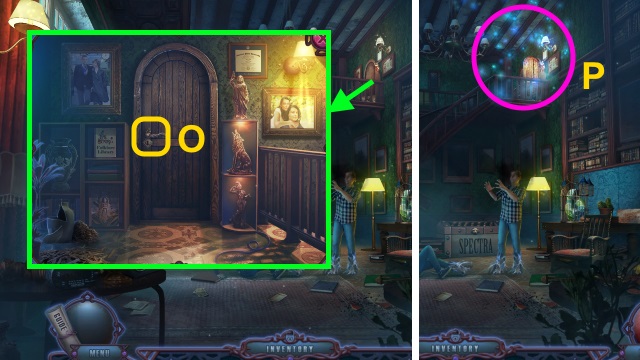
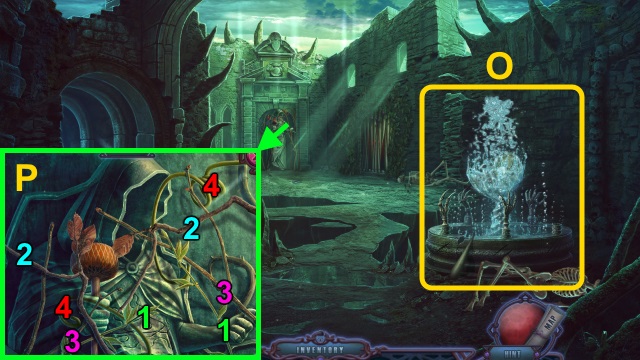
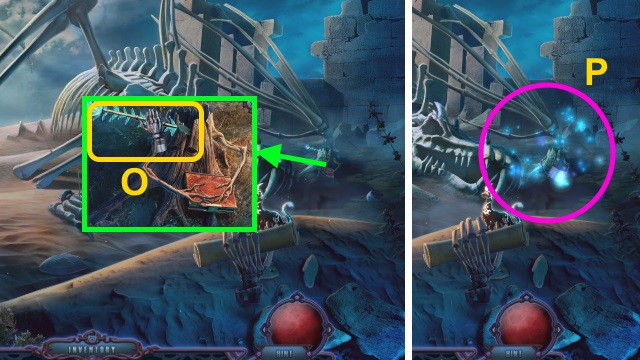
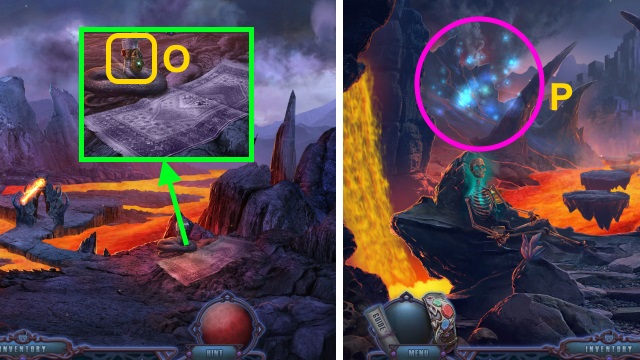
- Place objects; use ATTIC KEY (O).
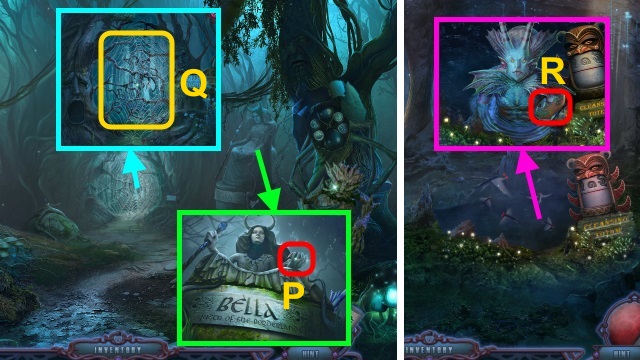
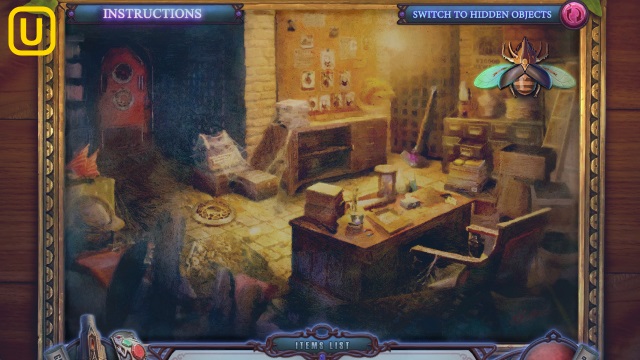
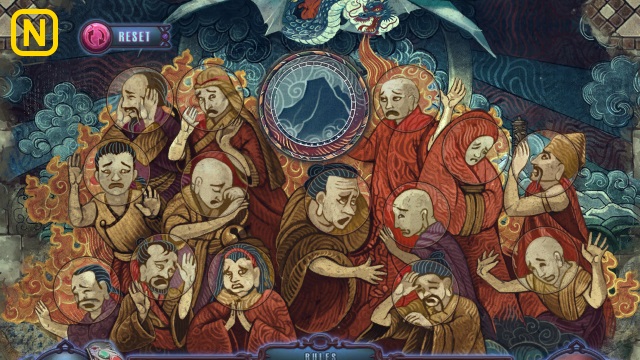
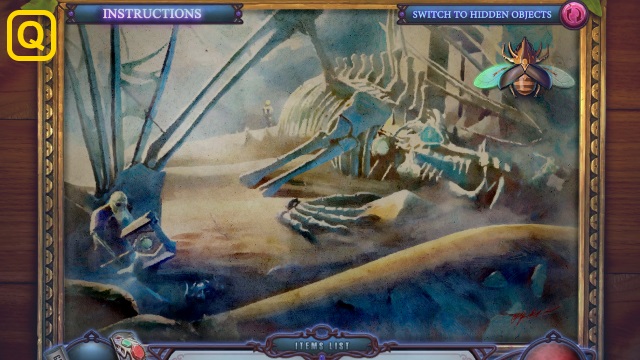
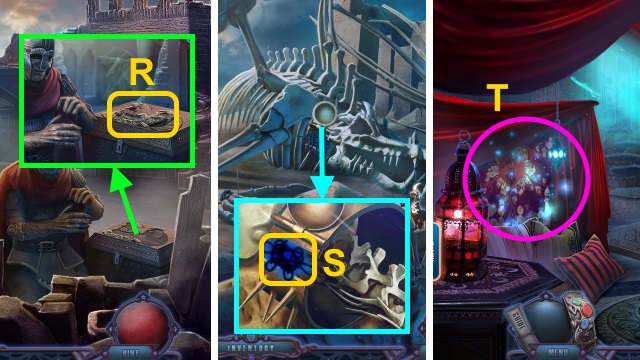
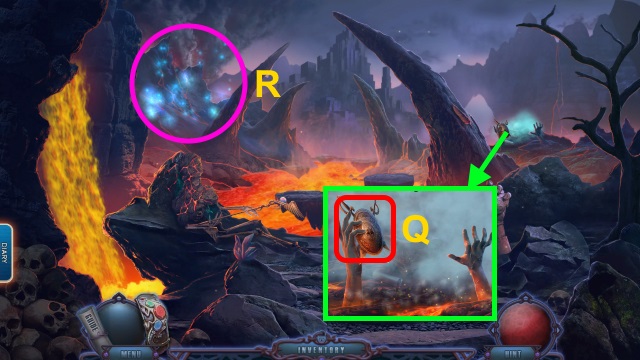
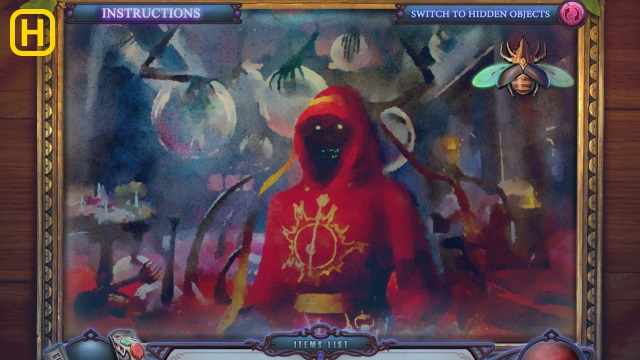
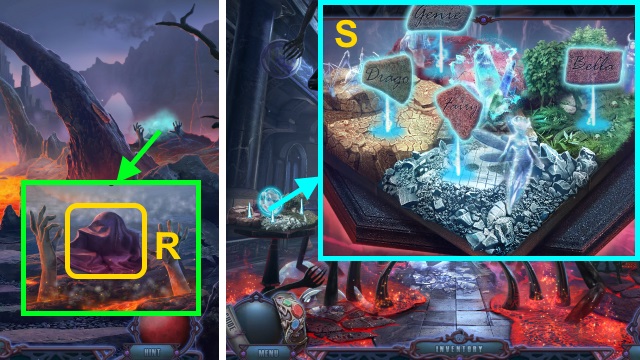
- Play HOP; receive GRANDMA'S JEWELRY BOX (P).
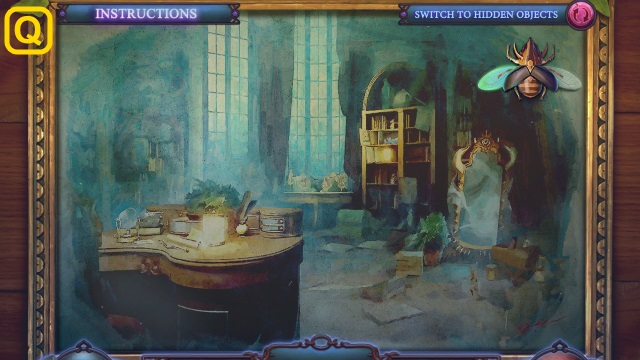
- HOP alternative solution (Q).
- HOP mini-game solution (R).
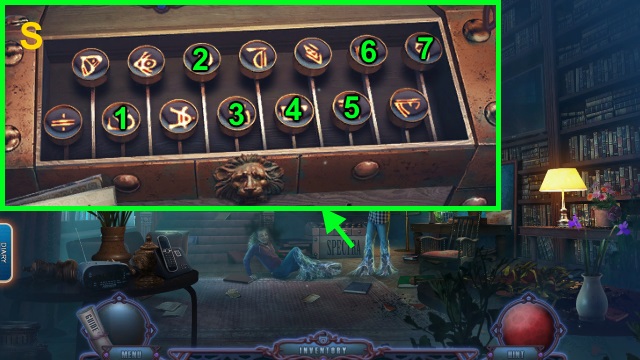
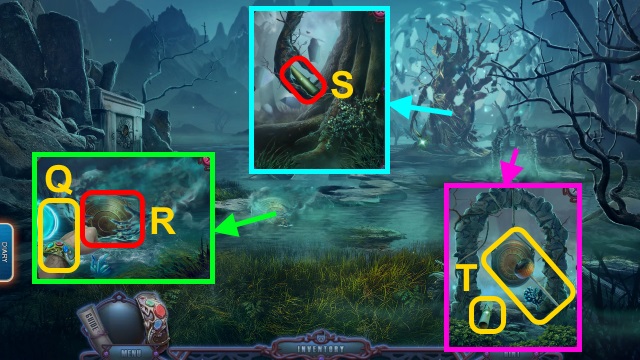
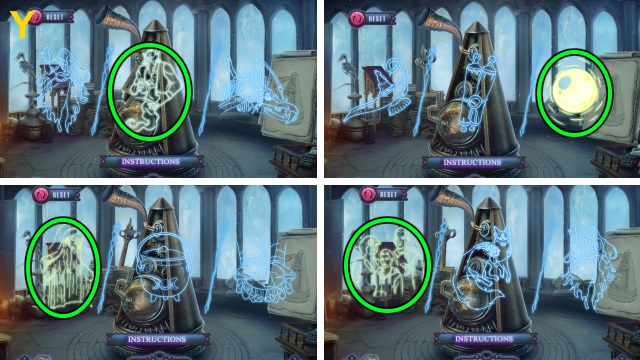
- Open GRANDMA'S JEWELRY BOX; read notebook. Take SYMBOLS CYPHER.
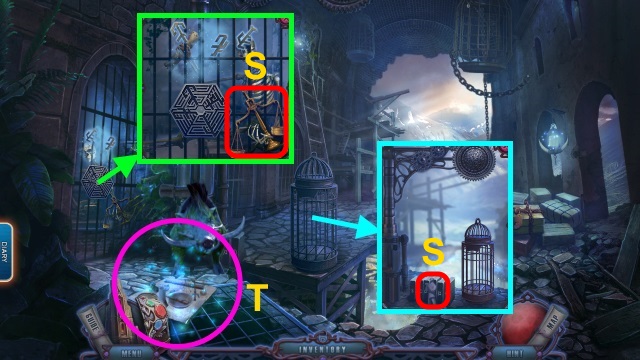
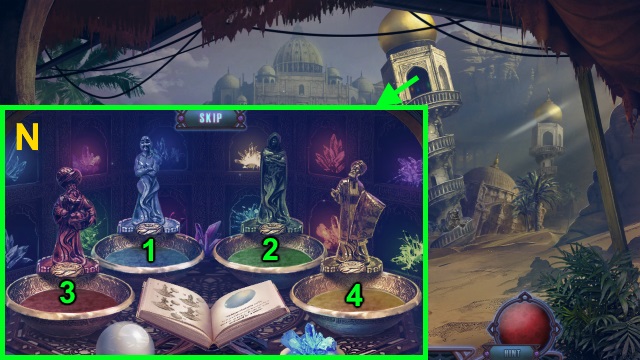
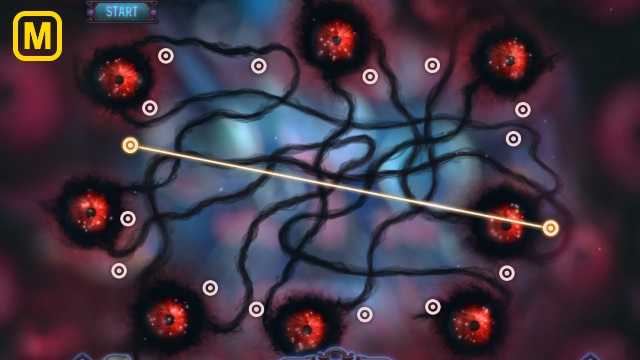
- Place SYMBOLS CYPHER for a mini-game; solution (S).
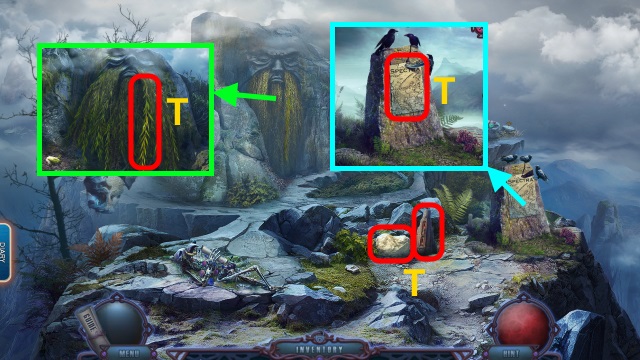
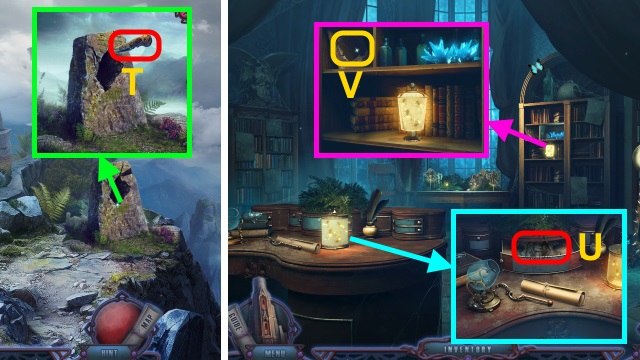
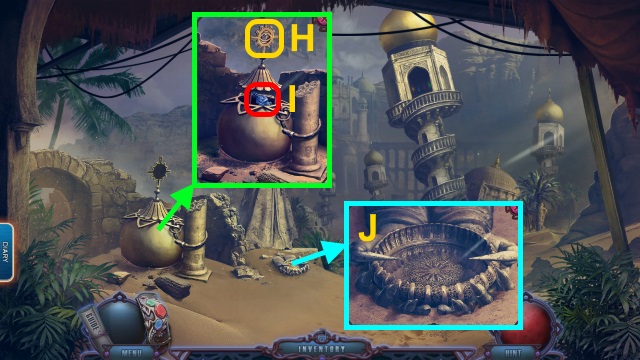
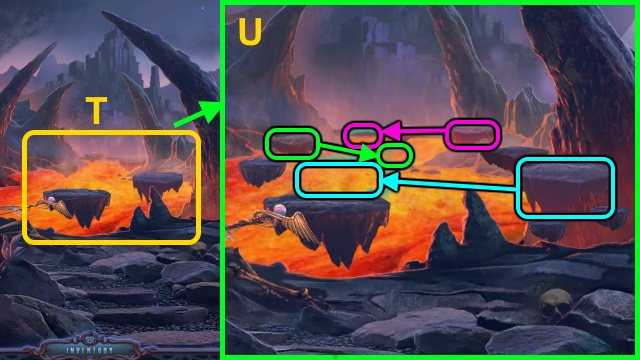
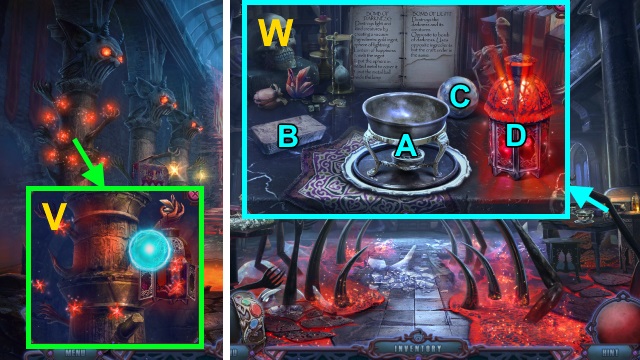
- Take Tower, CALCITE, VINE, Map, and GUARDIAN TOWER EMBLEM (T).
- Make VINE into LASSO.
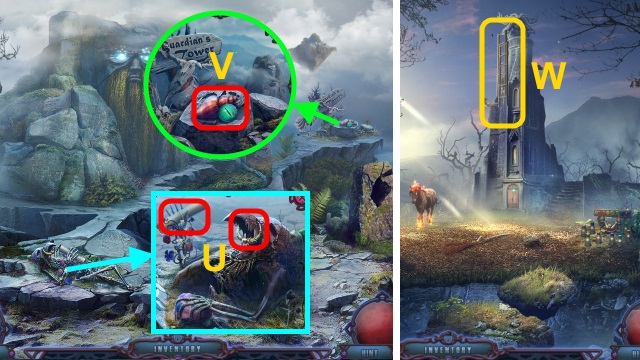
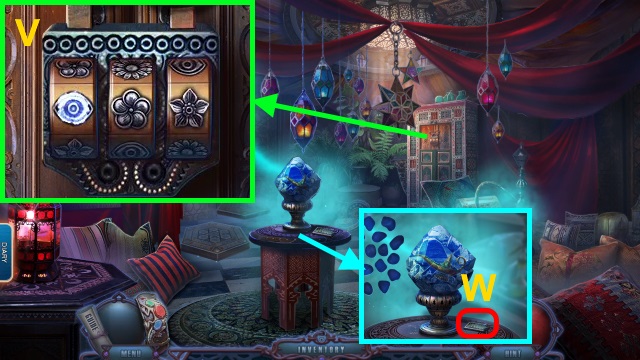
- Take note and BRONZE RING (U).
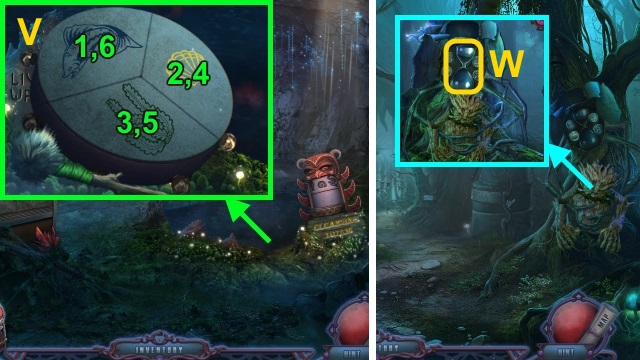
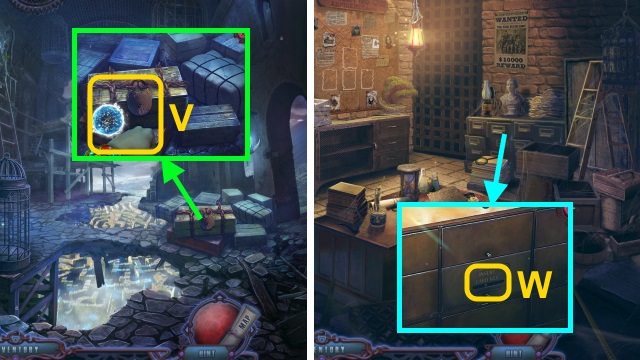
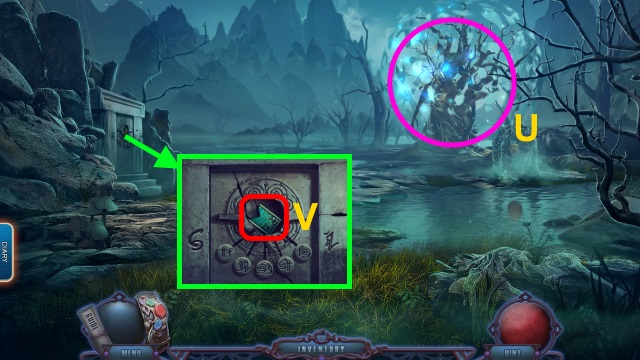
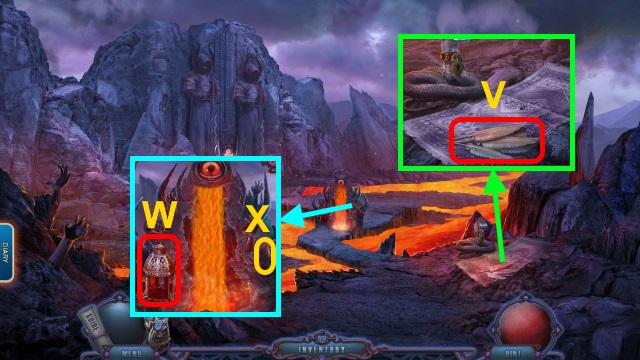
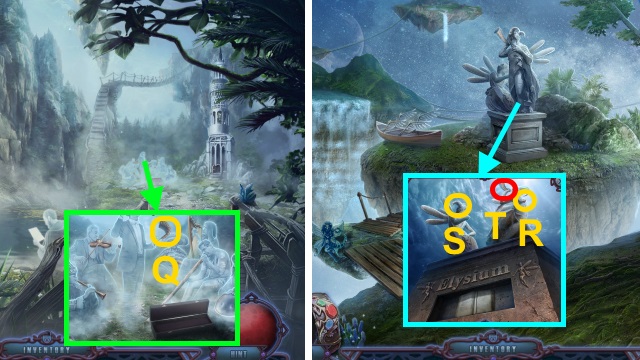
- Take STONE EYE and WOODEN SEASHELL (V); place GUARDIAN TOWER EMBLEM. Play HOP.
- Walk right.
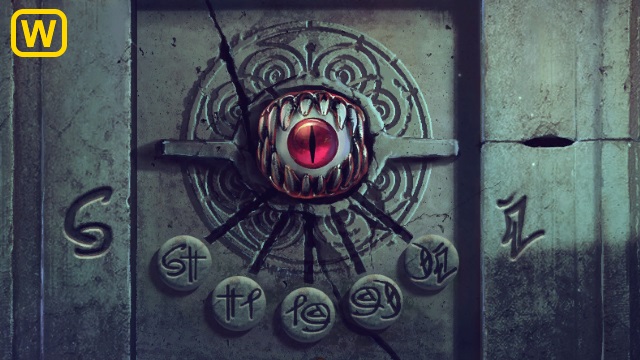
- Use LASSO (W).
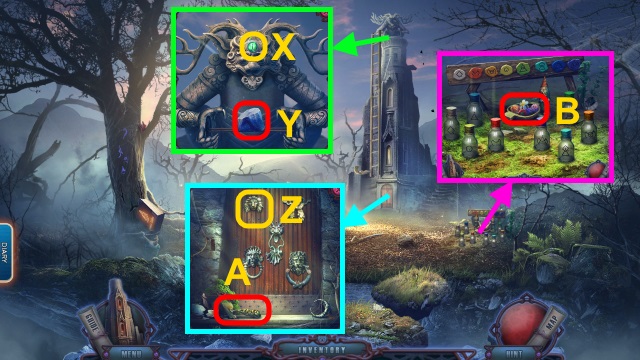
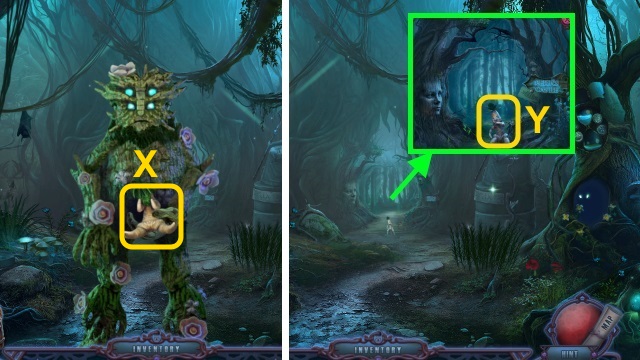
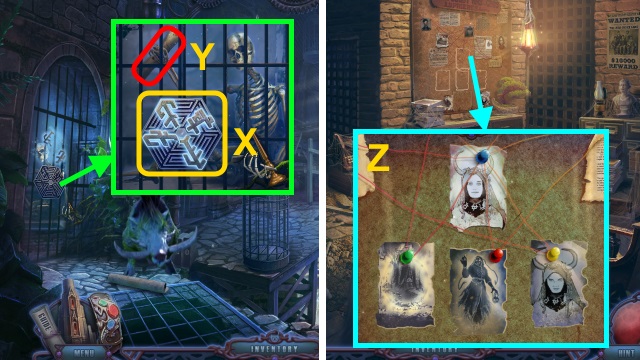
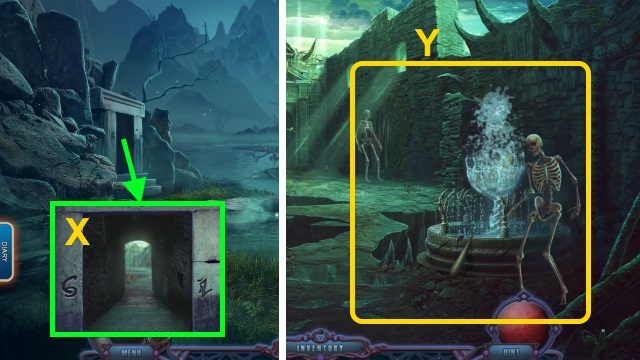
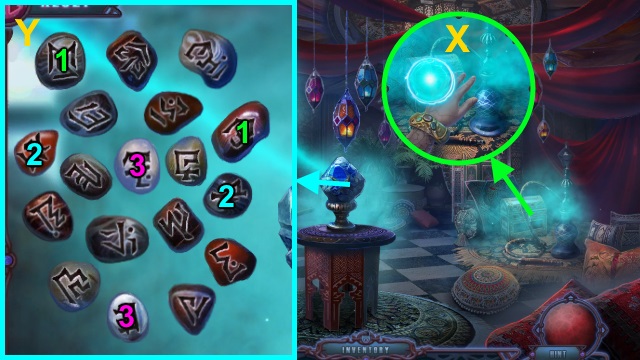
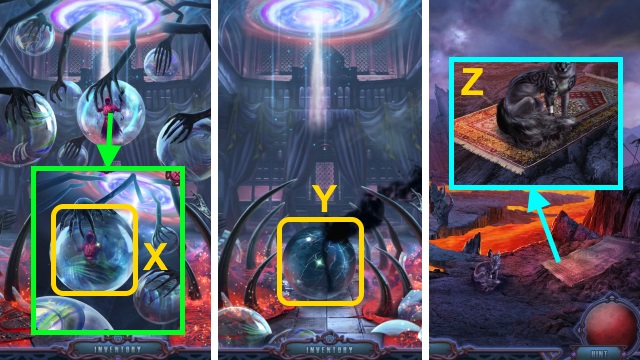
- Place STONE EYE (X); take LAPIS LAZULI (Y).
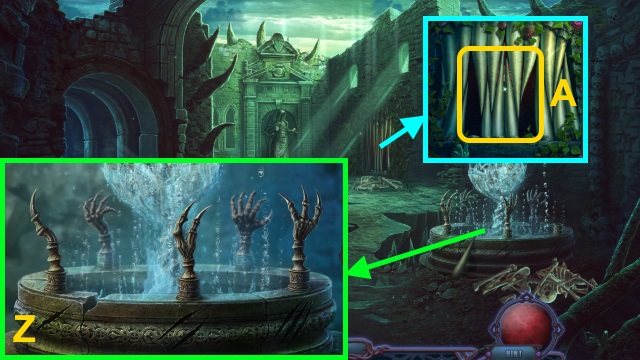
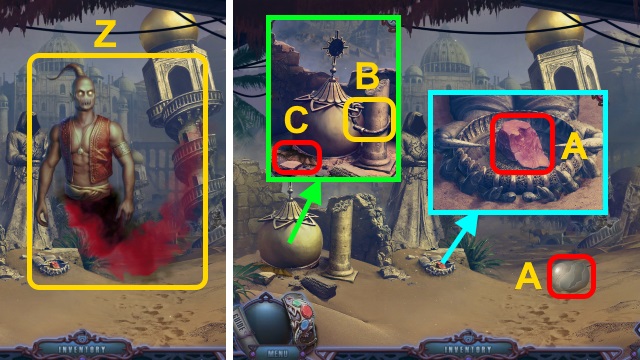
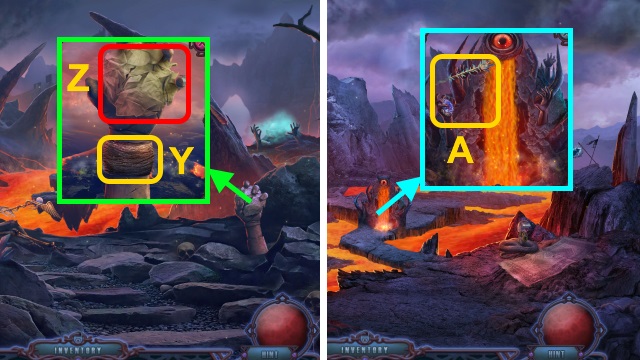
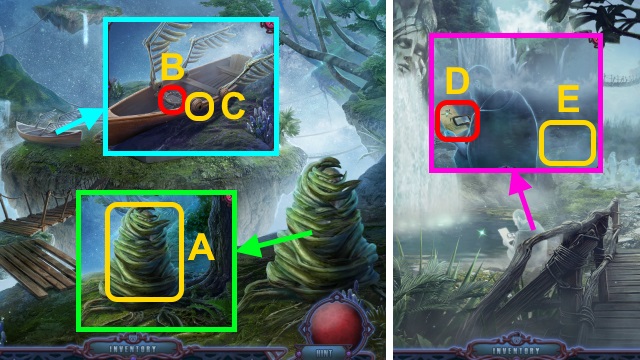
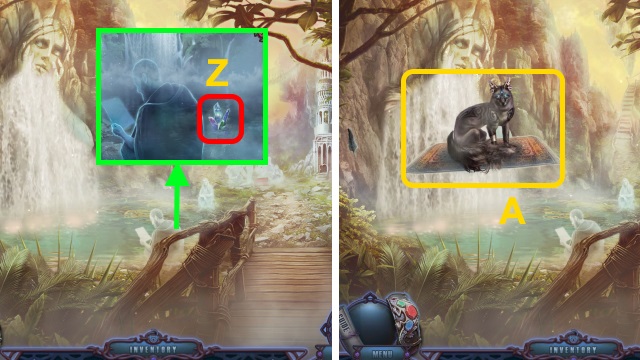
- Place BRONZE RING (Z); take SPADE (A).
- Take FLOWER RINGS (B).
- Walk down.
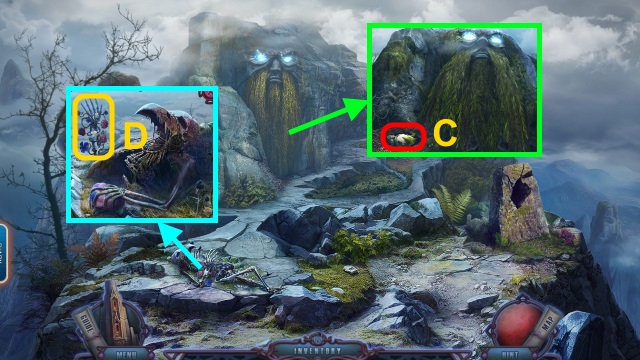
- Use SPADE; take CREATURE FIGURINE (C).
- Examine hand (D); place FLOWER RINGS.
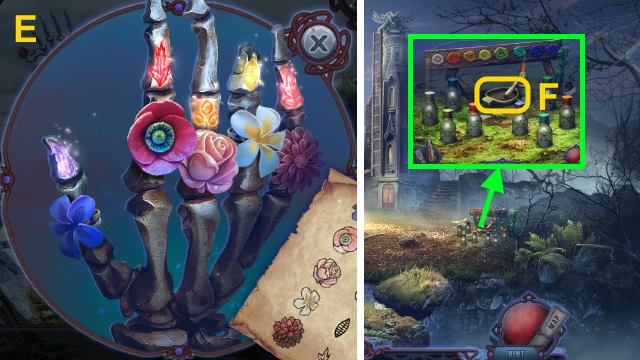
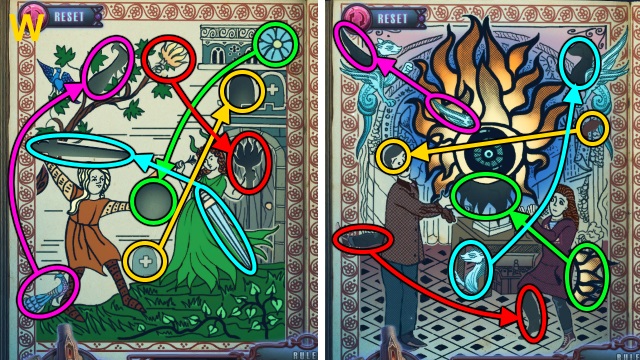
- Solution (E).
- Take CINNABAR.
- Walk right.
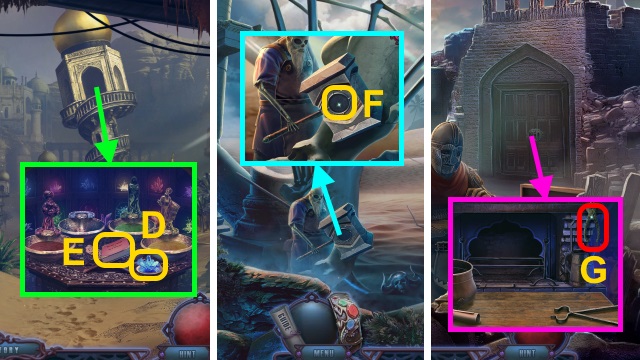
- Use YELLOW CHALK, LAPIS LAZULI, CALCITE, and CINNABAR (F).
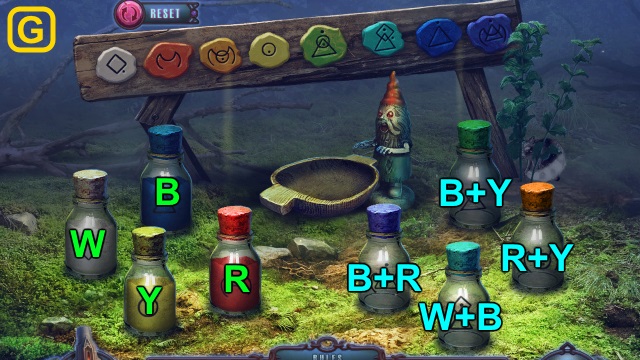
- Solution (G).
- Take PAINTS.
- Place CREATURE FIGURINE (I); play HOP. Use PAINTS (I).
- Play HOP; receive DOOR CODE (J).
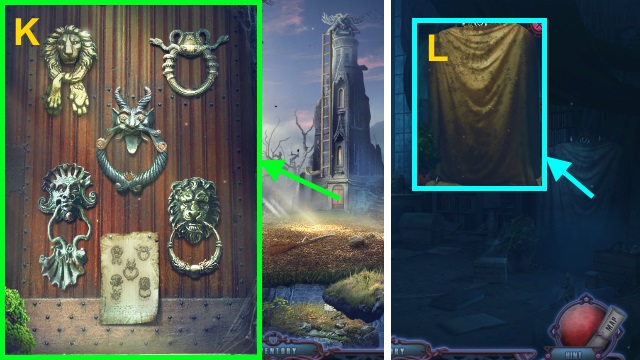
- Place DOOR CODE and ring; solution (K).
- Walk forward.
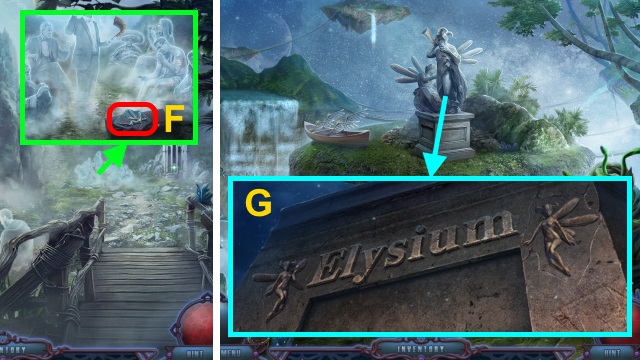
- Remove curtain (L).
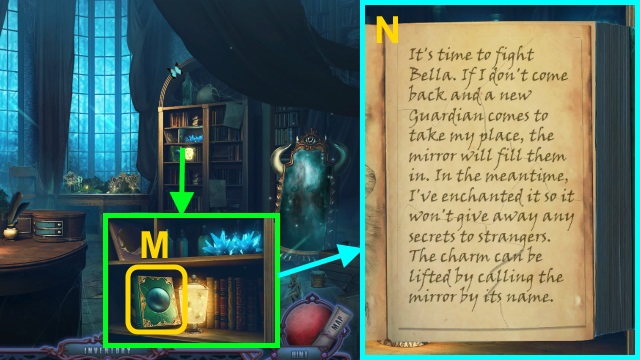
- Read book (M).
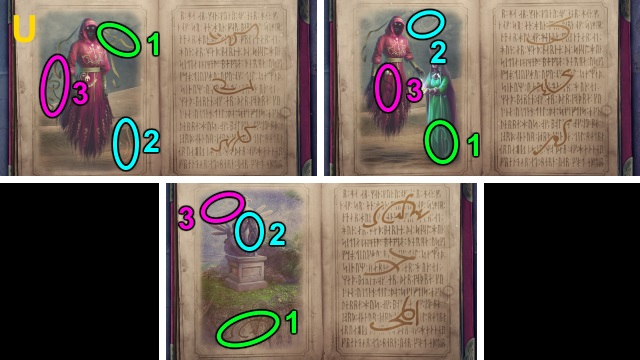
- Solution (N); take BELLA FIGURINE.
- Take KNIFE HANDLE and MINIATURE BOTTLE (O).
- Walk down twice.
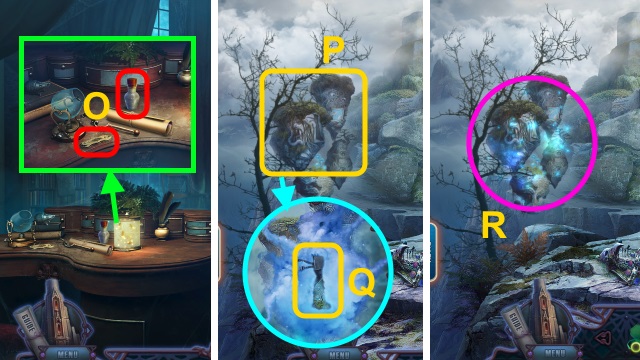
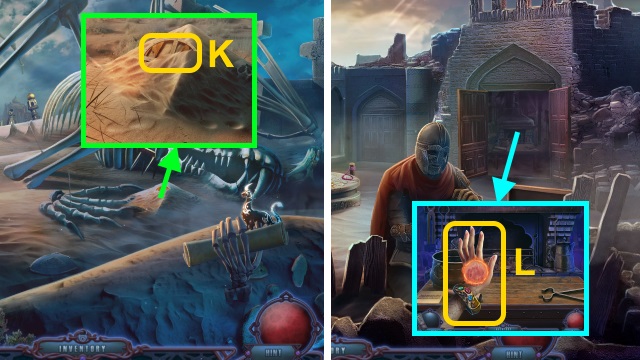
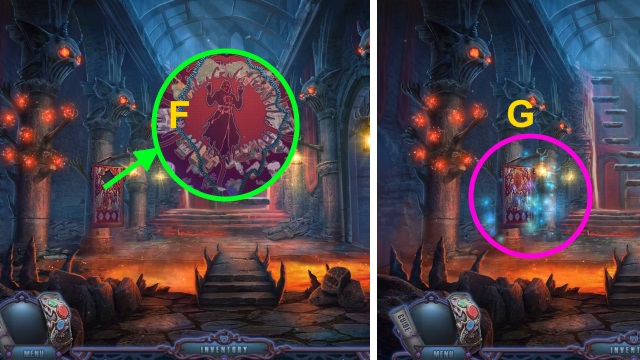
- Examine stones (P); place BELLA FIGURINE (Q).
- Play HOP; receive TOWER BAS-RELIEF (R).
- HOP alternative solution (S).
- Place KNIFE HANDLE; take SHARP KNIFE (T).
- Walk right, then forward.
- Use SHARP KNIFE; take STONE PORTRAIT and GUARDIAN'S RING (U).
- GUARDIAN'S RING on GRANDMA'S JEWELRY BOX; take SILVER SILHOUETTE.
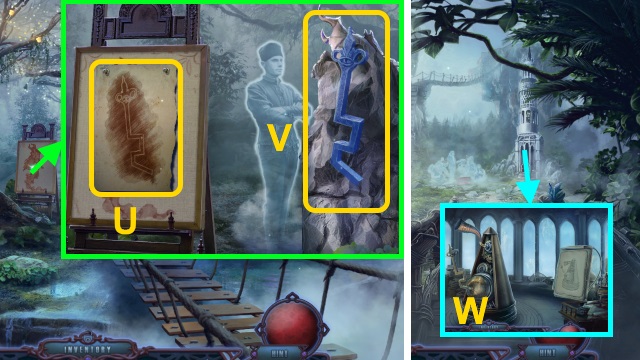
- Place SILVER SILHOUETTE. (V); examine book.
- Solution (W).
- Take MIRROR'S NAME.
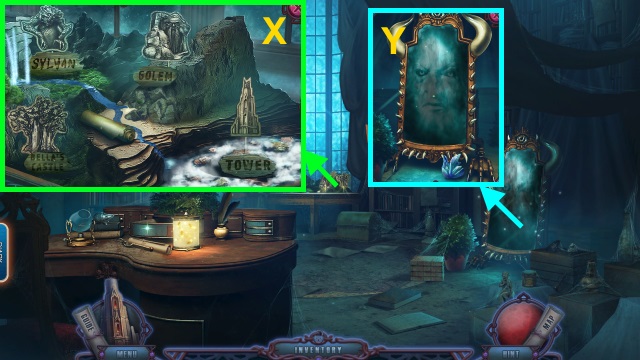
- Place TOWER BAS-RELIEF; solution (X).
- Use MINIATURE BOTTLE; receive BOTTLE WITH WATER.
- Use MIRROR'S NAME (Y); take SEALED TUBE.
- Open SEALED TUBE; take GOLEM TREAT RECIPE and AMBER POWDER.
- Place GOLEM TREAT RECIPE, AMBER POWDER and BOTTLE WITH WATER; solution (Z).
- Take GOLEM TREAT.
- Walk down twice.
- Give GOLEM TREAT (A).
- Solution (B).
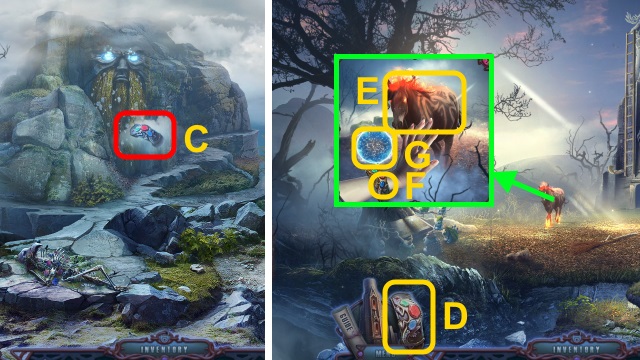
- Take Bracelet (C) and MAGIC BRIDLE.
- Walk right.
- Use Bracelet (D) on horse (E). Use blue gem (F); select orb (G). Use MAGIC BRIDLE.
Chapter 2: The Enchanted Forest
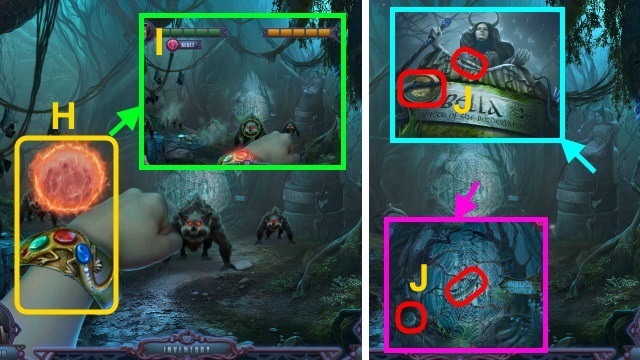
- Use Bracelet. Use red gem; select orb (H).
- Solution (I): shoot creatures.
- Take CHISEL, ROUND SHIELD, RITUAL HORN, and ORNATE DISC (J).

- Examine tree; place ORNATE DISC (K). Take JUG FOR LIVING WATER and BROKEN PORTRAIT (L).
- WOODEN SEASHELL on BROKEN PORTRAIT; place pieces (M). Take WOODEN PORTRAIT.

- Place WOODEN PORTRAIT (N).
- Go left.
- Take PEARL ORB and STICK (O).
- Walk down.
- Place PEARL ORB; take TABLET HALF (P).
- Use STICK (Q); receive NET.
- Go left.
- Use NET; take BROKEN TABLET (R).
- Ornate TABLET HALF on BROKEN TABLET; receive TABLET.

- Place TABLET (S).
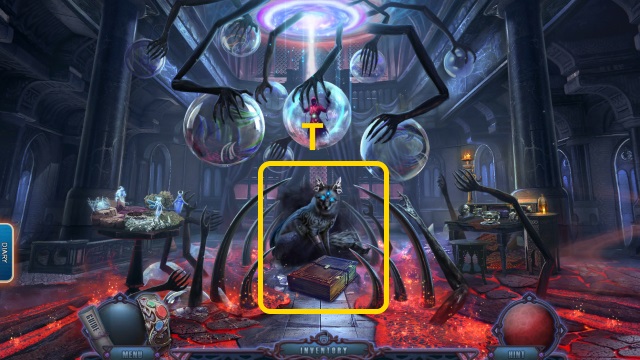
- Play HOP; receive RITUAL DRUM (T).
- HOP mini-game solution (U): (A-B)-(C-B)-(D-B)-(E-B)-(F-B)-(G-H-B)x3-(I-J)-(K-J)-(L-J).
- Use RITUAL DRUM; use stick to hit in order (V).
- Use JUG FOR LIVING WATER; receive LIVING WATER.
- Walk down.
- Use LIVING WATER (W).
- Examine creature (X).
- Go (Y).
- Solution (Z).
- Take CANDLE, RITUAL HORN, and DOORPLATE (A); place STONE PORTRAIT. Play HOP. Read note; take BLANK MASK.
- Walk down.
- Place CANDLE (B); take GOLEM FIGURINE and SANDALWOOD FLOWERS (C).
- Walk left.
- Place 2 RITUAL HORNS (D); examine paper (E). Play HOP; take FISHING LINE and LETTER E.
- Walk down, then forward.
- Place GOLEM FIGURINE (F). Read note; take MASKS OF HUMILITY (1/2) and LETTER B.
- Walk down.
- Place LETTER E and LETTER B (G); take ROSE OIL.
- Walk left.

- Use BLANK MASK, CHISEL, SANDALWOOD FLOWERS, and ROSE OIL. Solution (H): (A-B)-(C-B)-(B-D).
- Take MASKS OF HUMILITY (2/2).
- Walk down, then forward.
- Place MASKS OF HUMILITY (2/2) (I); examine.
- Walk forward.
- Use Bracelet. Use red gem; examine orb (J).
- Use ROUND SHIELD (K).
- Solution (L): block 12 orbs.
- Take ENCHANTED HAMMER and MAGNET (M).
- Open book (N); use pencil on each page. Take SANDMAN SKETCH; take TELESCOPIC FORK.
- FISHING LINE and TELESCOPIC FORK on MAGNET; receive MAGNETIC ROD.
- Use MAGNETIC ROD (O).
- Take DOORPLATE (P).
- Place 2 DOORPLATES (Q).
- Walk left.
- Take COPPER SCALES and FACELESS FIGURE (S).
- Play HOP; receive PUNCH CARD (T).
- HOP alternative solution (U).
- Use Bracelet. Use blue gem; select orb (V). Use ENCHANTED HAMMER; take CHAIN.
- Walk down.
- Use PUNCH CARD (W); take LOCK PART.
- Walk left.
- Place LOCK PART; place parts (X). Take GOOD-BELLA SKETCH (Y).
- Walk down.
- Place SANDMAN SKETCH and GOOD-BELLA SKETCH; solution (Z).
- Take note and STATUE'S HEAD.
- Place COPPER SCALES and STATUE'S HEAD (A); take SLEEP POTION (B).
- Walk left.
- Use SLEEP POTION; take note and WINCH HANDLE (C).
- Use CHAIN and WINCH HANDLE (D).
- Solution (E).
- Go forward.
- Play HOP; receive MAGIC COMPASS (F).
- HOP alternative solution (G).
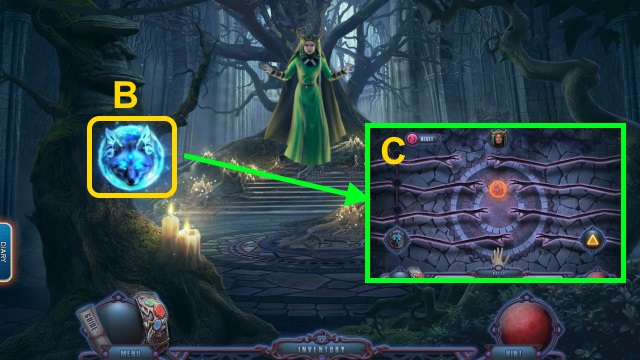
- Take CLAW and MINIATURE DARK ORB (H).
- Take SWEET FRUIT (I); place MINIATURE DARK ORB (J). Play HOP; take ROPE and DARK CLOCK HAND.
- Place FACELESS FIGURINE (K). Place clock hand and DARK CLOCK HAND; solution (L).
- Use MAGIC COMPASS (M).
- Solution (N).
Chapter 3: The Labyrinth
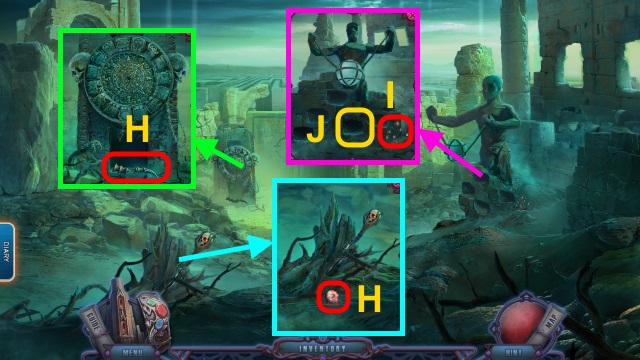
- Examine fountain (O).
- Examine statue; solution (P).
- Take GONG MALLET.
- Use Bracelet. Use green gem; select orb (Q). Take JAR OF OIL and GONG (R).
- Take RIGHT STONE TOOTH (S).
- Read note; use ROPE, GONG, and GONG MALLET (T).
- Play HOP; receive RUBY EYE (U).
- Take LEFT CHEST DECORATION (V); place RUBY EYE.
- Solution (W).
- Take note and MAGIC LANTERN.
- Go (X).
- Use MAGIC LANTERN (Y).
- Take LEFT STONE TOOTH; place CLAW. Solution (Z).
- Take FRESCO PART and FRUIT BOWL.
- SWEET FRUIT on FRUIT BOWL; receive TERMITE BAIT.
- Place LEFT STONE TOOTH and RIGHT STONE TOOTH (A); take GLOWING ORB.
- Walk left.
- Place TERMITE BAIT (B); take BOWL WITH TERMITES.
- Walk left, then down.
- Use BOWL WITH TERMITES (C); take SCEPTER.
- Walk forward.
- Use SCEPTER and GLOWING ORB (D); examine (E).
- Solution (F).
- Walk forward.
- Take GUIDE SIGN (G).
- Examine; place GUIDE SIGN. Solution (H).
- Take PILE OF WOOD.
- Take SICKLE (I).
- Walk left.
- Take WARRIOR'S HELMET and FRESCO PART (J).
- Walk down.
- Place WARRIOR'S HELMET (K); take IRON GLOVES (L).
- Place 2 FRESCO PARTS (M).
- Solution (N).
- Take DRAGON EMBLEM.
- Walk left.
- Use IRON GLOVES (O); receive CRYSTAL SPEAR.
- Play HOP; receive KNIGHT EMBLEM and BOOK OF FAIRY TALES (P).
- HOP alternative solution (Q).
- Walk down.
- Place DRAGON EMBLEM and KNIGHT EMBLEM (R); take SWORD OF LIGHT.
- Walk left.
- Use SWORD OF LIGHT (S).
- Walk forward.
- Select any options.
- Play HOP; receive BOOKCASE CODE (T).
- HOP alternative solution (U).
- Place BOOKCASE CODE; solution (V).
- Take YARN WITH NEEDLE, scrolls, and SPELL SCROLL.
- Take RIGHT CHEST DECORATION (W).
- Use Bracelet; select green gem (X). Take HOOKAH TUBE; place LEFT CHEST DECORATION and RIGHT CHEST DECORATION. Take RUNE STONES.
- Place RUNE STONES and SPELL SCROLL; solution (Y).
- Take GENIE'S LAMP.
- Go left.
- Use GENIE'S LAMP (Z).
- Take BROKEN SPHERE and STONE (A).
- Place HOOKAH TUBE (B); take FABRIC (C).
- Examine crystal (D). Read book (E); take LION SYMBOL.
- Walk down.
- Place LION SYMBOL (F); take SMITHY KEY and GOLDEN EYE.
- Walk down.
- Use SMITHY KEY; take STONECUTTER (G).
- Walk left, then forward.
- Place GOLDEN EYE (H); take GENIE FIGURINE (I).
- Use STONECUTTER (J); take SKULL BOWL.
- Walk down.
- Use SKULL BOWL (K); receive BOWL WITH SAND. Examine shield; use FABRIC. Receive SEIVE.
- Walk down.
- Place PILE OF WOOD; use Bracelet. Use red gem; examine orb (L). Place BROKEN SPHERE, BOWL WITH SAND, and SEIVE.
- Solution (M): (A-B)-(B-C)-(C)-(E-D-F)-(G-F).
- Take GLASS SPHERE.
- Walk left, then forward.
- Place GENIE FIGURINE and GLASS SPHERE; solution (N).
- Take CHARGED TELEPORTATION SPHERE.
- Place CHARGED TELEPORTATION SPHERE (O).
- Go (P).
Chapter 4: The Sandman
- Take COAT OF ARMS (Q).
- Play HOP; receive TELEKENISIS GLOVE (R).
- HOP alternative solution (S).
- Use TELEKENISIS GLOVE (T).
- Solution (U).
- Walk forward.
- Take HUGE FEATHERS (V).
- Take LANTERN (W). Use JAR OF OIL (X); receive LAVA BRACELET.
- Walk down.
- Place LAVA BRACELET (Y); take note and GLOWING EYE (Z).
- Walk forward.
- Give CRYSTAL SPEAR and GLOWING EYE (A).
- Solution (B).
- Walk left.
- Examine scene.
- Place COAT OF ARMS; take GOLDEN BOOMERANG and DIAMOND DAGGER (C).
- Take BONE WING (D).
- Walk down.
- Use GOLDEN BOOMERANG (E); take SANDMAN EMBROIDERY.
- Walk forward.
- Use SANDMAN EMBROIDERY and YARN WITH NEEDLE (F).
- Play HOP; receive REVIVING FLOWER (G).
- HOP alternative solution (H).
- Walk down.
- Use REVIVING FLOWER (I); take PRISONER'S SKULL.
- Walk down.
- Examine; use DIAMOND DAGGER and STONE (J). Give PRISONER'S SKULL; take STAFF Of INVISIBILITY.
- Walk forward twice.

- Use STAFF OF INVISIBILITY (K).
- Walk forward.
- Examine hole (L).
- Use SICKLE; solution (M).
- Take note, COLLAR KEY, LEVIATION POWDER, and DENSE CLOTH (N).
- Walk down twice.
- Use COLLAR KEY; take SILVER INGOT (O).
- Walk down.
- Play HOP; receive NAMEPLATES (P).
- HOP alternative solution (Q).
- Use DENSE CLOTH; take note and SPHERE OF FOG (R).
- Walk forward 3x.
- Place NAMEPLATES; solution (S). Take SOUL CRYSTALS; note, and SOUL BAIT.
- Examine (T).
- Solution (U).
- Take DRAINED ARTIFACT.
- Walk down.
- Place LANTERN and SOUL BAIT. Use Bracelet; select green gem. Push souls into lantern with orb (V); take LANTERN OF SORROW.
- Walk forward.
- Place SILVER INGOT, SPHERE OF FOG, and LANTERN Of SORROW; examine book.
- Solution (W): (A)-(B-A)-(C-A)-(D)-(C-D).
- Take BOMB OF LIGHT.
- Use BOMB OF LIGHT (X).
- Use DRAINED ARTIFACT (Y); receive ANTI-BARRIER ARTIFACT.
- Use LEVITATION POWDER and ANTI-BARRIER ARTIFACT (Z).
- Examine; use DIAMOND DAGGER (A). Receive DAGGER WITH RESIN.
- Take BONE NECKLACE (B); place BONE WING, DAGGER WITH RESIN, and HUGE FEATHERS (C).
- Go left.
- Take MAGNIFYING GLASS and note (D); use SOUL CRYSTAL (E).
- Take FAIRY PLAQUE (F).
- Walk down.
- Place FAIRY PLAQUE; solution (G). Open book; use MAGNIFYING GLASS. Take PAPER; take note and BROKEN PIPE.
- Walk left.
- Give BROKEN PIPE (H); play HOP. Open case; take LUTE.
- Walk down.
- Use LUTE (I).
- Solution is random (J).

- Play HOP; receive MAGIC SEAL (K).
- Walk left, then forward.
- Take CHALK (L).
- Talk; give BOOK OF FAIRY TALES (M). Take PENDULUM SCHEMATIC.
- Examine (N); play HOP. Take BATON.
- Walk down.
- Use MAGIC SEAL (O).
- Examine book (P); take paper. Use PAPER and CHALK. Take PENDULUM HAND SCHEMATIC.
- Give BATON (Q); receive HELMET HORN.
- Walk down.
- Place BONE NECKLACE (R) and HELMET HORN (S); take SPEAKING HORN (T).
- Go left, then forward.
- Place PENDULUM HAND SCHEMATIC (U); solution (V).
- Take PENDULUM HAND MOLD.
- Walk down.
- Place PENDULUM SCHEMATIC, SPEAKING HORN, and PENDULUM HAND MOLD (W).

- Solution (X-Y).
- Use SOUL CRYSTAL; take DISENCHANTED SOUL CRYSTALS (Z).
- Go (A).
- Give DISENCHANTED SOUL CRYSTALS (B).
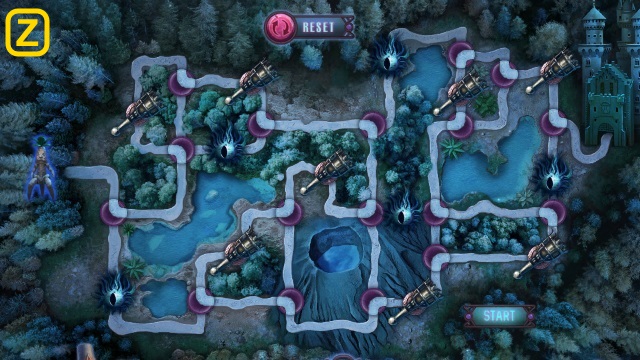
- Solution (C): move fireball past hands.
- Congratulations! You have completed The Forgotten Fairy Tales: The Spectra World.
Created at: 2017-06-18