

Walkthrough Menu
- General Tips
- Chapter 1: The Virus
- Chapter 2: The Dragon Palace
- Chapter 3: The Tablet of Knowledge
- Chapter 4: The White Hammer
- Chapter 5: The Sanctuary of Knowledge
General Tips
- This is the official guide for The Legacy: The Tree of Might.
- This guide won't tell you when to zoom into a location; the screenshots show each zoom scene.
- Hidden-object puzzles are referred to as HOPs. Only the locations of the HOPs will be shown.
- Use the Map to fast travel to a location.
Chapter 1: The Virus
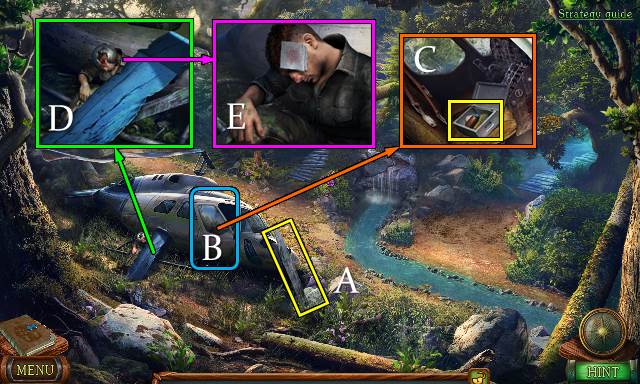
- Take A PIECE OF BLADE (A).
- Remove door (B).
- Take ANTISEPTIC and BANDAGE (C).
- Unroll BANDAGE; use ANTISEPTIC. Take ANTISEPTIC BANDAGE.
- Use A PIECE OF BLADE (D).
- Remove helmet and use ANTISEPTIC BANDAGE (E).
- Receive KNIFE.
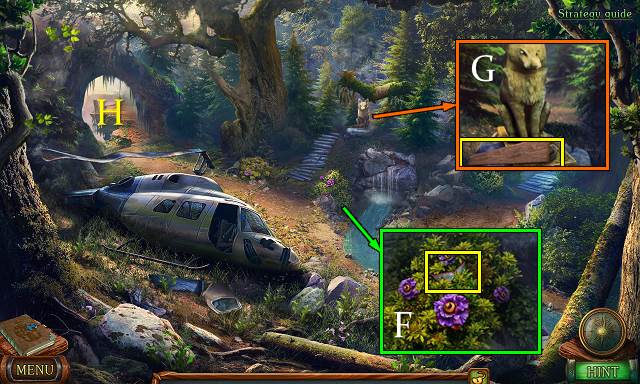
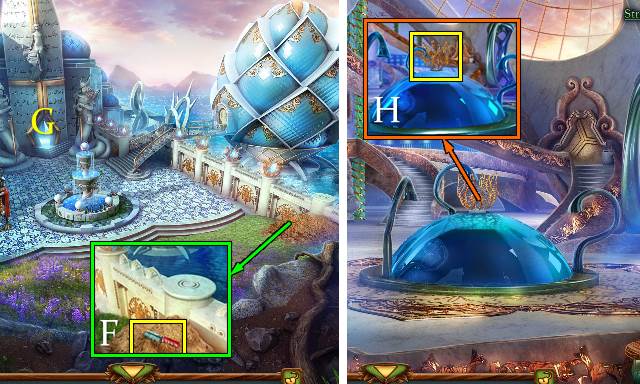
- Take BROKEN GLASSES (F).
- Take SOLID BOARDS 1/2 (G).
- Go (H).
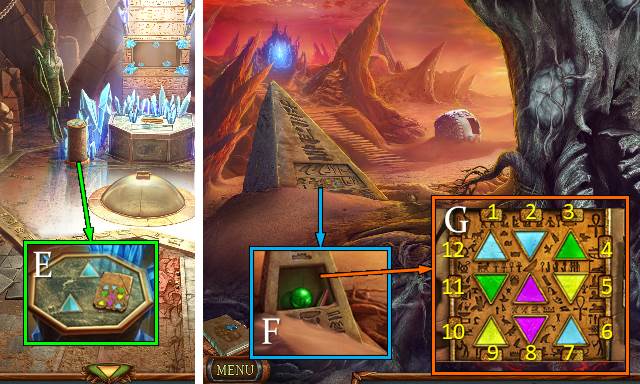
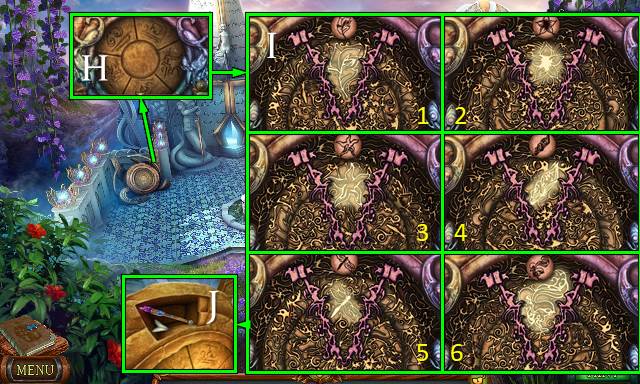
- Use KNIFE; take SOLID BOARDS 2/2 and GIRL FIGURINE 1/4 behind it (I).
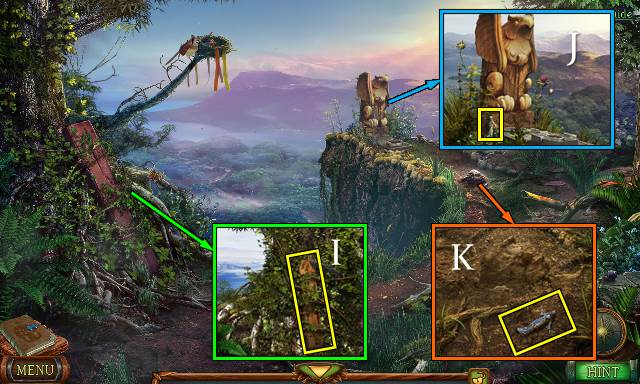
- Take GIRL FIGURINE 2/2 (J).
- Take GIRL FIGURINE 3/3 (K).
- Walk down.
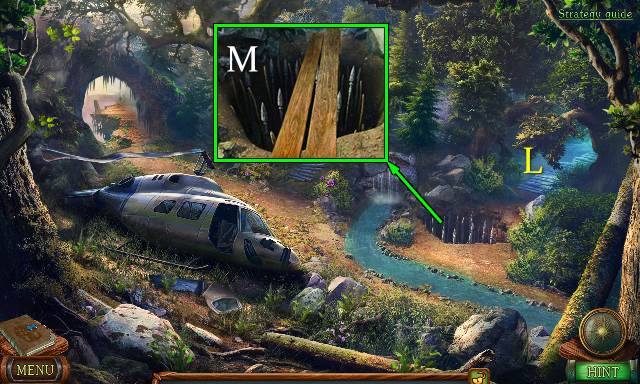
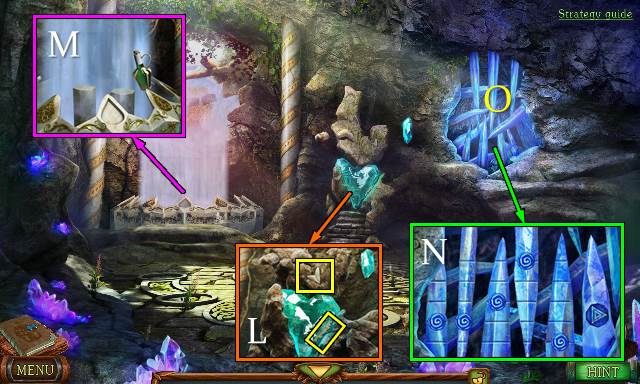
- Go (L).
- Place SOLID BOARDS (M).
- Go (L).
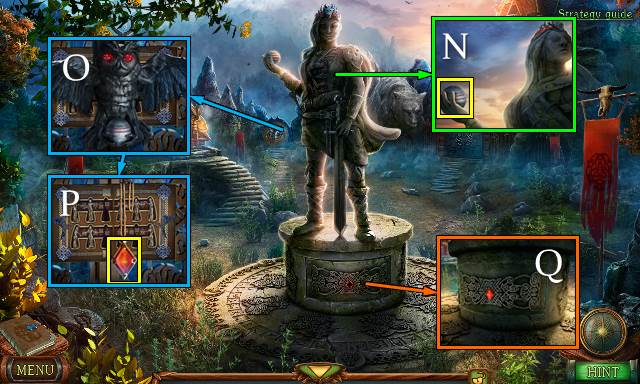
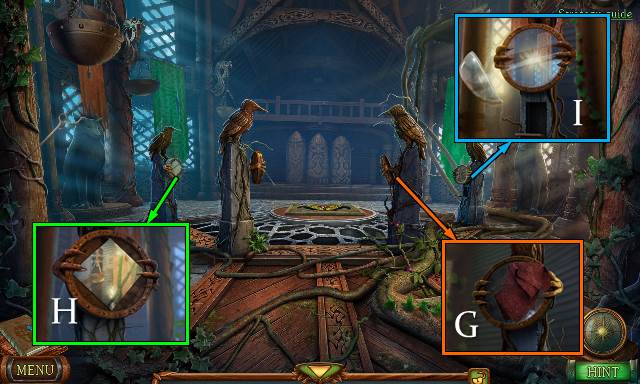
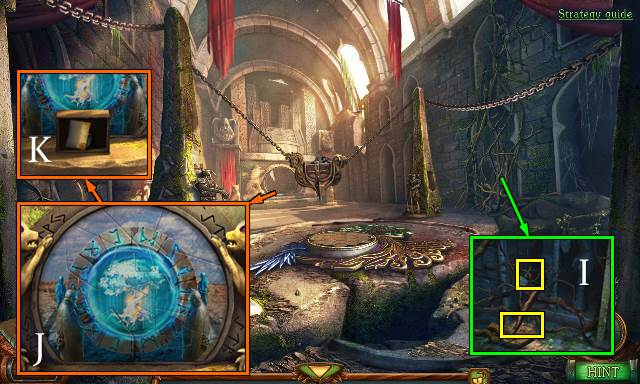
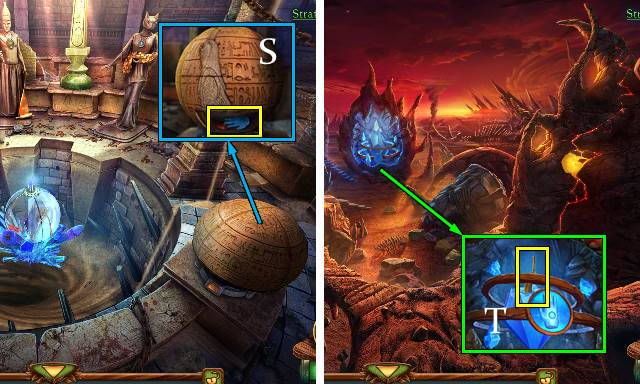
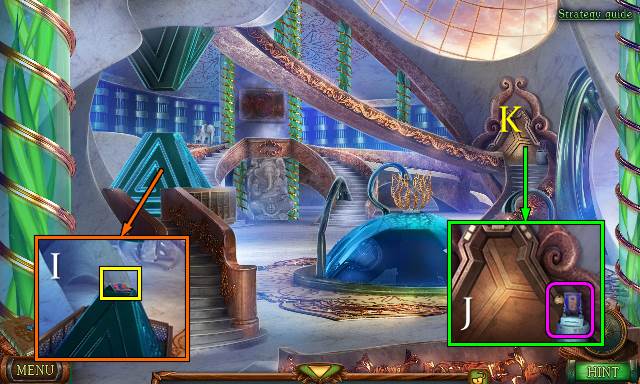
- Take STONE BALL (N).
- Place STONE BALL (O).
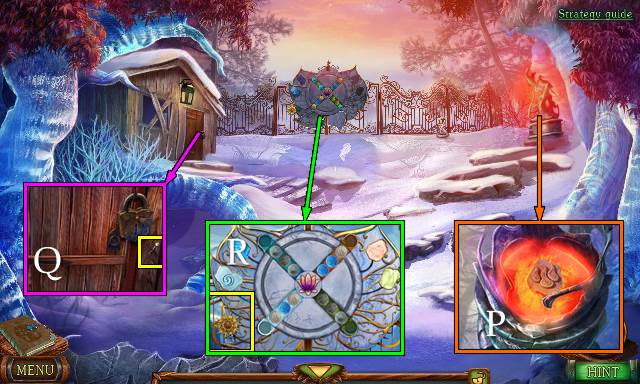
- Take RUBY (P).
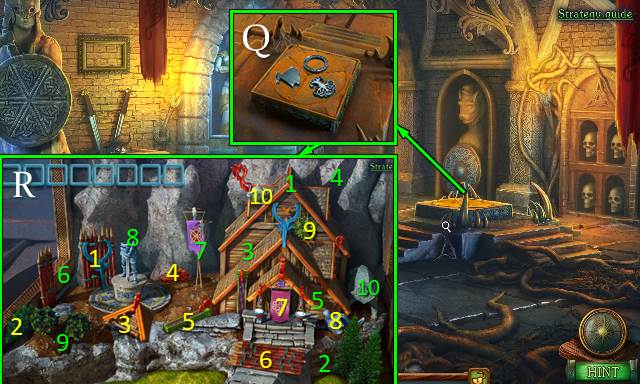
- Place RUBY (Q).
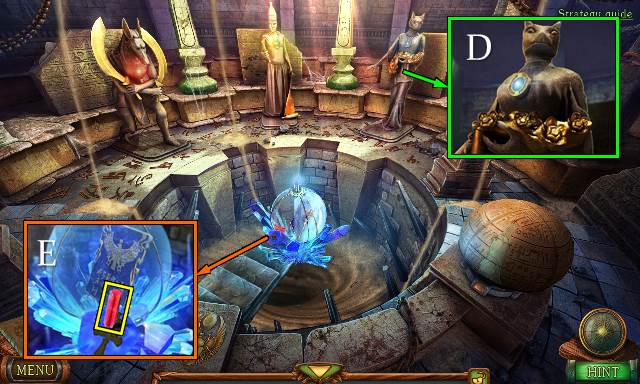
- Take manuscript; take GIRL FIGURINE 4/4 (R).
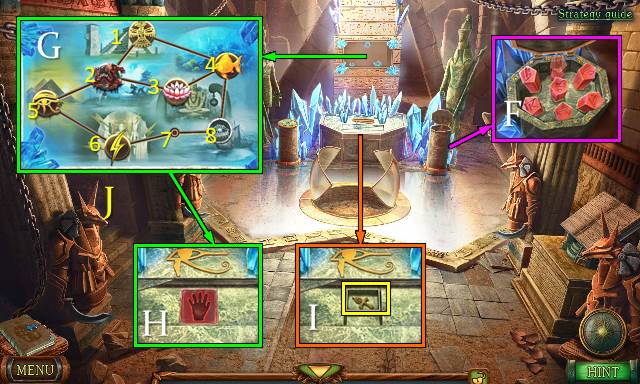
- Place GIRL FIGURINE (S).
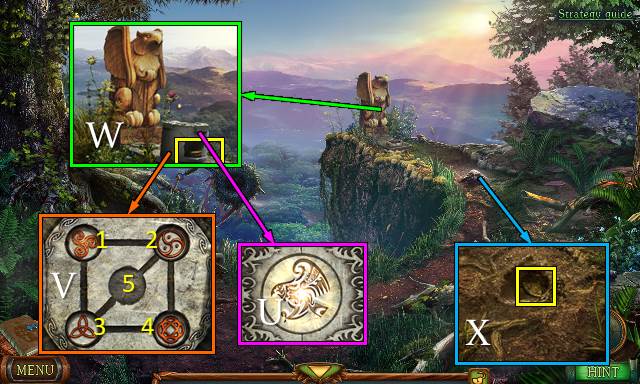
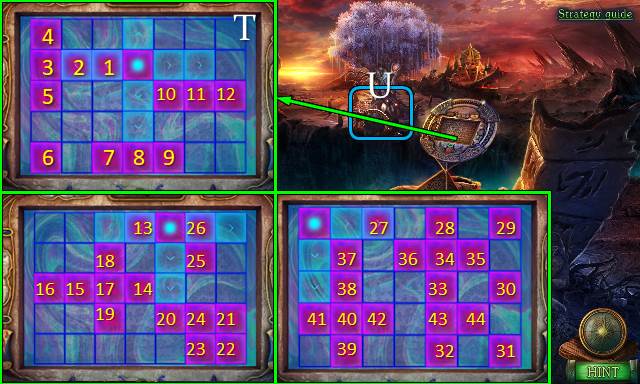
- Solution (T): (2-6)-(3-8)-(5-4)-(5-7)-(6-7).
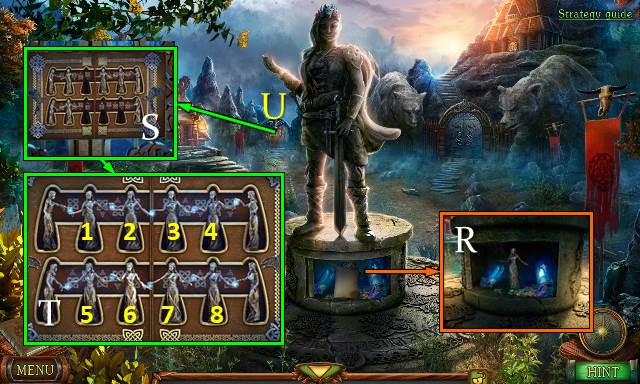
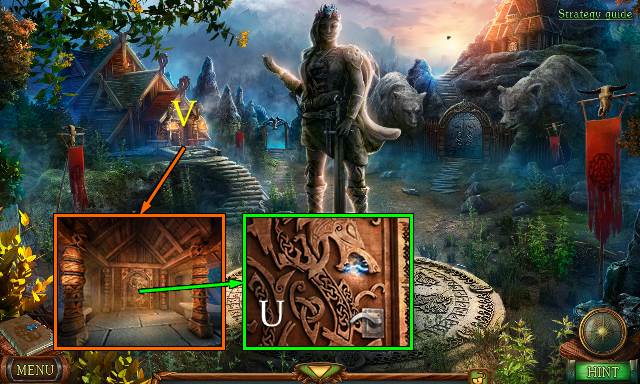
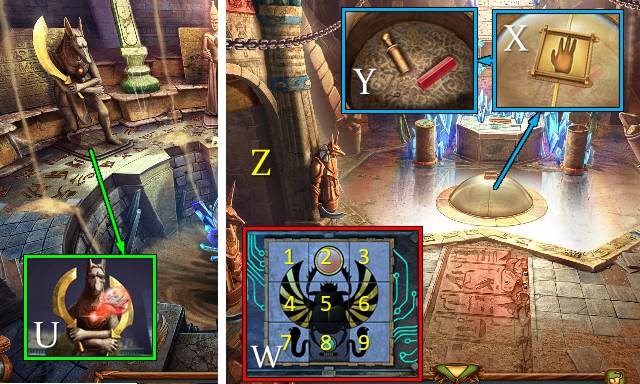
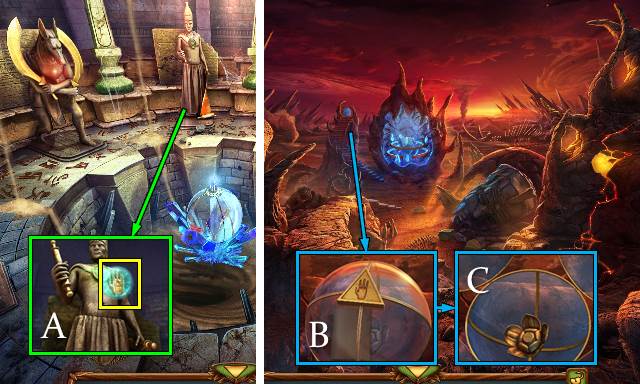
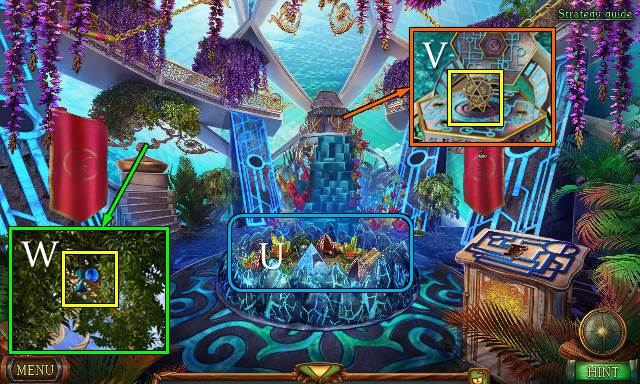
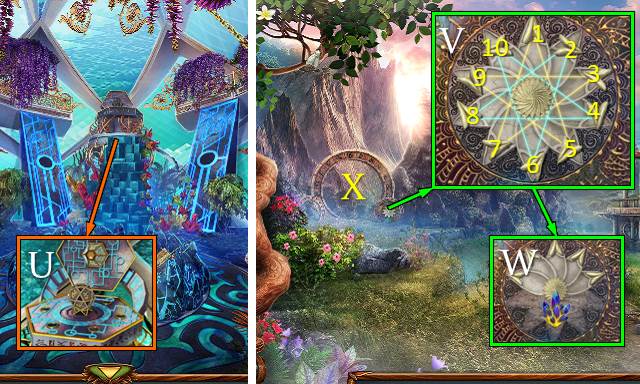
- Go (U).
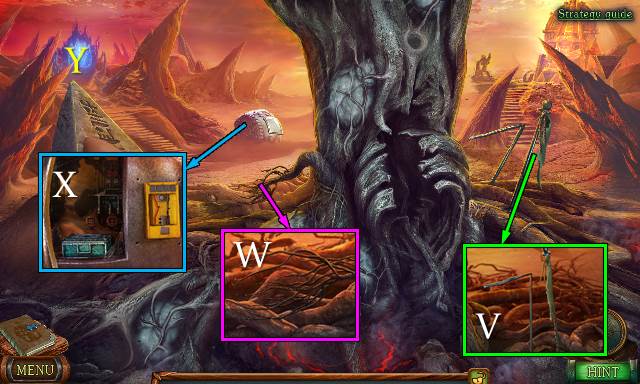
- Talk (V).
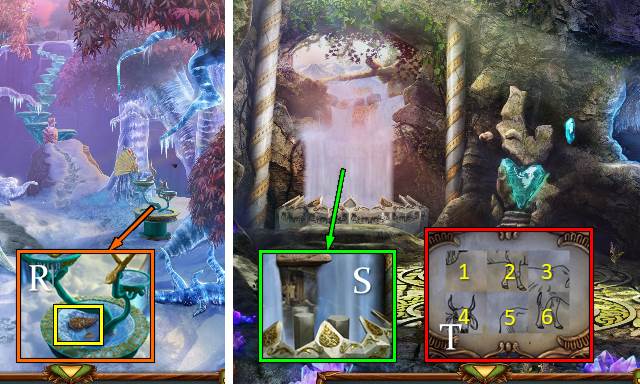
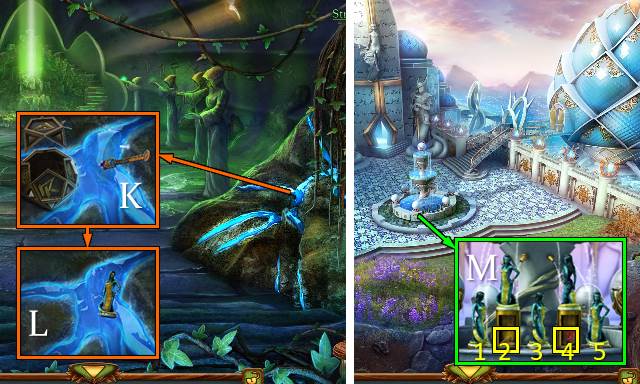
- Use KNIFE; receive ROPE. Remove tarp (W).
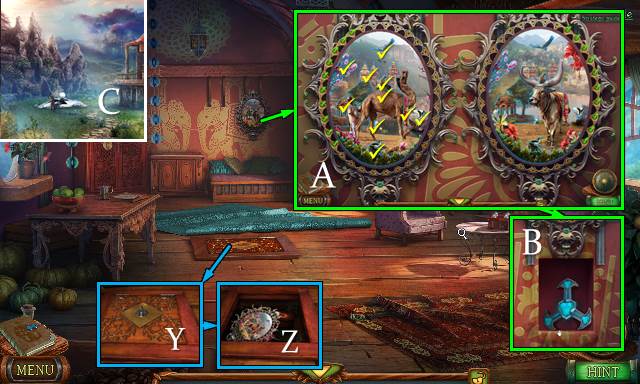
- Play HOP.
- Solution (X): Y-Z-Z-Y-Y-Z-Z-Y-A.
- Solution (B): (4-7)-(3-8)-(2-4)-(5-6)-(9-2)-(1-6).
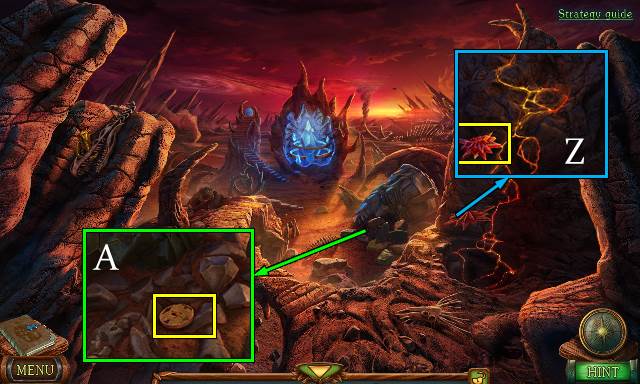
- Receive GRAPPLING HOOK.
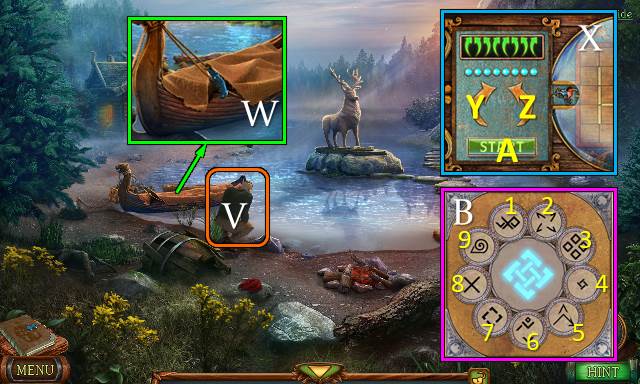
- Go to Steep.
- ROPE on GRAPPLING HOOK; receive ROPE WITH A HOOK.
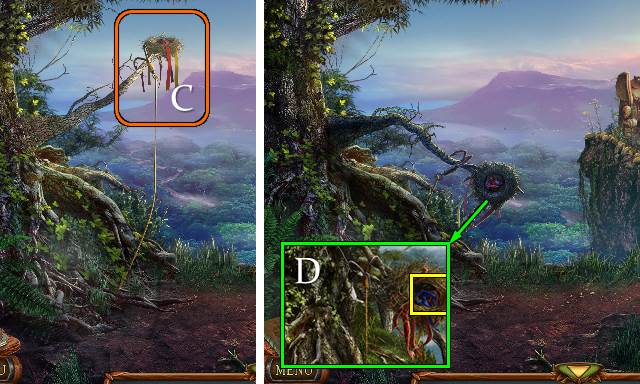
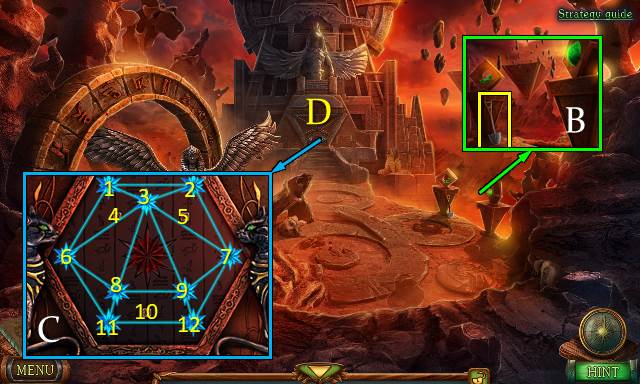
- Use ROPE WITH A HOOK (C).
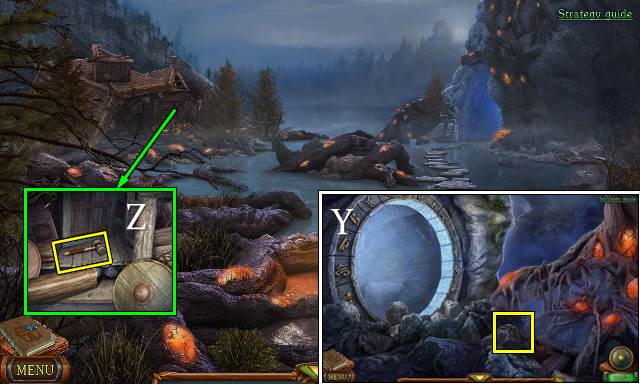
- Take FLAGGING TAPES and DEER STAMP (D).
- Go to Lakeside.
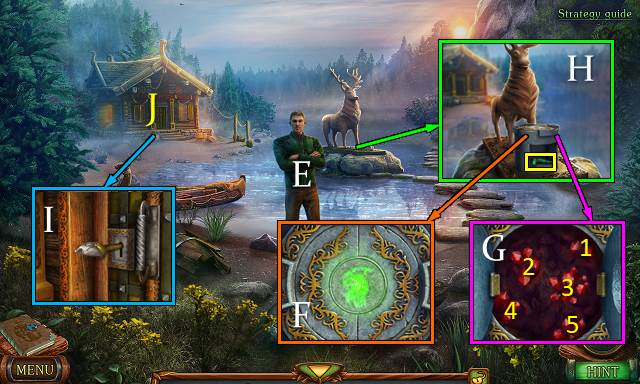
- Offer FLAGGING TAPES (E).
- Receive KEY TO THE HOUSE.
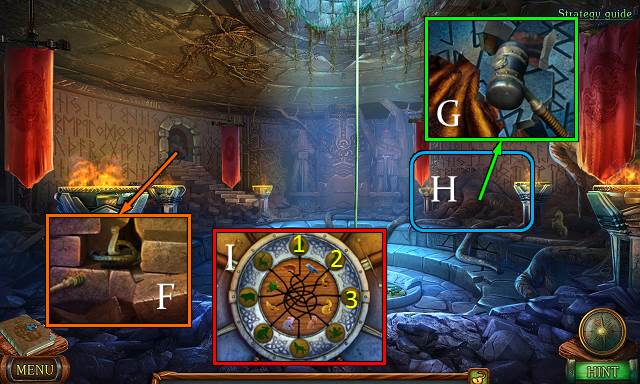
- Place DEER STAMP (F).
- Select 1-5 (G).
- Take EMERALD HORN (H).
- Use KEY TO THE HOUSE (I).
- Go (J).
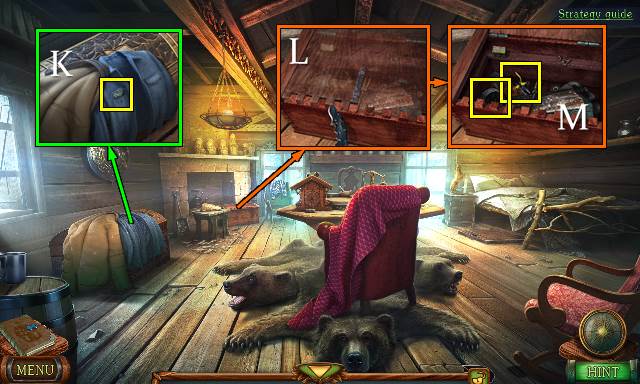
- Take HAIRPIN; remove coats (K).
- Use KNIFE (L); take PLIERS and ROLL OF WIRE (M).
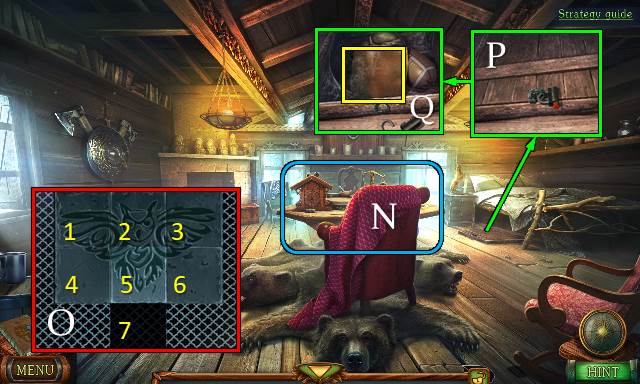
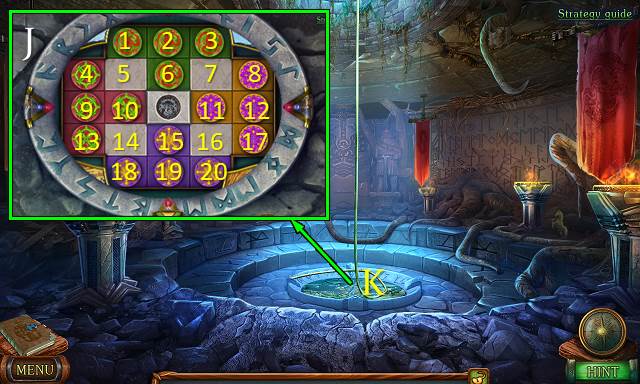
- Play HOP (N).
- Solution (O): 5-2-1-4-5-2-3-6-5-2-1-4-5-7.
- Receive KEY.
- Use KEY and PLIERS (P).
- Open hatch; take METAL PLATE and LIGHTER (Q).
- Walk down and go right.
- Bend ROLL OF WIRE and use PLIERS twice; receive HOOK and ROLL OF WIRE.
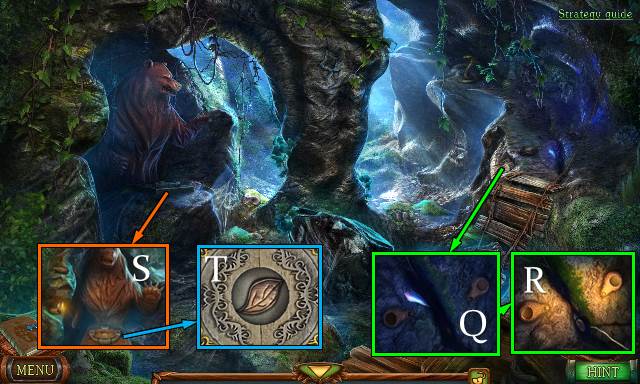
- Try to take fang (Q).
- Use LIGHTER and use HOOK twice. Receive WOLF STAMP and WOLF FANG (R).
- Use LIGHTER (S); take WOODEN LEAVES 1/5 (T).
- Walk down twice.
- Place WOLF FANG; open door (U).
- Go (V).
- Use HAIRPIN (W); receive WOODEN LEAVES 2/5.
- Open compartment; take WOODEN LEAVES 3/5. Use KNIFE (X).
- Take WOODEN LEAVES 4/5 (Y).
- Take WOODEN LEAVES 5/5 (Z).
- Walk down twice.
- Place WOLF STAMP (A).
- Solution (B): 4-3-2-3-1-5-3-2-4.
- Take SAPPHIRE HORN (C).
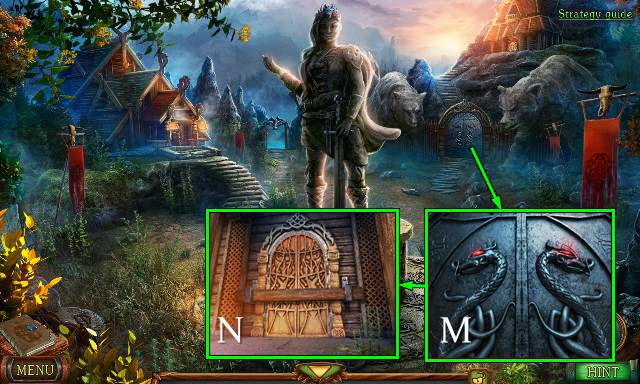
- Go to Prospector's House.
- Place WOODEN LEAVES (D).
- Solution (E): down-rightx2-down-left-downx2-right-upx2-leftx5-down-left-down-right-down-leftx3-down-rightx3-down-rightx2.
- Take EAGLE STAMP and RAG (F).
- Go to Small Temple.
- Use RAG (G).
- Place METAL PLATE (H).
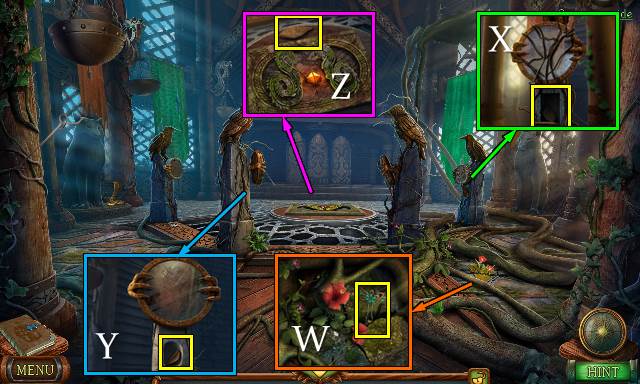
- LENS from BROKEN GLASSES.
- Use LENS (I).

- Open compartment (J).
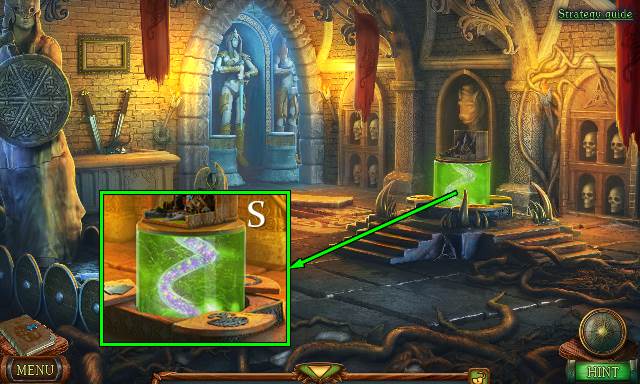
- Solution (K).
- Take DRAGON EYE (L).
- Walk down.
- Place DRAGON EYE (M).
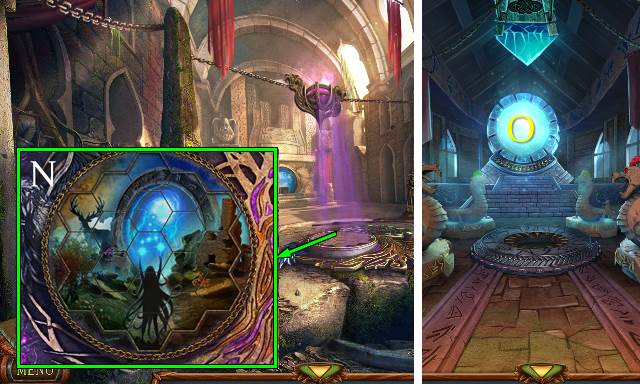
- Remove beam; go (N).
Chapter 2: The Dragon Palace
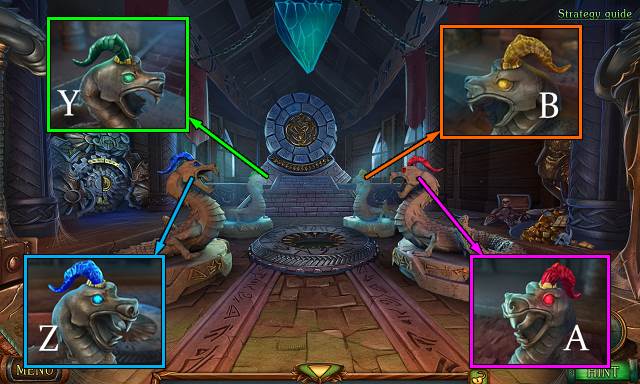
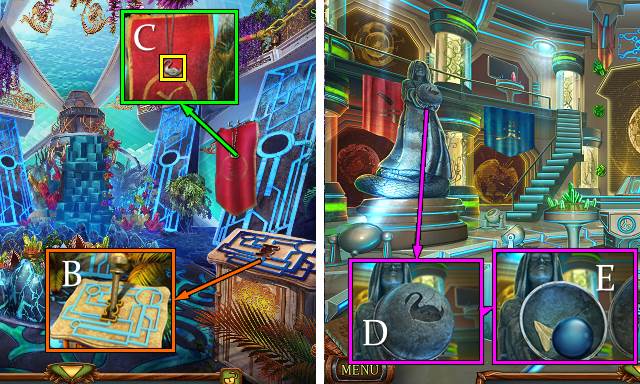
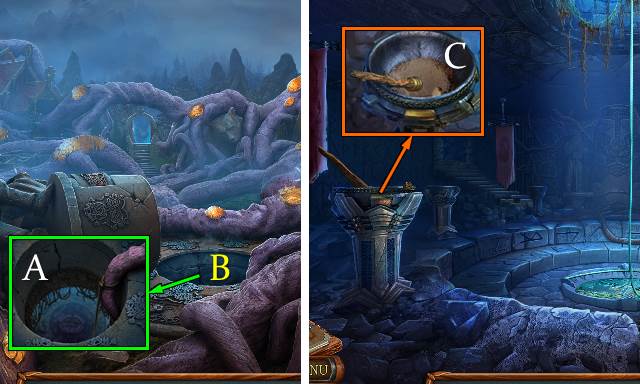
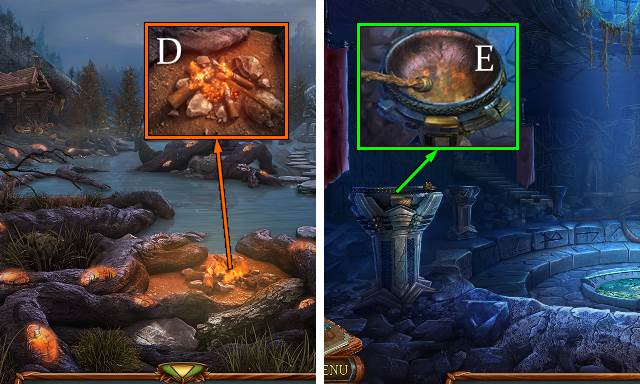
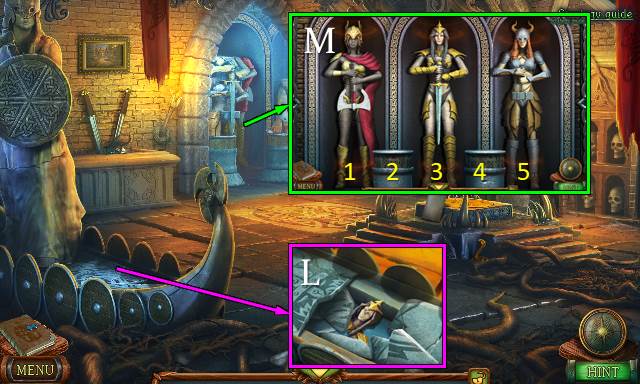
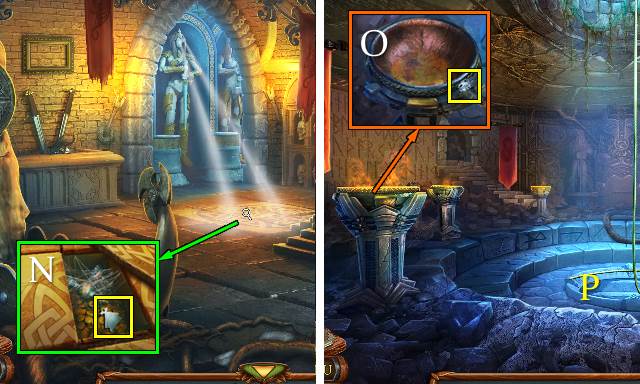
- Take PICKAXE, note and BACKPACK (O).
- Take BEAR STAMP with KNIFE (P).
- Go to Cave.
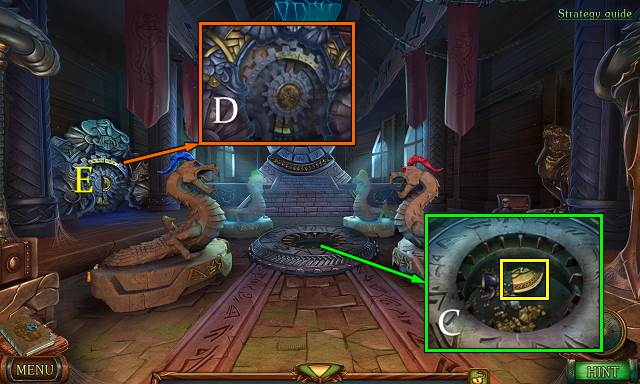
- Place BEAR STAMP (Q).
- Solution (R).
- Take RUBY HORN (S).
- SPADE from BACKPACK.
- Use PICKAXE. Place BACKPACK and use SPADE; take BACKPACK WITH COAL (T).
- Go to Steep.
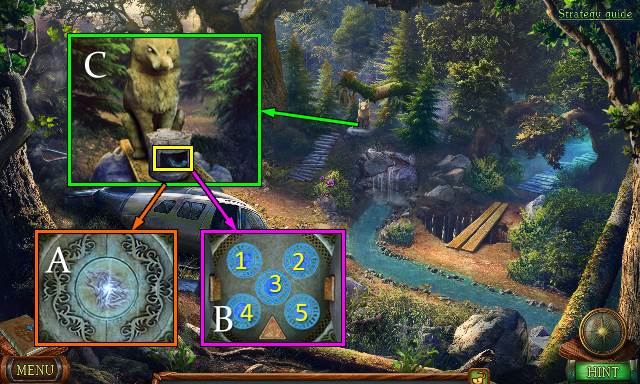
- Place EAGLE STAMP (U).
- Solution (V): 3-4-2-5-3-4-2-1-3-5.
- Take OPAL HORN (W).
- Use SPADE; take PARTS OF GOLDEN DISC 1/2 (X).
- Go to Main Hall of the Dragon Palace.
- Place EMERALD HORN (Y).
- Place SAPPHIRE HORN (Z).
- Place RUBY HORN (A).
- Place OPAL HORN (B).
- Take manuscript and PARTS OF GOLDEN DISC 2/2 (C).
- Place PARTS OF GOLDEN DISC (D).
- Go (E).
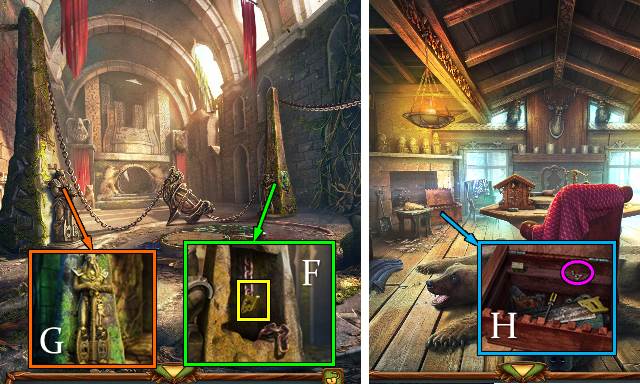
- Use PICKAXE; take SAW HANDLE. Use ROLL OF WIRE and PLIERS (F).
- Pull axe (G).
- Go to Prospector's House.
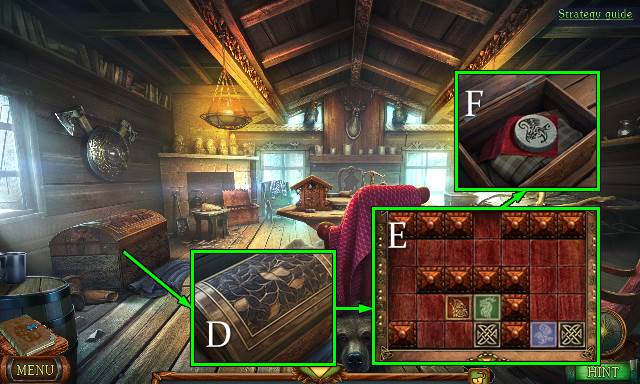
- Place SAW HANDLE. Place 3 screws and use screwdriver. Take SAW (H).
- Go to Upper Hall of the Dragon Palace.
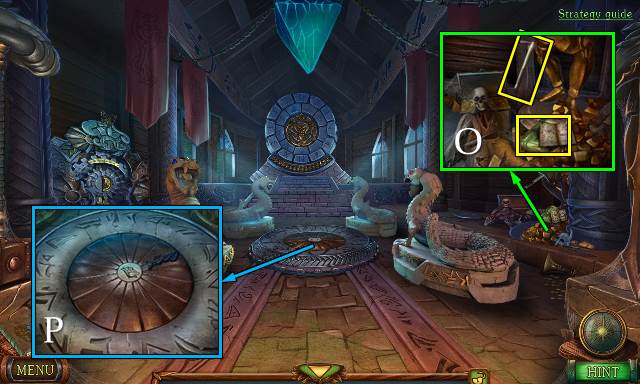
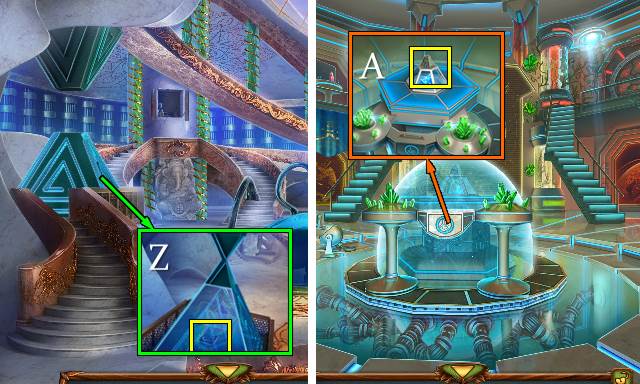
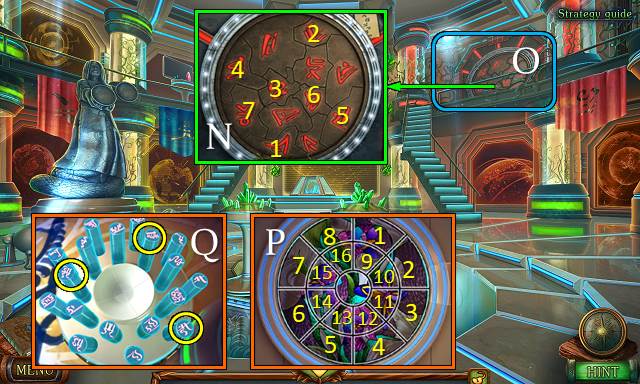
- Use SAW. Take BRUSH and SAWDUST (I).
- Use BRUSH. Solution (J).
- Touch mural; take manuscript and GLASS VESSEL (K).
- Go to Helicopter Crash Site.
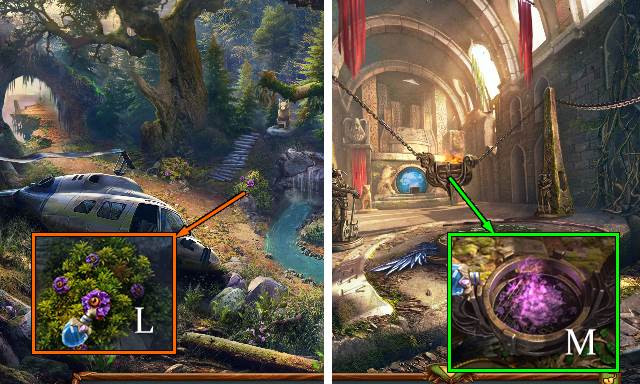
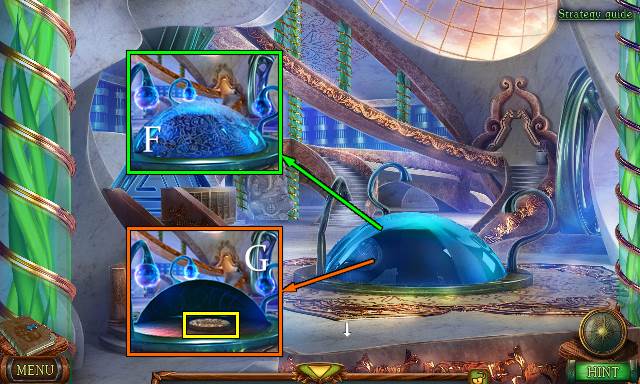
- Use GLASS VESSEL (L); receive FLOWER POLLEN.
- Go to Upper Hall of the Dragon Palace.
- Use BACKPACK WITH COAL, SAWDUST, LIGHTER and FLOWER POLLEN (M).
- Solution (N).
- Go (O).
Chapter 3: The Tablet of Knowledge
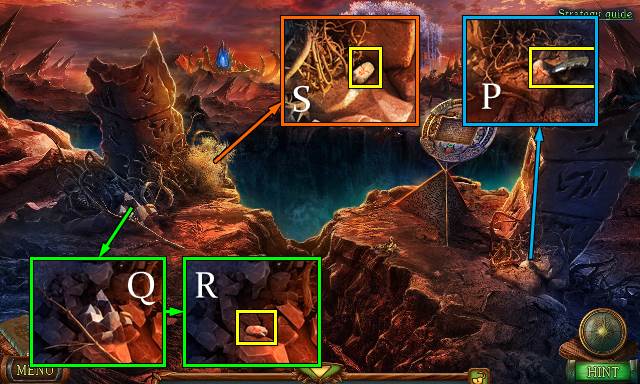
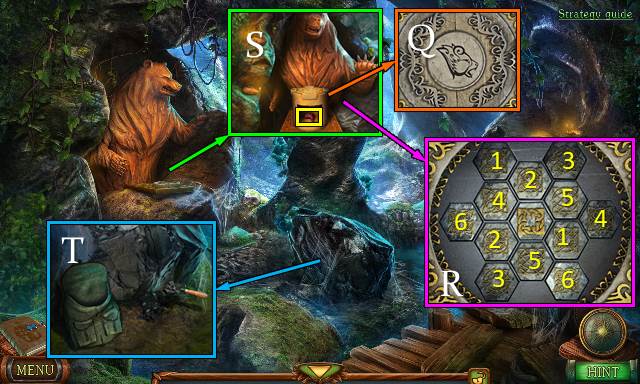
- Take RUNIC STONES 1/3 with KNIFE (P).
- Take BRANCH; move rocks (Q).
- Take manuscript and RUNIC STONES 2/3 (R).
- Use BRANCH; take RUNIC STONES 3/3 (S).
- Place RUNIC STONES (T); solution.
- Play HOP (U).
- Take METAL ROD; take STRAP OF CLOTH with KNIFE (V).
- Take TWO THIN TWIGS with KNIFE (W).
- Use METAL ROD; connect wires. Take METAL CASE (X).
- Go (Y).
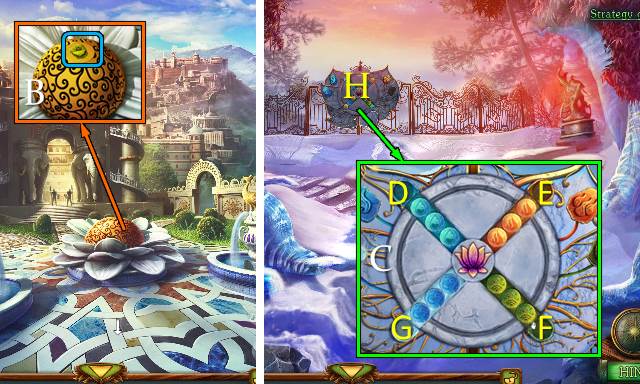
- Take STAR; use METAL ROD (Z).
- Move rocks; take DISC WITH SYMBOLS 1/2 and ROD 1/6 underneath it (A).
- Walk down and right.
- Take SPADE (B).
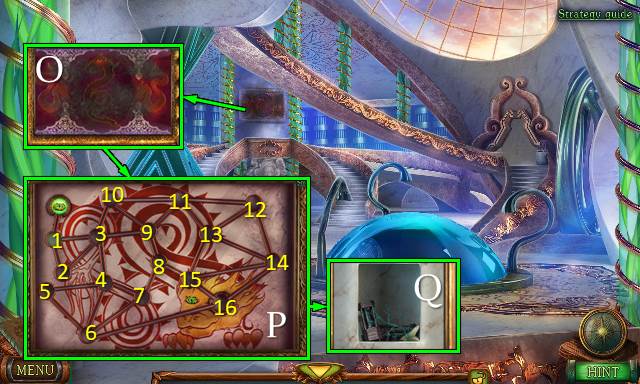
- Place STAR (C). Solution: (11-10)-(2-11)-(12-8)-(9-12)-(5-2)-(1-9)-(3-1)-(10-3).
- Go (D).
- Take STONE TABLET (E).
- Walk down twice.
- Use SPADE (F).
- Place STONE TABLET (G). Solution: 6-2-12-9-7-4.
- Take manuscript, GREEN BALL and ROD 2/6 (F).
- Go right.
- Replace broken GREEN BALL (H).
- Play HOP (I).
- Solution (J).
- Solution (K).
- Receive CAPSULE.
- Walk down and left.
- Open CAPSULE and place TWO THIN TWIGS and STRAP OF CLOTH; receive HOLDER WITH THE CAPSULE.
- Use HOLDER WITH THE CAPSULE; receive ENERGY CAPSULE (L).
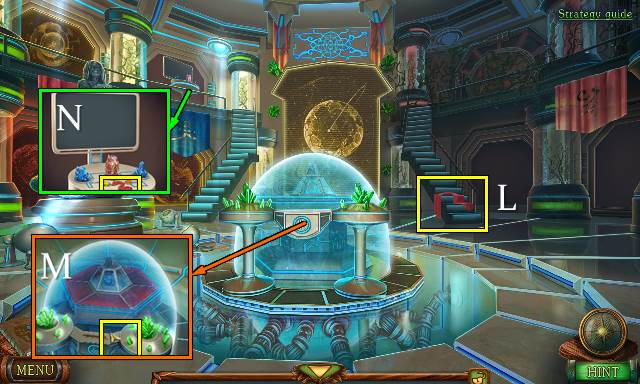
- Go to Control Hall.
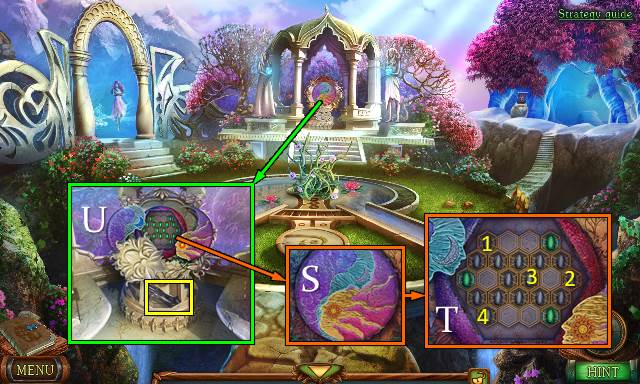
- Push buttons; place ENERGY CAPSULE (M).
- Take BRACELET (N).
- Walk down.
- Place BRACELET; take DISC WITH SYMBOLS 2/2 (O).
- Go (P).
- Place DISC WITH SYMBOLS (Q). Solution: 1-2-2-4-4-5-5-4-2-5-5-5-2-2-3-3-3-4-4-5-5.
- Go (R).
- Turn discs; take UNUSUAL PALM and ROD 3/6 (S).
- Go to Lone Rock.
- Place UNUSUAL PALM; take SWORD (T).
- Go to Storage.
- Place SWORD; take METAL FRAGMENT (U).
- Walk down.
- METAL FRAGMENT on METAL CASE.
- Solution (V): 9-8-5-4-1-2-3-6-9-8-5-4-7-8.
- Take UNUSUAL PALM and ROD 4/6.
- Place UNUSUAL PALM (X); take SCROLL and ROD 5/6 (Y).
- Go (Z).
- Place SCROLL; take UNUSUAL PALM (A).
- Go to Lone Rock.
- Place UNUSUAL PALM (B); take manuscript and FLOWER (C).
- Go to Storage.
- Place FLOWER (D).
- Take ROD 6/6 (E).
- Walk down.
- Place ROD (F).
- Solution (G): 6-5-2-1-4-8-7-6-5-2-3-4-1-2-3-4-8-7.
- Push plate (H).
- Take SARCOPHAGUS KEY (I).
- Go (J).
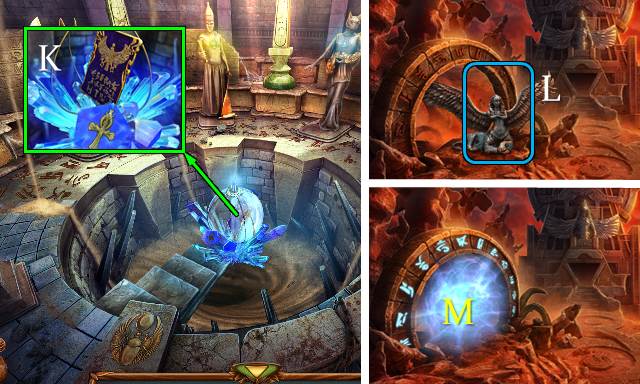
- Place SARCOPHAGUS KEY; take TABLET OF KNOWLEDGE (K).
- Walk down twice.
- Use TABLET OF KNOWLEDGE (L).
- Go (M).
Chapter 4: The White Hammer
- Receive LIST OF ITEMS.
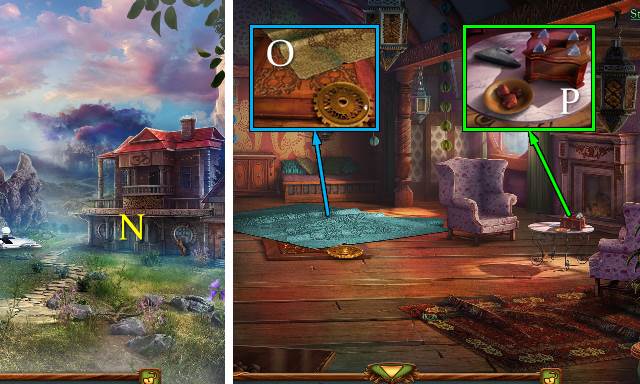
- Go (N).
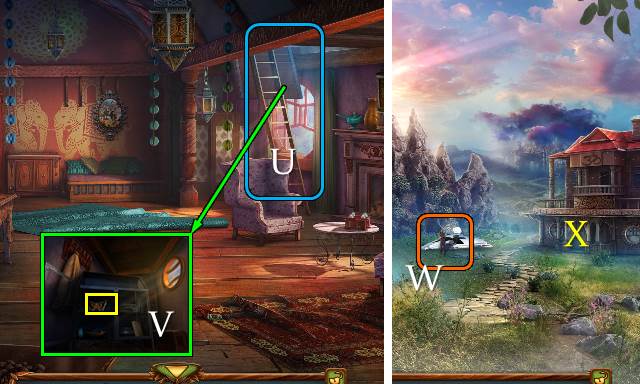
- Take GEAR WHEEL; move rug (O).
- Take FOOD and HEADLIGHT (P).
- Walk down.

- Place GEAR WHEEL; open door (Q).
- Play HOP (R).
- Receive LADDER.
- Place FOOD; take WHEEL (S).
- Go (T).
- Place LADDER (U).
- Open cabinet; take STEERING WHEEL (V).
- Walk down.
- HEADLIGHT, WHEEL and STEERING WHEEL on LIST OF ITEMS; receive ITEMS OF THE VEHICLE.
- Offer ITEMS OF THE VEHICLE (W).
- Receive KEY.
- Go (X).
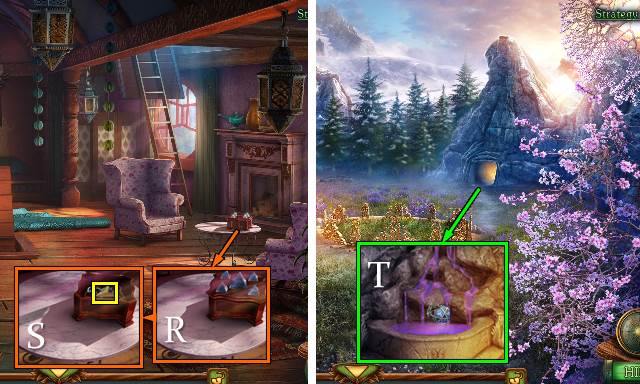
- Use KEY (Y); take PAINTING (Z).
- Place PAINTING. Solution (A).
- Take POWER SUPPLY UNIT (B).
- Walk down.
- Offer POWER SUPPLY UNIT (C).
- Receive CARD FOR THE BRIDGE ACTIVATION.
- Take FIRE STONE (D).
- Take LONG SPEAR (E).
- Place CARD FOR THE BRIDGE ACTIVATION (F).
- Go (G).
- Receive ACCES CARD TO THE FOREST.
- Take BLUE RIBBON (H).
- Place ACCESS CARD TO THE FOREST (I).
- Go (J).
- Take manuscript and CARD FOR THE STAIRS ACTIVATION (K).
- Take CRESCENT SYMBOL with LONG SPEAR (L).
- CARD FOR THE STAIRS ACTIVATION solution (M): (2-6)-(1-7)-(5-6)-(3-6)-(3-4).
- Place CARD FOR THE STAIRS ACTIVATION (N).
- Go (O).
- Place FIRE STONE; take CHARGED FIRE STONE (P).
- Take THIN NAIL (Q).
- Take SUN SYMBOL (R).
- Walk down twice.
- Place SUN SYMBOL and CRESCENT SYMBOL (S).
- Solution (T): select 1-4.
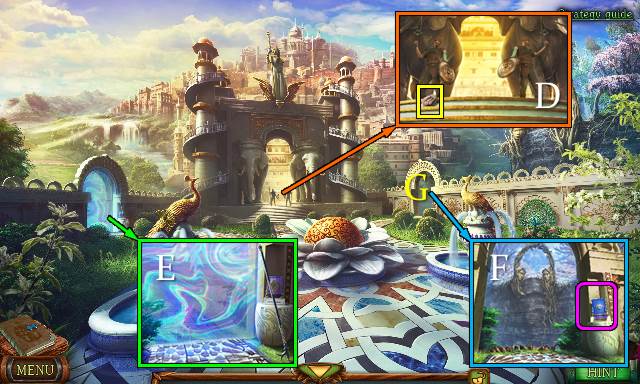
- Take manuscript, PROTECTIVE GLOVE and GLASS DAGGER (U).
- Walk down.

- Bend THIN NAIL and add BLUE RIBBON; receive HOOK ON A RIBBON.
- Use HOOK ON A RIBBON; take KEY (V).
- Go to Garden Gate.
- Use KEY (W).
- Take EMPTY BOTTLE and GARDEN CLIPPERS (X).
- Take WATER STONE with PROTECTIVE GLOVE (Y).
- Walk down.

- Place WATER STONE; take CHARGED WATER STONE (Z).
- Walk down.
- Use GARDEN CLIPPERS; take EARTH STONE (A).
- Walk down.
- Place EARTH STONE; take CHARGED EARTH STONE (B).
- Go to Garden Gate.
- Place CHARGED WATER STONE, CHARGED FIRE STONE and CHARGED EARTH STONE (C).
- Solution: move D-F-turn(D-G)-G-(G-F)-F-(D-G)-G-(D-G)-D-G-E-(E-D)-D-(D-F)-F-(F-E)-E-(E-G)-G-E-(E-G)-G-(G-D)-D-(D-E)-E-G-(E-F)-F-(F-G).
- Go (H).
- Solution (I).
- Take SCARLET DRAGON with GLASS DAGGER (J).
- Go to Sacred Glade.
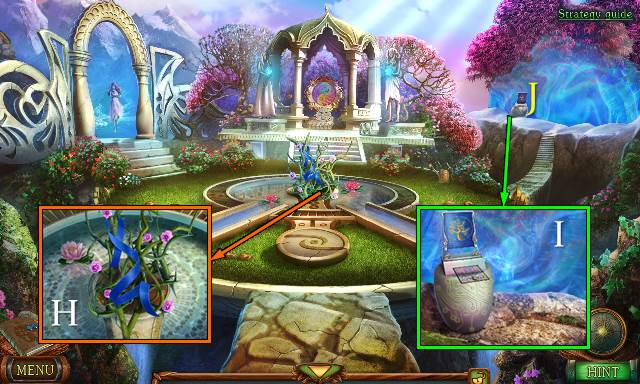
- Offer SCARLET DRAGON (K).
- Receive BREATH OF AIR.
- Go (K).
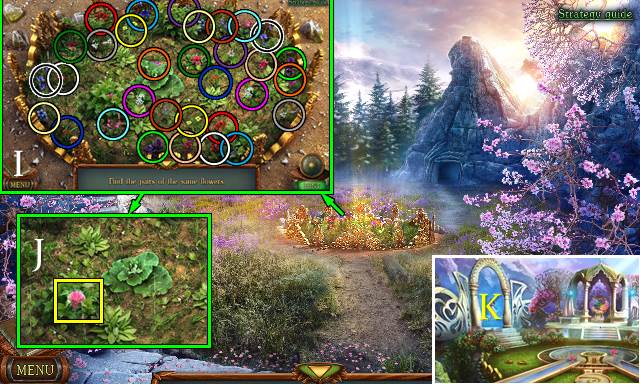
- Take MARBLE PETAL 1/9; take PORCELAIN LOTUS 1/3 with KNIFE (L).
- Take HOT WATER with EMPTY BOTTLE (M).
- Use BREATH OF AIR. Solution (N).
- Go (O).
- Take MARBLE PETAL 2/9 (P).
- Use KNIFE; take PORCELAIN LOTUS 2/3 (Q).
- Go to Crystal Forest.
- Use HOT WATER; take PART OF THE PATTERN and MARBLE PETAL 3/9 (R).
- Walk down and left.
- Place PART OF THE PATTERN (S).
- Play HOP.
- Solution (T): (3-4)-(2-4)-(1-5)-(5-6)-(4-5).
- Receive SUN STONE.
- Go to Mountain Garden.
- Place SUN STONE (U).
- Take PORCELAIN LOTUS 3/3 (V).
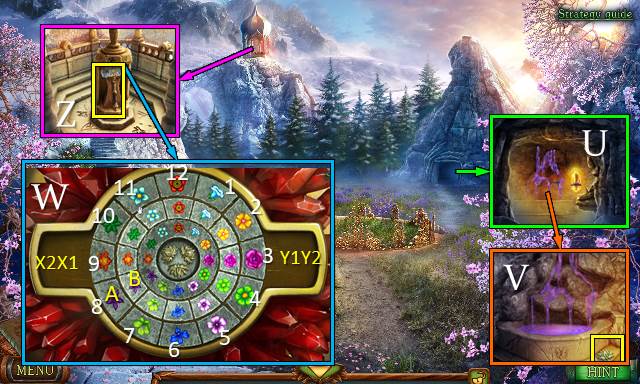
- Place PORCELAIN LOTUS (W). Solution: (A12-9)-A9-(B4-9)-B9-(A12-3)-A3-(A11-2)-(B4-3)-Y2-(A4-3)-A3-(B6-B3)-B3-(A6-10)-(B4-10)-X1-X2-(A4-9)-(B7-9)-A9-B9-(A11-2)-(B8-2)-Y1-Y2-(A11-3)-(B11-3)-A3-B3-(A2-8)-(B2-8)-X1-X2-(A5-9)-(B7-9)-A9-B9-(A3-9)-(B1-9)-Y1-Y2-(A4-3)-(B8-3)-A3-B3-(A6-8)-(B2-8)-X1-X2-(A7-9)-(B5-9)-A9-(A8-10)-X2-(A10-9)-(B11-9)-A9-B9-(B7-8)-X1-X2-(A11-4)-(B11-4)-Y1-Y2-A9-(B11-9)-B9-(A11-3)-(B7-3)-A3-B3-(B4-2)-Y1-Y2-(A12-8)-(B12-8)-X1-X2-(A9-2)-(B9-2).
- Take WHITE HAMMER (Z).
- Go to Altar of Green Flame.
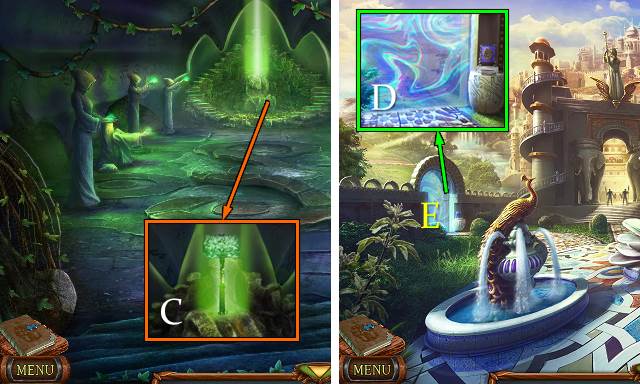
- Place WHITE HAMMER; take GREEN FLAME HAMMER (C).
- Receive ACCES CARD TO THE SANCTUARY.
- Use ACCES CARD TO THE SANCTUARY (D).
- Go (E).
Chapter 5: The Sanctuary of Knowledge
- Move sand; take METAL BRUSH (F).
- Go (G).
- Take FLOWER LANTERN (H).
- Take ACCES CARD TO THE LIBRARY (I).
- Place ACCES CARD TO THE LIBRARY (J).
- Go (K).
- Take FLAG (L).
- Take MARBLE PETAL 4/9 (M).
- Take DRAGON FIGURINE (N).
- Walk down.
- Use FLAG and place DRAGON FIGURINE (O).
- Solution (P).
- Take manuscript, CRYSTAL BRANCH and MARBLE PETAL 5/9 (Q).
- Walk down.

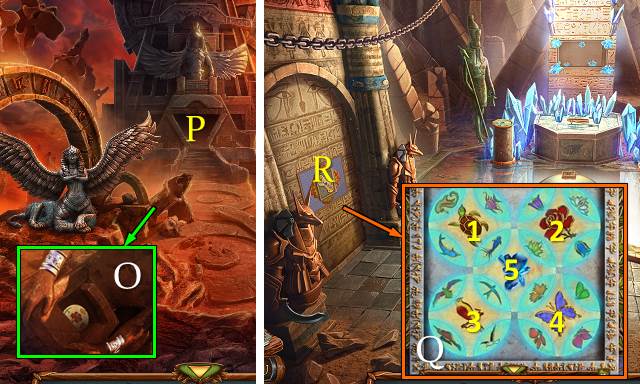
- Place FLOWER LANTERN; take CLUE and PLANET 1/3 (R).
- Place CRYSTAL BRANCH (S). Solution: select 1-5.
- Go (T).
- Play HOP (U); receive ENERGY CRYSTAL.
- Take CONTAINER (V).
- Use KNIFE; take PLANET 2/3 and HOURGLASS (W).
- Go to Library of the Sanctuary of Knowledge.

- Place ENERGY CRYSTAL; scroll through the screens (X).
- Take LEVER; use METAL BRUSH (Y).
- Walk down.
- Place HOURGLASS and KNIFE; take COORDINATES OF OUR WORLD (Z).
- Go forward.
- Place COORDINATES OF OUR WORLD; take INFORMATION MATRIX (A).
- Go to Crystal Greenhouse.
- Place LEVER (B).
- Take SWAN MEDALLION (C).
- Go to the Library of the Sanctuary of Knowledge.
- Place SWAN MEDALLION (D).
- Take manuscript, PLANET 3/3 and MARBLE PETAL 6/9 (E).
- Walk down.
- Place PLANET (F).
- Play HOP.
- Take STONE DISC (G).
- Walk down.
- Place STONE DISC (H).
- Solution (I1-6).
- Take MARBLE PETAL 7/9 and ICE FLAME (J).
- Go to Altar of Green Flame.
- Place CONTAINER and ICE FLAME; receive CONTAINER (K). Take NAGA FIGURINE (L).
- Go to Entrance to the Sanctuary of Knowledge.
- Place NAGA FIGURINE; solution: 1-3-4-4. Take MARBLE PETAL 8/9 and STONE WITH A SYMBOL (M).
- Go forward twice.
- Place CLUE and STONE WITH A SYMBOL. Solution: 1-7 (N).
- Play HOP (O).
- Solution (P): (1-4)-(2-5)-(3-4)-(4-7)-(6-8)-(9-13)-(10-14)-(11-13)-(12-14)-(15-16).
- Solution (Q).
- Receive CRYSTAL PYRAMID.
- Go to Guard's House.
- Place CRYSTAL PYRAMID (R); move items and take MARBLE PETAL 9/9 (S).
- Go to Mountain Garden.
- Place CONTAINER; receive BASE OF THE PORTAL CRYSTAL (T).
- Go to Crystal Greenhouse.
- Place BASE OF THE PORTAL CRYSTAL and INFORMATION MATRIX (U).
- Take PORTAL CRYSTAL.
- Walk down.
- Place MARBLE PETAL. Solution (V): (4-8)-(8-2)-(2-6)-(10-4)-(4-8)-(9-5)-(9-3)-(3-7).
- Place PORTAL CRYSTAL (W).
- Go (X).
- Take HANK OF ROPE (Y).
- Walk down.
- Move beams; take HAMMER (Z).
- Walk down.
- Use HANK OF ROPE (A).
- Go (B).
- Take TORCH (C).
- Go up and forward.
- Use TORCH (D); receive BURNING TORCH.
- Walk down twice.
- Use BURNING TORCH (E).
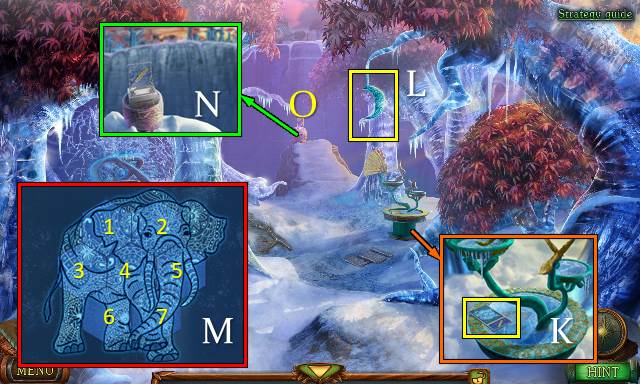
- Use BURNING TORCH; take LEATHER BAND and SYMBOL OF THE GATES (F).
- Use HAMMER (G).
- Play HOP (H).
- Solution (I): turn(1-2)-hare-(1-2)-crow-(1-3)-deer-(1-2)-wolf-(1-3)-fox-owl-frog-bear.
- Receive STAMP OF ODIN.
- Place STAMP OF ODIN (J). Solution. (7-15)-(6-17)-(20-6)-(19-20)-(15-19)-(3-15)-(20-3)-(15-20)-(14-7)-(13-11)-(9-16)-(4-13)-(10-9)-(5-4)-(1-15)-(6-1)-(7-14)-(11-10)-(12-5)-(16-12)-(15-11)-(14-16)-(10-15)-(5-14)-(4-6)-(9-10)-(13-5)-(14-4)-(15-9)-(16-13)-(10-15)-(5-10).
- Go (K).
- Use HAMMER; take BLADE OF A KNIFE and HEAD OF THE STATUE (L).
- Place HEAD OF THE STATUE (M). Solution: (2-5)-(3-5)-(1-3)-(4-2)-(3-1)-(3-4)-(1-4)-(3-1)-(4-3)-(4-1)-(3-1)-(5-3)-(5-4)-(3-4)-(5-3)-(4-5)-(4-3)-(5-3)-(2-5)-(2-4)-(5-4)-(2-5)-(4-2)-(4-5)-(2-5).
- LEATHER BAND on BLADE OF A KNIFE; take HANDMADE KNIFE.
- Use HANDMADE KNIFE; take SYMBOL OF A HOUSE (N).
- Walk down.
- Take SYMBOL OF A TREE with HANDMADE KNIFE (O).
- Go (P).
- Take manuscript; place SYMBOL OF THE GATES, SYMBOL OF A HOUSE and SYMBOL OF A TREE (Q).
- Solution (R).
- Use GREEN FLAME HAMMER (S).
- Congratulations, you have completed The Legacy: The Tree of Might.
Created at: 2018-11-18