

Walkthrough Menu
- General Tips
- Chapter 1: The Ice Twins
- Chapter 2: The Castle of Freedom
- Chapter 3: The Resistance
- Chapter 4: The Ship
- Chapter 5: The Master of Artifacts
- Chapter 6: The Mirror of Treachery
General Tips
- This is the official guide for Witches' Legacy: Dark Days to Come.
- This guide will not mention when you have to zoom into a location; screenshots will show each zoom scene.
- The screenshots will show where to play Hidden-Object Puzzles (HOP).
- Match-2 games can be played instead of HOPs.
- This guide will give step-by-step solutions for all puzzles that are not random. Read the instructions in the game for each puzzle.
Chapter 1: The Ice Twins
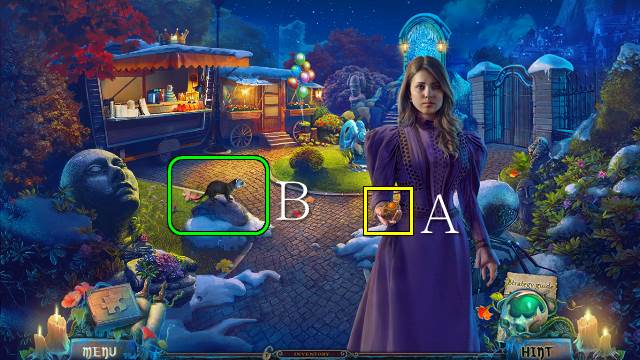
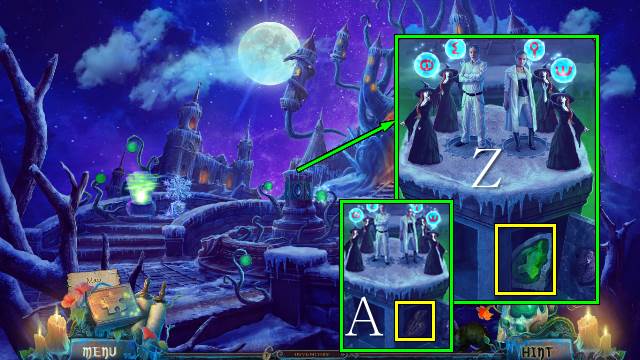
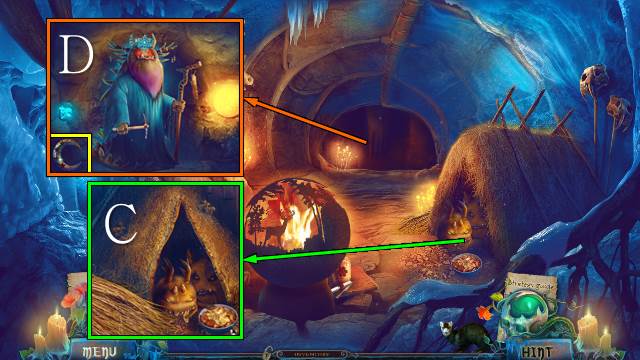
- Take ANNABEL'S MEDALLION (A).
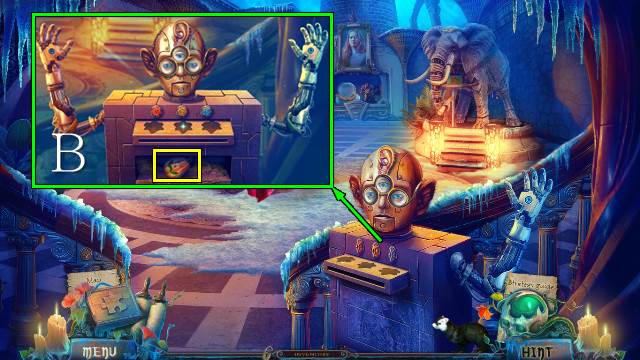
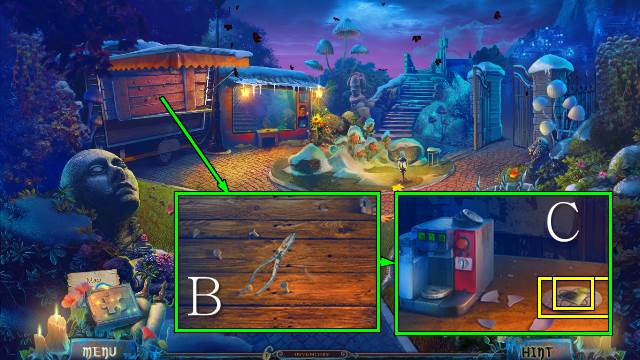
- Take Bertha (B).
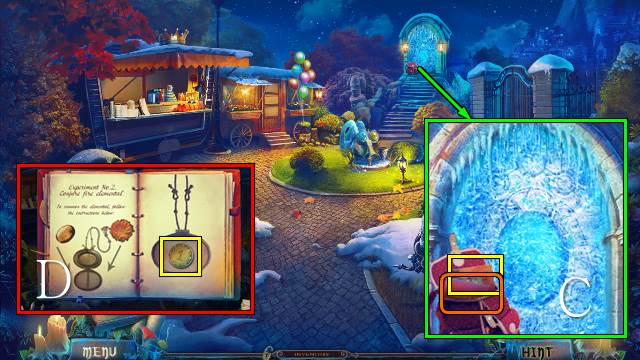
- Open the bag; take the certificate and ANNABEL'S TEXTBOOK (C).
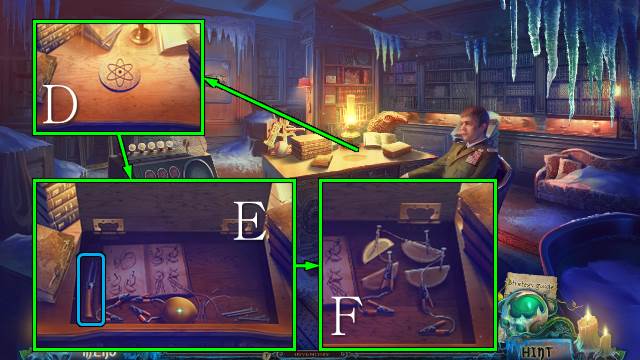
- Access and open ANNABEL'S TEXTBOOK and take the COIN (D).
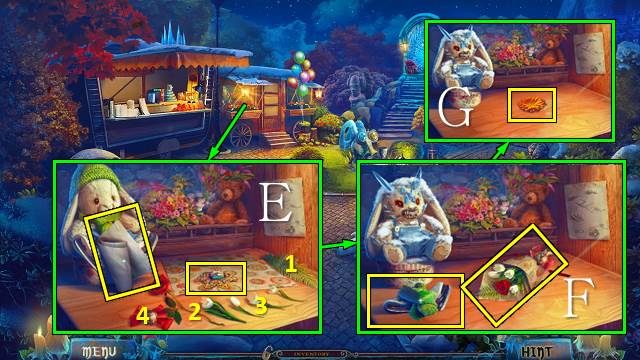
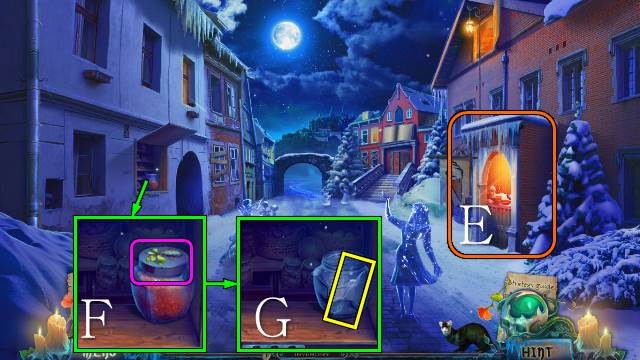
- Take the FLOWER and FOIL; place the items in the right order (E).
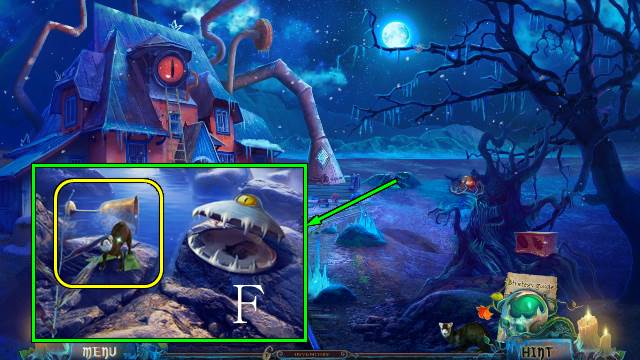
- Remove the skates, scarf and hat; take the WINTER OUTFIT and BOUQUET (F).
- Take the CALENDULA (G).
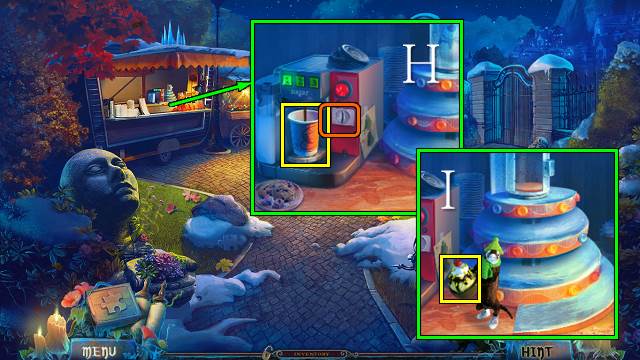
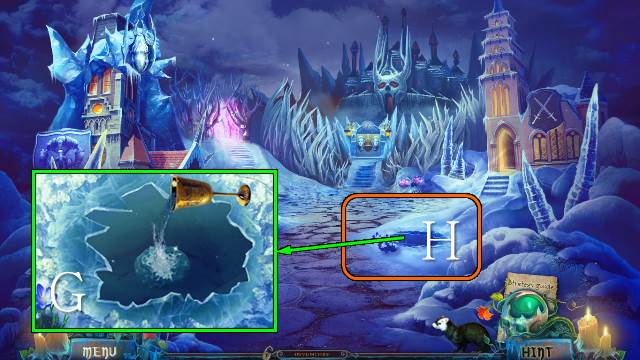
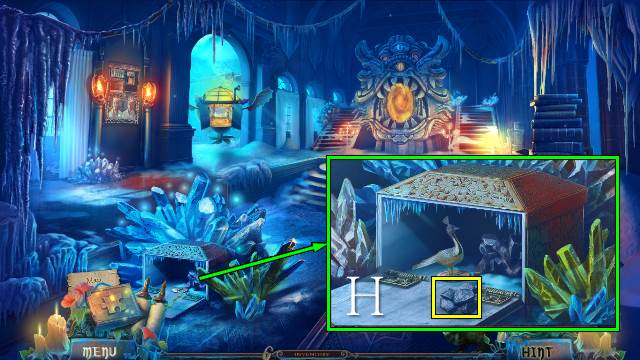
- Insert the COIN, press 1, 2 or 3, then the red button. Take the HOT COFFEE (H).
- Select the slide to send Bertha; offer the WINTER OUTFIT. Take the ICE CREAM (I).
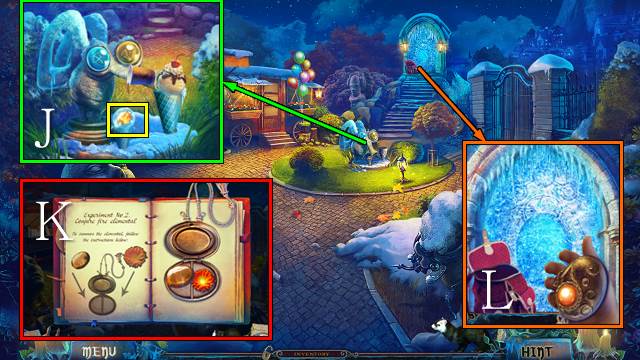
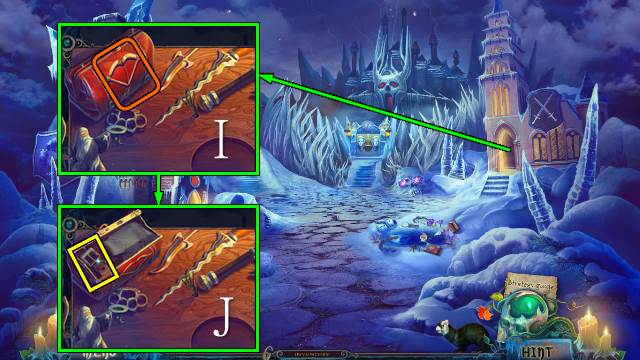
- Place the ICE CREAM and pour the HOT COFFEE; take the FIRE OPAL (J).
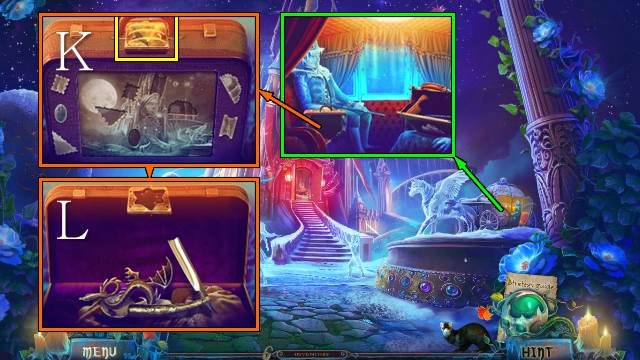
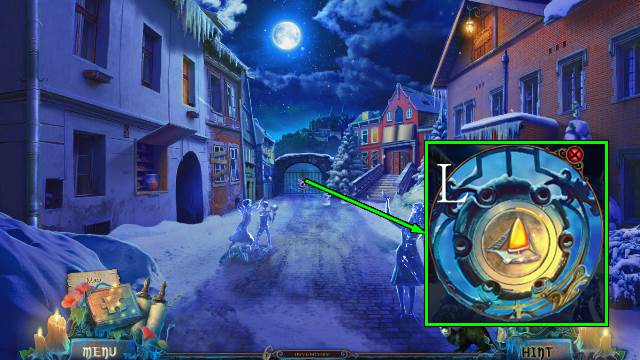
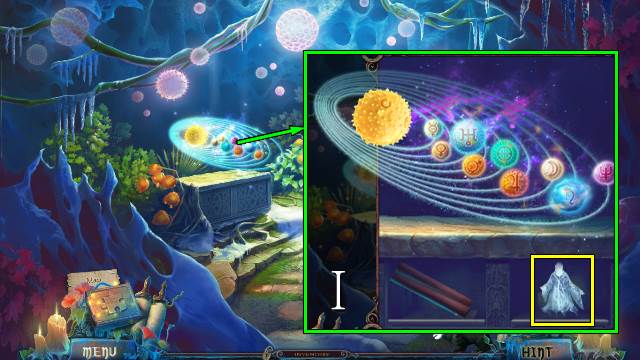
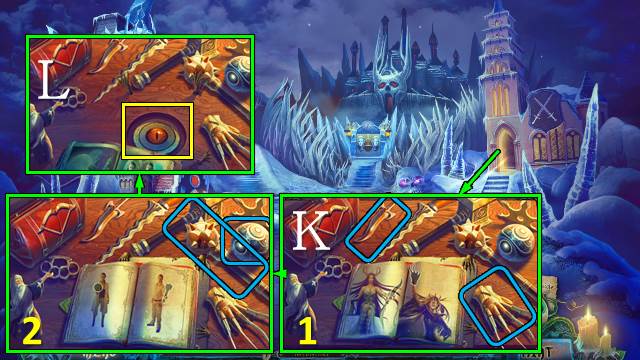
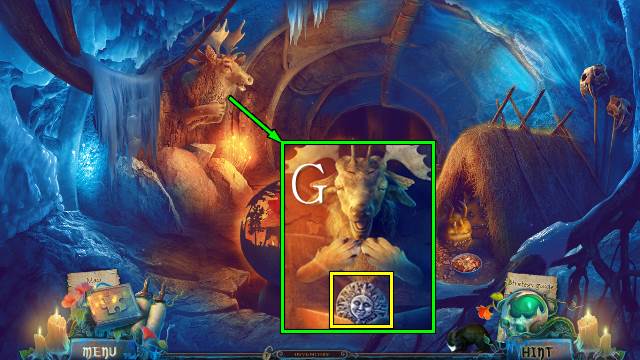
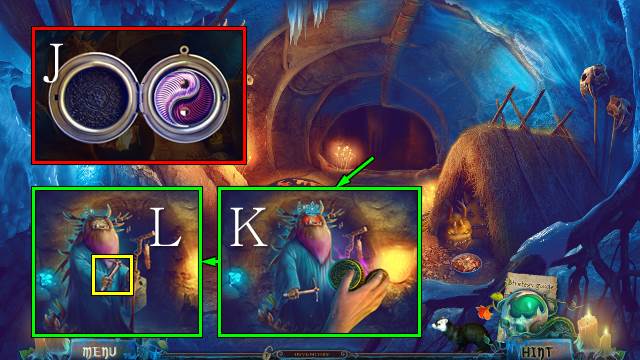
- Access ANNABEL'S TEXTBOOK, and place ANNABEL'S MEDALLION, CALENDULA and FIRE OPAL. Take the CHARGED MEDALLION (K).
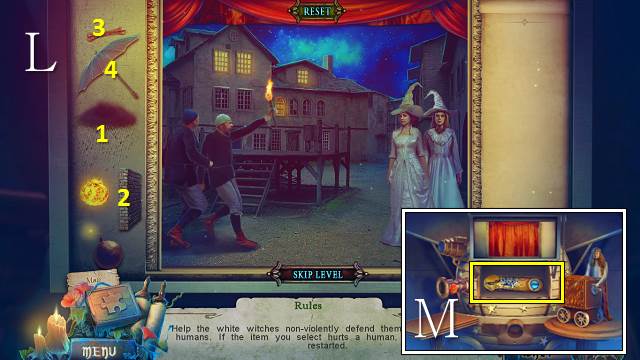
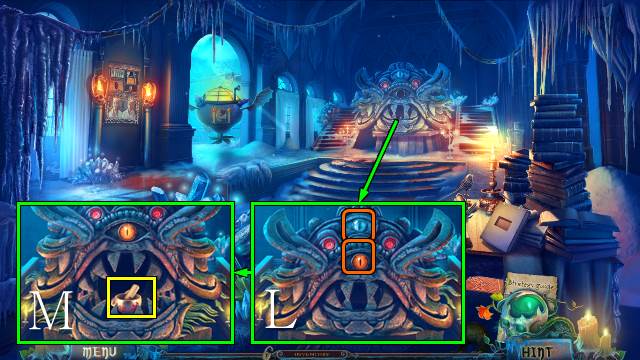
- Use the CHARGED MEDALLION (L). Go forward.
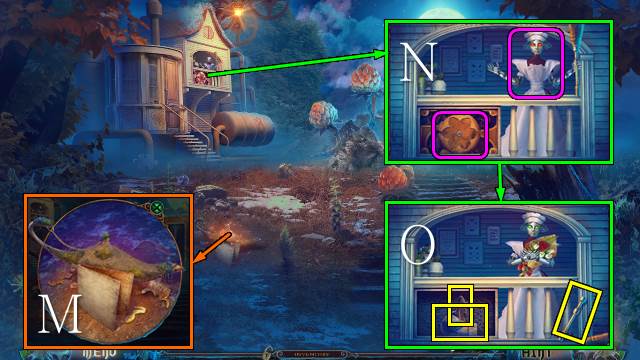
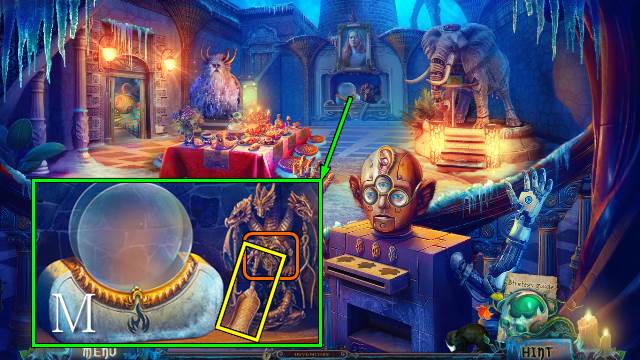
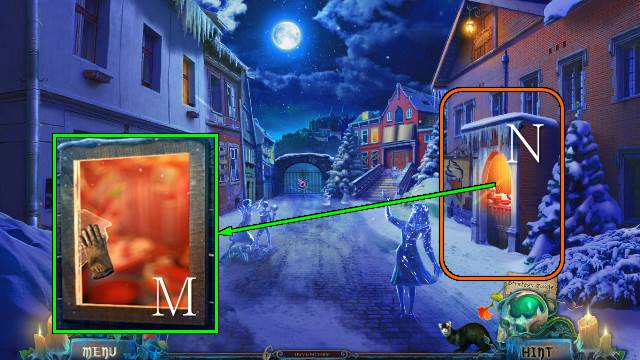
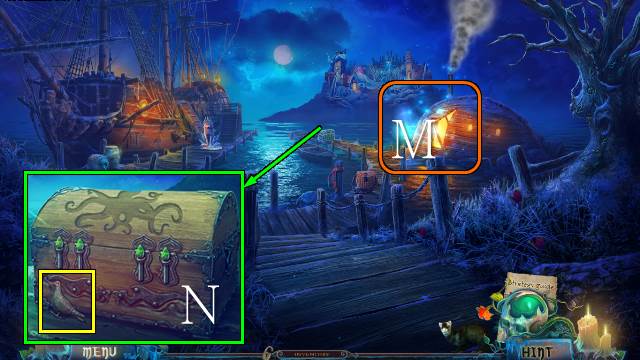
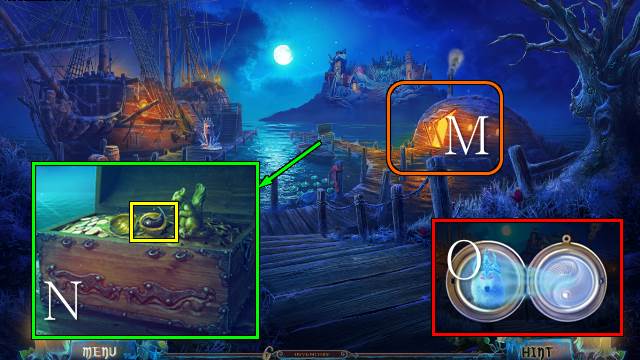
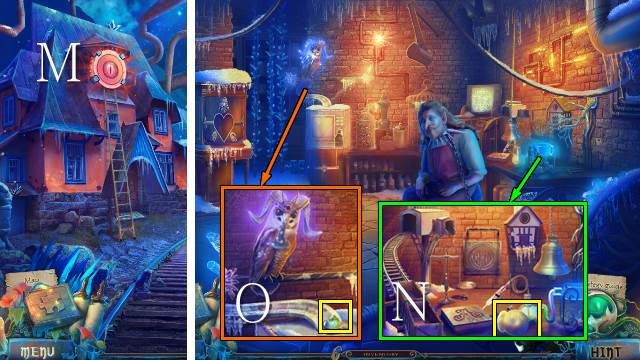
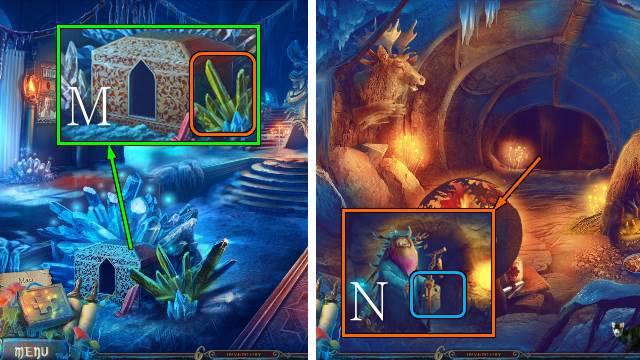
- Take the map (M).
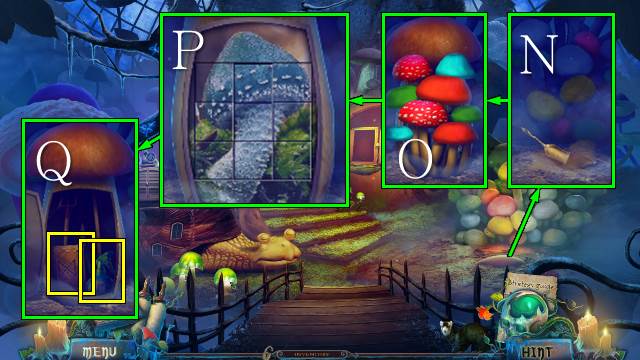
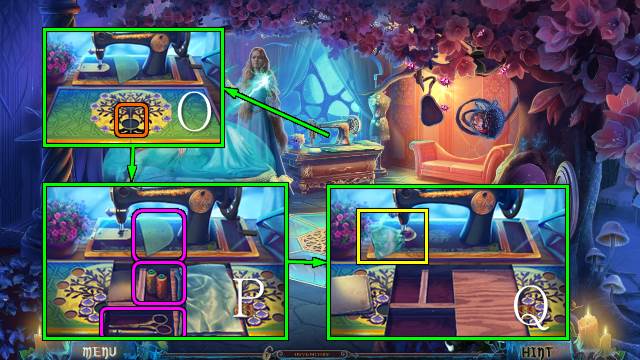
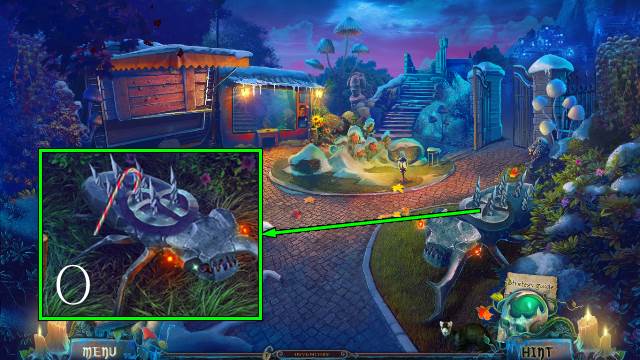
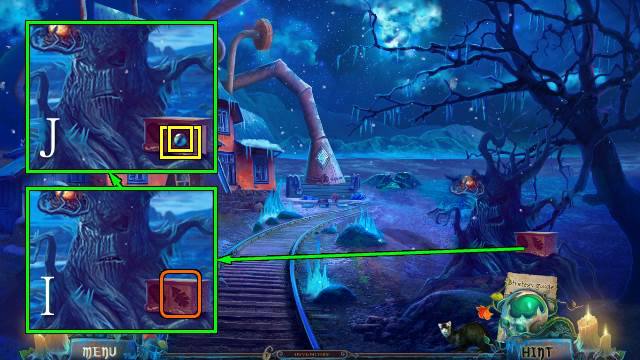
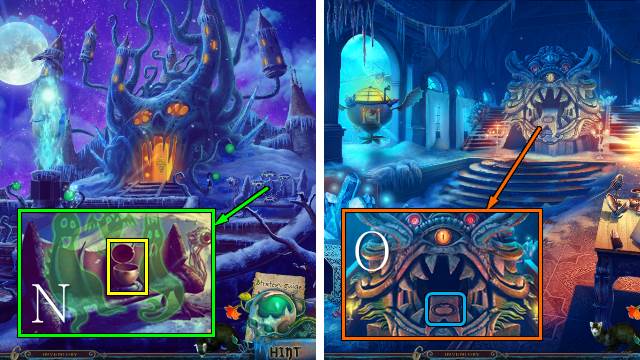
- Place the FLOWER and offer the BOUQUET (N); take the MUSHROOM STEM, BLACK WITCH and STEEL TUBE (O).
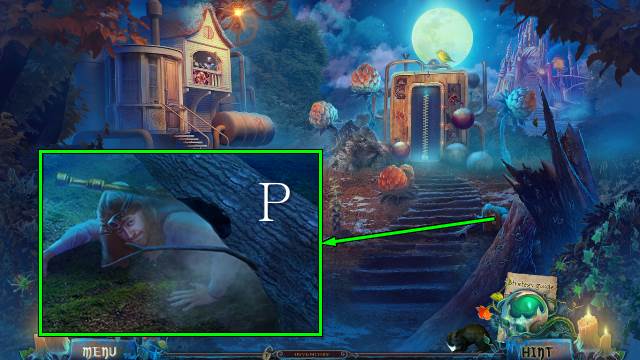
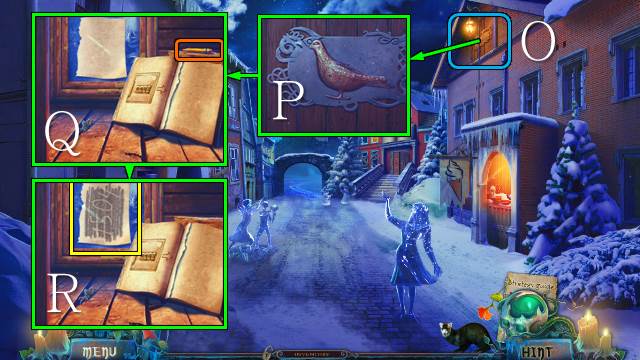
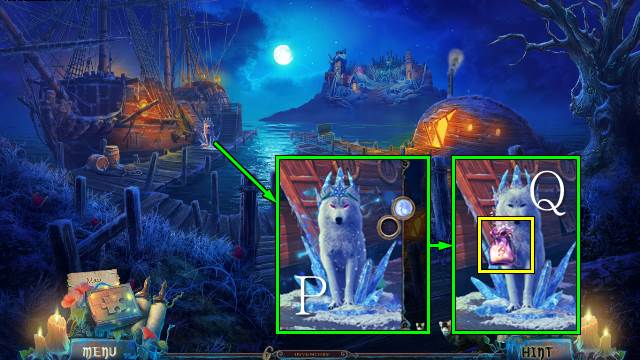
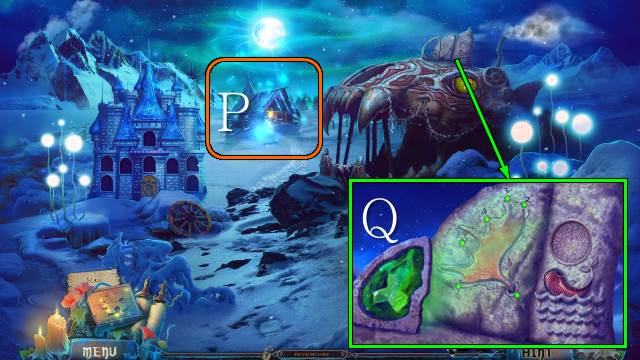
- Use the STEEL TUBE (P).
- Go left.
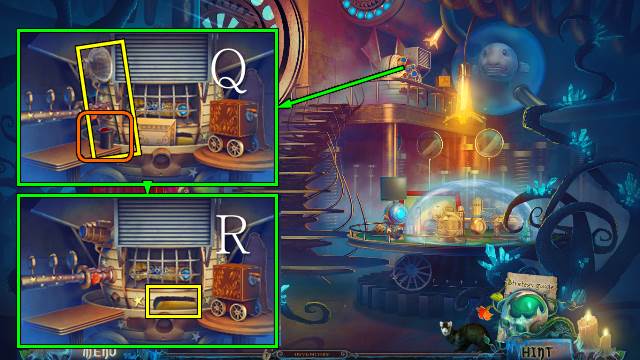
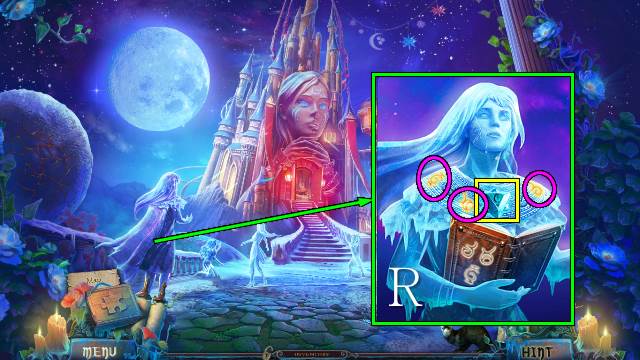
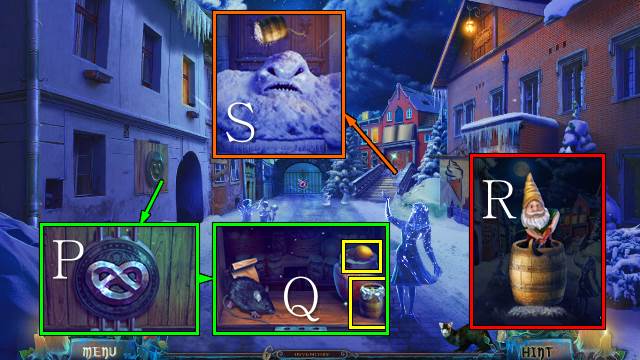
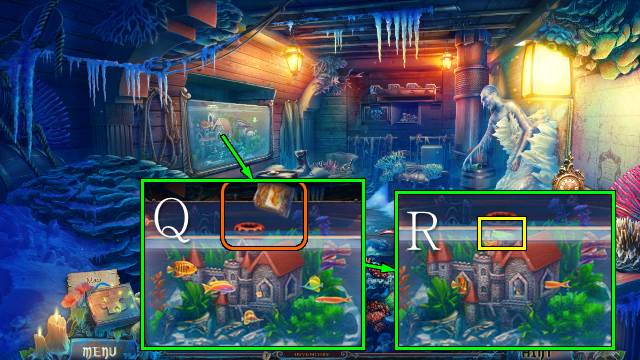
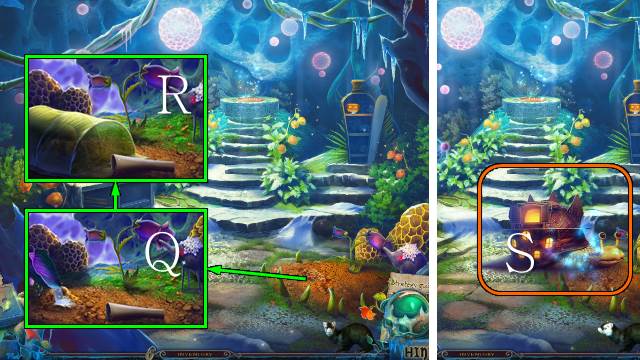
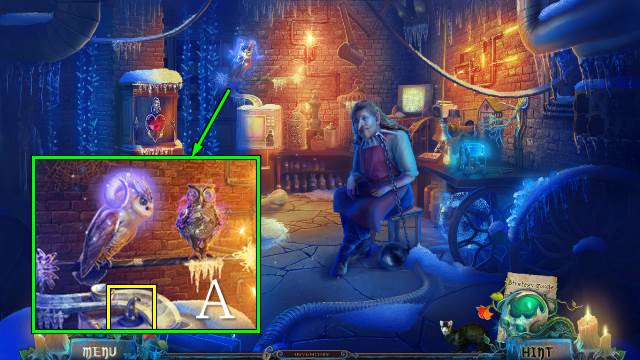
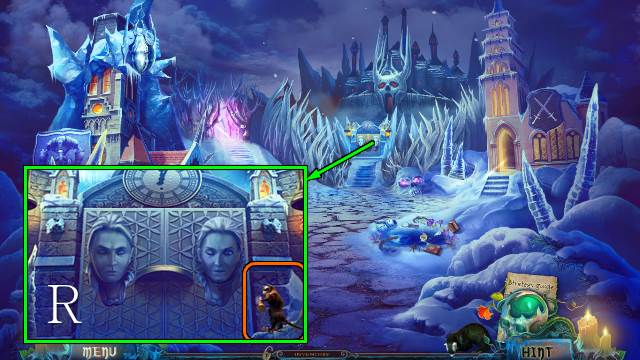
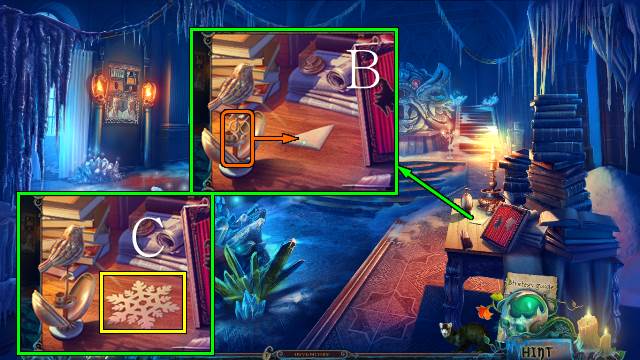
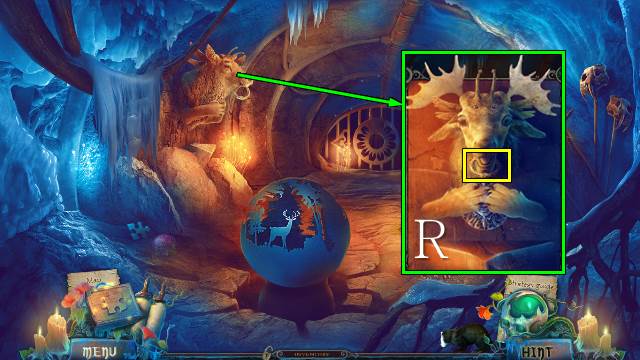
- Take the SCOOP NET and Select the top hat (Q). Read the note; take the BRUSH (R).
- Walk down.
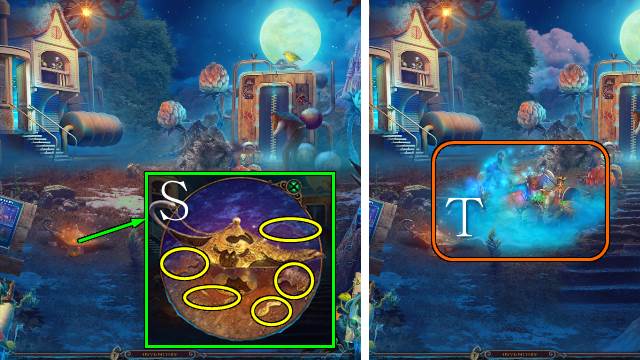
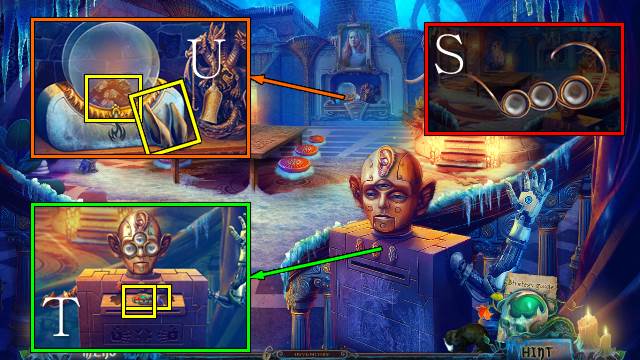
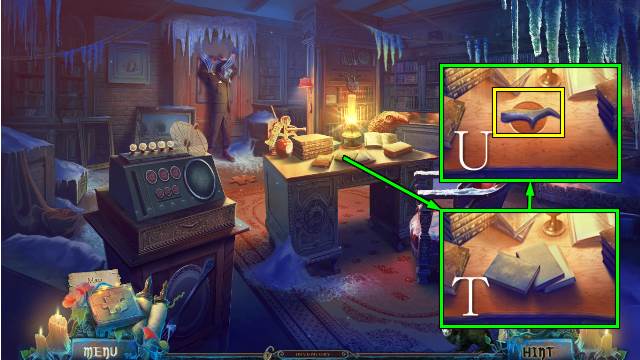
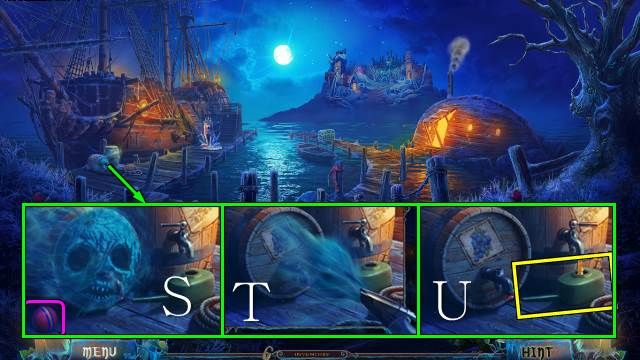
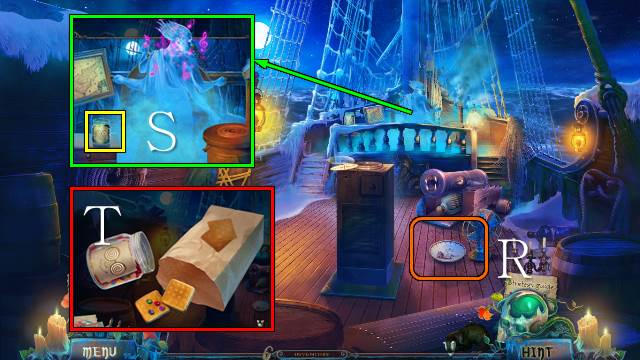
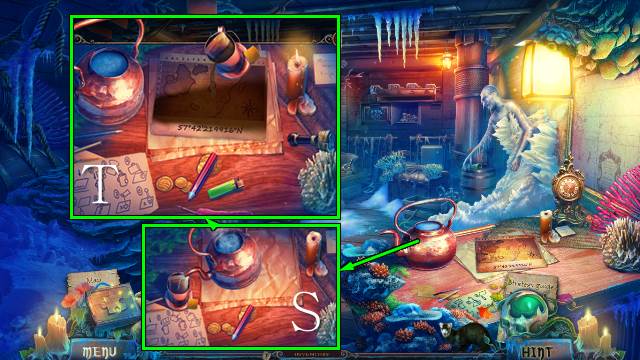
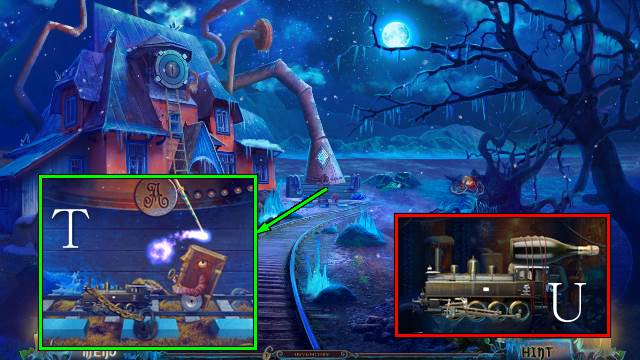
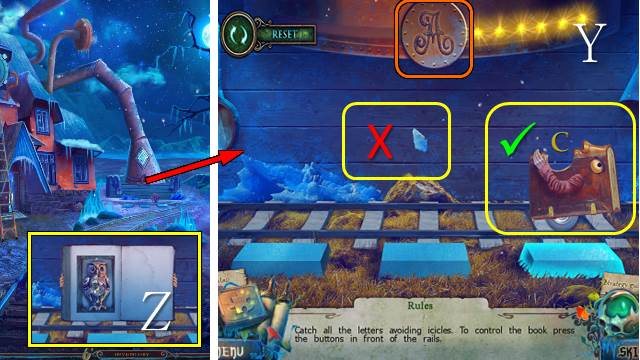
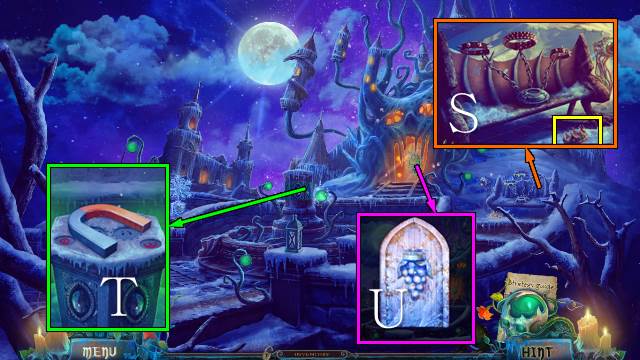
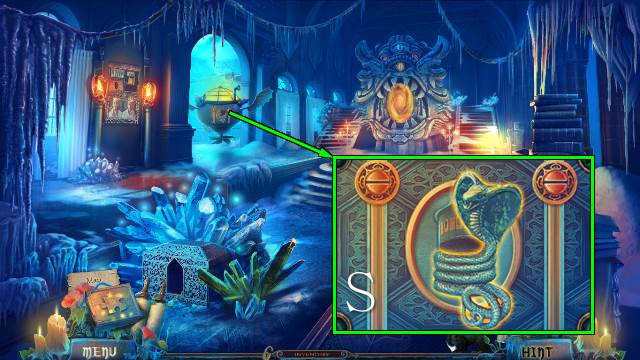
- Use the BRUSH. Place the pieces (S).
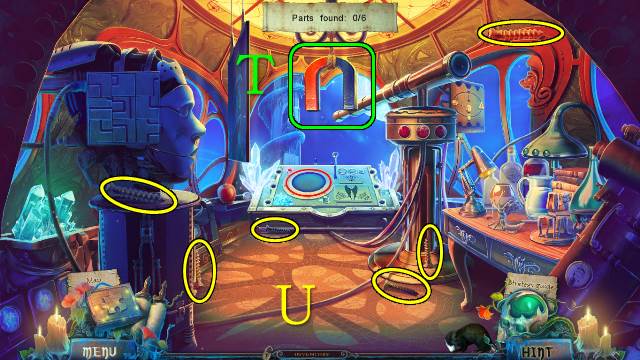
- Play the HOP (T); receive the WHITE WITCH.
- Go left.
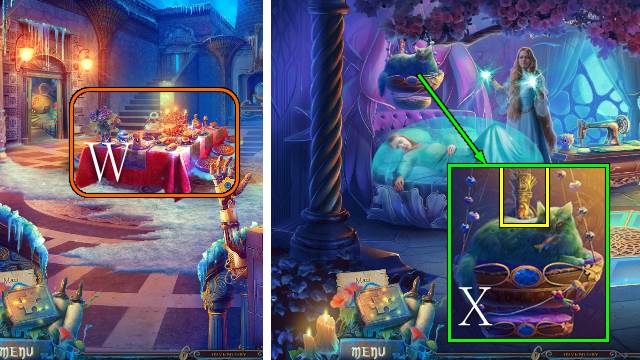
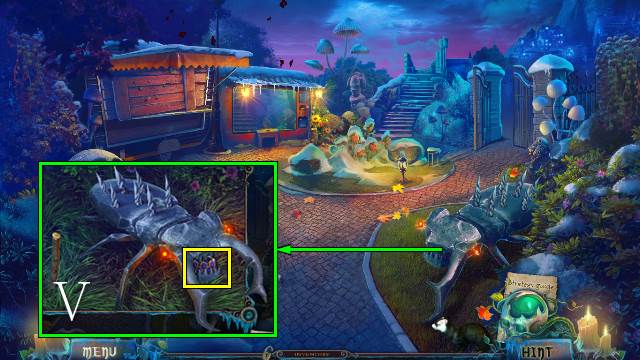
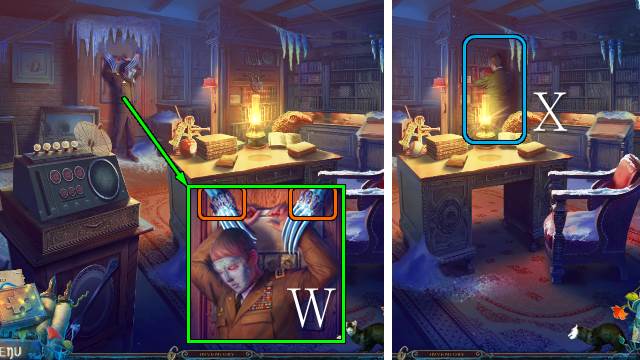
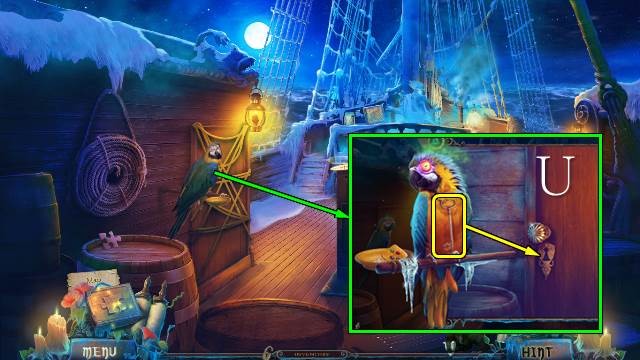
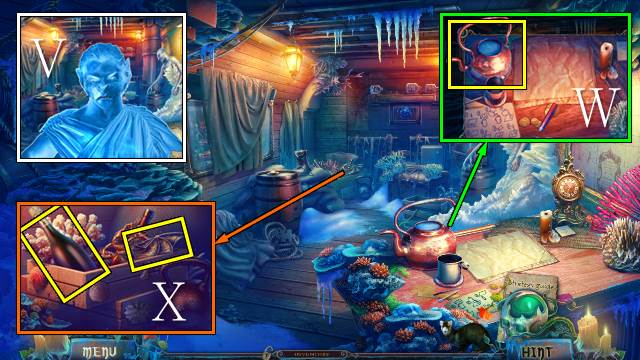
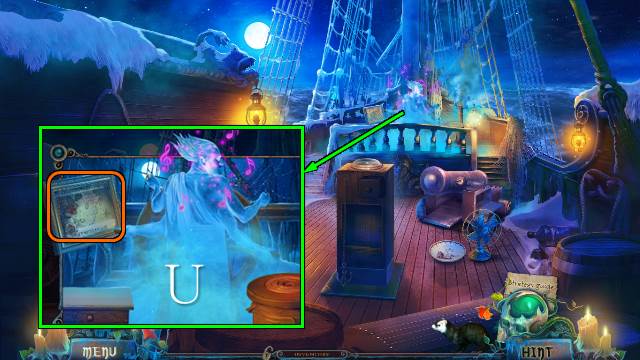
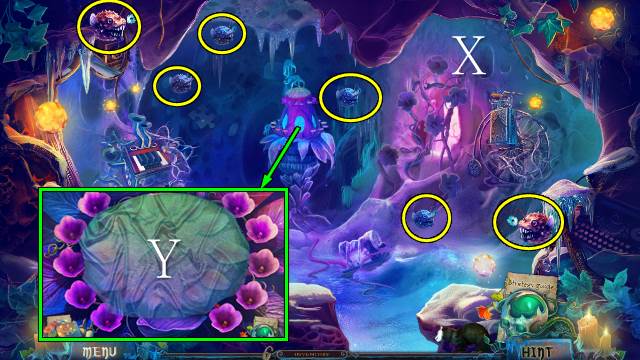
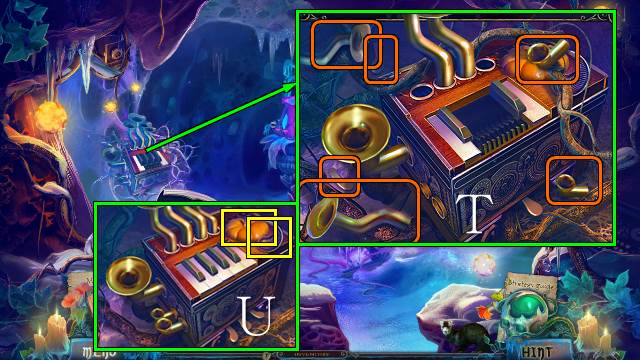
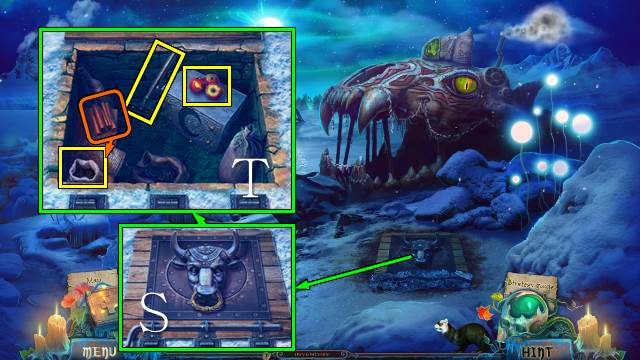
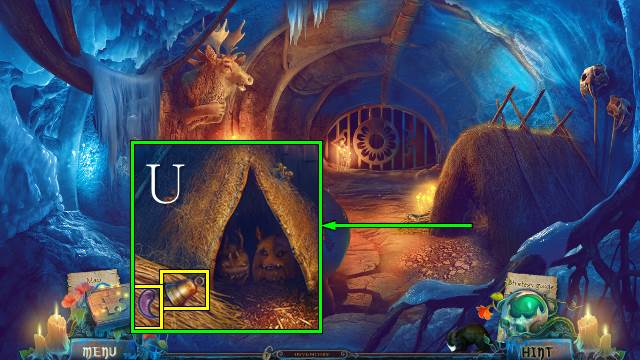
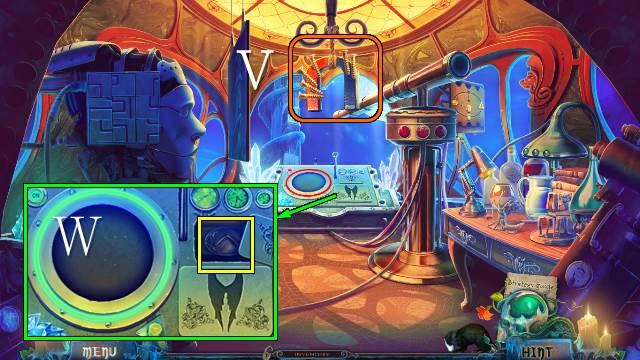
- Place the BLACK WITCH and WHITE WITCH (U). Take the STAFF (V).
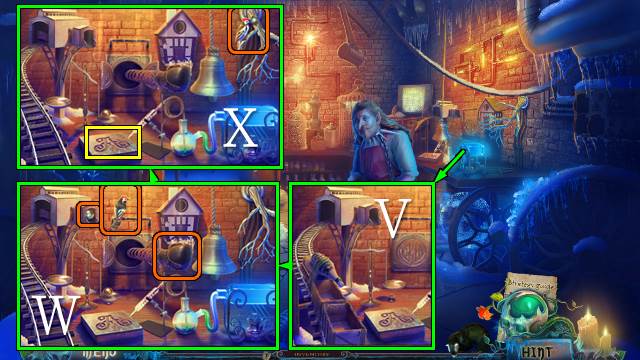
- Walk down.
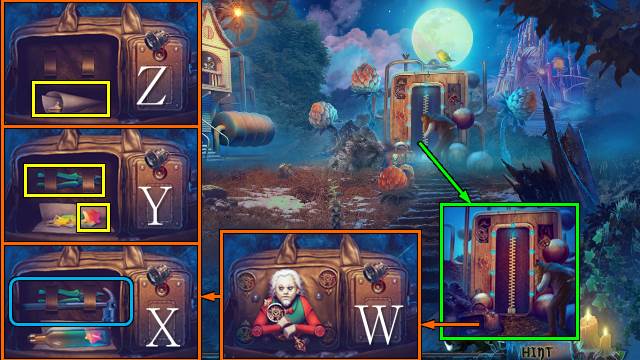
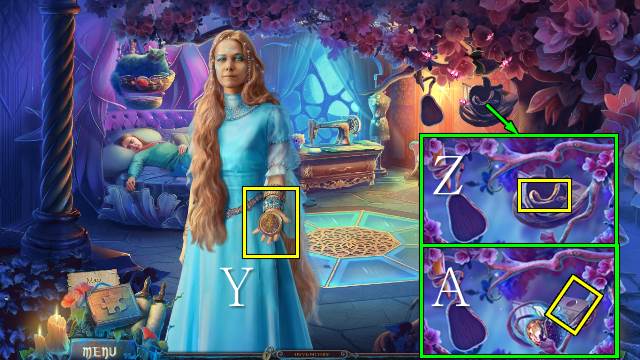
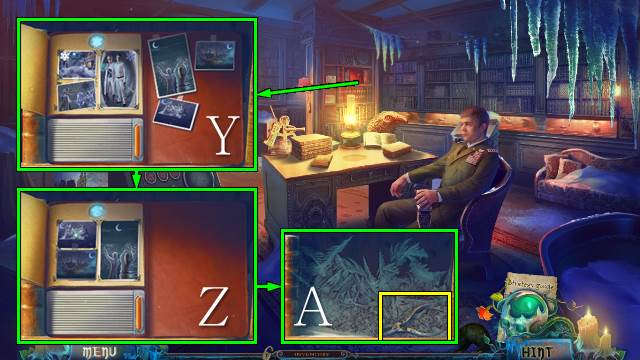
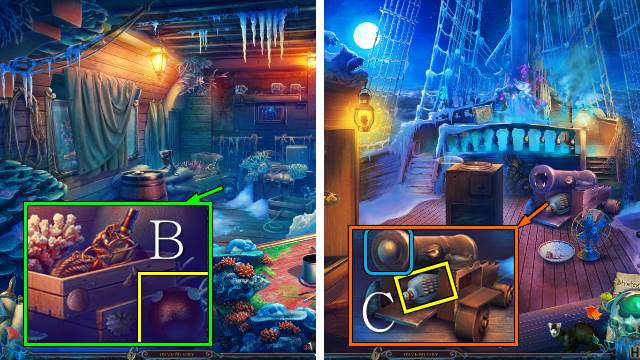
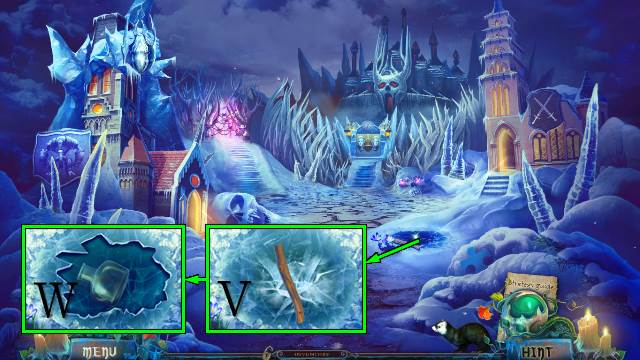
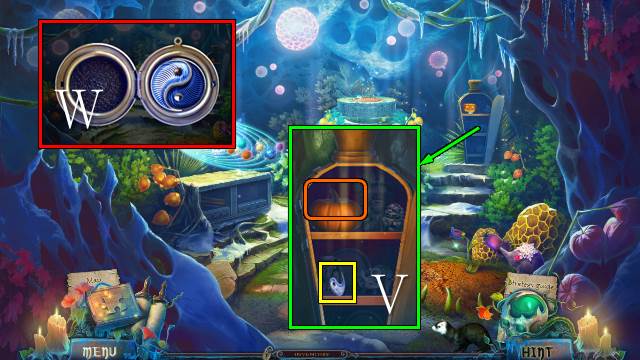
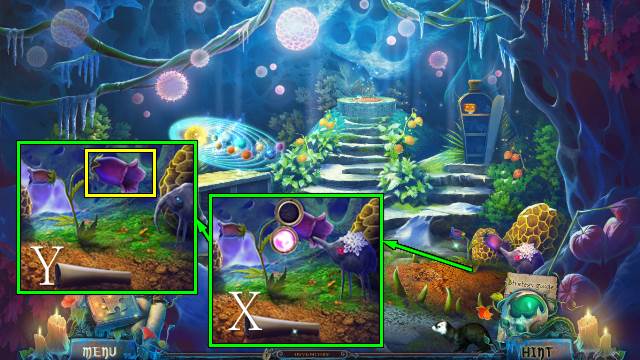
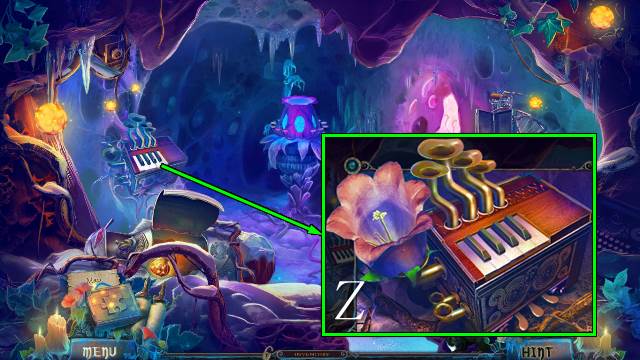
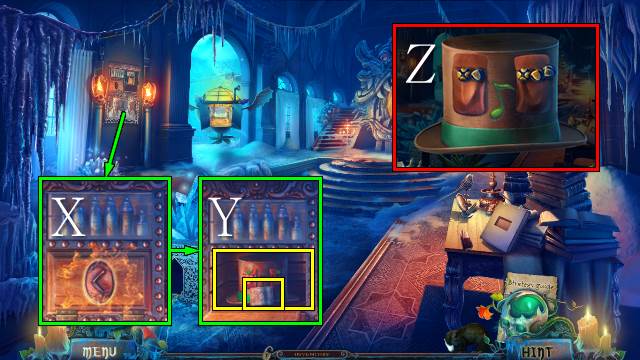
- Place the STAFF (W). Use the hammer (X); take the STONE OF WISDOM and PLIERS (Y). Roll up the paper and take the GLASS SHARDS (Z).
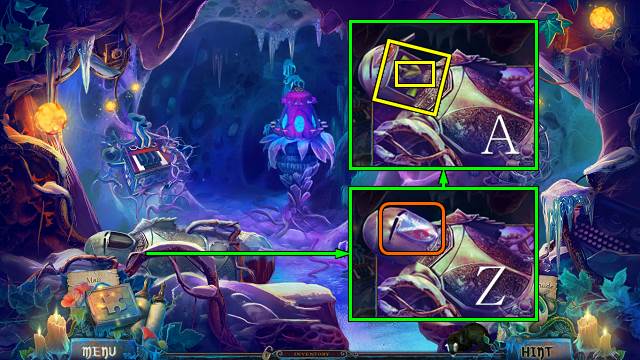
- Go left.
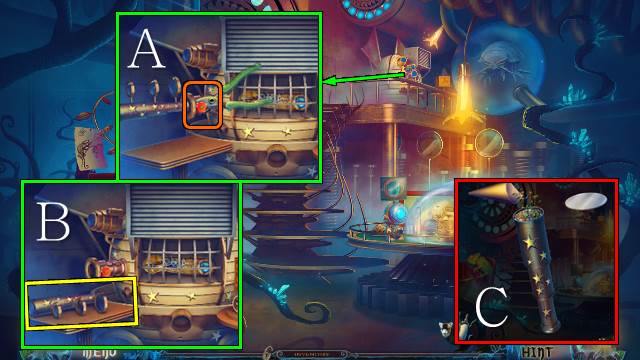
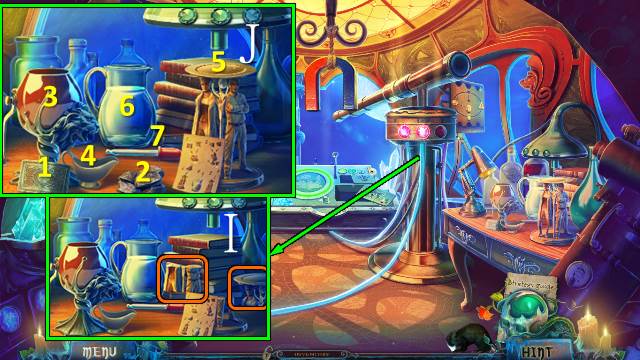
- Use the PLIERS (A); take the TUBE (B).
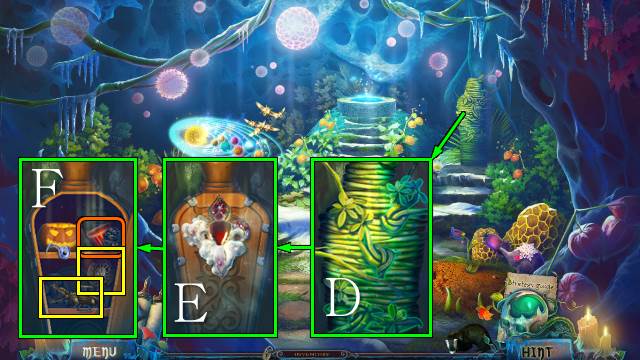
- Access the TUBE and remove the LENSES and cap; insert the FOIL and GLASS SHARDS. You receive a KALEIDOSCOPE (C).
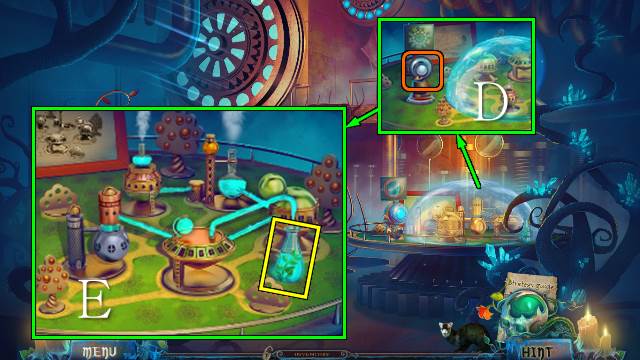
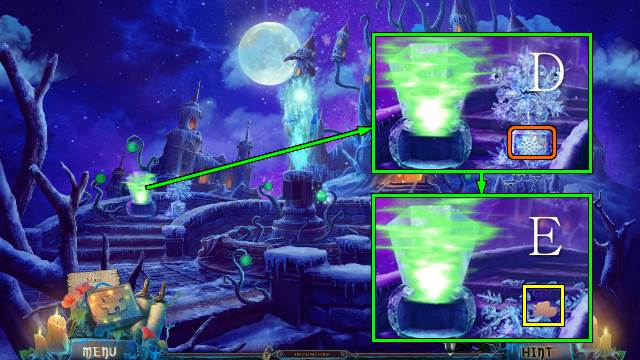
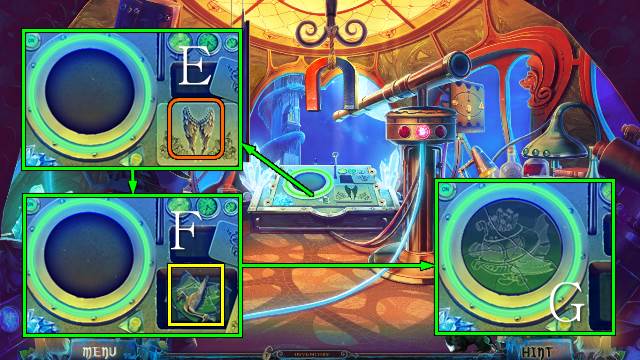
- Place the KALEIDOSCOPE (D). Rearrange the tubes; take the LIGHT POTION (E).
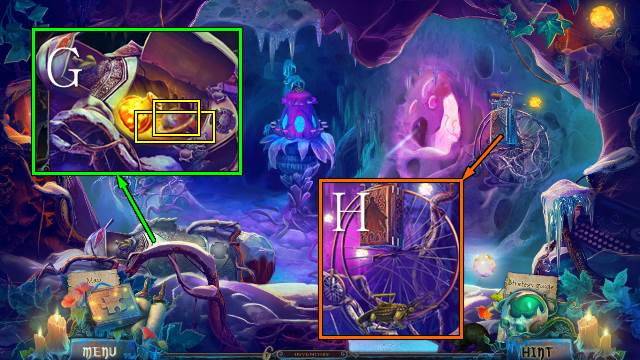
- Walk down.
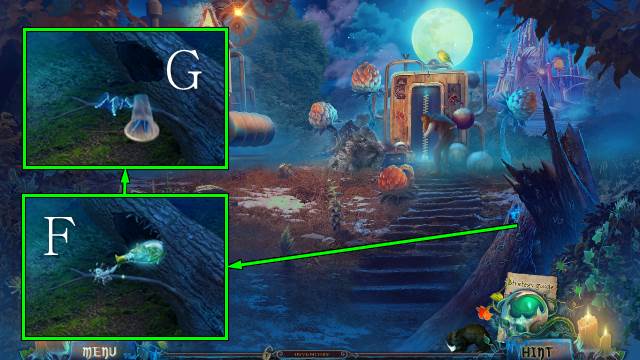
- Use the LIGHT POTION (F) and SCOOP NET (G); you receive a BUTTERFLY.
- Go left.
- Release the BUTTERFLY; take the LIGHT BULB (H).
- Walk down.
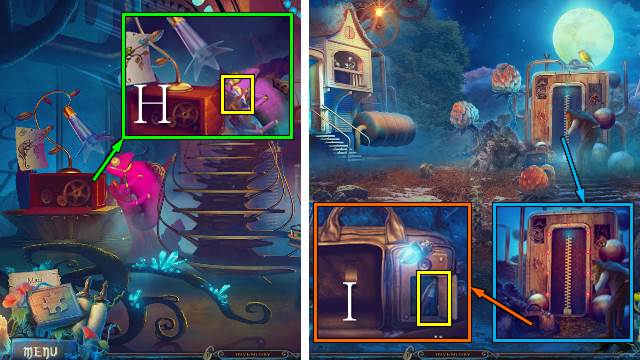
- Insert the LIGHT BULB; take the WIZARD FIGURINE (I).
- Go left.
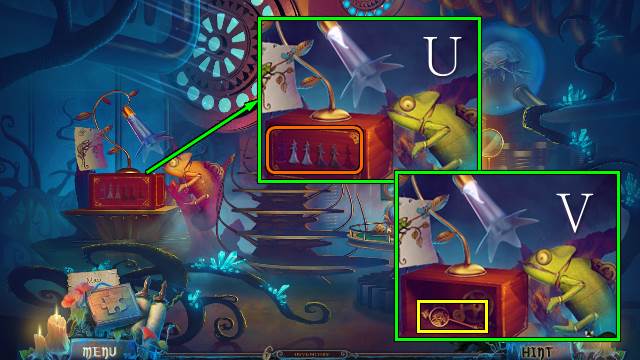
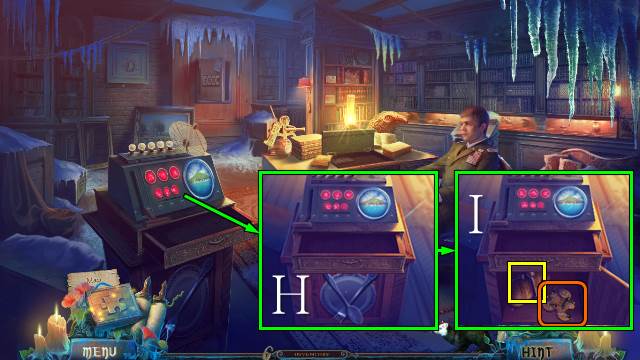
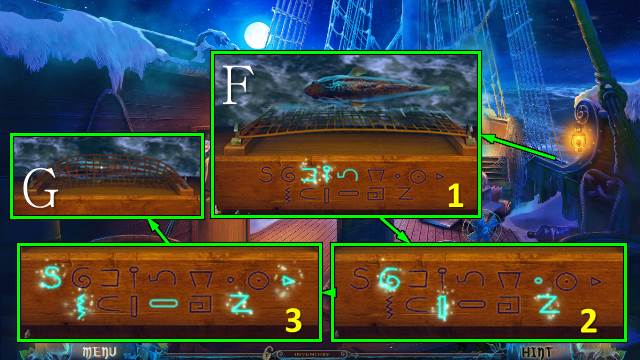
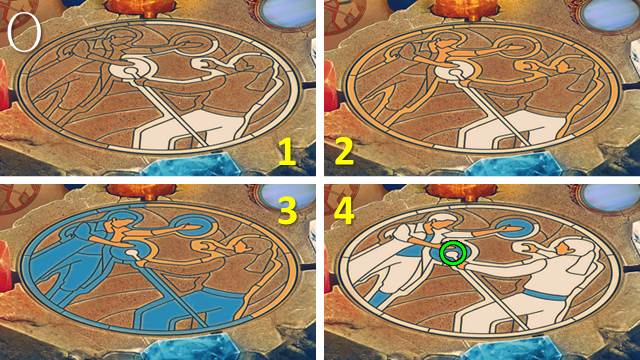
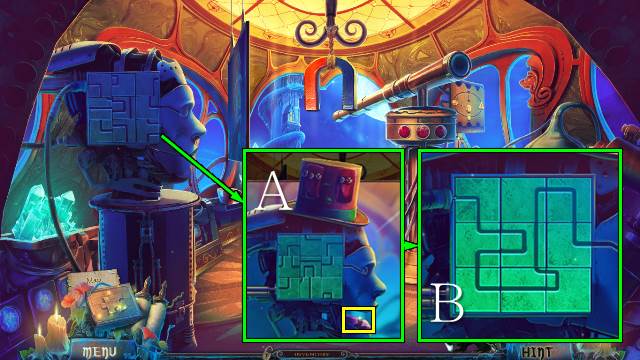
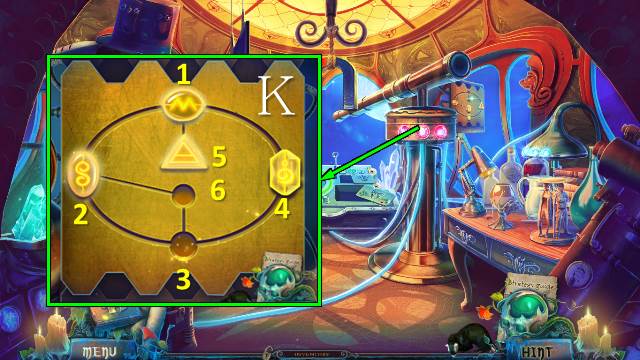
- Insert the WIZARD FIGURINE (J); play the mini-game.
- Solution 1 (K).
- Solution 2 (L).
- Take the ZIPPER LATCH (M).
- Walk down.
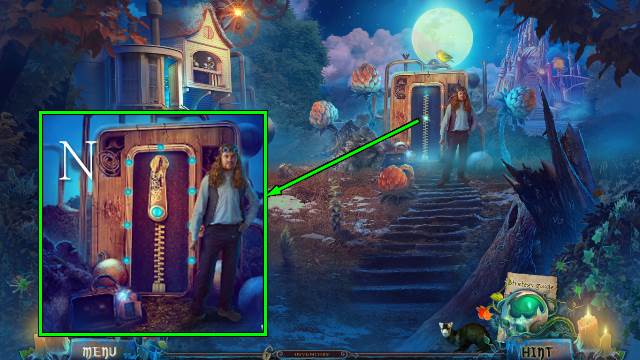
- Place the ZIPPER LATCH (N).
Chapter 2: The Castle of Freedom
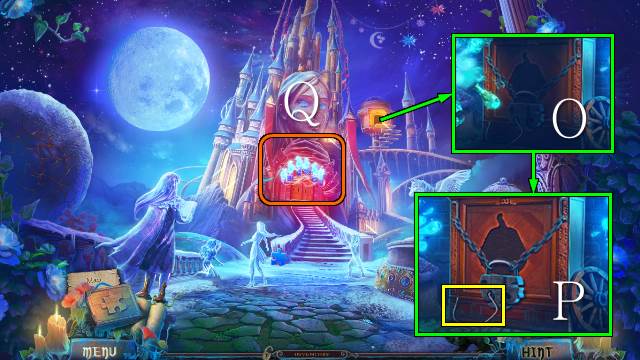
- Use the LIGHT POTION (O; take the WIRE (P).
- Zoom into the door (Q).
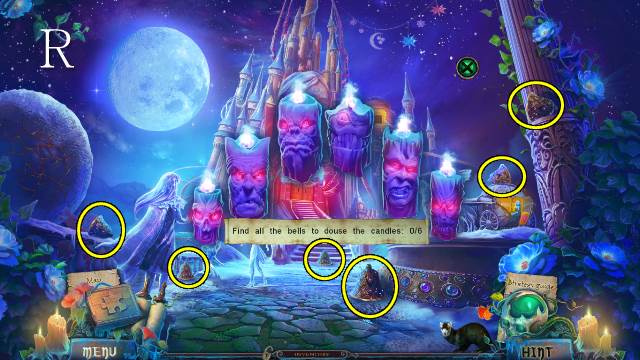
- Find the bells (R).
- Move forward.
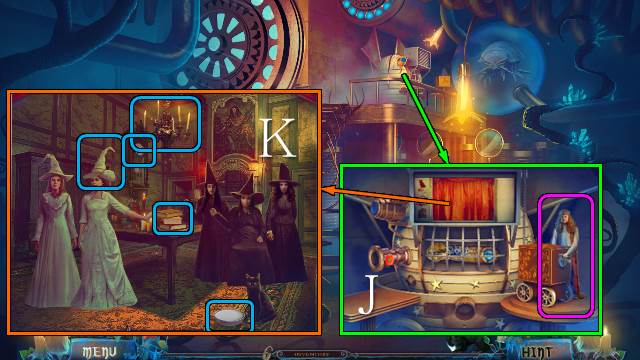
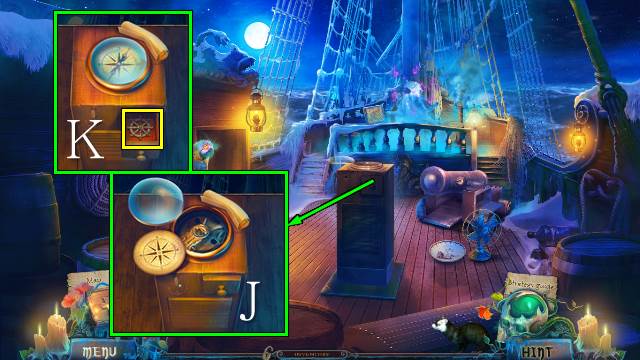
- Access the WIRE, unravel it and place the LENSES; take the GLASSES (S).
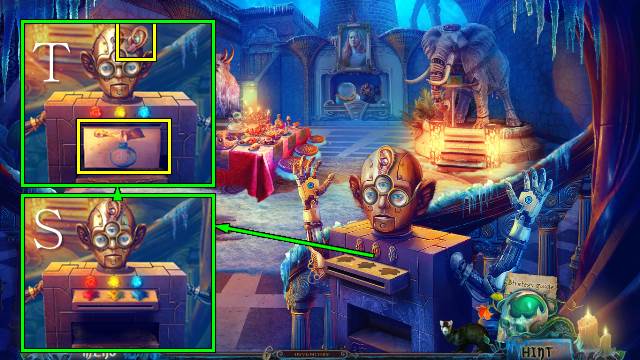
- Talk to the Keeper and place the GLASSES; take the CAP DECORATION and CASTLE (T).
- Take the RABBIT EARS and COAL (U).
- Walk down.
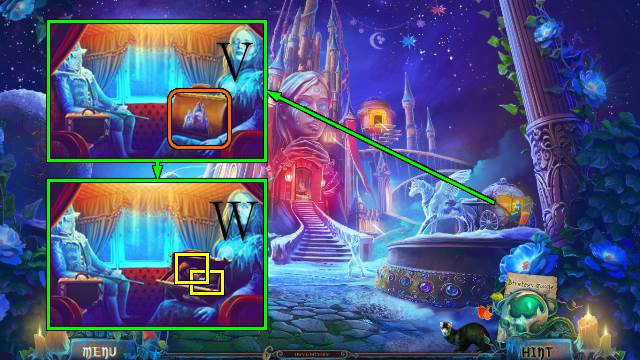
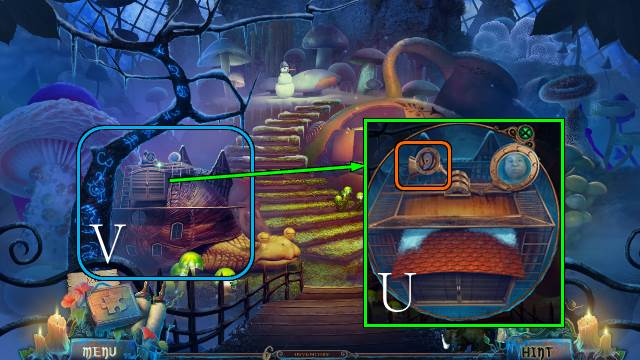
- Place the CASTLE (V). Move the items; take the APPLE and EMBROIDERY THREAD (W).
- Go forward.
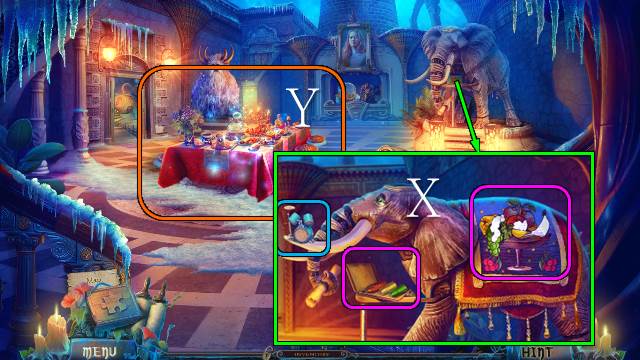
- Take the drums. Place the EMBROIDERY THREAD; restore the tapestry (X).
- Play the HOP (Y); you receive a CARROT.
- Go left.
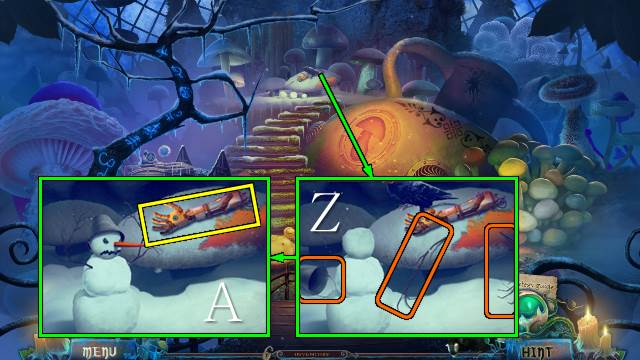
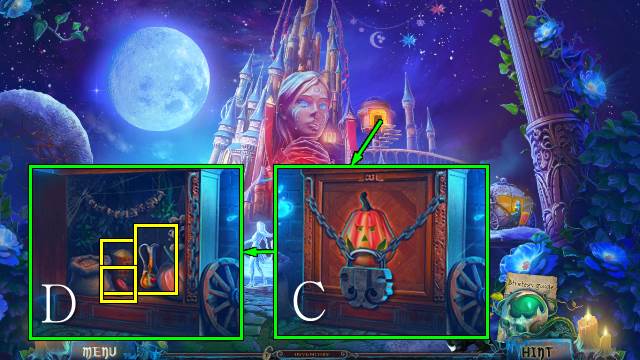
- Make snowballs, place the branches and bucket, COAL and CARROT (Z); take the GOLD HAND (A).
- Walk down.
- Place the GOLD HAND; take the PUMPKIN (B).
- Walk down.
- Place the PUMPKIN (C). Move the items; take the VINEGAR, MUSHROOM CAP and SODA (D).
- Go forward and left.
- Place the MUSHROOM STEM and MUSHROOM CAP (E). Play the mini-game (F).
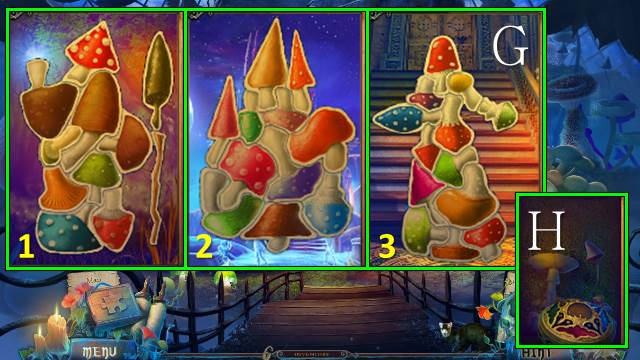
- Solution (G).
- Take the ELEPHANT CAP (H).
- Walk down.
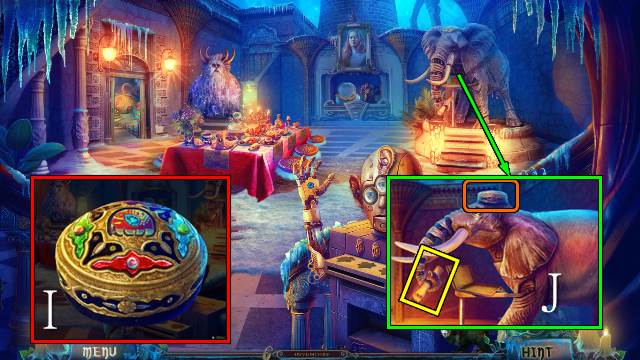
- Access the ELEPHANT CAP and place the pieces and CAP DECORATION; you receive the ELEPHANT CAP (I).
- Place the ELEPHANT CAP; receive the MAP (J).
- Walk down.
- Place the MAP and restore it; take the STONE OF WISDOM (K). Take the DRAGON AMULET and RAZOR (L).
- Go forward.
- Place the DRAGON AMULET; take the SCOOP (M).
- Go left.
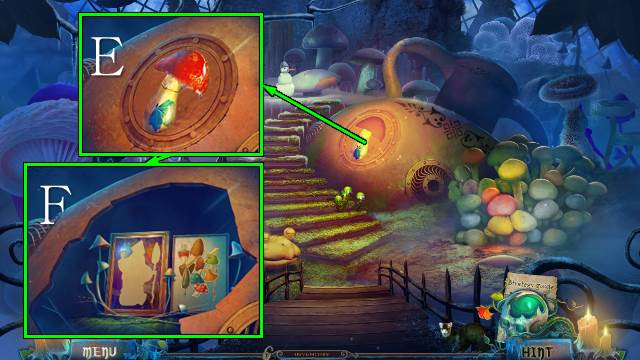
- Use the SCOOP (N). Match the mushrooms (O).
- Play the mini-game (P).
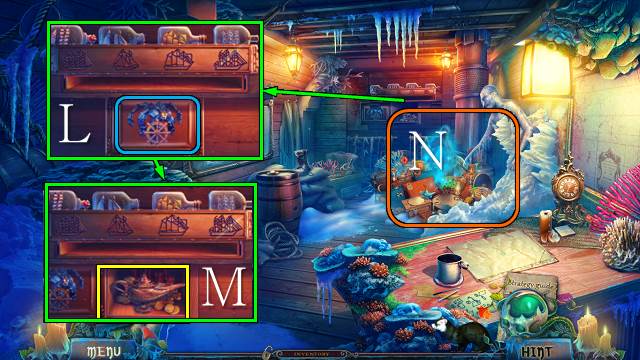
- Take the SPRAY BOTTLE and MAGIC BOOK (Q).
- Walk down twice.
- Place the MAGIC BOOK. Select the symbols; take the STONE OF WISDOM (R).
- Go forward.
- Place the three STONES OF WISDOM (S). Take the EAR and FOAM RECIPE (T).
- Go left.
- Place the EAR (U).
- Play the HOP (V); receive the SUDS.
- Receive the SNAIL SEED.
- Walk down.
- Access the SPRAY BOTTLE, remove the top and place the FOAM RECIPE, SUDS, SODA and VINEGAR; receive the SHAVING CREAM (W).
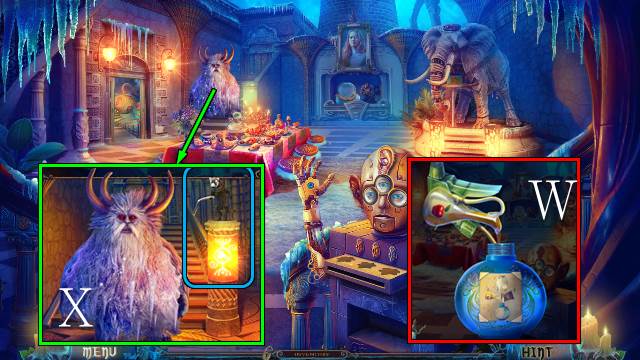
- Send Bertha. Offer the RAZOR and SHAVING CREAM (X).
- Go forward.
- Take EVA'S MEDALLION (Y).
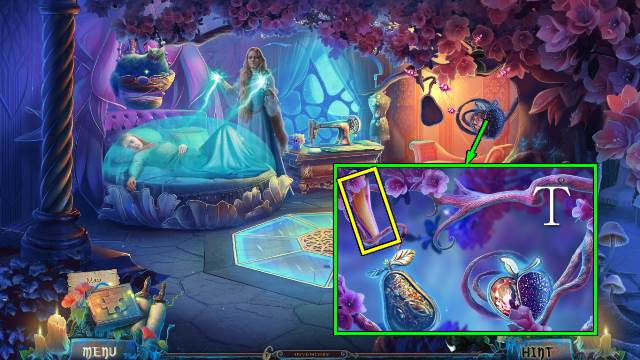
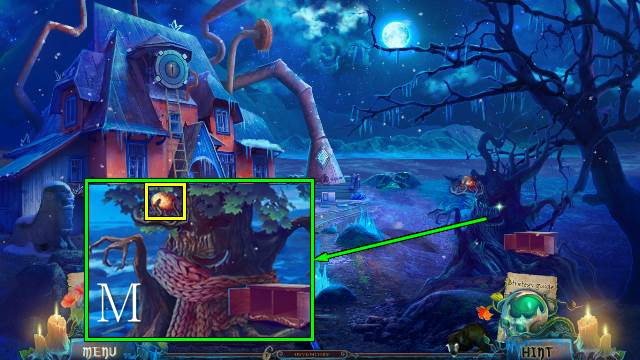
- Take the LITTLE TAIL (Z); place the APPLE and take the SHADOW THEATER (A).
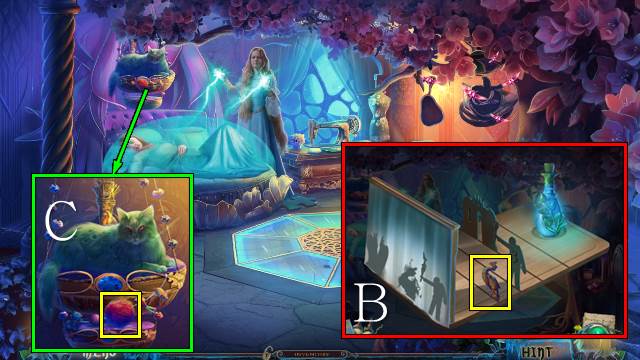
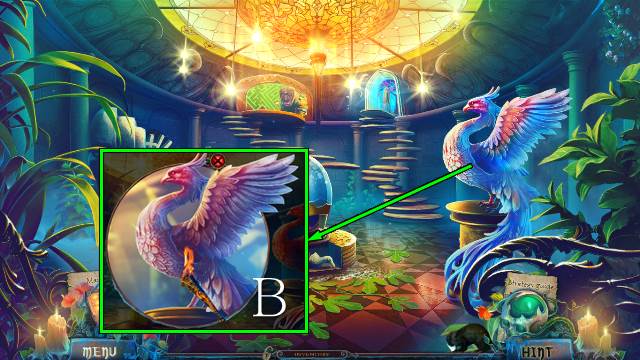
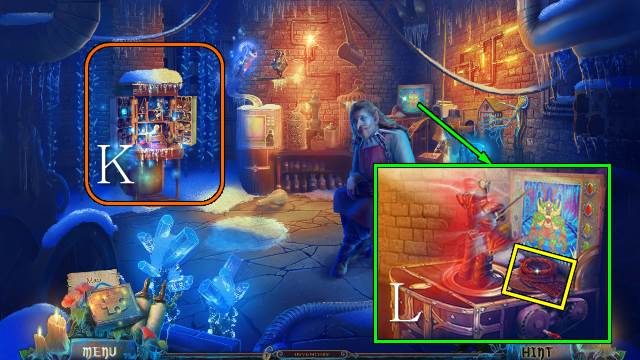
- Access the SHADOW THEATER; place the LIGHT POTION. Select 1, 2 and 3. Take the PHOENIX (B).
- Remove the toys until you can take the POM-POM (C).
- Walk down.

- Place the PHOENIX (D); take the MEMORY CRYSTAL (E).
- Take the FLINT (F).
- Go right.
- Open the hatch (G).
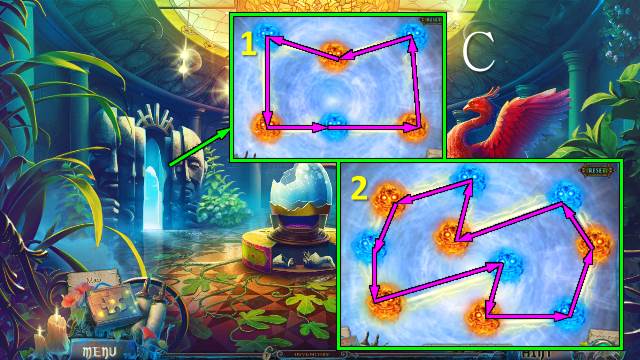
- Place the MEMORY CRYSTAL (H); play the mini-game (I, J).
- Take the prophecy, DWARF MINER and DUCK WING (K).
- Walk down.
- Open the panel. Place the DUCK WING (L) and RABBIT EARS (M). Take the BUTTON (N).
- Go right.
- Place the BUTTON (O). Place the pattern; use the pencil and scissors and place the thread on the machine (P). Sew the cap and place the POM-POM. Take the INVISIBILITY HAT (Q).
- Walk down.
- Send Bertha; offer the INVISIBILITY HAT (R). Take the PEAR (S).
- Go right.
- Place the PEAR; take the PHOENIX FEATHER (T).
- Walk down.
- Place the PHOENIX FEATHER (U); take the FIRE SYMBOL (V).
- Walk down.
- Play the HOP (W); receive a FISH.
- Go forward and right.
- Offer the FISH; take the TORCH (X).
- Walk down twice.
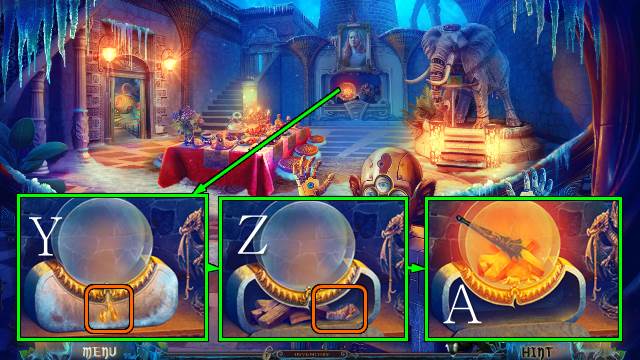
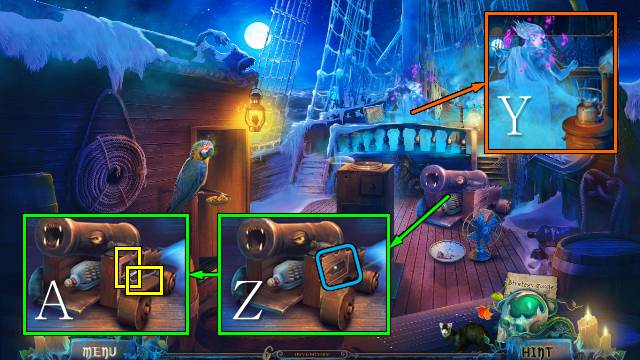
- Place the FIRE SYMBOL (Y). Move the logs and use the FLINT (Z). Light the TORCH (A).
- Go forward.
- Use the TORCH (B).
- Play the mini-game (C).
Chapter 3: The Resistance
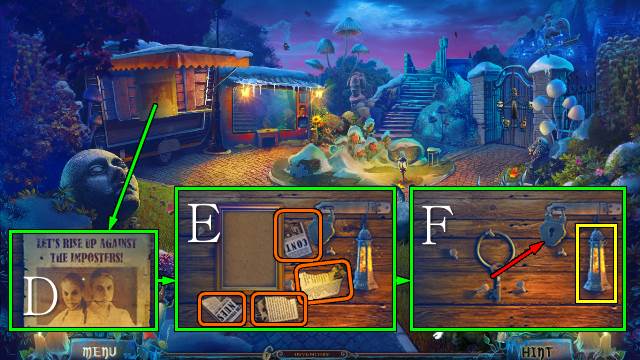
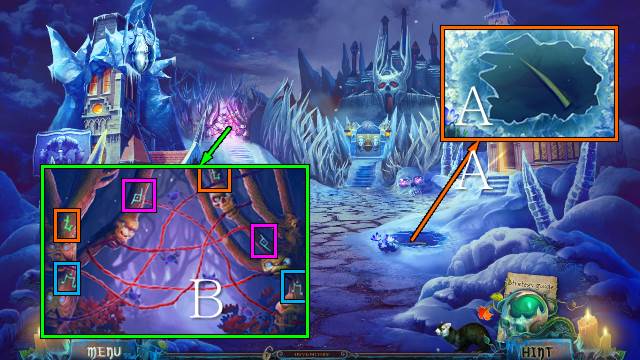
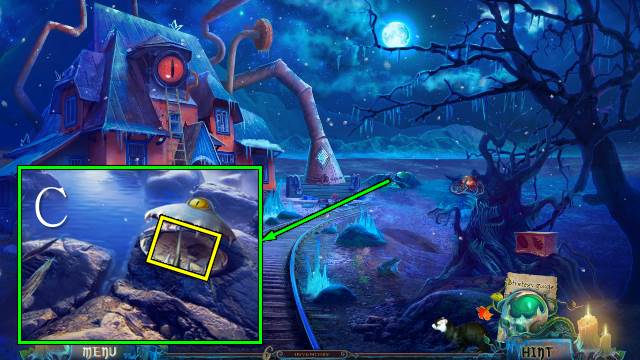
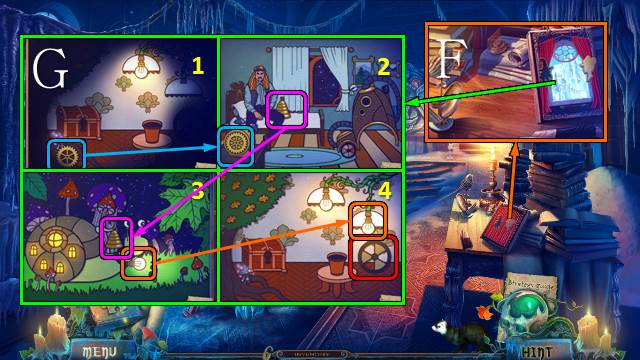
- Touch the poster (D). Restore the article and remove it (E). Put the key in the lock; take the MAGIC LANTERN (F).
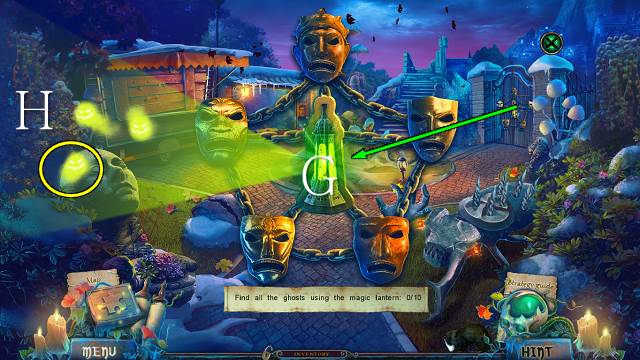
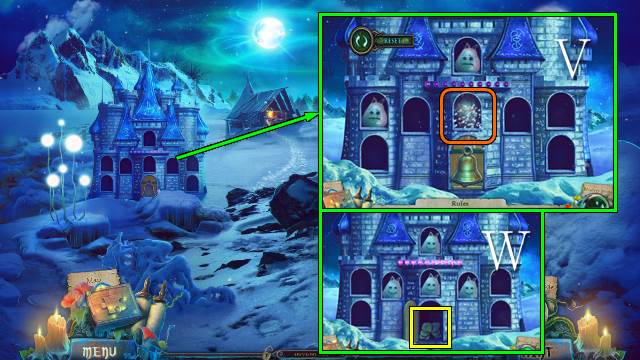
- Place the MAGIC LANTERN (G); find the ghosts (H).
- Go right.
- Take the STONE FINGERTIP (I).
- Take the FREEDOM BRACELET (J).
- Walk down.
- Place the STONE FINGERTIP and move the tips (K); take the GLOVE (L).
- Go right.
- Use the GLOVE six times (M).
- Play the HOP (N); receive a CANDY CANE.
- Walk down.
- Take the PRETZEL with the CANDY CANE (O).
- Go right.
- Place the PRETZEL (P). Take the LEMON and SALT BARREL (Q).
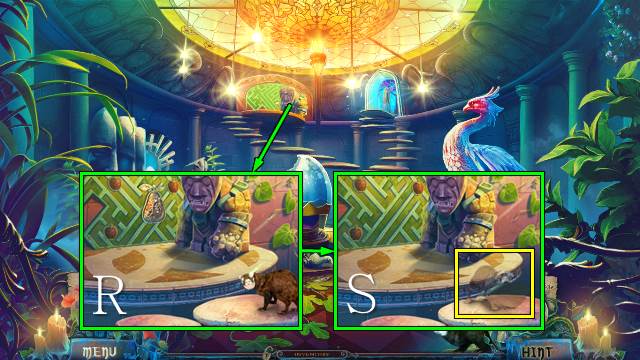
- Access the SALT BARREL and use the DWARF MINER (R); take the ROCK SALT.
- Use the ROCK SALT (S). Open the door; go forward.
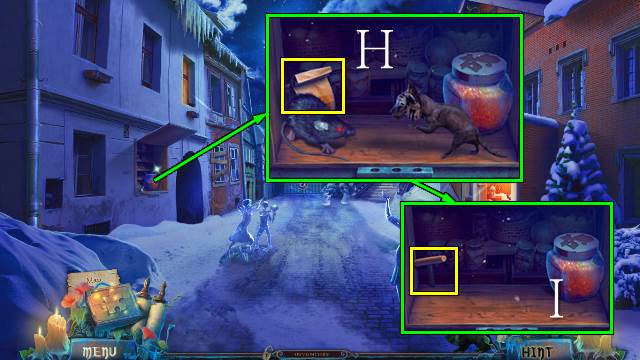
- Move the books (T); take the BUG HORN (U).
- Walk down twice.
- Place the BUG HORN and take the FREEDOM BRACELET (V).
- Go right twice.
- Place the two FREEDOM BRACELETS (W).
- Talk to the leader (X).
- Open the folder and play the mini-game (Y, Z).
- Take the PLIERS (A).
- Walk down twice.
- Take the ZINC NAILS with the PLIERS (B); remove the boards. Take the TEA BAG and ATOM SIGN (C).
- Go twice right.
- Place the ATOM SIGN (D). Read the instructions and place the LEMON and ZINC NAILS (E). Cut the lemon with the knife; place the nails, wires and clamps. Take the LEMON BATTERY.
- Walk down twice.
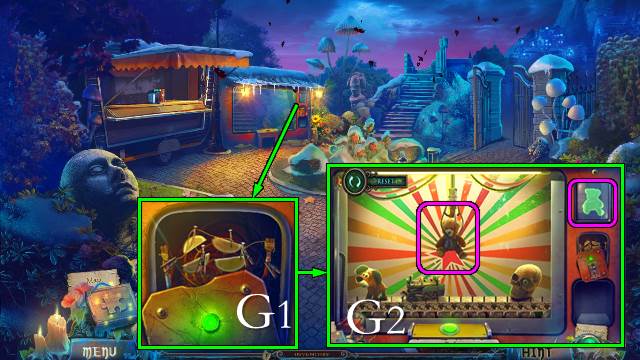
- Place the LEMON BATTERY (G1) for a mini-game (G2); receive the SCARY TIGER HEAD.
- Go right.
- Send Bertha, offer the SCARY TIGER HEAD and take the CRACKERS (H); take the COORDINATES MACHINE LEVER (I).
- Go right.
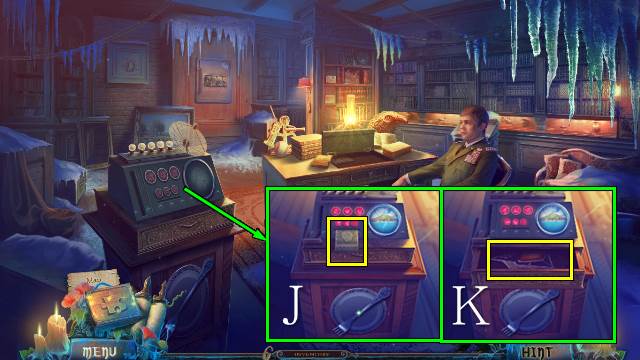
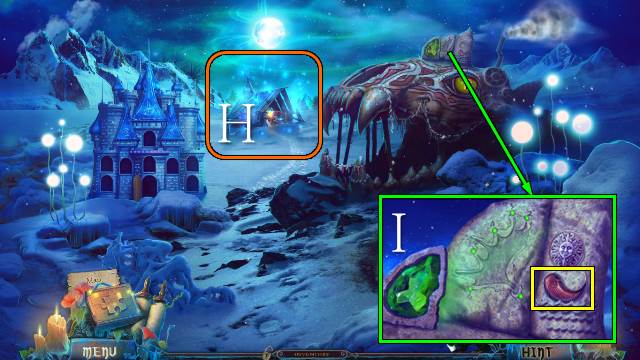
- Place the COORDINATES MACHINE LEVER; take the ISLAND COORDINATES (J). Take the SILVER SHIP (K).
- Walk down.
- Place the SILVER SHIP (L).
- Go forward.
- Play the HOP (M); receive a LASSO.
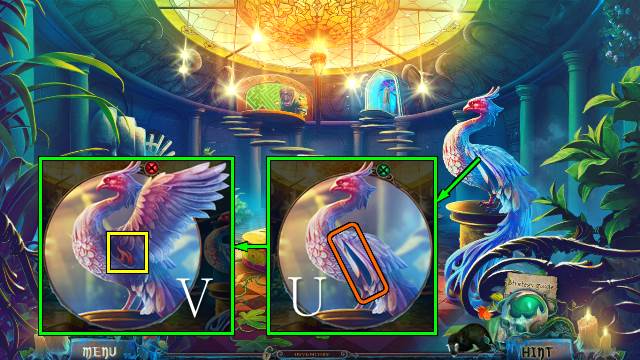
- Take the DOVE (N).
- Walk down.
- Use the LASSO (O).
- Place the DOVE (P). Take the VACUUM CLEANER, remove the items, open the book, place a page on the mirror and use the pencil (Q). Take the SAFE PASSWORD (R).
- Go forward.
- Take the ball (S); use the VACUUM CLEANER (T), turn the tap and take the OIL (U).
- Walk down and right.
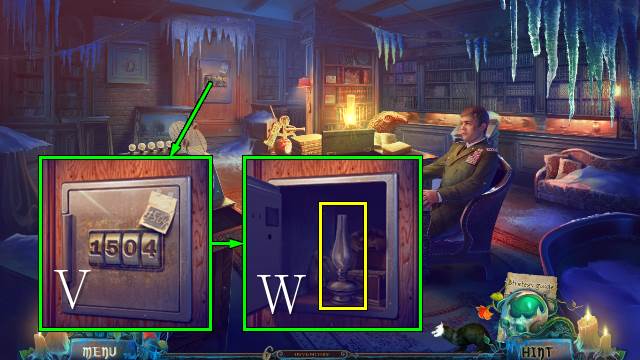
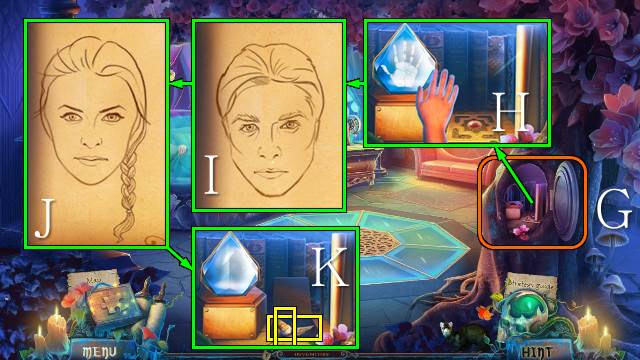
- Use the OIL and place the SAFE PASSWORD; enter 1504 (V). Move the money; take the LAMP (W).
- Go down and forward.
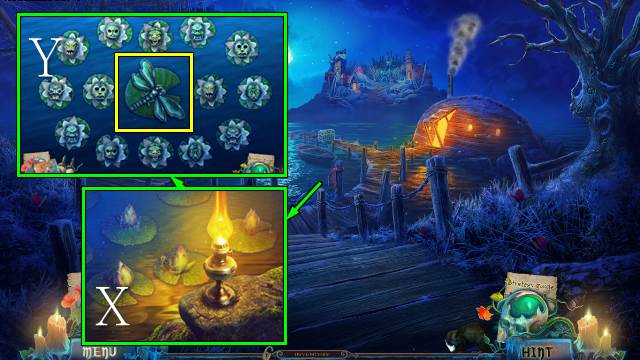
- Place the LAMP (X); play the mini-game. Take the TURQUOISE DRAGONFLY (Y).
- Walk down.
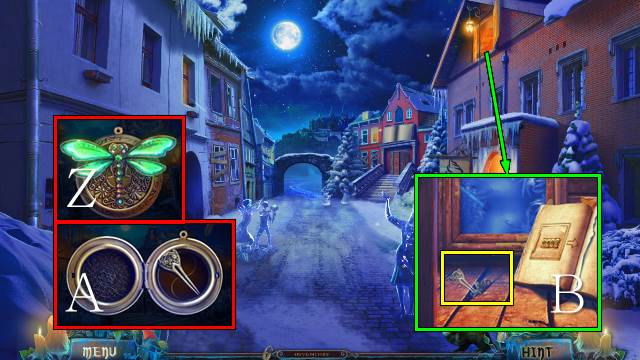
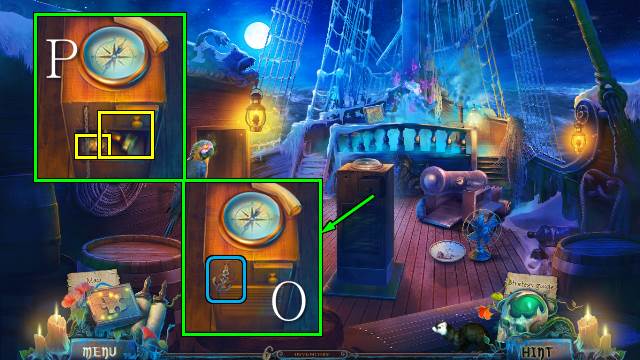
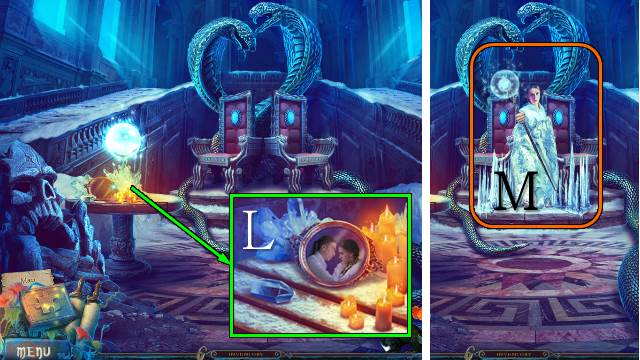
- Access EVA'S MEDALLION; place the TURQUOISE DRAGONFLY (Z). Read the note; take the HAIRPIN and OPEN MEDALLION (A).
- Use the HAIRPIN; take the OCTOPUS (B).
- Go forward.
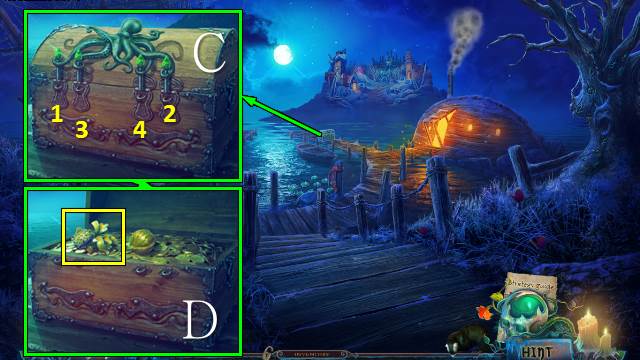
- Place the OCTOPUS; select the locks in the indicated order (C). Take the GOLDEN FISH (D).
- Walk down.
- Play the HOP (E); receive some GINGERBREAD.
- Place the GOLDEN FISH (F); remove the caviar and take the SPOON (G).
- Go right.
- Place the SPOON (H); Move the items and place the GINGERBREAD; take the BARREL TAP (I).
- Walk down and forward.
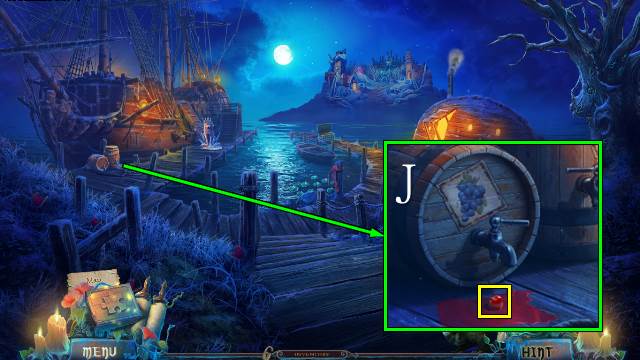
- Place the BARREL TAP; take the RUBY CHERRY (J).
- Walk down and right.
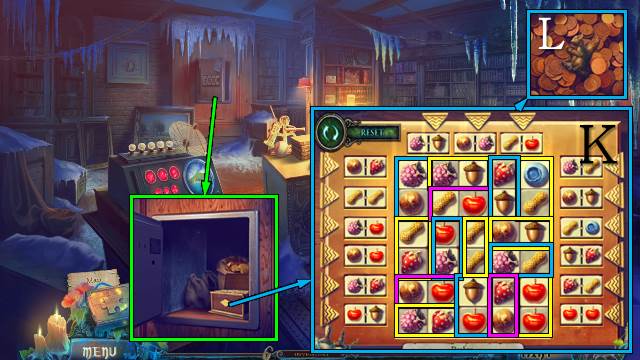
- Place the RUBY CHERRY for a mini-game (K); take the MECHANICAL SQUIRREL (L).
- Walk down and forward.
- Play the HOP (M); receive the FIRST YANG.
- Place the MECHANICAL SQUIRREL; take the FIRST YIN (N).
- Access the OPEN MEDALLION and place FIRST YIN and FIRST YANG; receive the FIRST CHARGED MEDALLION (O).
- Use the FIRST CHARGED MEDALLION (P); receive the OPEN MEDALLION. Take the MUSIC POWDER (Q).
- Go left.
Chapter 4: The Ship
- Place the MUSIC POWDER (R).
- Take the HYPNOTIC TABLETS (S).
- Access the CRACKERS, open the bag and add the HYPNOTIC TABLETS; take the HYPNOTIC CRACKERS (T).
- Remove the ropes and place the HYPNOTIC CRACKERS; place the key (U).
- Go left.
- Punch the ice monster (V).
- Take the KETTLE WITH WATER (W).
- Take the CHAMPAGNE; place the LITTLE TAIL, move it and take the LEATHERY WING (X).
- Walk down.
- Place the KETTLE WITH WATER; take the HOT TEAPOT (Y).
- Place the LEATHERY WING (Z); take the HACKSAW and COAT OF ARMS (A).
- Go left.
- Use the HACKSAW; take the CANNONBALL (B).
- Walk down.
- Place the CANNONBALL; take the SHIP IN A BOTTLE (C).
- Go left.
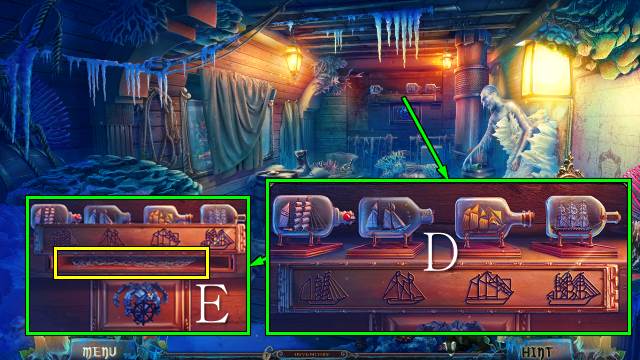
- Place the SHIP IN A BOTTLE; move the ships (D). Take the FISHING NET (E).
- Walk down.
- Remove the net; place the FISHING NET for a mini-game (F). Take the TOOTHY FISH (G).
- Go left.

- Remove the tarp (H).
- Release the TOOTHY FISH; take the COMPASS NEEDLE (I).
- Walk down.
- Place the disc, COMPASS NEEDLE and glass (J); take the SHIP'S WHEEL (K).
- Go left.
- Place the SHIP'S WHEEL (L); take the lamp (M).
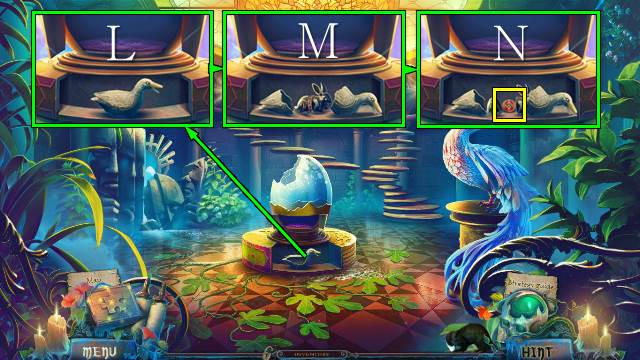
- Play the HOP (N); receive an ANCHOR.
- Walk down.
- Place the ANCHOR (O); take the FISH FOOD and FLEET SEAL (P).
- Go left.
- Use the FISH FOOD (Q); take the LIGHTER (R).
- Place the TEA BAG, HOT TEA POT and ISLAND COORDINATES and FLEET SEAL (S); use the LIGHTER. Pour the tea, put the map on the flame and use the pencil, candle and seal on the map. Take the COUNTERFEIT MAP (T).
- Walk down.
- Place the COUNTERFEIT MAP (U).
Chapter 5: The Master of Artifacts
- Use the stick three times (V); take the BOTTLE (W).
- Select all fish (X).
- Take the MAGIC CANVAS (Y).
- Place the COAT OF ARMS (Z); take the SWIM FINS and ICY LILY (A).
- Go right.

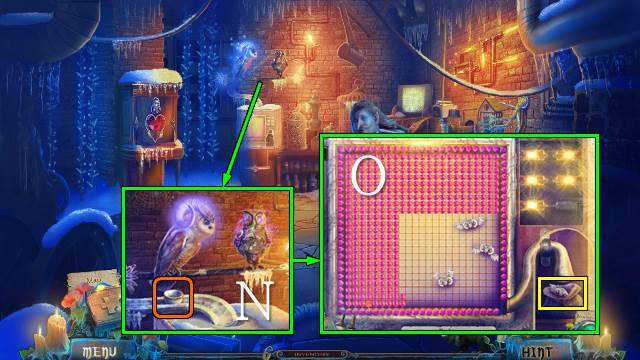
- Select all fireflies; take the NIGHT-LIGHT (B).
- Take the GLOWING POLLEN with the BOTTLE (C).
- Remove the vines (D); place the ICY LILY (E); take the BUCKLE, CROCODILE and popcorn (F).
- Walk down.
- Place the BUCKLE and NIGHT-LIGHT; take SATURN and the WOODEN ALTAR (G).
- Take the BENT SPOKES with the CROCODILE (H).
- Go right.
- Place SATURN. Read the note and rearrange the planets; take the SPIRIT FIGURE (I).
- Walk down.
- Place the SPIRIT FIGURE (J); take the AROMATIC OILS and INSENCE (K).
- Go right.
- Place the WOODEN ALTAR and INSENCE; use the stone on the incense sticks (L). Swap 1-4, 2-4; take the IDOL (M).
- Walk down.
- Place the IDOL (N) for a mini-game (O).
- Take the MAGIC JUICE (P).
- Go right.
- Place the SNAIL SEED, MAGIC JUICE (Q), BENT SPOKES and MAGIC CANVAS (R).
- Play the HOP (S); receive the PIANO KEYS.
- Walk down.
- Find the missing pieces and place the PIANO KEYS (T); push a key and take the SECOND YIN and PUMPKIN TOP (U).
- Go right.
- Place the PUMPKIN TOP; take the SECOND YANG (V).
- Access the OPEN MEDALLION; place the SECOND YIN and SECOND YANG. Receive the SECOND CHARGED MEDALLION (W).
- Use the SECOND CHARGED MEDALLION (X); receive the OPEN MEDALLION. Take the FLOWER MEGAPHONE (Y).
- Walk down.
- Place the FLOWER MEGAPHONE; push a key (Z).
- Take the SPIKE (A).
- Use the GLOWING POLLEN. Match the runes and take the WOOL ROPE (B).
- Go left.
- Place the SPIKE; take the GOLEM INSTRUCTIONS (C).
- Walk down.
- Remove the paper; place the GOLEM INSTRUCTIONS for a mini-game (D).
- Take the MAGIC GOBLET and GOLEM (E).
- Go left.
- Send Bertha. Use the MAGIC GOBLET to receive the FILLED MAGIC GOBLET (F).
- Walk down.
- Use the FILLED MAGIC GOBLET (G).
- Play the HOP (H); receive an OAK LEAF.
- Go left.
- Place the OAK LEAF (I); take the BLUE EYE and BOOK KEY (J).
- Walk down.
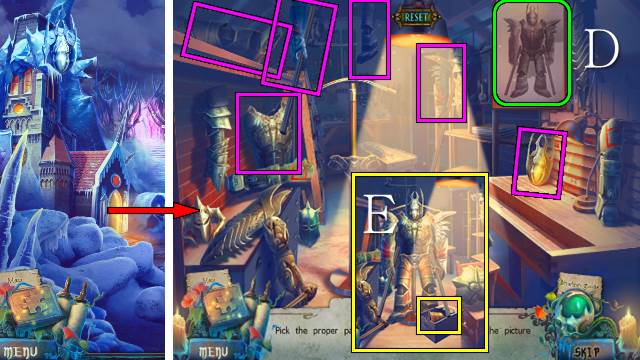
- Place the BOOK KEY for a mini-game (K).
- Take the SHIELD (L).
- Go left.
- Place the SHIELD (M).
- Go left.
- Take the UNDERWATER HELMET (N).
- Take the MAGICAL NOTE (O).
- Walk down.

- Offer the SWIM FINS and UNDERWATER HELMET (P).
- Play the mini-game (Q).
- Take the HEART SPLINTERS (P).
- Go left.

- Place the HEART SPLINTERS; restore the heart (R).
- Play the HOP (S); you receive a MAGIC WAND.
- Walk down.
- Use the MAGIC WAND (T); receive a TOY LOCOMOTIVE.
- Access the TOY LOCOMOTIVE; place the CHAMPAGNE and WOOL ROPE. Take the ROCKET LOCOMOTIVE (U).
- Go left.
- Place the ROCKET LOCOMOTIVE and remove the cork (V); move the ball, boxing glove, then bird (W). Push the button and take the LETTER (X).
- Walk down.
- Place the LETTER for a mini-game (Y).
- Read the note and take the OWL (Z).
- Go left.
- Place the OWL; take the WIZARD'S HAT (A).
- Walk down twice.
- Play the HOP (B); receive the GREEN CRYSTAL.
- Place the WIZARD'S HAT (C); take the ACORN (D).
- Go left.
- Place the ACORN (E); take the YELLOW CRYSTAL (F).
- Go left.
- Place the YELLOW CRYSTAL and GREEN CRYSTAL for a mini-game (G).
- Solution: 4-6-7-1, 8-5-3-2.
- Take the MIRROR OF TRUE INTENTIONS and ARROW (H).
- Walk down twice.
- Place the ARROW (I); move the coat and take the BELT (J).
- Go left twice.
- Play the HOP (K); receive the FLYING SANDALS.
- Replace the BELT. Place the GOLEM and WOOL ROPE; take the SCARF (L).
- Walk down.
- Place the SCARF; take the MAGIC EGG (M).
- Go left.
- Place the MAGIC EGG (N).
- Play the mini-game; take the IRON CREATURES (O).

- Offer the IRON CREATURES (P); take the WINDING KEY (Q).
- Walk down twice.
- Send Bertha; offer the FLYING SANDALS and WINDING KEY (R).
- Answer frost, snowflake and snowstorm.
- Go forward.
Chapter 6: The Mirror of Treachery
- Remove the snow; take the WITCH'S CROWN (S).
- Take the MAGNET (T).
- Pour the AROMATIC OILS (U).
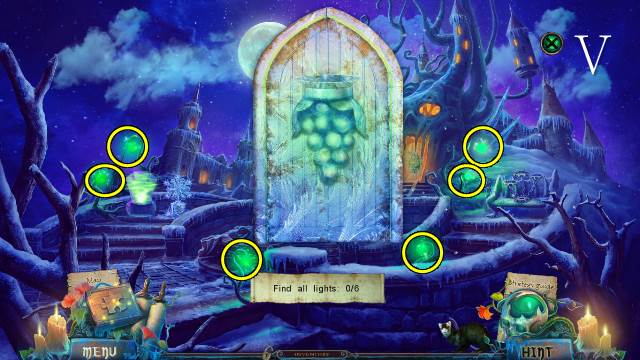
- Find the lights (V).
- Go forward.
- Play the HOP (W); you receive the MARA FIGURINE.
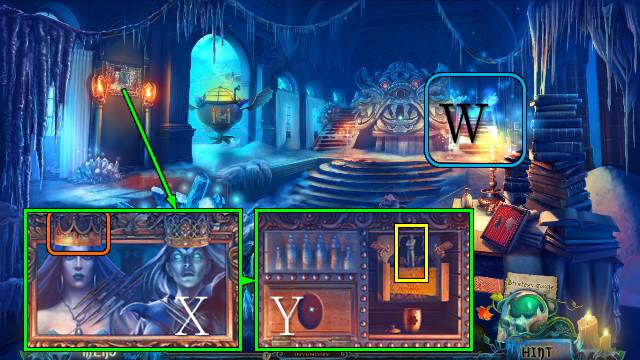
- Place the WITCH'S CROWN (X); remove the canvas. Take the MARCUS FIGURINE (Y).
- Walk down.
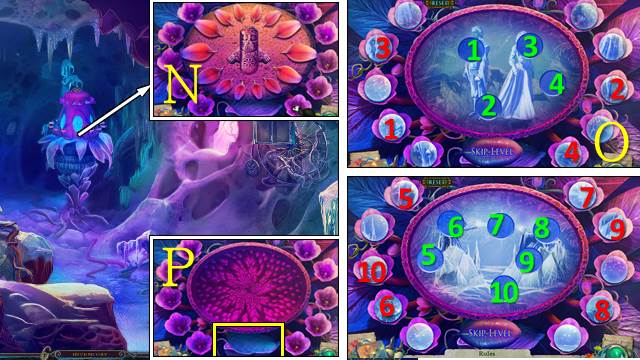
- Place the MARCUS FIGURINE and MARA FIGURINE; put the witches in their places. Take the EMERALD RIDGE (Z) and BRONZE BIRD (A).
- Go forward.
- Place the BRONZE BIRD. Fold the paper three times; use the scissors (B). Unfold and take the PAPER SNOWFLAKE (C).
- Walk down.
- Place the PAPER SNOWFLAKE (D). Touch the ice; take the LIGHT PROFILE (E).
- Go forward.
- Place the LIGHT PROFILE (F); play the mini-game (G).

- Solution continued (H).
- Take the GLASS BUTTON (I).
- Walk down.

- Place the GLASS BUTTON, touch it and touch the crystal (J); take the SCARLET EYE (K).
- Go forward.
- Place the BLUE EYE and SCARLET EYE (L). Open the apple and take the note and EMPTY BOX (M).
- Walk down.
- Place the EMPTY BOX, select the three shadows and take the BOX WITH SHADOWS (N).
- Go forward.
- Place the BOX WITH SHADOWS (O).
- Go forward.
- Play the HOP (P); receive an ANTLER.
- Place the EMERALD RIDGE; select numbers 1-6 and 1. Take the ANTLER (Q).
- Go right.
- Place the ANTLERS; take the RING (R).
- Walk down.
- Place the RING (S). Remove the bar; take the APPLES and RAKE. Grate and take the CINNAMON (T).
- Go right.
- Use the RAKE; take the BELL and THIRD YIN (U).
- Walk down.
- Place the BELL for a mini-game (V).
- Take the ROSE EMBLEM (W).
- Walk down.

- Play the HOP (X); receive a TREE AMULET.
- Place the ROSE EMBLEM; take the HONEY (Y).
- Go forward and right.
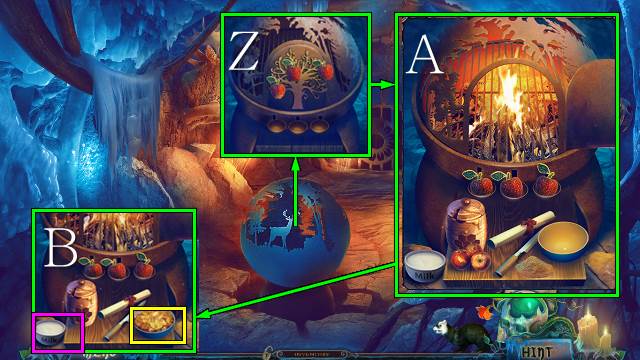
- Place the TREE AMULET (Z). Place the CINNAMON, HONEY and APPLES; cut the apples, add honey and cinnamon and put the bowl on the fire (A). Take the milk and BAKED APPLES (B).
- Place the BAKED APPLES (C); talk to the creatures.
- Take the MOON (D).
- Walk down.

- Place the MOON and select the stars (E); take the RECORDER (F).
- Go right.
- Use the RECORDER; take the SUN (G).
- Walk down.
- Play the HOP (H); receive the SNAKE TAIL.
- Place the SUN; take the THIRD YANG (I).
- Go right.
- Access the OPEN MEDALLION; place the THIRD YIN and THIRD YANG. Receive the THIRD CHARGED MEDALLION (J).
- Use the THIRD CHARGED MEDALLION (K); receive EVA'S OPENED MEDALLION.
- Take the PICKAXE (L).
- Walk down twice.
- Use the PICKAXE (M); receive COLORED MINERALS.
- Go forward and right.
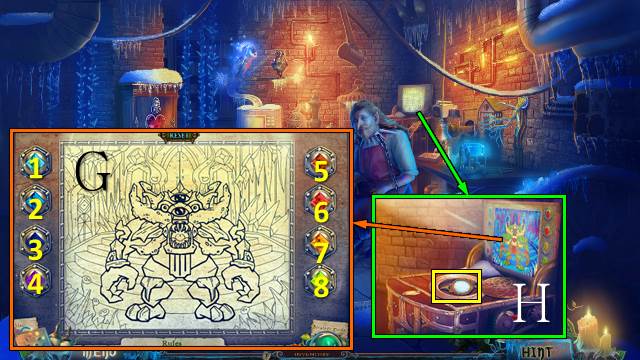
- Zoom in; place the MIRROR OF TRUE INTENTIONS and COLORED MINERALS for a mini-game (N).
- Select and color: 1 - all white; 2 - all yellow; 3 - all blue; 4 - all white except the marked cell (O).

- Select and color: 5 - all red; 6 - only marked white; 7 - only marked red (P).
- Take the MIRROR OF TREACHERY (Q) and SNAKE HEAD (R).
- Walk down twice.
- Place the SNAKE HEAD and SNAKE TAIL; select both buttons (S).
- Go left.
- Place the MAGNET (T); find the screws (U).
- Remove the screws (V).
- Remove the panel; take the SECRET RUNE (W).
- Walk down.
- Place the SECRET RUNE (X); take the ALUMINUM BUCKLE and HAT (Y).
- Access the HAT. Place the MAGICAL NOTE; open the pockets and take the MUSICAL HAT (Z).
- Go left.
- Place the MUSICAL HAT; take the QUARTZ CRYSTAL (A).
- Turn all tiles three times (B).
- Walk down.

- Place the QUARTZ CRYSTAL (C); take the WINGS SYMBOL (D).
- Go left.
- Place the WINGS SYMBOL (E); take the STEEL BIRD (F). Restore the panel (G).
- Walk down.
- Place the STEEL BIRD; take the IODINE CRYSTALS (H).
- Go left.
- Restore the statuette (I). Place the ALUMINUM BUCKLE (1) and IODINE CRYSTALS (2) and add them to (3); pour (4) onto (5) and add water (6) with (7)(J).
- Play the mini-game (K).
- Solution: (4-3)-(2-6)-(1-4)-(5-1)-(1-2)-(4-1)-(1-5)-(2-1)-(6-2)-(3-4)-(2-3)-(1-2)-(4-1)-(3-4).
- Remove the mirror; place the MIRROR OF TREACHERY (L).
- Use EVA'S OPENED MEDALLION for a mini-game (M).
- Congratulations! You've completed Witches' Legacy: Dark Days to Come.
Created at: 2016-08-28