
WALKTHROUGH MENU
- General Tips
- Tutorial
- Story 1: Everyone Loves a Clown
- Chapter 1.1: Delaware and the Krandall House
- Chapter 1.2: Kelly and the Clowns
- Chapter 1.3: Delaware and the Fun House
- Story 2: The Protector
- Chapter 2.1: Kelly and the Hunter
- Chapter 2.2: Kelly explores the Tunnels
- Chapter 2.3 Kelly and the Roller Coaster
- Chapter 2.4: Delaware Searches for Robert
General Tips
- This is a Point and Click Adventure Game. You will play sometimes as Delaware St. John, a young man who has psychic visions, and sometimes as Kelly, his partner and friend.
- This is a very creepy game with a lot of atmosphere. Some players will enjoy spending a lot of time wandering around looking at details. The game will last longer if you try to experience it as Delaware would, and don’t just jump ahead to the next place where you can perform a task.
- Use the ESC key at any time to bring up the Save menu. You use this menu to save your current game or exit altogether.

- There is no autosave, so you will want to save just before you quit.
- There are only 10 SAVE slots for the two stories combined, so you will probably have to reuse some slots as you progress through the game. Be aware that there is no “Are you sure?” question before you overwrite an existing saved game. If you click on a slot, your current position will be saved there immediately.
- The game is untimed, except for three chase sequences.
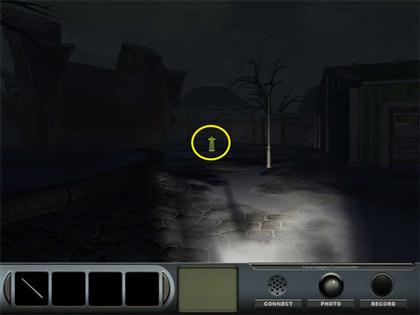
- At first glance the scenes appear very dark. However, once Delaware gets his flashlight from the truck, it will automatically illuminate a circular area around the cursor as you move the cursor across the scene. So you will be able to see details as you go.
- Delaware has a communication device called a VIC for Voice/Image Communicator. It works like a cellphone that can also record video and audio.
- This is the third title in the series. Delaware is a young man with psychic abilities who solves mysteries, usually involving a ghost. He was kidnapped as a child and grew up in an orphanage. He has been trying to find out more information about his parents.
- The game will automatically switch you between Delaware and Kelly for story reasons; you don’t get to choose which character you use or when.
- Simon is another friend/partner. You will use the VIC to send Simon video and audio to analyze on his computer.
- You can use the Options Menu to adjust the volume for the music and the special effects as you like.
- If you are playing as Kelly, a loud crackling is a spike on the EMF device that detects paranormal activity. It might be a ghost, or it might be a magical bad guy.
- Whenever a Shadow Person is in the scene, your cursor will automatically turn into a flashlight. Click quickly on the Shadow Person to disperse it.
- If bad guys do catch you, you will black out for a few moments or automatically restart at the beginning of a chase sequence.
- Your skill rank at the end of the game will be based on how many times the bad guys caught you, as well as the time you took.
Navigation
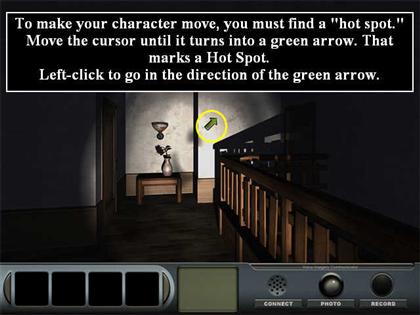
- If the cursor looks like a green arrow, that is a Hot Spot. Clicking there will either turn or move your character in that direction.
- A forward green arrow, diagonal right green arrow, or diagonal left green arrow will all cause your character to move in those directions.
- A green down arrow does NOT mean move in that direction. Instead, your character will turn around 180 degrees. This can make navigation a bit confusing since if you do one down arrow and then a second down arrow you will be right back where you started, since what you did was turn your character in a complete circle.
- A right arrow or left arrow that is parallel to the bottom of the screen does not move your character in that direction—it just turns you to face that way.
- Some Hot Spots will only appear after you have done something else in the scene.
- Some Hot Spots are story-dependent, and will only appear at certain times in the story.
- To close a zoom scene, click on the down arrow. It will be marked EXIT. Some EXIT Hot Spots turn your character around and some don’t.

- Throughout the game, most doors and gates will close automatically behind you as you go through them. This doesn’t necessarily mean anything supernatural, but it does mean you have to reopen a door each time you go through it.
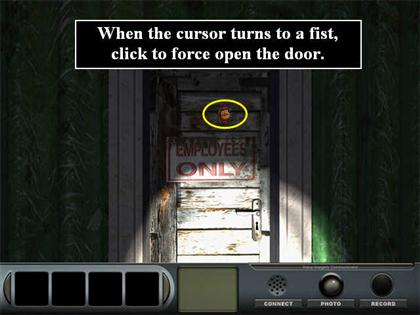
- If the cursor looks like a fist, clicking there acts like a forceful hit. Delaware sometimes uses this to force open doors.
- If the cursor looks like a grabbing hand, clicking there will pick up an object.
- If the cursor looks like an eye, clicking there will usually zoom in for a close-up view. In some cases, clicking on the eye doesn’t zoom in; it just gives you more information about the object.
- Many times you will have to zoom in twice. First you will go from the room scene to a view of the object. The second time you will get information about the object. Often you will not be able to progress in the story if you haven’t done the second click, so it’s a good idea to always zoom in until Delaware repeats himself.
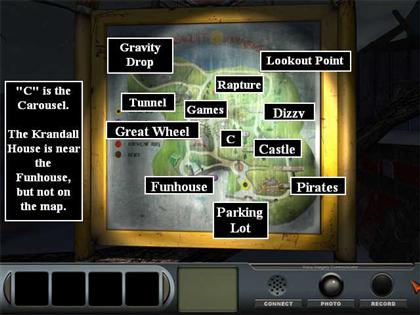
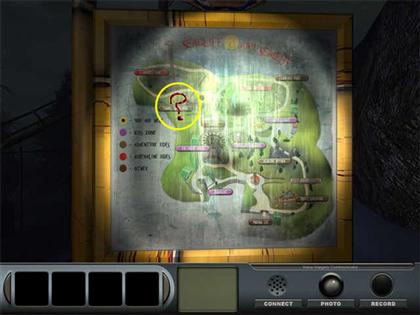
- There are Maps on signboards throughout the park. Each Map is the same, except for the yellow sunflower, which is a “You are Here” indicator.
Inventory Items
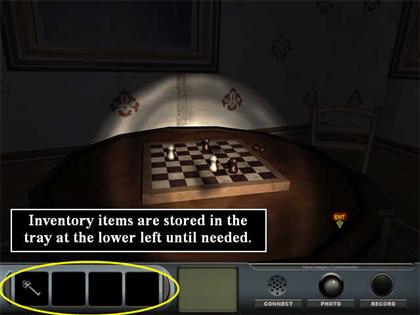
- Inventory items will be stored in the tray on the lower left until needed.
- To use an item from your inventory, left-click on the item to attach it to your cursor. Now move the cursor around the scene until it has a red outline. Then left-click to use the item.
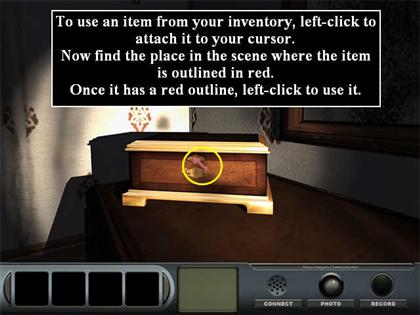
- You can only use the item where it has a red outline. This isn’t always where you expect. For example, in one case to use a key on a door you have to click the key on the handle rather than the lock. You know you’re in the right place to click when the inventory item is outlined in red.
- To combine items, left-click on one, to pick it up, then left-click on one in the scene to combine them.
- If an item can be examined, but you can’t pick it up, check your inventory to see if there’s anything you can combine with it.
Hint System & Batteries
- You will only be able to use an inventory item at the spot where it has a red outline on the screen.
- If the item can’t be used there, Delaware will say something like “That’s not right.”
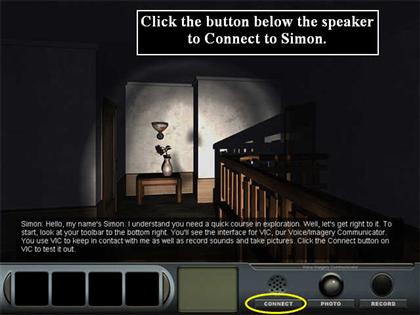
- If you’re stuck, use the CONNECT button on the VIC to call Simon. He will often have a helpful suggestion.
- If you use the CONNECT button, but Delaware won’t make the call, he’ll usually give you a hint himself. If it’s the general “I don’t need to call Simon right now, I should keep exploring” that means just what it says—Delaware should continue to explore and look for another place to interact with the game.
- We use “examine” to mean find the place where the cursor turns into an eye and click to zoom in.
- Remember that the down arrow causes your character to turn 180 degrees, but stay in place.
- Whenever a Shadow Person is in the scene, your cursor will automatically turn into a flashlight. Click quickly on the Shadow Person to disperse it.
Tutorial<
- This section is optional. It explains the navigation controls.
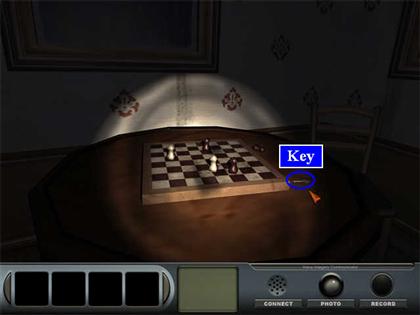
- During the tutorial you will have to find a Key. It is on the table next to the chess set.
Story 1: Everyone Loves a Clown
The Park Entrance
- The first scene is quite dark. You can turn left or right or walk forward. Go forward.
- Delaware will immediately discover it is too dark to see and he has left his flashlight in the truck. Return to the truck.
- When you see the eye on the truck, zoom in.
- You will see a cut scene. Kelly has hidden in the truck, and wants to do her own investigation.
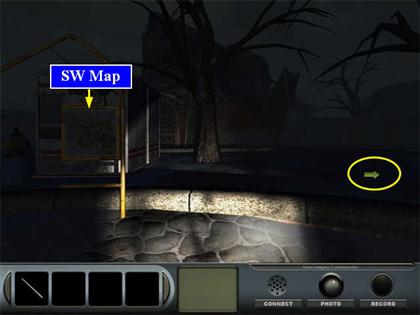
- Playing as Delaware, you are back at the original scene, but this time you have a flashlight and can see better. Go forward.
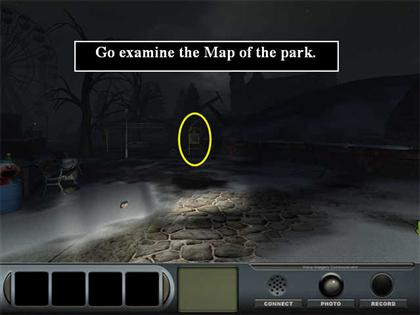
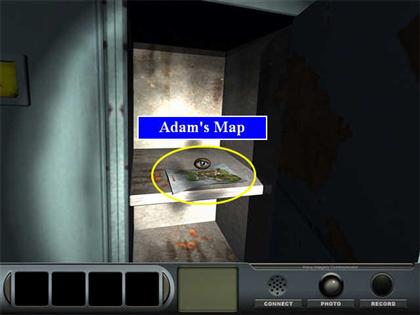
- Examine the Map on the right.
- At this point you can do a lot of wandering around the park if you like. Everything is very creepy. Most of the areas are blocked, locked, boarded up, or require special equipment that Kelly has.
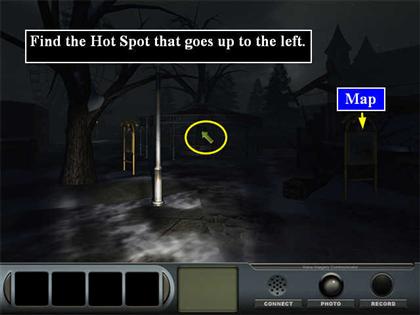
- To go to the next area where you can actually do something, position yourself at the Map at the Entrance.
- Click on the Hot Spot arrow that goes diagonally left.
Chapter 1.1: Delaware and the Krandall House
The Park
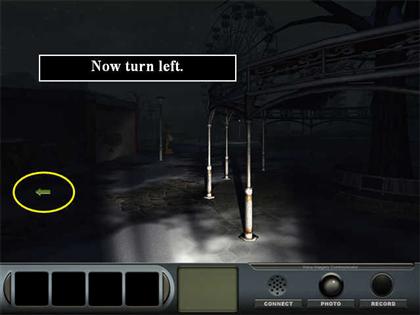
- Now turn left.
- You will see a Notice Board. Click on it to examine it more closely.
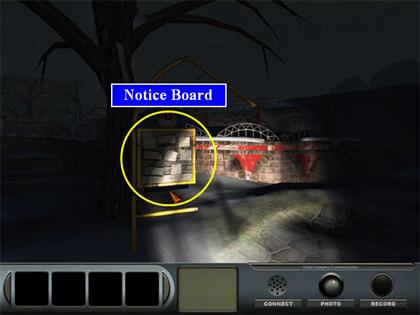
- Double-click and Delaware will tell you these are all notices of children who went missing within one year of each other. You will not be able to read more details.
- Call Simon, and you’ll find out he knew Kelly was at the park.
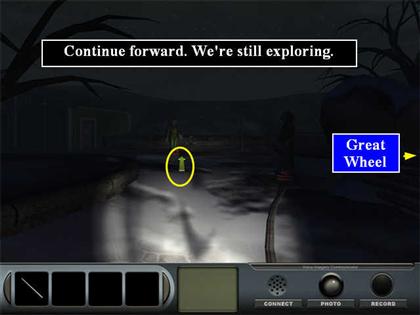
- Continue exploring. From the Notice Board, turn right.
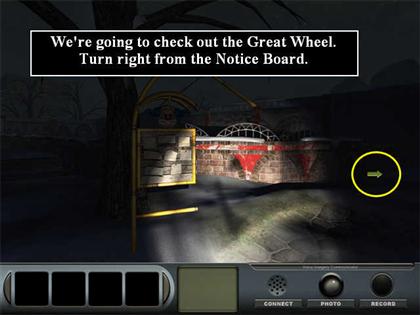
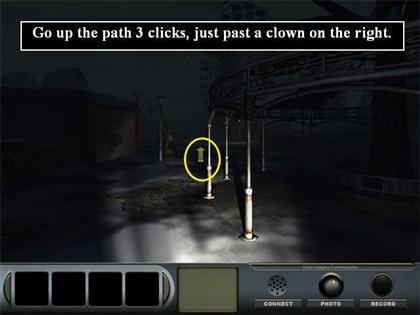
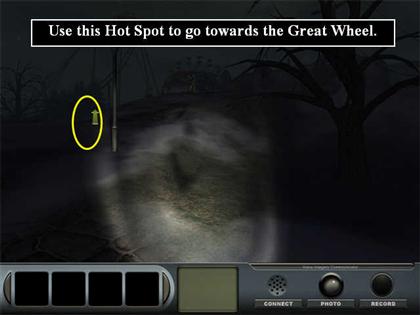
- Continue up the path ahead for 3 clicks, until you have passed a clown on your right.
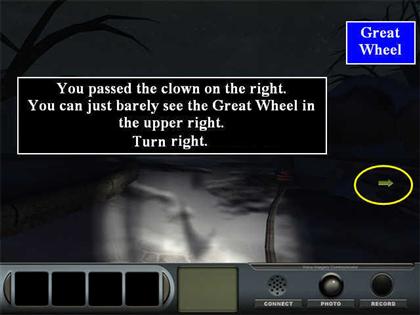
- You will be able to very dimly see the Great Wheel (Ferris wheel) up to your right. Turn right towards the Great Wheel.
The Great Wheel
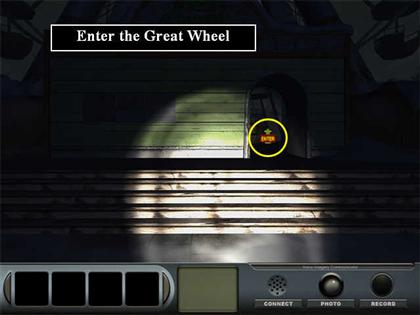
- Go in the entrance. You can look around in here, but there’s nothing to do.
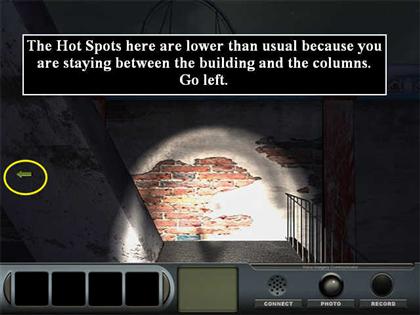
- Go out through a door at the upper right side of the building.
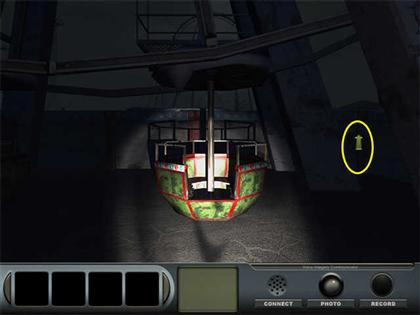
- Turn left. The Hot Spots are a little lower than usual here because you are staying between the columns and the building.
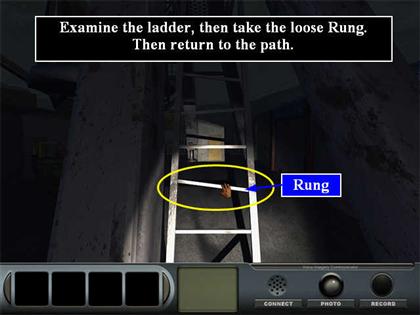
- There is a ladder here.
- Examine the ladder. It is too rickety to climb, but a piece of it will come off and go into your inventory.
- Leave the building.
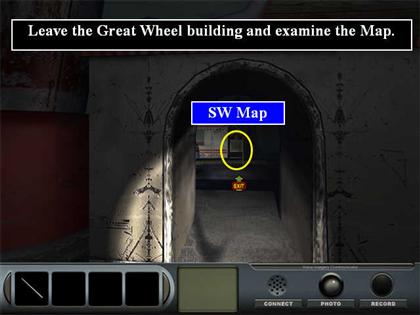
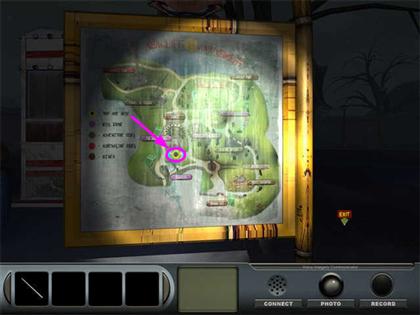
- You will see another park map. Look at it, and you will see you are just below the Great Wheel in the lower left corner of the map.
- Exit the zoom scene.
The Park
- Turn right.
- Continue exploring by going forward to the end of the path.
- When you get to the clown, you won’t be able to go forward any more. Turn left.
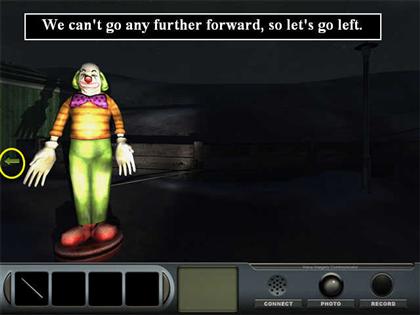
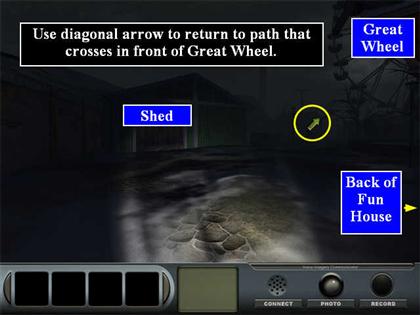
- Ahead you can see a Shed on the right and a large house straight ahead. The back of the Funhouse is on your left.
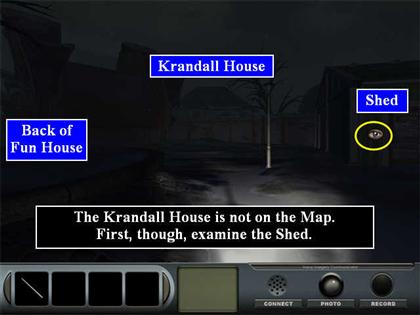
The Shed
- Begin by examining the Shed.

- You can’t get in. Exit the zoom scene.
- You will see a cut scene. A menacing Shadow Person will appear, but the flashlight will scare it off. Don’t bother trying to follow it.
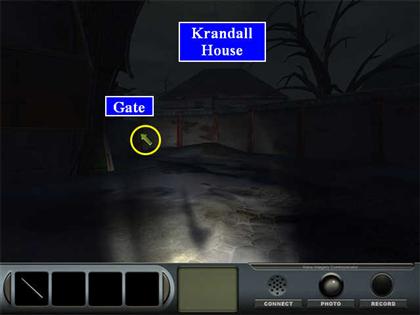
The Krandall House
- Continue to the house.
- Open the gates and go through.
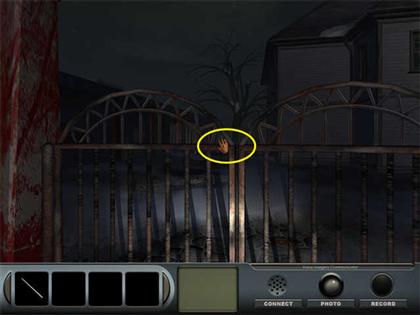
- Simon will call you and you can describe the Shadow Person. Simon will tell you they are demons, not ghosts. Light will scare them away. If you don’t use light on them quickly enough, you can pass out. (You will come to in the same place, but you will earn fewer points towards your total score in the game.)

- There is a light on in the house window, but Simon says that’s OK because the park still has electricity on to discourage vandals.
- Continue to the right of the house.
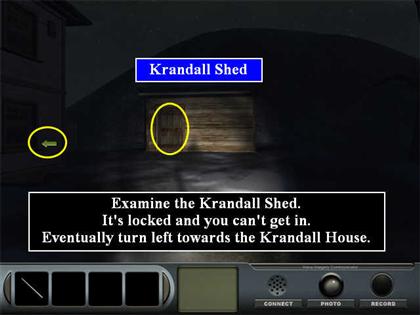
- You will see a brown shed up ahead.
- Move forwards and examine the Shed. It’s locked and you can’t get in.
- Turn left to look at the Krandall House.
- You see a Cellar door. Click to zoom in.
- Take the Rung from inventory and use it on the lock to break it open. If you don’t have this item, you will have to go to the Great Wheel building and find it.
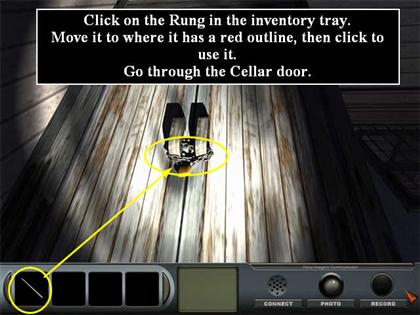
- Go through the doors into the Cellar.
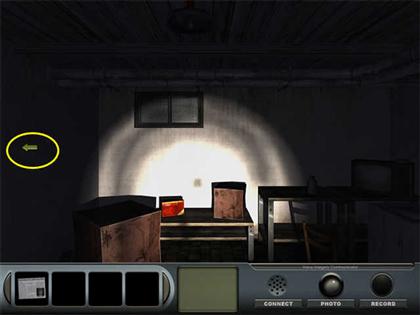
The Cellar
- You will see a light switch on the wall straight ahead. Try it, but it doesn’t work.
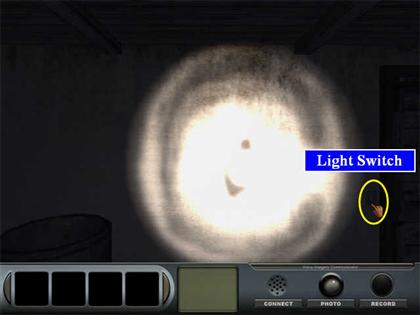
- Turn right.
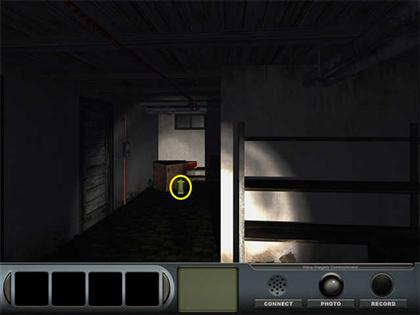
- A Shadow Person may appear. From now on, whenever you see one, quickly click on them. This will activate the flashlight and they will disappear.
- Continue forward to the box.
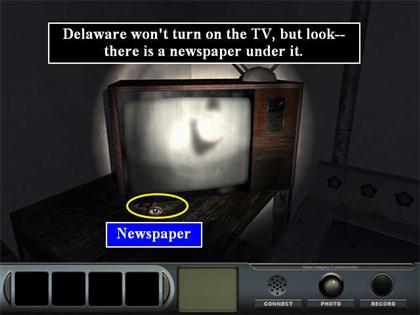
- Try the TV.
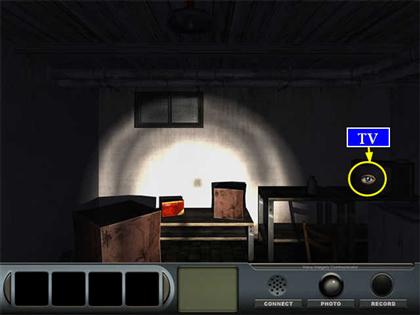
- Click to examine it, but Delaware doesn’t want to turn it on.
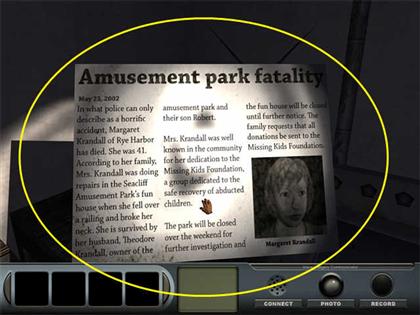
- Look underneath the TV. There is a newspaper clipping there. Click once to zoom in.
- Read the clipping. The wife of the park owner died before the cave collapse. And in one of the creepy touches this series is known for, donations in her memory are to be made to the Missing Children Foundation. (Remember all those missing kids listed on the Notice Board?)
- Click one more time to collect the newspaper.
- Click the down arrow. Now you are facing into the Cellar with the TV behind you. Go forward to the other side of the room.
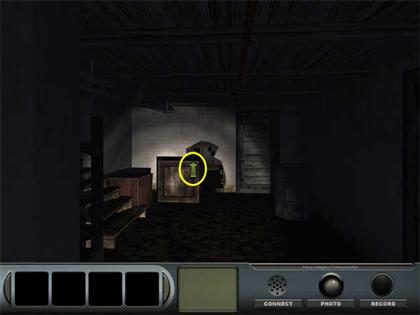
- There is a door here. Open it. It leads to the Furnace Room.
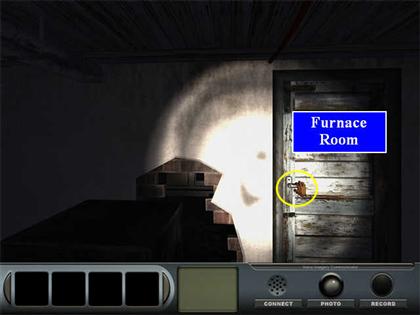
- Examine the Furnace Room so you know what’s here, but there’s nothing to interact with.
- Go back out into the Cellar. Now you are again facing the box by the TV. Go towards it.

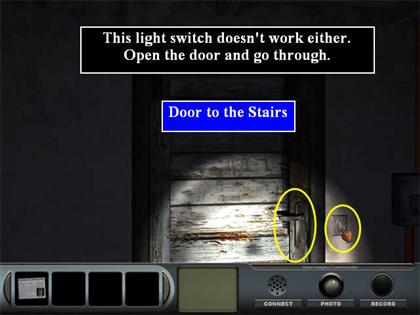
- This time turn left.
- Try the light switch. This one doesn’t work either.
- Go through the door. You can look around, but there’s nothing interesting here—just some old furniture.
- Go upstairs.
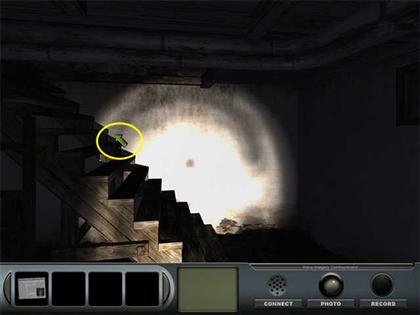
Ground Floor
- The door at the top of the stairs is locked. Have a conversation with Theodore Krandall (the previous owner of the amusement park who hanged himself the day of the accident).
- He wants you to wait until his wife returns, but she’s the one who died based on the newspaper article.
- Take the newspaper from your inventory and slide it under the door. He will unlock the door.

- If you don’t have the newspaper, it is in the cellar underneath the TV.
- This floor has 3 rooms: Kitchen, Living room, and Dining room. You need to visit all 3.
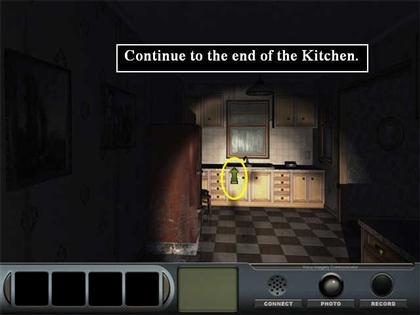
- You start in the Kitchen. Examine the stove—looks like no one has been here for a long time.
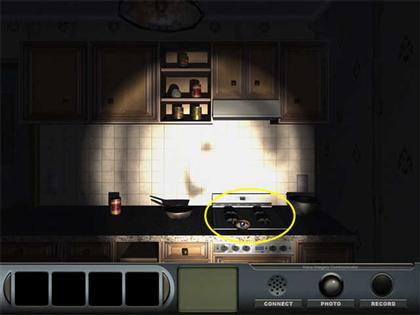
- Turn left. Walk to the far end of the kitchen.
- Turn left to look at the refrigerator.
- Now click the down arrow to turn all the way around and you will see the entrance to the Dining room.
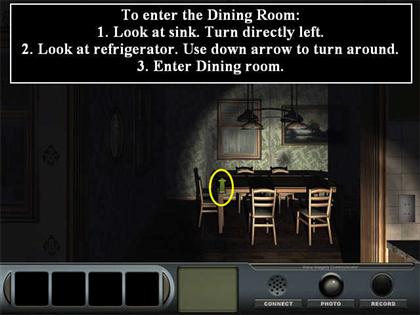
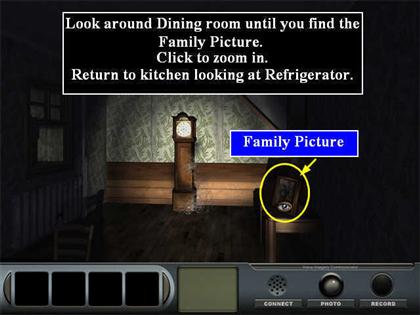
- Enter the Dining room and look around. The only thing to notice is a Family Picture on a table.
- You don’t have to collect the Family Picture, just look at it closely.
- Go back to the kitchen. This time when you are facing the refrigerator, turn left.
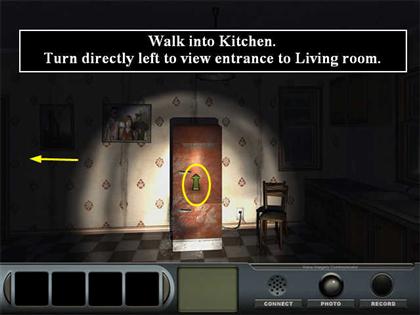
- You can see the entrance to the living room. Go in and look around.
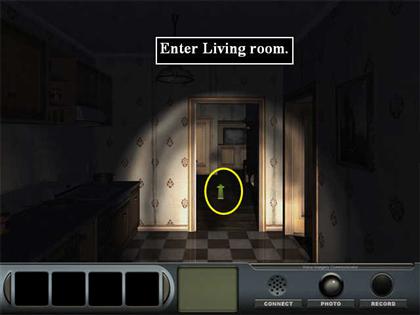
- Go upstairs.
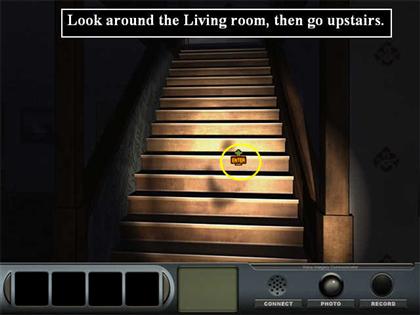
Upper Floor
- There are 4 doors on this level. They are all locked.
- When you are facing the vase in the alcove, turn right.
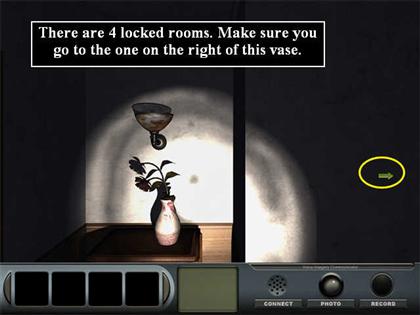
- Talk to Theodore again through the door. (Try to open the door, and he will start talking.)
- He tells you he also lost his son. He and Delaware have an uncomfortable conversation.
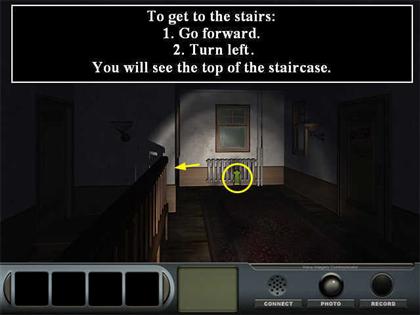
- Turn back so you are facing the radiator.
- Go forward.
- Turn left and you will be at the top of the stairs. You will hear a noise downstairs.
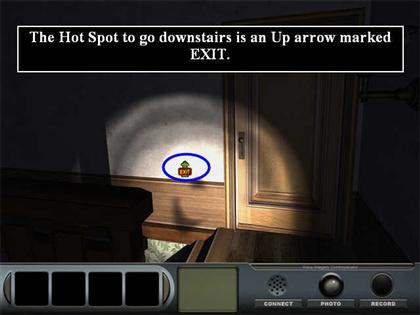
- The Hot Spot to go downstairs is an up arrow marked EXIT.
The Safe
- Go downstairs. Someone has moved a painting from above the sofa. Look closely—there is a safe there.
- Examine the safe. There are marks which look like Roman numerals.
- The three numbers are 9, 2, and 3.
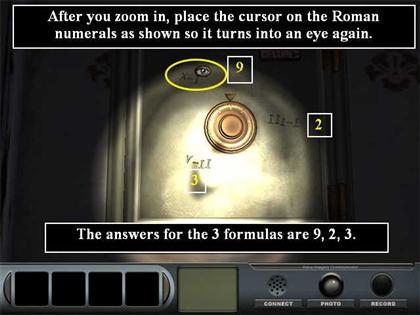
- Click once on the dial and a line of numbers will appear at the top of the scene.
- Click on 9, 2, and 3 and the safe will open.

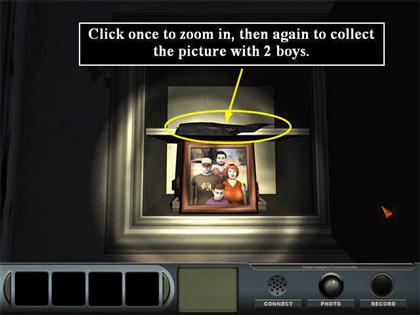
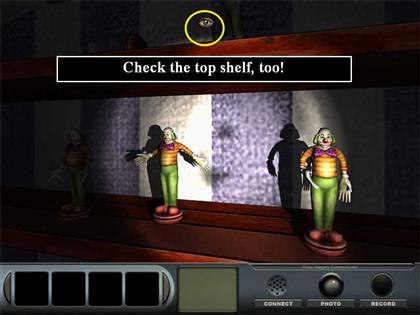
- There are more family pictures in here, but they have two boys instead of one.
- Click on the picture on the top shelf of the safe to zoom in.
- Click again to collect it.
- You need to talk to Mr. Krandall again to find out who the boy is.
- Turn until you are looking at the stairs.
- Go up the stairs.
Upstairs
- You are facing the radiator.
- Click on the down arrow to turn around.
- You are facing the vase.
- Go forward once.
- Click on the right arrow to face the bedroom where Mr. Krandall is.
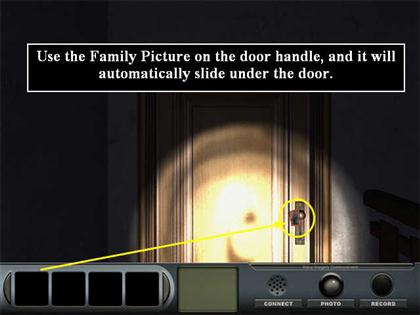
- Take the Family Picture from your inventory and click it on the door handle where the photo is outlined in red.
- The photo will automatically slide under the door.
- Talk to Mr. Krandall about Adam, the boy in the picture. He is the Krandalls’ younger son, who disappeared from the park.
- Mr. Krandall will get angry and tell you to go away, but the door will unlock.
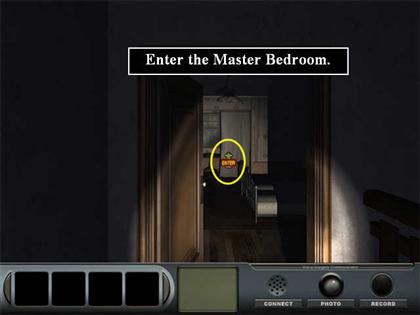
- Use the handle to open the door; then enter the Master Bedroom.
- Look around the Master Bedroom.
- If you meet any Shadow People, use the flashlight on them.
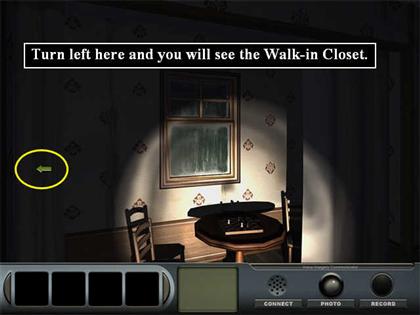
- Eventually face the table with the chessboard and turn left and you will see the walk-in closet.
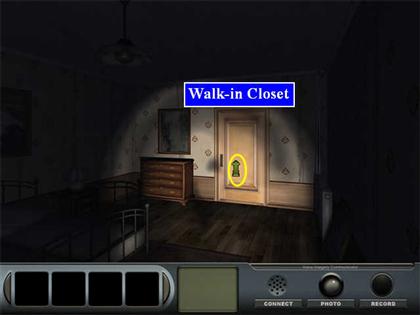
- Walk through the closet and try to open the door on the far side.
- You will talk to Mr. Krandall again. Again he will tell you to go away, but again the door will be unlocked when the conversation ends.
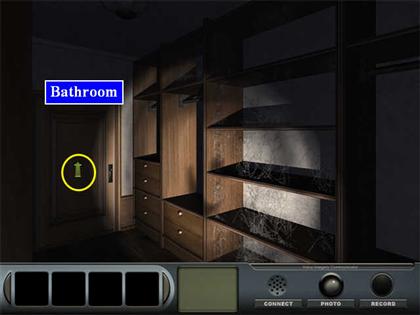
- Go through the door into the bathroom.
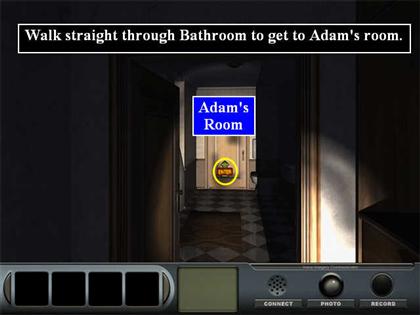
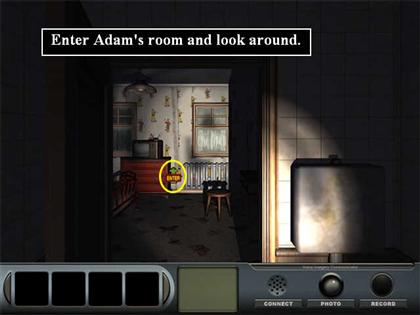
- Go straight through the bathroom to the connecting door on the other side. This door opens into Adam’s bedroom.
- Look around and notice the pictures on the walls.
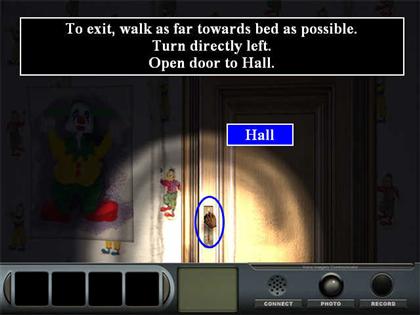
- Eventually face the bed and go as far forward as you can, then turn left. This is the door to the hallway.
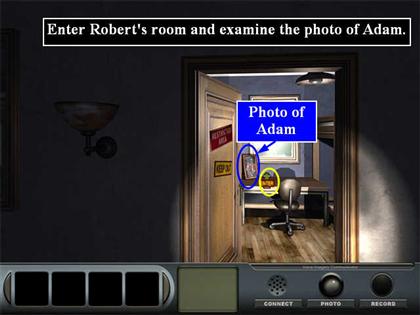
- After you finish in Adam’s bedroom, you need to go to Robert’s. Turn until you are facing the radiator again; then turn right.
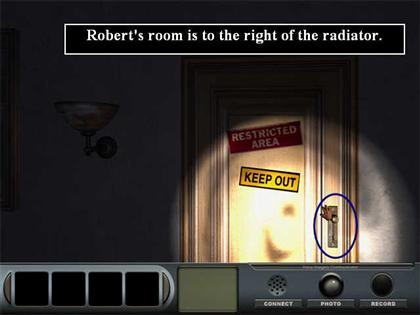
- Try to open the door.
- Have another conversation with Mr. Krandall.
- Use the handle and enter the room.
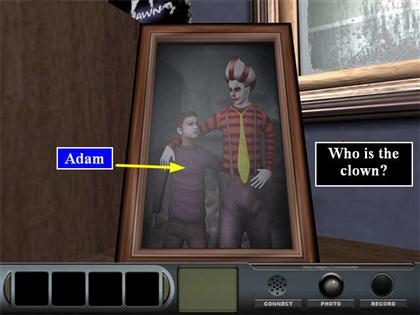
- Look around. There is a photo on the desk of Adam (not Robert) with a clown. Odd.
- That is all you can do in the house now. You need to return all the way to the parking lot.
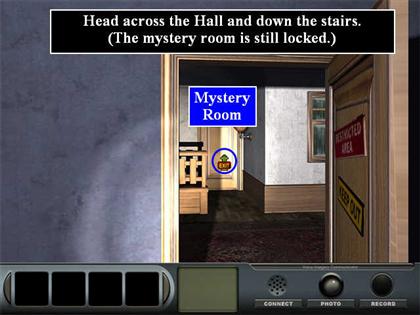
- Go back into the hallway. You will see the mystery room straight across from you. Go to it.
- Again use the EXIT hot spot to go downstairs to the Living room.
Ground Floor
- Turn until you see the entrance to the kitchen.
- Go in the kitchen.
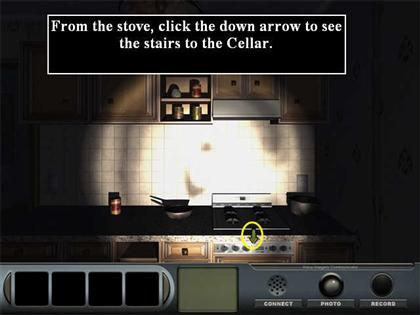
- Turn until you see the stove.
- From the stove, click on the down arrow to turn around. You will see the entrance to the stairs.
- Click on any Shadow People who show up.
- Go down the stairs to the cellar.
Cellar
- You are at the bottom of the stairs, but you will have to open the gray door to go back into the main Cellar room.
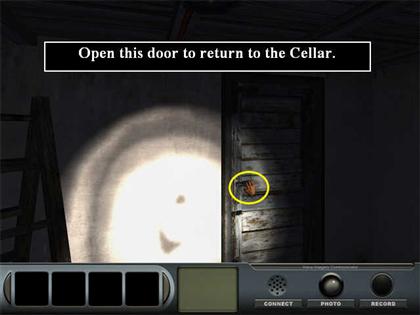
- When you see the TV, use the down arrow to turn around.
- Go forwards towards the Furnace Room Door.
- Turn left and you will see the stairs that go outside.
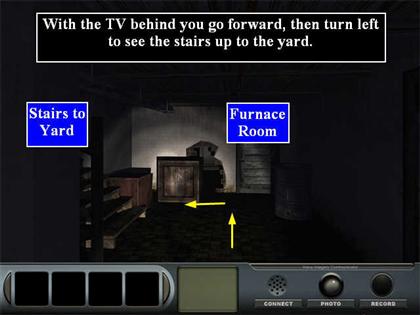
- Go up to the yard.
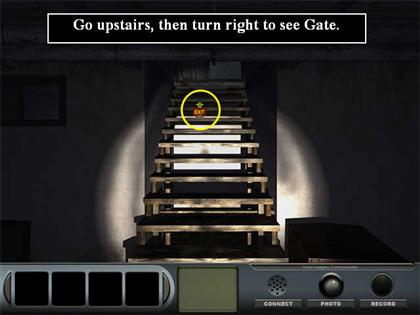
Yard
- Go forward to the wall.
- Turn left to see the Gate.
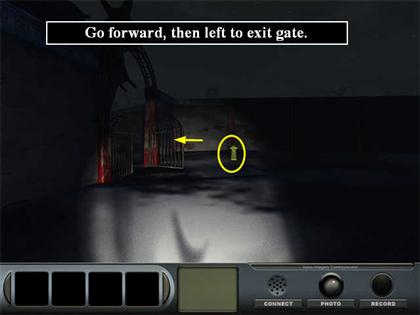
- Go through the Gate.
Park
- Now you need to make your way back to the Parking Lot.
- Go one click diagonally forward up the path towards the Great Wheel.
- Turn right.
- Go forward past the Fun House to a wall.
- Turn left.
- Go forward.
- Turn right and you will see the parking lot ahead and to the right.
- Watch out for Shadow People!
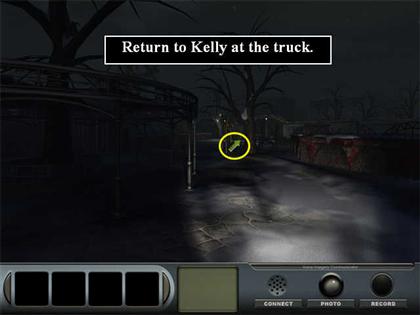
Park Entrance
- Talk to Kelly. She will start her own exploration of the right side of the park while Delaware waits in the truck.
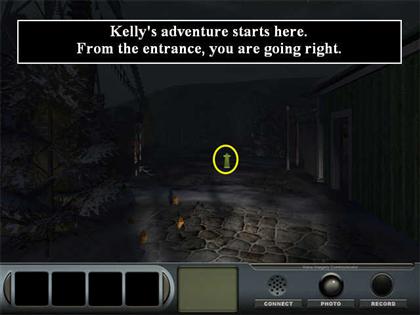
Chapter 1.2: Kelly and the Clowns<
- You will automatically begin by going right from the entrance.
- Go forward, and Kelly will hear the crackle that indicates the EMF meter has detected paranormal activity.
- Send a photo to Simon. Sometimes he finds paranormal activity and sometimes not; it doesn’t matter to the game.
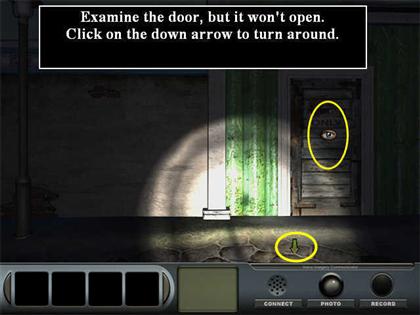
- Turn right so you are facing a green building.
- Check out the door marked Employees Only, but it won’t open.
- Click on the down arrow to turn around and face the Pirate Ship.
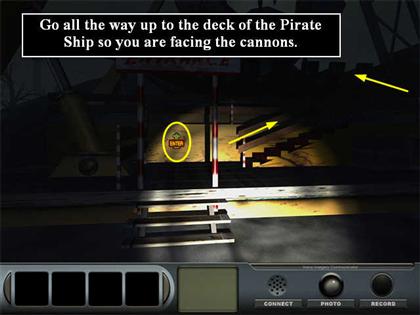
Pirate Ship
- You need to go up to the deck of the ship so you are facing the cannons. Start by going forward.
- Turn right.
- Go forward.
- Turn left.
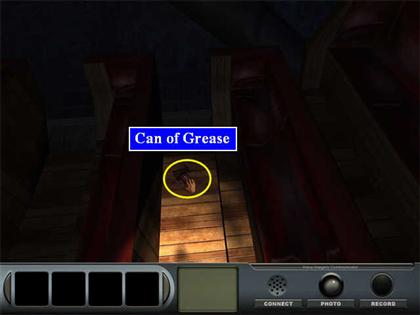
- Examine the Cannon on the right side of the scene and collect the Can of Grease.
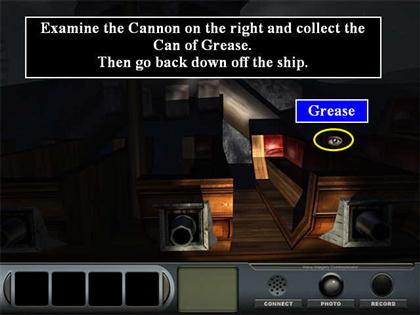
- Come down off the ship and turn left.
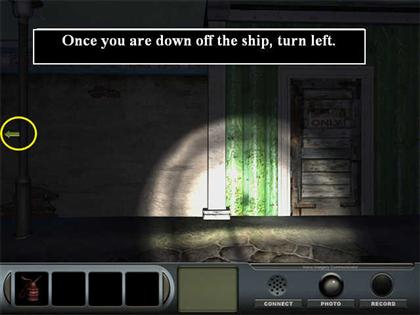
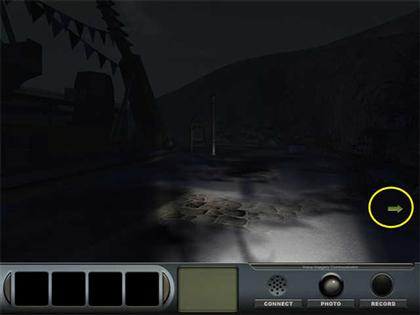
Park
- Continue diagonally to the left by the Map. You can stop and look at the Map if you like, but it’s the same as the others. It just shows that you are in the Southeast of the park now.
- Continue straight ahead for two clicks.
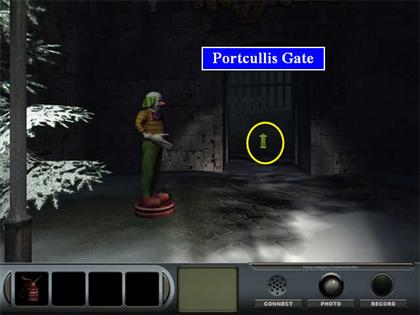
- You will see a large clown statue and a Portcullis gate. Go through the gate. You can look around, but every side path will be blocked.
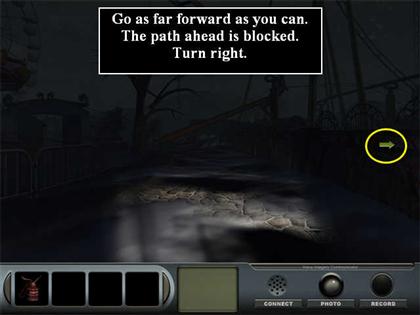
- Go as far forward as you can. The path ahead is also blocked.
- Turn right at this point.
The Roller Coaster
- You can barely see the entrance to the Roller Coaster ahead. Go towards it.
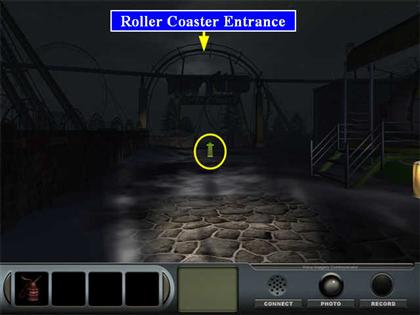
- You will see a woman walk through ahead of you. Follow her.
- At this point Kelly will decide that there has to be an easier way to get up the hill. (If you study the map, the hill is Lookout Point.)
- Click on the down arrow to turn around.
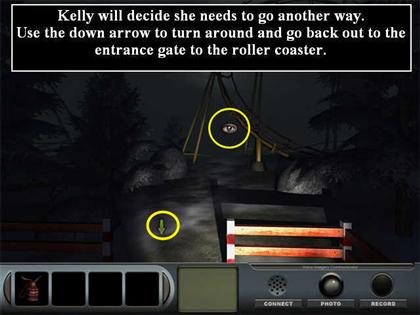
- Walk forward two clicks to the entrance to the Roller Coaster.
- As soon as you are through the gate, turn left.
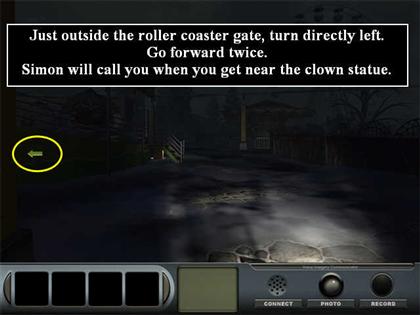
- Now go forward two clicks.
- Turn left at the yellow post.
- You will see a clown statue up ahead on the left, and Simon will call and have a conversation with you.
- Continue forward past the clown.
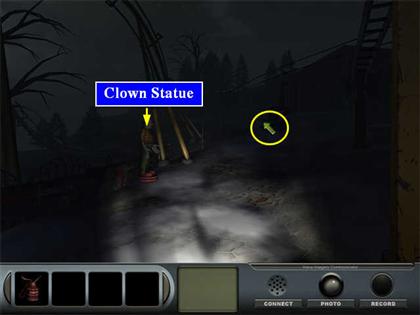
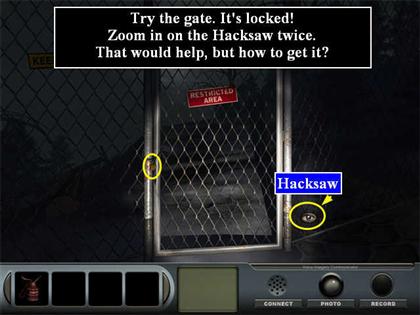
- You will come to a chain link fence. This leads to Lookout Point, but it is locked.
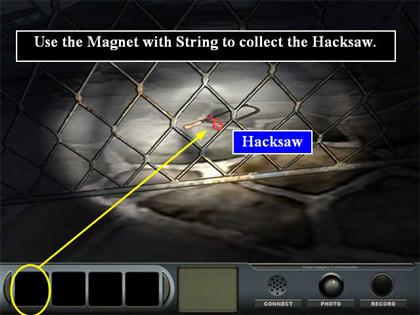
- On the ground to the right of the gate, but behind the fence, is a Hacksaw. Click twice to examine it closely.
- If you study the map, there are some unnamed booths along the path on the far right. That’s where Kelly is going now.
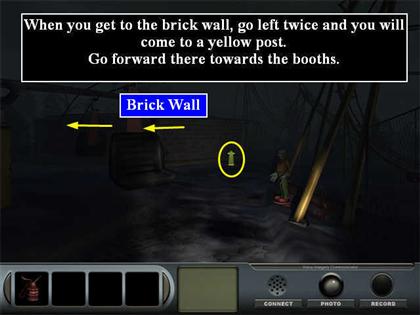
- Turn around and walk past the clown.
- When you get to the brick wall, go left twice.
The Booths
- You will come to a yellow post, where you can dimly see the booths ahead. Go forward to the red and white booth.
- Click to examine several times and you will find a spool of string. Collect it.
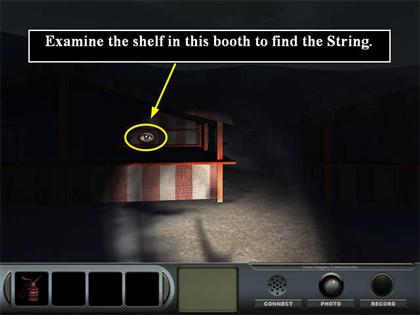
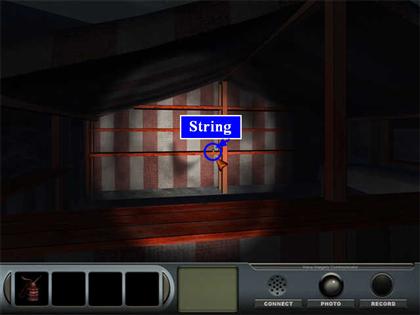
- Exit the zoom scene.
- From the red and white booth, turn left once and you will see a large building ahead.
- Go forward to it.
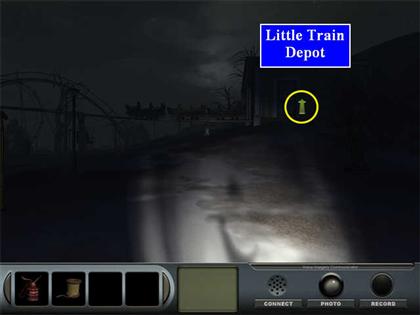
The Small Train Depot
- This is the building where they kept the little train that went around the perimeter of the park.
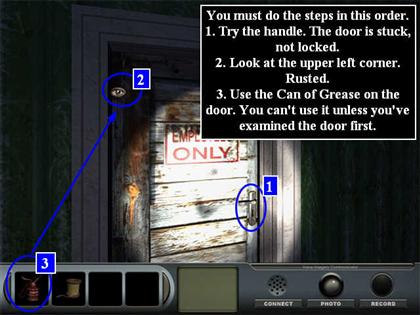
- You must do the next 3 steps in this order.
- Try the handle. The door is stuck, not locked.
- Examine the door. It is rusted in the upper left corner.
- Use the Can of Grease from your inventory on the door. Click where the can gets a red outline. You will not be able to use the can unless you’ve examined the door first.
- If you don’t have the Can of Grease, you will have to go back to the Pirate Ship to get it.
- Enter the Depot.
- Examine the train cars.
- Turn right.
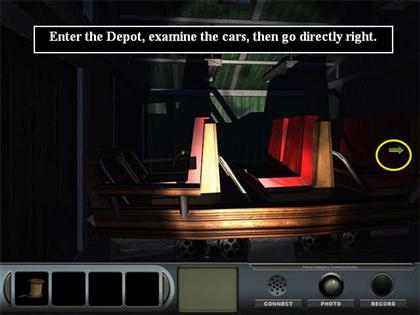
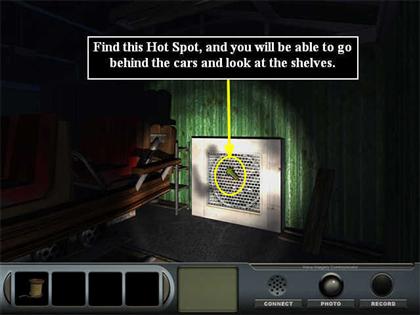
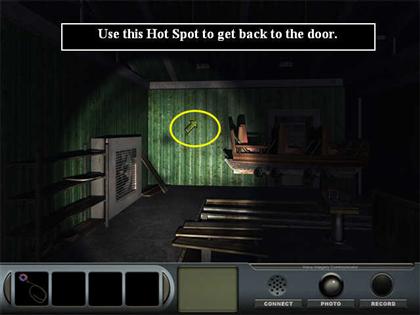
- You will see a white fan. Find the Hot Spot that lets you go behind the cars to the left and look at the shelves there.
- Now turn until you see the viewpoint in the screenshot.
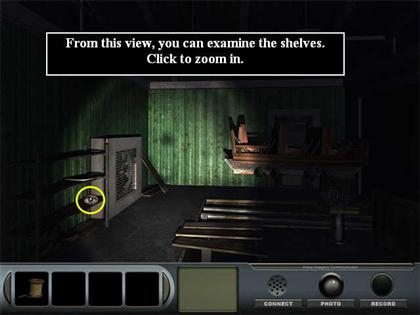
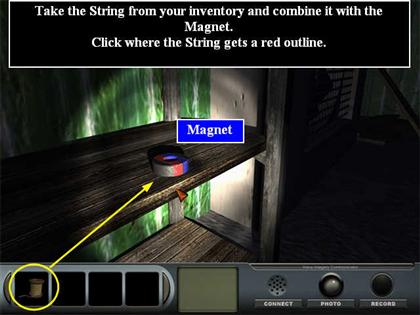
- Click to examine the shelves. You will see a Magnet, but you can’t pick it up.
- Use the String from your inventory on the Magnet, and they will combine to make a Magnet on a String.
- Leave the train depot.
- Return to the gate to Lookout Point by going forward.
- Turn right.
- Turn right until you see the clown again.
- Go past it to the gate.
Lookout Point
- Examine the Hacksaw on the ground.
- Take the Magnet with String from your inventory and use it on the Hacksaw.
- Now you have the Hacksaw. However, you cannot use it immediately.
- (If you do not have the Magnet with String, you have to get the String from the booths on the right side of the park and the Magnet from the small train depot.)
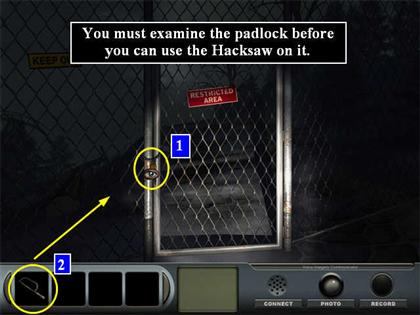
- You must first examine the lock on the gate so Kelly will decide to use the Hacksaw there.
- Then take the Hacksaw from your inventory and use it on the padlock.
- Push the gate to open it.
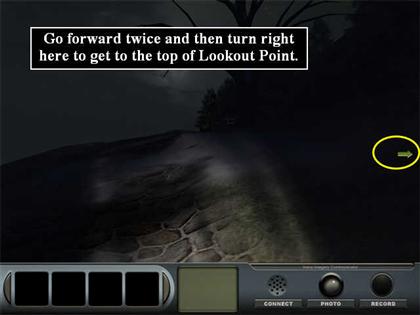
- Go forward twice and then turn right to get to the top of Lookout Point.
- Talk to Miss Rose.
- When you are done, turn right and you will see the gate.
- Go forward twice to go through the gate.
- There may be Shadow People around, so click on them as soon as you see them.
Giant Clowns
- Now you want to go back to the Parking Lot. Turn right, and you will see the clown where Simon spoke to you.
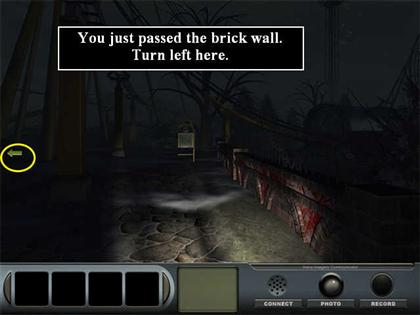
- Go forward past it twice (the brick wall is on your left) and then turn left as soon as you see the Map.
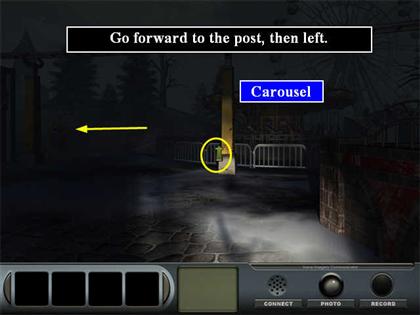
- Go forward twice to the yellow post in front of the Carousel, and then turn left.
- Keep going forward until you are through the portcullis gate; then turn right at the short clown.
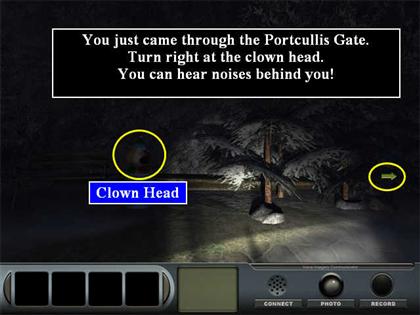
Clown Chase Scene
- You can hear noises behind you! (If you turn around, you will see that the clown statue has moved, but you don’t need to take the time to do that.)
- Go forward twice. You see two giant clown statues moving towards you!
- Quickly click on the down arrow to turn around and run back the other way.
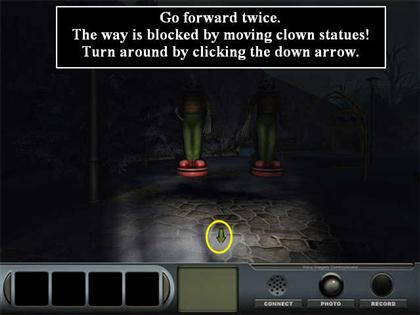
- More clown statues!
- Turn back around and look down at the ground.
- Quickly click on the sewer cover to enter the sewer.
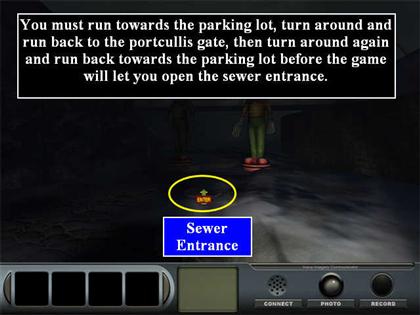
- If you are not quick enough, the game will start over where you are just coming through the portcullis gate.
- You cannot go into the sewer until you have run both ways and turned around again. The timed section ends once you go into the sewer.
The Sewer
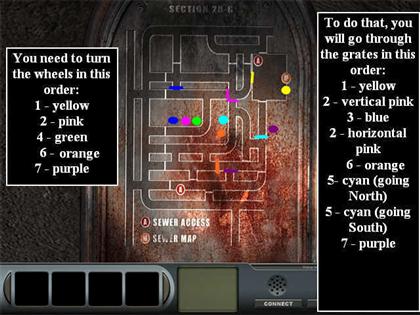
- This is a maze. You have the ability to open and close various access points, so there are many different solutions depending on which wheels you turn.
- There are TWO grates marked #2, both controlled by the same wheel. They are at 90 degrees to each other in the same tunnel intersection.
- Although you can see a clear path on the map, you can’t use it because of the grates. Instead, you will have to go down a couple of dead-ends in order to get to the wheels that control the grates.
- On the screenshots have been marked with the locations of the wheels (circles) and grates (colored lines that match the circles).
- Think of yourself as moving from wheel to wheel and it will be easier to follow on the map. You are going to go from Wheel 1 (yellow) to Wheels 2 (pink) and 4 (green). Then loop up and around and come down to Wheel 6 (orange). Then Wheel #7 (purple). And finally out to the Access ladder.
- The exact instructions are given below, but if you look at the map and just think about where the wheels are, you’ll understand where you’re going and why.
Step-by-Step Path
- Begin by turning directly left.
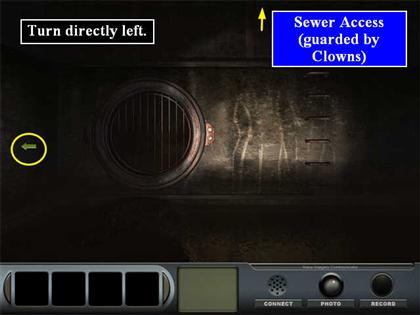
- There is a grate here that is marked with a #1. It looks like it would open, but how?
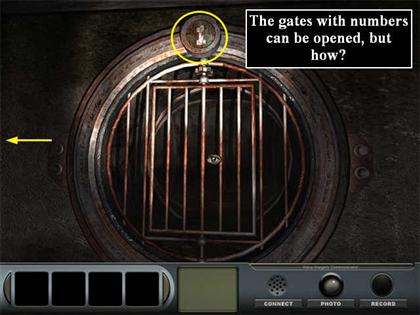
- Turn left until you see the Sewer Map.
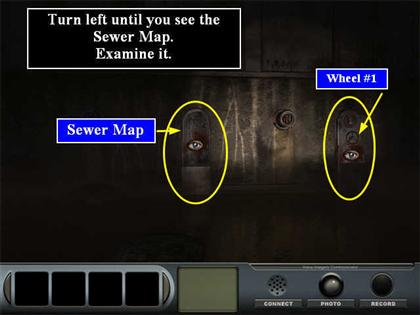
- Examine the Map. You will need to get from the A in the upper right to the A in the lower left. The open grates and control wheels have been marked for you.
- Now examine the Wheel to the right of the Map. It also has a #1 on it.
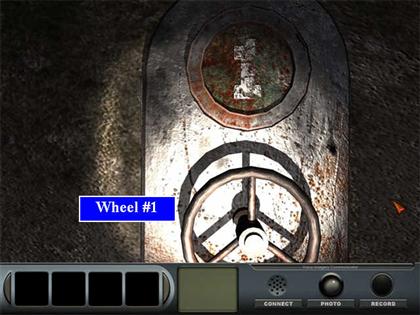
- Turn Wheel #1.
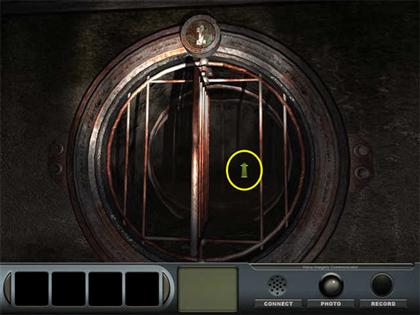
- Turn around, and Grate #1 has opened. Now you know how to open numbered grates; find the matching numbered wheel.
- Go through the gate into the tunnel.
- Turn to face left.
- Go forward at a slight right slant as the tunnel curves.
- Come to the vertical Grate #2, which is already open. Go through.
- Turn left.
- Go forward. You are now in the dead-end tunnel in the center of the map.
- Turn to the right wall. There are three wheels here, #3, #2, and #4. Leave #3 alone.
- Turn #2. This closes the vertical #2 grate and opens the horizontal one.
- Turn #4. You will go through this grate from the back, so you will never see the number for it; but if you don’t turn the wheel, it will be closed when you get there.
- Now you need to retrace your steps to the main tunnel. Turn right.
- Go forward. You are back at the intersection with the main tunnel.
- Since the vertical grate #2 is closed now, you can’t go back that way. Turn left.
- Go forward.
- Turn right.
- You are facing Grate #3 (the dark blue line on the screenshot). Go forward through #3 to the next intersection.
- Turn right.
- Go forward twice.
- Turn right so you are facing the horizontal Grate #2. It is now open. Go through the grate and forward.
- You will see the Wheels for #5 and #6 on the wall on the right. Click on them where the cursor turns into an eye.
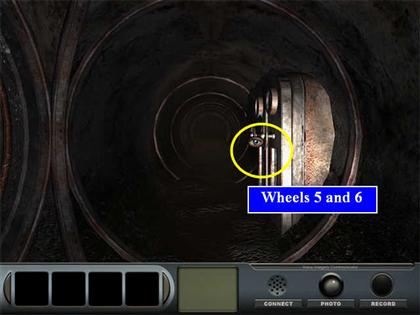
- Leave #5 alone. Turn #6.
- Continue forward with the wheels on your right.
- Turn left.
- Go forward.
- Turn left.
- Go forward once. You are facing Grate #6, which is open.
- Go through Grate #6.
- Go forward 3 times, turn left. You are now facing North on the long tunnel on the far right of the map.
- Go forward until you get to Grate #5, which is open.
- Go through Grate #5.
- Turn right and you will see Wheel #7 on the wall.
- Turn Wheel #7.
- Turn around and come back down through Grate #5, so you are heading South this time.
- Go forward twice.
- Turn right.
- Go forward once.
- Turn left.
- You are facing Grate #7, which is open.
- Go through Grate #7.
- Turn right at the intersection.
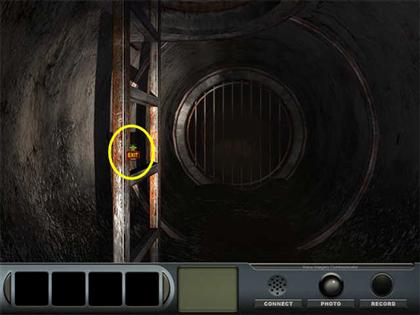
- Go forward until you see the metal ladder on your left. That is the exit.
- Click on the Hot Spot on the ladder to go up.
- Watch the cut scene where Kelly talks to Delaware.
Chapter 1.3: Delaware and the Funhouse<
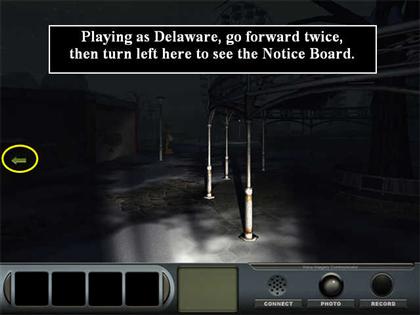
- Delaware begins facing into the park with the parking lot behind him.
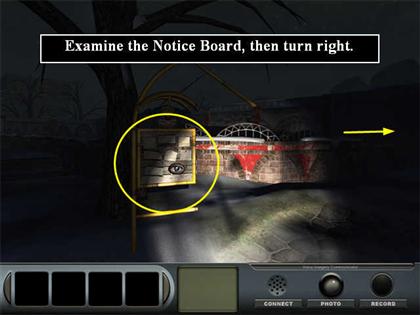
- Go forward twice; then turn left to see the Notice Board.
- Click on it to zoom in. Delaware will have a vision of the Fun House with a skeleton in it.
- Remember that the Fun House is boarded up. It is where Mrs. Krandall died. The Fun House is a green building in the Southwest quadrant of the park. Delaware passed it on his way to the Krandall house in Chapter 1.1.
- Exit the Notice Board so you are looking at it again.
- Turn right.
- Go forward.
Fun House
- Turn left. You can see the Fun House up ahead.
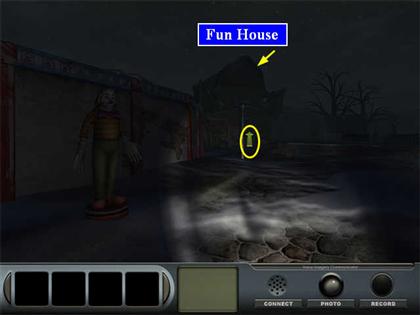
- Go there. The Fun House will briefly turn on.
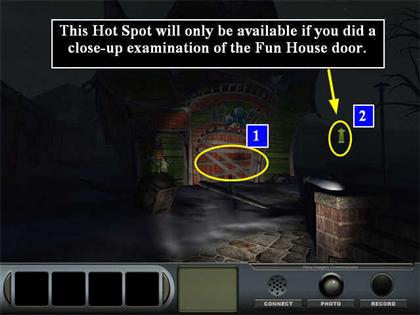
- Examine the Fun House door closely. Delaware will say, “It’s all boarded up, it doesn’t look like I can get in right now.”
- Exit the zoom scene.
- At this point if you examined the Fun House, a new Hot Spot arrow will be available and you can go forward with the Fun House on your left.
- If you skipped the close-up examination, you’ll have to go the long way around, so it’s better to go back and fully examine the Fun House door now.
- Go forward using the new Hot Spot arrow.
- At the green building, turn right.
Games Area
- You are now approaching the Games area of the park.
- Go forward until you see the gates of the Games area; then enter.
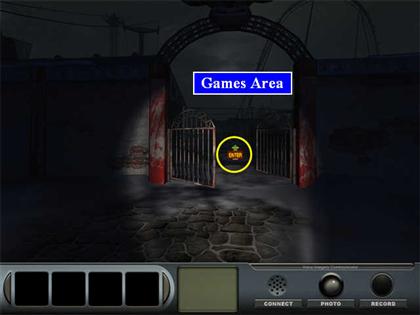
- Keep an eye out for Shadow People!
- Continue forward until you see one of the booths lit up: the Hit the Cans Game.
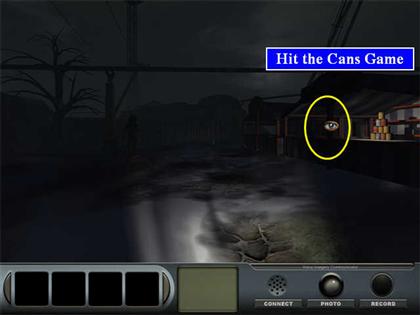
- Examine it.
- A man (Carl) will come out and talk to you. He will offer information as a prize.
- Click on the game again to get a closer view.
- Take a ball from the bucket on the right. It will go into the inventory tray.
- Take the Ball from the inventory tray and click it on the cans where the Ball is outlined in red. No matter what you do, the Ball will always go to the left.
- Take one more Ball and keep it.
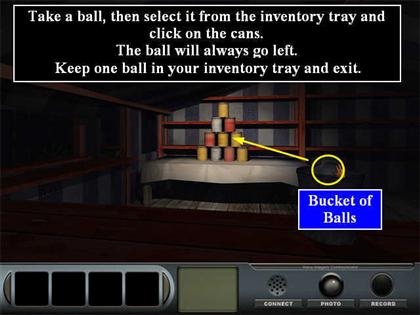
- Exit the booth.
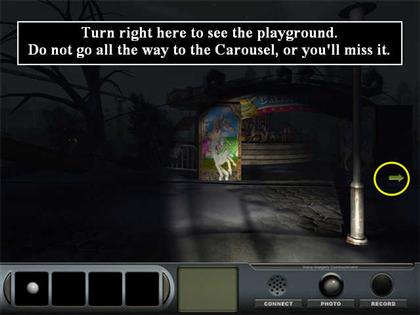
- Turn to the right.
The Playground
- Walk forward until you first see the lit-up Carousel.
- Stop there and turn right and you will see the playground. Do not walk all the way to the Carousel, or you’ll miss the playground.
- You can zoom in on the right side of the playground. Do so.
- Adam’s ghost will appear in the sandbox and tell you it isn’t safe. He is playing with a toy shovel.
- Examine the toy shovel twice.
- Take the Ball from inventory and combine it with the shovel. Now the ball is weighted evenly.
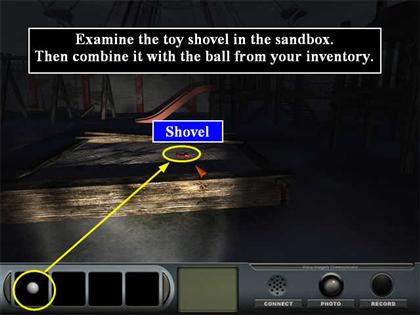
- Exit the zoom scene.
- Turn right.
- Go forward.
Cans Game
- Turn right and you will see the booth again.
- Go back and play the game with the weighted ball. The cans will fall down.
- (If the Ball keeps going left, you need to go to the sandbox by the Carousel and get the toy shovel. See the walkthrough instructions just before this section.)
- This time Carl will talk to you. He tells you that Robert, the oldest son, was “the Devil incarnate.”
- You should still be looking at the fallen cans. Take the Crowbar that is behind them. That should be useful on the Fun House doors!
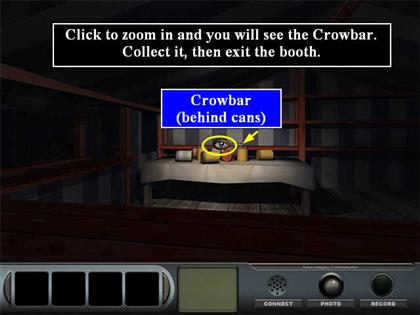
- Exit the booth.
- Use the down arrow to turn around so you are looking at the gate out of the Games area.
Fun House
- Go forward 4 times.
- Turn left.
- Go forward once to the wall.
- Turn right and you will see the Fun House door.
- Examine it twice.
- Take the Crowbar from your inventory and use it on the door. Look for the red outline around the Crowbar, then click.
- (If you don’t have the Crowbar, you’ll find it behind the fallen cans when you win the Hit the Cans game.)
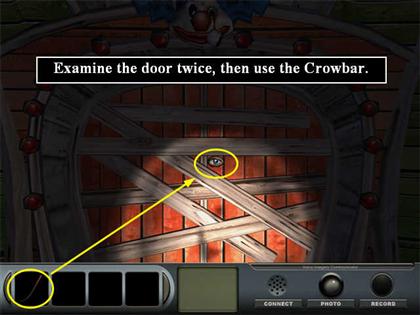
- Click on the door; then click again to enter.
Inside the Fun House
- You will see a long tunnel in front of you. Go forward to the wall.
- Turn left.
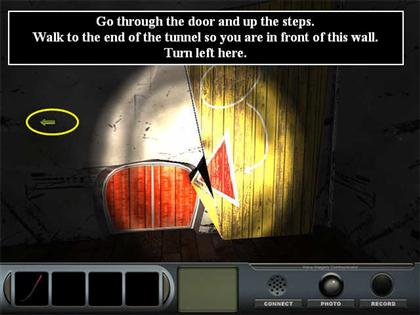
- Go forward into the room that has hanging punching bags.
- Watch out for Shadow People!
- Turn left at the single pink punching bag.
- Look for the Hot Spot that goes behind the striped column. It can be hard to find.
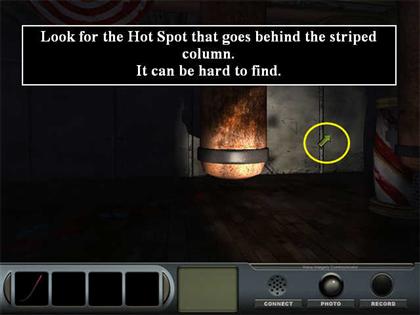
- Now you can see the stairs. To get to them, you must go all the way to the end of the hall, and then turn left until you are facing the stairs.
- Now go up.

Fun House Maze
- This is a maze, but it is not timed.
- Go forward so you can study the pictures on the wall. This is the key to the maze.
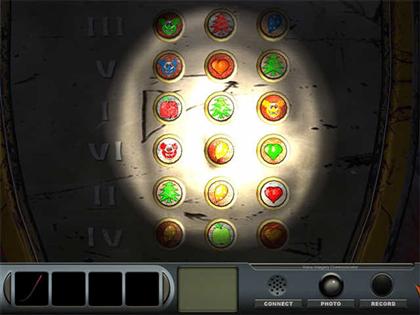
- You must find the doors in the sequence of their Roman numerals, and the pictures must match the picture series shown.III. Green Clown, red tree, blue balloon V. Blue clown, red heart, green tree I. Red apple, green tree, yellow clown. VI. Red clown, yellow balloon, green heart II. Green tree, orange balloon, red heart IV. Yellow balloon, green apple, yellow heart
- Remember to do the numbers in the sequence I, II, III, IV, V, VI.
- Turn left. You see a blank red door.
- You are going to enter 6 rooms. Each room has 4 doors, 3 with pictures and 1 that says EXIT.
- In each room you must choose the correct door to go through, based on the pictures.
- If you pick the wrong door, you will still go into a room with 4 new doors, but you won’t be able to find a match for the next picture sequence. You’ll have to use the EXIT door to go back to the very beginning and start over.
- You cannot go back into the previous room.
- Go through the blank red door. This starts the maze.
- You are now in Room I.
- You are immediately in front of a new red door, but this one has pictures on it. You’re looking for one that matches the pictures sequence for Room I: red apple, green tree, yellow clown. It’s not this one.
- Turn left. You see a door that has the correct pictures, but a different sequence. It will not work.
- Turn again until you see the door with the right pictures in the right sequence.
- Go through. You are now in Room II and must match that picture sequence: green tree, orange balloon, red heart.
- If you get stuck and need to start over, pick any door that has an EXIT sign on it. That will take you back to the beginning and you can start over.
- Continue through the maze using the sequences from the wall.
- Caution: there are two balloon pictures in Room II that look very similar. You want the one with the lighter background. If you picked the correct one, the voice will say “You’re half way out! Or are you half-way in? Either way, you’re stuck in the middle!”
- If you can’t find a match for the third door, you picked the wrong balloon for the second. Go back out the Exit and try again, starting with the blank red door that goes into Room I.
- The red heart for Door V may look yellow in the light, but it will be the only door with the correct outer pictures.
- When you pick the correct 6th door, you’ll hear “Come back soon, ya hear?”
- You are out of the maze.
Mrs. Krandall
- Look at the wall. The words say “Left!” the arrow points right. Go left.
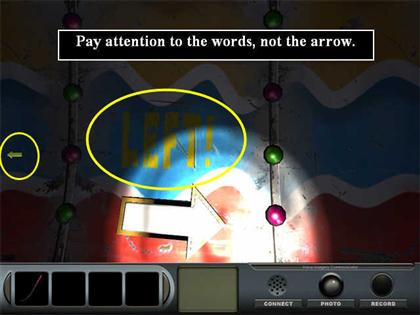
- The ghost of Mrs. Krandall appears. She tells you she was working with her older son Robert the day she died. She is now free to go see her husband’s ghost at their house.
- Go forward to the end of the hall.
- Turn right and place the cursor in the lower right corner.
- When it turns into an eye, click to zoom in.
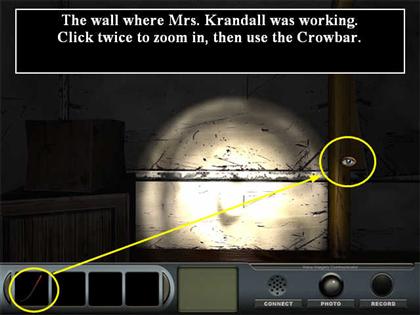
- You will need to zoom in twice.
- Take the Crowbar from the inventory tray and use it on the wall where it is outlined in red. This will reveal a skeleton.
- Simon will call you. Bring him up to date on the case.
- Turn right and you will see the employee stairs. Go down them.
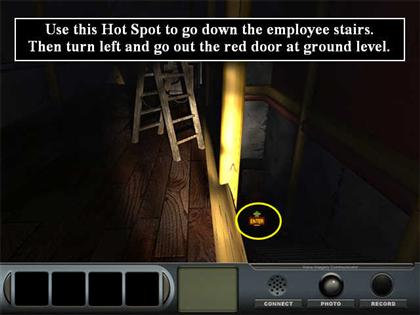
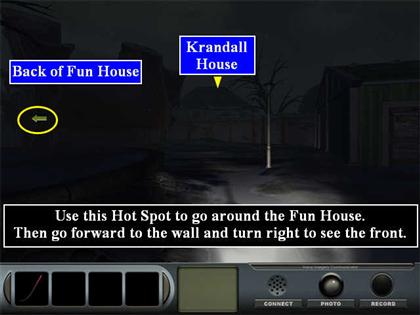
- Turn left and you will find a door that’s not boarded up. Go out to the front of the Fun House.
- You are standing in front of the Fun House, but you want to go around back to the Krandall House.
- Turn around; then go straight on the path to the right of the Fun House.
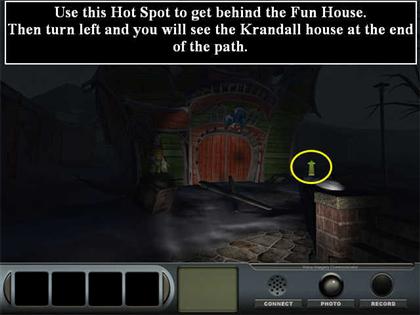
- Turn left and you will see the Krandall House.
The Krandall House
- Go in through the gate.
- Turn right.
- Go through the side yard.
- Turn left to face the house
- Go back in through the Cellar door.
Cellar
- Talk to Mr. Krandall. He will tell you that Robert was working near the Roller Coaster the day of the collapse.
- That’s all you can do here now. Time to go back to the parking lot and catch up with Kelly.
- Turn around.
- Go up the cellar stairs.
Yard
- Turn right.
- Go to the wall.
- Turn left.
- Go through the gate.
- Go forward up the path (there will only be one hot spot).
- Meet a young woman named Katherine.
- After the conversation, continue towards the Great Wheel.
- Turn right.
- Go forward past the Fun House to a wall.
- Turn left.
- Go forward.
- Turn right and you will see the parking lot ahead and to the right.
Park Entrance
- Go to the truck and talk to Kelly.
- Notice that Kelly is talking about Miss Rose and Delaware is talking about Katherine, but they think they’re talking about the same person.
- They agree that Kelly will go investigate the Roller Coaster. This ends Story 1.
- You will be ranked based on how many times the Shadow People caught you.
Story 2: The Protector<
- To begin this story, you must choose New Game from the Main Menu; then choose Story 2.
- Note: your saved games from Story 1 are still available on the save menu.
- You can go back to Story 1 by loading a saved game, or by choosing Story 1 from the Main Menu.
Chapter 2.1 Kelly and the Hunter<
- You are playing as Kelly. You start out facing right.
- Go forward 7 times, all the way to the end of the park.
The Roller Coaster
- The way forward is blocked. Turn right at this point and you will be facing the Roller Coaster, but it’s still a ways ahead.
- Go forward once.
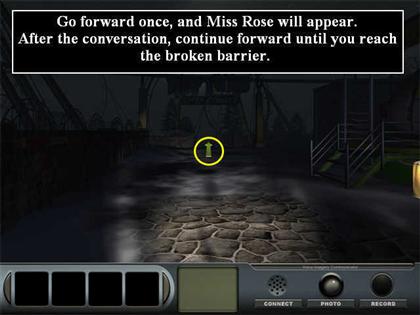
- Miss Rose will show up and talk to Kelly. She will show Kelly a symbol that Simon says can disperse an energy barrier spell.
- Miss Rose will pass on a message for Delaware—he should trust his instincts. And Kelly should be careful.
- Miss Rose leaves.
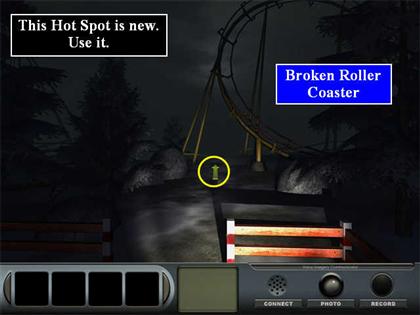
- Continue forward until you reach the broken barrier.
- Simon will call and you will bring him up to date on the case.
- Notice that this time there is a Hot Spot allowing you to move forward past the barrier. Use it.
- The being that appears is the Hunter, who was in the previous Delaware St John stories, although it looks different in this one.
The Cave
- Kelly falls into a cave.
The Hunter Chase
- The Hunter is after her! This section of the game is timed. If you take too long, you will start over at the top by the Roller Coaster just before Kelly falls into the cave.
- Quickly go forward twice.
- Turn left. You can see some kind of brick wall straight ahead.
- Go forward and examine it twice.
- Exit the zoom scene.
- Turn left.
- Go forward.
- Turn left.
- You will see a brick on the ground. Pick it up.

- Return to the wall by turning right 3 times, then going forward and turning left again so you can see the brick wall.
- Take the brick from your inventory and use it to smash open the hole so it’s big enough for Kelly to get through.
- Go through the hole.
The Office
- You will see a cut scene where Kelly blocks the hole with a metal cabinet.
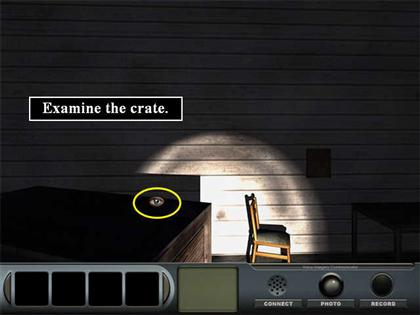
- Examine the crate on the left side of the scene and you will find a Fuse. Collect it.
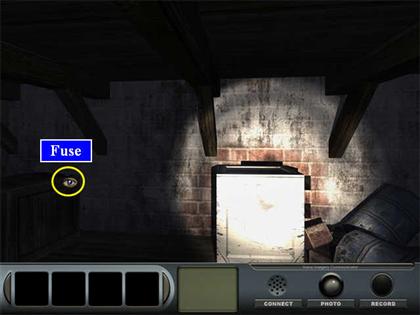
- Exit the zoom scene.
- Turn left.
- Go through the door.
The Tunnel
- Turn left.
- Go forward.
- Continue through the tunnel until you get to the door at the end.
- (There’s another door on the side of the tunnel, but it doesn’t open.)
- Go through the door at the end of the tunnel and turn right.
- You will see another door ahead and a spiral staircase.
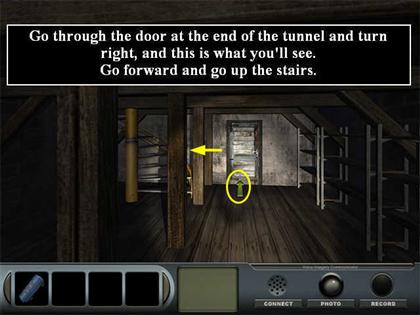
- Go forward.
- Turn left.
- Go up the staircase.
- There is a door right at the top of the stairs. Go out the door.
- Ah ha! This is the Employees Only building that’s across from the Pirate Ship ride.
Pirate Ship
- Kelly will have a conversation with Simon and Delaware about the Hunter. It can’t manifest again for awhile, so Kelly is going back to explore.
Chapter 2.2 Kelly Explores the Tunnels
Employee Building
- You will automatically be back in the Employee building at the top of the stairs.
- There is another Fuse on top of the crate here. Collect it if you didn’t get it earlier.
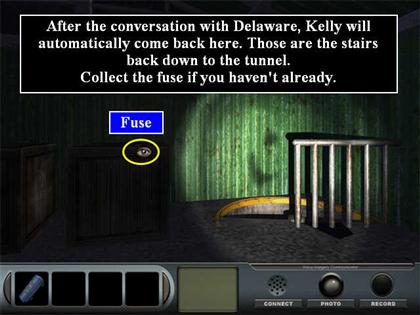
- You should now have 2 Fuses.
- Go down the stairs.
- At the bottom of the stairs, turn around. You see another door.
Locker Room Tunnel
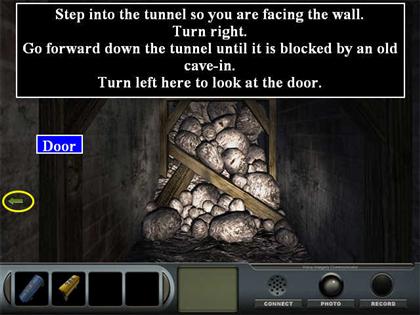
- Go through the door into the tunnel. You are facing the tunnel wall.
- Turn right. You can see the tunnel ahead.
- Go forward twice until you reach an area that is blocked by a cave-in.
- Turn left. There is a door here.
Locker Room
- Go through the door. You are in the employee locker room.
- Go forward.
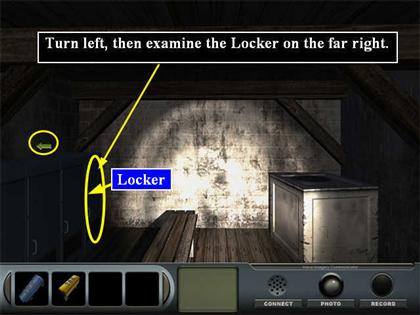
- Turn left to look at the lockers.
- Examine the locker on the far right.
- Open the locker.
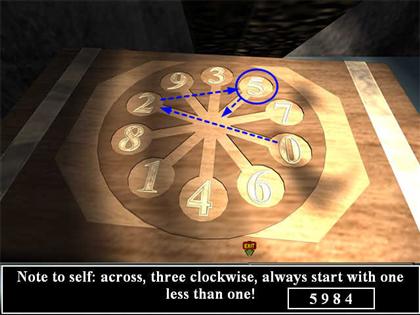
- There is a note stuck on the back of the locker. It says “Note to self: across, three clockwise, always start with one less than one!”
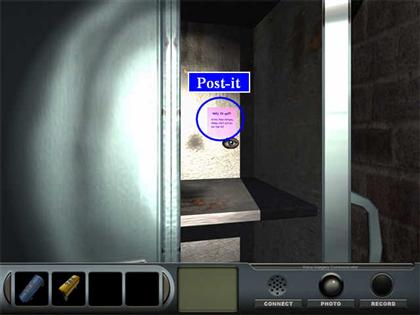
- Exit the zoom scene.
The Briefcase Code
- Look on top of the lockers. You see a briefcase with a 4 digit lock.
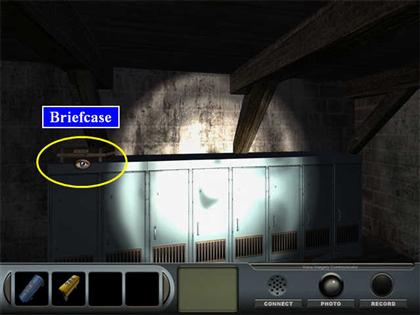
- Examine the top of the briefcase by positioning the cursor just above the briefcase so the cursor turns into an eye.
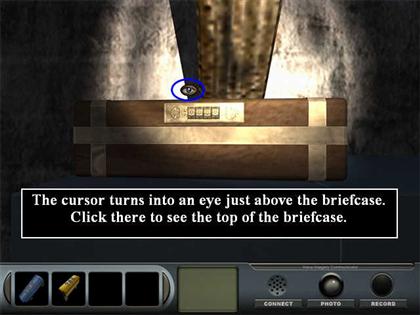
- There are some weird numbers on the top in a circle.
- Use the code from the note. “Always start with one less than one,” so start at 0.
- Go across the circle—that’s 2.
- “Three clockwise” from 2 on this circle is 5. 5 is the first digit of the code.
- Repeat. So go across from 5; that’s 1. Three clockwise from 1 is 9. The second number is 9.
- Across from 9 is 6. Three clockwise from 6 is 8. The third number is 8.
- Across from 8 is 7. Three clockwise from 7 is 4. The fourth number is 4.
- The briefcase lock code is 5-9-8-4.
- Exit the zoom scene.
- Click on the briefcase lock.
- Numbers will appear at the top of the screen.
- Enter the code: 5 9 8 4.
- Open the briefcase and take the tube of Face Paint.
- Exit to close the briefcase.
- Exit again to close the zoom scene.
- Turn left to face the door.
- Click once to open the door.
- Go through the door into the tunnel.
Locker Room Tunnel
- Turn right.
- Go 2 clicks forward.
- Turn left. You see the door you came in originally.
- Go through the door back into the employee building across from the Pirate Ship.
Employee Building
- Turn right. You will see the stairs ahead on the left and a door on the far wall.
- Go forward until you get to the door. This goes into the tunnel to the office you were in during Story 1.
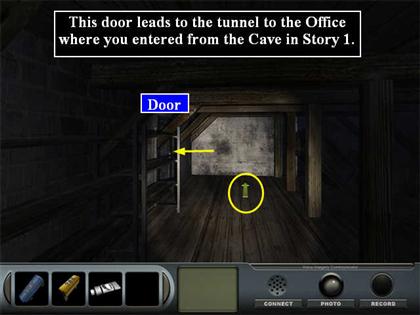
Office Tunnel
- Open the door and step forward into the tunnel so you are facing the wall.
- Turn right.
- Go forward 4 clicks.
- Turn left.
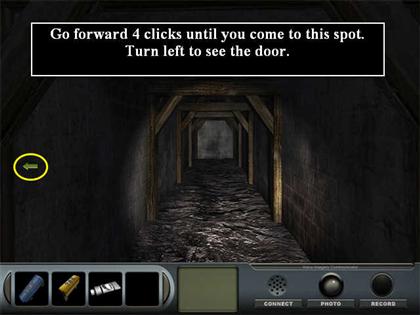
- Try to open the door. It has a barrier spell.
The Barrier Room
- Take the Face Paint from inventory and use it on the door. Kelly will paint the symbol that Miss Rose showed her.
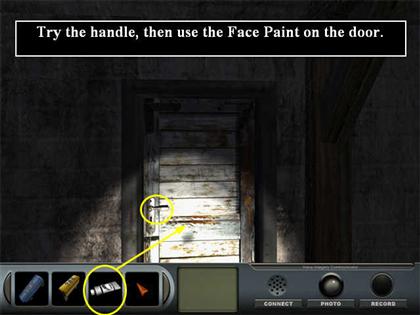
- Now you can open the door.
- Go into the room. Straight ahead is a desk with some drawings on it.
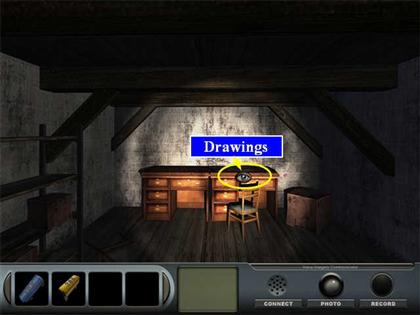
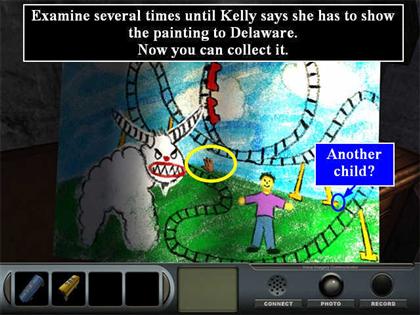
- Examine the drawings closely. You will have to click several times until Kelly finally says “I have to show this painting to Delaware!” It is a painting of a boy with the Hunter that chased Kelly!
- Now place the cursor where it turns into a grabbing hand and collect the Painting.
- Exit the zoom scene of the desk.
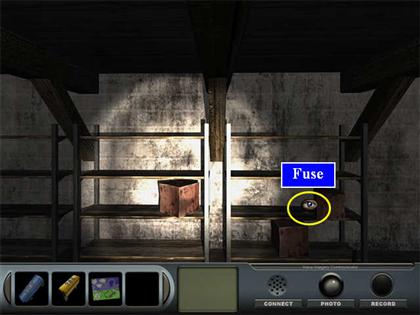
- Turn left. There are shelves here.
- Look closely. You can collect another Fuse in the middle right.
- Exit the zoom scene.
- Turn around.
- The EMF will crackle. Try taking a photo and sending it to Simon. It doesn’t go through because there is no signal.
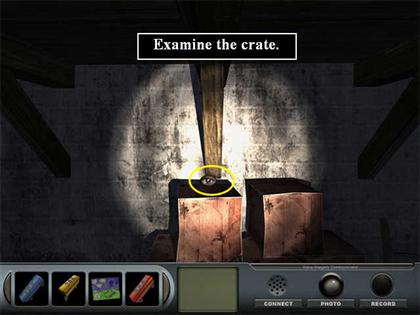
- Examine the crate on the left and you will find another skeleton.
- Exit the zoom scene.
- Stop here and check your inventory tray. You should have 3 Fuses and the Child’s Painting. Make sure you picked up both the Fuse and the Painting in this room before you leave.
- Turn right.
- Go through the door back into the tunnel.
Office Tunnel
- Turn right.
- Go all the way to the end.
- Go through the door.
The Employee Building
- Turn right. You can see the stairs.
- Go up the stairs and out the door to talk to Delaware. Kelly believes there are two children in the picture—one happy child with the Hunter, and one hiding behind the Roller Coaster.
Chapter 2.3 Kelly and the Roller Coaster<
- You begin facing the Pirate Ship. Turn right.
- Go 6 clicks forward, all the way to the end of the park. The way forward is blocked.
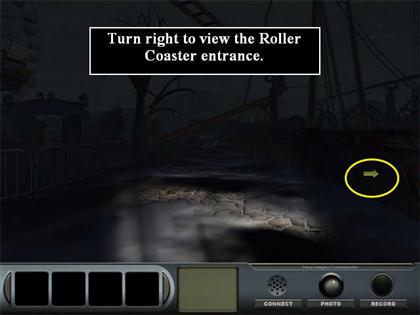
- Turn right, and you can see the Roller Coaster in the distance.
The Roller Coaster
- Go forward until you get to the barrier.
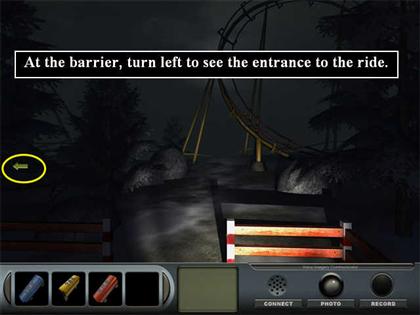
- Turn left. You can see the entrance to the ride.
- Go forward. You can see the cars.
- Go forward into the area with the cars.
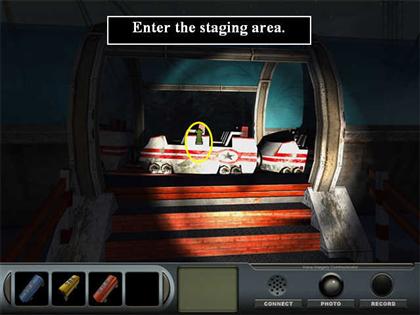
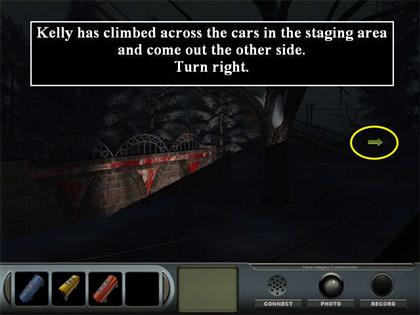
- You will see a cut scene where Kelly climbs across the cars and out the other side of the staging area.
- You are now standing with the staging area behind you. Turn right.
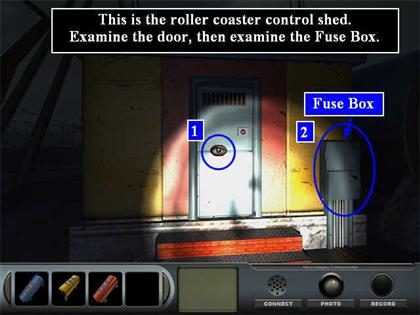
Control Shed
- You can see the control shed for the Roller Coaster. Examine it twice. Kelly says it needs power.
- Exit the zoom scene.
Fuse Box Puzzle
- You need 3 Fuses for this puzzle. Kelly collected them in the office next to the cave where she escaped from the Hunter, at the top of the stairs in the Employees Only building across from the pirate ship, and in the room with the child’s drawings down in the tunnel.
- To the right of the door is a Fuse Box. Examine it.
- You can turn the switch on, but it doesn’t do anything.
- Open the compartment on the top left.
- Examine it to access the puzzle.
- This puzzle is pretty easy to figure out. You have three different colored Fuses in your inventory: red, yellow, and blue.
- Each of the three parts of the Fuse Box is missing one Fuse. You just have to figure out which color is missing from each part.
- Look at the rows, not the columns. There is one of each color in each row, so the missing Fuse in the top left compartment is Red.
- Take the red Fuse from your inventory and place it in the compartment.
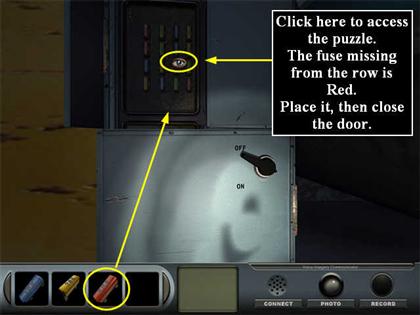
- Close the door.
- Open the compartment on the top right.
- Place the yellow Fuse here.
- Close the door again.
- Click on the far left of the bottom door to open it.
- Place the blue Fuse.
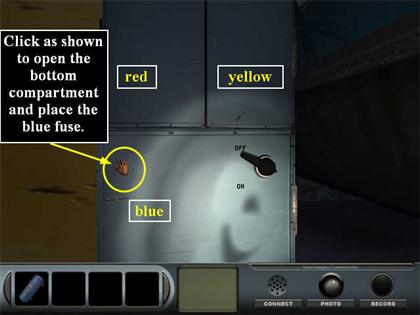
- This time use the Exit Hot Spot and the door will close.
- Turn the on switch. After a moment, Kelly will say “Power is on!”
- Exit the zoom scene.
- The door to the control shed is open. Enter the control shed.
- Turn left.
- Examine the far right locker.
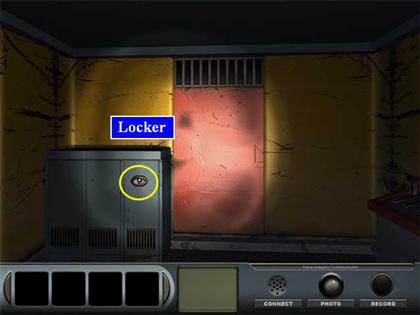
- Open the locker. Another skeleton is revealed.
- Exit the zoom scene.
- Turn left and you will see the door.
- Go through the door.
Roller Coaster Cars
- Turn until you see the Roller Coaster Cars.
- Walk into the staging area. You will see Kelly get grabbed by a clown, who forces her into a Roller Coaster car then starts it. (Remember that the end of the track collapsed, and the coaster now drops its cars into the ocean!) Delaware saves her.
Chapter 2.4 Delaware Searches for Robert<
- You will now play as Delaware. Let’s see if we can find Robert.
Games Area
- Head for the Games area. Go as far North as you can on the left side of the park. You will have to veer slightly left around the gazebo near the entrance, otherwise it’s straight ahead.
- When you get to the last Clown statue, turn right.
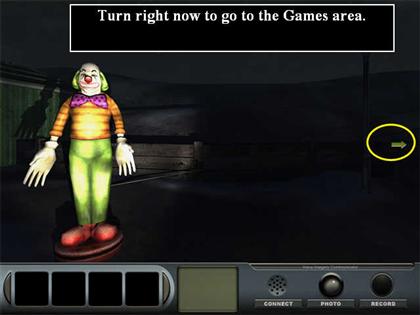
- Walk towards the Games area.
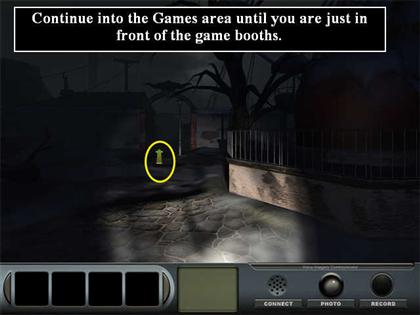
- Go forward 3 clicks until you are inside the Games area just before the first row of game booths.
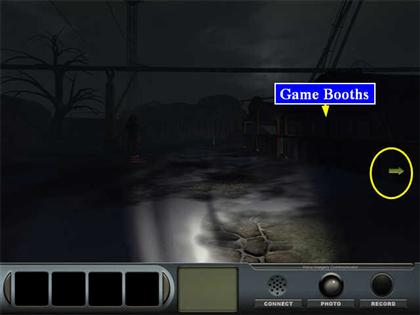
- Turn right. You can barely see the Carousel ahead in the dark.
The Carousel
- Walk into the Carousel. Adam will show up, and ask you to turn on the Carousel.
- There is a control box on the left. Examine it.
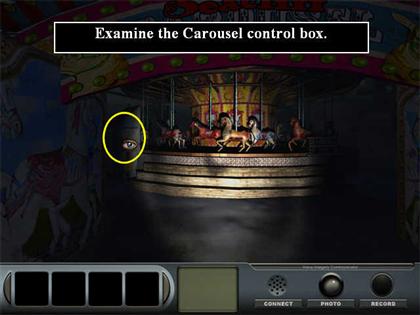
- Open the door and examine the controls. You need an access code.
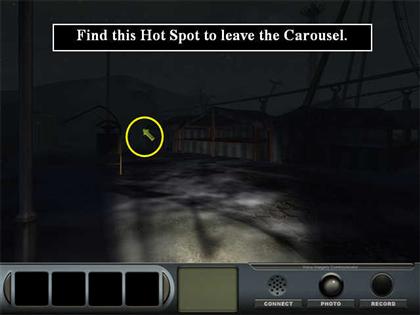
- Turn around.
- You need to find the Hot Spot that will allow you to move forward to the left. Click it.
- Simon will call you. (If he doesn’t, go forward one more click.) Delaware will make it clear that he believes he is a Protector, and he asks Simon how one gets that title. Simon says it is inherited.
- Go forward one more click towards a large red post. Delaware will have a vision of a soda can and a game token.
- At this point you can search all over the park, but you are going to find the token back at the entrance.
- To get to the entrance, turn left at the red post.
- Go forward out of the Games area 3 clicks.
- Turn left.
- Go forward 3 clicks, and you will see the Gazebo near the center of the park.
- Go past it on the right and continue all the way to the entrance.
- Turn around.
Park Entrance
- Remember the Map at the very beginning of Story 1? It’s up ahead on the right side. You are going to pass the Gazebo on the right side this time, so that you are going behind that Map.
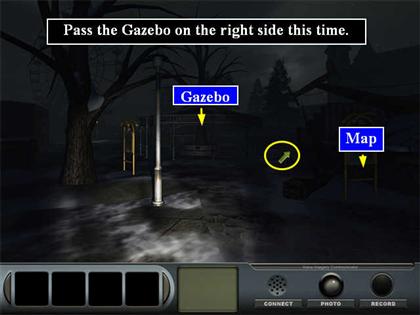
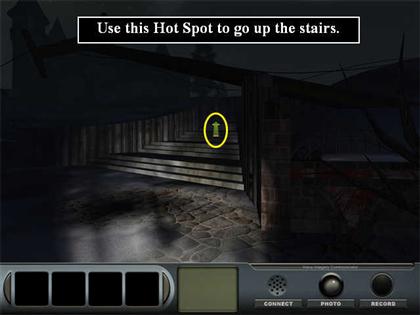
- You will see some steps. Go up the steps.
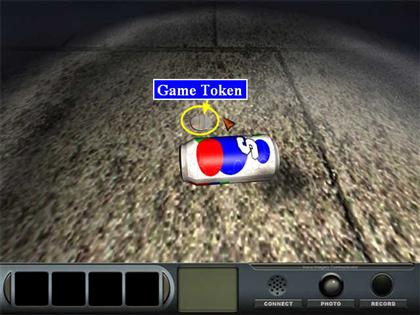
- You will see a soda can on the ground. Examine the can, and you will see that it is like the one in the vision by the Carousel. Pick up the game Token.
- Delaware wonders “Where can I use this?” How about back by the games?
- Turn around.
- Go forward 6 clicks, past the left side of the Gazebo, all the way back to the clown at the top left side of the park.
- Turn right.
Games Area
- Go back into the games area. This time go all the way forward until you come to a pile of brush.
- Turn right.
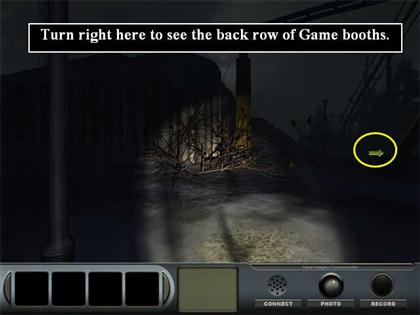
- You are looking at the back row of booths. You can examine one of them, so go do that.
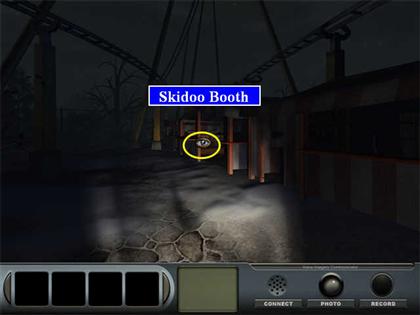
Skidoo Game
- Look around. There are some little clown statues on the shelves.
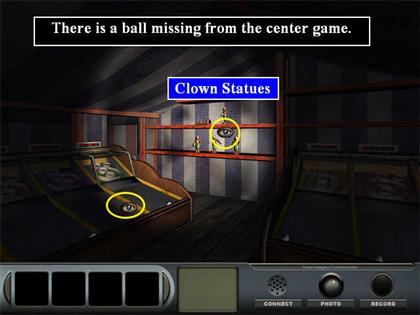
- One of the machines is missing a ball.
- There’s nothing more you can do here now. Exit the booth.
- Enter the next booth. It is a Horserace game.
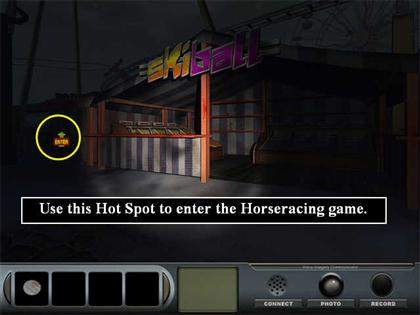
Horserace Game
- It needs a token. Use the Token you have.
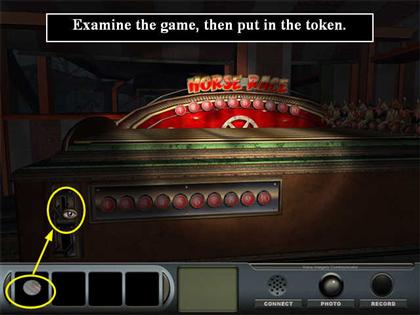
- (If you don’t have the Token, you need to go to the Carousel and have a vision of where the Token is. Then you need to go to the park entrance, turn around, and go up the steps between the Gazebo and the Map on its right; you will find the Token on the ground next to a soda can.)
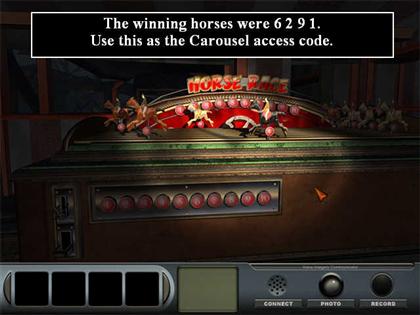
- The winning horses are 6, 2, 9, and 1. This will be the Carousel control box access code.
- Time to return to the Carousel. Exit twice.
- Turn right.
- Go forward once.
- Turn left. You will see the Carousel far ahead.
- Go all the way forward to the Carousel.
The Carousel
- Examine the control box to zoom in.
- Open it.
- Click 6-2-9-1 on the keypad. The Carousel will start.
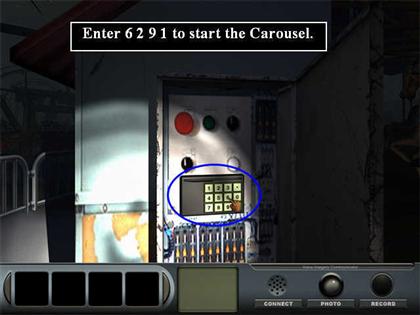
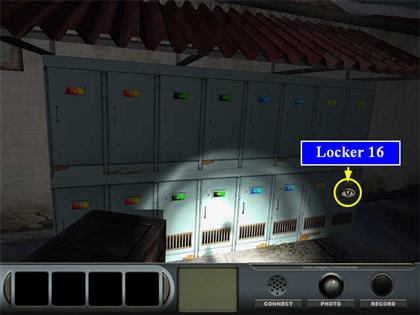
- Adam will tell you to look for Locker 16.
- Return to the entrance of the park.
Park Entrance
- At this point you have hopefully learned your way around the park, because something is going to leave you clues all over.
- You will be reviewing a Map at each stop, so you should be able to orient yourself easily.
- As you stand with your back to the park, there are visitor lockers on the right side.
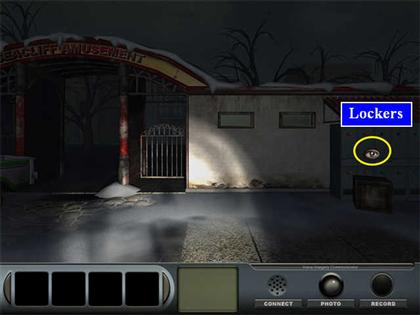
- Examine the bottom right locker. Open it.
- Note: Once you examine the map, if you save before you get to the Tunnel of Terror, you will not be able to complete the game correctly, so save now. Do not save again until you get to the Tunnel of Terror.
- Examine the map.
- There is an X on the Gravity Drop ride. Click on the X on the map.
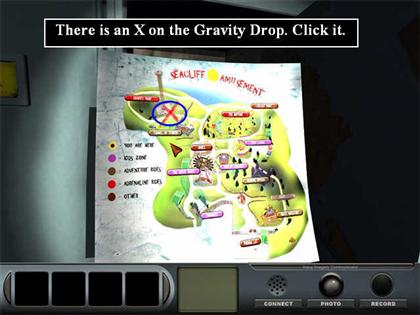
- Now we are going to go to the Gravity Drop (Northwest corner of the park).
- Go all the way forward to the brush in the Games Area. This time, find the Hot Spot that continues north.

- There will be a gate on the upper left side. Find it and go through it.
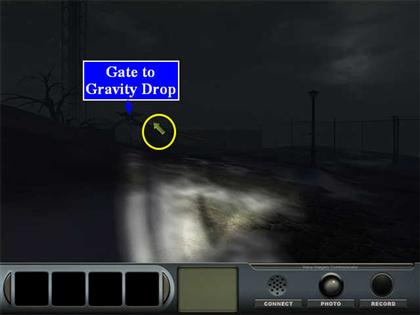
Gravity Drop
- Examine the Map.
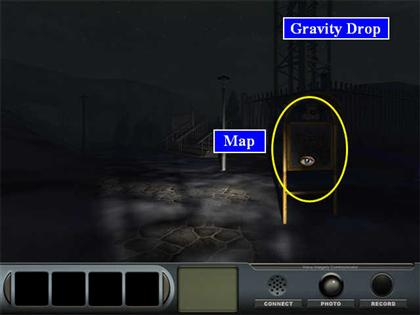
- There is an X on the Great Wheel.
- Turn around.
- Go through the gate.
- Turn right.
- Find the Hot Spot that is just to the left of the lamp post and continue forward.
- Continue forward all the way through the Games area, out the gate, and one more click forward with the Great Wheel on your left.
Great Wheel
- Turn left. It’s hard to see, but there is a map ahead on the right.

- Go forward.
- Turn right.
- Examine the Map.
- This time the X is on the Carousel.
- Exit the Map.
- Turn right.
- Go forward.
- Turn right.
- Go forward.
The Carousel
- Turn right. You can see the gate to the Games area ahead.
- Go forward 3 clicks.
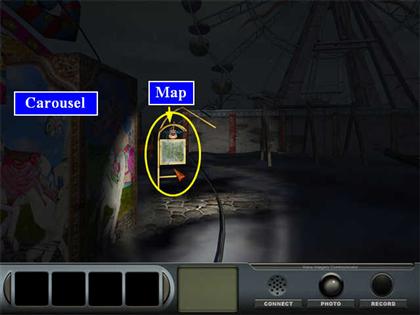
- Turn right in front of the Game booths. You can see a Map ahead on the right and the Carousel even further ahead. This is NOT the Map you need.
- Go forward all the way until you can see the Carousel control box on the left of the horses.
- Turn right.

- Now you will see the correct Carousel map. Examine the Map. There is an X over the Tunnel of Terror.
- Exit the Map.
- Turn right.
- Go forward two clicks.
- Turn right.
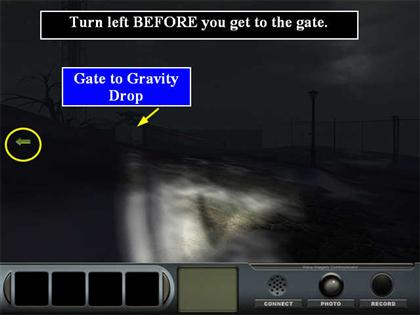
- Go forward all the way past the brush.
- You will see the gate to the Gravity Drop up ahead, but don’t go there. Instead, turn left before you get to the gate.
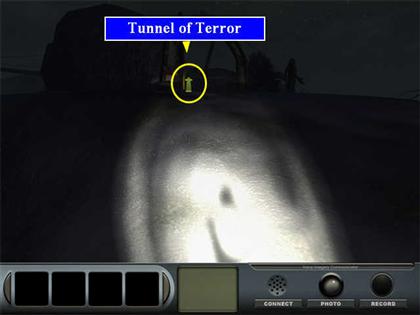
Tunnel of Terror
- The entrance to the Tunnel of Terror is up this hill. Go up.
- Click on the Map. You will see a red question mark instead of an X this time.
- You may now save the game again.
- Go forward along the path.
- Watch out for Shadow People!
- When you get to the platform, a train will come and Delaware will get on.
- The train will go into the tunnel.
- When the train stops, turn around.
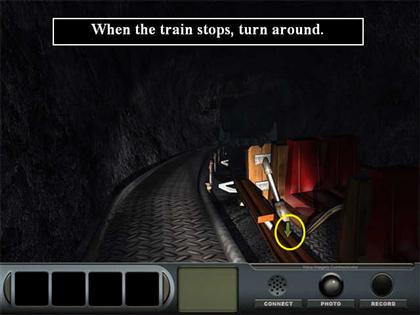
- Walk up the tracks through the tunnel.
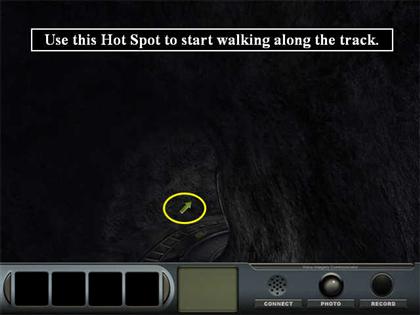
- Continue forward until you are facing the mummy.
- Turn left.
- Continue forward following the tracks.
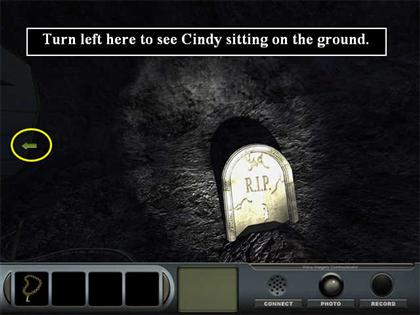
The Cemetery
- When you come to the cemetery, you will have to veer right.
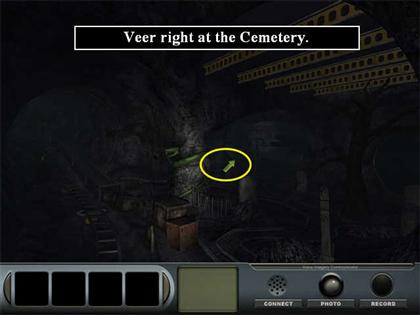
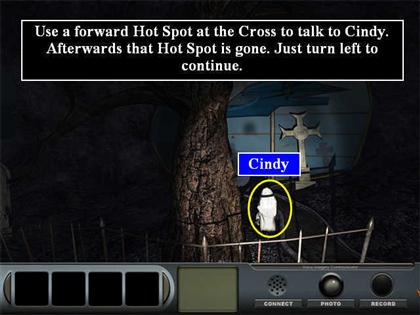
- There is a cross ahead with a Hot Spot arrow. Go forward.
- You will talk to Cindy, the ghost of a young woman who used to work in the park. She is dressed in costume.
- When you are done talking to Cindy, the forward Hot Spot is no longer available.
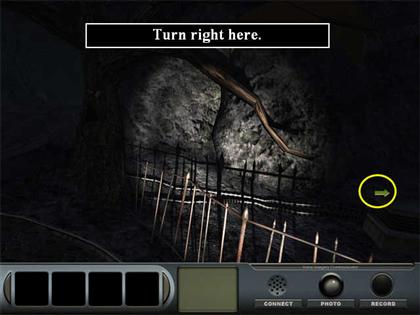
- Turn left.
- Go forward one click.
- Turn right.
- Click on the coffin to zoom in.
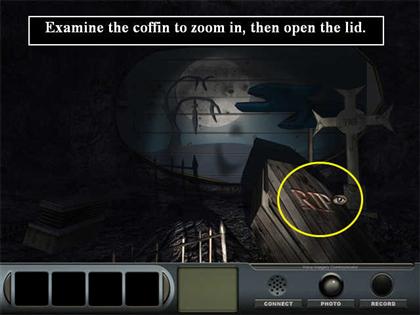
- Open the coffin. There are two more real skeletons in it.
- Exit the zoom scene.
- Turn left twice.
- Now you are going to get off the track and go along the path the employees used. Go forward down the path towards the large crate.
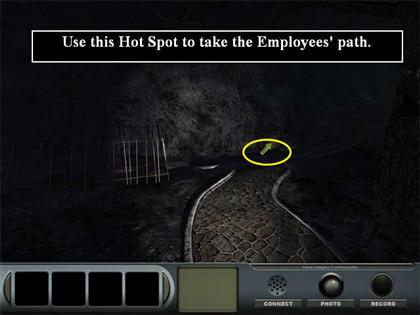
- Continue following the path by moving forwards as it curves around.
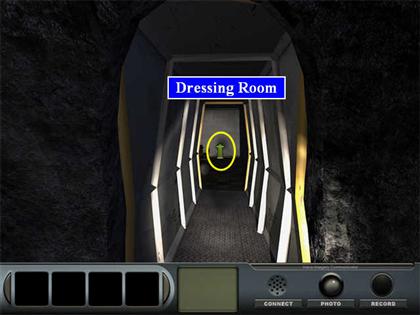
Employee Dressing Room
- When you get to the large green crate, turn right.
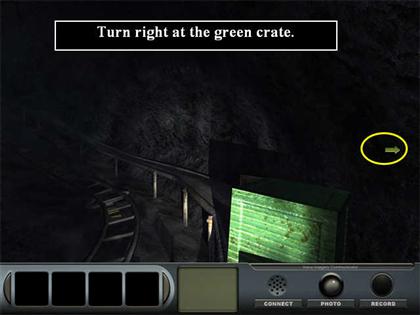
- This passage leads to the dressing room for the employees who worked here.
- Go forward one click.
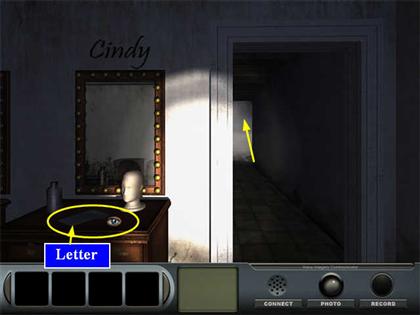
- Turn left and see mirrors for Cindy, Rachel, and Jim.
- Turn right.
- Go forward one click.
- Turn left.
- From this viewpoint you can examine Cindy’s dressing table.
- Read the letter from her mother.
- Click on the letter again and Delaware gets a vision of the bracelet next to one of the small clowns from the Games area.
- Go through the hallway to the right of Cindy’s dressing table.
- Go all the way into the room until you are at the wall.
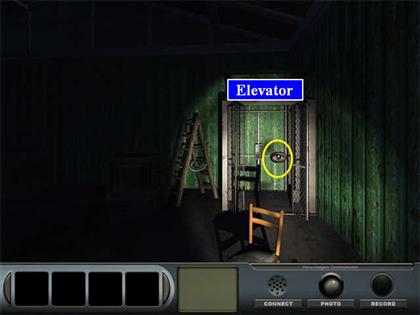
Elevator Room
- Turn left. You can see an elevator on the left and a door straight ahead.
- Walk forward to the door, but don’t open it yet.
- Turn left and examine the elevator 3 times. It’s not working.
- Exit twice to return to the room view.
- Turn right.
- Go out the door. You are back in the Games area.
Games Area
- Go forward.
- Turn right.
Skidoo Game
- Examine the Skidoo Booth.
- Check the shelf inside. But it’s not there.
- Put the cursor above the top shelf and it will turn into an eye. Click there.
- Take the bracelet.
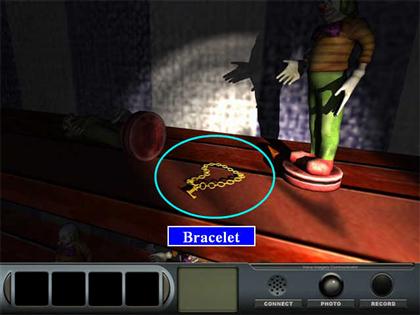
- Carl will show up and tell you you can’t take the bracelet because it’s a prize. He agrees to let you have it if you get all the equipment back in the correct game booths. You will have to leave the bracelet where it is for now.
- Exit until you are standing at the Skidoo booth again.
- Examine the booth to the right of it.
Darts Booth
- A dart is missing from the Darts booth.
- You will find it in the clown statue to the right of the Tunnel of Terror.
- Turn left.
- Go forward.
- Turn right.
- Go to the Tunnel of Terror.
- Turn right and you will see the clown statue.
- Collect the Dart. The clown will fall, revealing another skeleton.
- Turn left to view the Tunnel of Terror.
- Turn around.
- Turn right.
- Go forward to the fence.
- Turn right.
- Go forward.
- Turn left.
- Examine the Dart Booth and you will automatically enter it.
- Examine the Dart Board; then place the Dart on it.

- Exit the Dart booth.
Skidoo Booth
- Examine the Skidoo booth.
- Go inside. Carl will tell you a ball is missing.
- Delaware will have a vision. The ball is on a bench.
- Exit until you are out of the booth.
- Turn around.
- Turn left.
- Walk forward out of the Games area.
- As soon as you are outside the gate, turn right.
- There are two benches ahead of you. Examine the left one.
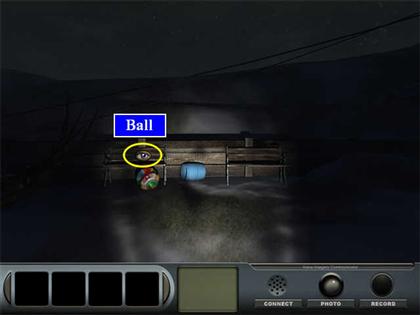
- Collect the Ball.
- Exit the zoom scene.
- Turn left.
- Return to the Skidoo booth.
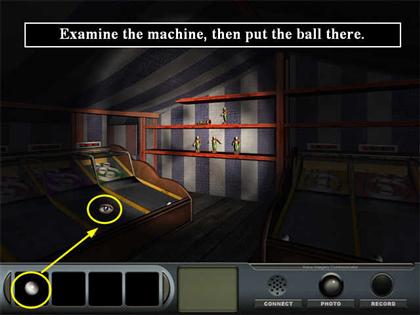
- Examine the machine.
- Take the Ball from your inventory and place it on the machine where the Ball is outlined in red.
- Exit twice to leave the booth.
- It’s not obvious what to do now, but you have to find the next booth that Carl wants fixed. You can check all the booths if you like, but Carl will be waiting at the Bean Bag booth to the left of the Carousel.
- To get there from the Skidoo booth, turn around.
- Turn left.
- Go forward once.
The Carousel
- Turn left. Now you are working your way up the front row of booths. You will see the Carousel far ahead.
- Go forward to the Carousel.
- Turn left. You will see the Bean Bag booth.
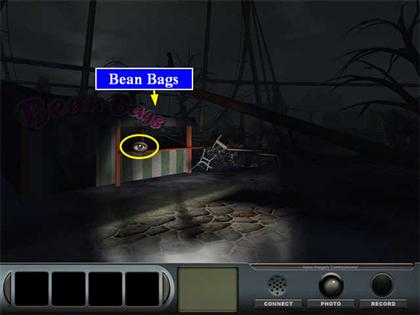
Bean Bag Booth
- Click to examine it.
- You will automatically go inside the booth. Carl will tell you there is a bean bag missing.
- You will have a vision of the bean bag by the mummy’s foot in the Tunnel of Terror.
- Exit the booth.
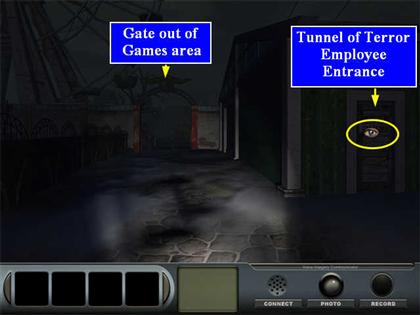
- You can’t work the train by yourself, so you’ll need to go back in through the Employee entrance.
- Turn left.
- Go forward.
- Turn left.
Tunnel of Terror
- You can now see the Employees Only sign. Enter that door.
- Go forward until you are in front of the wall with the map.
- Turn right. That’s the hall to the dressing room.
- Go back out through the dressing room.
- Turn left at the tunnel and backtrack to the cemetery.
- Turn left when you see the cemetery.
- Go forward one click.
- Turn right.
- Go forward to the gravestone.
- Turn right.
- Go forward until you see the mummy.
- Go forward one more click.
- Turn left and you will be facing the mummy.
- Examine the Bean Bag; then collect it.
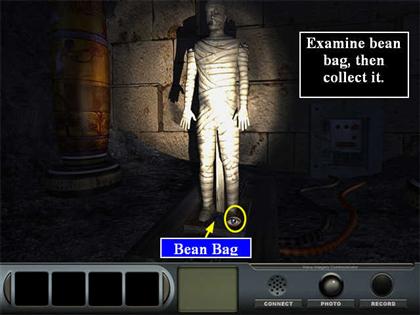
- Exit the zoom scene.
- Return the way you came.
Games Area
- When you step out into the Games area, turn right.
- Go forward one click towards the Carousel.
- Turn left.
Bean Bag Booth
- Examine the Bean Bag booth and you will automatically go inside.
- Examine the bean bag target.
- Put the Bean Bag there.
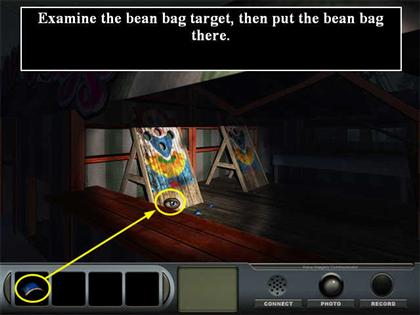
- (If you don’t have the Bean Bag, it is by the mummy’s foot in the Tunnel of Terror.)
- Carl will tell you you can take the bracelet now.
- Exit the booth.
- Turn left.
- Go forward.
- Turn right at the red post.
- Go forward.
- Turn right at the brush.
Skidoo Booth
- Go back into the Skidoo booth and collect the Bracelet just like you did before. Remember that it’s on the top shelf. This time you will be able to put it into your inventory.
- Exit 4 times to get out of the booth.
- Turn around.
- Go forward.
- Turn left.
Tunnel of Terror
- Go back into the Employee Entrance to the Terror Tunnel just like you did to get the Bean Bag.
- Go through the dressing room, turn left at the tunnel, and continue to the Cemetery.
The Cemetery
- When you get to the solitary RIP tombstone, turn left, and you will see Cindy sitting on the ground.
- Give her the Bracelet.
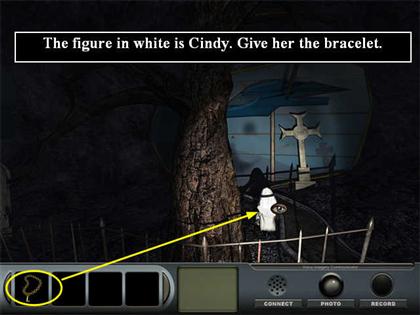
- She will give you a Key. This is the key to the shed in the Krandalls’ yard.
- To return from this point, turn left, go forward one click, and turn left again and you’ll be back on the path to the dressing room.
- Go all the way back to the Games area.
Games Area
- When you step out into the Games area, turn right twice so you see the gate out of the Games area.
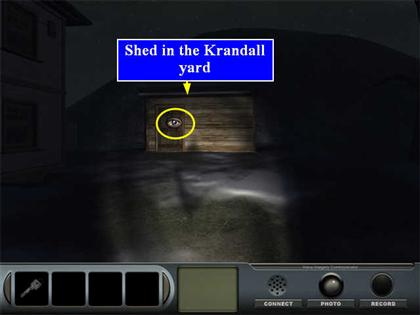
- Go forward all the way to the Krandall House.
The Krandall House
- Go through the gate.
- Turn right.
- Go forward 1 click.
The Shed
- Examine the shed.
- Examine the lock.
- Use the Key from your inventory to open the lock.
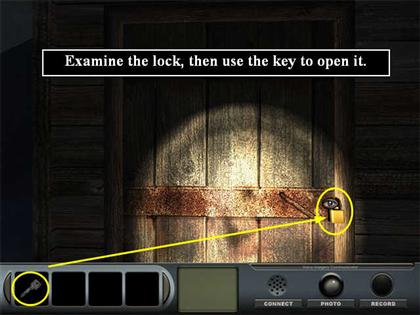
- Open the door. You will immediately see an altar.
- Examine the altar twice. There is a spell sheet used to summon the Hunter.
- Delaware will look for something to destroy the spell sheet, but it will blow away!
- Simon will call, and Delaware will bring him up to date.
- Exit three times to go back to the Krandall yard.
The Yard
- Go forward to the wall.
- Turn left.
- Go through the gate.
- Go forward.
Green Shed
- You will see a laughing clown go into the green shed opposite the back of the Fun House. It looks like the clown in the picture in Robert’s room. Delaware realizes it is Robert.
- Because of the way the navigation works in the game, you will have to go forward two clicks; then turn around to see the door to the building.
- The door is locked. There’s no time to get a key.
- Put the cursor on the door and it will turn into a fist. Click to smash open the door.
- Enter. You will immediately see a large box.
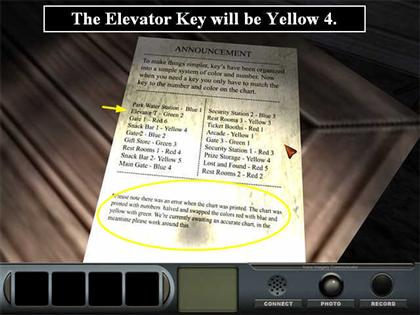
- Examine the box.
- You will see a code sheet. The important one is the Elevator.
- Check the error note at the bottom of the page. The real elevator key is Yellow 4.
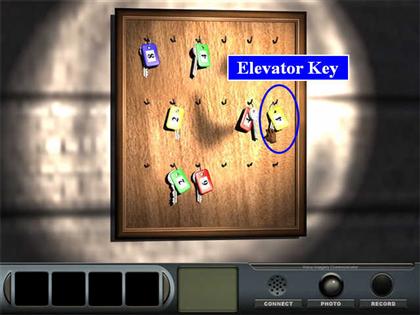
- Look at the board of keys on the wall. You can take any key you like, but you will only be allowed to keep one in your inventory tray.
- If you take the wrong key, just put it back on the board.
- Take the Yellow 4 Key.
- Keep looking around the room. There is another large box on the floor.
- Examine it and find another skeleton.
- There doesn’t seem to have been any way for Robert to get out of here, but he’s not here now. Go back outside.
Tunnel of Terror
- Let’s go try the elevator key. Go forward into the Games area; then enter the Employee Entrance to the Tunnel of Terror.
- Go into the Elevator.
- Examine the lock.
- Use the Key.
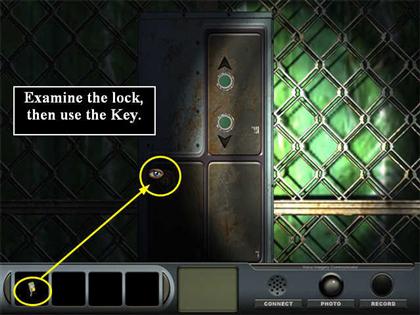
- Press the down button.
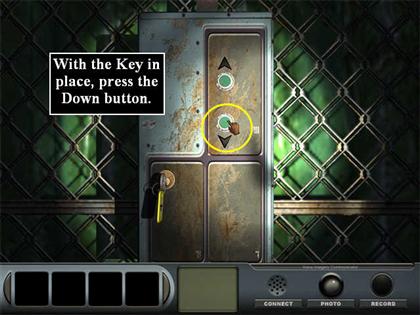
- On the way down, Delaware will have a vision of another key.
Lower Level Tunnels
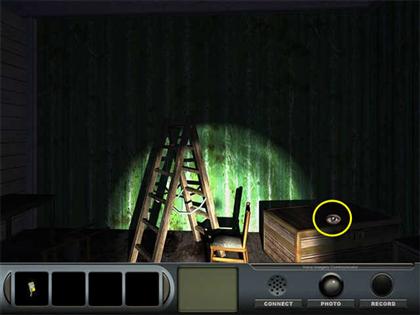
- At the bottom of the elevator, you can see a tunnel straight ahead of you.
- Turn left and there is another tunnel.
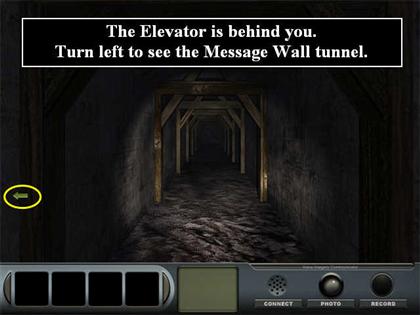
- Let’s explore the one on the left first.
Message Wall Tunnel
- There are several doors on the sides, but none of them open. Just go all the way to the end.
- A message will show on the end wall: “The eight will show the way.” There should be seven handprints there for the seven skeletons you’ve found so far.
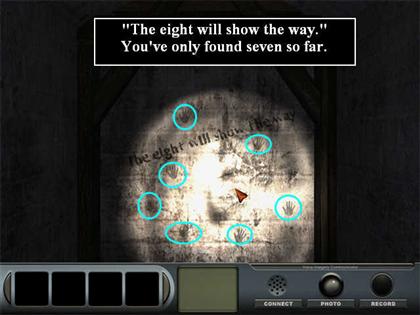
- If there are not, or if the message doesn’t appear, you missed one or more skeletons and must go back and find them before you can continue from this point.
- The skeletons were:#1 was in the Fun House wall by Mrs. Krandall’s ghost. #2 was in the crate in the tunnel room with the child’s drawings. #3 was in the Roller Coaster control shed locker. #4 and #5 were in the coffin in the cemetery in the Tunnel of Terror. #6 was in the clown statue with the dart outside the Tunnel of Terror. #7 was in the box in the green shed that the laughing clown ran into.
Forward Tunnel
- Return to the elevator. This time, go down the tunnel that is straight in front of the elevator.
- At the end, the tunnel is blocked by a cave-in. Turn left.
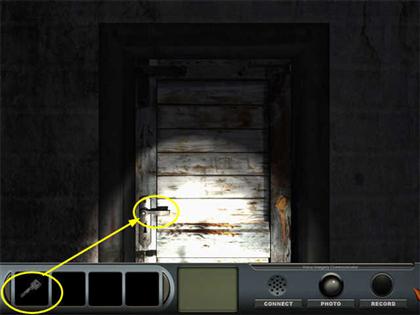
- You will see a door. Try the handle. It’s locked.
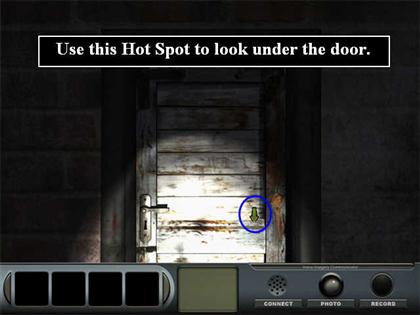
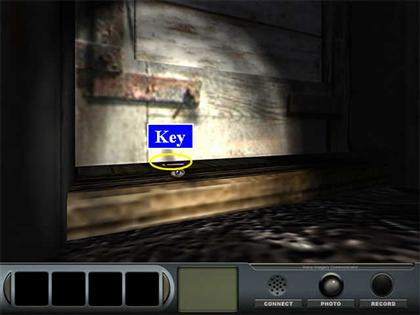
- You will find a down arrow Hot Spot on the upper right part of the door. You won’t turn around with this one. Instead, you will be able to look under the door and see a Key.
- Click on the Key to zoom in. You need to find something to get it.
- Exit to leave the zoom scene.
- Go all the way back to the elevator.
- Turn right so you are facing the other tunnel.
Message Wall Tunnel
- Go all the way forward to where the wall is. The writing will appear again.
- Turn around.
- Go forward one click.
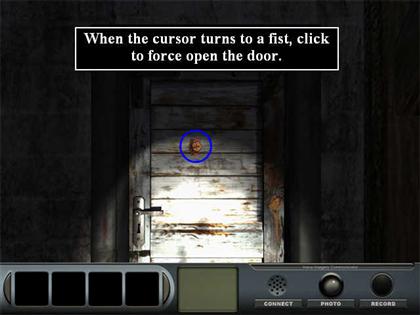
- Turn right. There is a door here.
- Put the cursor on the door and it will turn into the fist icon. Click to hit the door.
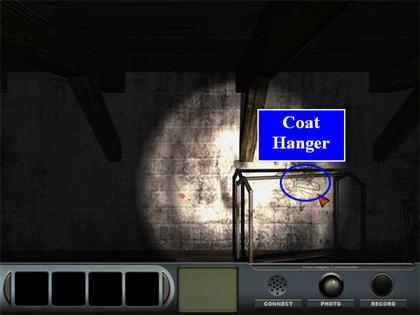
Coat Rack Room
- Go through the door into the room.
- Take a Hanger from the coat rack.
- Go back to the tunnel intersection.
- Turn left.
Forward Tunnel
- Go all the way down to where the cave-in is.
- Turn left.
- Use the down arrow across from the door handle to get the view under the door.
- Use the Hanger to get the Key.
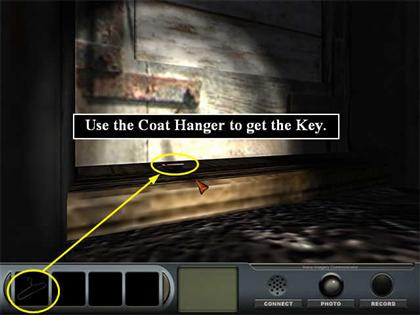
- Exit the zoom scene.
- Try the Key on the door. It doesn’t work here.
- Go back down to the elevator.
- Turn right.
- Go forward one click.
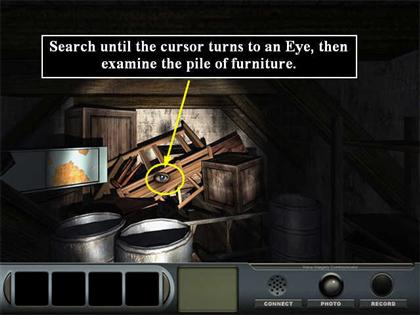
Storage Room
- Turn right and you will see a door.
- Try the Key here. It works!
- There is a lot of furniture stacked in here. Examine it closely, and you will find the eighth skeleton.
- Turn around and go back through the door into the tunnel.
Message Wall Tunnel
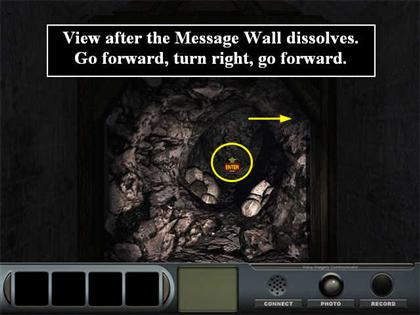
- Turn right and go back to the message wall. The message will appear, and then the wall will dissolve.
- Find the Hot Spot that says ENTER; click on it to go into the tunnel.
- Turn right.
- Go forward one click.
- Robert will appear. He and Delaware will have a brief conversation, then Robert will throw a knife at Delaware and Delaware will start to run away.
Robert Chase Scene
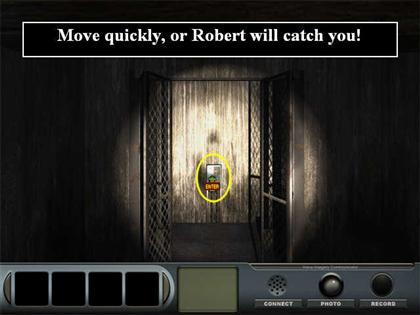
- You will be standing in front of the Message Wall tunnel where the wall dissolved, but pointed back towards the elevator tunnel. This part of the game is timed. You must move quickly, or Robert will catch you. If he does catch you, you will black out and then start over again where the message wall first dissolved before your conversation with Robert.
- Go forward all the way to the end of the tunnel.
- Turn right. You will see the elevator.
- Go into the elevator. It will automatically go up.
- Turn left.
- Go through the door into the Games area. Robert is still chasing you, so continue to move quickly.
The Park
- There are many different things you can do here, but either Robert or the Hunter will catch you in almost all of them.
- The only safe thing to do is quickly turn right twice.
- Go forward through the gate out of the Games area.
- Go forward all the way to the Krandall house.
- Go through the Krandall gate.
- Turn right.
- Go to the end of the Krandall yard.
- Turn left so you can see the Cellar door.
- Go into the Cellar. This ends the timed section. Watch the ending cut scene.
Park Entrance
- Delaware will have a closing conversation with Kelly, and we will learn something more about Katherine, the woman Delaware met earlier.
- You will get a rank based on how many times the Shadow People or other bad guys caught you.
- Watch the closing credits!
Created at: 2010-03-07